• Regeln für den Video-Bereich:

    In den Börsenbereich gehören nur Angebote die bereits den Allgemeinen Regeln entsprechen.

    Einteilung

    - Folgende Formate gehören in die angegeben Bereiche:
    - Filme: Encodierte Filme von BluRay, DVD, R5, TV, Screener sowie Telesyncs im Format DivX, XviD und x264.
    - DVD: Filme im Format DVD5, DVD9 und HD2DVD.
    - HD: Encodierte Filme mit der Auflösung 720p oder darüber von BluRay, DVD, R5, TV, Screener sowie Telesyncs im Format x264.
    - 3D: Encodierte Filme von BluRay, die in einem 3D Format vorliegen. Dies gilt auch für Dokus, Animation usw.
    - Serien: Cartoon/Zeichentrick, Anime, Tutorials, Dokumentationen, Konzerte/Musik, Sonstiges sind demnach in die entsprechenden Bereiche einzuordnen, auch wenn sie beispielsweise im High Definition-Format oder als DVD5/DVD9/HD2DVD vorliegen. Ausnahme 3D.
    - Bereich Englisch: Englische Releases gehören immer in diesen Bereich.
    - Bereich Talk: Der Bereich, in dem über die Releases diskutiert werden kann, darf, soll und erwünscht ist.


    Angebot/Beitrag erstellen

    - Ein Beitrag darf erst dann erstellt werden, wenn der Upload bei mindestens einem OCH komplett ist. Platzhalter sind untersagt.
    - Bei einem Scenerelease hat der Threadtitel ausschließlich aus dem originalen, unveränderten Releasenamen zu bestehen. Es dürfen keine Veränderungen wie z.B. Sterne, kleine Buchstaben o.ä. vorgenommen werden. Ausnahme Serienbörse:
    - Bei einem Sammelthread für eine Staffel entfällt aus dem Releasename natürlich der Name der Folge. Beispiel: Die Simpsons S21 German DVDRip XviD - ITG
    - Dementsprechend sind also u.a. verboten: Erweiterungen wie "Tipp", "empfehlenswert", "only", "reup", usw. / jegliche andere Zusatzinformation oder Ergänzung, welche nicht in obiger Beschreibung zu finden ist.

    Aufbau des Angebots und Threadtitel

    Der Titel nach folgendem Muster erstellt zu werden. <Name> [3D] [Staffel] [German] <Jahr> <Tonspur> [DL] [Auflösung] <Quelle> <Codec> - <Group>
    Beispiel: The Dark Knight German 2008 AC3 DVDRip XviD - iND
    Beispiel: The Dark Knight 2008 DTS DL BDRip x264 - iND
    Beispiel: The Dark Knight 2008 AC3 DL BDRip XviD - iND
    Beispiel: The Dark Knight German 2008 AC3 720p BluRay x264 iND
    Beispiel: The Dark Knight 2008 DTS DL 1080p BluRay x264 iND
    Beispiel: Die Simpsons S01 German AC3 DVDRip XviD iND
    Beispiel: Die Simpsons S20 German AC3 720p BluRay x264 iND
    Beispiel: Sword Art Online II Ger Sub 2014 AAC 1080p WEBRip x264 - peppermint
    Entsprechend sind also u.a. verboten: Sonderzeichen wie Klammern, Sterne, Ausrufezeichen, Unterstriche, Anführungszeichen / Erweiterungen wie "Tipp", "empfehlenswert", "only", "reup", usw. / jegliche andere Zusatzinformation oder Ergänzung, welche nicht in obiger Beschreibung zu finden ist
    Ausnahmen hiervon können in den Bereichen geregelt sein.

    Die Beiträge sollen wie folgt aufgebaut werden:
    Überschrift entspricht dem Threadtitel
    Cover
    kurze Inhaltsbeschreibung
    Format, Größe, Dauer sind gut lesbar für Downloader außerhalb des Spoilers zu vermerken
    Nfo sind immer Anzugeben und selbige immer im Spoiler in Textform.
    Sind keine Nfo vorhanden z.B. Eigenpublikationen, sind im Spoiler folgende Dateiinformationen zusätzlich anzugeben :
    Quelle
    Video (Auflösung und Bitrate)
    Ton (Sprache, Format und Bitrate der einzelnen Spuren)
    Untertitel (sofern vorhanden)
    Hosterangabe in Textform außerhalb eines Spoiler mit allen enthaltenen Hostern.
    Bei SD kann auf diese zusätzlichen Dateiinformationen verzichtet werden.

    Alle benötigten Passwörter sind, sofern vorhanden, in Textform im Angebot anzugeben.
    Spoiler im Spoiler mit Kommentaren :"Schon Bedankt?" sind unerwünscht.


    Releases

    - Sind Retail-Release verfügbar, sind alle anderen Variationen untersagt. Ausnahmen: Alle deutschen Retail-Release sind CUT, in diesem Fall sind dubbed UNCUT-Release zulässig.
    - Im Serien-Bereich gilt speziell: Wenn ein Retail vor Abschluss einer laufenden Staffel erscheint, darf diese Staffel noch zu Ende gebracht werden.62
    - Gleiche Releases sind unbedingt zusammenzufassen. Das bedeutet, es ist zwingend erforderlich, vor dem Erstellen eines Themas per Suchfunktion zu überprüfen, ob bereits ein Beitrag mit demselben Release besteht. Ist dies der Fall, ist der bereits vorhandene Beitrag zu verwenden.
    - P2P und Scene Releases dürfen nicht verändert oder gar unter einem iND Tag eingestellt werden.


    Support, Diskussionen und Suche

    - Supportanfragen sind entweder per PN oder im Bereich Talk zu stellen.
    - Diskussionen und Bewertungen sind im Talk Bereich zu führen. Fragen an die Uploader haben ausschließlich via PN zu erfolgen, und sind in den Angeboten untersagt.
    - Anfragen zu Upload-Wünschen sind nur im Bereich Suche Video erlaubt. Antworten dürfen nur auf Angebote von MyBoerse.bz verlinkt werden.


    Verbote

    - Untersagt sind mehrere Formate in einem einzigen Angebotsthread, wie beispielsweise das gleichzeitige Anbieten von DivX/XviD, 720p und 1080p in einem Thread. Pro Format, Release und Auflösung ist ein eigener Thread zu eröffnen.
    - Grundsätzlich ebenso verboten sind Dupes. Uploader haben sich an geeigneter Stelle darüber zu informieren, ob es sich bei einem Release um ein Dupe handelt.
    - Gefakte, nur teilweise lauffähige oder unvollständige Angebote sind untersagt. Dies gilt auch für eigene Publikationen, die augenscheinlich nicht selbst von z.B. einer DVD gerippt wurden. Laufende Serien, bei denen noch nicht alle Folgen verfügbar sind, dürfen erstellt und regelmäßig geupdatet werden.
    - Untersagt sind Angebote, welche nur und ausschließlich in einer anderen Sprache als deutsch oder englisch vorliegen. Ausnahmen sind VORHER mit den Moderatoren zu klären.


    Verstoß gegen die Regeln

    - Angebote oder Beiträge, die gegen die Forenregeln verstoßen, sind über den "Melden"-Button im Beitrag zu melden.
  • Bitte registriere dich zunächst um Beiträge zu verfassen und externe Links aufzurufen.

*** Bestes IPTV *** bester Preis *** gratis Test ***


Englische Tutorials

Sketchup And Photoshop For Landscaping

pjvjkfrlsu3pbn4uesze53af6v.jpg


Sketchup And Photoshop For Landscaping
Last updated 4/2021
MP4 | Video: h264, 1280x720 | Audio: AAC, 44.1 KHz
Language: English | Size: 9.51 GB | Duration: 13h 13m

Create garden renderings with Sketchup 3D modeling and Photoshop image editing


What you'll learn
Use Sketchup free for deskop
Understand navigation in Sketchup
Create shapes
Create volumes
Add materials
Create components
Use 3D warehouse
Create transformations
Create scenes
Import plants
Create terrace
Create decorative pots
Create garden
Use Photoshop
Understand dashboard
Use layer panel
Create layer mask
Create montage with different photos
Crop trees
Change ground texture
Create patterns
Edit photos
Add guides
Manage alignments
Terrace design with photo montage
Garden design with photo montage
Complete garden render from garden photo
Introduce render

Requirements
You need to have Sketchup free online
You need to have Photoshop

Description
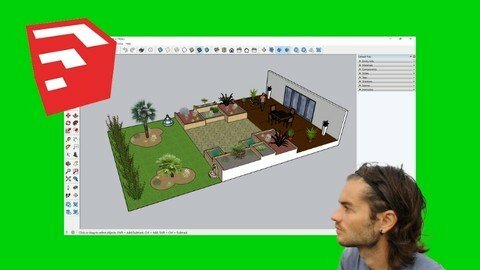
Landscaping renderingAre you planning to become a landscaper ? Want to use rendering software to model your garden landscaping ideas? Want to do it with affordable software? Or do you just want to learn more about Photoshop and Sketchup for garden design ? So discover this course which will allow you to create different types of rendering in order to model your ideas, and thus to offer communication supports.For this you will see two types of softwareSketchup free in browser versionSketchup will allow you to make 3D garden models. Thanks to all the tools, it is possible to render 3D garden using the different tools, adding materials, importing plants from the online library, and creating animations thanks to the scenes. So you can create a house and the whole garden design.PhotoshopPhotoshop will be a different tool. With Photoshop you can work on renderings from existing photos. The purpose of using Photoshop in landscape architecture is to visualize landscaping changes through a photo. Thus, from a photo, you can modify elements, add trees, change textures and more.Training videoIn this training, you will learn how to use Sketchup in the browser version, which is the completely free version. The entire software will be covered, with examples related to landscape planning. There will also be a garden creation project. Next, you will learn how to use Photoshop for garden landscaping. You can start with the trial version or have Photoshop as a subscription with Adobe. You will learn what there is to know in Photoshop for landscaping. There will also be concrete garden landscaping projects based on photos.
Overview
Section 1: Start with Sketchup
Lecture 1 Manage dashboard
Lecture 2 Manage navigation
Lecture 3 Manage selections
Lecture 4 Create and open document
Section 2: Create shapes
Lecture 5 Create rectangles
Lecture 6 Create circles
Lecture 7 Create lines
Lecture 8 Create arcs
Section 3: Transformations
Lecture 9 Push pull
Lecture 10 Create object with follow me
Lecture 11 Create offset
Lecture 12 Move elements
Lecture 13 Create rotations
Lecture 14 Duplicate elements
Lecture 15 Erase elements
Lecture 16 Smooth edges
Section 4: Add guides
Lecture 17 Create guides
Lecture 18 Add text
Lecture 19 Add dimensions
Section 5: Materials
Lecture 20 Add materials
Lecture 21 Import materials
Lecture 22 Resize material
Section 6: Components
Lecture 23 Components part 1
Lecture 24 Components part 2
Section 7: 3D warehouse for garden
Lecture 25 3D warehouse part 1
Lecture 26 3D warehouse part 2
Lecture 27 Edit groups
Section 8: Add scenes
Lecture 28 Add scenes
Lecture 29 Add sections
Lecture 30 Change styles
Section 9: Project decorative pots
Lecture 31 Project decorative pots create base
Lecture 32 Project decorative pots create pots
Lecture 33 Project decorative pots add texture
Lecture 34 Project decorative pots add plants
Lecture 35 Project decorative pots add character
Lecture 36 Project decorative pots add scenes
Section 10: Project garden
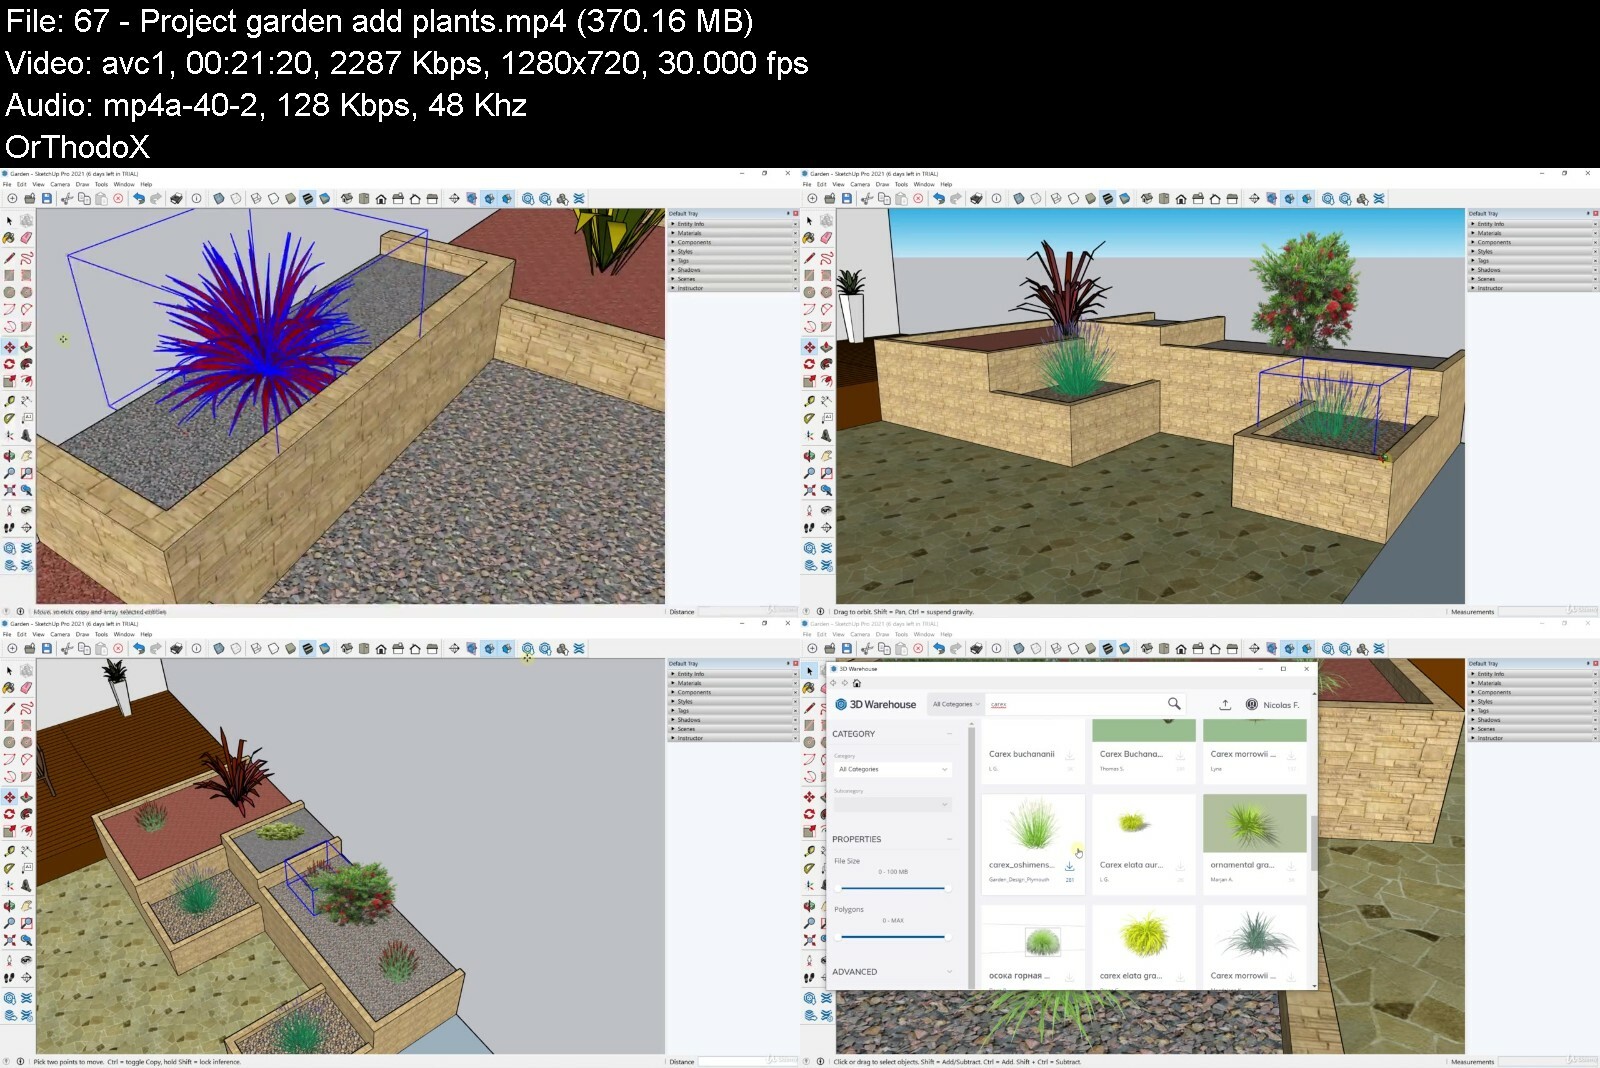
Lecture 37 Project garden create base
Lecture 38 Project garden create terrace
Lecture 39 Project garden add path
Lecture 40 Project garden flower bed detail elements
Lecture 41 Project garden flower beds main elements
Lecture 42 Project garden grass area
Lecture 43 Project garden add decorations
Lecture 44 Project garden add scenes
Lecture 45 Project garden add dimensions
Lecture 46 Project garden export work
Section 11: Start with Photoshop
Lecture 47 Manage dashboard
Lecture 48 Edit toolbar
Lecture 49 Manage navigation
Lecture 50 File difference
Lecture 51 Find images
Lecture 52 Selection and direct selection
Lecture 53 Create new document
Lecture 54 Save and export document
Section 12: Layers
Lecture 55 layers
Lecture 56 Layer groups
Lecture 57 Layer mask
Lecture 58 Blend mode
Section 13: Create selections
Lecture 59 Basic selections
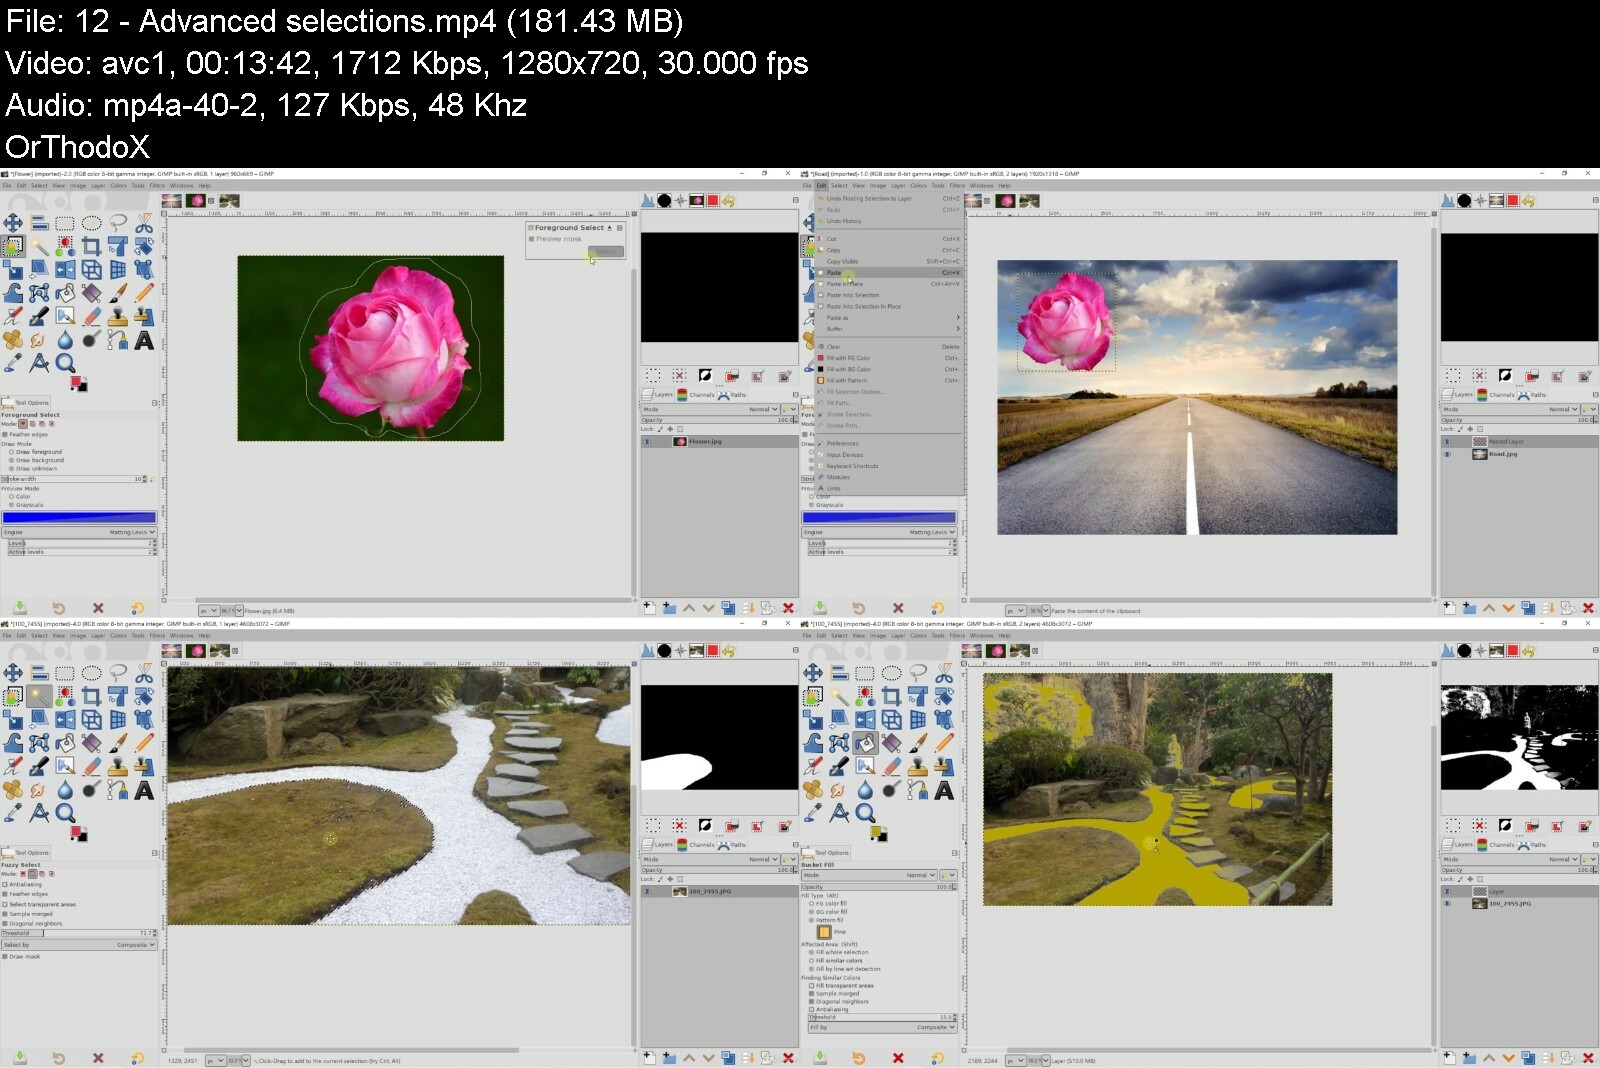
Lecture 60 Advanced selections
Lecture 61 Refine selections
Lecture 62 Free transform
Section 14: Add corrections
Lecture 63 Crop image
Lecture 64 Correct defaults
Lecture 65 Clone elements
Lecture 66 Blur and sharpen
Lecture 67 Lighten and darken
Section 15: Master pen
Lecture 68 Pen tool
Lecture 69 Edit anchor points
Section 16: Manage colors
Lecture 70 Manage colors
Lecture 71 Recuperate color with eyedropper
Lecture 72 Apply erasers
Section 17: Edit with brush
Lecture 73 Brush tool
Lecture 74 Add arrows
Section 18: Add patterns
Lecture 75 Create patterns
Lecture 76 Apply patterns
Lecture 77 Scale pattern example 1
Lecture 78 Scale pattern example 2
Section 19: Tree filter
Lecture 79 Filter tree part 1
Lecture 80 Filter tree part 2
Section 20: Photo adjustments
Lecture 81 Adjustment layers
Lecture 82 Main adjustment layers
Lecture 83 Adjustment layers on selections
Section 21: Add text
Lecture 84 Add text
Lecture 85 Add notes
Section 22: Create shapes
Lecture 86 Create shapes
Section 23: Grid guides and columns
Lecture 87 Add guides
Lecture 88 Columns and rows
Lecture 89 Manage grid
Section 24: Master alignments
Lecture 90 Manage alignments
Lecture 91 Manage distribution
Section 25: Change ground texture
Lecture 92 Change texture on ground example 1
Lecture 93 Change texture on ground example 2
Lecture 94 Change texture on ground example 3
Section 26: Change grass color
Lecture 95 Change grass color example 1
Lecture 96 Change grass color example 2
Section 27: Add filters
Lecture 97 Filters part 1
Lecture 98 Filters part 2
Section 28: Training edit complete garden from photo
Lecture 99 Project garden add corrections
Lecture 100 Project garden apply patterns
Lecture 101 Project garden add trees
Lecture 102 Project garden create flower bed 1
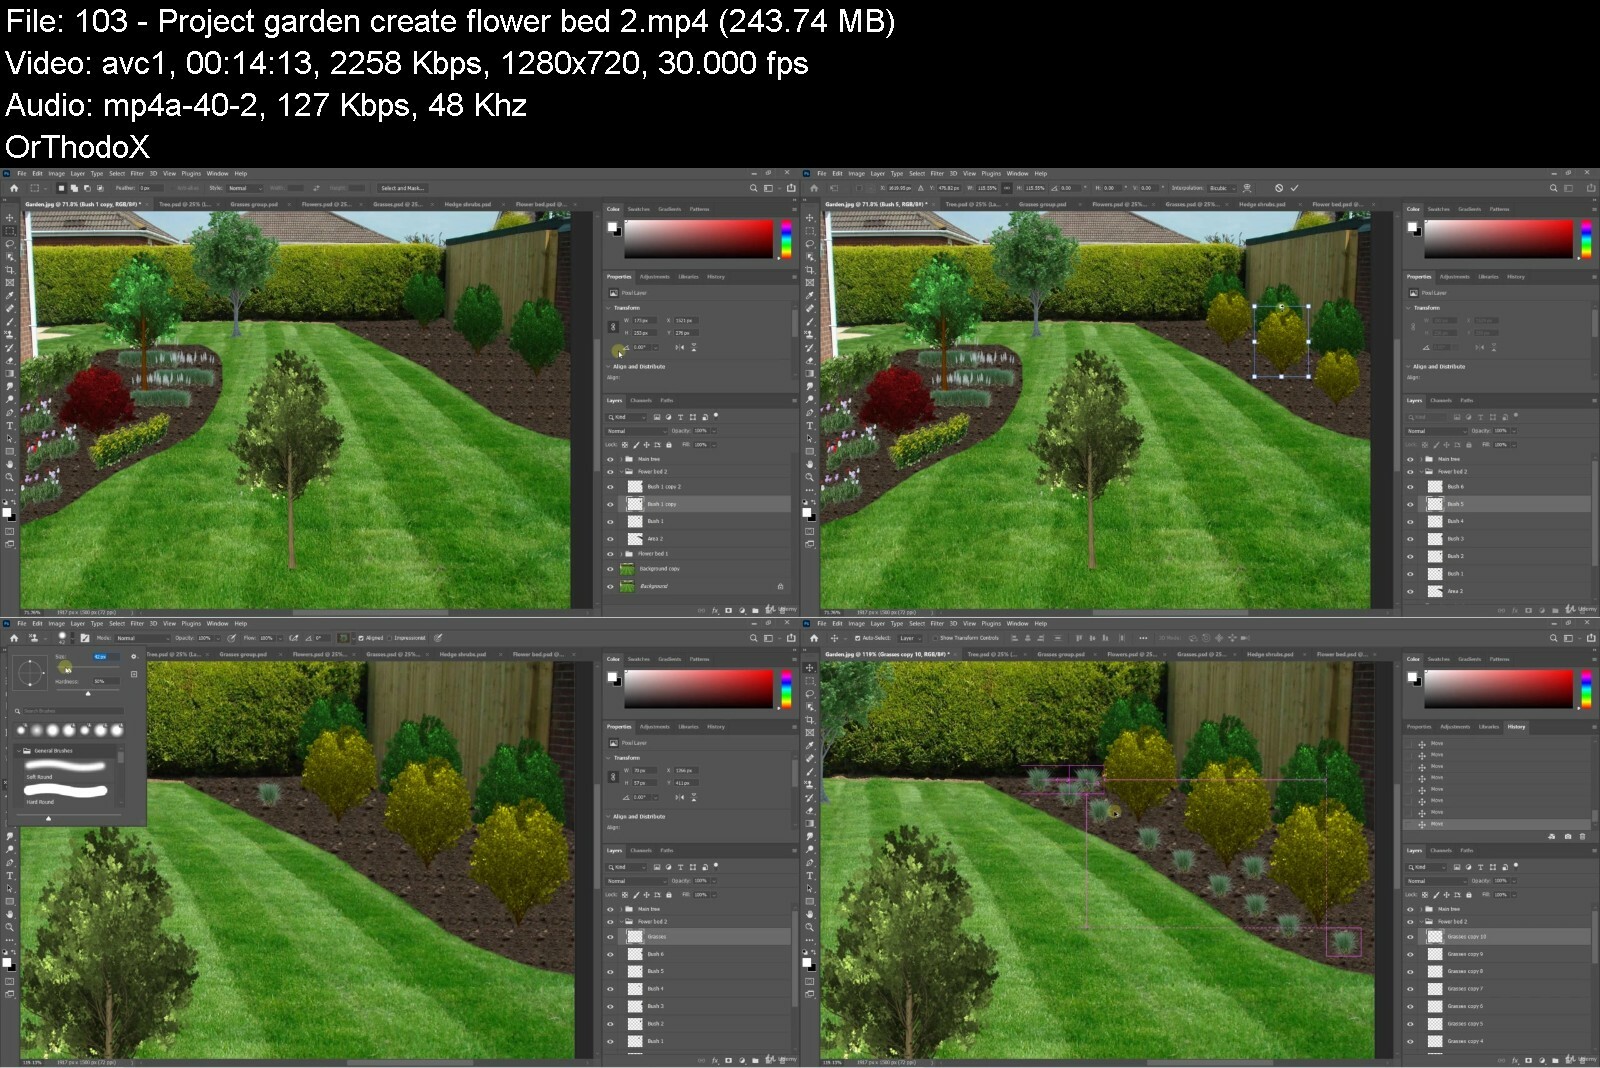
Lecture 103 Project garden create flower bed 2
Lecture 104 Project garden finish work
Section 29: Training edit terrace
Lecture 105 Project terrace part 1
Lecture 106 Project terrace part 2
Lecture 107 Project terrace part 3
Section 30: Introduce your work
Lecture 108 Add description
Lecture 109 Render before after
Student of the landscape,Landscaper,Designer,Particular


sketchupandphotoshopftpd0o.jpg


Download from RapidGator


Download from DDownload


The Ultimate Coding Bootcamp: Make Your First Websites Today

ju2mvedhzoq0esnipyqdxhbfj6.jpg


The Ultimate Coding Bootcamp: Make Your First Websites Today
Last updated 4/2018
MP4 | Video: h264, 1280x720 | Audio: AAC, 44.1 KHz
Language: English | Size: 5.93 GB | Duration: 8h 6m

Includes FREE book! Hands-on practical examples in web development for beginners. You will become a fast & smart coder!


What you'll learn
3 projects to put in your web design portfolio
Real-world skills to build real-world websites
Get our eBook "1 Hour HTML" for free
A master toolset of the fundamentals of coding
Knowledge on the history of computers and computer science
Learn how to market yourself, network, and make connections as a freelance programmer
Get tips from a real entrepreneur

Requirements
No experience necessary!
A modern web browser
This course was recorded on a Mac, but you can use a PC.

Description
"This is a great experience so far. I'm transitioning careers from large engine diesel mechanic, to coding. Very helpful so far" - Jared C.What if I told you you could learn to code in HTML, CSS & JavaScript just one day?*It's true! This course is compact and teaches you every single essential topic you need to know to become a coder. By the end of this course you can say that you have made your first website and landing page.This course was funded by a wildly successful KickstarterWith our training model, learning to program is straightforward. You will become a fast and smart coder with this course!Feeling stuck in life? Maybe you're working three jobs to make ends meet. I'm sure you've heard how much developers make these days . Want to get in on that action?*Coding is not as hard as you think.*First you will learn the fundamentals of coding and computers.*Then we will teach you the foundations of web development. You will learn HTML, CSS, & JavaScript -- these are the 3 key languages of the web.*Together we will build from scratch a customization landing page and modular website.*As a bonus, you'll learn how to bootstrap a site. You will also learn how you can enter the industry. You'll know how to code and sell.Coding is an awesome way to train your brain while gaining marketable skills.*Don't get left behind as coding becomes a job requirement. Get insight into how the technology you use every day works. Learn to think in a new way.*Make money from home by making your own websites and web apps. No matter your industry, having technical skills makes you stand out. Computing literacy is a necessary skill. Technical roles need diversity, and with our courses, anyone can learn.*This is real coding for all ages.We design our tutorials for people with NO EXPERIENCE. In a Mammoth Interactive curriculum, you get as much useful information as possible from every minute. No longer do you need to spend time putting together knowledge from YouTube videos. We've curated what you need to know.What's great about online learning is that you can learn at your own pace. You can speed up or slow down videos. Coding boot camps don't work for everyone. Why spend money when you can make money? Save thousands of dollars, and make thousands of your own.*Learning at Mammoth Interactive can be your next step to improving your career and your life.We at Mammoth Interactive have been producing online tutorials since 2011. We know what self-directed learners need. Over 300'000 students have enrolled in our courses. And they love it.*Our instructors make video tutorials that are practical and to the point. At the end of this course, you will have projects that you made and can show off in your portfolio.*Start your epic journey here, with Mammoth Interactive!
Overview
Lecture 1 Course Trailer
Section 1: Introduction to Coding
Lecture 2 Learn about Different Coding Languages
Lecture 3 The History of Programming
Lecture 4 What is Web Development?
Section 2: Learn to Code in HTML
Lecture 5 HTML Introduction
Lecture 6 JS Bin - Collaborative JavaScript Debugging
Lecture 7 Writing our First HTML
Lecture 8 Lists and Comments
Lecture 9 Nested Lists
Lecture 10 Loading Images
Lecture 11 Loading Images in Lists
Lecture 12 Links
Lecture 13 Images as Links
Lecture 14 Mailto Link
Lecture 15 Div Element
Section 3: Learn to Code in CSS
Lecture 16 CSS Introduction
Lecture 17 Box Model
Lecture 18 Writing our First CSS
Lecture 19 More CSS Examples
Lecture 20 Inheritance
Lecture 21 More on Type Selectors
Lecture 22 Getting Direct Descendants
Lecture 23 Introduction to Classes
Lecture 24 Multiple Classes
Lecture 25 Introduction to ID
Lecture 26 CSS Specificity
Lecture 27 Pseudo Classes & Sibling Matching
Lecture 28 Styling Recipe Page
Lecture 29 Loading External Stylesheet
Section 4: Learn to Code in Javascript
Lecture 30 What is ES6?
Lecture 31 Functionality of ES6
Lecture 32 Testing your Code
Lecture 33 Tips to Getting Started with Javascript
Lecture 34 Common Pitfalls
Lecture 35 Source Code
Lecture 36 Numbers and Strings
Lecture 37 Booleans
Lecture 38 Booleans Continued!
Lecture 39 Objects
Lecture 40 Objects Continued!
Lecture 41 Arrays
Lecture 42 Arrays Continued!
Section 5: Make Your First Landing Page
Lecture 43 Introduction to the Landing Page
Lecture 44 Building the Page
Lecture 45 Adding CSS
Lecture 46 Final Touches
Section 6: Code a Modular Website
Lecture 47 Writing the HTML
Lecture 48 More HTML
Lecture 49 Completing HTML
Lecture 50 Writing CSS
Lecture 51 More CSS
Lecture 52 Completing CSS
Lecture 53 Project Final Touches
Section 7: Build a Bootstrap Website
Lecture 54 Build a Bootstrap Website
Section 8: Expand Your Horizons
Lecture 55 How to Market Yourself
Lecture 56 Start Networking and Making Connections
Lecture 57 Learn to Expand Your Horizons
Section 9: Free Stuff for Students!
Lecture 58 (Normally $34.74) JavaScript eBook
Lecture 59 Please rate this course
Lecture 60 Bonus Lecture: Community Newsletter
Anyone who wants to learn to code,Coders who want to become freelancers,Any programmer who wants to get a complete grasp of core coding concepts,Anyone who needs to build a website or landing page for their business, product, or fun!


theultimatecodingboot9kcd9.jpg


Download from RapidGator


Download from DDownload


ITProTV - Microsoft Power BI Skills

aa9f96776764490e88a46a2fq7.png


ITProTV - Microsoft Power BI Skills
Released 25/08/2022
MP4 | Video: h264, 1920x1080 | Audio: AAC, 44.1 KHz, 2 Ch
Genre: eLearning | Language: English | Duration: 18 Lessons (6h) | Size: 5.7 GB


Want to learn more about how to use Power BI and the most important skills you need to

Power BI is a collection of software services, apps, and connectors that work together to turn your unrelated sources of data into coherent, visually immersive, and interactive insights. Your data may be an Excel spreadsheet, or a collection of cloud-based and on-premises hybrid data warehouses. Power BI lets you easily connect to your data sources, visualize and discover what's important, and share that with anyone or everyone you want. Want to learn more about how to use Power BI and the most important skills you need to be successful? Join Adam as he guides you through everything you want to know about Power BI.


microsoftpowerbiskill4pime.jpg


Download from RapidGator


Download from DDownload


Photo Editing With Gimp And Darktable

hbwl2opzeybhjk4ojrdjjwdezb.jpg


Photo Editing With Gimp And Darktable
Last updated 1/2021
MP4 | Video: h264, 1280x720 | Audio: AAC, 44.1 KHz
Language: English | Size: 7.06 GB | Duration: 9h 39m

Photo editing with two amazing open source softwares Gimp and Darktable


What you'll learn
Manage dashboard of Gimp
Adjust windows for photo editing
Use layers
Use masks
Create selections
Create montage
Crop photos
Master tools for photo editing
Read photo histogram
Master photo adjustments
Apply filters
Edit face
Edit landscape photos
Manage dashboard of Darktable
Import photos
Add informations on photos
Use filters
Apply styles
Define favorite modules
Master main modules
Use drawn mask
Use parametric mask
Use drawn and parametric mask
Add effects
Improve portrait photo
Improve landscape photo

Requirements
You need to have Gimp
You need to have Darktable

Description
GimpGimp is an open source software that offers enormous graphical possibilities. By knowing how to master the techniques and tools, you will be able to do any type of photo editing and photo montage. Many tools and techniques will be seen in the training, and the emphasis is mainly on photo editing. It is thus possible to make selections, make adjustments, use layers and masks to optimize renderings.DarktableDarktable is open source photo editing software. It allows processing of Raw files, ie a non destructive raw data format. The changes are saved against the original file which is kept at all times and thus allows for advanced processing. It is great because you can edit your photo in real time. The software thus has two main modes, lighttable mode for importing and classifying photos, and darkroom mode for editing photos.The complementarity They are two very complementary self-service software. Like Photoshop and Lightroom do, you will be able to use Gimp and Darktable. Gimp will allow you to edit and use the layer system. It will also allow you to make adjustments and use the masks. On the other hand, it will not allow you to classify photos or process files in real time. So this is where Darktable software comes in. Darktable will allow you to import photos, classify them, and then make changes in real time thanks to the many modules.Training videoIn this course, you will learn how to use Gimp for photo editing. The basics of using layers, masks, adjustments or even retouching tools will be covered in this course, supplemented by workshops. You will also learn how to use Darktable, to import and organize your photos, and then process all your photos with the modules. The whole will also be supplemented by workshops.
Overview
Section 1: Introduction
Lecture 1 Introduction
Section 2: Start with Gimp
Lecture 2 Manage dashboard
Lecture 3 Display the windows
Lecture 4 Create new document
Lecture 5 Save and export document
Lecture 6 Navigation on photo
Section 3: Layers
Lecture 7 Layers
Lecture 8 Layer mask
Lecture 9 Blend mode
Section 4: Crop photo
Lecture 10 Crop photo
Section 5: Create selections on images
Lecture 11 Basic selections
Lecture 12 Advanced selections
Lecture 13 Recuperate selection
Section 6: Defaults correction
Lecture 14 Remove defaults
Lecture 15 Clone elements
Section 7: Tools for photo editing
Lecture 16 Brush parameters
Lecture 17 Lighten and darken
Lecture 18 Add blur and details
Lecture 19 Spread color
Lecture 20 Add color and gradient
Section 8: Photo adjustments
Lecture 21 Read histogram
Lecture 22 Start with adjustments
Lecture 23 Adjustment color balance
Lecture 24 Adjustment color temperature
Lecture 25 Adjustment hue chroma
Lecture 26 Adjustment hue saturation
Lecture 27 Adjustment saturation
Lecture 28 Adjustment exposure
Lecture 29 Adjustment shadows highlights
Lecture 30 Adjustment brightness contrast
Lecture 31 Adjustment levels
Lecture 32 Adjustment curves
Lecture 33 Adjustment invert
Lecture 34 Adjustment threshold
Lecture 35 Adjustment colorize
Lecture 36 Adjustment posterize
Lecture 37 Adjustments on selections
Lecture 38 Change photo in black and white
Section 9: Add filters
Lecture 39 Add blur
Lecture 40 Increase details
Lecture 41 Add effects
Lecture 42 Create frame
Lecture 43 Red eye removal
Section 10: Trainings
Lecture 44 Change eyes color
Lecture 45 Smooth skin
Lecture 46 Selective black and white example
Lecture 47 Edit face part 1
Lecture 48 Edit face part 2
Lecture 49 Improve landscape photo part 1
Lecture 50 Improve landscape photo part 2
Section 11: Start with Darktable
Lecture 51 Start with dashboard
Lecture 52 Lighttable mode
Lecture 53 Import photos
Lecture 54 Grid and selections
Section 12: Add informations on photos
Lecture 55 Add informations
Lecture 56 Apply filters
Lecture 57 Styles
Section 13: Start with darkroom
Lecture 58 Darkroom mode
Lecture 59 Edit modules
Section 14: Basic modules
Lecture 60 Module sharpen
Lecture 61 Module levels
Lecture 62 Module contrast brightness saturation
Lecture 63 Module color zones
Lecture 64 Module shadows and highlights
Lecture 65 Module white balance
Lecture 66 Module basic adjustments
Lecture 67 Module base curve
Lecture 68 Module exposure
Lecture 69 Module color balance
Section 15: Modules parameters
Lecture 70 Color picker
Lecture 71 Snapshots
Lecture 72 Duplicate manager
Section 16: Other modules
Lecture 73 Add effects
Lecture 74 Crop photo
Section 17: Photo in black and white
Lecture 75 Photo black and white
Lecture 76 Selective black and white
Section 18: Apply masks
Lecture 77 Drawn mask
Lecture 78 Drawn and parametric mask
Lecture 79 Parametric mask
Lecture 80 Apply multiple masks
Section 19: Trainings
Lecture 81 Process eyes color
Lecture 82 Process smooth skin
Lecture 83 Make up face part 1
Lecture 84 Make up face part 2
Lecture 85 Improve landscape photo 1
Lecture 86 Improve landscape photo 2
Lecture 87 Improve landscape photo 3
Lecture 88 Improve landscape photo 4
Students,People who want to work with Gimp,People who want to work with Darktable,People who want to improve photos


photoeditingwithgimpapbfuu.jpg


Download from RapidGator


Download from DDownload


Practical Guide To Setup Hadoop And Spark Cluster Using Cdh

2ssuqawvxywtejag2xf46rje39.jpg


Practical Guide To Setup Hadoop And Spark Cluster Using Cdh
Last updated 6/2019
MP4 | Video: h264, 1280x720 | Audio: AAC, 44.1 KHz
Language: English | Size: 10.02 GB | Duration: 20h 56m

Step by step instructions to setup Hadoop and Spark Cluster using Cloudera Distribution of Hadoop (Formerly CCA 131)


What you'll learn
Learn Hadoop and Spark Administration using CDH
Provision Cluster from GCP (Google Cloud Platform) to setup Hadoop and Spark Cluster using CDH
Setup Ansible for server automation to setup pre-requisites to setup Hadoop and Spark Cluster using CDH
Setup 8 node cluster from scratch using CDH
Understand Architecture of HDFS, YARN, Spark, Hive, Hue and many more

Requirements
Basic Linux Skills
A 64 bit computer with minimum of 4 GB RAM
Operating System - Windows 10 or Mac or Linux Flavor

Description
Cloudera is one of the leading vendor for distributions related to Hadoop and Spark. As part of this Practical Guide, you will learn step by step process of setting up Hadoop and Spark Cluster using CDH.Install - Demonstrate an understanding of the installation process for Cloudera Manager, CDH, and the ecosystem projects.Set up a local CDH repositoryPerform OS-level configuration for Hadoop installationInstall Cloudera Manager server and agentsInstall CDH using Cloudera ManagerAdd a new node to an existing clusterAdd a service using Cloudera ManagerConfigure - Perform basic and advanced configuration needed to effectively administer a Hadoop clusterConfigure a service using Cloudera ManagerCreate an HDFS user's home directoryConfigure NameNode HAConfigure ResourceManager HAConfigure proxy for Hiveserver2/ImpalaManage - Maintain and modify the cluster to support day-to-day operations in the enterpriseRebalance the clusterSet up alerting for excessive disk fillDefine and install a rack topology scriptInstall new type of I/O compression library in clusterRevise YARN resource assignment based on user feedbackCommission/decommission a nodeSecure - Enable relevant services and configure the cluster to meet goals defined by security policy; demonstrate knowledge of basic security practicesConfigure HDFS ACLsInstall and configure SentryConfigure Hue user authorization and authenticationEnable/configure log and query redactionCreate encrypted zones in HDFSTest - Benchmark the cluster operational metrics, test system configuration for operation and efficiencyExecute file system commands via HTTPFSEfficiently copy data within a cluster/between clustersCreate/restore a snapshot of an HDFS directoryGet/set ACLs for a file or directory structureBenchmark the cluster (I/O, CPU, network)Troubleshoot - Demonstrate ability to find the root cause of a problem, optimize inefficient execution, and resolve resource contention scenariosResolve errors/warnings in Cloudera ManagerResolve performance problems/errors in cluster operationDetermine reason for application failureConfigure the Fair Scheduler to resolve application delaysOur ApproachYou will start with creating Cloudera QuickStart VM (in case you have laptop with 16 GB RAM*with Quad Core). This will facilitate you to get comfortable with Cloudera Manager.You will be able to sign up for GCP*and avail credit up to $300 while offer lasts. Credits are valid up to year.You will then understand brief overview about GCP*and provision 7 to 8 Virtual Machines using templates. You will also attaching external hard drive to configure for HDFS*later.Once servers are provisioned, you will go ahead and set up Ansible for Server Automation.You will take care of local repository for Cloudera Manager and Cloudera Distribution of Hadoop using Packages.You will then setup Cloudera Manager with custom database and then Cloudera Distribution of Hadoop using Wizard that comes as part of Cloudera Manager.As part of setting up of Cloudera Distribution of Hadoop you will setup HDFS, learn HDFS Commands, Setup YARN, Configure HDFS*and YARN*High Availability, Understand about Schedulers, Setup Spark, Transition to Parcels, Setup Hive and Impala, Setup HBase and Kafka etc.
Overview
Section 1: Introduction - CCA 131 Cloudera Certified Hadoop and Spark Administrator
Lecture 1 Introduction to the course
Lecture 2 CCA 131 - Administrator - Official Page
Lecture 3 Understanding required skills for the certification
Lecture 4 Understanding the environment provided while taking the exam
Lecture 5 Signing up for the exam
Section 2: Getting Started - Provision instances from Google Cloud
Lecture 6 Introduction
Lecture 7 Setup Ubuntu using Windows Subsystem
Lecture 8 Sign up for GCP
Lecture 9 Create template for Big Data Server
Lecture 10 Provision Servers for Big Data Cluster
Lecture 11 Review Concepts
Lecture 12 Setting up gcloud
Lecture 13 Setup ansible on first server
Lecture 14 Format JBOD
Lecture 15 Cluster Topology
Section 3: Getting Started - Setup local yum repository server - CDH
Lecture 16 Introduction
Lecture 17 Overview of yum
Lecture 18 Setuphttpd service
Lecture 19 Setup local yum repository - Cloudera Manager
Lecture 20 Setup local yum repository - Cloudera Distribution of Hadoop (CDH)
Lecture 21 Copy repo files
Section 4: Install CM and CDH - Setup CM, Install CDH and Setup Cloudera Management Service
Lecture 22 Introduction
Lecture 23 Setup Pre-requisites
Lecture 24 Install Cloudera Manager
Lecture 25 Licensing and Installation Options
Lecture 26 Install CM and CDH on all nodes
Lecture 27 CM Agents and CM Server
Lecture 28 Setup Cloudera Management Service
Lecture 29 Cloudera Management Service - Components
Section 5: Install CM and CDH - Configure Zookeeper
Lecture 30 Introduction
Lecture 31 Learning Process
Lecture 32 Setup Zookeeper
Lecture 33 Review important properties
Lecture 34 Zookeeper Concepts
Lecture 35 Important Zookeeper Commands
Section 6: Install CM and CDH - Configure HDFS and Understand Concepts
Lecture 36 Introduction
Lecture 37 Setup HDFS
Lecture 38 Copy Data into HDFS
Lecture 39 Copy Data into HDFS Contd
Lecture 40 Components of HDFS
Lecture 41 Components of HDFS Contd
Lecture 42 Configuration files and Important Properties
Lecture 43 Review Web UIs and log files
Lecture 44 Checkpointing
Lecture 45 Checkpointing Contd
Lecture 46 Namenode Recovery Process
Lecture 47 Configure Rack Awareness
Section 7: Install CM and CDH - Important HDFS Commands
Lecture 48 Introduction
Lecture 49 Getting list of commands and help
Lecture 50 Creating Directories and Changing Ownership
Lecture 51 Managing Files and File Permissions - Deleting Files from HDFS
Lecture 52 Managing Files and File Permissions - Copying Files Local File System and HDFS
Lecture 53 Managing Files and File Permissions - Copying Files within HDFS
Lecture 54 Managing Files and File Permissions - Previewing Data in HDFS
Lecture 55 Managing Files and File Permissions - Changing File Permissions
Lecture 56 Controlling Access using ACLs - Enable ACLs On Cluster
Lecture 57 Controlling Access using ACLs - ACLs On Files
Lecture 58 Controlling Access using ACLs - ACLs On Directories
Lecture 59 Controlling Access using ACLs - Removing ACLs
Lecture 60 Overriding Properties
Lecture 61 HDFS usage commands and getting metadata
Lecture 62 Creating Snapshots
Lecture 63 Using CLI for administration
Section 8: Install CM and CDH - Configure YARN + MRv2 and Understand Concepts
Lecture 64 Introduction
Lecture 65 Setup YARN + MR2
Lecture 66 Run Simple Map Reduce Job
Lecture 67 Components of YARN and MR2
Lecture 68 Configuration files and Important Properties - Overview
Lecture 69 Configuration files and Important Properties - Review YARN Properties
Lecture 70 Configuration files and Important Properties - Review Map Reduce Properties
Lecture 71 Configuration files and Important Properties - Running Jobs
Lecture 72 Review Web UIs and log files
Lecture 73 YARN and MR2 CLI
Lecture 74 YARN Application Life Cycle
Lecture 75 Map Reduce Job Execution Life Cycle
Section 9: Install CM and CDH - Configuring HDFS and YARN HA
Lecture 76 Introduction
Lecture 77 High Availability - Overview
Lecture 78 Configure HDFS Namenode HA
Lecture 79 Review Properties - HDFS Namenode HA
Lecture 80 HDFS Namenode HA - Quick Recap of HDFS typical Configuration
Lecture 81 HDFS Namenode HA - Components
Lecture 82 HDFS Namenode HA - Automatic failover
Lecture 83 Configure YARN Resource Manager HA
Lecture 84 Review - YARN Resource Manager HA
Lecture 85 High Availability - Implications
Section 10: Install CM and CDH - YARN Schedulers - FIFO, Fair, and Capacity
Lecture 86 Introduction
Lecture 87 Schedulers Overview
Lecture 88 FIFO Scheduler
Lecture 89 Introduction to Fair Scheduler
Lecture 90 Configure Fair Scheduler - Configure Cluster with Fair Scheduler
Lecture 91 Configure Fair Scheduler - Running Jobs Without Specifying Queue
Lecture 92 Configure Fair Scheduler - Running Jobs Specifying Queue
Lecture 93 Configure Fair Scheduler - Important Properties
Lecture 94 Capacity Scheduler - Introduction
Lecture 95 Capacity Scheduler - Configure using Cloudera Manager
Lecture 96 Capacity Scheduler - Run Sample Jobs
Section 11: Install Other Components - Spark Overview and Installation
Lecture 97 Introduction
Lecture 98 Setup and Validate Spark 1.6.x
Lecture 99 Review Important Properties
Lecture 100 Spark Execution Life Cycle
Lecture 101 Convert Cluster to Parcels
Lecture 102 Setup Spark 2.3.x
Lecture 103 Run Spark Jobs - Spark 2.3.x
Section 12: Install Other Components - Configuring Database Engines - Hive and Impala
Lecture 104 Introduction
Lecture 105 Setup Hive and Impala
Lecture 106 Validating Hive and Impala
Lecture 107 Components and Properties of Hive
Lecture 108 Troubleshooting Hive Issues
Lecture 109 Hive Commands and Queries
Lecture 110 Different Query Engines
Lecture 111 Components and Properties of Impala
Lecture 112 Running Queries using Impala - Overview
Section 13: Install Other Components - Configure Hadoop Ecosystem components
Lecture 113 Introduction
Lecture 114 Setup Oozie, Pig, Sqoop and Hue
Lecture 115 Review Important Properties
Lecture 116 Run Sample Oozie job
Lecture 117 Run Pig Job
Lecture 118 Validate Sqoop
Lecture 119 Overview of Hue
Section 14: Install Other Components - Install and Configure Kafka and HBase
Lecture 120 Introduction
Lecture 121 Kafka Overview
Lecture 122 Setup Parcels and Add Kafka Service
Lecture 123 Validate Kafka
Lecture 124 Setting up HBase
Lecture 125 Validate HBase
Section 15: CCA 131 - Revision for the Exam - Install the Cluster
Lecture 126 Introduction
Lecture 127 Set up a local CDH Repository
Lecture 128 Perform OS-level Configuration
Lecture 129 Install Cloudera Manager Server and Agents
Lecture 130 Install CDH using Cloudera Manager
Lecture 131 Add a New Node to an Existing Cluster
Lecture 132 Install - Add Host as Worker
Lecture 133 Add a Service using Cloudera Manager
Section 16: CCA 131 - Revision for the Exam - Configure the Cluster
Lecture 134 Introduction
Lecture 135 Configure a Service using Cloudera Manager
Lecture 136 Create an HDFS user's home directory
Lecture 137 Configure NameNode HA
Lecture 138 Configure ResourceManager HA
Lecture 139 Configure proxy for HiveServer2/Impala - Install HA Proxy
Lecture 140 Configure proxy for HiveServer2
Lecture 141 Configure proxy for Impala
Section 17: CCA 131 - Revision for the Exam - Manage the Cluster
Lecture 142 Introduction
Lecture 143 Rebalance the cluster
Lecture 144 Set up alerting for excessive disk fill
Lecture 145 Define and install a rack topology script
Lecture 146 Add I/O Compression Library
Lecture 147 YARN Resource Assignment
Lecture 148 Commission/Decommission a node
Section 18: CCA 131 - Revision for the Exam - Secure the Cluster
Lecture 149 Introduction
Lecture 150 Configure HDFS ACLs
Lecture 151 Install and Configure Sentry
Lecture 152 Configure Hue user authorization and authentication
Lecture 153 Enable or Configure Log and Query Redaction
Lecture 154 Create Encrypted Zones in HDFS - Enable Encryption
Lecture 155 Create Encrypted Zones in HDFS - Create Encryption Keys and Zones
Section 19: CCA 131 - Revision for the Exam - Test and Troubleshoot the Cluster
Lecture 156 Introduction
Lecture 157 Execute file system commands via HTTPFS
Lecture 158 Efficiently copy data within a cluster
Lecture 159 Efficiently copy data between clusters
Lecture 160 Create/Restore a snapshot of an HDFS directory
Lecture 161 Get/Set ACLs for a file or directory structure
Lecture 162 Benchmark the cluster (I/O, CPU, network)
Lecture 163 Resolve errors/warnings in Cloudera Manager
Lecture 164 Resolve performance problems/errors in cluster operation
System Administrators who want to understand Big Data eco system and setup clusters,Experienced Big Data Administrators who want to learn how to manage Hadoop and Spark Clusters setup using CDH,Entry level professionals who want to learn basics and Setup Big Data Clusters


practicalguidetosetupc7ekj.jpg


Download from RapidGator


Download from DDownload


Simpler Trading - Small Accounts Secrets PRO

simplertradingsmallacdif7c.jpg


Simpler Trading - Small Accounts Secrets PRO
MP4 | Video: 1920x1080/1280x720 | Audio: AAC 44.1 Khz , 2ch | Duration: 60h 58 min | Language: English | 43.8 GB

With the Premium Package you get the Basic Package with the Strategy Class on Saturday, PLUS 2 days of Live-Trading!
Take advantage of our popular live-trading sessions because it is during market hours that everything you learned in the Strategy class comes together. The fastest way to absorb and internalize this strategy and 'make it your own' is by immediately using your new knowledge in live-market conditions.
This is your opportunity to day trade and swing trade stocks, options, and ETFs with John Carter in real-time. Past attendees tell us there's nothing like being able to watch over John's screen as he looks for setups and dives deeper into the strategy.
It is amazing how much it is possible to improve your skills in a few trading sessions. As always, our informal goal is to strive to make enough profit to more than pay for the class (obviously, no promises).

simplertradingsmallacjte81.jpg


Download from RapidGator


Download from DDownload


TTC - Great Artists of the Italian Renaissance

51wifc4fzvl.acsy3508ccsj.jpg


TTC - Great Artists of the Italian Renaissance
MP4 | Video: h264, 1280x720 | Audio: AAC, 44.1 KHz, 2 Ch
Genre: eLearning | Language: English | Duration: 36 Lessons (18h 12m) | Size: 15.7 GB


No era of artistic achievement is as renowned as the Renaissance, and no country holds a higher place in that period than Italy. The supreme works created in Florence, Rome, Venice, and other Italian cities by such masters as Leonardo da Vinci, Botticelli, Michelangelo, Raphael, and Titian have never equaled..

No era of artistic achievement is as renowned as the Renaissance, and no country holds a higher place in that period than Italy. The supreme works created in Florence, Rome, Venice, and other Italian cities by such masters as Leonardo da Vinci, Botticelli, Michelangelo, Raphael, and Titian have never equaled and have established a canon of beauty that pervades Western culture to this day.
"These Arts, in their highest province, are not addressed to the gross senses, but to the desires of the mind, to that spark of divinity which we have within."
-Sir Joshua Reynolds, 1786
To view these works is to enter a world that is incomparably rich, filled with emotion and drama that is palpable, though sometimes mysterious to our modern sensibility.
To study these works with an expert is to penetrate that mystery and gain a new appreciation for how these masterpieces were created and what they meant to the artists and people of the time.
Experience the Vision of Great Art with an Expert Guide
Professor William Kloss is your guide through this visual feast in an artist-centered survey that explores hundreds of paintings and sculptures by scores of artists.
An independent art historian, scholar, and curator, Professor Kloss is a frequent lecturer for the Smithsonian Institution's seminar and travel program. He has served on the Committee for the Preservation of the White House by presidential appointment since 1990, and he is the author of several books and exhibition catalogs.
Commenting on Kloss's eloquent writing, The Washington Post marveled that "his pointed and persuasive perceptions are not easily resisted."
Unlock the Mysteries of Renaissance Art
Take Botticelli's Primavera, a bewitching allegory of springtime featuring two gods, three goddesses, the three Graces, and Cupid, set in a lush orange grove. Its sheer beauty transfixes visitors to Florence's Uffizi Gallery, where it hangs today. But what does it mean?
Noting that for centuries scholars have debated the painting's symbolism, Professor Kloss directs your attention to a few intriguing details
The orange tree foliage makes a halo around the central figure of Venus, connecting her with the Virgin Mary. According to Renaissance thought, Venus may also represent humanitas-culture or civilization.
On the right, flowers float from the mouth of the nymph Cloris, and her finger is merging with a flower in the gown of Flora, goddess of spring. One is metamorphosing into the other as spring arrives in this ideal glade of divine love.
Meanwhile on the left, Mercury is waving his staff to dispel a tiny patch of clouds. He is clearing the atmosphere-the intellect-for the three Graces who represent culture and the arts.
Professor Kloss then points out another equally rich interpretation and concludes, "A bad artist could do terrible things with such a complex story, but fortunately a great artist was at hand to visualize this elaborate subject."
The same can be said for all of the artists in this course, and it is through their distinctive styles, innovations, and matchless skill that you learn about this remarkable period.
What Is the Renaissance?
These lectures cover art history at the times of the Early Renaissance and the High Renaissance, which extended from about 1400 to about 1520. Italy is the first and principal location of the Renaissance, and it was in Florence that it took its deepest root.
The word renaissance means rebirth, and it is the name given to the transition from medieval to modern times in Europe, when the rediscovery of ancient Greek and Roman culture sparked a creative revolution in the humanities, the sciences, and the arts.
Humanism, a philosophical, literary, and artistic ideal, went hand in hand with this rebirth. It emphasized the dignity and potential of humanity and inspired secular studies, as well as the creation of art that reflected the forms and ideas of the Classical era. Renaissance society-and art-was permeated with religion.
In the arts, this new approach encompassed powerful new techniques for representing the human figure and the visible world, and also new attitudes about the roles of artists in society. From a modest rank as craftsman, the artist gradually rose to a status comparable to poets and philosophers.
Examine Works by More Than 40 Great Artists
The first 25 lectures examine the artists of Central Italy, where Florence is located, then the focus shifts to Northern Italy. You cover the works of more than 40 artists, among them
Filippo Brunelleschi and Donatello: One an architect, the other a sculptor, they were the principal founders of the Renaissance style. Florence cannot be properly understood without looking at Brunelleschi's buildings, notably his dome for the Florence Cathedral. The influence of Donatello's sculpture was unequalled before Michelangelo.
Masaccio: The greatest painter of the Early Renaissance is studied in two lectures; he is compared to Giotto, the great "proto-Renaissance" master of a century earlier.
Piero della Francesca: Now considered one of the greatest Renaissance painters, he was primarily associated with smaller urban centers such as Urbino and Arezzo, where he created the fresco cycle The Legend of the True Cross.
Botticelli: Two lectures are devoted to this master whose wistful grace gave way to anguished expression as the religious climate in Florence took a fanatical turn under the reformer Savonarola.
Leonardo da Vinci, Michelangelo, and Raphael: For many, this triumvirate is synonymous with the High Renaissance. Their influence and fame have scarcely waned from their day to our own. Seven lectures are devoted to their work.
Andrea Mantegna: Master painter in Padua and Mantua, his art has a sculptural quality combined with rich color and a spirit of pathos. He was also an innovator in spatial illusionism in painting.
Carpaccio and Gentile Bellini: This pair excelled in rendering contemporary Venice in vivid narrative cycles. They are included in an eight-lecture sequence on Venice, the proud center of culture in northern, Adriatic Italy.
Antonello da Messina and Giovanni Bellini: Both working in Venice, they achieved such brilliant effects with the new oil medium that they inspired many other artists to adopt it. Giovanni Bellini was the younger brother of Gentile.
Giorgione and Titian: From Giovanni Bellini's workshop came two artists who helped define the Venetian High Renaissance. Giorgione altered the development of Western art, and Titian blended the achievements of Giorgione, central Italian painting, and his own coloristic genius into a style of stirring beauty.
Some of the Art You See
The visual content of this course puts it in a class with heavily illustrated art books. Some 500 images of paintings, sculptures, prints, drawings, maps, buildings, and architectural details are featured. Many works are explored in considerable depth, with searching commentary by Professor Kloss that is both enlightening and personal. For example
Church of San Lorenzo, by Brunelleschi: "Brunelleschi's architecture reflects the scale of the human being. I have a greater sense of calm and comfort and well-being in that church than any other Italian church until we get to the work of Palladio well over 100 years later. It's an extraordinary experience."
St. George, by Donatello: "The widespread legs of the figure and the central axis of the shield lead us up to the head, the vigilant, intelligent head, a thinking head. We take it far too much for granted, but Donatello has been able to give the power of thought to the head of George."
Ginevra de' Benci, by Leonardo da Vinci: "The strangely unemotional character of the face, the dreamy eyes, don't really connect with ours. This seems to be more of a projection of Leonardo's own secretive personality than a record of the sitter's. I think that it is generally true of portrait artists that they project themselves to a large degree onto their sitters."
The Sistine Chapel Ceiling, by Michelangelo: "Do I think that the Sistine Ceiling was the victim of a poor or careless restoration? No, I do not; emphatically, I do not. These are the colors that we should have expected to see. These are in fact the colors of much later 16th-century Italian painting. We always knew that Michelangelo invented the poses of the human body that were used by everyone for the rest of the century. Now we know that he may have invented the colors as well."
Baldassare Castiglione, by Raphael: "Look in his eyes. Look at the wonderful blue-green of his eyes against the flesh tones and against the grayish background. The color scheme of the whole thing is a flawless consonance of gray, black, flesh tones, of perfectly defined volumes, persuasive description, and in every sense it's the true likeness of the man. It is what we call a speaking likeness."
The Tempest, by Giorgione: "This is one of the most puzzling paintings in art history. My preferred explanation: The soldier and the broken columns symbolize fortitude or constancy. The woman and child stand for Christian love. The threatening storm over the town and the country is a symbol of fortune or chance. What is distinctly uncommon here is the subordination of the emblematic devices to the evocative landscape. This is the first instance of Italian painting in which a landscape is given the principal role, not just a supporting role, but the principal role."
You discuss many other major masterpieces in detail, from Giotto's frescoes for the Arena Chapel and Ghiberti's bronze doors for the Florence Baptistery to Leonardo's The Last Supper and Michelangelo's Last Judgment.
Terms and Techniques
Professor Kloss offers other insights as well. Did you know that it is incorrect to refer to Leonardo as "da Vinci," which is not his last name but the indication of his town of birth? Or that the Renaissance was put on hold for half a century due to the Black Death? Or that Renaissance marble sculpture was sometimes painted?
You also learn how to recognize saints from the symbols that accompany them: St. Paul by his sword, St. Peter by his keys, and St. Jerome by the stone in his hand with which he strikes himself in penance for his sins.
Of great use in your further studies are the terms and techniques that Professor Kloss explains
In Italian, the 14th century is called the Trecento. The literal meaning is 300, but it is shorthand for the 1300s. Likewise, the 15th century is called the Quattrocento and the 16th the Cinquecento. These Italian terms are commonly used in art historical writing and speaking about Italian art.
Fresco means fresh in Italian. The technique involves painting on a shallow layer of freshly troweled wet plaster (the intonaco) with water-based pigments, which penetrate into the plaster. Rapid execution is required before the plaster sets overnight, allowing one working day. The area that can be covered is thus called a giornata (day, or day's work).
In linear or one-point perspective, the vanishing point corresponds to the spectator's viewpoint, and that is why the pictorial space can be felt as an extension of the viewer's real space. Leon Battista Alberti, the architect who first published a formulation of these principles in 1435, likened the picture surface to a window.
Drying oils such as linseed oil and walnut oil form a solid film when exposed to the air for long enough time. Because they dry slowly, they can be applied evenly over a wide surface. The color, bound in the oil, has a richness and a luminosity that comes from the translucency of the medium.
Uffizi, the name of the famous museum in Florence, in English means simply offices-the original function of the museum building.
The Renaissance: 120 Years That Transformed Art
In the final two lectures, Professor Kloss looks at the Renaissance as a whole and surveys the political, social, and religious events of the early 16th century that brought profound change to Italy and the rest of Europe. He then examines how art inevitably changed as a result.
Altogether, the Renaissance lasted about 120 years, and the period of the High Renaissance a little over 40 years. No later Western art can be discussed without reference to this era-especially as it matured and flourished in the cities of Italy.


greatartistsoftheitaletdxj.jpg


Download from RapidGator


Download from DDownload


Digital Nomad The Complete Course For Freedom Life

dp9dkgp78lbjwor1rwkdlkiedq.jpg


Digital Nomad The Complete Course For Freedom Life
Last updated 3/2022
MP4 | Video: h264, 1280x720 | Audio: AAC, 44.1 KHz
Language: English | Size: 6.79 GB | Duration: 8h 15m

Freedom and simplified life using an online business in the countries of your choice


What you'll learn
Define the concept
Understand the lifestyle
My experience as a Digital Nomad
Start your project
Don't have regret
Understand the situation at point A and point B
Limiting beliefs to overcome
Define your goals
Minimalist attitude
Importance of daily actions
Choose countries
Understand the compromise system
Use the table with criterias
Understand the daily life
Create day structure
All the tools that i use explained
Best website to use
Start online business
Create profitable system
Introduction of my activities
Develop other activities
Choose your insurance
Pay taxes

Requirements
You need to have the motivation to work on this project

Description
Live abroad and work from a computer ! It's not a dream life, but a free life according to your personality and your choices ! My name is Nicolas and I consider myself a Digital Nomad ! Through this course, I introduce this way of life to you, I give you all the advices you need, as well as the right informations !Obviously, this way of life is not suitable for everyone. On the other hand, for some people, it is the ideal solution for a fulfilling life according to their convictions. You may be tired of following the crowd, staying in the same system, having a job with no fulfillment, staying in one place, not taking action, being surrounded by too many material things, and I pass.Dematerialized activity. To become a Digital Nomad, it is essential to create an online activity. For this, there are several solutions. From my experience, I will give you some tips for creating a stable activity. It's up to you, then, to invest yourself fully, and to optimize an activity that suits you. One cumputer for a job.Are you fed up with everyday life and your lifestyle ? Indeed it happens to people who do not have the same value as the majority, rest assured there is no problem.Are you tired of living in the same type of society ? I do not hide it from you, the world is vast and you can find countries where it is good to live and discover according to your criteria of choice.Do you want to choose a geographical area or a country of your choice ? I give you advice based on my personal experience and I propose a playful table to make comparisons.You think it's not possible? You know years ago when I observed these few people who had this way of life, I said to myself that it was made for me, for my personality, without thinking of getting there. And one day I set up the actions and I focused on it every day until I succeeded, and guess what, I did.Are you thirsty for freedom ? Do you want adventure ? Want to change your lifestyle ? Want to travel ? Do you want to live differently than in the comfort zone of everyday life ? Try the experience by becoming a Digital Nomad.An updated reference training. Presentation of the sites that I use. All my experience to give you the right advices. I will also give you many directions to start well as a Digital Nomad.
Overview
Section 1: Introduction
Lecture 1 Introduction
Section 2: Understand the concept
Lecture 2 Advantages of digital nomad
Lecture 3 Advantages of this lifestyle
Lecture 4 Digital nomad description
Section 3: Start your project
Lecture 5 Define point A
Lecture 6 Define point B
Section 4: Work with 3 types of goals
Lecture 7 Goal step 1
Lecture 8 Goal step 2
Lecture 9 Goal step 3
Section 5: Work and project to start
Lecture 10 Start keep job
Lecture 11 Create transition
Lecture 12 No regrets
Lecture 13 Define ressources
Lecture 14 Dismiss from your job
Lecture 15 Create life at your image
Lecture 16 Your personality
Section 6: The mindset to have abroad
Lecture 17 Minimalist attitude
Lecture 18 Mindset during daily life
Lecture 19 Create freedom days
Lecture 20 Spend money depending of your income
Lecture 21 Learn language
Lecture 22 The different criterias
Section 7: Choose your destinations
Lecture 23 Compromise system
Lecture 24 Use the table
Lecture 25 Advices to use the table
Lecture 26 The motivations for this life
Section 8: My experience in Asia
Lecture 27 My experience in asia
Lecture 28 Cost of life reality
Lecture 29 Cost of life in asia
Section 9: Digital Nomad tools explained
Lecture 30 Select insurance
Lecture 31 Search flight
Lecture 32 Return ticket solution
Lecture 33 Book accomodation
Lecture 34 Find informations with criterias
Lecture 35 Payment process
Lecture 36 Find credit cards
Lecture 37 Graphic design softwares
Lecture 38 Host blog
Lecture 39 Stock files
Lecture 40 Online business platforms
Lecture 41 Meet people
Lecture 42 Woofing as a solution
Section 10: Start online business
Lecture 43 My different incomes
Lecture 44 Two models to earn money
Lecture 45 Earn money with skills
Lecture 46 Sell books part 1
Lecture 47 Sell books part 2
Lecture 48 Sell courses part 1
Lecture 49 Sell courses part 2
Lecture 50 Create audience part 1
Lecture 51 Create audience part 2
Lecture 52 Work freelance part1
Lecture 53 Work freelance part 2
Lecture 54 Create graphic documents
Lecture 55 Never stop to work
Section 11: Develop other activities
Lecture 56 Activity expatriation
Lecture 57 Activity photography
Lecture 58 Activity blog
Lecture 59 Activity youtube
Section 12: My equipment
Lecture 60 My electronic equipment
Lecture 61 My suitcase
Section 13: Digital Nomad visa explained
Lecture 62 Countries with digital nomad visa
Section 14: Pay taxes
Lecture 63 Taxes and quality of life
Lecture 64 Pay taxes basics
Lecture 65 Pay taxes in a different country
Section 15: Conclusion
Lecture 66 Conclusion
You need to be interested by this lifestyle,You want to have all the informations to start,You want to live abroad,You want to expatriate with online activity


digitalnomadthecomple1keoy.jpg


Download from RapidGator


Download from DDownload


Create And Sell Coloring Books

c02m17tozu8lsghqqhvv0aai62.jpg


Create And Sell Coloring Books
Last updated 8/2022
MP4 | Video: h264, 1280x720 | Audio: AAC, 44.1 KHz
Language: English | Size: 5.03 GB | Duration: 9h 16m

Design step by step coloring books with Affinity Publisher and sell on Amazon KDP for passive income


What you'll learn
Understand the different styles of coloring book
Define trim size
Define a number of pages
Target the niche process
Target the creation process
Target the sale process
Find niches
Use tools to find niches
Understand how to niche coloring book
Find image library
Use images
Understand copyright to use images
Create interior for coloring book using Affinity Publisher
Start with Affinity Publisher
Convert images in drawings using Affinity Publisher
Understand the different processes to create coloring book
Understand all basics to create covers
Create cover step by step using Affinity Publisher
Start with Amazon KDP
Understand profitability criterias to sell coloring book
Publish coloring book step by step on Amazon KDP
Create activity book using coloring book
Ideas for activity books

Requirements
You need to create Amazon account
You need to have a licence with Affinity Publisher or to start with a trial version
You need to have motivation and to invest yourself in this business

Description
Coloring book concept with Amazon KDPCreate and sell coloring books on the Amazon KDP platform is a great way to make money online. It is thus possible to create additional income, but also a full salary. Indeed, there is a low initial investment. It is a business that can be profitable, provided that the different parts of the process are optimized. It's not enough to create an interior, a cover, publish the book you want, and wait. This is the best way to not succeed. On the other hand, by working step by step, in a structured way, and with the right tools, it is possible to position your books on the first pages of research on keyword queries and make sales. The business is focused on three axes, finding niches, creating the book and cover, and publishing the book.Affinity Publisher softwareAffinity Publisher is a design software specialized in layouts, but also in the creation of graphic documents. It thus has advanced tools for managing pages, using models, or even advanced text modifications. Its value for money is excellent with a lifetime license, which means a purchase for long term use. Very affordable cost. Very ergonomic, it will allow you to optimize the creation of coloring book. It is important to directly use the best to create quality coloring books. Managing pages, advanced tools or even adding effects, that's what it takes to create quality coloring books.What you need to have to optimize this training- Motivation and personal investment- An Affinity Publisher license, lifetime license, you can also start with a trial version- Open an account on AmazonTraining courseIn this course, I will show you how to create and sell coloring books step by step. To do this, you'll learn the basics of setting a size, using margins, bleeds, and more. Then, we will see the process in several modules. Search for coloring book niches to define profitable books. You will learn how to create a coloring book interior using images and quickly converting them to a drawing in Affinity Publisher, layout and export your work. The other design step will be the cover, we will also see how to design it using the cover model, calculating the size and optimizing the different elements. Then there will be the publication part with the Amazon KDP platform. you will learn how to publish a book step by step on Amazon KDP by optimizing the metadata.A reference course to create and publish coloring books ! Ideal for people who enjoy creating, researching, or even using graphic design software !
Overview
Section 1: Introduction
Lecture 1 Introduction
Section 2: Concept presentation
Lecture 2 Different types of coloring book
Lecture 3 Mistake beginners
Lecture 4 Niche part
Lecture 5 Design part
Lecture 6 Publication part
Lecture 7 Coloring book examples
Lecture 8 BSR description
Lecture 9 Define trim size
Lecture 10 Number of pages for your coloring book
Lecture 11 Create drawing horizontally or vertically
Section 3: Find niches for coloring book
Lecture 12 Find ideas
Lecture 13 Niche research basics
Lecture 14 Niche research complete process
Lecture 15 Why you need to niche your coloring book
Lecture 16 Find seasonal niche
Section 4: Find images
Lecture 17 Why you need to work in vector
Lecture 18 Choose an image library
Lecture 19 Use images
Lecture 20 Image licence
Lecture 21 Start with dashboard
Lecture 22 Master navigation
Section 5: Affinity Publisher create interior for coloring book
Lecture 23 Start an interior
Lecture 24 Add margins
Lecture 25 Edit pages
Lecture 26 Convert image to drawing with frame
Lecture 27 Convert image to drawing with bleed
Lecture 28 Create layout
Lecture 29 Export your interior
Section 6: Affinity Publisher useful features for coloring book
Lecture 30 Use layers
Lecture 31 Create shapes
Lecture 32 Draw with pen
Lecture 33 Edit nodes
Lecture 34 Remove elements
Lecture 35 Edit strokes
Lecture 36 Create group
Lecture 37 Improve drawing
Lecture 38 Crop drawing
Lecture 39 Create drawing with different files
Section 7: Start with cover creation
Lecture 40 Cover process
Lecture 41 Cover calculator
Lecture 42 Cover structure
Section 8: Affinity Publisher create cover for coloring book
Lecture 43 Cover turtle coloring book part 1
Lecture 44 Cover turtle coloring book part 2
Lecture 45 Cover turtle coloring book part 3
Lecture 46 Cover turtle coloring book part 4
Lecture 47 Cover horse coloring book part 1
Lecture 48 Cover horse coloring book part 2
Lecture 49 Cover horse coloring book part 3
Lecture 50 Cover horse coloring book part 4
Section 9: Affinity Publisher useful features for cover
Lecture 51 Manage aligments
Lecture 52 Edit colors
Lecture 53 Curve text
Lecture 54 Edit letters
Lecture 55 Add effects
Lecture 56 Add transparency
Section 10: Amazon KDP start with the marketplace
Lecture 57 Start with Amazon
Lecture 58 Profitability criterias
Section 11: Importance of informations
Lecture 59 Title importance
Lecture 60 Description importance
Lecture 61 Keywords importance
Lecture 62 Categories importance
Lecture 63 Cover importance
Lecture 64 Define price
Section 12: Publish coloring book on Amazon KDP
Lecture 65 Publish coloring book part 1
Lecture 66 Publish coloring book part 2
Lecture 67 Publish coloring book part 3
Lecture 68 Publish coloring book part 4
Section 13: Use coloring book to create activity book
Lecture 69 Create activity book
Lecture 70 Find scissor skills niches
Lecture 71 Book coloring cutting part 1
Lecture 72 Book coloring cutting part 2
Lecture 73 Book coloring cutting past part 1
Lecture 74 Book coloring cutting past part 2
Lecture 75 Create cover
Section 14: Conclusion
Lecture 76 Conclusion
People who want to create additional income,People who want to earn money online,People who want to earn money with graphic skills,People who want to create coloring book


createandsellcoloringa1fsk.jpg


Download from RapidGator


Download from DDownload


Corporate Esg And Sustainability - Doing Well And Doing Good

blca5tgmvxwxosbpcpcv10ndw9.jpg


Corporate Esg And Sustainability - Doing Well And Doing Good
Published 8/2022
MP4 | Video: h264, 1280x720 | Audio: AAC, 44.1 KHz
Language: English | Size: 5.05 GB | Duration: 4h 8m

The New Leadership Priority - Building a Best-in-Class ESG (Environmental, Social and Governance) Program


What you'll learn
Understand the "ESG revolution" and its relevance to your business
Establish or evolve an effective ESG program
Understand ESG v. CSR and how to reconcile them
Attract investors, customers, and employees with strong ESG alignment
Choose an ESG framework that works for your business
Engage in ESG reporting best practices
Understand the latest trends and be up-to-date on the rapidly-changing ESG world
Learn from ESG experts from top Fortune 100 companies
Be equipped to support your business in building a better, more sustainable world

Requirements
The only requirement is an interest in Environmental, Social and Governance (ESG) responsibilities of organizations.

Description
The global investment and corporate community has realized that companies that do good in the world also do better in their business. Programs for corporate social responsibility (CSR), corporate volunteerism, environmental sustainability, diversity and inclusion, ethical behavior, philanthropy, and a focus on stakeholder capitalism were all "nice to haves," but now investors, consumers, and employees are demanding that companies make positive ESG (environmental, social, and governance) impacts and the game has changed. Positively contributing to society and the environment is now a "must have." ESG frameworks have brought transparency, objectivity, and accountability to companies' environmental, social, and governance impacts. But, ESG frameworks are numerous and confusing. Reporting standards are varied and difficult to navigate. And, the ESG landscape is changing rapidly.According to the Harvard Business Review, there is an "ESG Reckoning" taking place. ESG is the No. 1 topic investors want to discuss with boards of directors. (PWC.) As of 2020, almost 90% of publicly traded companies and 67% of privately-owned companies had embarked on ESG initiatives. (NAVEX Global). Additionally, 88% of institutional investors believe that companies that prioritize ESG initiatives represent better opportunities for long-term returns than companies that do not. (Edelman)Whether your company already has an ESG program or is thinking of developing one, this course will help you understand ESG, navigate the alphabet soup of the ESG world, and lead your company in establishing a high-impact ESG program. Layli Miller-Muro has a 25-year career as a corporate lawyer with one of the top law firms in the world and as a human rights lawyer with one of the most influential non-profits in the United States.*Named as one of Goldman Sachs's Top 100 Most Intriguing Entrepreneurs, Newsweek Magazine's 150 Most Fearless Women in the World, and a winner of the Washington Post's Award for Management Excellence, Layli is an author and frequent lecturer. Currently, she is a consultant helping corporations with their social impact strategies. With both a legal and practical lens, she will demystify ESG and help you establish an effective ESG program. This course will enable you to:Understand the history of ESG and what ESG means (including how it is different from CSR)Realize its relevance to you and your companyBecome an expert in the range of frameworks currently out there, as well as those that are pending and coming down the pipeYou will receive a road map for implementing an ESG strategy for your company - whether small or large. (With practical tools, handouts, and exercises to support you in your journey.)Have a sense of what is coming next in the industry and what experts are expecting in this fast-changing landscape.Most importantly, this course will support you in ensuring that your company has a competitive edge in both making profit and making the world a better place!
Overview
Section 1: Welcome!
Lecture 1 Overview of the Course
Section 2: What is ESG?
Lecture 2 What is ESG: Overview
Lecture 3 What is ESG: Basic Definition
Lecture 4 What is ESG: Comparing ESG to CSR (Corporate Social Responsibility)
Lecture 5 What is ESG: Historic Overview
Lecture 6 Expert Interview (Varma): What does ESG mean to you?
Lecture 7 Expert Interview (Tullier): How ESG has evolved?
Lecture 8 Expert Interview (Chew): How has ESG evolved?
Lecture 9 Expert Interview (Ndiaye): What is your definition of ESG?
Lecture 10 Expert Interview (Bergman): What is ESG?
Lecture 11 Expert Interview (Dodson): What is ESG from an equity lens?
Lecture 12 Expert Interview (Silberman): How CSR has evolved to ESG?
Section 3: Why is ESG Important for your Business?
Lecture 13 Why is ESG Important: Overview
Lecture 14 Why is ESG Important: Competitive Edge
Lecture 15 Why is ESG Important: Compliance
Lecture 16 Why is ESG Important: Strategically Planning for the Future
Lecture 17 Why is ESG Important: Making the World a Better Place
Section 4: ESG Frameworks
Lecture 18 ESG Frameworks: Overview
Lecture 19 GRI (Global Reporting Initiative)
Lecture 20 CDP (Carbon Disclosure Project)
Lecture 21 SASB (Sustainability Accounting Standards Board)
Lecture 22 TCFD (Taskforce on Climate-related Financial Disclosure)
Lecture 23 WDI (The Workforce Disclosure Initiative)
Lecture 24 CDSB (The Climate Disclosure Standards Board)
Lecture 25 WEF (World Economic Forum Stakeholder Capitalism Metrics)
Section 5: ESG Program Best Practices
Lecture 26 ESG Program Best Practices: Overview
Lecture 27 Choosing or Constructing a Relevant ESG Framework
Lecture 28 Conducting a Materiality Assessment
Lecture 29 Establishing ESG Goals
Lecture 30 Conducting a Gap Analysis
Lecture 31 Mapping Actions Needed to Meet Goals
Lecture 32 Prioritizing and Allocating Resources Needed
Lecture 33 Track Progress and Hold Accountable
Lecture 34 Reporting and Promoting Progress
Lecture 35 Expert Interview (Tullier): Corporate ESG best practices
Lecture 36 Expert Interview (Chew): Conducting materiality assessments
Lecture 37 Expert Interview (Silberman): Choosing metrics, materiality, and goal setting
Lecture 38 Expert Interview (Tullier): Best practices in engaging investors
Lecture 39 Expert Interview (Alemayehou): Board of Directors best practices
Section 6: Overcoming Barriers in ESG
Lecture 40 Overcoming Barriers in ESG: Overview
Lecture 41 What are the Barriers to Implementing a Successful ESG Program?
Lecture 42 How You Can Overcome the Barriers
Lecture 43 Expert Interview (Varma): Challenges and opportunities in ESG
Lecture 44 Expert Interview (Alemayehou): Challenges in implementing ESG
Lecture 45 Expert Interview (Chew): ESG obstacles and ways to overcome them
Lecture 46 Expert Interview (Tullier): ESG's biggest challenges
Lecture 47 Expert Interview (Ndiaye): Challenges with ESG programs, particularly in Africa
Lecture 48 Expert Interview (Silberman): Overcoming obstacles to implementing ESG
Lecture 49 Expert Interview (Dodson): Challenges with ESG implementation
Section 7: ESG Updates and Trends to Watch
Lecture 50 ESG Trends to Watch: Overview
Lecture 51 Expert Interview (Chew): Future of mandatory v. voluntary disclosures
Lecture 52 Expert Interview (Varma): ESG is here to stay with new disclosure requirements
Lecture 53 Expert Interview (Bergman): The future of ESG frameworks
Lecture 54 Expert Interview (Ndiaye): Future trends in ESG
Lecture 55 Expert Interview (Dodson): Future trends in ESG
Section 8: Extra: ESG Experts' Views on Roles and Responsibilities to Ensure Accountability
Lecture 56 Expert Interview (Varma): The role of the General Counsel in ESG
Lecture 57 Expert Interview (Chew): The role of investors in advancing ESG
Lecture 58 Expert Interview (Dodson): The role of asset managers and implicit bias
Lecture 59 Expert Interview (Silberman): Role of third party assurances in advancing ESG
Lecture 60 Expert Interview (Alemayehou): Role of investors in advancing ESG
Lecture 61 Expert Interview (Nydiaye): Role of investors
Lecture 62 Expert Interview (Varma): Role of the Board
Lecture 63 Expert Interview (Dodson): Role of boards in ESG
Lecture 64 Expert Interview (Bergman): Roles of stakeholders in motivating accountability
Lecture 65 Expert Interview (Ndiaye): Role of the Board
Lecture 66 Expert Interview (Ndiaye): Role of government regulation
Section 9: Extra: Leader Perspectives on ESG in Various Global Markets
Lecture 67 Expert Interview (Ndiaye): ESG in Africa
Lecture 68 Expert Interview (Bergman): ESG in Europe v United States
Lecture 69 Expert Interview (Dodson): ESG among marginalized communities
Section 10: Course Closing
Lecture 70 You did it!
This course is for board members, executives, and employees who want to advance ESG in their organization.


corporateesgandsustai7pdqi.jpg


Download from RapidGator


Download from DDownload


How To Sell Your Feature Film: Intro To Film Distribution

ewvzwaw9qfjglmjmtfqrfkciqu.jpg


How To Sell Your Feature Film: Intro To Film Distribution
Last updated 1/2022
MP4 | Video: h264, 1280x720 | Audio: AAC, 44.1 KHz
Language: English | Size: 5.35 GB | Duration: 4h 16m

This course will prepare your film for world-wide film distribution. Power to filmmaking & filmmakers.


What you'll learn
How to choose a film distributor
How not to get ripped off by a film distributor
What is a Film Aggregator
What are the different kinds of VOD

Requirements
Basic Filmmaking knowledge

Description
Join over 70,000 students learning from our courses!So you made a feature film, now what? Most filmmakers don't even think about film distribution but it is, by far, one of the most important parts of the filmmaking process. Film distribution lives in shark infested waters where the system is designed to screw the filmmaker. In this course we will arm you with the knowledge to help you make a smart choice when choosing a film distributor and how to prepare your film for world-wide film distribution.Whether you have a feature film or documentary we have you covered. Knowledge is power and this course will add more tools to your filmmaker toolbox. Here is what you will learn in the course: What is a Film Distributor and the Standard DealCarving Out Your Film's RightsGross vs Net ProfitsDistribution Expenses - Film MarketsDistribution Expenses - Marketing & MaterialsDistribution Expenses - Cost Saving TechniquesIncreasing Your Leverage with DistributorsWhat is a Film Market?Pros and Cons of Attending a Film MarketGetting the Most Out of a Film MarketingWhat are film deliverables? What is a Film Aggregator?Distribber DebacleWhen to Use an Aggregator?Things to Do Before You Choose a Film AggregatorLearn how and when to work with sales agents, as well as how to avoid sharksWe discuss the reality of the VOD*streaming landscape and how you can profitDon't get taken advantage of by predatory film distributors. Arm yourself with the knowledge you need to get your feature film out to the world. --------------------------------------------------------------------------------------------------------------------------------What people are saying about this course:*This is a really informative course. It's obvious that the teachers have a lot of passion behind what they do and a ton experience. I look forward to making my next film with some of the tips and ideas shared here in the course. - Laura SwartzThis a great course. It has very practical advise for indie filmmakers, and a step by step process to make a micro-budget feature in a few months. I'm going to apply it to my first feature. - Jared Evans---------------------------------------------------------------------------------------------------------------------------------Your instructor:*Alex Ferrari has been working in the film industry for over 25 years and is the founder of Indie Film Hustle. He became a whistleblower and exposed Distribber, a film aggregator who owed film producers millions of dollars. Since their closure they also left thousands of filmmaker's without access to their films.He kept hearing story after story of how filmmakers were being taken advantage of by predatory film distributors so he decided to put together a course explaining the pitfalls filmmakers face when trying to get their films distributed through the legacy distribution model. It is his mission to help filmmakers survive and thrive in the film business.---------------------------------------------------------------------------------------------------------------------------------So what are you waiting for? Join over 70,000*students that have already taken IFH filmmaking and screenwriting*courses.*If you've got the dream.If you've got the drive.If you've got the passion - but you're missing the knowledge and experience...this course*will help you make your feature*film into a reality. Enroll NOW*and learn the in and outs of film distribution! Let's get started!
Overview
Section 1: Introduction
Lecture 1 Introduction
Lecture 2 What is Traditional Film Distributor
Lecture 3 Carving Out Rights
Lecture 4 Gross vs Net Profits
Lecture 5 Distribution Expenses - Film Markets
Lecture 6 Distribution Expenses - Marketing & Creation
Lecture 7 Distribution Expenses - Cost Saving Techniques
Lecture 8 Windowing Strategies
Lecture 9 Increasing Leverage with Distributors
Section 2: What are Sale Agents and Producer Reps?
Lecture 10 What is an International Sales Agent?
Lecture 11 What is a Producers Rep?
Lecture 12 BONUS: Interview with Producers Rep Ben Yennie
Section 3: Understanding Film Markets
Lecture 13 What is a Film Market?
Lecture 14 Pros and Cons of Attending a Film Market
Lecture 15 Getting the Most Out of a Film Market
Lecture 16 BONUS: Interview with American Film Market President Jonathan Wolf
Section 4: Video On-Demand Services
Lecture 17 OTT (Over the Top) Services
Lecture 18 TVOD (Transactional Video On-Demand)
Lecture 19 SVOD (Subscription Video On-Demand)
Lecture 20 AVOD (Ad Based Video On-Demand)
Lecture 21 Cable & Satellite Supported VOD
Lecture 22 VOD Myth Busting
Lecture 23 PVOD (Premium Video On-Demand)
Section 5: The World of Film Deliverables
Lecture 24 Film Deliverables - Film
Lecture 25 Film Deliverables - Audio
Section 6: Film Aggregators
Lecture 26 What is a Film Aggregator?
Lecture 27 A Cautionary Tale - Distribber
Lecture 28 When to Use a Film Aggregator
Lecture 29 Things to Do Before You Choose a Film Aggregator
Section 7: Wrapping Things Up
Lecture 30 Wrapping Things Up
Filmmakers,Directors,Screenwriters,Film Producers


howtosellyourfeaturefyeitu.jpg


Download from RapidGator


Download from DDownload


Sketchup For Garden Design

mfbpfqtqfz50tbcmy8qfq3ofop.jpg


Sketchup For Garden Design
Last updated 2/2021
MP4 | Video: h264, 1280x720 | Audio: AAC, 44.1 KHz
Language: English | Size: 5.54 GB | Duration: 8h 50m

Master Sketchup to render 3D garden


What you'll learn
Use Sketchup for garden design
Use the different parameters of Sketchup
Export work
Master the different tools of Sketchup
Master transformations
Create components
Add materials
Add guides
Add dimensions
3D warehouse for garden
Create scenes
Create pots
Create wooden planter
Create ground step by step
Create decorative flower pots
Create garden step by step
Increase rendering with plugin Twilight Render

Requirements
You need to have Sketchup Pro or Sketchup Make

Description
SketchUpSketchup is a powerful 3D modeling tool with robust functionality that allows designers to explore and communicate projects, import and export various file formats, and create interactive presentations. It is a software widely used in the world, in particular by architects, landscapers but also for the presentation of events, the design of 3D objects ... Sketchup is very interesting for garden design because it allows to model a 3D garden project. With this software, it will be possible to give an overview of a project with a 3D model to scale. We can thus create step by step a garden, starting from a plan, by positioning the structural elements of the arrangement, by adding materials, plants, decorations.Advantages of Sketchup- SketchUp is simple, fast and intuitive software compared to other 3D modeling software.- You can already make simple models after only a few hours of learning.- SketchUp allows you to produce models made up of few faces.- Due to its non-parametric modeling principle, SketchUp is suitable for a large number of uses.- It has a large collection of free components with the 3D Warehouse to import plants, decorations or even furniture.- It is possible to create complete garden projects.- There are a large number of plugins, many of which are free like Twilight Render to create realistic renderings.Training courseIn this course you will learn how to use Sketchup from the start and use it for landscaping. We will thus see all the tools step by step and then adapt them for the creation of garden. We will thus see concrete examples such as a project to develop a small garden or a project with decorative pots. I will show you how to use the free Twilight Render plugin to create a more realistic rendering of your project.
Overview
Section 1: Introduction
Lecture 1 Introduction
Section 2: Start with Sketchup
Lecture 2 Manage dashboard
Lecture 3 Edit toolbar
Lecture 4 Navigation on 3D space
Lecture 5 Edit views
Lecture 6 Change axes
Lecture 7 Edit camera
Lecture 8 Manage selections
Section 3: Create save and export
Lecture 9 Create and open document
Lecture 10 Save and export work
Section 4: Create shapes
Lecture 11 Create lines
Lecture 12 Create rectangles
Lecture 13 Create circles
Lecture 14 Create arcs
Lecture 15 Create objects with follow me
Lecture 16 Erase elements
Section 5: Transformations
Lecture 17 Push pull
Lecture 18 Push pull duplicate
Lecture 19 Create offset
Lecture 20 Scale elements
Lecture 21 Move elements
Lecture 22 Create rotations
Lecture 23 Duplicate elements
Lecture 24 Duplicate with rotation elements
Lecture 25 Apply symmetries
Lecture 26 Soften and smooth
Section 6: Measure guides and dimensions
Lecture 27 Create guides
Lecture 28 Add guides with angles
Lecture 29 Add dimensions
Section 7: Add text
Lecture 30 Add text
Lecture 31 Add 3D text
Section 8: Materials
Lecture 32 Edit materials
Lecture 33 Create materials
Lecture 34 Import materials
Lecture 35 Resize materials
Section 9: Components
Lecture 36 Components part 1
Lecture 37 Components part 2
Section 10: Groups
Lecture 38 Edit groups
Lecture 39 Create solids
Section 11: 3D warehouse for garden
Lecture 40 3D warehouse for garden part 1
Lecture 41 3D warehouse for garden part 2
Section 12: Create sections and add scenes
Lecture 42 Add sections
Lecture 43 Add scenes
Lecture 44 Edit styles
Lecture 45 Edit shadows
Section 13: Create ground
Lecture 46 Sandbox from contours
Lecture 47 Sandbox from scratch
Lecture 48 Sandbox stamp and drape
Lecture 49 Sandbox add details and flip edge
Lecture 50 Create ground part 1
Lecture 51 Create ground part 2
Section 14: Create pots
Lecture 52 Create pot example 1
Lecture 53 Create pot example 2
Section 15: Create wooden planter
Lecture 54 Create wooden planter part 1
Lecture 55 Create wooden planter part 2
Section 16: Project decorative pots
Lecture 56 Project decorative pots create base
Lecture 57 Project decorative pots create pots
Lecture 58 Project decorative pots add texture
Lecture 59 Project decorative pots add plants
Lecture 60 Project decorative pots add characters
Lecture 61 Project decorative pots add scene
Section 17: Project garden
Lecture 62 Project garden create base
Lecture 63 Project garden create terrace
Lecture 64 Project garden position flower bed 1
Lecture 65 Project garden position flower bed 2
Lecture 66 Project garden add materials
Lecture 67 Project garden add plants
Lecture 68 Project garden create grass area
Lecture 69 Project garden add decorations
Lecture 70 Project garden add dimensions
Lecture 71 Project garden create scenes
Lecture 72 Project garden export work
Lecture 73 Project garden add walls
Lecture 74 Project garden twilight render part 1
Lecture 75 Project twilight render part 2
Graphic design students,People who want to design gardens,People who want to become landscaper,Professionnal landscapers


sketchupforgardendesidnidi.jpg


Download from RapidGator


Download from DDownload


Zurück
Oben Unten