• Regeln für den Video-Bereich:

    In den Börsenbereich gehören nur Angebote die bereits den Allgemeinen Regeln entsprechen.

    Einteilung

    - Folgende Formate gehören in die angegeben Bereiche:
    - Filme: Encodierte Filme von BluRay, DVD, R5, TV, Screener sowie Telesyncs im Format DivX, XviD und x264.
    - DVD: Filme im Format DVD5, DVD9 und HD2DVD.
    - HD: Encodierte Filme mit der Auflösung 720p oder darüber von BluRay, DVD, R5, TV, Screener sowie Telesyncs im Format x264.
    - 3D: Encodierte Filme von BluRay, die in einem 3D Format vorliegen. Dies gilt auch für Dokus, Animation usw.
    - Serien: Cartoon/Zeichentrick, Anime, Tutorials, Dokumentationen, Konzerte/Musik, Sonstiges sind demnach in die entsprechenden Bereiche einzuordnen, auch wenn sie beispielsweise im High Definition-Format oder als DVD5/DVD9/HD2DVD vorliegen. Ausnahme 3D.
    - Bereich Englisch: Englische Releases gehören immer in diesen Bereich.
    - Bereich Talk: Der Bereich, in dem über die Releases diskutiert werden kann, darf, soll und erwünscht ist.


    Angebot/Beitrag erstellen

    - Ein Beitrag darf erst dann erstellt werden, wenn der Upload bei mindestens einem OCH komplett ist. Platzhalter sind untersagt.
    - Bei einem Scenerelease hat der Threadtitel ausschließlich aus dem originalen, unveränderten Releasenamen zu bestehen. Es dürfen keine Veränderungen wie z.B. Sterne, kleine Buchstaben o.ä. vorgenommen werden. Ausnahme Serienbörse:
    - Bei einem Sammelthread für eine Staffel entfällt aus dem Releasename natürlich der Name der Folge. Beispiel: Die Simpsons S21 German DVDRip XviD - ITG
    - Dementsprechend sind also u.a. verboten: Erweiterungen wie "Tipp", "empfehlenswert", "only", "reup", usw. / jegliche andere Zusatzinformation oder Ergänzung, welche nicht in obiger Beschreibung zu finden ist.

    Aufbau des Angebots und Threadtitel

    Der Titel nach folgendem Muster erstellt zu werden. <Name> [3D] [Staffel] [German] <Jahr> <Tonspur> [DL] [Auflösung] <Quelle> <Codec> - <Group>
    Beispiel: The Dark Knight German 2008 AC3 DVDRip XviD - iND
    Beispiel: The Dark Knight 2008 DTS DL BDRip x264 - iND
    Beispiel: The Dark Knight 2008 AC3 DL BDRip XviD - iND
    Beispiel: The Dark Knight German 2008 AC3 720p BluRay x264 iND
    Beispiel: The Dark Knight 2008 DTS DL 1080p BluRay x264 iND
    Beispiel: Die Simpsons S01 German AC3 DVDRip XviD iND
    Beispiel: Die Simpsons S20 German AC3 720p BluRay x264 iND
    Beispiel: Sword Art Online II Ger Sub 2014 AAC 1080p WEBRip x264 - peppermint
    Entsprechend sind also u.a. verboten: Sonderzeichen wie Klammern, Sterne, Ausrufezeichen, Unterstriche, Anführungszeichen / Erweiterungen wie "Tipp", "empfehlenswert", "only", "reup", usw. / jegliche andere Zusatzinformation oder Ergänzung, welche nicht in obiger Beschreibung zu finden ist
    Ausnahmen hiervon können in den Bereichen geregelt sein.

    Die Beiträge sollen wie folgt aufgebaut werden:
    Überschrift entspricht dem Threadtitel
    Cover
    kurze Inhaltsbeschreibung
    Format, Größe, Dauer sind gut lesbar für Downloader außerhalb des Spoilers zu vermerken
    Nfo sind immer Anzugeben und selbige immer im Spoiler in Textform.
    Sind keine Nfo vorhanden z.B. Eigenpublikationen, sind im Spoiler folgende Dateiinformationen zusätzlich anzugeben :
    Quelle
    Video (Auflösung und Bitrate)
    Ton (Sprache, Format und Bitrate der einzelnen Spuren)
    Untertitel (sofern vorhanden)
    Hosterangabe in Textform außerhalb eines Spoiler mit allen enthaltenen Hostern.
    Bei SD kann auf diese zusätzlichen Dateiinformationen verzichtet werden.

    Alle benötigten Passwörter sind, sofern vorhanden, in Textform im Angebot anzugeben.
    Spoiler im Spoiler mit Kommentaren :"Schon Bedankt?" sind unerwünscht.


    Releases

    - Sind Retail-Release verfügbar, sind alle anderen Variationen untersagt. Ausnahmen: Alle deutschen Retail-Release sind CUT, in diesem Fall sind dubbed UNCUT-Release zulässig.
    - Im Serien-Bereich gilt speziell: Wenn ein Retail vor Abschluss einer laufenden Staffel erscheint, darf diese Staffel noch zu Ende gebracht werden.62
    - Gleiche Releases sind unbedingt zusammenzufassen. Das bedeutet, es ist zwingend erforderlich, vor dem Erstellen eines Themas per Suchfunktion zu überprüfen, ob bereits ein Beitrag mit demselben Release besteht. Ist dies der Fall, ist der bereits vorhandene Beitrag zu verwenden.
    - P2P und Scene Releases dürfen nicht verändert oder gar unter einem iND Tag eingestellt werden.


    Support, Diskussionen und Suche

    - Supportanfragen sind entweder per PN oder im Bereich Talk zu stellen.
    - Diskussionen und Bewertungen sind im Talk Bereich zu führen. Fragen an die Uploader haben ausschließlich via PN zu erfolgen, und sind in den Angeboten untersagt.
    - Anfragen zu Upload-Wünschen sind nur im Bereich Suche Video erlaubt. Antworten dürfen nur auf Angebote von MyBoerse.bz verlinkt werden.


    Verbote

    - Untersagt sind mehrere Formate in einem einzigen Angebotsthread, wie beispielsweise das gleichzeitige Anbieten von DivX/XviD, 720p und 1080p in einem Thread. Pro Format, Release und Auflösung ist ein eigener Thread zu eröffnen.
    - Grundsätzlich ebenso verboten sind Dupes. Uploader haben sich an geeigneter Stelle darüber zu informieren, ob es sich bei einem Release um ein Dupe handelt.
    - Gefakte, nur teilweise lauffähige oder unvollständige Angebote sind untersagt. Dies gilt auch für eigene Publikationen, die augenscheinlich nicht selbst von z.B. einer DVD gerippt wurden. Laufende Serien, bei denen noch nicht alle Folgen verfügbar sind, dürfen erstellt und regelmäßig geupdatet werden.
    - Untersagt sind Angebote, welche nur und ausschließlich in einer anderen Sprache als deutsch oder englisch vorliegen. Ausnahmen sind VORHER mit den Moderatoren zu klären.


    Verstoß gegen die Regeln

    - Angebote oder Beiträge, die gegen die Forenregeln verstoßen, sind über den "Melden"-Button im Beitrag zu melden.
  • Bitte registriere dich zunächst um Beiträge zu verfassen und externe Links aufzurufen.

*** Bestes IPTV *** bester Preis *** gratis Test ***


Englische Tutorials

09d3b5f88207a7eaa31f45063fea0c59.jpg


School of Motion Bundle
English | 7 courses | 50 GB

After Effects Kickstart
Character Animation Bootcamp
Explainer Camp
Photoshop + Illustrator Unleashed
Rigging Academy
Rigging Academy 2.0
The Path to MoGraph


b8db15efbf862439685008cbf88600dd.jpg


Learning Unreal Engine: From Beginner To Pro
Published 1/2023
MP4 | Video: h264, 1280x720 | Audio: AAC, 44.1 KHz
Language: English | Size: 22.39 GB | Duration: 24h 19m

Get Up To Speed With A Working Knowledge Of Unreal Engine 4 and 5 Fast, And Have Fun At The Same Time


What you'll learn
You will learn how to download & install your personal free copy of Unreal Engine
You will learn how to create your first Unreal Engine scene
You will learn how to import assets to the Unreal Engine
You will learn how to apply materials to your imported asset
You will learn how to light a scene - in just a few simple steps
You will learn how to create an animation sequence and add your assets to the sequence
You will learn how to create a simple animation - ready to render in high-definition video
You will learn how to export your scene out to a video file, ready for further manipulation
You will learn how to create a stunning cinematic animation scene in Unreal Engine, from beginning to end
You will learn how to create the scene in the "Preview This Course" video, step-by-step
You will receive all scene files including alien character, male & female characters, spaceship interior & music
Learn the benefits of "real-time rendering and animation" - a true game changer in the industry
You will learn how to export a Genesis character from Daz Studio, and import it to Mixamo to prepare for animation
Learn how to export the character and animations from Mixamo and then import them to Unreal Engine 4
You will learn how to use realistic Pbr (Physically based rendering) Materials in your scene to give ultra realism
You will learn how to create smooth camera moves inside Unreal Engine 4, giving your scene a professional cinematic look and feel
You will learn how to color grade your scene with HitFilm Express ( a free video editing program) and upload your finished scene to YouTube
You will get a tutorial on how to use Unreal Engine 4's "Decals" which will give your scene a new level of realism
The Complete Unreal Engine Scene File Ready To Go Out-of-the-Box
A Really Cool Toon House To Use In Your Scenes Created by Michael Ricks ($25.00 value)
Four (4) Rigged Daz Original Toon Characters Included With the Course Created by Michael Ricks ($60.00 retail value)
Rigged Robot character included in course (compliments of Epic Games)
You will learn how to create high quality facial animations & more
Learn how to export morph targets (expressions) out of Daz Studio and bring them into Unreal Engine 4
Create high quality blink animations, the basis for realistic characters
Animate side-to-side and up & down eye movements for believable characters
Animate Mouth movements and mouth expressions.
Animate head movements with the little known animation tools within Unreal Engine 4
Create believable, expressive expressions, right within Unreal Engine 4
Includes the incredibly detailed Paragon Sevarog and Paragon Narbash fully rigged characters
You will learn how to use the incredibly fun and powerful cloth tools in Unreal Engine in a few easy steps
You will learn the easy, simple steps to create real-time cloth animation inside of Unreal Engine 4
You will learn how to use physics assets in Unreal Engine 4 that will interact with cloth and clothing
No additional software programs are needed to achieve cloth simulation & animation other than Unreal Engine
You will learn how to create an "Animation Asset" from your cloth and physics character setup
Use your characters in games, film, television and commercials
Easy and fun - once you know the simple steps
You will learn how to jump into iClone 7 and get a fast start to animating your characters
Learn how to create an original 3d Character in Character Creator 3
Learn how to send your character to iClone 7 ready for animation
Learn how to pose and animate your character in iClone 7
Learn how to perform facial animation and lip sync with your character
Discover how to use powerful tools such as Motion Puppet, Direct Puppet and Face Puppet
You willYou will learn how to render and export your video from iClone 7 learn how to record your animations for later use on other characters
You will learn how to use "Live-Link" to send your character to Unreal Engine for animation and scene setup
You will learn how to setup your scene in Unreal Engine and record the animation there
You will be able to rig and animate a character in Unreal Engine 4 using the Allright Rig plugin and output your animations to video
You will receive the Creature "The Dweller" by Josh P. Crockett - fully rigged and ready to animate
Course includes the full Unreal Engine 4.17 scene - setup and ready to go! (v 4.17 required for the free version of Allright Rig 1.3)
UE4 Scene Contains Allright Rig 1.3 (free version) installed
Full step-by-step instructions on how to setup your characters with Allright Rig 2.0
Instructions on how to prepare your characters for rigging in Allright Rig 2.0
Allright Rig 2.0 Presets for Daz characters: Genesis, Genesis 2, Genesis 3, Genesis 8
Allright Rig 2.0 Presets for Paragon characters: Shinbi and Dekker

Requirements
A copy of Unreal Engine, which is free. No knowledge of Unreal Engine is required. You will learn the easy, simple steps to get up and running in Unreal Engine quickly and have lots of fun in the process
DAZ Studio 4.1, which is free

Description
Everything you'll learn in this course can be applied to Unreal Engine 5. You can even switch the layout of Unreal Engine 5 back to classic Unreal Engine 4 if you'd like to make it easier to follow along. Keep in mind that Unreal Engine 5 requires a powerful computer to run efficiently, so be sure that your computer is powerful enough to run the program. Unreal Engine 4 runs much faster on less powerful computers, so many people are staying with this version until they can upgrade their machines. Unreal Engine has become a leading resource in the creation of games, animations, television shows and feature films! In this course we will take the absolute beginner from knowing nothing about Unreal Engine 4 and 5 to a workable understanding of:Scene setupImporting assets & charactersLighting setupBasic material setup and applicationThe Sequencer (Unreal Engine's animation & editing timeline)Setting up a simple animationImporting audio into the SequencerRendering your movie out to a movie file for further manipulationSTUNNING CINEMATICSYou will learn how to create a stunning cinematic animation scene in Unreal Engine from beginning to endFREE COPY OF UNREAL ENGINEYou will learn how to get your own free copy of Unreal EngineREAL TIME RENDERINGLearn the benefits of "real-time rendering & animation," a true game changer in the industryEPIC MANNEQUIN CHARACTERYou will learn how to get the awesome Epic Mannequin character along with ready-made animations for your projectSUPER REALISTIC PBR MATERIALSYou will learn how to use realistic PBR (Physically based materials) in your scene to give ultra realismEDIT WITH HITFILM 3 EXPRESSYou will learn how to color grade your scene with HitFilm 3 Express (we'll show you where to get this free program) and upload your finished scene to YouTubeTESTIMONIAL"One word for this course . . . "fantastic." This course is as close to perfection as you can get. The instructor speaks slowly, with enthusiasm. He covers all the necessities without bogging you down with too much info. I love how he gets you having fun quickly with the Sequencer section. The audio is of great quality. His depth of knowledge in a variety of 3d packages is amazing. I am familiar with Daz 3d, Mixamo and Unreal but I learned so many great tips and discovered several things that I was doing incorrectly. I searched YouTube for Unreal Engine 4 sequencer tutorials and found none of them to be satisfactory. After ten minutes with this course, I was very confident with Sequencer. If you are interested in getting Daz 3d characters into Unreal, and a ton of tips and information on top of it, you do not want to miss out on this fantastic course." ~ J JacksonWhat You Will Learn In This CourseIn this course we will cover the steps on how to animate your character in Unreal Engine. This is a project based course, and I ve designed it to be really, really fun. All the scene files you will need are included in the course. You will get the Exile Alien character along with 28 motion-capture animations that work with him. You re going to love how easy it is - you just drag and drop your character in the scene and it s ready to go. We re also going to cover lighting, physically based materials, camera movement and much more. Best of all it s fun. DAZ Studio ExportWe will cover how to prepare your Daz Genesis character for export and animation. There are certain steps that need to be taken in order for the character to be able to accept motion-capture animations in Mixamo and then imported into Unreal Engine.Mixamo(Note: Even though Mixamo discontinued direct support for Unreal Engine, this method works by exporting standard Fbx from Mixamo to Unreal Engine 4.)Next, we ll upload your character into Adobe Mixamo and add motion-capture animations. Mixamo is a ton of fun, and super easy to use as you ll see. There are literally thousands of animations in Mixamo, and all you have to do is click on the animated preview and it will be applied to your character. So you re basically auditioning your character using different animations. You can adjust the speed of the animation, and adjust things like the arm spacing as well. Your character won t have his materials or textures applied - we will do that over in Unreal Engine. Unreal Engine 4 - Drag and Drop Animation Inside of Unreal Engine we will have some fun with the Mixamo animations you applied to your character. All you have to do is select your character and drag him into your scene. Hit play, and the animation begins, being rendered in real-time.An Army of Animated Aliens Inside the course, there are 28 animated aliens, ready for you to drag and drop into your Unreal Engine scene for instant animations! In no time at all, you ll have your aliens fighting, jumping, running, or falling. You ll have enough animations to make some really awesome movie scenes. Unreal Engine Sequencer Next up is the Unreal Engine Sequencer, which is very similar to a non-linear editor. We will set up your scene, complete with spaceship interior, Exile alien characters, lights, smoke effects and cameras and get it ready for animation. Sequencer makes it really fun to get your scene set up and feels very similar to being on a real movie set. In fact, I ve found that s the best way to think about it - like you re in the real world. Unreal Engine s lighting system behaves like real world lights, so it s very responsive and intuitive, as you will see.Exporting your video file - and rendering in near real time Now we will export your movie in high-definition... in near real time. No longer does it take hours or days to render a single frame. This is a real game changer. Imagine being able to setup, animate and then render 1 minute of finished animation per day...it would be entirely possible to complete a 2 hour feature film in 120 days. Unreal Engine has provided the tools to make this possible some day. HITFILM Express We will then take our rendered video file and bring it into HitFilm Express, or your favorite video editing program. There we will add color grading, music, sound effects and fine tune our edits to prepare our scene for final output. Your finished High-Definition Scene By the end of the course you will have completed your own animation scene from beginning to end and have a good understanding of Unreal Engine's animation workflow.Go ahead and click on the enroll now button to get immediate access to your scene files and get started right away! To recap, you ll get:The Exile Alien Character along with 28 motion-capture animationsThe complete Unreal Engine 4 project with all assetsThe Genesis 2 Male and Female charactersComplete sci-fi spaceship interiorBest of all, it s fun See you on the insideLEARN FACIAL ANIMATION & MORE WITH UNREAL ENGINE 4 & DAZ STUDIOBoth of these outstanding animation programs are free and will allow you to create stunning and highly professional character animations. In this course we will go over the simple techniques that unlock the little known animation powers inside of Unreal Engine. By using the high quality Daz 3d characters, you will learn how to export any morph targets you'd like from Daz Studio and then utilize them inside of Unreal Engine. (Note: Even though there is a Daz to Unreal Bridge there are some issues with it and its good to learn how to do this manually as discussed in this course)REAL TIME ANIMATION RENDERINGBy far one of the most powerful features of Unreal Engine is the ability to see your animations playing in real time as you work. No more slow, sluggish systems that cramp your style and hinder your animation creativity. Unreal Engine is a breeze to use, and best of all ... it's fun. When you're ready to export your animation to an image sequence for later compositing or to a video file, you will be able to render your animation out in near real time. IN THIS COURSE YOU WILL LEARN:How to prepare your Daz 3d character for export to Unreal Engine 4 with all the morph targets and expressions you wishHow to use the Puppeteer tool in Daz Studio as a way to export morphs and animationsHow to properly import your Daz 3d character with it's skeleton, rigging, morph targets, materials and texturesLearn where the morph sliders are in Unreal Engine and how to use themCreate a realistic blink animation for your characterCreate side to side and up & down eye movements for your characterAnimate mouth movements for speech as well as expressionsAnimate your characters head movementsCreate and animate believable expressionsLearn about amazing new tools that work in conjunction with Unreal Engine 4 such as Allright Rig & AkeytsuPlus much, much moreIncluded In The Course Are Five (5) Fully Rigged CharactersSuper Dude - this character is an original creation by Michael Ricks sculpted in ZBrush. Inspired by the characters from the hit film 'The Incredibles,' Super Dude comes fully rigged with a ton of facial morphs. You'll have an absolute blast right away when you start sliding around the controls and see what hilarious expressions you can make with him. He also comes with the phoneme mouth shapes for accurate lip sync punctuation. Super Dude is based on the Daz 3d Genesis 8 character. Wendy - this cute Toon girl character is also an original creation by Michael Ricks and was sculpted in ZBrush, based on the Daz 3d Genesis 3 character. She also comes with many facial morph and expression controls and will immediately come alive for you in Unreal Engine 4. With her big expressive eyes, you will have her emoting in no time at all.Lil' Frankenstein - this Toon character was also created by Michael Ricks in ZBrush and is based on the Daz 3d Genesis 3 character. Frankie comes with a wide array facial morphs and can create many emotions. You'll have tons of fun with Lil' Frankenstein all year around, not just on Halloween.Billy - also created and sculpted in ZBrush by Michael Ricks, this Toon boy character is based on the Daz 3d Genesis character and comes with a wide variety of facial morphs. You'll have a blast animating Billy.Epic Robot - this way cool robot character is created by Epic Games for the hit VR game Robot Recall. He's a stunning 3d character asset and really fun to animate. He comes with an included animation and sound wave 'roar' so you'll have him up and running right away.NOW IS THE BEST TIME TO LEARN ANIMATION! SO GO AHEAD AND CLICK THE ENROLL NOW BUTTON AND LET'S BEGIN All these characters are included in the course and are for your use both personal and professional for cinematics and film/video use. If you desire to use the characters in an actual game as a playable character you will need to purchase an interactive license from Daz 3d as these characters are based on the Genesis models. At this time, game licenses are running approximately $30-$50 per character for a published game. "The course is well organized and it's a good beginner course. I would recommend this for anybody wanting to learn the basics of unreal engine 4 cloth simulation." ~Robert S "There is essential info concerning clothes in Unreal Engine 4. I had issues about a character and asked help to Michael. His dedication to help you solve your issues is amazing. 5 stars, and I go to follow his other courses. Thanks again Michael for your professionalism." ~Luter L __________________________________________________________________________LEARN HOW TO CREATE AMAZING, REAL TIME CLOTH ANIMATIONIn this course you will learn the simple, easy steps to apply real-time cloth animation to your characters. Once a very difficult task, the folks at Epic Games have made this process a lot easier and actually FUN to do, right inside of Unreal Engine 4.FULLY RIGGED CHARACTERS ARE INCLUDED IN THIS COURSEYou will have access to the amazing Paragon Sevarog and Paragon Narbash characters that are fully rigged and come complete with motion-capture animations.ONLY A FEW SIMPLE STEPS ARE NECESSARYYou will be taken thru the easy step-by-step process of painting cloth weights to create your animation. You will learn how to use the wind tool inside of Unreal Engine 4 to get your character's clothing to blow in the wind! (This is a little known feature)Best of all, the process is simple, and anyone can do it once they follow the steps. YOU WILL LEARN ABOUT PHYSICS ASSETS AND HOW TO CREATE AMAZING ANIMATIONS WITH ITIn this course you will learn about physics assets and how to set it up on your character to create amazing animations that look like it took you days to hand animate. This is one of the hidden features of Unreal Engine 4 that few have figured out how to use. It's amazingly powerful - you're going to love it.ANIMATION ASSETSYou will learn how to create reusable animation assets that can be imported into Sequencer, blended with other animations and then exported out into a cinematic movie file. ENROLL NOWNow is the perfect time to enroll in the course and have fun learning cloth animation in Unreal Engine 4! See you on the insideIMPORTANT: Everything you'll learn in this course can be applied to the new releases of Character Creator 4 and iClone 8. In this course you will learn one of the most powerful animation workflows available today - Reallusion's Character Creator 3, iClone 7 and Unreal Engine Learn how to create an original 3D Character in Character Creator 3Learn how to send your character to iClone 7 ready for animationLearn how to pose and animate your character in iClone 7Learn how to perform facial animation and lip sync with your characterDiscover how to use powerful tools such as Motion Puppet, Direct Puppet and Face PuppetYou will learn how to record your animations for later use on other charactersYou will learn how to render and export your video from iClone 7You will learn how to use "Live-Link" to send your character to Unreal Engine for animation and scene setupYou will learn how to setup your scene in Unreal Engine and record the animation thereYou will also learn how to setup and use the amazing Live Face App for iPhone X, 11, or 12 to create high quality lip sync and facial animations. You're going to love how intuitive and simple it is to create your very own custom character in Character Creator 3. In no time at all you will be creating broadcast and film quality characters that are rigged and ready to animate in iClone 7. You will learn how to apply mocap animations to your character and adjust the animation to your liking - all within iClone 7.After that you will discover the powerful workflow of sending your character and animation to Unreal Engine, using Live-Link, and then record your animation inside of Unreal Engine in real-time. And the best part? It's fun. Now is the perfect time to jump in and learn this powerful workflow that will assist you in bringing your creative vision to life.RIGGING YOUR CHARACTER IN UNREAL ENGINE New: Allright Rig's price has now been lowered to $49.99 in the Unreal Engine Marketplace. Even with the introduction of the new Epic Control Rig, I have found the Allright Rig to be a very helpful tool. It's an all in one tool, where you can rig your character's body and facial morphs, so it is ready for animation in Sequencer. Finally. The Holy Grail of animation (Lip Synch animation) can be done inside of Unreal Engine 4 with the new plugin "Allright Rig 2.0" created by Alexander Shatalov. Complete Unreal Engine 4 Scene FileAllright Rig 1.3 (free version)"Dweller" creature character, fully rigged (created by Josh P. Crockett)Presets for Genesis, Genesis 2, Genesis 3, & Genesis 8 charactersComplete video instruction (over 3.5 hours) on how to rig and animate your character - from beginning to endNo longer do you need to purchase expensive programs such as Maya and 3ds Max to animate your characters - now you can achieve stunning quality with the powerful combination of Daz Studio, Unreal Engine and Allright Rig 2.0 Here is some additional information about the plugin:Modular rigging system allows you to create any kind of rigs.Facial rigging using bones and blend shapes.Baking animation from an animation sequence to the rig and vise versa.Partial animation editing.Pose library.Copy/paste, mirror animation using animation tools.Animation constraints such as parent, point, orient, scale and aim.Animation curve filters such as butterworth, peak removal, simplify curve.Custom Blueprint library.Presets for different character rigs.Open source.ENROLL NOWNow is the perfect time to enroll in the course and have fun learning Unreal Engine. See you on the inside.

Overview
Section 1: Introduction: Let's begin - off we go to a quick start

Lecture 1 Preview Video: What you will learn in this course

Lecture 2 Preview Video: Facial Animation & More In Unreal Engine! | 3D Animation

Lecture 3 Preview Video: Learn Amazing Cloth Animation, Simulation and Animation

Lecture 4 Preview Video: Learn iClone 7 | Character Creator | Unreal Engine Pipeline

Lecture 5 Where to get your FREE copy of Unreal Engine

Lecture 6 Let's Take A Tour Of The Epic Launcher

Lecture 7 Create Your First Project and Import The Robot

Section 2: How To Organize & Navigate Your Scene/Level/Map

Lecture 8 How To Create Folders To Organize Your Scene

Lecture 9 How To Save Your Level (Scene)

Lecture 10 How To Hide Scene Icons

Lecture 11 How To Open Different Viewports Such As Top, Side, Left, Right and Bottom

Lecture 12 How To Dock and Undock Windows

Lecture 13 REVIEW: Remember The F Key and ALT Key Are Your Friends

Section 3: Let's Build Some Stuff

Lecture 14 Let's Drag & Drop Some Walls Into The Scene

Lecture 15 Let's add materials to your walls

Lecture 16 A quick look at materials in the Material Editor

Section 4: Unreal Engine's Realistic Lighting System: You're Gonna Love This

Lecture 17 Let's Start By Deleting All Our Lights, Then Add A Directional Light (Sun)

Lecture 18 If you are having a problem getting your scene completely black?

Lecture 19 Contact Shadows: One Of The Keys To Realism

Lecture 20 Now We're Going To Set up your First Point Light

Lecture 21 That was easy! Now Let's Set Up A Spotlight

Lecture 22 Onward to Rectangle Lights

Lecture 23 Onto Some Really Cool Lighting Setups

Lecture 24 The Sphere Reflection Capture

Lecture 25 The Skylight: Lighting With HDRI Images (High Dynamic Range Images)

Lecture 26 Let's Create The Sky

Section 5: Atmospheric Effects

Lecture 27 Atmospheric Fog

Lecture 28 Exponential Height Fog - You're going to love this

Lecture 29 God Rays! The Holy Grail of Lighting Effects

Lecture 30 How About A Little Fire, Scarecrow? Unreal Engine's Amazing Particle System

Section 6: How To Create Amazing Cinematics In Unreal Engine

Lecture 31 First We'll Create A New Level & Add A Character

Lecture 32 Here's The Scene We Are Going To Create

Lecture 33 Next We'll Create An Awesome HDRI Environment

Lecture 34 Add Your Cinematic Camera To The Level and Sequence

Lecture 35 Create a new Level Sequence (Cinematic Sequence)

Lecture 36 Add "Manny," Our Robot Mannequin Character & Animation

Lecture 37 Let's make that camera bad ass and create some advanced settings

Lecture 38 Now Let's Get Some Beautiful Depth Of Field In Our Shot

Lecture 39 Let's Add Some Camera Movement

Lecture 40 Now Let's Add A 2nd Camera

Lecture 41 Preparing Our Project For Export: Production Quality Settings

Lecture 42 How To Export Your Video For Further Editing & Manipulation

Section 7: Video Editing & Color Grading

Lecture 43 FREE Video Editing Program: HitFilm Express

Lecture 44 Let's Edit and Color Grade Our Unreal Engine Clips

Section 8: Where To Get Your Free Daz 3d Genesis Character Bundles

Lecture 45 Where To Get Your Free Genesis Character Bundles

Section 9: Introduction To 3D Character Animation In Unreal Engine

Lecture 46 What You Will Learn About 3D Character Animation In Unreal Engine

Lecture 47 This Is The Unreal Engine Movie Scene You Will Be Creating In This Course

Lecture 48 Download The Needed Programs - all free

Section 10: Resources: All The Course Project Files Needed Are In This Section

Lecture 49 The newest complete Unreal Engine 4.27 Project File

Section 11: Quick Start - Let's Have Some Fun

Lecture 50 Getting around Unreal Engine 4 - A quick tour of the basics of getting around

Lecture 51 Your First Practice Animation Exercise - Let's Jump Right In

Lecture 52 High Definition Video Of Your Practice Scene

Lecture 53 How To Achieve Amazing Depth of Field in Unreal Engine

Section 12: Preparing Your Character For Animation and Export From Daz Studio

Lecture 54 Preparing & Exporting Your Genesis 2 Character

Lecture 55 Preparing & Exporting Your Genesis 3 Character

Lecture 56 DAZ Studio Export - SciFi Interior

Lecture 57 DAZ Studio Export - Genesis 8 Character

Section 13: Mixamo Animation - Now let's make your character move

Lecture 58 An Introduction to the Amazing Adobe Mixamo Animation System

Lecture 59 Uploading Your DAZ Genesis 2 Character To Mixamo

Lecture 60 Uploading your Genesis 3 Character to Mixamo

Section 14: Unreal Engine 4: Lights, Camera...Action

Lecture 61 Import Your DAZ Genesis 2 Character and Mixamo Animations

Lecture 62 Setup Your SciFi Alien Spaceship Interior in Unreal Engine

Lecture 63 Now Let's Setup Light Shafts and Fog Effects for Moodiness In Your Scene

Lecture 64 Adding Your Characters To The Scene

Lecture 65 Add Particle Effects - Smoke, Steam & Fire

Lecture 66 The Unreal Engine Sequencer - Let The Magic Begin

Lecture 67 The Unreal Engine Sequencer: Creating Your 2nd Shot

Lecture 68 The Unreal Engine Sequencer: Creating Your 3rd Shot

Section 15: HitFilm Express - Editing Your Scene

Lecture 69 HitFilm Express: Importing Your Footage & Music

Lecture 70 HitFilm Express: Color Grading Your Footage

Section 16: How To Create Materials In Unreal Engine

Lecture 71 How to export textures from DAZ and create materials in Unreal Engine

Section 17: Get Your free Paragon Characters from Epic Games

Lecture 72 Free Paragon Assets Released

Lecture 73 Awesome things on the horizon! Check this out

Lecture 74 Video: Preview of Unreal Engine 5

Section 18: Important Resources For You

Lecture 75 Quick Start: Getting Around Unreal Engine

Lecture 76 How to prepare your Genesis 3 characters for Mixamo & Unreal Engine

Lecture 77 How To Create and Use Decals In Unreal Engine 4

Lecture 78 How To Apply Root Animation To Your Characters

Lecture 79 How To Get Your Genesis 8 Characters To Mixamo, Then To Unreal Engine

Lecture 80 Here's What's Coming Up Next

Section 19: Introduction To Facial Animation

Lecture 81 What You Will Learn In This Section Of The Course

Lecture 82 Four (4) Rigged DAZ Characters Included with Course

Lecture 83 Character Animation Example with Lip Sync Done With Unreal Engine Sequencer

Lecture 84 Download the Required Free Software Programs (If you haven't already)

Section 20: Course Project Files: Download Your Facial Animation Unreal Engine Project File

Lecture 85 Facial Animation Unreal Engine Project File

Lecture 86 Where To Get Your FREE Genesis Character Bundles

Section 21: From Daz Studio To Unreal Engine

Lecture 87 Getting Morph Targets Into Unreal Engine - Preview

Lecture 88 Preparing Facial Morphs In DAZ Studio using "Puppeteer"

Lecture 89 Getting Your Morphs Into the Daz Studio Timeline

Lecture 90 Exporting Daz Character Fbxj and Importing Into Unreal Engine

Section 22: Setting Up Your Character In Unreal Engine

Lecture 91 Organizing & Preparing Your Scene in Unreal Engine

Lecture 92 Fix character materials, clean up and organize morph sliders

Section 23: Onward To Facial Animations and Expressions

Lecture 93 Let's start animating! How to create a realistic eye blink cycle!

Lecture 94 Look at Me Now! Create a "Turning Eyes" Animation

Lecture 95 Look Who's Talking Now! Create an Open & Close Mouth Animation

Lecture 96 Animating Expressions! Bringing Your Character To Life

Section 24: Head & Body Animation

Lecture 97 Head Animation

Lecture 98 Body Animation

Section 25: Lip Sync Animation And More

Lecture 99 Down & Dirty Lip Sync Animation In Unreal Engine

Lecture 100 Using Audacity For Dialogue Recording

Lecture 101 Recording Dialogue Live Along with Your Character Part 1

Lecture 102 Recording Dialogue Live Along With Your Character Part 2

Lecture 103 Add Secondary Mouth & Body Animation

Lecture 104 Bringing It All Together! Load Your Character & Animation Into The Sequencer

Lecture 105 "Blendspaces" - Amazing fun combining animations in Unreal Engine

Lecture 106 Getting Your Character To Move Forward Over Distances

Section 26: More Cool Animation Tools

Lecture 107 AKEYTSU - The Amazing, FREE, Easy To Use Animation Software!

Section 27: Learn How To Do Amazing Cloth Animation In Unreal Engine

Lecture 108 Learn How To Do Amazing Cloth Simulation, Physics and Animation - Quick Look

Lecture 109 War Drum Scarecrow Physics Animation Example

Lecture 110 Cartoon Girl Example Of Cloth Animation

Lecture 111 Mannequin Toss Physics Asset Example

Section 28: Amazing Cloth Animation In Unreal Engine

Lecture 112 Update: Use Unreal Engine Version 4.26 or 4.27 for this lesson

Lecture 113 Download Unreal Engine 4.26 or 4.27 and Create Your Project

Lecture 114 Download Your FREE Paragon Characters

Lecture 115 Import Paragon Characters To Your Project

Lecture 116 Create Level & Drag Characters Into The New Level

Lecture 117 Weight Painting Your 1st Piece of Clothing

Lecture 118 Weight Painting Your 2nd Piece of Clothing

Lecture 119 Weight Painting Your 3rd Piece of Cloth

Lecture 120 Fine Tune Your Clothing Movement In Skeleton Mode

Lecture 121 Physics Assets with the NARBASH Character

Lecture 122 Create NARBASH Animation Asset

Section 29: Advanced Cloth Simulation and Animation

Lecture 123 Introduction To Advanced Cloth Animation

Lecture 124 Create a New Third Person Project

Lecture 125 Make "Sevarog" a Third Person Game Character

Lecture 126 Add Cloth Settings To Your "Sevarog" Character: Burlap & Heavy Leather

Lecture 127 Add Burlap Cloth Settings To "Sevarog" Character

Lecture 128 Get Cloth To Drape and Drag on the Floor and Other Props

Lecture 129 Create a New Sequence and Add an Animation

Lecture 130 Export Your Animation To Video

Section 30: Setting Up Props For Cloth Simulation

Lecture 131 Import Starter Content To Your Project

Lecture 132 The Rock: We Will Build a Custom Collision Setting For the Rock Object

Lecture 133 The Chair: We Will Build a Custom Collision Setting For the Chair Object

Lecture 134 Congratulations On Finishing This Part Of The Course

Section 31: Learn iClone 7 | Character Creator | Unreal Engine Pipeline

Lecture 135 Up Next: iClone 7 | Character Creator | Unreal Engine Pipeline

Lecture 136 Where To Download Your Trial Versions of Character Creator and iClone

Section 32: Where To Get Your Free Custom Characters Included With This Course

Lecture 137 Where to get your custom characters: "Gork The Alien" and "Funny Looking Guy"

Section 33: Project Files: Gork Alien and Hector, Funny Looking Guy (iClone 7)

Lecture 138 GORK Alien/Hybrid iClone 7 Project File

Lecture 139 HECTOR Funny Looking Guy[iClone 7 Project File]

Section 34: Let's Get Off To A Fast Start and Create Our First Character

Lecture 140 Let's get started by resizing our character's body and head

Lecture 141 Let's give our character a nose job

Lecture 142 Let's plump up those lips

Lecture 143 Toon Girl Ear Shape

Lecture 144 Toon Girl Eyes - The Window To The Soul

Lecture 145 Toon Girl Head Shape

Lecture 146 Toon Girl - Let's Smooth Some Details On Her Head

Lecture 147 Toon Girl - Let's Add Some Beautiful Hair

Lecture 148 Change Eye Color & Eyelashes

Lecture 149 Add SkinGen & Makeup To Toon Girl

Lecture 150 Toon Girl - How To Enlarge The Iris and Pupil

Lecture 151 Toon Girl Teeth Shapes

Lecture 152 Toon Girl Teeth Materials & Colors

Lecture 153 Time To Pick Out Toon Girl's Wardrobe

Section 35: Into iClone We Go

Lecture 154 We Send Toon Girl To iClone & Add Mocap Animation

Lecture 155 Toon Girl - Export Animation

Lecture 156 How To Import Sound Into iClone

Lecture 157 Toon Girl Automatic Lip-Sync With Audio File

Lecture 158 Toon Girl - How To Adjust Lip-Sync Manually & Add Expressions

Lecture 159 Face Puppet Preview Examples

Lecture 160 Toon Girl - Using The Face Puppet Tool

Lecture 161 Toon Girl - Motion Puppet Tool

Lecture 162 Toon Girl - Let's Edit The Motion Layer

Lecture 163 Toon Girl - The Direct Puppet Tool

Section 36: Live Face: Reallusion's Amazing iPhone App for Real-time Facial Animation

Lecture 164 "Manfred" Example Using Live Face App and iPhone 11 - Genesis 8 Character

Lecture 165 Get This Lightning Cable For Your iPhone - You'll Thank Me Later

Lecture 166 Audacity - The Powerful Free Audio Editing Program - where to get and how to use

Lecture 167 Quick Start To Animating With Live Face

Lecture 168 Live Face Lip-Sync With Existing Dialogue Track (ADR, Looping)

Lecture 169 Live Face: How To Record Live Dialogue AND Facial Animation In Real time

Lecture 170 The Power of Layered Animation Expressions

Section 37: The Amazing "Live-Link" : iClone to Unreal Engine Live-Link & Auto Setup Plugins

Lecture 171 Audio Files Needed For This Section

Lecture 172 Quick Start To iClone To Unreal Engine Via Live-Link

Lecture 173 Create Your Unreal Engine Project With Live-Link And Auto Setup

Lecture 174 Transfer Gork The Alien-Hybrid To Unreal Engine

Lecture 175 Get Live-Link Connected And Playing Animation In Both iClone and Unreal Engine

Lecture 176 Record Your Animation In Unreal Engine With Sequence Recorder

Lecture 177 Record Your Animation In Unreal Engine (continued)

Lecture 178 How To Clean Up & Edit Your Animation In Unreal Engine

Lecture 179 Create Sequence & Sync Up Dialogue Track

Lecture 180 Smooth Your Character Mesh In Unreal Engine - Say Goodbye To The Jaggies

Lecture 181 Congratulations, You Finished This Section Of The Course

Section 38: Rigging Your Character For 3D Animation In Unreal Engine 4

Lecture 182 Allright Rig Plugin For Unreal Engine

Lecture 183 Included with the course: "Dweller Creature Character" by Josh P. Crockett

Section 39: Project Source Files

Lecture 184 Unreal Engine Project File Including Allright Rig 1.3 , Characters & Props

Lecture 185 Allright Rig 1.3 Plugin

Lecture 186 The Dweller DAZ character file (for use in DAZ Studio)

Lecture 187 Dweller Character Texture Maps

Lecture 188 Allright Rig 2.0 Character Presets

Lecture 189 The Dweller (Ready For Allright Rig 2.0)

Lecture 190 Where To Get Your FREE Genesis Character Bundles

Lecture 191 Allright Rig 2.0 Documentation

Section 40: Example Videos of Allright Rig in Action Inside of Unreal Engine

Lecture 192 Cartoon Girl Lip Sync Animation

Lecture 193 The Dweller Lip Sync Animation

Lecture 194 The Pixie Animation Test

Lecture 195 Hookah Cat Animation Example

Lecture 196 SHINBI Epic Games Paragon Character Animation Test

Lecture 197 Epic Mannequin Rigged With Allright Rig - Example Animation

Lecture 198 Allright Rig 2.0 Demo Video

Section 41: Getting Started With Allright Rig 1.3

Lecture 199 Quick Start - Let's Have A Look Around The Project

Lecture 200 Quick Start: "The Dweller" Character - Allright Rig 1.3

Lecture 201 Quick Start: Animating Your Character In Sequencer

Lecture 202 Quick Start: Creating Animation Asset & Rendering Your Animation To Video

Section 42: Preparing Your Daz Characters For Allright Rig 2.0 & Unreal Engine

Lecture 203 Introduction: Daz Genesis character differences

Lecture 204 Preparing & Exporting Genesis & Genesis 2 Characters

Lecture 205 Preparing Genesis 3 & Genesis 8 Characters (Re-parenting arm and leg bones)

Lecture 206 Exporting Genesis 3 and Genesis 8 Characters Correctly As FBX files

Section 43: Rigging Your Character In Allright Rig 2.0

Lecture 207 Prepare Your Unreal Engine Project and Install Allright Rig 2.0

Lecture 208 Allright Rig 2.0 - New Lower Price

Lecture 209 Import & Rig Your Genesis Character with Allright Rig 2.0

Lecture 210 Create Morph Controllers & Add Morph Targets - Genesis Character

Lecture 211 Let's Create The Rig For Our Genesis 3 and Genesis 8 Characters

Lecture 212 Create Rig For Paragon Characters

Lecture 213 Rigging A Character From Scratch Part 1 (Create Animation Blueprint)

Lecture 214 Rigging A Character From Scratch Part 2

Lecture 215 Rigging A Character From Scratch Part 3

Lecture 216 How To Rig A Non-Biped Character (Animals, Creatures, Monsters)

Section 44: Let's Animate: Onward To Sequencer

Lecture 217 Create A New Level For Animation and Add The Dweller Character

Lecture 218 Create Your Cinematic Sequence

Lecture 219 Export Your Animation To Video

Lecture 220 Create an Animation Asset

Lecture 221 Editing With Curves Inside Sequencer With The Curve Graph

Section 45: The Pose Library

Lecture 222 How To Create & Save Character Poses

Lecture 223 Adding Poses To The Sequencer For Pose To Pose Animation

Section 46: Animation Dynamics

Lecture 224 Animation Dynamics - A Dinosaur Whips It's Tail

Section 47: Cool Things and Extras

Lecture 225 Congratulations On Finishing The Course

Lecture 226 MetaHuman Creator

Lecture 227 Video: Preview of Unreal Engine 5

Lecture 228 Free Paragon Assets Released

This course is perfect for anyone with absolutely no knowledge of Unreal Engine 4 that would like to get up and running quickly and without delay. It is also great for those familiar with Unreal Engine 4 that would like to brush up on the basics,Anyone who wants to learn how to animate a character inside of Unreal Engine 4,Anyone who wants to learn how to create stunning cinematic animations inside of Unreal Engine 4,Beginner to intermediate animators who wish to learn facial animation & intermediate animation in Unreal Engine 4,Artists, hobbyists, filmmakers and game developers interested in learning the powerful cloth and clothing tools in Unreal Engine 4,Students who are brand new to iClone 7 or current users who wish to dive deeper into character animation using Character Creator 3, iClone 7 and Unreal Engine,Students who wish to learn a cost-effective, powerful workflow for high quality 3D animation for film, TV or game development,Students who wish to learn how to perform facial animation and lip sync for their digital characters,Anyone interested in learning how to rig and animate inside Unreal Engine 4


444566291_learning_unreal_engine_from_beginner_to_pro.jpg


456a6ec17f8d222941c3636008ea5a6f.jpg


Full Stack Data Scientist
Last updated 2/2023
Created by Bright Kyeremeh
MP4 | Video: h264, 1280x720 | Audio: AAC, 44.1 KHz, 2 Ch
Genre: eLearning | Language: English | Duration: 793 Lectures ( 127h 15m ) | Size: 73.1 GB


Stats,Python| SQL| Machine Learning & Cloud| Deep Learning & A.I |Computer Vision & NLP| Power BI | 32 RealWorldProjects


What you'll learn
Build Robust Industry Machine Learning Models
Don't just learn, Become a Data Scientist through hands-on practice
Industry ??? skills (???? ??????)
Understand the field of Data Science through demonstrable experience.
Learn from an industry expert
Industry ?????? skills (???? ??????)
Industry ?????????? for Data Science skills (???? ??????)
Industry ??????? ????????(ML) skills (???? ??????)
Industry ?? ????? ????? ?????????? skills (???? ??????)
Industry ???? ???????? skills (???? ??????)
Industry ?????????? ???????????? skills (???? ??????)
Industry ???????? ?????? (CV) skills (???? ??????)
Industry ??????? ???????? ?????????? (NLP) skills (???? ??????)
Industry ????????? ????? ?? skills (???? ??????)
Reading Scientific ???????? ?????
?????? for Data Science
?????????????? ??????? skills (???? ??????)
31 Hands-On ???? ????? ????????
24/7 support
Guide and techniques for searching and applying for Internships and Jobs
lifetime access
???????? to ???????? course
????-??-???? walkthrough
Practical ?????-?? Demonstration

Requirements
This is a beginner to advanced course and the instructor with many years of experience in the industry and classroom breaks the concepts down for anyone at any level to understand. A laptop, internet connections and willingness to learn is enough to succeed in this comprehensive course.

Description
Data Science is bringing innovations to the world. The recent incident of Covid and ChatGPT is making the demand for Data scientists even more crucial in organizations.Employees with data science and analytical skills are highly valued and paid for in organizations. If you are interested in learning and understanding the field of data science, then this course is for you.This is the most COMPREHENSIVE and STRUCTURED course that covers EVERYTHING you need in order to become a Data Scientist.The course is designed for a period of 9-months of intensive lessons and projects. The topics included in this course are update and includes critical areas of demand in 2023 such as ChatGPT and Generative Artificial Intelligence (A.I).Why Should You Enroll In This Particular Course?If you are aiming to become a Data Scientist or switch from one domain to data science and machine learning or AI field, you should first look at job requirement of the Data Science field and see the skills that are needed in order for you to get a job in that field.While creating this course, I have taken time to research many company job postings, including vacancies in my own company and created the course to give students the exact skills that they need in order to crack their Data Science interviews and also be successful when employed.In simple terms, this course is:Well structured : a 9-month plan to your dream jobIncludes the exact skills that you need in order to secure a data science job.31 diverse projects in different domains : Telecommunication, Banking, Health, E-commerce, Tech, etc.From very BASIC to very ADVANCED concepts.Step-by-step walkthrough of conceptsstraight to the point and not wasting time on unnecessary topics that you'll never use in the industryIn the course, you have access to : Industry SQL skills (full course)Industry Python skills (full course)Industry Statistics for Data Science skills (full course)Industry Machine Learning (ML) skills (full course)Industry ML Model Cloud Deployment skills (full course)Industry Deep Learning skills (full course)Industry Artificial Intelligence skills (full course)Industry Computer Vision (CV) skills (full course)Industry Natural Language Processing (NLP) skills (full course)Industry Microsoft Power BI skills (full course)Reading Scientific Research PaperGithub for Data ScienceRecommendation Systems skills (full course)31 Hands-On Real World ProjectsGuide and techniques for searching and applying for Internships and Jobs24/7 supportlifetime accessIn this course, you will get to understand the core areas of Data Science and the various career opportunities in Data Science. After that, you will start with SQL for Data Science to give you solid grounds for your data science career.This should give you the foundation needed for advanced concepts in data science such as Machine learning, Deep learning, Computer vision (CV), and Natural Language Processing (NLP). The instructor for this course has 15 years of industry experience as well as classroom experience in developing and deploying machine learning models in production. He is also instructor of top online courses and books. He combines his industry and academic experience in delivering the lessons. The lessons are broken down for easy understanding. A step by step approach is followed in order to cater for diverse audience such as beginners, intermediate as well as advanced learners.You only need your laptop, internet and willingness to learn and you are good to go.See you in the course.

Who this course is for
Students who want to become Data Scientist and are serious about their career
Working professionals who want to transition to the field of Artificial Intelligence(A.I.) , Machine Learning, Deep learning, Computer Vision(CV), Natural Language Processing(NLP)
Anyone interested in building A.I applications such as ChatGPT or BARD
Anyone interesting in diving deeper into the field of Computer Vision(CV), Natural Language Processing(NLP)
Anyone aspiring to be a Computer Vision(CV) or Natural Language Processing(NLP) engineer.
Anyone finding it difficult to understand the field and concepts in Data Science and wants a breakdown step-by-step guide in understanding these concepts.
Anyone who wants to be career secured and not easily affected by layoffs in organizations
Anyone looking for salary hikes and increase in salary with a lucrative tech career.
NB: This course is not for lazy students who are not serious about their career. I am very busy person and if am spending my time providing you 24/7 support, I expect you to be serious about your career. The course is good and there is no two ways about it. You just have to be serious to work towards your goals and we can achieve it together.


444358020_full_stack_data_scientist.jpg


50e964366f55ce4a09fe909cc89ea7c3.jpg


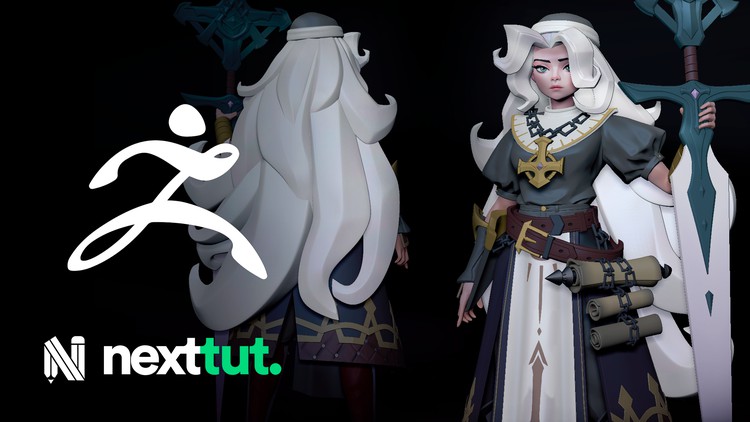
Stylised Character Sculpting in Zbrush
Published 3/2023
Created by Nexttut Education Pvt.Ltd.
MP4 | Video: h264, 1280x720 | Audio: AAC, 44.1 KHz, 2 Ch
Genre: eLearning | Language: English | Duration: 119 Lectures ( 42h 51m ) | Size: 30.2 GB


Learn how professional artists model stylised characters for games and films.


What you'll learn
Sculpt stylized female anatomy
Sculpt stylised costumes with folds and wrinkles
Sculpt armour and props
Sculpt female face and hair

Requirements
I expect you to have some sort of basic zbrush experience.

Description
Do you want to learn how to sculpt beautiful stylised characters in Zbrush?Then I welcome you to Nexttut education's stylized character sculpting in zbrush course.About Me:My name is Daniel da Costa and I have been a 3D character artist for about 11 years now. I have worked for tv commercials, movie agencies and 3D animation studios, currently I m working as a freelance character artist and 3D tutor.By the End Of This Course, You Will Be Able To:You'll be able to sculpt stylized high poly female characters using zbrush and you ll get a great sense of the stylized anatomy and high poly character construction from start to finish.You will be able to sculpt stylized high poly characters with better accuracy than before.What You Will Learn:Sculpt stylized female anatomySculpt stylised costumes with folds and wrinklesSculpt armour and propsSculpt female face and hairCreate high poly characters stylizedInterpret concepts and turn it in stylized 3d modelsCourse Project Overview:We will start with a sphere using our sculpt system. Then we will create the general blocking of the body. I will explain what you should watch for in an initial sculpting. Then we will make the torso and legs, starting the body from the bottom to the top. Then we will make the overall armour and props blocking. After that we will work on the overall sculpt and we are gonna finish the body details and volumes. Then all of it, we're gonna sculpt the head,hair and look for the sword workflow.Who is This Course For?I have designed this course for intermediate Zbrush user who wants to model stylised characters for games and films.Who is Not The Ideal Student For This Course?This course is not designed for absolute zbrush beginners.What Are The Requirements Or Prerequisites For Taking This Course?I expect you to have some sort of basic zbrush experience.You should have zbrush installed on your computer.Join Me Now:So if you want to model stylized characters in zbrush, then join me now, and take your skills to the next level. Don't forget that investing in yourself will pay for the rest of your life. Hope to see you in the course.

Who this course is for
This course is not designed for absolute zbrush beginners.
I have designed this course for intermediate Zbrush user who wants to model stylised characters for games and films.


444523740_stylised_character_sculpting_in_zbrush.jpg


896837ea162c00758d35bba61e8ff219.jpg


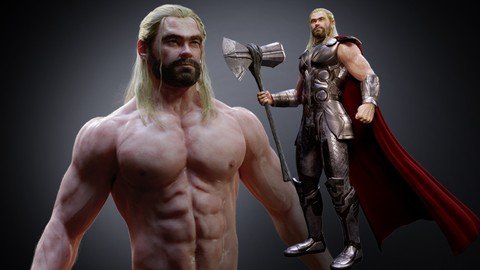
Anatomy And Character Creation In Blender
Last updated 3/2023
MP4 | Video: h264, 1280x720 | Audio: AAC, 44.1 KHz
Language: English | Size: 74.38 GB | Duration: 74h 58m

Learn the Human Anatomy and How to Create Realistic Character in Blender


What you'll learn
Gain knowledge of the skeletal system
Gain knowledge of each individual muscles that show on the surface
Learn how to identify muscles, bones, and fat from real photos
Learn muscle connections (origin and insertion)
Learn about proportions and gender differences
Create a realistic character from scratch
Learn how to make a human skin lifelike
Learn how to create hair using sculpting tools and geometry nodes
Learn how to composite and enhance renders

Requirements
Blender 3.3 or higher is required. Photoshop or a free painting program like Krita is also required.

Description
Corazon Bryant always had an artistic bone in her body. When she was only 2 years old, she would make detailed drawings on her mother's wall. Her mother loved the drawings so much, she decided to keep them. With the encouragement of her mother, she continued drawing and she only got better as time went by. When Corazon was in middle and high school, she earned money making portraits for her classmates and even for her teachers. She pursued a college degree in Media Arts & Animation and later worked for architectural and entertainment companies such as Camm Productions, ID DI Design, and PDT International. She also had an opportunity to do some freelance work for Mega Pickle Entertainment. While working as a 3D artist, she had a chance to teach 3D animation classes in an A+ school. This is when she found her true love - which is not only to talk about 3D endlessly but to also inspire greatness in young upcoming artists. Corazon is currently working on a new project called Victory 3D with fellow industry-experienced artists to provide an affordable and effective learning system that will make it easier for students to get a job in the 3D industry.Course InfoIf you are struggling to create a good looking character, that's because you have not yet mastered the human anatomy. If you have tried several times to create a realistic character, but saw very little or no improvements at all, that's because you have not taken the time to truly understand the underlying structure of the human body. Don't worry, my name is Corazon Bryant, professional 3d artist and educator. In this course, I will teach you the human anatomy in depth. We will start out by learning all about the bones of the body. By understanding the bony landmarks, we will be able to track the connections of muscles and understand their form. Gaining knowledge of the skeletal system makes it easier for us to sculpt a realistic looking human body. We will learn all about each individual muscle that appear on the surface of the skin. We will understand where each muscle starts and where it ends, that way when we are sculpting, we are placing the muscles accurately. When you are sculpting a character, whether you are using references or straight from your imagination, it's important to accurately depict their correct attachment points, otherwise you will just end up with a very weird looking character. We will learn about proportions and how the male and female body is different from each other. I will show you how you can study the anatomy the right way so you can achieve great results. By dissecting each surface forms that we see on the real photos, we can get clarity of what we are drawing or sculpting, that way we are not just guessing, but actually sculpting with thought and precision. After we get acclimated with the human anatomy, we will apply what we have learned to create a character from scratch. We start by defining the basic shape and structure of the character. Then we we will add layers of detail like wrinkles and pores to really make our character come to life. To make our character pop out, we will go through the process of texturing. We begin by creating clean UVs for our character so our colors and textures will line up correctly and seamlessly. We will then project our high poly details to our low poly mesh and bake our texture map. We will create realistic skin blemishes to provide depth to our character and construct a skin shader that will really make our character look believable. Using Blender's powerful hair system, we go through the process of creating hair for our character's head and body. We will shape the hair by sculpting and using geometry nodes To give our character mobility and personality, we will go through the process of rigging. We start by setting up the skeletal system where we can adjust individual joints to make our character pose in anyway we can imagine. Last we will take our work into Photoshop or any free 2d software that you like so we can enhance our character and create an appealing background. If you are ready to create a 3d character that actually looks like a human character, then the Anatomy and Character Creation course in Blender in just for you. You will learn everything you need to be able to make incredibly detailed and lifelike characters. Take your character creations skills to the next level, come and join this course at Victory3D.

Overview
Section 1: Introduction

Lecture 1 Promo

Lecture 2 Why learn the anatomy?

Section 2: Facial Anatomy

Lecture 3 Skull

Lecture 4 Skull Dissections

Lecture 5 Facial Muscles

Lecture 6 Facial Muscle Dissections

Lecture 7 Facial Fat

Lecture 8 Facial Fat Dissections

Lecture 9 Nose

Lecture 10 Nose Drawing

Lecture 11 Eye

Lecture 12 Eye Drawing

Lecture 13 Lips

Lecture 14 Lip Drawing

Lecture 15 Ears

Lecture 16 Ear Drawing

Section 3: Proportions & Gender

Lecture 17 Proportions

Lecture 18 Gender Differences

Lecture 19 Anatomical Terms

Section 4: Torso Anatomy

Lecture 20 Torso Bony Landmarks

Lecture 21 Torso Front Muscles

Lecture 22 Torso Back Muscles

Lecture 23 Torso Drawing

Section 5: Arm Anatomy

Lecture 24 Arm Bony Landmarks

Lecture 25 Upper Arm

Lecture 26 Forearm

Lecture 27 Arm Drawing

Section 6: Leg Anatomy

Lecture 28 Leg Bony Landmarks

Lecture 29 Upper Legs

Lecture 30 Lower Legs

Lecture 31 Leg Drawing

Section 7: Neck Anatomy

Lecture 32 Neck

Lecture 33 Neck Drawing

Section 8: Hand Anatomy

Lecture 34 Hand Bony Landmarks

Lecture 35 Hand Tendons

Lecture 36 Hand Muscles

Lecture 37 Hand Drawing

Section 9: Foot Anatomy

Lecture 38 Foot Bony Landmarks

Lecture 39 Foot Tendons & Muscles

Lecture 40 Foot Drawing

Section 10: Character Basic Forms

Lecture 41 Reference Studies

Lecture 42 Base Skull

Lecture 43 Face Basic Forms 1

Lecture 44 Face Basic Forms 2

Lecture 45 Eyeball Holder & Tweaks

Lecture 46 Likeness Phase 1

Lecture 47 Likeness Phase 2

Lecture 48 Likeness Phase 3

Lecture 49 Placeholder Light & Hair

Lecture 50 Accuracy Check

Lecture 51 Long Hair Mesh

Lecture 52 Torso Basic Shape

Lecture 53 Arms Basic Shape

Lecture 54 Hands Basic Shape

Lecture 55 Fingers Basic Shape

Lecture 56 Legs Basic Shape

Lecture 57 Feet Basic Shape

Lecture 58 Proportion

Lecture 59 Real World Size

Lecture 60 Hair & Body Tweaks

Section 11: Armor & Cape Concept Sculpting (Base)

Lecture 61 Armor Base 1

Lecture 62 Armor Base 2

Lecture 63 Armor Base 3

Lecture 64 Armor Base Tweaks

Lecture 65 Armor Refinement

Lecture 66 Armor Shoulder

Lecture 67 Cape Mesh

Section 12: Character Retopology

Lecture 68 Prepare for Retopo

Lecture 69 Intro to Retopo

Lecture 70 Essential Loops Face

Lecture 71 Essential Loops Torso & Arms

Lecture 72 Essential Loops Legs & Feet

Lecture 73 Essential Loops Hands

Lecture 74 Retopo Face

Lecture 75 Retopo Back Head & Ears

Lecture 76 Retopo Upper Body 1

Lecture 77 Retopo Upper Body 2

Lecture 78 Retopo Hands

Lecture 79 Retopo Legs

Lecture 80 Retopo Feet

Lecture 81 Retopo Facial Features

Lecture 82 Topology Fixes 1

Lecture 83 Topology Fixes 2

Lecture 84 Topology Fixes 3

Section 13: Body Unwrapping & Detail Projection

Lecture 85 Intro To Unwrapping

Lecture 86 Body Unwrap 1

Lecture 87 Body Unwrap 2

Lecture 88 Body Unwrap 3

Lecture 89 Project Details

Lecture 90 Eye Modifications

Section 14: Character Details Sculpting

Lecture 91 Face Secondary Forms 1

Lecture 92 Repainting

Lecture 93 Face Secondary Forms 2

Lecture 94 Upper Body Secondary Forms

Lecture 95 Lower Body Secondary Forms

Lecture 96 Hand Secondary Forms

Lecture 97 Feet Secondary Forms

Lecture 98 Veins

Lecture 99 Face Fixes

Lecture 100 Face Tertiary Forms

Lecture 101 Body Tertiary Forms

Lecture 102 Micro Details 1

Lecture 103 Micro Details 2

Lecture 104 Skin Maps & HDRI

Lecture 105 Teeth Placement

Section 15: Armor Cage, Refinements & Textures

Lecture 106 Torso Armor Cage 1

Lecture 107 Torso Armor Cage 2

Lecture 108 Torso Armor Cage 3

Lecture 109 Torso Armor Cage 4

Lecture 110 Torso Armor Cage 5

Lecture 111 Knee Armor Cage

Lecture 112 Boots Armor Cage 1

Lecture 113 Shrinkwrap

Lecture 114 Boots Armor Cage 2

Lecture 115 Boots Armor Cage 3

Lecture 116 Wrist Armor Cage

Lecture 117 Shoulder Armor Cage

Lecture 118 Leg Armor Cage

Lecture 119 Armor Cage Modifications 1

Lecture 120 Armor Cage Modifications 2

Lecture 121 Solidify Armor

Lecture 122 Torso Armor Refinement 1

Lecture 123 Torso Armor Refinement 2

Lecture 124 Torso Armor Refinement 3

Lecture 125 Wrist Armor Refinement

Lecture 126 Knee Armor Refinement

Lecture 127 Boots Armor Refinement

Lecture 128 Shoulder Armor Refinement

Lecture 129 Torso Armor Extra Details 1

Lecture 130 Torso Armor Extra Details 2

Lecture 131 Wrist Armor Extra Details

Lecture 132 Knee & Boots Extra Details

Lecture 133 Armor Layering

Lecture 134 Armor Metal Texture

Section 16: Cape Creation & Armor Diamond

Lecture 135 Cape Fix

Lecture 136 Cape Retopo 1

Lecture 137 Cape Retopo 2

Lecture 138 Unwrap & Transfer Details

Lecture 139 Cape Detailing

Lecture 140 Cape Baking

Lecture 141 Cape Fabric Texture

Lecture 142 Cape Fuzz

Lecture 143 Armor Diamond Texture

Section 17: Eye & Skin Textures

Lecture 144 Eye Modeling

Lecture 145 Caruncle Material

Lecture 146 Sclera Material

Lecture 147 Iris Material

Lecture 148 Tear Duct

Lecture 149 SSS Control

Lecture 150 Skin Texture

Lecture 151 Skin Tweaks

Lecture 152 Roughness and Spec Maps

Section 18: Hair Creation

Lecture 153 Hair Upper Lashes

Lecture 154 Hair Lower Lashes

Lecture 155 Hair Eyebrows 1

Lecture 156 Hair Eyebrows 2

Lecture 157 Hair Beard 1

Lecture 158 Hair Beard 2

Lecture 159 Hair Lower Hemisphere

Lecture 160 Hair Middle Hemisphere

Lecture 161 Hair Upper Hemisphere

Lecture 162 Hair Tweaks & Front Strands

Lecture 163 More Tweaks & Breakups

Lecture 164 Ponytail Part

Lecture 165 Side Hair & Fly Aways

Lecture 166 Peach Fuzz

Lecture 167 Body Hair

Lecture 168 Asymmetry Face

Section 19: Rigging

Lecture 169 Rig Setup

Lecture 170 Weight Painting Body 1

Lecture 171 Paint Tweaks for Arms and Hands

Lecture 172 Weight Painting Body 2

Lecture 173 Eyes & Armor Weight Paint

Lecture 174 Extra Armor Weight Painting

Lecture 175 Skirt Rig

Lecture 176 Hair Mesh Bind

Lecture 177 Inverse Kinematics & Cape Rig

Section 20: Axe Creation

Lecture 178 Axe Modeling 1

Lecture 179 Axe Modeling 2

Lecture 180 Axe Retopo 1

Lecture 181 Axe Retopo 2

Lecture 182 Axe Retopo 3

Lecture 183 Axe Unwrap 1

Lecture 184 Axe Unwrap 2

Lecture 185 Axe Sculpting 1

Lecture 186 Axe Sculpting 2

Lecture 187 Axe Sculpting 3

Lecture 188 Organize UVs, Bake & Texture

Lecture 189 Axe Displacement Map & Setup

Section 21: Posing, Rendering & Compositing

Lecture 190 Posing

Lecture 191 Skirt & Camera View

Lecture 192 Tweaks & Renders

Lecture 193 Final Composite

For those who are struggling to create a character after so many attempts. It is time to learn the anatomy. :)


444545931_anatomy_and_character_creation_in_blender.jpg


88914b8f186032df65fe99bcee938e77.jpg


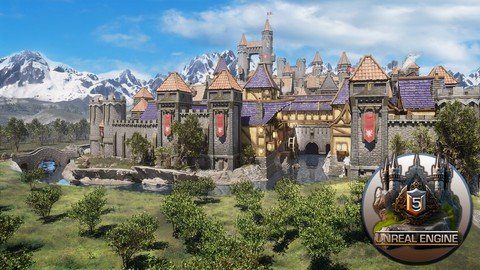
Building Medieval Worlds - Unreal Engine 5 Modular Kitbash
Published 2/2023
MP4 | Video: h264, 1280x720 | Audio: AAC, 44.1 KHz
Language: English | Size: 24.20 GB | Duration: 21h 54m

Unreal Engine 5 Build your own fantasy world | Learn how to create your own RPG


What you'll learn
Learning unique techniques for modular assets for stylized structures
Creating a functional water system with directional water flow and submergible boat assets
Building a fully functional open-world landscape material including distance, noise masking, and automatic material transitions
Assembling custom prop collections using blueprints to make your world alive
Learning how to create large-scale structures in open-world environments
Filling your world with animated, nanite-enabled foliage to enrich its nature side
Sculpting terrain and optimising thermal erosion and hydro erosion to add natural detail to a landscape
Creating (a) an automatic landscape based on a one-slope angle with mask height overlay, (b) castle tiles with rotation and scaling, and (c) landscape-painted
Learning about snapping, free transform techniques, and structure modification
Learning how to set up and generate for stairs to help your playable character interact better with the world
Setting up an asset pack that can be easily imported onto any Unreal Engine 5 project
Creating a dynamic light system using the addon blueprint
Maintaining and optimising medieval Europe aesthetics for a full medieval stronghold castle keep or city scene using an Unreal Engine 5 skybox
Complete the course which is going to be the first stepping-stone to creating your 3D world and RPG game environment

Requirements
To own a computer (Microsoft, Linux or Mac)
To have downloaded Unreal Engine 5
A thirst to learn and excitement about 3D modelling, animation, and game engine integration
To download all course resources including 241 Meshes, 4 flags with cloth physics enabled (these are part of the 241 items), a modular set with 327,549 faces / 491,516 tris, 35 PBR materials with emissive maps, 1 clean file with a new level that features nothing in it (all parts available in the content folder), and 9 references.

Description
Course DescriptionAre you a 3D modelling artist, game designer or developer looking for a 3D model kitbash that will leave your eyes throbbing with creative excitement?Join Build Stunning Medieval Worlds with UE5's Modular Kitbash to take your game design skills up a notch! Learn how to use Unreal Engine 5 (UE5) to optimise a modular kitbash that will take your skills to the next level.Immerse yourself and your players in a medieval fantasy world complete with iconic shop windows, moving flags, banners, market stalls and cobbled streets!In a world where the boundaries between what is real or imagined are blurred by the ever-increasing skills of computer-generated imaging (CGI), we are giving you the power to create something HUGE!A modular kitbash is a powerful tool in every 3D modeller s or game designer s toolbox. It helps you quickly and easily create intricate assets and environments using pieces based on a set of concrete variations.Use 250 modular kitbash parts to build ANY medieval city, castle village or town better, bigger, and with more detail than ever before! Graduate to the next level of game design by learning all about the Blender to Unreal Engine 5 (UE5) professional workflow for medieval modular set pieces.We have designed the course from the ground up to make sure that no matter your skill level, you will easily be able to follow along and more importantly learn most of the skills to create your 3D game environment.Our Build Stunning Medieval Worlds with UE5's Modular Kitbash top 6 points:1. Learning unique techniques for modular assets for stylized structures;2. Creating a functional water system with directional water flow and submergible boat assets;3. Building a fully functional open-world landscape material including distance, noise masking, and automatic material transitions4. Assembling custom prop collections using blueprints to make your world alive;5. Learning how to create large-scale structures in open-world environments;6. Filling your world with animated, nanite-enabled foliage to enrich its nature side.Unreal Engine 5This course is a full guide to using UE5 to plan out and create large-scale cities from the get-go.Every modular kitbash asset and every single one of the building parts has been carefully crafted and optimised to work with the latest version of one of the biggest game engines out there Unreal Engine 5. Hand-in-hand with UE5, the possibilities can become endless and you can tailor everything to your vision.With Build Stunning Medieval Worlds with UE5's Modular Kitbash , you will build a stylized environment that would leave someone second-guessing whether it is real or not.Using the same pieces, you could build a cathedral or a castle or a house and a shop.And that s not all Our Build Stunning Medieval Worlds with UE5's Modular Kitbash modular kitbash items include all the smaller assets that are necessary to make any UE5 environment look real when you walk around it.What makes a 3D world immersive? The ability to walk around it in awe of how much identify with the environment and you feel like you re there.Getting Started Build Stunning Medieval Worlds with UE5's Modular Kitbash will also be an introduction to how to set up files to create a clean UI. The skills you learn here are fully transferable to all your future builds.It will teach you about snapping, free transform techniques, and structure modification. This will allow you to get unique-looking variances to populate your medieval castle, stronghold area, or city as fast as possible.Work with multiple pre-set camera angles to get the best composition out of a castle that looks great from any angle.Texturing & MaterialsThrough Build Stunning Medieval Worlds with UE5's Modular Kitbash you will be learning everything right from importing individual models from Blender to having them work correctly in UE5.We will look at how to import and use textures created specifically for Unreal Engine and use them to create the materials for our medieval castle stronghold modular pieces. You will find out how to change PBR texture values by directly adjusting their information from within, built into the image editor.Next, we will set up PBR materials with adjustable parameters that will allow you to change the intensity of the normal map (e.g., adjust colour, change roughness values, and more). You will work through the different transparency materials that will help you set up cut-out decals, partially transparent decals with PBR values and two side-faced textures.UE5 Water SystemYou will learn how to use UE5 s modeling mode to deform a collection of modular assets. One of the things we will do together is to merge bridge pieces and bend a bridge using the curve deformer. And that s because who doesn t love a picturesque bridge over a body of water?! Build Stunning Medieval Worlds with UE5's Modular Kitbash will also show you how to create a body of water for a river which transitions into a lake using UE5 s built-in water plugin. Together, we will learn how to modify the plugin to allow submergible boats to float on it in a realistic way.Sculpting TerrainThis course will teach you how to model and sculpt out terrain using a variety of techniques to help us shape out large-scale areas:- Using sculpting mode tools (e.g., sculpt + flatten) to shape out terrain;- Optimising thermal erosion and hydro erosion to add natural detail to a landscape;- Utilising UE5 s copy mode to reuse height information to create background mountains quickly. Build Stunning Medieval Worlds with UE5's Modular Kitbash will also see us creating a landscape material that uses PBR values from Quixel asset library materials and sets them up as a material attribute .You will learn how to hide a textured pattern with mask noise variances and distance blend techniques. Afterwards, you will learn how to create (a) an automatic landscape based on a one-slope angle with mask height overlay, (b) castle tiles with rotation and scaling, and (c) landscape-painted puddles.Landscaping in UE5 Build Stunning Medieval Worlds with UE5's Modular Kitbash will show you how to make texture adjustments in the texture detail panel and material graph. You will also be finding out about how to organise material graphs with comments boxes and node reroute techniques.Using Quixel library assets, we will be quickly populating our medieval city scene with rocks. At the same time, we will also make use of Quixel s built-in vertex painting tool to paint a grass texture onto our rocky assets.Likewise, Quixel foliage will allow us to add animated trees and bushes to our scene, and with UE5 s nanite functionality, there are no limits to how great and alive these can look! Build Stunning Medieval Worlds with UE5's Modular Kitbash will teach you how to paint out natural forests and make them look realistic in a large-level environment.Lighting & VFXUsing the UE5 starter content pack, we will readjust fire and smoke VFX to fit the aesthetics of our medieval city stronghold scene. This will involve rescaling and applying these effects to our torches and chimney. Build Stunning Medieval Worlds with UE5's Modular Kitbash will show you how to create a dynamic light system using the addon blueprint. We will also be creating a day/night cycle by manually setting up a moon since it does not work by default.As part of the course, you will also be engaging in post-processing, and we will be adding additional lighting sources to the castle, such as the ones coming out of the building windows.One of the most exciting things about Build Stunning Medieval Worlds with UE5's Modular Kitbash is that you will create collisions for stairs so that a playable UE5 character can use them. We use a 3rd person template that allows you to run into your medieval castle stronghold.Course Resources & FreebiesThe Build Stunning Medieval Worlds with UE5's Modular Kitbash resource pack includes 241 Meshes, 4 flags with cloth physics enabled (these are part of the 241 items), a modular set with 327,549 faces / 491,516 tris, 35 PBR materials with emissive maps, 1 clean file with a new level that features nothing in it (all parts available in the content folder), and 9 references.Our top 10 points of awesomeness for the Build Stunning Medieval Worlds with UE5's Modular Kitbash medieval modular kitbash pieces:1. Get started with ease with pivots positioned and oriented to help you speed up the building part of a structure;2. Light up the night sky with houses lights that glow in the dark, and assets set up with emission textures;3. Unique stylized touch of texturing;4. Modular castle walls and tower pieces to help you build as tall of a fortress as you d like;5. Building variations for roofs and huts to build from the humblest of huts to the most extravagant type of mansion in a stylized manner in minutes;6. Custom textures for each modular piece to help bring out a unique look from every asset;7. Variety of outdoor props to help you populate the streets and make them look alive;8. Doors that open to help your taverns, houses, and shops feel as welcoming as you like;9. Create unique outdoor marketplaces with our market assets;10. Enjoy intricate mesh detail to help you get depth from close-up camera shots.Join this course and come be part of a game design journey of over 22 hours of learning that will see you go away with over 240 game-ready medieval kitbash pieces for your medieval castle stronghold in just 117 lessons.Check out the free introduction and I am sure you won t be able to put this course down!To get you pumped, imagine how well this medieval castle stronghold modular pack fits in with your other 3D Tudor projects.Be creative! Add medieval dungeon assets inside a medieval castle stronghold using Blender to Unreal Engine Become a Dungeon Prop Artist .Also, think about surrounding your medieval castle stronghold or city with other medieval environments such as a farm using Blender 3 The Ultimate Medieval Scene Course .Add gallows to your medieval castle keep main square using Blender to Unreal Engine 5 | 3D Props | Medieval Gallows to master the look of your medieval castle s execution area. Use the full power Unreal Engine 5 (UE5) to your advantage.Even as early as 1 week into development, we knew Build Stunning Medieval Worlds with UE5's Modular Kitbash will be something special.Don t miss out on the opportunity to build stunning medieval worlds in UE5!So, come give us a try and be blown away by just how much you can achieve from one course.Until next time, happy modelling everyone!Neil 3D Tudor

Overview
Section 1: Introduction

Lecture 1 Introduction

Section 2: Section 1: Introduction to Unreal Engine 5 and Resource Pack

Lecture 2 Lesson 1 - Creating New Project & UI Basics

Lecture 3 Lesson 2 - Viewport Basics

Lecture 4 Lesson 3 -[RESOURCE PACK] and Introduction to Modular Kit

Lecture 5 Lesson 4 - Setting up Large-Scale Scene

Section 3: Section 2: Working on Castle Entrance

Lecture 6 Lesson 5 - Landscape Mode Basics

Lecture 7 Lesson 6 - Creating Entrance for the Tower

Lecture 8 Lesson 7 - Creating Curvature out of Stone Walls

Section 4: Section 3: Creating Elevation out of Castle Structure

Lecture 9 Lesson 8 - Building Archway within Inner Castle Walls

Lecture 10 Lesson 9 - Building Staircase and Fixing Collisions

Lecture 11 Lesson 10 - Working with Vertical Slopes of Castle Walls

Section 5: Section 4: Building a House from the Ground up

Lecture 12 Lesson 11 - Building House Base

Lecture 13 Lesson 12 - Adding Roof to our 3D Hut

Lecture 14 Lesson 13 - Breaking up the Surface of a Digital House

Lecture 15 Lesson 14 - Creating Variation out of Modular Mesh

Section 6: Section 5: Structural Decoration of a Virtual House

Lecture 16 Lesson 15 - Adding Smaller Detail to the House

Lecture 17 Lesson 16 - Customizing 3D House Using Props

Lecture 18 Lesson 17 - Modelling Complexity to our 3D Hut Using Kitbash Assets

Section 7: Section 6: Working on a 3D Hut from Top Down

Lecture 19 Lesson 18 - Working on a Small 3D Hut from Roof Downwards

Lecture 20 Lesson 19 - Adding Door and Overhang to 3D Small Hut

Lecture 21 Lesson 20 - Adding Detail to Small Modular Houses

Lecture 22 Lesson 21 - Composition Patterns from Modular Houses

Section 8: Section 7: Free Form 3D Building Creation

Lecture 23 Lesson 22 - Creating Grand Building Using Free Flow Modular Building Technique

Lecture 24 Lesson 23 - Creating Clock Tower

Lecture 25 Lesson 24 - Creating Water Mill Using Free-Form Modular Modelling

Lecture 26 Lesson 25 - Extending 3D Water Mill & Creating Custom Attachments

Section 9: Section 8: Thinking of Location for Modular Structure Setup

Lecture 27 Lesson 26 - Building Base for River Pass House

Lecture 28 Lesson 27 - Building Modular Hut for River Top

Lecture 29 Lesson 28 - Combining the Modular Collections for a Grand 3D Watermill

Lecture 30 Lesson 29 - Creating Roof Archway Attachments for Custom Buildings

Lecture 31 Lesson 30 - Adding Water mill to the Center of a Castle

Section 10: Section 9: Creating UE5 Modular Hut Iterations

Lecture 32 Lesson 31 - Creating Hut Tower Extensions Using 3D Modular Pack

Lecture 33 Lesson 32 - Reinforcing 3D Huts with Stone

Lecture 34 Lesson 33 - Finishing Small Hut Iteration and Planning Ahead

Lecture 35 Lesson 34 - Populating UE5 Castle with Houses

Section 11: Section 10: Creating Castle Harbor

Lecture 36 Lesson 35 - Creating River Housing Area in UE5

Lecture 37 Lesson 36 - Breaking up River Roofs with more Roofs

Section 12: Section 11: Working with Unreal Engine 5 Water Plugin

Lecture 38 Lesson 37 - Creating River in Unreal Engine 5

Lecture 39 Lesson 38 - Setting up River Material

Lecture 40 Lesson 39 - Creating Lake Water in UE5

Section 13: Section 12: UE5 Modeling Mode

Lecture 41 Lesson 40 - Setting up Bridge

Lecture 42 Lesson 41 - Deforming Bridge Using Modeling Toolkit

Section 14: Section 13: Decorating Harbor Area

Lecture 43 Lesson 42 - Creating Harbor Area in UE5

Lecture 44 Lesson 43 - Finalizing Harbor Environment for Castle City

Lecture 45 Lesson 44 - Creating Boat Occlusion

Section 15: Section 14: Working with Water Visuals within the Scene

Lecture 46 Lesson 45 - Material Graph Basics

Lecture 47 Lesson 46 - Tweaking Water Material for Boat Masking

Lecture 48 Lesson 47 - Material Instance Basics

Lecture 49 Lesson 48 - Creating Depth Fade Material Instance

Section 16: Section 15: Building Digital Alleyway

Lecture 50 Lesson 49 - Designing Alley Way 3D Environment

Lecture 51 Lesson 50 - Creating Mini Huts for Extra Space Fillings of a Castle

Lecture 52 Lesson 51 - Finding Place for Smaller Houses Within 3D City Scene

Lecture 53 Lesson 52 - Design Overhangs for a Virtual Street

Lecture 54 Lesson 53 - Adding Attachments to the Street

Section 17: Section 16: Working on Street Elevation in UE5

Lecture 55 Lesson 54 - Creating Huts on Top of Castle Walls

Lecture 56 Lesson 55 - Adjusting Structural Detail for a UE5 Street

Lecture 57 Lesson 56 - Connecting Edges of our UE5 Castle

Section 18: Section 17: Landmark Tower in our Unreal Castle

Lecture 58 Lesson 57 - Working on our Environment 3D Landmark

Section 19: Section 18: Castle Stone Stronghold in UE5

Lecture 59 Lesson 58 - Creating Stronghold Structure in Unreal Engine 5

Lecture 60 Lesson 59 - Creating Different-Sized Cobblestone Buildings

Lecture 61 Lesson 60 - Adding Detail Variances to the Stronghold Structural Assets

Lecture 62 Lesson 61 - Creating Stronghold Structures In-between Landmark and City

Lecture 63 Lesson 62 - Connecting the Edge to the Stronghold

Section 20: Section 19: Working on Castle back

Lecture 64 Lesson 63 - Finishing Elevation Edges

Lecture 65 Lesson 64 - Shaping out the Stronghold

Lecture 66 Lesson 65 - Patching up the Back end of our Virtual Stronghold

Lecture 67 Lesson 66 - Reinforcing Virtual Castle Walls

Section 21: Section 20: OpenWorld Landscape Setup in UE5

Lecture 68 Lesson 67 - Preparing for Landscape Creation

Lecture 69 Lesson 68 - Creating Landscape base Material with Quixel Textures

Lecture 70 Lesson 69 - Using Noise Texture to Break Landscape Pattern

Lecture 71 Lesson 70 - Distance Based Material Blending

Section 22: Section 21: Landscape Material Creation Expansion

Lecture 72 Lesson 71 - Creating Material Blend

Lecture 73 Lesson 72 - Automatic Landscape Material Setup

Lecture 74 Lesson 73 - Creating Tile Textures for Landscape Material

Lecture 75 Lesson 74 - Creating Node Reroutes

Lecture 76 Lesson 75 - UE5 Landscape Material Cleanup

Section 23: Section 22: Working on a Castle Ground

Lecture 77 Lesson 76 - Fixing Ground for Digital Castle

Lecture 78 Lesson 77 - Creating Puddles in our Castle

Section 24: Section 23: Asset Collection Blueprints in UE5

Lecture 79 Lesson 78 - Creating our First Blueprint

Lecture 80 Lesson 79 - Blueprint Basics

Lecture 81 Lesson 80 - Creating Blueprint Variations

Lecture 82 Lesson 81 - Populating our Castle With 3D Market Stalls

Lecture 83 Lesson 82 - Populating Castle with Asset Collections

Section 25: Section 24: Working on Castle Overall Appearance

Lecture 84 Lesson 83 - Working on Structure Aesthetics inside of Castle Walls

Section 26: Section 25: Sculpting Castle Terrain

Lecture 85 Lesson 84 - Landscape Building

Lecture 86 Lesson 85 - Eroding Edges of our Cliffs in UE5

Lecture 87 Lesson 86 - Working with Chunk Copies

Section 27: Section 26: Populating Scene with Stone Formations

Lecture 88 Lesson 87 - Bringing in Stone Assets onto our Environment

Lecture 89 Lesson 88 - Setting up Rock Formation in our Digital Landscape

Lecture 90 Lesson 89 - Reforming Rock Formation in 3D Environment

Lecture 91 Lesson 90 - Placing Stone Clusters using Foliage Mode

Section 28: Section 27: Quixel Material Blend Setup

Lecture 92 Lesson 91 - Quixel Material Blend Setup

Lecture 93 Lesson 92 - Adjusting Textures using Material Blend Controls

Lecture 94 Lesson 93 - Vertex Painting

Section 29: Section 28: Foliage in Unreal Engine 5

Lecture 95 Lesson 94 - Small Foliage Setup

Lecture 96 Lesson 95 - Building Our Shrubs

Lecture 97 Lesson 96 - Setting up Large Trees

Lecture 98 Lesson 97 - Planting Trees in Unreal Engine 5

Section 30: Section 29: Working on Addition Detail to Give Character to our Castle

Lecture 99 Lesson 98 - Cloth Simulation for Flags

Lecture 100 Lesson 99 - Adding Fighting Ring to Castle

Lecture 101 Lesson 100 - Setting up Chimneys and Slabs to Decorate 3D Huts

Section 31: Section 30: Day and Night Cycle Setup in UE5

Lecture 102 Lesson 101 - Setting up Day-Night Cycle Using BP

Lecture 103 Lesson 102 - Setting up the Moon in UE5

Lecture 104 Lesson 103 - Adding Moon Cycles

Lecture 105 Lesson 104 - Setting up Night Light

Lecture 106 Lesson 105 - Window Light Sources in UE5

Section 32: Section 31: UE5 Particle Effects

Lecture 107 Lesson 106 - Setting up Fire Particle within Torch Blueprints

Lecture 108 Lesson 107 - Setting Torches in Medieval Castle

Section 33: Section 32: Working on Background Terrain for the Scene

Lecture 109 Lesson 108 - Large Scale Terrain Sculpting

Lecture 110 Lesson 109 - Sculpting out Large Terrain for Castle Scene

Lecture 111 Lesson 110 - Creating Clusters of Foliage for Large-Scale Environments

Lecture 112 Lesson 111 - Setting up Bush Clusters for Large Environments

Section 34: Section 33: Background Mountain Setup

Lecture 113 Lesson 112 - Adding Decorative Mountains in Background

Lecture 114 Lesson 113 - Setting up Custom Vertex Blend

Lecture 115 Lesson 114 - Blending in Mountains with Landscape in UE5

Section 35: Section 34: Final Touches in Unreal Engine 5

Lecture 116 Lesson 115 - Post Processing in UE5

Lecture 117 Lesson 116 - Water Wheel Motion

Lecture 118 Lesson 117 - Final Unreal Engine 5 Steps

3D modellers eager to learn how to use a medieval castle kitbash made up of 241 individual pieces to build an entire castle or city, Enthusiasts of Unreal Engine 5 who want to fast-track their understanding of its new and exciting changes, Game designers who would like to design a medieval stronghold castle keep or city including a background mountain range, river, and foliage for games in Unreal Engine 5, RPG fans and dungeons and dragons (DND) players who want to walk through and experience a medieval stronghold castle keep or city


444345161_building_medieval_worlds_unreal_engine_5_modular_kitbash.jpg


e50de7b40ccead2c46ac5d5ae002e90d.jpg


3ds Max: Learn 3D Modeling & Interior designs from Scratch
Published 1/2023
Created by Bhavanams C2C
MP4 | Video: h264, 1280x720 | Audio: AAC, 44.1 KHz, 2 Ch
Genre: eLearning | Language: English | Duration: 34 Lectures ( 32h 29m ) | Size: 21.2 GB


Create your own 3D projects from scratch by using 3ds max within a few hours


What you'll learn
Complete working knowledge and ability to create projects using 3ds max from scratch to end.
Learning by working on live projects.
Navigate Autodesk 3DS Max Design user interface.
Discussion on Autodesk 3ds Max Design commands
Professional 3D model, design, and rendering projects.
Understand concepts and techniques in 3D modeling.
Discussion on to provide complete rendering
Navigate the 3DS Max User Interface and Workspace
Discussion on Graphite Modeling Tools Set
Discussion on Command Panel, status information, viewports
Discussion on Time Slider and Track Bar
Discussion on File Management & Working with Objects
Discussion on Transforming Objects & Copying an Object
Discussion on Understanding the Perspective Viewing Tools
Discussion on Using Multiple Viewports
Discussion on Setting Up a Project Workflow
Discussion on Units Setup
Importing a CAD Drawing
Modeling Standard Primitives with Modifiers
Using the Modifier Stack Tools
Making Clones That Share Properties
Discussion on Using Various Modifiers
Working with Groups
Discussion on Creating the Walls, Doors & Windows
Discussion on Adding the Floor and Ceiling
Discussion on Modeling the Sofa and Furniture
Discussion on Modeling the Chair and dining table
Discussion on Creating Stairs & Modeling of the Parking
Creating AEC Objects (Architectural,Engineering,Construction)

Requirements
No prior experience is needed. You will learn everything you need to know
A computer with either Windows or Mac to install the 3ds max
A strong work ethic, willingness to learn, and plenty of excitement about the awesome new 3ds max design and modeling
Nothing else! It's just you, your computer and your hunger to get started today.

Description
Major Highlights of The CourseAll lesson files included for downloadSelf-assessment Practice drawings at the end of every sectionTaught by certified Industry working professionalExtra practice drawings and projects at the end of the courseYou will be able to get 50% tool-based learning & 50% Real-time Experience-based learning.A Few Highlights of this course:Create your own 3d projects from scratch to end within a few hoursBe comfortable finding your way around the 3ds Max User interfaceProvide the foundation for starting a career in 3d visualization.Create your own models, materials, and renderings in 3ds MaxUnderstand the concepts of 3d graphics and know how to apply them using 3ds MaxCreate components, Models of a bedroom, hall, kitchen, and AEC industry objects.What is this course all about?3ds Max is an architecture engineering and construction industry-leading 3d software used widely in various different fields of 3d, including video games, film, medical illustration, architectural illustration, animation, industrial design and concept art, etc. Regardless of what field you are in, if you are willing to go into 3d design, modeling and graphics, then this is the best place to start.This course is designed and delivered by industry experts. You can kickstart your 3ds Max Journey, wherein we take you Step by Step with Real-Life Projects and get you up & running to design your favorite design, model, and graphics efficiently, quickly, and in the right way.This course is a perfect hand-holding companion which guides you through various tools within 3ds max coupled with your creative knowledge you can create complex artistic models, thus creating an artistic world around you. Care is taken to start on a very basic level, and progress with complicated techniques.Comprehensive coverage of the essential tools to design a space, components, Bedroom, hall kitchen models, elevations & more. You will learn not only how every tool works but also how to apply it in the right way in your 3ds Max workflow. Exercise files like 3D Models for every lecture & section so you can follow along step by step included in this course.Real-life work examples were included in this course so, you will be able to directly work also in any company/industry. To check the understanding level quizzes were provided at the end of every section. No matter whether you are a Beginner, Intermediate, or in an Advance level candidate this course teaches you everything and clears your doubts.Project-oriented courseThe course lessons are mostly project-oriented and most of the tools and commands are taught with their real-world applications. Each module ends with a practical question that is related to the course and students are encouraged to answer the questions before moving further.Quizzes and Drawings for practiceTo check the understanding level quizzes were provided at the end of every section. And also drawings were provided for practice purposes.Course InstructorMs. Rutuja UbaleInterior DesignerShe worked as an architectural planning engineer and interior designer for residential buildings in Pune. also worked as an architectural trainer.Instructor support for questionsWe understand that students will have questions related to the course and it's necessary also for a healthy learning process hence we encourage students to ask their questions related to the course in the Q&A section of the course. We answer each and every question as soon as possible and so far we have answered every single course-related question from students in the Udemy Q&A section.

Who this course is for
Civil Engineers
Architects
Designers
Space Planner
Interior designers
Furniture designers
Modelers
Beginner to Advanced 3ds max Users
Construction Professionals
Anyone with an interest in 3D design , modeling and rendering in 3ds max


444671417_3ds_max_learn_3d_modeling__interior_designs_from_scratch.jpg


a8dbdda53e545d61a733b63c87c584fa.jpg


Complete Procreate Megacourse: Beginner to Expert (2023)
Published 1/2023
Created by Creativity Unleashed
MP4 | Video: h264, 1280x720 | Audio: AAC, 44.1 KHz, 2 Ch
Genre: eLearning | Language: English | Duration: 61 Lectures ( 30h 13m ) | Size: 21.8 GB


Learn how to create digital art and illustrate like a pro with this step-by-step course!


What you'll learn
How to use Procreate and its tools
The principles of drawing and sketching in Procreate
The principles of illustrations in Procreate
The principles of character design
How to use different brushes
How to sketch out, colour, render and master your art
The basics of animation
How to create 3D models
The theory behind your creative choices

Requirements
No previous knowledge of Procreate required
An iPad
A desire to learn!
A positive attitude!

Description
Learn digital art with Procreate!Draw like a pro!Have you ever wanted to learn how to draw digitally? In the era of digital media, we see thousands of drawings and animations that are actually produced on an iPad. Maybe you already doodle on a piece of paper and have been wanting to take the next step. Whether you re a casual doodler or you want to make a career out of illustration, drawing digitally has been the trend for the last few years. The current tools let you achieve way more than you ever imagined.In this course, you re going to learn everything about digital illustration and some animation in Procreate. You will learn about drawing and sketching as well as canvas settings, brushes, layers, masks, textures and such. You will start and complete a digital illustration piece that you ll be able to export in high-resolution, print it and gladly hang on your wall.Our instructors have years of experience not only in digital art, but also in teaching, and the expertly-crafted syllabus is designed to be easy to follow and thorough. We ve even included plenty of examples designed and drawn on-screen for you to study. That s why this is the only Procreate course you ll ever need to create impeccable digital art and illustrate like a pro!Start digitalizing your art today!

Who this course is for
Anyone who wants to learn to create digital art - no experience needed!
Anyone who wants to draw and sketch on an iPad
Artists who want to learn new styles
Anyone with specialised needs (cartoonists, digital artists, illustrators, animators, graphic designers)


444523746_complete_procreate_megacourse_beginner_to_expert.jpg


01c7bd4b26b752786d17dcad09bcb5f2.jpg


Android App Development Master Course with Java | Android
Last updated 02/2023
Duration: 53h 51m | Video: .MP4, 1280x720 30 fps | Audio: AAC, 48 kHz, 2ch | Size: 29.2 GB
Genre: eLearning | Language: English[Auto]

Android Java | Learn Android App Development java with Android Studio & Java to master your android development skills


What you'll learn
Due to its open-source nature, working with the Android platform necessitates constantly learning about the Android platform. My Android development course.
What is Android Development?Android development is a software creation process that focuses on applications, better known as apps, that are compatible with devi
Android development is a software creation process that focuses on applications, better known as apps, that are compatible with devices running the Android.
This is the most comprehensive Android course. Learn Android app development with practices and build your android development skills.
You can enroll this course if you want to develop advanced Android Applications using web integrated, online database.
The tools you will use for Android development depend on how you would like to focus your career as an Android developer.
Android development is a valuable skill that can help you enhance your career. Android development skills are in-demand around the world with various.
If you are building new Android apps, Kotlin is better suited because it is the recommended programming language for Android.
Proficiency in Java 11
Proficiency in Eclipse
Obtain Core Java skills
Essential Java basics
What Java is and how it works
Programming fundamentals with Java
Java Development Kit - JDK
Java Runtime Environment JRE
Java Virtual Machine - JVM
All concepts of Object-Oriented Programming
How to use static keyword and nested and inner classes
Super Classes and Sub Classes
Wrapper Classes
Throw vs Throws
Exceptions
Enum Types and more
Swing
Android
Learn the most used operating system on the planet
Learn the new version of Android. Here it is: Android 11 (Android R)
Learn Publishing Android App on Google Play
Start from scratch and become a Professional Android App Developer
In this course, we will build 14 different real Android Apps from scratch together
Android applications' levels in this course are from easy to difficult
Learn how to develop modern Android Apps in the simplest way and improve your self-confidence
You will reinforce your existing Android information by applying
Using SQLite database, you will understand how to work with external databases
You will be able to develop Android applications with powerful architecture using Architecture Components (ViewModel, LiveData, Room).
With Firebase, you will be able to develop real-time applications
You will learn how to make a messaging app using Firebase
You will be able to develop user-friendly interfaces using Material Design principles and components
You will be able to develop modern Android apps
This course is built to help beginners to start making applications in Android
You will learn to develop games using Java Programming Language and Android Studio
You will learn to develop applications by getting real-time data from the Internet
You will have 14 different applications that you will publish on Google Play
android app development
android development
android studio
Learn the key concepts of the Git
Learn the entire Git workflow
Learn create branches, resolve conflicts, undoing things etc.
Create and fork repositories on GitHub and push changes back after locally
Learn how to collaborate a GitHub project
java
mobile app development
mobile development
Android app
Android app, android application development
app android
android application development
android app design
android ecommerce app
android game development
java programming
selenium
selenium java
java projects
Android 11

Requirements
We prefered Windows OS (64-bit) but this is not mandatory. You can prefer to use other Operating Systems. We also provided specific videos on installations for each platform
Having a working computer with 8 GB RAM or higher and internet connection
No prior android knowledge is required
No java coding knowledge required
Watching the Android course videos completely, to the end and in order.
Determination to learn Android and patience
Desire to learn Java and Android App Development
Nothing else! It s just you, your computer and your ambition to get started today
No prior knowledge is required for Android Development
No Android coding knowledge required!
Desire to learn Android Application Development

Description
Hi there,Welcome to the "Android App Development Master Course with Java | Android" course.Android Java | Learn Android App Development java with Android Studio & Java to master your android development skills
Due to its open-source nature, working with the Android platform necessitates constantly learning about the Android platform. My Android development course on Udemy keeps you ahead of this learning curve, with hands-on lectures on Android operating systems and more.The Android platform is increasingly popular with developers and a dominant force in the global smartphone market. As more businesses develop mobile apps for customer engagement, Android development skills are likely to stay in high demand.
Do you want to improve your career options by learning android?
Do you want to learn android app development from Scratch?
Do you want to learn android development from Scratch?
Do you want to be an android studio master?
Do you want to build your first app?
Oak Academy s top-rated Java instructors specialize in a wide array of Java programming practices. Whether you need a basic introduction to Java and website building using Selenium WebDriver or are continuing your Android app developer education, Oak Academy has you covered.This is the most comprehensive Android course. Learn Android app development with practice and build your android development skills.I really like the approach of this course about the Android app. It first teaches you Java which is highly important for designing apps in Android. Next, the instructor focuses on the Android SDK to teach you how to build beautiful applications for smartphones. As the course title indicates, it is the complete guide to learn android application development.The Android platform is increasingly popular with developers and a dominant force in the global smartphone market. As more businesses develop mobile apps for customer engagement, Android development skills are likely to stay in high demand.
Android development is a software creation process that focuses on applications, better known as apps, that are compatible with devices running the Android operating system (OS). Because Android is an open-source project, developers have easy access to the Android software development kit (SDK). Many use this kit in conjunction with Kotlin, Java, and C++ programming languages to make their apps. The Android SDK tools compile your code along with any data and resource files into an APK, or Android package, which is an archive file that uses an .apk suffix. One APK file contains all Android app contents used by devices to install your app. When the app is complete and ready for release, Android developers can upload their apps to the Google Play Store for users to download for android game development.
Chances are, you ve heard of Android many times, and Do u want to the android developer? You may even have an Android smartphone, app android tablet, watch, or TV. But what is Android? Android is a mobile operating system (OS) that was designed and developed by Google. The Android OS is Linux kernel-based. So, what s Linux kernel, and why is that such an essential detail about Android Development?
In a nutshell, Linux kernel is an OS, well, sort of it s partially an OS. More like a small part of an OS, but an important one. The Linux kernel is the layer responsible for interfacing with the device s hardware and managing the device s CPU and memory. The Android OS is Linux kernel-based because the Linux kernel allows for a more open and customizable OS, which is what Android promotes any device manufacturer can take the Android OS and make it their own. Imagine how bad it would be if, say, resources from application A read information from another application s files and vice versa with no constraints malicious, insecure interactions would take hold and bring the whole system to a halt.
The sharing of information (data) between applications is an essential part of building inter-connected applications, so the android OS requires developers to set permissions that users must grant to do certain things. For example, for an application to access the phone s File System (internal files), the user must give access first. This means the app developer must let the user know, in advance, what the app they are installing wants to access. For example, when a user installs an android app that needs to access the photo gallery or the phone s camera, the app will ask for permission to access the gallery or the camera. The app user has the power to either grant or denies permission. App permissions in Android ensure the user s protection from malware and software viruses.
This course is built to help beginners to start making applications in android studio and android application development or android app design.
If you want to develop yourself in Android Apps, this course is for you. Improve yourself with different applicationsOnline course platforms have android app development courses and android eCommerce app but we still think that most of them are missing the hands-on application part. This course is designed to fill this gap.
Android is the most used operating system on the planet. In fact, it s almost omnipresent in the mobile ecosystem. With millions of Android devices in use, and an incredible 500,000+ new Android devices activated daily, the popularity of Android applications is increasing exponentially - and with it, the demand for Android mobile application developers is soaring.If you're interested in developing new and innovative applications for the world s mobile platform, this course is a perfect match for you.
This "Android App Development 11 Master Course with Java | Android" course will take you from beginner to advance level.
Our passion is to carry our experience with the right examples to anyone who will enroll in this course. In this course, you will learn Android app development step-by-step. While doing kind of show and tell in our lectures we are also explaining whys. During the lectures, we will be practicing with more than 10 examples and we will be learning to build and publish 14 major apps.
What s important
This course is expertly designed to teach everyone from complete beginners, right through to professionals as a refresher.What is Android Development?Android development is a software creation process that focuses on applications, better known as apps, that are compatible with devices running the Android operating system (OS). Because Android is an open-source project, developers have easy access to the Android software development kit (SDK). Many use this kit in conjunction with Kotlin, Java, and C++ programming languages to make their apps. The Android SDK tools compile your code along with any data and resource files into an APK, or Android package, which is an archive file that uses an .apk suffix. One APK file contains all Android app contents used by devices to install your app. When the app is complete and ready for release, Android developers can upload their apps to the Google Play Store for users to download.What are some of the important tools for Android Development?The tools you will use for Android development depend on how you would like to focus your career as an Android developer. If you plan on focusing on native Android app development, you should know one or more of three programming languages: Java, Kotlin, and C++. Java and Kotlin are popular with a number of organizations that build their app natively. C++ is the popular choice amongst developers who build high-performance games or plan on doing entry-level SDK work. Some employers seek out Android developers that can create multiple platforms at the same time using programming frameworks like Flutter or React Native. If you are working with Flutter, you will also need to know Dart. If you are working with React Native, you will most likely also need JavaScript programming knowledge.Is Android Development a good career?With over 2.5 billion active Android users globally, Android development is a valuable skill that can help you enhance your career. Android development skills are in-demand around the world with various organizations across a broad range of industries. When these organizations build Android apps natively, the top three programming languages are typically Java, Kotlin, and C++. You can also look for a job in Android development that uses cross-platform solutions like Flutter or React Native. Whether you're inspired to add a new language to your repertoire or prepare for an interview, you can find a ton of online resources on sites like OAK Academy to keep your Android skills well-rounded.
Is Kotlin or Java better for Android Development?If you are building new Android apps, Kotlin is better suited because it is the recommended programming language for Android. If you are a first-time programmer, Kotlin android is also a better choice as it has safety features and concise syntax that will help you focus on learning core program fundamentals. You should note that in some cases, employers may seek out Android developers that have Java programming skills. For example, if you plan on joining an organization that already has an Android app, they may already be using Java. If they already have an app written in Java, it is unlikely they will want to redesign the app in a different language, such as android kotlin. Therefore, you should look at the job requirements to see if the job posting you are interested in lists Java as a required skill.
In this course you will learn; Android Environment Setup - Download, install and configure the necessary software
Creating a New Project
Android Studio
Android Components
Components and Life Cycles
Publishing Your App on Google Play and more
You will reinforce your existing android information by applying.
You will learn to develop games using Android Studio
You will learn to develop applications by getting real-time data from the Internet.
Using SQLite database, you will understand how to work with external databases
You will be able to develop applications with powerful architecture using Architecture Components (ViewModel, LiveData, Room).
You will learn how to make a messaging app using Firebase.
With Firebase, you will be able to develop real-time applications
You will be able to develop user-friendly interfaces using Material Design principles and components.
You will be able to develop modern Android apps.
At the end of this course, you have the following apps in the Google Play Store
To-Do List
Math Game
Calculator
Number Guessing Game
My Information Book
Note Take App
Photo Album
Quiz Game
Chat App
Weather App
Flag Quiz
MP3 Player
Balloon Burst Game
Help the Innocent Bird
Why would you want to take this course?
Our answer is simple: The quality of teaching.
OAK Academy based in London is an online education company. OAK Academy gives education in the field of IT, Software, Design, development in Turkish, English, Portuguese, Spanish, and a lot of different languages on the Udemy platform where it has over 1000 hours of video education lessons. OAK Academy both increases its education series number by publishing new courses, and it makes students aware of all the innovations of already published courses by upgrading.
When you enroll, you will feel the OAK Academy`s seasoned developers' expertise.
This course will take you from a beginner to a more experienced level.
We will take you from beginner to advance level. You will learn step-by-step with hands-on demonstrations.
Fresh Content
It s no secret how technology is advancing at a rapid rate. New tools are released every day, Google updates android and it s crucial to stay on top of the latest knowledge. With this course, you will always have a chance to follow the latest trends.
You'll also get
Lifetime Access to The Course
Fast & Friendly Support in the Q&A section
Udemy Certificate of Completion Ready for Download

Dive in now "Android App Development Master Course with Java | Android" course.Android Java | Learn Android App Development java with Android Studio & Java to master your android development skills
We offer full support, answering any questions.

Who this course is for
Beginners with no previous coding of Android App Development experience
Anyone who wants to learn important subjects of Java like Strings, Exceptions, Swing and Enum Types and etc.
Anyone who wants to create desktop applications, web applications, enterprise applications, mobile applications, computer games with Java
Anyone who are planning job transformation and want to become Java developer
Anyone who wants to become a computer programmer like Java
Those who want to develop an Android mobile application
Who wants to improve their existing android knowledge
Those who want to develop applications using the Java programming language
Those who want to develop modern applications and applications with a user-friendly interface
Those who want to develop applications with Firebase Real-Time Database, Architectural Components (View Model, Live Data, Room) and SQLite
Those who are curious about the Android Mobile game World
Those who want to improve their application development skills using Android studio and java programming language
A total beginner, with a curious mind and wants to be an app developer
Anyone planning a job transformation and wants to become an Android developer
Udemy s top-rated Java instructors specialize in a wide array of Java programming practices.
Whether you need a basic introduction to Java and website building using Selenium WebDriver, or are continuing your Android app developer education, Udemy has you covered.


Homepage

444356145_full-android-11-masterclass-course-with-java-53-hours.jpg


354e1780c0cc320fbf5285a873a73e3a.jpg


Laravel 9 - Building a Complete Job Portal Application
Published 1/2023
Created by Morshedul Arefin
MP4 | Video: h264, 1280x720 | Audio: AAC, 44.1 KHz, 2 Ch
Genre: eLearning | Language: English | Duration: 295 Lectures ( 53h 25m ) | Size: 30.7 GB


Learning Laravel fundamentals (A to Z) and developing a complete dynamic multi-user job portal website with Laravel 9


What you'll learn
Laravel 8 or Laravel 9 from scratch
Laravel Fundamentals (A to Z)
Laravel Single and Multi Auth (with Guard) System
Visual Studio Code Editor and Important Plugins
Laravel CRUD option
Laravel Login System
Forget Password and Reset Password System
Email Verification System Logic and Implementation
Contact form email sending
Website logo, favicon and other items setup
Admin profile management
Photo uploading system
Toastr message notification system
Company Profile Management
Company Login and Registration
Candidate Login and Registration
Candidate Profile Management
CV Creation and Uploading System
Pricing Package Management
Advanced Job Searching Option
Uploading Project to Live Server
Candidate Job Apply and Bookmarking System

Requirements
Basic Knowledge in PHP Language
Basic Knowledge in OOP Concept
Knowledge about using local server. Ex: xampp or wampp
Basic knowledge about HTML, CSS and Bootstrap
Basic knowledge about using code editor like Notepad++, Sublime Text or any

Description
In this course, I have taught the students the Laravel framework from scratch. After showing all the basics of Laravel, authentication system, template mastering etc., I have developed a complete job portal web application with the latest version of Laravel, Laravel 9. The persons who are very beginner in Laravel and only have few php and oop idea, they will be benefitted the most from this course. But the advanced persons will also get help from this course, because I have coded following the standard and showed some advanced features. Admin Panel Features:Admin can change the website colorAdmin can change logo, favicon etc. Admin can change header information.Admin can control the home page information. Admin can create, edit and delete blog categories.Admin can create, edit and delete blog posts.Admin can create, edit and delete services.Admin can create, edit and delete portfolios.Admin can create, edit and delete skills.Admin can create, edit and delete education.Admin can create, edit and delete experience.Admin can create, edit and delete testimonials.Admin can create, edit and delete client sections.Admin can create, edit and delete social icons.Admin can control counter section.Admin can control the share and comment section during post.Admin can change his own photo, information and password.

Who this course is for
Persons who want to learn a php framework from scratch
Persons who want to learn making a complete web application from beginning
Persons who are looking for a good job in web development sector
Persons who want to learn making a job portal application with Laravel


444577715_laravel_9_-_building_a_complete_job_portal_application.jpg


9c694dc0d0bc11f6a1143e9ec21a6985.jpg


ETABS: Real Time RCC Building Analysis & Design Projects
Published 1/2023
Created by Bhavanams C2C
MP4 | Video: h264, 1280x720 | Audio: AAC, 44.1 KHz, 2 Ch
Genre: eLearning | Language: English | Duration: 67 Lectures ( 43h 19m ) | Size: 26.8 GB


Analysis & Design of Single story and G+1 and G+5 story buildings As Per IS Codes (Gravity,Earthquake and Wind Loads)


What you'll learn
Workflow Of Modeling And Analysis Of Structure Using Etabs
Getting Started With ETABS
What, Why And When ETABS
Basics Of Structural Analysis
Comparing Etabs Results With Manual Calculations
ETABS User Interface
Discuss File Operations, Edit, View, Define Menu,Draw, Select, Assign, Analyze, Display , Design, Detailing Menu Options
Reading Drawings,Creation Of Grid Points And Generation Of Structure
Defining Properties In Project
Starting Modeling Of Project
Modeling Different Components In Structure
Assigning Of Supports And Joints
Defining Of Loads
Assigning Of Dead Loads
Assigning Of Superimposed Dead Loads (IS 875- PART 1)
Assigning Of Live Loads (IS 875- PART 2)
Wind Manual Calculations (IS 875:2015 - PART 3)
Seismic Manual Calculations (IS 1893:2016 - PART 1)
Assigning Of Seismic Loads (IS 1893:2016 - PART 1)
Run The Analysis
Run The Design (IS 456 : 2000)
Run The Detailing
Essential Basics In Structural Design

Requirements
No prior experience is needed. You will learn everything you need to know.
Interest in structures and ETABS
A computer with either Windows or Mac to install the ETABS 2016 or 2018
A strong work ethic, willingness to learn, and plenty of excitement about the awesome new ETABS Static .
Nothing else! It's just you, your computer and your hunger to get started today.

Description
Major Highlights of The CourseAll lesson files included for downloadSelf-assessment Practice files at the end of every sectionTaught by Industry working professionalExtra practice files and projects at the end of the courseYou will be able to get 50% tool-based learning & 50% Real-time Experience-based learningWhat is this course all about?The innovative and revolutionary new ETABS is the ultimate integrated software package for the structural analysis and design of Buildings. ETABS offers a single-user interface to perform modeling, analysis, design and reporting. There is no limit to the number of model windows, model manipulation views, and data views.Etabs will perform analysis and design of steel frames, concrete frames, concrete slabs, concrete shear walls, composite beams, composite columns, and steel joists can be performed based on Industry standards.This course is designed and delivered by industry experts. You can kickstart your ETABs Journey, wherein we take you Step by Step process with Real-Life Projects and get you up & running to design your favorite design and analysis efficiently, quickly, and in the right way.This course starts with the basics of Structural engineering and ETABS. First, you will be introduced to the user interface, different tools and components available and how to use such as Import, Export, Extensions, Application menu, File operations, Edit, View, Define, Select, Display, Design, and Detailing options.Afterward will start studying plans and drawings to start working with ETABS. Where will be start creating grid points, assigning property, support, load combinations, analysis, design, and running the detailing?Step-by-step instruction for modeling, defining, and assigning different supports and loads. You will learn about manual calculations as per the below IS Codes.Superimposed Dead Loads (IS 875- PART 1)Live Loads (IS 875- PART 2)Wind Calculations (IS 875:2015 - PART 3)Seismic Calculations (IS 1893:2016 - PART 1)Load Combinations (IS 875 - PART 5)RCS Design (IS 456: 2000)This course is a perfect hand-holding companion which guides you through various tools within ETABS coupled with your creative knowledge you can perform design and analysis of complex Structures. Care is taken to start on a very basic level, and progress with complicated techniques.Comprehensive coverage of the essential tools to design, and analyze structures. You will learn not only how every tool works but also how to apply it in the right way in your ETABS design and analysis workflow. Exercise files are provided over every lecture & section so you can follow along step by step included in this course..Real-life work examples were (Single story building analysis and design, G+1 & G+5 story Building design and analysis) included in this course so, you will be able to directly work also in any company/industry. To check the understanding level quizzes were provided at the end of every section. No matter whether you are a Beginner, Intermediate, or in an Advance level candidate this course teaches you everything and clears your doubts.Project-oriented courseThe course lessons are mostly project-oriented and most of the tools and commands are taught with their real-world applications. Each module ends with a practical question that is related to the course and students are encouraged to answer the questions before moving further.Quizzes and Drawings for practiceTo check the understanding level quizzes were provided at the end of every section. And also drawings were provided for practice purposes.Course InstructorMr. Bhavanam SrinivasaReddy MSc Structural EngineeringHe is an experienced structural engineer and currently doing Masters's in Structures in Texas (USA), Completed his bachelor's in Civil engineering at AU. Worked as a Structural engineer dealing with US projects. Worked as an RCC design/detailing engineer for central, state govt & private projects in Vizag. Worked as an Executive engineer for G+15 Storey High-rise Building in Vizag. Worked as a Steel design & detailing engineer in Pune.Instructor support for questionsWe understand that students will have questions related to the course and it's necessary also for a healthy learning process hence we encourage students to ask their questions related to the course in the Q&A section of the course. We answer each and every question as soon as possible and so far we have answered every single course-related question from students in the Udemy Q&A section.If you are still thinking about whether you should enroll or not then we encourage you to watch some of the preview videos and test the waters before you actually enroll in the course.

Who this course is for
Civil Engineers
Structural Engineers
Designers
Modelers
Beginner to Advanced ETABS Users
Construction Professionals
Anyone with an interest in Design,modeling and analysis


444671377_etabs_real_time_rcc_building_analysis__design_projects.jpg


Zurück
Oben Unten