• Regeln für den Video-Bereich:

    In den Börsenbereich gehören nur Angebote die bereits den Allgemeinen Regeln entsprechen.

    Einteilung

    - Folgende Formate gehören in die angegeben Bereiche:
    - Filme: Encodierte Filme von BluRay, DVD, R5, TV, Screener sowie Telesyncs im Format DivX, XviD und x264.
    - DVD: Filme im Format DVD5, DVD9 und HD2DVD.
    - HD: Encodierte Filme mit der Auflösung 720p oder darüber von BluRay, DVD, R5, TV, Screener sowie Telesyncs im Format x264.
    - 3D: Encodierte Filme von BluRay, die in einem 3D Format vorliegen. Dies gilt auch für Dokus, Animation usw.
    - Serien: Cartoon/Zeichentrick, Anime, Tutorials, Dokumentationen, Konzerte/Musik, Sonstiges sind demnach in die entsprechenden Bereiche einzuordnen, auch wenn sie beispielsweise im High Definition-Format oder als DVD5/DVD9/HD2DVD vorliegen. Ausnahme 3D.
    - Bereich Englisch: Englische Releases gehören immer in diesen Bereich.
    - Bereich Talk: Der Bereich, in dem über die Releases diskutiert werden kann, darf, soll und erwünscht ist.


    Angebot/Beitrag erstellen

    - Ein Beitrag darf erst dann erstellt werden, wenn der Upload bei mindestens einem OCH komplett ist. Platzhalter sind untersagt.
    - Bei einem Scenerelease hat der Threadtitel ausschließlich aus dem originalen, unveränderten Releasenamen zu bestehen. Es dürfen keine Veränderungen wie z.B. Sterne, kleine Buchstaben o.ä. vorgenommen werden. Ausnahme Serienbörse:
    - Bei einem Sammelthread für eine Staffel entfällt aus dem Releasename natürlich der Name der Folge. Beispiel: Die Simpsons S21 German DVDRip XviD - ITG
    - Dementsprechend sind also u.a. verboten: Erweiterungen wie "Tipp", "empfehlenswert", "only", "reup", usw. / jegliche andere Zusatzinformation oder Ergänzung, welche nicht in obiger Beschreibung zu finden ist.

    Aufbau des Angebots und Threadtitel

    Der Titel nach folgendem Muster erstellt zu werden. <Name> [3D] [Staffel] [German] <Jahr> <Tonspur> [DL] [Auflösung] <Quelle> <Codec> - <Group>
    Beispiel: The Dark Knight German 2008 AC3 DVDRip XviD - iND
    Beispiel: The Dark Knight 2008 DTS DL BDRip x264 - iND
    Beispiel: The Dark Knight 2008 AC3 DL BDRip XviD - iND
    Beispiel: The Dark Knight German 2008 AC3 720p BluRay x264 iND
    Beispiel: The Dark Knight 2008 DTS DL 1080p BluRay x264 iND
    Beispiel: Die Simpsons S01 German AC3 DVDRip XviD iND
    Beispiel: Die Simpsons S20 German AC3 720p BluRay x264 iND
    Beispiel: Sword Art Online II Ger Sub 2014 AAC 1080p WEBRip x264 - peppermint
    Entsprechend sind also u.a. verboten: Sonderzeichen wie Klammern, Sterne, Ausrufezeichen, Unterstriche, Anführungszeichen / Erweiterungen wie "Tipp", "empfehlenswert", "only", "reup", usw. / jegliche andere Zusatzinformation oder Ergänzung, welche nicht in obiger Beschreibung zu finden ist
    Ausnahmen hiervon können in den Bereichen geregelt sein.

    Die Beiträge sollen wie folgt aufgebaut werden:
    Überschrift entspricht dem Threadtitel
    Cover
    kurze Inhaltsbeschreibung
    Format, Größe, Dauer sind gut lesbar für Downloader außerhalb des Spoilers zu vermerken
    Nfo sind immer Anzugeben und selbige immer im Spoiler in Textform.
    Sind keine Nfo vorhanden z.B. Eigenpublikationen, sind im Spoiler folgende Dateiinformationen zusätzlich anzugeben :
    Quelle
    Video (Auflösung und Bitrate)
    Ton (Sprache, Format und Bitrate der einzelnen Spuren)
    Untertitel (sofern vorhanden)
    Hosterangabe in Textform außerhalb eines Spoiler mit allen enthaltenen Hostern.
    Bei SD kann auf diese zusätzlichen Dateiinformationen verzichtet werden.

    Alle benötigten Passwörter sind, sofern vorhanden, in Textform im Angebot anzugeben.
    Spoiler im Spoiler mit Kommentaren :"Schon Bedankt?" sind unerwünscht.


    Releases

    - Sind Retail-Release verfügbar, sind alle anderen Variationen untersagt. Ausnahmen: Alle deutschen Retail-Release sind CUT, in diesem Fall sind dubbed UNCUT-Release zulässig.
    - Im Serien-Bereich gilt speziell: Wenn ein Retail vor Abschluss einer laufenden Staffel erscheint, darf diese Staffel noch zu Ende gebracht werden.62
    - Gleiche Releases sind unbedingt zusammenzufassen. Das bedeutet, es ist zwingend erforderlich, vor dem Erstellen eines Themas per Suchfunktion zu überprüfen, ob bereits ein Beitrag mit demselben Release besteht. Ist dies der Fall, ist der bereits vorhandene Beitrag zu verwenden.
    - P2P und Scene Releases dürfen nicht verändert oder gar unter einem iND Tag eingestellt werden.


    Support, Diskussionen und Suche

    - Supportanfragen sind entweder per PN oder im Bereich Talk zu stellen.
    - Diskussionen und Bewertungen sind im Talk Bereich zu führen. Fragen an die Uploader haben ausschließlich via PN zu erfolgen, und sind in den Angeboten untersagt.
    - Anfragen zu Upload-Wünschen sind nur im Bereich Suche Video erlaubt. Antworten dürfen nur auf Angebote von MyBoerse.bz verlinkt werden.


    Verbote

    - Untersagt sind mehrere Formate in einem einzigen Angebotsthread, wie beispielsweise das gleichzeitige Anbieten von DivX/XviD, 720p und 1080p in einem Thread. Pro Format, Release und Auflösung ist ein eigener Thread zu eröffnen.
    - Grundsätzlich ebenso verboten sind Dupes. Uploader haben sich an geeigneter Stelle darüber zu informieren, ob es sich bei einem Release um ein Dupe handelt.
    - Gefakte, nur teilweise lauffähige oder unvollständige Angebote sind untersagt. Dies gilt auch für eigene Publikationen, die augenscheinlich nicht selbst von z.B. einer DVD gerippt wurden. Laufende Serien, bei denen noch nicht alle Folgen verfügbar sind, dürfen erstellt und regelmäßig geupdatet werden.
    - Untersagt sind Angebote, welche nur und ausschließlich in einer anderen Sprache als deutsch oder englisch vorliegen. Ausnahmen sind VORHER mit den Moderatoren zu klären.


    Verstoß gegen die Regeln

    - Angebote oder Beiträge, die gegen die Forenregeln verstoßen, sind über den "Melden"-Button im Beitrag zu melden.
  • Bitte registriere dich zunächst um Beiträge zu verfassen und externe Links aufzurufen.

*** Bestes IPTV *** bester Preis *** gratis Test ***


Englische Tutorials

f75a2ab79551940021100200faaefda8.jpg


Complete CSS Megacourse: Beginner to Expert
Published 6/2023
Created by Creativity Unleashed
MP4 | Video: h264, 1280x720 | Audio: AAC, 44.1 KHz, 2 Ch
Genre: eLearning | Language: English | Duration: 162 Lectures ( 55h 10m ) | Size: 27.3 GB


Learn how to master CSS and create stunning web designs with this project-based course!


What you'll learn
The basics of CSS, including selectors, properties and values
The UI Design rules to make your web design attractive
Basic principles of animation in CSS
Then main shortcuts in CSS to make your work more efficient
How to apply CSS to create stunning web designs
Learn different best practices for CSS application in different industries
Gain and improve your CSS coding skills
How to create responsive web designs for mobile and desktop applications
How to design and develop unique user- interactive web pages and web applications
Understand advanced CSS layouts, including normal flow, floats, positioning, and multiple-column layouts
Learn the principles and concepts of CSS grids, including grid boxes and advanced grid layouts
Deep dive into the properties and concepts of CSS Flexbox for flexible and responsive layouts

Requirements
No previous knowledge of CSS required
A desire to learn!
A positive attitude!

Description
Learn CSS Fundamentals for Beautiful Web Designs!Design like a pro!Have you ever wanted to create stunning websites and web applications that look beautiful and function flawlessly? In the modern era of technology, having a strong understanding of web development is crucial, and that s where Cascading Style Sheets, or CSS, comes in. CSS is the tool that allows us to control the layout, typography, and visual styling of web pages. Whether you are building a personal website or working on a complex web application, a solid understanding of CSS is crucial to your success as a developer, and we re here to teach you everything about it.In this course, we will guide you through the fundamentals of CSS, including selectors, box model, positioning, layout, and responsive design. You will also learn how to work with CSS grids, Flexbox and Styling Tables.You will even be able to create reference tools that you can use in the future to help you remember and quickly access CSS information. By the end of this course, you'll have a portfolio that showcases your skills and demonstrates your abilities to potential employers or clients.Our instructors have years of experience not only in web development, but also in teaching, and the expertly- crafted syllabus is designed to be easy to follow and thorough. We ve evenincluded plenty of projects and digital content for you to study. That s why this is the only CSS course you'll ever need to make your web content effective and visually appealing.Start creating beautiful web designs today!After taking this course, you will be able to:Work professionally with CSSCreate visually appealing and responsive web designsFind creative solutions to design problems and create standout web contentOptimize web page performance and accessibility with CSSCollaborate with other web developers and designers using CSS frameworks and librariesDevelop your own CSS code style and workflow for efficient web developmentUse advanced CSS techniques, such as animations and transitionsConstruct complex grid-based layouts using CSS Grid, including masonry grids and the Holy Grail layoutLeverage the power of SASS to write clean and efficient CSS code, utilizing variables, nesting, mixins, and more

Who this course is for
Anyone who wants to learn web development and programming - no experience needed!
Web developers who want to learn CSS
Anyone who has started working with CSS, but wants to advance their skills and create stunning web designs


442427239_complete_css_megacourse_beginner_to_expert.jpg


86c8a55ec693fc92099db7da645b76f6.jpg


100 Days of Code: The Complete Python Pro Bootcamp for 2023
Last updated 1/2024
MP4 | Video: h264, 1280x720 | Audio: AAC, 44.1 KHz, 2 Ch Language: English | Duration: 57h 59m | Size: 25.3 GB

Master Python by building 100 projects in 100 days. Learn data science, automation, build websites, games and apps!


What you'll learn
You will master the Python programming language by building 100 unique projects over 100 days.
You will learn automation, game, app and web development, data science and machine learning all using Python.
You will be able to program in Python professionally
You will learn Selenium, Beautiful Soup, Request, Flask, Pandas, NumPy, Scikit Learn, Plotly, and Matplotlib.
Create a portfolio of 100 Python projects to apply for developer jobs
Be able to build fully fledged websites and web apps with Python
Be able to use Python for data science and machine learning
Build games like Blackjack, Pong and Snake using Python
Build GUIs and Desktop applications with Python


Requirements
No programming experience needed - I'll teach you everything you need to know
A Mac or PC computer with access to the internet
No paid software required - I'll teach you how to use PyCharm, Jupyter Notebooks and Google Colab
I'll walk you through, step-by-step how to get all the software installed and set up


Description
Welcome to the 100 Days of Code - The Complete Python Pro Bootcamp, the only course you need to learn to code with Python. With over 500,000 5 STAR reviews and a 4.8 average, my courses are some of the HIGHEST RATED courses in the history of Udemy!

100 days, 1 hour per day, learn to build 1 project per day, this is how you master Python.

At 60+ hours, this Python course is without a doubt the most comprehensive Python course available anywhere online. Even if you have zero programming experience, this course will take you from beginner to professional. Here's why

The course is taught by the lead instructor at the App Brewery, London's best in-person programming Bootcamp.

The course has been updated to be 2023 ready and you'll be learning the latest tools and technologies used at large companies such as Apple, Google and Netflix.

This course doesn't cut any corners, there are beautiful animated explanation videos and tens of real-world projects which you will get to build. e.g. Tinder auto swiper, Snake game, Blog Website, LinkedIn Auto Submit Job Application

The curriculum was developed over a period of 2 years, with comprehensive student testing and feedback.

We've taught over 600,000 students how to code and many have gone on to change their lives by becoming professional developers or starting their own tech startup.

You'll save yourself over $12,000 by enrolling, and still get access to the same teaching materials and learn from the same instructor and curriculum as our in-person programming Bootcamp.

The course is constantly updated with new content, with new projects and modules determined by students - that's you!

We'll take you step-by-step through engaging video tutorials and teach you everything you need to know to succeed as a Python developer.

The course includes over 65 hours of HD video tutorials and builds your programming knowledge while making real-world Python projects.

Throughout this comprehensive course, we cover a massive amount of tools and technologies, including

Python 3 - the latest version of Python

PyCharm, Jupyter Notebook, Google Colab

Python Scripting and Automation

Python Game Development

Web Scraping

Beautiful Soup

Selenium Web Driver

Request

WTForms

Data Science

Pandas

NumPy

Matplotlib

Plotly

Scikit learn

Seaborn

Turtle

Python GUI Desktop App Development

Tkinter

Front-End Web Development

HTML 5

CSS 3

Bootstrap 4

Bash Command Line

Git, GitHub and Version Control

Backend Web Development

Flask

REST

APIs

Databases

SQL

SQLite

PostgreSQL

Authentication

Web Design

Deployment with GitHub Pages, Heroku and GUnicorn

and much much more!

By the end of this course, you will be fluently programming in Python and you'll be so good at Python that you can get a job or use the language professionally.

You'll also build a portfolio of 100 projects that you can show off to any potential employer. Including

Blackjack

Snake Game

Pong Game

Auto Swipe on Tinder

Auto Job Applications on LinkedIn

Automate Birthday Emails/SMS

Fully Fledged Blog Website

Build Your Own Public API

Data Science with Google Trends

Analysing Lego Datasets

Google App Store Analysis

and much much more!

Sign up today, and look forward to

Video Lectures

Code Challenges and Exercises

Fully Fledged Projects

Quizzes

Programming Resources and Cheatsheets

Downloads

Our best selling 12 Rules to Learn to Code eBook

$12,000+ Python Pro Bootcamp course materials and curriculum

Don't just take my word for it, check out what existing students have to say about my courses

"Angela is just incredible, awesome and just fantastic in this course. I've never had such an instructor; detailed in every aspect of the course, gives precise explanations, gives you the anxiety to learn etc. She's got that ability to make fun while explaining things for better understanding. I really love this course." - Ekeu MonkamUlrich

"Angela is very thorough without ever being boring. I've taken MANY online courses in my life including my Bachelors and Masters degrees. She is by far the best instructor I've ever had. This course is packed with thousands of dollars worth of great instruction, and paced well enough for anyone to pick coding up and run with it- Thank you!" - J Carlucci

"Love the way Angela explains things. Easy to follow and full of logic. I can say she must spend a lot of energy creating this great course. Thank you and I recommend it to all who's interested in coding!" - Yiqing Zheng

"So far (on my third day) this course has taught me more than I was able to learn in multiple other programming courses. This course is clearly outlined and builds upon itself gradually in an easy to understand way." - Normal Ramsey

"It's a different approach to teaching Web Development. I like that you are given everything possible to succeed from the onset." - Ronick Thomas

The tutor is simply AMAZING, by far the best tutor I have ever had. I would give her 10 stars out of 5. She is not just punching the code and talking to herself, but she is actually explaining things. She keeps on giving really useful hints and she will give you a great load of other references. I always knew what I was doing and why I was doing it. All the extra challenges have just made me remember and understand things better. - Peter Dlugos

REMEMBER I'm so confident that you'll love this course that we're offering a FULL money-back guarantee for 30 days! So it's a complete no-brainer, sign up today with ZERO risk and EVERYTHING to gain.

So what are you waiting for? Click the buy now button and join the world's highest-rated development course.

Who this course is for
If you want to learn to code from scratch through building fun and useful projects, then take this course.
If you want to start your own startup by building your own websites and web apps.
If you are a complete beginner then this course will be everything you need to become a Python professional
If you are a seasoned programmer wanting to switch to Python then this is the quickest way. Learn through coding projects.
If you are an intermediate Python programmer then you know 100 days of code challenges will help you level up.


Homepage

442098582_100_days_of_code_the_complete_python_pro_bootcamp.jpg


aeee2108adaa572e35f72ee9b287df33.jpg


BIM- Revit Architecture- Full Course- From Zero to Advanced
Published 4/2023
Created by Amir Karami
MP4 | Video: h264, 1280x720 | Audio: AAC, 44.1 KHz, 2 Ch
Genre: eLearning | Language: English | Duration: 147 Lectures ( 44h 48m ) | Size: 31 GB


Master Revit and Become a BIM Expert for Architects and BIM Modelers (Building Information Modeling)


What you'll learn
Master the BIM Process and Learn Revit from Zero
Essential Drawing and Editing Tools in Autodesk Revit
Floors, Walls, and Ceilings in Revit
Technical Connections, Insulations, and Details
Executive Stairs and Drawing All Types of Ramps
Curtain Walls and Designing Partitions
Sloped Roofs and Ramp Drawing Techniques
Importing AutoCAD Drawings into Revit
Steel and Concrete Structures in Revit
Integrating Disciplines of Structure, Architecture, and MEP
Topography and Landscaping for Site Planning and Design
Objects and Furniture with Model in Place
Facade Construction with Reveal and Sweep Tools
Annotation, Tagging, and Grouping
Conditional Writing in Meter Tables
Sheets and Print for Professional Presentations
Complex Shells with Mass

Requirements
Nothing

Description
Are you looking to learn Revit and become an expert in BIM (Building Information Modeling)?Do you want to gain a competitive edge in your career by learning advanced modeling techniques?Divided into small, easy-to-follow parts, this project-based training will guide you through the BIM process and teach you all the essential drawing and editing tools in Autodesk Revit. You'll learn how to define floors, draw walls and ceilings, and check technical connections, insulations, and details. You'll also discover advanced techniques for modeling different types of stairs, curtain walls, partitions, and roofs, as well as steel and concrete structures.But this course is not just about tools and instructions - it's also about sharing real-world experiences and solutions to common problems. You'll learn tricks and shortcuts that will give you a competitive advantage in your career, and you'll have the confidence to take on any project or challenge.Here are just some of the topics covered in this course:The BIM process and its importanceDefining floors and drawing walls and ceilingsModeling different types of stairs and rampsDesigning curtain walls, partitions, and roofsModeling steel and concrete structures, trusses, braces, and rebarsIntegrating disciplines of structure, architecture, and MEPTopography and landscapingCreating special objects and furnitureAnnotation, tagging, and groupingView templates, stair and wet area layouts, and conditional writingModeling complex shells and facadesPlus, you'll learn about families, how to prepare a dedicated library of required objects, and how to prepare special sheets and prints.With lifetime access to the course, you'll be able to learn at your own pace and revisit topics as needed. And with a dedicated support team, you'll have the help you need to master Revit and take your career to the next level.Enroll now and start your journey to becoming a Revit expert!

Who this course is for
BIM Modelers
BIM Coordinators
BIM Managers
Revit Users
Architects
Project Managers


443253109_bim-_revit_architecture-_full_course-_from_zero_to_advanced.jpg


23b3c47f601f69773985d1b7341ac5b6.jpg


The Complete 2024 Web Development Bootcamp
Last updated 1/2024
MP4 | Video: h264, 1280x720 | Audio: AAC, 44.1 KHz, 2 Ch Language: English | Duration: 62h 11m | Size: 31.6 GB

Become a Full-Stack Web Developer with just ONE course. HTML, CSS, Javascript, Node, React, MongoDB, Web3 and DApps


What you'll learn
Build 16 web development projects for your portfolio, ready to apply for junior developer jobs.
Learn the latest technologies, including Javascript, React, Node and even Web3 development.
After the course you will be able to build ANY website you want.
Build fully-fledged websites and web apps for your startup or business.
Work as a freelance web developer.
Master frontend development with React
Master backend development with Node
Learn professional developer best practices.

Requirements
No programming experience needed - I'll teach you everything you need to know
A computer with access to the internet
No paid software required
I'll walk you through, step-by-step how to get all the software installed and set up

Description
Welcome to the Complete Web Development Bootcamp, the only course you need to learn to code and become a full-stack web developer. With 150,000+ ratings and a 4.8 average, my Web Development course is one of the HIGHEST RATED courses in the history of Udemy!

At 65+ hours, this Web Development course is without a doubt the most comprehensive web development course available online. Even if you have zero programming experience, this course will take you from beginner to mastery. Here's why

The course is taught by the lead instructor at the App Brewery, London's leading in-person programming bootcamp.

The course has been updated to be 2023 ready and you'll be learning the latest tools and technologies used at large companies such as Apple, Google and Netflix.

This course doesn't cut any corners, there are beautiful animated explanation videos and tens of real-world projects which you will get to build.

The curriculum was developed over a period of four years, with comprehensive student testing and feedback.

We've taught over a million students how to code and many have gone on to change their lives by becoming professional developers or starting their own tech startup.

You'll save yourself over $12,000 by enrolling, but still get access to the same teaching materials and learn from the same instructor and curriculum as our in-person programming bootcamp.

The course is constantly updated with new content, with new projects and modules determined by students - that's you!

We'll take you step-by-step through engaging video tutorials and teach you everything you need to know to succeed as a web developer.

The course includes over 65 hours of HD video tutorials and builds your programming knowledge while making real-world websites and web apps.

Throughout this comprehensive course, we cover a massive amount of tools and technologies, including

Front-End Web Development

HTML 5

CSS 3

Flexbox

Grid

Bootstrap 5

Javascript ES6

DOM Manipulation

jQuery

Bash Command Line

Git, GitHub and Version Control

Backend Web Development

Node.js

NPM

Express.js

EJS

REST

APIs

Databases

SQL

MongoDB

Mongoose

Authentication

Firebase

React.js

React Hooks

Web Design

Deployment with GitHub Pages, Heroku and MongoDB Atlas

Web3 Development on the Internet Computer

Blockchain technology

Token contract development

NFT minting, buying and selling logic

By the end of this course, you will be fluently programming and be ready to make any website you can dream of.

You'll also build a portfolio of over 32+ websites that you can show off to any potential employer.

Sign up today, and look forward to

Animated Video Lectures

Code Challenges and Coding Exercises

Beautiful Real-World Projects

Quizzes & Practice Tests

Downloadable Programming Resources and Cheatsheets

Our best selling 12 Rules to Learn to Code eBook

$12,000+ worth of web development bootcamp course materials and course curriculum

Don't just take my word for it, check out what existing students have to say about the course

"Angela is just incredible, awesome and just fantastic in this course. I've never had such an instructor; detailed in every aspect of the course, gives precise explanations, gives you the anxiety to learn etc. She's got that ability to make fun while explaining things for better understanding. I really love this course." - Ekeu MonkamUlrich

"Angela is very thorough without ever being boring. I've taken MANY online courses in my life including my Bachelors and Masters degrees. She is by far the best instructor I've ever had. This course is packed with thousands of dollars worth of great instruction, and paced well enough for anyone to pick coding up and run with it- Thank you!" - J Carlucci

"Love the way Angela explains things. Easy to follow and full of logic. I can say she must have spent a lot of energy creating this great course. Thank you and I recommend it to all who's interested in coding!" - Yiqing Zheng

"So far (on my third day) this course has taught me more than I was able to learn in multiple other programming courses. This course is clearly outlined and builds upon itself gradually in an easy to understand way." - Normal Ramsey

"This course will take you from beginner to intermediate level for real. If you don't know how to put together the pieces of web development this is what you're looking for. Angela explains in an amazing way by creating projects all the way during this course, explaining the concepts in real practice. Thank you very much, Angela. I will always consider you my mentor. Look forward to taking more courses with you." - Moises Dionisio Cruz

"An amazing course, perfect for absolute beginners at the start of their coding journey! Angela is an amazing tutor and can explain in the most simple and comprehensible way even complex coding notions. Learning web development cannot get any more fun!" - Zoe Moyssoglou

"It's a different approach to teaching Web Development. I like that you are given everything possible to succeed from the onset." - Ronick Thomas

The tutor is simply AMAZING, by far the best tutor I have ever had. I would give her 10 stars out of 5. She is not just punching the code and talking to herself, but she is actually explaining things. She keeps on giving really useful hints and she will give you a great load of other references. I always knew what I was doing and why I was doing it. All the extra challenges have just made me remember and understand things better. - Peter Dlugos

REMEMBER I'm so confident that you'll love this course that we're offering a FULL money-back guarantee for 30 days! So it's a complete no-brainer, sign up today with ZERO risk and EVERYTHING to gain.

So what are you waiting for? Click the buy now button and join the world's highest-rated web development course.

Who this course is for
If you want to learn to code through building fun and useful projects, then take this course.
If you want to start your own startup by building your own websites and web apps.
If you are a seasoned programmer, then take this course to to get up to speed quickly with the latest frameworks and NodeJS
If you want to take ONE COURSE and learn everything you need to know about web development, take this course


Homepage

442710940_the_complete_2024_web_development_bootcamp.jpg


132657babb6bcbdab9c78caf3b574fd0.jpg


Learn Complete Python In Simple Way
Last updated 3/2020
MP4 | Video: h264, 1280x720 | Audio: AAC, 44.1 KHz, 2 Ch Language: English | Duration: 114h 13m | Size: 139 GB

Direct Class Room Videos To give Left & Right Anywhere about Python 3 Concepts In Detail From Beginner to Expert Level


What you'll learn
Student can get much perfection on Complete Python concepts and in a position to develop applications

Requirements
No prerequisite. It's desirable to have some minimum basic knowledge of ENGLISH Language.

Description
As the part of this course the following topics covered in detail.

1. Language Fundamentals

2. Operators

3. Input and Output Statements

4. Flow Control

5. Pattern Applications

6. Strings

7. 20+ Applications on String Concept

8. List Data Structure

9. Tuple Data Structure

10. Set Data Structure

11. Dictionary Data Structure

12. Functions

13. Modules

14. Packages

15. Object Oriented Programming (OOPs)

16. Exception Handling

17. Logging Module

18. Assertions

19. File Handling

20. Object Serialization By using PICKLE, JSON and YAML

21. Decorators

22. Generators

Who this course is for
Anyone looking to Learn Python Language In detail
Anyone looking to clear Python Interviews
Anyone looking to clear Python Certification
Anyone to get perfection on day to day coding requirements on Python Concepts


Homepage

442937729_learn_complete_python_in_simple_way.jpg


03a626b78e8c812599e40d964347ccfe.jpg


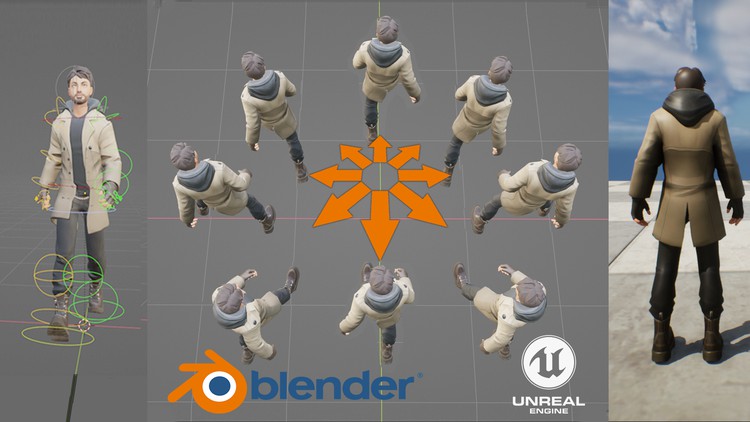
Complete game animators pipeline from Blender to engine
Last updated 10/2023
Created by Hamish Calthorpe
MP4 | Video: h264, 1280x720 | Audio: AAC, 44.1 KHz, 2 Ch
Genre: eLearning | Language: English + srt | Duration: 105 Lectures ( 30h 7m ) | Size: 29.2 GB


Make and take a professional game ready character rig, and a full set of hand keyed movement animations into engine.


What you'll learn
The complete game character animation pipeline from Blender to Unreal
How to make professional complete game ready animation sets for an in game character.
Create a professional game ready animation rig from scratch.
Tips and tricks on creating better walk cycles, and using animation layers to build up compeling movment.
How to set up animation graphs, blend states and more in Unreal engine 5
Create a game ready character that can walk, run, jump, strafe and more!
Learn the correct way to set up a character rig, and correct export and import settings from Blender to Unreal engine.

Requirements
No experience needed. Follow along and create the animations from scratch, or use the included animation files, and learn the theory of creating a full set of game ready animations and how to set them up in an animation graph in Unreal Engine 5.
All software needed for the course (Blender and Unreal engine 5) can be downloaded for free, and the included character mesh and animation files means everything is included to complete the course. If you have never done animation before, the course will guide you through each step, in easy to follow sections.

Description
This course was created to help students or anybody learn the full game animators pipeline from Blender to Unreal. You will learn how to create a professional custom animation rig, and animate by hand, a full set of idle, transition and movement animations, and how to export correctly, and bring them all into the Unreal engine. From there you will learn how to set up an animation graph and character blueprint, and create a custom character controller that will allow you to walk, run, crouch, jump and more. No experience required, the full process is walked through in easy to follow steps broken down into logical sections, each building on the last, with lots of tips and tricks to make your animations work correctly as a complete set as used in a modern AAA game.No coding knowledge is required as everything will be created in Unreal's blueprint system using nodes, just simply follow along and build up the character controller bit by bit, and by the end of the course, you will have a fully playable character that can move around the game world, with the satisfaction and knowledge that you created the whole thing from scratch. So lets get started!

Who this course is for
Beginner game developers interested in learning how to create professional game ready character animations, and how to implement them into a game engine.
Students wanting to get a better understanding of the full pipeline required for a games animator.


443270623_complete_game_animators_pipeline_from_blender_to_engine.jpg


231ef15e779a18c6e7c75b7204d54981.jpg


Blender: Creating Jeep Gladiator Rubicon From A To Z
Published 4/2023
MP4 | Video: h264, 1280x720 | Audio: AAC, 44.1 KHz
Language: English | Size: 82.66 GB | Duration: 87h 4m

Learn Step by Step how Creating a Realistic Jeep Gladiator in Blender From Start to Finish With Marwan Hussein


What you'll learn
How to create a complex 3D model of the Jeep Gladiator using Blender.
Techniques for modeling realistic details and textures, such as the wheels, grill, and headlights.
How to create and apply realistic materials to your 3D model, including metal, plastic, and glass.
Tips for lighting and rendering your model to create stunning, photorealistic images.
Best practices for working with Blender's 3D modeling tools and user interface.
How to use efficient and streamlined methods to create complex objects with ease.
Advanced 3D modeling techniques and workflows that can be applied to other projects.

Requirements
A basic understanding of Blender's user interface and 3D modeling tools. Students should have some experience with the software before taking this course.
Familiarity with 3D modeling concepts and terminology, such as polygons, vertices, and UV mapping.
Access to a computer that can run Blender (version 2.8 or later recommended) and a stable internet connection to access the course materials.
A passion for 3D modeling and a desire to learn new techniques and workflows.
A willingness to put in time and effort to practice and apply the concepts covered in the course.

Description
Welcome to the Jeep Gladiator 3D Modeling Course, created by Marwan Hussein, a highly experienced 3D artist and teacher with over 10 years of experience in the field. In this comprehensive course, you will learn how to create a stunning 3D model of the Jeep Gladiator from scratch, using the powerful 3D modeling software Blender.Designed for intermediate to advanced users, this course is perfect for 3D artists and enthusiasts who are looking to take their skills to the next level. With over 200 video tutorials, you'll learn all the important modeling techniques needed to create a complex object like the Jeep Gladiator, including how to use simple methods to achieve stunning results.Through this course, you'll gain valuable insights into the 3D modeling process, from creating basic shapes to adding details and creating realistic materials. You'll also learn how to render your model to create stunning, photorealistic images.The course includes all the necessary files you need to get started on your 3D modeling journey, and it's taught in an engaging and easy-to-follow manner by Marwan Hussein himself. By the end of the course, you'll have a deep understanding of 3D modeling, and you'll be able to create your own amazing 3D models with ease.Don't miss out on this opportunity to take your 3D modeling skills to the next level. Enroll in the Jeep Gladiator 3D Modeling Course today!

Overview
Section 1: Introduction

Lecture 1 Introduction

Lecture 2 Before you start

Section 2: Modeling

Lecture 3 003_Adding The Reference Images

Lecture 4 004_Creating the Grilles with the head lights

Lecture 5 005_Adding the inner rims of the grilles and the pattern

Lecture 6 006_Creating the headlight details part 1

Lecture 7 007_Creating the headlight details part 2

Lecture 8 008_Completing the headlight and starting with the fender

Lecture 9 009_Creating the fender base

Lecture 10 010_Modeling the Hood

Lecture 11 011_Modeling the Hood part 2

Lecture 12 012_Fixing some issues with the Hood

Lecture 13 013_Modeling the Hood Vents

Lecture 14 014_Starting with the front Bumper

Lecture 15 015_Starting with the front Bumper part 2

Lecture 16 016_Optional video to watch ( fixing some issues with the Bumper )

Lecture 17 017_Creating the Bumber lights cover

Lecture 18 018_Creating the bumper front cover and give it a thickness

Lecture 19 019_Bending the bumper and creating the Hook

Lecture 20 020_Creating a cover behind the bumper

Lecture 21 021_Creating the bumper's bottom cover

Lecture 22 022_Starting with the fender

Lecture 23 023_Creating the Fender cover

Lecture 24 024_Adding details for the Fender cover

Lecture 25 025_Using Shrinkwrap modifier to fix the fender's shading issue

Lecture 26 026_Finishing the Fender frame

Lecture 27 027_Starting with Fender front light

Lecture 28 028_Finishing the back buckets of the light

Lecture 29 029_Creating the reflector light

Lecture 30 030_Creating fender vents

Lecture 31 031_Creating the fender vents pattern

Lecture 32 032_Making some tweaks for the fender

Lecture 33 033_Starting with the top area of the Fender

Lecture 34 034_Creating the windshield base panel

Lecture 35 035_Creating the wiper base panel

Lecture 36 036_Creating the Wiper base hatch

Lecture 37 037_Modeling the wiper panel

Lecture 38 038_Modeling the wiper panel part 2

Lecture 39 039_Finishing the modeling of the wipers panel

Lecture 40 040_Creating pattern for the wipers panel

Lecture 41 041_Creating the Hood Hinge

Lecture 42 042_Shrinkwrap the Hood hinge on the hood and creating the head screw

Lecture 43 043_Creating the windshield hold down rubber

Lecture 44 044_Starting with the Hood Latch part 1

Lecture 45 045_Finishing the Hood Latch

Lecture 46 046_making some changes for the Hood and the Hood latch

Lecture 47 047_Putting the Hood Latch in place and use Data Transfer to fix the shading pro

Lecture 48 048_Starting with the windshield

Lecture 49 049_Completing the frame and creating the windshield glass

Lecture 50 050_Creating the doors panel

Lecture 51 051_Starting with the front door

Lecture 52 052_Starting with the door part 2

Lecture 53 053_Modeling the front door part 3

Lecture 54 054_Modeling the Handle and the door hinges bases

Lecture 55 055_Creating and editing the door hinges

Lecture 56 056_Creating the door handle

Lecture 57 057_Modeling the door lock and the handle pad

Lecture 58 058_Focusing on the back side of the cabin

Lecture 59 059_Modeling the rear windshield frame

Lecture 60 060_Creating the rear windshield rubber frame with the small middle window

Lecture 61 061_Completing the rear side of the cabin

Lecture 62 062_Starting with the rear left door

Lecture 63 063_Fixing some shading issues and creating the door hinges bases

Lecture 64 064_Finishing the doors

Lecture 65 065_Starting with the roof

Lecture 66 066_Starting with the roof part 2

Lecture 67 067_Adding Bevel to the sharp edges and creating the top panels

Lecture 68 068_Adding panels for the front side of the roof

Lecture 69 069_Creating the front door glass and the rubber frame

Lecture 70 070_Creating the Back driver side door's glass and rubber frame

Lecture 71 071_Starting with the truck bed

Lecture 72 072_Starting with the truck bed part 1

Lecture 73 073_Adding a bevel modifier to the truck bed and fix all the shading issues

Lecture 74 074_Starting with the rear fender

Lecture 75 075_Starting with the rear fender part 2

Lecture 76 076_Starting with truck bed door

Lecture 77 077_Creating the truck bed door handle

Lecture 78 078_Starting with the rear bumper part 1

Lecture 79 079_Modeling the rear bumper part 2

Lecture 80 080_Creating the foot step of the rear bumper

Lecture 81 081_Creating the foot step pattern

Lecture 82 082_Modeling the rear bumper hook

Lecture 83 083_Creating the tail light and the license light cover for the rear bumper

Lecture 84 084_Creating the rear fender tail and the bumper Parking Assist Sensor

Lecture 85 085_Modeling the trailer plug part 1

Lecture 86 086_Creating the trailer plug part 2

Lecture 87 087_Starting with the tail light

Lecture 88 088_Adding more details for the tail light

Lecture 89 089_Finishing the tail light

Lecture 90 090_Starting with the bed interior

Lecture 91 091_Modeling the bed interior part 2

Lecture 92 092_Making some tweaks for the bed and creating bed rail cover plastic

Lecture 93 093_Truck bed tweaking part 2

Lecture 94 094_Truck bed tweaking part 3

Lecture 95 095_Adding new panel at the end of the bed floor

Lecture 96 096_Blocking the left side of the bed

Lecture 97 097_Completing the left side of the truck bed

Lecture 98 098_Finishing the left side of the truck bed

Lecture 99 099_Finishing the left side of the bed part 2

Lecture 100 100_Finishing the right side of the truck bed

Lecture 101 101_Fixing the corner of the left side of the bed

Lecture 102 102_Creating the truck bed tie down hook

Lecture 103 103_Starting with the truck bed door details

Lecture 104 104_Creating the truck bed door details from inside

Lecture 105 105_Making some tweaking to the truck bed floor

Lecture 106 106_Creating the panel underneath the truck bed with some adjustment to the rear

Lecture 107 107_Creating the windshield hinges

Lecture 108 108_Starting with the windshield wipers

Lecture 109 109_Creating the windshield wiper's rubber holder

Lecture 110 110_Putting the Windshield wipers in the place

Lecture 111 111_Using shrinkwrap modifier on the windshield wipers

Lecture 112 112_Creating the hood vents pattern

Lecture 113 113_Creating the truck bed rubber panel

Lecture 114 114_Starting the Doors mirrors

Lecture 115 115_Creating the doors mirrors arms

Lecture 116 116_Closing the gap between the panels

Lecture 117 117_Closing the gap between the panels part 2

Lecture 118 118_Mirroring the objects

Lecture 119 119_Starting with the wheels part 1

Lecture 120 120_Starting with the wheels part 2

Lecture 121 121_Modeling the tire

Lecture 122 122_Modeling the tire part 2

Lecture 123 123_Modeling the tire part 3

Lecture 124 124_ preparing and adding the array and simple deform mod to the tire

Lecture 125 125_Finishing the tire

Lecture 126 126_Creating the Jeep logo in the middle of the wheel

Lecture 127 127_Creating the wheel bolts

Lecture 128 128_Creating air valve caps

Lecture 129 129_Creating the brakes disk

Lecture 130 130_Modeling the disk caliper

Lecture 131 131_Starting with the chassi

Lecture 132 132_Adding details for the chassis

Lecture 133 133_Adding more details for the chassis part2

Lecture 134 134_Adding more details for the chassis part3

Lecture 135 135_Modeling the front fender liner

Lecture 136 136_Modeling the front fender liner part 2

Lecture 137 137_Making some tweaks

Lecture 138 138_Modeling the rear fender liner

Lecture 139 139_Starting with the Axel

Lecture 140 140_Starting with the Axel par 2

Lecture 141 141_Modeling the axel details part 3

Lecture 142 142_Starting the axel housing part 4

Lecture 143 143_Modeling the axel housing part 5

Lecture 144 144_Prepering the axel housing for the subdivision surface part 6

Lecture 145 145_Moving the axle to the correct position and creating the spring

Lecture 146 146_Adding more important details to the chassis and mirror them

Lecture 147 147_Making some tweaking for the axel and create the jeep logo

Lecture 148 148_Creating the rear axle hinge

Lecture 149 149_Copying the front axle to the rear side and make some changes

Lecture 150 150_Creating cargo carrier above the truck bed

Lecture 151 151_creating cargo carrier above the truck bed par 2

Lecture 152 152_Creating the cargo carrier above the truck bed part 3

Lecture 153 153_Adding more details for the cargo carrier part 4

Lecture 154 154_Adding welding effect

Lecture 155 155_Finishing the cargo carrier

Lecture 156 156_Starting with the doors side steps

Lecture 157 157_Starting with the doors side steps part 2

Lecture 158 158_Modeling the doors side steps part 3

Lecture 159 159_Modeling the doors side steps part 4

Lecture 160 160_Modeling the doors side steps part 5

Lecture 161 161_Starting with the cabin roof

Lecture 162 162_Creating the cargo roof holder legs

Lecture 163 163_Creating the cargo roof handle

Lecture 164 164_Starting with the cargo roof front light base

Lecture 165 165_Modeling the cargo roof light part 2

Lecture 166 166_Starting modeling the front bumper shield pipe

Lecture 167 167_Starting with the radiator and surrounding details

Lecture 168 168_Creating the fule door

Lecture 169 169_Modeling the radio antenna

Lecture 170 170_Creating the Gladiator tex and use it on the body

Lecture 171 171_Creating the truck bed sensor

Lecture 172 172_Craeting the Jeep logo

Lecture 173 173_applaying the shrinkwrap technique on the text

Lecture 174 174_Creating the 4x4 and Rubicon text and apply it on the body

Lecture 175 175_Creating new light for the front bumper

Lecture 176 176_Distributing the bolts on the front bumper and creating the front fender log

Lecture 177 177_Creating the exhaust and the spare tire

Lecture 178 178_Preparing the environment and creating the ground texture

Lecture 179 179_Organizing the scene

Lecture 180 180_Car paint material

Lecture 181 181_Adding orange peel effect for the material and create dark car paint

Lecture 182 182_Creating a plastic material

Lecture 183 183_Craeting black metal material for the roof and other objects

Lecture 184 184_Creating the bumper material

Lecture 185 185_Creating materials for the Rubicon, Jeep Gladiator texts

Lecture 186 186_Creating the Line X material for the truck bed

Lecture 187 187_Adding materials for the chassis and fender cover

Lecture 188 188_Creating multiple materials for multiple objects

Lecture 189 189_Creating materials for the head lights and roof lights

Lecture 190 190_Tail light materials

Section 3: Resource

Lecture 191 Resource

Intermediate to advanced 3D artists who want to take their skills to the next level and learn advanced modeling techniques.,Professionals or students in the fields of architecture, product design, or entertainment who want to create realistic 3D models for their projects.,3D enthusiasts who want to learn how to create complex 3D models using Blender.,Anyone interested in 3D modeling and looking for a comprehensive course that covers all aspects of the modeling process.,Individuals who have experience with Blender and want to improve their 3D modeling skills.



443242397_blender_creating_jeep_gladiator_rubicon_from_a_to_z.jpg


477e4a0b5bc4529949e2019c6ed9129a.jpg


C# Programming And Dot Net : A Total Reference
Published 7/2023
Created by Prof . Mathew K K Kanhirathinkal Kurian
MP4 | Video: h264, 1280x720 | Audio: AAC, 44.1 KHz, 2 Ch
Genre: eLearning | Language: English | Duration: 95 Lectures ( 31h 17m ) | Size: 29.5 GB


CLR, CTS and CLS. Dot Net Solution .Single File and Multifile Assemblies. C# Language. Oops Principles. C# Jagged Array


What you'll learn
This course introduces the DOT NET technology from Microsoft which is a total updating of the previous Windows technologies from Microsoft.
Microsoft introduced a new programming language called C# (C Sharp) which is totally object oriented like C++ and Java , very suitable for app development.
We are discussing the C# language in great detail starting from the basics to the most advanced features of the language supported by elaborate examples.
Students will be mastering the C# language which is best for application development as against the C++ language which is a language of Systems programming.

Requirements
No programming experience needed. But an elementary training in programming concepts will be an added advantage of course. If you have learned any other programming language it will help you a lot, but absolutely not a compulsory requirement. An attitude towards learning new technologies is all what is required.

Description
The Dot Net Framework includes CLR, CTS and the CLS. The Dot Net Solution. Full interoperability with existing code. Complete and total language integration . Single File and Multifile Assemblies. C# is a completely object oriented language created by Microsoft that runs on the Dot Net Framework. C# is used for: Mobile applications , Desktop applications, Web applications, Web services, Web sites, Games, VR, Database Applications and much more. Value Types and Reference Types. Classes are Reference Types while Structs are value Types. Cross language inheritance . Cross-Language interoperability. Elimination of DLL Hell. Automatic Resource Management. Type Safety. Multi-language support. C# is primarily a type-safe language , meaning that types can interact only through protocols they define, thereby ensuring each type's internal consistency . Visual Studio is the primary and most preferred software used to create and build Dot Net framework applications in Windows and other platforms. C# is a high level language with object-oriented features and automatic memory management and garbage collection.Good performance was the motive behind the launch of C#. It is well known that C# uses a Just - in- time compiler, which usually loads less on the CPU and responds quickly. Cross-language support is the ability provided by the common language runtime(CLR) and the CLS.

Who this course is for
The course is highly beneficial to the application developers. People who are used to the C++ language , will find the C# language , much easier to master. Learning C# helps you tackle any application development an easier task. Students may particularly be interested in C# as an essential tool in their programming career.


442715451_c-_programming_and_dot_net__a_total_reference.jpg


fe8e0f35c5574149a4435bbc97b400d2.jpg


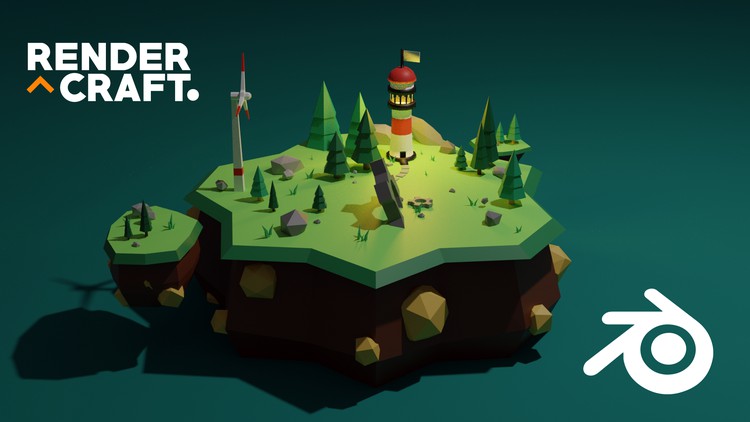
Blender Academy
Last updated 6/2021
Created by Render Craft,Dino Bandzovic
MP4 | Video: h264, 1280x720 | Audio: AAC, 44.1 KHz, 2 Ch
Genre: eLearning | Language: English + srt | Duration: 332 Lectures ( 50h 48m ) | Size: 40.8 GB


3D Modeling and Animation


What you'll learn
User Interface, Navigation and more
Modeling Fundamentals
Shading Fundamentals
Particle Simulation
Lighting Fundamentals
Animation Fundamentals
Rendering Fundamentals
UV Mapping Fundamentals
Texturing & Texture Painting Fundamentals
Physic and Cloth Simulation
And More

Requirements
Blender 2.8 or above
Basic navigation in Blender

Description
NEW COURSES ADDED EVERY MONTH FOR FREE(35 COURSES SO FAR)You will get full lifetime access for a single one-off fee. This course is continually updated in response to student suggestionsBlender is a fantastic platform that enables you to make quality models that can be exported to any game engine, 3D printer, or other software. Blender is a free and open-source 3D modeling and animation software. Light and powerful, it caters to every step of the production process of 3D modeling and animation.The course is project-based, so you will applying your new skills immediately to real projects. You will get all the references and resources - so you'll never get stuck. At the end of every section, you will have an exercise to test your knowledge and by finishing the course, you will already have 30+ projects that you can immediately include in your portfolio.The Instructor is qualified and experienced with modeling and animation, so is able to explain complex concepts clearly, as well as entertain along the way. The instructor has a passion for art, teaching, and helping students to not only learn but have a fun experience while doing so. By the end of the course, you'll be confident in the 3D modeling, animation, and rendering, and hungry to learn more.What Is Your Risk By Taking This Course?Nothing!! If you are not satisfied with the course, I promise I will give you a full refund of your money NO questions asked!!Dive in now, you won't be disappointed!

Who this course is for
Designers
Game Developments
Art students
Advertisers
3D Artist
Animators
Beginners who wants to enter in the 3D industry


442693979_blender_academy.jpg


23eb1a1061efc0213fbb03a0338ffed5.png


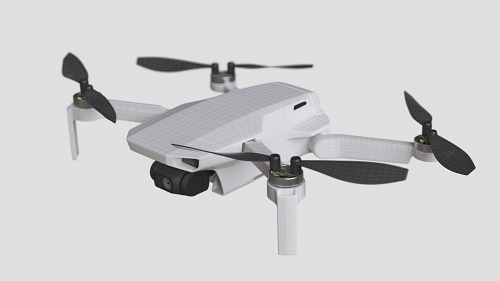
Advanced Hard Surface Product Modeling and Rendering Tutorial
MP4 | Video: h264, yuv420p, 2560x1440 | Audio: aac, 48000 Hz | Duration: 8h 25m | 21.8 GB
Genre: eLearning | Language: English

In this tutorial series, you will learn how to approach to very complex hard surface shapes, you will learn new Subdivision Surface techniques to get a very fast and easy results, after this tutorial, you will be ready for the new Cinema 4D interface and improved UV tools, I sincerely believe that this tutorial will take your hard surface modeling skills to the next level.

This tutorial is mainly focused on Subdivison Surface modeling techniques in Cinema 4D, these techniques could be applied by any other 3D modeling sorfwares which has Subdivision Surface workflow.

What's included?

8 hours of content, 13 parts.
Vanilla Cinema 4D R25, no modeling plugins used.
Modeling, UV unwrapping, Rendering and Rigging tutorials.
Final project files and image planes.
New Cinema 4D interface and new modeling workflow.
Octane Render Engine is used.
PureRef images

Tutorial Parts

Introduction and Setup
Part 1 - Modeling The Base ( 48:11 Minutes )
Part 2 - Subdivision ( 25:22 Minutes )
Part 3 - Bottom Details ( 28:39 Minutes )
Part 4 - Seams ( 32:36 Minutes )
Part 5 - Smaller Details ( 59:12 Minutes )
Part 6 - Arms ( 58:37 Minutes )
Part 7 - Propellers ( 29:12 Minutes )
Part 8 - Camera ( 51:30 Minutes )
Part 9 - Finalizing Modeling ( 34:56 Minutes )
Part 10 - Toloopgy ( 11:50 Minutes )
Part 11 - UV Unwrapping ( 1 Hour 8 Minutes )
Part 12 - Rendering and Materials ( 26:31 Minutes )
Part 13 - Rigging ( 27:32 Minutes )


Homepage

443242485_advanced_hard_surface_product_modeling_and_rendering.jpg


b040573372a3787caa4c08a37447e13d.jpg


How 2 Sew: Beginner to Advanced Online Sewing Course
Published 7/2023
Created by NIMT - National Institute of Master Tailor
MP4 | Video: h264, 1280x720 | Audio: AAC, 44.1 KHz, 2 Ch
Genre: eLearning | Language: English | Duration: 178 Lectures ( 18h 5m ) | Size: 21.1 GB


Including FREE Sewing Patterns/Templates


What you'll learn
Introduction to Tools
Tape Reading
Hand Sewing
Sewing Machine and it's Relation
Sewing Symbols
Sewing Machine Practice Sheets
How to Begin with Threads
How to Use Scissor
How to Start with Thread and Tacks
What is a Fabric
Iron Box and it's Uses
Stitch with Fabric
Stitch according to Throat Plate with Fabric
Basic Seams
On Fold Seams
Open Seams
Felled Seams
Welt Seams
Lapped Seams
Edge Finish
Fold Hem Edge Finish
Faced Hem Edge Finish
Binding Edge Finish
Piping Edge Finish
Extended Edge
Insert Seams
Darts and it's Types
Waist Hem Parts
Neck Lines
Hook Part and Eye Part
Loops
Bias Cords
Bias Cord Piping with Neck Lines
Pockets
Sleeve Attachments
Plackets and Opens
Cuffs
Collars
Zippers
Neck Finishings with Zipper
Zippers and Waist Bands
Elastic Attachments

Requirements
Required: Sewing Machine, Iron Box, Scissors, Measuring Tape, Pins, Thread, Fabric marker or chalk, Seam Ripper, Fabric
There are no prerequisites to learn this course. This course will be for everyone who wants to start from Basics. So, you can learn this course!

Description
As this course will teach you the complete basics of stitching and advanced stitching techniques. This course will also help you to pursue Basic and Advanced Pattern Making Courses and improve your skills. This online sewing course is specifically created to teach you the easier way of sewing, We teach the basics as well as more advanced sewing in this online sewing course. Our sewing course is very detailed and easy to follow, with beginners in mind. You will learn how to understand your sewing machine, about different sewing feet that make the sewing easier, learn about tension on the sewing machine and what to do when troubleshooting occurs. We teach you how to practice hand sewing, sewing symbols, scissors, threads and tacks, iron box and its uses, basic seams, on-fold seams, open seams, felled seams, welt seams, lapped seams, edge finish, fold hem edge finish, faced hem edge finish, binding edge finish, piping edge finish, extended edge, insert seams, darts and it's types, waist hem parts, necklines, hook part and eye part, loops, bias cords, bias cord piping with necklines, pockets, sleeve attachments, plackets and opens, cuffs, collars, zippers, neck finishings with zipper, zippers and waistbands, and elastic attachmentsThis course exists of 170+ Lectures and 18 Hours of video content, you will sew different sewing skills. After finishing this course, you will be able to sew any design easily. This sewing course is for anyone, young and old, who has a passion for sewing and would like to learn a new skill as a hobby or to create an income from home. After finishing this course, you should be ready to do our online pattern-making courses where we teach you how to take correct measurements, draft all ladies' bodice blocks with different designs, sleeves and pants patterns and many more designs.

Who this course is for
As this course will teach you the complete basics of stitching and advanced stitching techniques. By learning this stitching course you will be able to start your career as a Tailor or Start your own business. This course will also help you to pursue Basic and Advanced Pattern Making Courses and improve your skills.
170+ Lectures and 18 Hours of Video Content
PDF Sewing Patterns/Templates to practice sewing


442710665_how_2_sew_beginner_to_advanced_online_sewing_course.jpg


e3649f0df09539ff76b27ea1e2f5036f.jpg


Learn Squared - Hard Surface Design
MP4 | Video: h264, yuv420p, 1920x1080 | Audio: aac, 44100 Hz | Duration: 45h 03m | 24.1 GB
Genre: eLearning | Language: English

Build hard surface props of any size! Leading concept artist Lars Sowig will guide you through his entire professional workflow, from blocking and modeling to texturing and rendering, all the way down to designing your own stickers and decals. Every movie, TV show and video game needs a prop designer. Why shouldn't that be you?


Homepage

442701108_learn_squared_-_hard_surface_design.jpg


Zurück
Oben Unten