• Regeln für den Video-Bereich:

    In den Börsenbereich gehören nur Angebote die bereits den Allgemeinen Regeln entsprechen.

    Einteilung

    - Folgende Formate gehören in die angegeben Bereiche:
    - Filme: Encodierte Filme von BluRay, DVD, R5, TV, Screener sowie Telesyncs im Format DivX, XviD und x264.
    - DVD: Filme im Format DVD5, DVD9 und HD2DVD.
    - HD: Encodierte Filme mit der Auflösung 720p oder darüber von BluRay, DVD, R5, TV, Screener sowie Telesyncs im Format x264.
    - 3D: Encodierte Filme von BluRay, die in einem 3D Format vorliegen. Dies gilt auch für Dokus, Animation usw.
    - Serien: Cartoon/Zeichentrick, Anime, Tutorials, Dokumentationen, Konzerte/Musik, Sonstiges sind demnach in die entsprechenden Bereiche einzuordnen, auch wenn sie beispielsweise im High Definition-Format oder als DVD5/DVD9/HD2DVD vorliegen. Ausnahme 3D.
    - Bereich Englisch: Englische Releases gehören immer in diesen Bereich.
    - Bereich Talk: Der Bereich, in dem über die Releases diskutiert werden kann, darf, soll und erwünscht ist.


    Angebot/Beitrag erstellen

    - Ein Beitrag darf erst dann erstellt werden, wenn der Upload bei mindestens einem OCH komplett ist. Platzhalter sind untersagt.
    - Bei einem Scenerelease hat der Threadtitel ausschließlich aus dem originalen, unveränderten Releasenamen zu bestehen. Es dürfen keine Veränderungen wie z.B. Sterne, kleine Buchstaben o.ä. vorgenommen werden. Ausnahme Serienbörse:
    - Bei einem Sammelthread für eine Staffel entfällt aus dem Releasename natürlich der Name der Folge. Beispiel: Die Simpsons S21 German DVDRip XviD - ITG
    - Dementsprechend sind also u.a. verboten: Erweiterungen wie "Tipp", "empfehlenswert", "only", "reup", usw. / jegliche andere Zusatzinformation oder Ergänzung, welche nicht in obiger Beschreibung zu finden ist.

    Aufbau des Angebots und Threadtitel

    Der Titel nach folgendem Muster erstellt zu werden. <Name> [3D] [Staffel] [German] <Jahr> <Tonspur> [DL] [Auflösung] <Quelle> <Codec> - <Group>
    Beispiel: The Dark Knight German 2008 AC3 DVDRip XviD - iND
    Beispiel: The Dark Knight 2008 DTS DL BDRip x264 - iND
    Beispiel: The Dark Knight 2008 AC3 DL BDRip XviD - iND
    Beispiel: The Dark Knight German 2008 AC3 720p BluRay x264 iND
    Beispiel: The Dark Knight 2008 DTS DL 1080p BluRay x264 iND
    Beispiel: Die Simpsons S01 German AC3 DVDRip XviD iND
    Beispiel: Die Simpsons S20 German AC3 720p BluRay x264 iND
    Beispiel: Sword Art Online II Ger Sub 2014 AAC 1080p WEBRip x264 - peppermint
    Entsprechend sind also u.a. verboten: Sonderzeichen wie Klammern, Sterne, Ausrufezeichen, Unterstriche, Anführungszeichen / Erweiterungen wie "Tipp", "empfehlenswert", "only", "reup", usw. / jegliche andere Zusatzinformation oder Ergänzung, welche nicht in obiger Beschreibung zu finden ist
    Ausnahmen hiervon können in den Bereichen geregelt sein.

    Die Beiträge sollen wie folgt aufgebaut werden:
    Überschrift entspricht dem Threadtitel
    Cover
    kurze Inhaltsbeschreibung
    Format, Größe, Dauer sind gut lesbar für Downloader außerhalb des Spoilers zu vermerken
    Nfo sind immer Anzugeben und selbige immer im Spoiler in Textform.
    Sind keine Nfo vorhanden z.B. Eigenpublikationen, sind im Spoiler folgende Dateiinformationen zusätzlich anzugeben :
    Quelle
    Video (Auflösung und Bitrate)
    Ton (Sprache, Format und Bitrate der einzelnen Spuren)
    Untertitel (sofern vorhanden)
    Hosterangabe in Textform außerhalb eines Spoiler mit allen enthaltenen Hostern.
    Bei SD kann auf diese zusätzlichen Dateiinformationen verzichtet werden.

    Alle benötigten Passwörter sind, sofern vorhanden, in Textform im Angebot anzugeben.
    Spoiler im Spoiler mit Kommentaren :"Schon Bedankt?" sind unerwünscht.


    Releases

    - Sind Retail-Release verfügbar, sind alle anderen Variationen untersagt. Ausnahmen: Alle deutschen Retail-Release sind CUT, in diesem Fall sind dubbed UNCUT-Release zulässig.
    - Im Serien-Bereich gilt speziell: Wenn ein Retail vor Abschluss einer laufenden Staffel erscheint, darf diese Staffel noch zu Ende gebracht werden.62
    - Gleiche Releases sind unbedingt zusammenzufassen. Das bedeutet, es ist zwingend erforderlich, vor dem Erstellen eines Themas per Suchfunktion zu überprüfen, ob bereits ein Beitrag mit demselben Release besteht. Ist dies der Fall, ist der bereits vorhandene Beitrag zu verwenden.
    - P2P und Scene Releases dürfen nicht verändert oder gar unter einem iND Tag eingestellt werden.


    Support, Diskussionen und Suche

    - Supportanfragen sind entweder per PN oder im Bereich Talk zu stellen.
    - Diskussionen und Bewertungen sind im Talk Bereich zu führen. Fragen an die Uploader haben ausschließlich via PN zu erfolgen, und sind in den Angeboten untersagt.
    - Anfragen zu Upload-Wünschen sind nur im Bereich Suche Video erlaubt. Antworten dürfen nur auf Angebote von MyBoerse.bz verlinkt werden.


    Verbote

    - Untersagt sind mehrere Formate in einem einzigen Angebotsthread, wie beispielsweise das gleichzeitige Anbieten von DivX/XviD, 720p und 1080p in einem Thread. Pro Format, Release und Auflösung ist ein eigener Thread zu eröffnen.
    - Grundsätzlich ebenso verboten sind Dupes. Uploader haben sich an geeigneter Stelle darüber zu informieren, ob es sich bei einem Release um ein Dupe handelt.
    - Gefakte, nur teilweise lauffähige oder unvollständige Angebote sind untersagt. Dies gilt auch für eigene Publikationen, die augenscheinlich nicht selbst von z.B. einer DVD gerippt wurden. Laufende Serien, bei denen noch nicht alle Folgen verfügbar sind, dürfen erstellt und regelmäßig geupdatet werden.
    - Untersagt sind Angebote, welche nur und ausschließlich in einer anderen Sprache als deutsch oder englisch vorliegen. Ausnahmen sind VORHER mit den Moderatoren zu klären.


    Verstoß gegen die Regeln

    - Angebote oder Beiträge, die gegen die Forenregeln verstoßen, sind über den "Melden"-Button im Beitrag zu melden.
  • Bitte registriere dich zunächst um Beiträge zu verfassen und externe Links aufzurufen.

*** Bestes IPTV *** bester Preis *** gratis Test ***


Englische Tutorials

1c1859b604fb62969026467a8526fb19.jpg


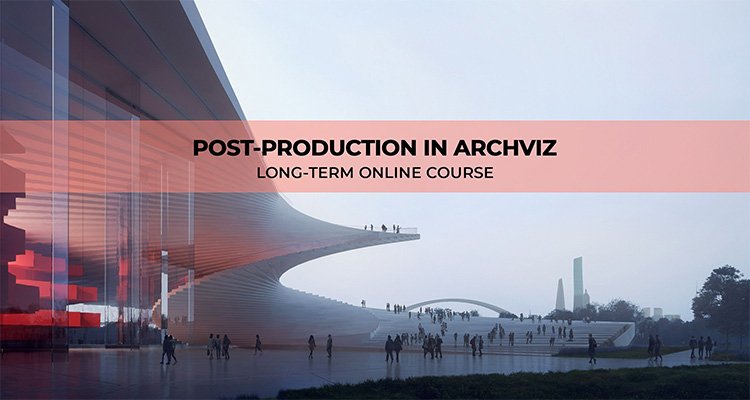
Post-production in Archviz: Hybrid Advanced Class
Andras K ldos, Istv n Lov k, P ter Pazsiczky | Duration: 56 h | Video: H264 1920x1080 | Audio: AAC 32 kHz mono | 160 GB | Language: English

The course has changed my mindset on how to approach an archviz project. Now I'm able to elevate the quality of my still images while making the transition from being a CGI visualizer to becoming a 3D artist.
Davor Robitschko, 3D artist & architect

Create images with strong conceptual foundations that show the main ideas of the design and engage the viewer. Our remotely mentored class is for intermediate to advanced 3D artists who want to optimize their workflow and craft Brick-standard images.

Take our hybrid course either online from anywhere or in-class at the HQ of Brick in Budapest. Both formats will be held parallelly and all attendees will have full mentorial support and access to the software needed.

During our online classes your mentor will guide you through the initial steps of high-end architectural visualization. By the end of the course, you will acquire powerful skills to handle recurring challenges and problems in the post-production phase.

Reference
Having the best references can be a deal-breaker in architectural visualization. You will learn how to find and follow the best ones.

Composition
Our course will give you insight into professional composition techniques and artistic image creation.

Matte Painting
The craft that will make your images unique and memorable, saving you valuable time during your workflow

Draft
By the end of this course, you will be able to create eye-catching drafts that look close to final images in 2-3 hours.


Homepage


441987624_gmt20230209-091034_recording_1920x1080_s.jpg


5e013a6ab065fa91f53366605d4ec36a.jpg


Crea un Sistema de Compra y Venta con PHP, JS y SQL SERVER
Last updated 11/2023
Created by Davis Anderson Bastidas Vicente
MP4 | Video: h264, 1280x720 | Audio: AAC, 44.1 KHz, 2 Ch
Genre: eLearning | Language: Spanish + srt | Duration: 265 Lectures ( 34h 22m ) | Size: 22.2 GB

Aprender a Crear un Proyecto de Compra y venta con PHP, SQL SERVER y JS


What you'll learn
Manejo de Base de Datos
Creaci n de Diagrama de Flujo del Proyecto
Creaci n de Mockups del Sistema
Realizaci n de un caso practico para gestionar un proyecto desde su inicio hasta su finalizaci n
Compra y Venta en un sistema Web
Portal de Administraci n de Usuario, Productos, Categor as, Roles y Mas.
Estimaci n de los Plazos del proyecto
Programaci n en PHP desde 0
Manejo de Base de datos SQL SERVER
Crearemos CRUD de Categor as.
Crearemos CRUD de Productos.
Crearemos CRUD de Clientes
Crearemos CRUD de Proveedores
Crearemos CRUD de Moneda
Crearemos CRUD de Unidad de medida
Crearemos CRUD de Empresa
Crearemos CRUD de Sucursal
Crearemos CRUD de Usuario
Crearemos CRUD de Rol
Aprender s conceptos avanzados de SQL con SQL SERVER
Crearemos gr ficos estad sticos Dashboard
Manejo de Im genes del Producto
Manejo de Foto de Perfil de Usuarios
Registro de Compra y venta, y dscto de stock de productos
Listado de Compra y venta, visualizador de documento y detalle
Creaci n de Reportes en Power BI
Desplegar BD y Proyecto en Azure


Requirements
No se necesita experiencia en programaci n
Aprender s todo lo que necesitas saber
Ninguno
Solo ganas de Aprender


Description
Bienvenido al curso del desarrollo de un Aprender a Crear un Proyecto de Compra y venta con PHP, SQL SERVER y JS en PHP POO, PDO, SQLSERVER, JQuery Ajax, Json, Bootstrap, vas a aprender paso a paso como desarrollar un Sistema web desde cero y lo podr s ver en cualquier dispositivo m vil con responsive design.Vas a aprender como desarrollar sistemas de control de contenidos utilizando el lenguaje de programaci n m s popular y con m s oportunidades de trabajo PHP, trabajaremos con la programaci n orientada a Objetos, PDO (PHP Data Objects) y el gestor de base de datos SQLSERVER, para el dise o y la administraci n de las tablas de la base de datos trabajaremos con la herramienta MSSQLSERVER, utilizaremos HTML5, CSS3 para el dise o de las vistas de las p ginas web del proyecto, tambi n vamos a trabajar con el framework Bootstrap para hacer m s f cil nuestro dise o web, usaremos la librer a JQuery y JS, la tecnolog a Ajax y Json para hacer din mico nuestras p ginas del proyecto web.Vamos a dise ar las tablas de la base de datos del proyecto utilizando la tecnolog a SQLSERVER.Vamos a trabajar con una plantilla web y luego la vamos a depurar para adecuarla a nuestro modo.Haremos la conexi n a la base de datos SQLSERVER con el proyecto web usando la conexi n PDO(PHP Data Objects).Con PDO puedes manejar 12 tipos distintos de bases de datos (Oracle, MySQL, SqLite, etc ), con solo cambiar el nombre de la base de datos en la conexi n y sin necesidad de rehacer todo el proyecto, adem s que con PDO nos brinda mucho m s seguridad.Aprender s a desarrollar CRUD (CREATE, READ, UPDATE, DELETE) de tablas independientes, tablas relacionales y el control de accesos de usuarios a los m dulos del Sistema de Compra y Venta con PHP, JS y SQL SERVER.Trabajaremos con expresiones regulares para validar los campos del formulario.Trabajaremos con ventanas modales para agregar, editar y eliminar registros. Qu es un diagrama de Gantt?El diagrama de Gantt es una herramienta gr fica cuyo objetivo es exponer el tiempo de dedicaci n previsto para diferentes tareas o actividades a lo largo de un tiempo total determinado. A pesar de esto, el diagrama de Gantt no indica las relaciones existentes entre actividades. Qu es un tablero Kanban?El tablero Kanban es la herramienta para mapear y visualizar su flujo de trabajo y uno de los componentes claves del m todo Kanban. Originalmente, se utilizaba una pizarra blanca (o un tablero de corcho) que se divid a en columnas y filas.Cada columna visualiza una fase de su proceso y las filas representan diferentes tipos de actividades espec ficas (dise o, errores, deuda t cnica, etc.).Al mismo tiempo, cada tarea que entra en su flujo de trabajo aparece en el tablero como una tarjeta Kanban. El punto de entrada de cada tarjeta es la columna Por hacer .Hoy en d a, existen soluciones de tarjetas Kanban digitales m s pr cticas y accesibles a nivel global que son perfectas tanto para para los equipos remotos como para los equipos que desarrollan su actividad en el lugar donde se realiza el proyecto. Qu es un Diagrama de Flujo de Proceso o Flujograma?Un diagrama de flujo, o flujograma, es una representaci n gr fica de un proceso. Cada paso del proceso se representa por un s mbolo diferente que contiene una breve descripci n de la etapa de proceso.Los s mbolos gr ficos del flujo del proceso est n unidos entre s con flechas que indican la direcci n de flujo del proceso.Si quieres aprender a desarrollar aplicaciones web y manejar un proyecto desde 0 con PHP POO, PDO, MySQL, JQuery Ajax, Json, Bootstrap, Flujo de Proceso, diagrama de GANTT, Kanban y GIT subir de nivel en el desarrollo Frontend, Backend y aumentar tus oportunidades laborales Este es tu curso!

Who this course is for
Desarrolladores de Software
Desarrolladores de Aplicaciones Web
Programadores de Base de Datos


Homepage


442538788_1-creacion-de-login-1_s.jpg


89286da5f5239e6bb1b3b5853832bc3b.jpg


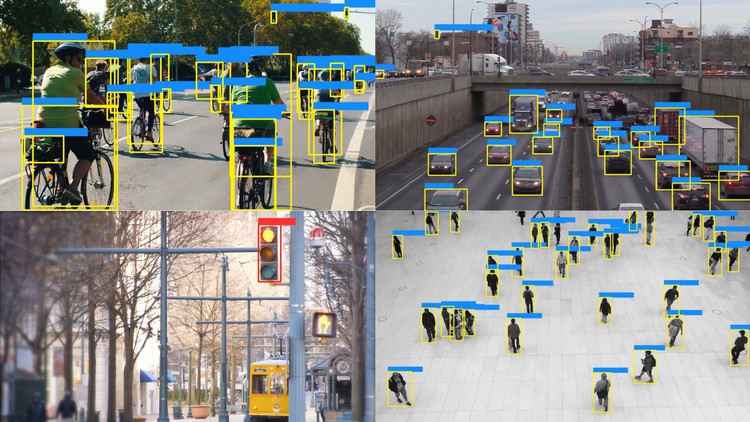
YOLO-NAS, Segment Anything Model, ChatGPT with WebApps 2023
Last updated 7/2023
Created by Muhammad Moin
MP4 | Video: h264, 1280x720 | Audio: AAC, 44.1 KHz, 2 Ch
Genre: eLearning | Language: English + srt | Duration: 57 Lectures ( 17h 51m ) | Size: 22 GB

YOLO-NAS, Train Custom Dataset, Object Detection, Segmentation, Tracking, Real World Projects & Web Apps in Python


What you'll learn
YOLO-NAS : A New Foundation Model for Object Detection
What's New in YOLO-NAS | Is YOLO-NAS the Future of Object Detection?
YOLO-NAS Implementation | Windows
Object Detection with YOLO-NAS on Images
Object Detection with YOLO-NAS on Videos
Object Detection with YOLO-NAS on Live Webcam Feed
Run YOLO-NAS in Google Colab
YOLO-NAS + DeepSORT Tracking
YOLO-NAS + DeepSORT Tracking on Custom Dataset
YOLO-NAS with SORT Object Tracking
Vehicles Counting (Entering and Leaving) using YOLO-NAS and SORT Object Tracking
Building a Computer Vision Web App & Why UI is important
Streamlit with YOLO-NAS Integration
Streamlit YOLO-NAS on Images
Streamlit YOLO-NAS on Videos
Deploy Your Streamlit Web Application
Streamlit App to Count the Vehicles Entering and Leaving
Empty Shelf Detection using YOLO-NAS
License Plate Detection using YOLO-NAS
Automatic Number Plate Recognition using YOLO-NAS and EasyOCR
Automatic Number Plate Recognition using YOLO-NAS and PaddleOCR
YOLO-NAS Multi-Cam Number Plate Recognition App
Face Detection using YOLO-NAS
Face Blurring using YOLO-NAS
Face Detection and Gender Classification using YOLO-NAS
Vehicle Intensity Heatmaps | YOLO-NAS
Integrating YOLO-NAS with Flask and Creating a WebApp
Personal Protective Equipment (PPE) Detection with YOLO-NAS
Web App- Personal Protective Equipment (PPE) Detection
Web App- Vehicles Counting (Entering and Leaving) using YOLO-NAS and SORT Object Tracking


Requirements
Python Programming experience is an advantage but not required
Laptop/PC


Description
Welcome to the YOLO-NAS: The Ultimate Course for Object Detection & Tracking with Hands-on Projects, Applications & Web App Development using Flask and Streamlit. YOLO-NAS is the state-of-the-art object detection model. It is the latest version of YOLO and is an improvement over the previous versions in terms of speed, accuracy and efficiency. What will you learn in this course:YOLO-NAS : A New Foundation Model for Object DetectionWhat's New in YOLO-NAS | Is YOLO-NAS the Future of Object Detection?YOLO-NAS Implementation | WindowsObject Detection with YOLO-NAS on ImagesObject Detection with YOLO-NAS on VideosObject Detection with YOLO-NAS on Live Webcam FeedRun YOLO-NAS in Google ColabYOLO-NAS + DeepSORT TrackingYOLO-NAS + DeepSORT Tracking on Custom DatasetYOLO-NAS with SORT Object TrackingVehicles Counting (Entering and Leaving) using YOLO-NAS and SORT Object TrackingBuilding a Computer Vision Web App & Why UI is importantStreamlit with YOLO-NAS IntegrationStreamlit YOLO-NAS on ImagesStreamlit YOLO-NAS on VideosDeploy Your Streamlit Web ApplicationStreamlit App to Count the Vehicles Entering and LeavingEmpty Shelf Detection using YOLO-NASLicense Plate Detection using YOLO-NASAutomatic Number Plate Recognition using YOLO-NAS and EasyOCRAutomatic Number Plate Recognition using YOLO-NAS and PaddleOCRYOLO-NAS Multi-Cam Number Plate Recognition AppFace Detection using YOLO-NASFace Blurring using YOLO-NASFace Detection and Gender Classification using YOLO-NASVehicle Intensity Heatmaps | YOLO-NASIntegrating YOLO-NAS with Flask and Creating a WebAppPersonal Protective Equipment (PPE) Detection with YOLO-NASWeb App- Personal Protective Equipment (PPE) DetectionWeb App- Vehicles Counting (Entering and Leaving) using YOLO-NAS and SORT Object Tracking

Who this course is for
For Everyone who is interested in Computer Vision
For Everyone who study Computer Vision and want to know how to use YOLO for Object Detection
For Everyone who wants to learn the latest YOLO-NAS version
Building Deep learning Apps with Computer Vision
Building Web Apps with Computer Vision


Homepage


442537350_2-yolo-nas-deepsort-tracking_s.jpg


9dc24fba76591878469c677cc1c85bda.jpg


Adobe Photoshop CC Essentials | Photoshop Retouching
Last updated 10/2023
Duration: 37h 32m | Video: .MP4, 1920x1080 30 fps | Audio: AAC, 48 kHz, 2ch | Size: 38.1 GB
Genre: eLearning | Language: English

This Adobe Photoshop masterclass will teach you Photoshop retouching + photo editing. Bonus: 7 Photoshop courses in 1.


What you'll learn
Discover how to edit and retouch your photos, like a pro, with Photoshop
37+ hours of Photoshop tutorials (recorded at 1080HD) already included - for both beginners and advanced users!
Photoshop - Learn how to edit like a pro. You'll learn how to use ALL retouching tools for awesome photos.
Photoshop Layers - learn how to use layers and take your creativity to the next level
Pro tips for a fast productive workflow
How to use Adjustment Layers & Masks to edit like a pro and be more creative
Adobe Camera Raw - everything you need to know to edit your photos like a pro
How to be more productive - a must for a fast and productive workflow
Photoshop basics - a solid foundation for your journey with Photoshop CC
How to use Adobe Bridge to organize and streamline your workflow
Understand the fundamentals of Photoshop
Understanding color in Photoshop - a must for a fast and productive workflow
How to add Photoshop Layer Styles to add that extra touch of creativity
Learn about Blending Modes and how to use them to take your creativity to the next level
How to create vectors in Photoshop
Learn how to Clone + Heal to master retouching
Learn how to crop, straighten and adjust for perspective
Learn how to convert your images to B&W like a true artist
Learn all about Photoshop filters, how to use and apply
Learn how to make your own Photoshop actions
Learn how to use 2 pro Photoshop editing tools; Curves & Levels.
Learn all about Photoshop brushes to help you master your editing. Plus, creative techniques too.
Learn all about how to use Typography with Photoshop
Learn how to make Selections to fine-tune your editing and retouching

Requirements
Any version of Adobe Photoshop, preferably the CC (Creative Cloud) version.
No prior knowledge or experience with Photoshop is required

Description
Hello!
My name is Chris Parker and I m a
photographer and graphic designer that has been using Photoshop professionally since 1991
. Yes, I m that old. But, that just means I have a lot of pro experience to share with you.
I ve also been teaching other creative artists on how to use Photoshop for the last 10+ years.
This course includes 7 Photoshop courses in 1! Learn Photoshop retouching, image editing, portrait editing, portrait retouching, RAW retouching, JPG retouching, photo editing, special effects and more.
Check out what a recent student had to say about this Photoshop course
Chris is obviously very much in love with what he does. This is equally important as knowing stuff and being able to teach stuff, in my opinion. I am 100% satisfied with this course. He responds to questions within a day! And he obviously cares about what his students think. I totally recommend this course for beginners. He covers everything and he seems to know everything about photoshop.
~ Busra
and another
A heart felt thanks to Chris Parker for such a comprehensive Adobe Photoshop course. Highly recommend course for every photographer & graphic designer to become more creative and productive.
~ Hassan
and another
I have already done several courses with Chris and I think he is a great teaching professional. To be a good teacher, not only do you need high technical knowledge, but you also have to know how to communicate it to the students.
Also, in my case, the English language is not my native language, I appreciate very much that Chris speaks slowly and with a "neutral" accent, which allows me not to have to "rewind" because I have not understood the sentence in English. Thanks, Chris.
~ Juan
*********
So, I have a question or two for you.
Are you new to Photoshop and/or struggling to learn Photoshop on your own?
Then,
this course is perfect for you.
In the beginning you ll learn the basics of Photoshop and as you work your way through the course we ll cover more advanced Photoshop projects.
You can then take
your new Photoshop skills and begin getting paid for it!
How?
Either apply your knowledge to your own images for
your photographic studio
or
take on freelance work
for editing, re-touching, color correction, and even graphic design (we ll cover graphic design projects later in the course: how to use/add text, create logos, web design and more).
Yes
, it is possible to learn everything you need to know about getting started with Photoshop in one course.
With over 33 hours of Photoshop content and 7 Photoshop courses in 1, with more tutorials being added on a regular basis, you can
learn Photoshop essentials
and advanced projects in this 1 Photoshop course.
This Photoshop course is perfect for
both photographers and graphic designers
.
******
Oh, and this course was designed for beginners in mind. You do not need any previous knowledge of Photoshop, photography or graphic design.
******
I love how clear and easy this is to follow along. I feel like I am learning so much, and I am only part way through the class. I definitely recommend this if you want to learn Photoshop, and improve your workflow with it!
~ Jeron
Great job. Clearly explains the details in a way you can follow and understand. Good response to questions. Photoshop has so much to offer it takes somebody who can really organize the flow and the delivery and Chris does a wonderful job. Highly recommended.
~ Chuck
I love this course! I'm not even finished and I've already learned so much! Chris Parker speaks clearly and zooms in to show you where he's at. I appreciate this a lot. Can't wait to create another book cover or create a fun family picture with my new skills! Thanks for doing such a great job, Chris!
~ Pixie
*********
Here is a complete list of everything
you ll learn in this Photoshop course.
Section 1
Photoshop Crash Course for Beginners!
Here you ll download all course resources:
photo files and the exclusive Photoshop Essentials Guide.
The
Photoshop Essentials Guide
is designed to be used with this Photoshop course. Print it out and use it to take notes. Plus, each lecture is summarized in the guide for easy reference when offline.
Throughout the remainder of this section you ll learn key essentials all Photoshop users should know
How to use the Home Screen
How to create new files
How to use and setup the Photoshop interface
How to open your images (there are several ways to do so)
How to work with multiple files that are open at once
How to save and export your files
Section 2
Quick Start Photoshop for Image Editing
Learn the 3 most requested things Photoshop beginners want to know
How to make your images POP
How to retouch your photos in Photoshop
How to re-size and save your images for social media
Section 3:
Photoshop Course 2: Photoshop Layers: What They Are & How To Use Them
You ll learn all about layers in the digital world AND the real world . Why?
Knowing how I used layers (before there were layers) will help you better understand how and why layers are an essential Photoshop skill.
Discover the 12 different types of Photoshop layers, an overview of the layers panel and much more.
Oh, and this is the beginning of the second Photoshop course. The first one was the first 2 sections: crash course + quick start .
Section 4:
How To Edit Your Photos, in Photoshop, Like a Pro!
In this section, you ll learn the power of Photoshop Adjustment Layers (and what they are and how to use them).
Section 5
How to Maximize Color in Photoshop
Understanding the color of light, color in general and how to manage it in Photoshop is critical for getting the results you want.
Learn how to see color and pro tips for managing color.
Section 6:
How to Edit RAW Files In Photoshop
Learn the difference between RAW & JPG and which one is better (and why).
Section 7:
Image Processing & a Photoshop Workflow
You ll learn my thoughts on processing and you ll learn from my own personal workflow. The same workflow I ve used on millions of edits.
Section 8:
How To Use Photoshop Adobe Camera Raw plugin Or Also Known As: ACR
Learn the ins-and-outs of editing your RAW (and jpg if you prefer) files in ACR.
You ll learn all of the following
White Balance, what it is and how to adjust it (properly)
a lesson on the Histogram and why it s important to use before and during editing
a quick overview of the Photoshop ACR interface
How to make adjustments to improve the dynamic range of your photos
How to use the power of Tone Curves to improve your photos
How to sharpen your photos (properly)
How to use the HLS + Color for editing your images
How to use the lens correction to fix distortions
How to add a vignette, grain and use the de-haze tool
How crop & straighten your photos in Photoshop ACR
How to remove spots in ACR
How to use the graduated filters to improve your photos
How to use the target adjustment tool to precisely control your edits
How to merge multiple images for an HDR effect
How to merge multiple images to create a panoramic
How to remove red eye (and pet eye) in ACR
Section 9
How to Crop, Straighten and Fix Perspective in Photoshop
Although you learned how to crop your photos in ACR, you ll learn how to do so directly in Photoshop.
Plus, learn how to straighten and fix perspective issues with Photoshop.
Section 10:
How to Convert Color Images to B&W
First, you ll learn 3 ways NOT to convert your images into B&W.
Then, you ll learn how the pro s convert to B&W for full creative control.
Section 11:
How to Precisely Edit Your Photos in Photoshop
You ll now learn some additional ways to edit your images, like a pro.
Here are a few things you ll learn in this section
Learn what the dodge, burn and sponge tool are used for
How to use the dodge and burn tool to edit your images
How to use the sponge tool to edit your images
How to use the dodge and burn tool with blending modes
How to use the dodge and burn tool with gradients
Section 12
How to Use the Tone Curve in Photoshop
We ll expand on your knowledge of the tone curve tool (based on what you learned in ACR first). Learn how to use it directly in Photoshop and you ll learn some basic color corrections that can be done with the curves tool.
Section 13
How to Use the Levels Tool in Photoshop
You ll learn how to use the Levels tool to edit your photos. We ll start with the basics and then you ll learn how to add contrast with it.
Section 14
How to Use Photoshops Stamp Tool
We ll start with a quick overview. Then, you ll learn how to use the stamp tool to edit your photos.
Section 15:
How to Use the Healing Tools in Photoshop
The Heal Tool is a powerful tool all retouchers should learn how to master. There are several tools within the Heal category that can be used for a variety of retouching challenges.
You ll learn about each and when/why to use it for specific retouching projects.
Section 16:
How to Use the Select Tools in Photoshop
Selecting , in Photoshop, is another one of those skillsets you ll need to master in order to fulfill your creative vision. There s a lot of selection tools to get the job done.
You ll learn about all of them and how to use them. Including
How to use the Marquee Selection tool
How to use the Lasso tool
How to use the Magic Wand tool
How to use the Quick Mask mode
How to use a Mask selection
How to use the Content Aware Fill tool
How to use the Color Range tool
How to use the Select Subject tool
Take your knowledge, and the provided photo, to make a selection of an outfit and change the color
Plus, learn advanced selection techniques to select and edit your photos
Section 17:
How to Use Blending Modes, in Photoshop, For Creative Edits
Blending Modes are another part of layers . They can be used for creative editing effects not possible with other tools.
First, we ll start off with the basics of blending modes and how they work.
Then, we ll cover each group of blending modes and learn what type of editing effects to expect for your artwork/photos.
Section 18:
How to Use Photoshop Filters For More Creative Edits
Take your creativity to the next level with Photoshop filters. Learn what they are, where they are and how to use them for your creative vision.
Section 19:
Learn Additional Photoshop Layer Tips: for Graphic Designers
This section is focused on layer skills all graphic designers should know!
How to align layers
How to stack, copy + delete layers
How to organize your layers, like a pro
Section 20:
Learn How to Use Photoshop Brushes
All creative artists should know how to use brushes in Photoshop. They are essential for editing, drawing, painting, design and more.
First, you ll learn the basics of the brush tool. Then
How to adjust brush options
How to create a custom logo brush
Learn the difference between brushes vs. the pencil
How to use the color replacement tool
How to use the history brush
and more tips along the way
Section 21
Learn How to Output Your Files From Photoshop
Once you ve completed your creative masterpiece it s time to share it with the world! Learn about different file formats, saving and more.
Section 22
How to Use the Eraser Tool in Photoshop
Sometimes you just need to get rid of something, fast. Introducing the Eraser tool, how to use it to remove backgrounds and more.
Section 23:
How to Use the Frame Tool in Photoshop
This new Photoshop frame tool is something I desired during my 30 year career as a graphic designer. It s an awesome new tool all graphic designers will want in their toolbox.
Learn what it is and how to use it.
Section 24:
How to Use the New Content Aware Fill Tool in Photoshop
Another new awesome Photoshop tool. This tool is intelligent and will make a breeze at retouching your photos. Learn what it is and how to use it to retouch your photos.
Section 25
How To Be More Productive in Photoshop
Now that you know the basics of Photoshop it s time to improve your productivity. Some of this stuff is boring. However, it s imperative to a fast and productive workflow. Especially for working professionals where time is money.
How to adjust the Photoshop preferences for optimal performance
How to adjust Photoshop color preferences for consistent results
How to adjust menus based on your own specific requirements
How to save 1 hour for every 8 hours worked!
How to use the zoom + hand tools like a pro
and much more
Section 26
How to Use Adobe Photoshop Bridge to Manage Your Digital Assets
Adobe Bridge is a free plugin included with Photoshop. You can use it as a file manager to organize, search, add metadata and more
You ll learn the basics of Bridge
How to adjust the Bridge preferences for optimal performance
How to adjust the Bridge workspace
How to use favorites + collections for organizing your files
How to improve your organization with keywords, ratings and labels
How to quickly find any photo (providing you did some of the above) with search + filter
How to add copyright metadata to your files (and more)
Plus, my personal workflow with Adobe Bridge
Section 27:
How to Use Photoshop Actions
Photoshop actions are another powerful tool for helping you streamline your workflow.
Learn how to record specific steps you take to edit your photos and save it (as an action) to be re-used on other photos.
Section 28
Photoshop Course 3: Light Effects
This Photoshop course (included for free) provides valuable lessons on
how to use 5 awesome Photoshop tools that will allow you to
;
add light, enhance existing light, enhance and add color to your sunsets and sunrises, create lens leaks, add lens flare and much more.
Included with this course are the images used in each lesson. Use them to follow along as you learn! This is a great way to increase the learning process. Plus,
submit your practice files for feedback!
First,
you'll learn about the 5 tools that are used throughout the course
;
Adjustment Layers, Adjustment Layer Masks, Curves, Levels & Gradients
.
Then, you will be able to confidently use them while watching the lessons. By the time you're done with the course & practice files,
you'll be able to achieve the same look on your own photos.
Each lighting effect is taught in
bite-size, step-by-step lessons
to better grasp each step of the process.
You will also see how different Blend Modes effect the final results, how to use opacity, keyboard shortcuts and much more.
A comprehensive resource file is included that has all of the keyboard shortcuts used throughout the lessons. And, each video will display the keyboard shortcut used at that time!
Section 29:
Photoshop Course 4: Zombie Apocalypse
In this course you ll learn all the tools I use to create custom Zombie s, in Photoshop, from ordinary portraits. Plus, you ll also receive my Zombie Apocalypse Photoshop action (includes 3 versions) that will easily and quickly transform your ordinary portrait into a Zombie all in under 2 minutes!
Once you know how to create a Zombie, from the Photoshop action, I ll then walk you through all the different tools, tips and techniques that I use to create custom Zombie portraits.
First, you'll install the
3 Zombie Photoshop actions, 20+ skin textures and 10+ blood brushes that come with this course
and then you'll run the Photoshop action. I ll explain what needs to be done for best results and additional tips.
Once you know the basics,
you ll be able to transform your ordinary portrait, into a Zombie, in 2 minutes or less.
Then
you ll begin learning advanced techniques for customizing your Zombie
to fulfill your creative vision. This course has been
structured for all levels of Photoshop users, from beginners to more experienced users
.
Plus, bite-size (each lesson is around 5 - 6 minutes) detailed explanations and Photoshop keyboard shortcuts are included for you as well. All keyboard shortcuts are displayed, throughout the tutorials, for easy and quick reference.
Some of the tools
you ll learn throughout the course will include

the Free Transform Tool
Layer Styles
Blending Modes
Layer Masks
and much more
Each tutorial is jam packed with shortcuts, tips and techniques for creating one-of-a-kind Zombies!
Plus, as an
extra bonus
,
you'll also receive 20+ additional wound overlays for customizing your Zombies
. This includes skin lesions, open wounds, bullet holes and more. You ll learn how to add them to your Zombie portraits and customize for a natural look.
Once you ve completed this course you ll be able to easily and quickly create gory Zombie portraits your friends and/or clients will be
DYING
for.
Section 30:
Photoshop Course 5: How to Transform Photos With Fall Colors
Hello and welcome to my Photoshop Fall Edits for Outdoor Portraits & Landscapes!
In this Photoshop course I share how to easily and quickly transform ordinary, boring, green foliage into beautiful, vibrant and colorful Fall colors.
It's super easy. So easy, you can could create this transformation within a couple of minutes.
So, the question is, why does it take over an hour to explain? Well, I'm sharing more than how to achieve this creative edit.
Not only do I share the fundamentals of the tools being used... like layers, layer masks, blending modes, ACR and more... but, I'm also going to share my 3 step editing workflow! This is the same workflow I use to edit hundreds of images PER hour!
As a professional photographer, it's imperative to spend less time in front of the computer and have more time for more clients. That doesn't mean we cut corners and ignore the creative process. Instead, we prioritize with the end in mind. You'll learn my basic premise for editing in general and exactly where your editing should start... Hint: it's not in Photoshop.
Section 31:
Photoshop Course 6: Cinematic Edits
Hello and welcome to my
Photoshop Cinematic Photography Effects
course!
Have you ever wondered
how Hollywood creates those stunning, cinematic colors
and wished you could apply to your photos? Well, wonder no more. This course will teach you how to add Cinematic color style effects to your still photography - all in Photoshop!
You will learn how easy it is to apply those Cinematic effects directly in Photoshop
. No filters, plugins or other tools required. Everything can be done directly in Photoshop within minutes.
Plus,
I'll share with you my favorite keyboard shortcuts, editing process and more to streamline your Photoshop workflow
.
You'll be amazed
how easy it is
to create this trendy photo effect in Photoshop. You'll also learn what Color Grading is and how to apply to your images.
First
, you'll start of learning all the basics in the, well, Basics section. :)
This includes learning all about the Curves tool (how to use, tips and more), how to use Adjustment Layers (plus Masks) to streamline your workflow, an awesome (free) tool for finding complimentary colors (which are important for achieving the Cinematic style), how to color correct an image in 5 seconds and much more.
Once you've mastered the basics, you'll move on to learn
3 different ways to create the Cinematic style
within Photoshop.
Want feedback?
Projects include the same photos used in the course. This will give you an opportunity to follow along, practice with and upload
your Cinematic edits for review
either by me and/or other photographers in the community.
Section 32 - 50:
Photoshop Course 7: Advanced Photoshop Projects
This and the following sections include additional Photoshop advanced projects and is considered another course in-and-of-itself. Includes projects for photographers and graphic designers.
Here are a few of the things you ll learn
photography
how to control depth-of-field
how to add motion blur
landscape editing workflow
high school portrait editing workflow
how to replace skies with new clouds
how to add snow to your winter images
how to blur the background
how to create the Stranger Things Shadow Monster
how to transform a portrait into vector art
how to transform a photo into a watercolor
how to create a half B&W and half sepia toned image with a torn paper effect down the middle
graphic design
how to add text to your documents
how to use layer styles for your creative vision
how to use vector paths and create shapes
how to design a website in Photoshop
how to create grungy/retro/3D text
how to create a modern/retro logo
how to create a web banner
7 tips for creating t-shirt designs in Photoshop
and much more pro tips along the way
*********
So far I'm really enjoying this course. I've been using Photoshop in hobby photography for about 10 years and thought it was time to check and see what I'm not using :) Chris's presentation is clear and precise and I'm learning tips and tricks that will definitely be useful. Looking forward to the rest of the course!
~ Susan
Amazing instructor with years of experience the instructor have giving lots of info on his tutorials, easy to follow step-by-step. I would recommend for those who are beginner and work your way up to become a pro in photoshop.
I have taken several courses and this course has taught me in depth learning Photoshop. 5 star for this Photoshop course. The best part after you have learn the basic, the instructor give us a project to follow along beside guiding us to successfully understanding on our tools and project,
I have managed to improve my skills. You just need to practice and keep practicing.
Finally I have manage to finish my own project and this Photoshop course have make me to keep crafting ideas and make my imagination come to next level. Thumb up..!!
~ Muhammad
*********
If you ve read this far, thank you! Just a few more things (in case I forgot anything)
Photos are included to practice what you learn
The Photoshop Essentials Guide includes project details and some homework assignments
Feedback and critiques are provided if requested
Course is updated based on student demand/requests
I think that covers everything (just like these Photoshop courses)! :)
Looking forward to helping you achieve your creative vision and improving your Photoshop skills. Can t wait to see you on the inside.
Regards,
Chris Parker
Photoshop Guru, Pro Photographer + Graphic Designer
Who this course is for
Beginners to Adobe Photoshop CC
Photographers of all levels
Designers of all levels
Anyone who wants to learn the essentials of Photoshop
Anyone that wants to discover how to retouch photos with Photoshop


Homepage

441987122_97-3-ways-not-to-convert-your-bw-images-in-photoshop_s.jpg


efe85d3dddcb21d821479b67ad7452dd.jpg


iOS 12 & Swift 5 - App Design, UI/UX plus Development
Last updated 6/2022
Created by Gwinyai Nyatsoka
MP4 | Video: h264, 1280x720 | Audio: AAC, 44.1 KHz, 2 Ch
Genre: eLearning | Language: English + srt | Duration: 492 Lectures ( 80h 32m ) | Size: 61 GB

The three-in-one course that teaches app design, UI/UX and iOS development. Includes Sketch and Figma.


What you'll learn
Design app assets, icons and logos from scratch.
Design wireframes, mockups and prototypes.
Build aesthetic, clean and beautiful iOS apps that stand out on the app store.
Apply animation and motion based design to bring interactivity to your app.
Become an all-in-one UI/UX designer and iOS developer.
Understand the thinking and principles behind great user experience and app design.
Create custom controls that supercharge your UI.
Learn how to build custom UI components and never rely on overused libraries.


Requirements
No previous coding or design knowledge is needed.
An Apple MacBook laptop or iMac.
Sketch (optional). If you can't get Sketch we use Figma as an alternative because it's free.


Description
Welcome to the course that will take you from app design to code. This is a three-in-one course aimed at helping you master app design, UI/UX and iOS app development from absolute beginner to advanced professional. The top iOS apps clearly set themselves apart from all the rest with amazing user interfaces and modern user experience design. We see them featured on the iOS App Store and as winners of Apple's Design Awards. This simply means that app design and UI/UX are key factors for successful apps. But surprisingly, traditional iOS courses only go as far as teaching you how to build apps with nothing on app design and UI/UX. This course is different in that it goes well beyond just teaching you how to code.This course includes app design and UI/UX to help you build the kind of apps that stand out on the App Store.We will cover how to use app design tools like Sketch and Figma to create app assets, icons, logos, wireframes, mockups and prototypes. We will learn essential UI/UX principles such as usability testing, user journey mapping, motion design, micro-interactions, typography and much more. We will also master iOS development to bring our app design to code and build over 20 different apps along the way. What kind of improvements to your app can you expect by the end of this course? A recent study by Forrester Research concluded a well designed user interface could raise conversion rates by up to 200% and a better UX design could raise conversion rates up to 400%. Clearly, learning app design and UI/UX is well worth the effort. It just might be what makes or breaks your app. This course is perfect for app designers who would like to learn how to code and app developers who would like to learn how to design. If you are an absolute beginner in both design and code you are still in the right place. This course starts by assuming you have never designed or coded before and builds up at a comfortable pace before getting into more advanced topics. The trick to really mastering design or code is practice and this course recognises that. All our app designs will be created from scratch and our apps will be coded line by line without any help from libraries. Plus, there are dozens of quizzes and challenges to reinforce everything we learn. For more enthusiastic learners, there are further reading topics and bonus articles to help you go beyond this course's main curriculum.All the tools we use in this course are free. Sketch is the only exception to this because Sketch requires a paid license to use. If you cannot afford Sketch then that's no problem! This course includes Figma as an alternative to Sketch and Figma is free. We will cover the same topics in Figma as we do Sketch so there's nothing you will miss. If you are feeling like taking on an extra challenge, you are more than welcome to master both Sketch and Figma!I certainly hope to see you around in this course where we have quite the journey ahead of us. Let's get started with mastering app design, UI/UX and iOS development!

Who this course is for
iOS developers who would like to learn how to both design and code.
Graphic or UI/UX designers who would like to learn how to bring their app designs to code.
iOS developers looking to learn how to design great looking apps that also deliver incredible user experience.


Homepage


442537984_001-prototype-setup_s.jpg


406dfb64e0411865245f01ca50758fd8.jpg


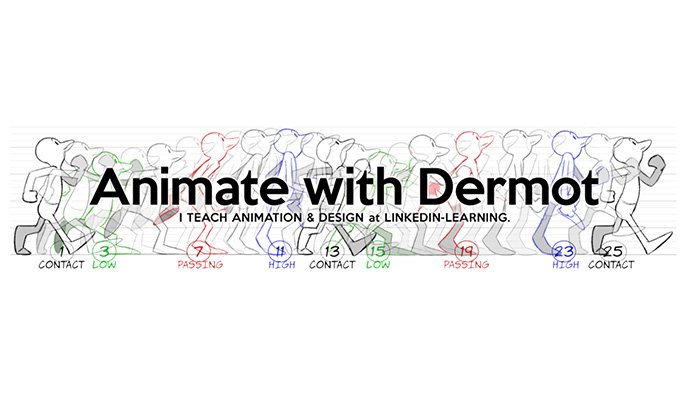
Animate with Dermot: 30 Full Animation Courses
Dermot O Connor | Duration: 109:23 h | Video: H264 1280x720 | Audio: AAC 48 kHz 2ch | 20,5 GB | Language: English

Dermot O'Connor, an animator, designer, cartoonist, and indie filmmaker, has been working in animation since being hired by Don Bluth in 1988. He has experience in feature films, television, interactive media, and mobile/web animation.

His reel primarily features footage from his courses on Lynda/LinkedIn. Most of the scenes were animated traditionally, either by hand or using software like Harmony, Photoshop, or Animate CC. O'Connor recently began using Krita for 2D animation due to its superior capabilities compared to Adobe products. Many scenes also utilize symbol/puppet systems, with O'Connor striving to make the puppetry seamless. He employed After Effects for adding blurs and depths, as well as adjusting color saturation and levels.

O'Connor recently created all the character animation for the popular Disney mobile game "Where's My Water?" The animation presented technical challenges due to extreme frame limitations and memory constraints, but the project ultimately proved enjoyable. Another recent work of note is the music video "As Lights Fall" for Alan Parsons (of The Alan Parsons Project), where O'Connor hand-animated the ink drawings coming to life in Adobe Photoshop to maintain a practical feel.

O'Connor further highlights his expertise by mentioning his courses for Lynda.com, now known as LinkedIn Learning. These courses primarily focus on animation and design, utilizing software like Adobe Photoshop, Macromedia Flash, Adobe Animate CC, Adobe After Effects, and Toonboom Harmony.
Contents

Dermot O'Connor - 2D Animation Animal Walk Cycles
Dermot O'Connor - 2D Animation Animate Flying Creatures
Dermot O'Connor - 2D Animation Animate Monsters & Aliens
Dermot O'Connor - 2D Animation Character and Attitude Walk Cycles
Dermot O'Connor - 2D Animation Principles
Dermot O'Connor - 2D Animation Walk Cycles Basics
Dermot O'Connor - 21 Foundations of Animation
Dermot O'Connor - After Effects Compositing Animation from Animate CC
Dermot O'Connor - Animate CC Animating Scenes
Dermot O'Connor - Animate CC Storyboarding
Dermot O'Connor - Animating in 2D Breakdowns and Thumbnails
Dermot O'Connor - Animating in 2D Hair and Clothing
Dermot O'Connor - Animating in 2D Loosening Up
Dermot O'Connor - Animating in Historical Styles
Dermot O'Connor - Animating in Photoshop
Dermot O'Connor - Animation Foundations Storyboarding
Dermot O'Connor - Animation Tips and Tricks with Flash Professional
Dermot O'Connor - Applying the Foundations of Animation
Dermot O'Connor - Creative Animation in Photoshop
Dermot O'Connor - Draw Characters in Photoshop
Dermot O'Connor - Essential Technical Aspects of Animation
Dermot O'Connor - Flash Professional CS5 Character Animation
Dermot O'Connor - Foundations of Drawing Cartoon Characters for Animation
Dermot O'Connor - Hand-Drawn Animation in Flash
Dermot O'Connor - Learn Adobe Animate CC Animation
Dermot O'Connor - Learning 2D Animation Tips and Tricks (Updated 29.06.2021)
Dermot O'Connor - Migrating from Flash to Toon Boom Harmony
Dermot O'Connor - Rigging a Face in Flash Professional
Dermot O'Connor - Toon Boom Harmony Essential Training
Dermot O'Connor - Traditional 2D Animation in Harmony


Homepage


441987419_22-timing-and-materials_s.jpg


4c86bfd277a1ddc6f4211e59a5c8fbde.jpg


Fast Python Programming For Absolute Beginners SQL in Python
Last updated 6/2023
Created by Mega Learning
MP4 | Video: h264, 1280x720 | Audio: AAC, 44.1 KHz, 2 Ch
Genre: eLearning | Language: English + srt | Duration: 289 Lectures ( 60h 37m ) | Size: 27.7 GB

Python 3 Programming from Basics to Pro, JSON SQL - MySQL MongoDB PostgreSQL Python Database - PDF, Image , GUI Tkinter


What you'll learn
+10 Courses in One | 60 Hours + Multiple Projects | Easily and Deeply learn the Python!
Python Basics - Advance -Pro | SQL in Python | MySQL in Python | MongoDB in Python | PostgreSQL in Python | JSON in Python | PDF by PyPDF3| GUI Apps by Tkinter
Using Python, Pycharm, Selenium, pillow image processing, Face detection, Modules, Flow controls, loops, functions, file & folders, Debugging, PIP, Collections
Install & customize Python and Pycharm
Basics to Advance topics of Python coding
MS SQL - MySQL - PostgreSQL - MongoDB - JSON in Python
Create Basic GUI Apps by Tkinter
Introduction to PyQt 6 GUI
Image processing & manipulation by pillow image library
Face detection, makeup ... in image
Web automation in Python and selenium
Using PDF file in Python by PyPDF3, PyPDF2, PyPDF4
String Methods (lower, replace, find,...)
Operators and functions in Python
Python Statements - Flow Control
Files and Folders in Python
Debugging and Error Handling
Collections in Python
PIP and Packages


Requirements
A pc with Windows OS


Description
Hi There!With my 23 years programming skills I'm with you to share my knowledge with you.In dead this course is based on my teaching skills in the real world classes and how to teach the students in the unique and simple method.So the only thing you need is your inner motivation for learning the Python. Then you can start learning it after watching the tutorial.The main purpose of this course is only to teach you the basics and how to start learning the Python.SoIf you try you will be a Python programmer!If you wanna start learning Python programming!If you are beginners or student looking for a tutorial that teach Python with real project in simplest way!If you want really to be a Python programmer so it's best place that you can start to learn Python.This is what you will get in this Python Programming course:python Basics , Advance, ProSQL in PythonMySQL in PythonMongoDB in PythonPostgreSQL in PythonJSON in PythonBasic GUI Apps by TkinterIntroduction to PyQt 6Using PDF file in Python by PyPDF3, PyPDF2, PyPDF4Web automation in Python and seleniumUsing Python, PycharmWorking with VariablesUsing Flow controls, loopsUsing functionsCollections in PythonPIP , packages and modulesImage processing & manipulation by pillow image libraryFace detection, makeup ... in imageInstall & customize Python and PycharmString Methods (lower, replace, find,...)Operators and functions in PythonPython StatementsFiles and Folders in PythonDebugging and Error Handling...Don't hesitate to start learning Python!Every thing will be discussed with sample project and you will have lot of fun within my course.Say Hi Python world and let's go !!!

Who this course is for
Anyone who wants to learn python deeply and easily from scratch to pro topics


Homepage


442090748_easy_python_programming_for_absolute_beginners_sql_in_python.jpg


1a48e69ab00235bd80cadfdb514a4513.jpg


Patrick Brown - reating Art, Video Tutorials and Time-lapses
MP4 | Video: h264, yuv420p, 1920x1080 | Audio: aac, 44100 Hz | Duration: 52h 23m | 73.4 GB
Genre: eLearning | Language: English

I've always loved doing fan art, it's been a passion of mine for over 10 years now and I've had a blast filling up my gallery with it. Being a huge gamer and having big interest in the entertainment world, I can never run out of things to draw. Be it to gain hype over an upcoming game that I'm bursting to play, or to let out excitement for that blockbuster movie that seems so far off. I'm always inspired to create more fan art using the dynamics and energy of my style.


Homepage

442068981_reating_art_video_tutorials_and_time-lapses.jpg


3d34713df2b3c78f59abbd8d13093dd8.jpg


Laravel 10 & 9 : Devenez maitre avec 50 heures de projets
Last updated 8/2023
Created by H ritier N'kele N'kele
MP4 | Video: h264, 1280x720 | Audio: AAC, 44.1 KHz, 2 Ch
Genre: eLearning | Language: French + srt | Duration: 322 Lectures ( 53h 1m ) | Size: 32.5 GB


Apprendre Laravel 9 & 10 en construisant 3 projets en partant de z ro


What you'll learn
Apprendre les bases de Laravel (Routes, Contr leur, Template blade, Mod les et Migrations, MVC etc...)
Apprendre cr er des fonctionnalit s CRUD avec des images avec Laravel.
Apprendre manipuler les fichiers (Images) avec Laravel.
Apprendre int grer L'API PayPal dans Laravel.
Apprendre cr er les API REST FULL avec Laravel

Requirements
Avoir les notions de base en programmations et en programmations orient es objets.

Description
Dans ce cours, nous allons apprendre construire quatre projets professionnels en utilisant le Framework PHP Laravel.Le premier projet sera bas sur la cr ation d'une application web e-commerce en utilisant l'API PayPal comme syst me de paiement.Sur ce, nous allons apprendre :Cr er, lire, modifier et supprimer les produits ;Cr er, lire, modifier et supprimer les diff rentes cat gories de produits ;Dynamisation des sliders dans la barre de navigation;Affichage des produits r cents et populaires;Affichage des d tails du produit;Cr er, lire, modifier et supprimer les sliders ;Afficher dynamiquement les diff rents produits cr s dans l'interface client ;Ajouter, afficher, modifier et supprimer les produits du panier ;Cr er le compte client;Int grer L'API PayPal pour le paiement ;Enregistrer les commandes du client ;Le deuxi me projet sera bas sur la cr ation d'une application pour la gestion d'un h pital.Sur ce, nous allons apprendre :La gestion des patients ;La gestion des employ s ;La gestion des produits pharmaceutiques ;La gestion des relev s m dicaux ;La gestion des laboratoires.Le troisi me projet sera bas sur la cr ation d'une application CRUD Avec Le REST FULL APIREST pour Le SPAs.Sur ce, nous allons apprendre :La cr ation des APIS REST publique;La cr ation des APIS REST priv es avec Laravel Sanctum.

Who this course is for
Aux d veloppeurs de tous les niveaux.


441764003_laravel_10__9__devenez_maitre_avec_50_heures_de_projets.jpg


feb4f9b3282da8aab47874ea23409d2e.jpg


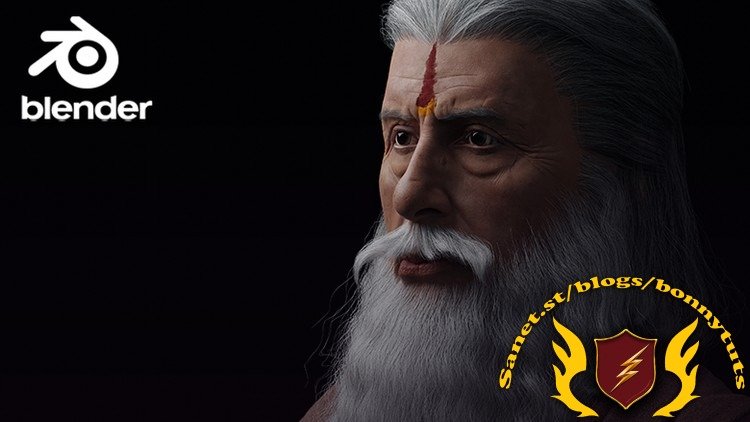
Likeness Portrait Creation in Blender
Published 7/2023
Created by Bharat Sharma
MP4 | Video: h264, 1280x720 | Audio: AAC, 44.1 KHz, 2 Ch
Genre: eLearning | Language: English | Duration: 50 Lectures ( 28h 51m ) | Size: 33 GB


The only Likeness Portrait course you will ever need to make Realistic looking Portraits !!


What you'll learn
Full Portrait Creation Workflow
Sculpting Face
Much more Artistic and Manual Workflow
Skin Detailing in Blender
Brushes Creation for Skin Details
Texture Painting in Blender
Cloth Sculpting and Materials
Hair Grooming using Blender's New Hair System Using Geometry Nodes
Creating Tilak on Forehead

Requirements
Little bit of blender and sculpting knowledge is required

Description
My name is Bharat Sharma and I'm Freelance 3D character artist, This project is one of my favorite's that I have worked on and I wanna share all the info and the workflow through which I was able to create this portrait with the use of free but awesome software called Blender. This workflow does not include the use of any third party resources from internet but we do everything in blender and own our own to achieve all the skin details in the portrait.This whole Project is free to create you won't need any paid 3rd party Resources to Achieve this much amount of Details.This Course is made for Character artist on intermediate level where we are gonna learn about full Portrait creation in Blender which also include Likeness. We are gonna learn to Create Likeness, Brush making for Skin Details, Texture painting, Hair grooming using New Hair system which uses Geometry nodes and finally Tilak on forehead. This Course contains- 30 Hours of Content - 50 lectures- Resource files Software you need for this courseBlender Gimp ( or any Image editing Software like Photoshop, krita etc ) Both of these software are free.So you can start this journey straight away !! Watch the Index Video for more Info !!What will you get with this course.- 30 hours Lectures- Basemesh - Brushes for skin detailing- All the Important Files- Eyes- Final render fileYou can contact me on Udemy if you have any problems.

Who this course is for
Beginner who have learned blender and sculpting but cannot translate that to Real looking portrait


441753485_likeness_portrait_creation_in_blender.jpg


a74f7f821f9550c7f911760403d15717.jpg


The Blender 4 Ultimate Guide
Published 12/2023
MP4 | Video: h264, 1920x1080 | Audio: AAC, 44.1 KHz
Language: English | Size: 25.52 GB | Duration: 21h 29m

Blender 4 Complete course on realistic 3D environments & Buildings including geometry nodes and cloth simulation


What you'll learn
Blender Basics: Navigating the Viewport - Master the essential techniques to efficiently move around Blender's viewport.
Reference-Based Modelling - Learn to use PureRef, Google, AI, and Pinterest for gathering references and creating stunning models.
Creating Greyboxes - Adopt AAA industry standards in greyboxing for assets and environments.
Working with Eevee Next & Blender Cycles - Gain proficiency in both the new Eevee Next and Blender Cycles rendering engines.
Massive Download Pack - Utilise a comprehensive download pack, demonstrating all you need for various projects.
Blender Asset Manager Mastery - Explore the functionalities of Blender's Asset Manager for efficient project management.
Modelling Workflow - From basic modelling techniques to advanced professional workflows, including secrets used by pros.
Geometry Nodes for Procedural Modelling - Leverage geometry nodes to enhance workflow efficiency with procedural modelling.
Vertex Painting for Landscapes - Texture landscapes using vertex painting, bringing scenes to life with unprecedented realism.
Complete Guide to Blender Shaders - Understand the assembly and application of Blender shaders.
Advanced UV Mapping - Learn advanced UV mapping techniques to effectively hide seams.
Rendering and Compositing - In-depth guide to rendering and compositing, making any scene look expertly crafted.
Composition and Planning Insights - Gain inside knowledge on planning and creating compelling compositions.
Comprehensive Lighting Guide - Including detailed use of Blender's powerful sky texture.
Blender Cloth Generator Guide - Complete walkthrough of using Blender's cloth generator.
Introduction to Blender Sculpting - A primer on sculpting in Blender, focusing on cloth and terrain enhancements.
Displacement Modifier Guide - Detailed tutorial on using the displacement modifier for realistic textures.
Emission Techniques - Learn how to use emission to add vibrancy and depth to scenes.
Lighting Control for Different Times - Master techniques to control lighting for various times of day or night.

Requirements
To own a computer (Microsoft, Linux or Mac)
To have downloaded Blender
A thirst to learn and excitement about 3D modelling, game art, and lighting to take your portfolio to the next level
To download all course resources including 4 x geometry nodes (chain geometry node, palm tree geometry node, grapevine geometry node, planks geometry node), 1 x displacement modifier terrain setup, multiple reference plants and foliage (4 x ferns, 4 x plants, 8 x grape bundles), and 1 x human reference. You will also find 31 different types of textures and shaders and 120 x texture maps. The resource pack also has 1 x terrain, 1 x rock, 1 x stone, 1 x wall, 4 x wood, 2 x metal, 1 x gold, 1 x cloth, 3 x windows, 4 x painted wood pieces, 1 x rope, 1 x palm, 1 x set of tiles, 1 x water, 1 x carpets, 1 x linen, 1 x basket weave, 3 x clay and soil, 2 x coloured stone.

Description
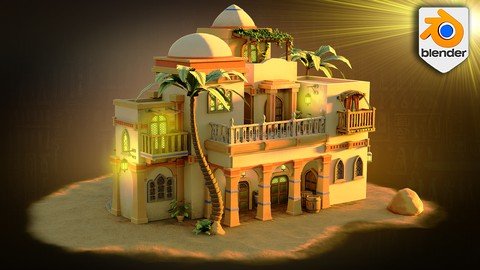
Welcome to Blender 4 The Ultimate Guide , a transformative journey designed by 3D Tudor, perfect for those looking to master Blender 4 modelling techniques.Join Neil from 3D Tudor in Blender 4 the Ultimate Guide and transform your 3D modelling skills. This 20-hour comprehensive course covers everything from Blender basics to advanced texturing and rendering techniques.Learn to create realistic 3D environments, master UV unwrapping, and explore cutting-edge features like geometry nodes and cloth simulation. Perfect for both beginners and seasoned artists, Blender 4 The Ultimate Guide offers over 100 lessons in Blender 4 modelling, texturing, and environmental design. Elevate your 3D art with our hands-on approach and become part of a vibrant community of learners.My name is Neil, the driving force behind 3D Tudor, and I am thrilled to introduce you to this comprehensive 20-hour course, a deep dive into 3D environment design with Blender. In your course project for 'Blender 4 The Ultimate Guide', you will create a stylized 3D environment that captures the essence of ancient Egyptian architecture with a modern twist.Your building will feature iconic domes and arched doorways reminiscent of traditional Egyptian structures, complemented by vibrant textures and a warm, inviting colour palette. Balconies adorned with intricate railings and geometric patterns, as well as ornate windows with lattice designs, will add depth and character to your model.The environment will be brought to life with lush, green palm trees that frame the structure and flowing vines that drape over the sandstone walls, creating a scene that is both historic and rich in detail. This project will not only showcase your ability to blend the past with the present in your 3D modelling but also demonstrate your skill in infusing a classic setting with a contemporary style.Embark on an enthralling journey through time with our Blender 4 The Ultimate Guide , where the magic begins at the planning stage. We meticulously lay the foundation using advanced tools like MidJourney and PureRef, ensuring that your creation is not just a figment of imagination but a masterpiece grounded in realism.This is an essential skill for anyone looking to delve into Blender 4 modelling techniques. Intensive research and gathering references will enable you to craft an authentic 3D environment that resonates with the grandeur of ancient Egypt in a stylized style.We've meticulously crafted Blender 4 the Ultimate Guide to take you through every stage of the 3D modelling pipeline from the initial idea to greyboxing, modelling, texturing, and finally, rendering and compositing.This journey is not just about 3D modelling with Blender 4; it's about revolutionizing the way you approach 3D modelling and laying a robust foundation to become a professional in this dynamic field. Blender 4 The Ultimate Guide top 7 points about the course:Master the art of crafting a vibrant, stylized sunrise for virtual environments using advanced rendering and composition techniques in BlenderUtilize our exclusive asset library, meticulously curated for creating stylized Egyptian environments, featuring a variety of exotic plants, materials and geometry nodesAccelerate your asset generation and enhance your scenes with our adaptable geometry node system, designed for efficient, professional-level scene developmentDiscover specialized UV unwrapping methods that allow precise control over texture application, ensuring your desired resultsDesign intricate vine formations that seamlessly integrate with architectural structures, adding a unique flair to your Egyptian-themed sceneConstruct a distinctive terrain foundation for your environment, skillfully merging stylized textures through vertex painting for a cohesive look Blender 4 The Ultimate Guide is more than just a series of tutorials. It's an interactive learning experience that will elevate your skills in 3D design, texturing, lighting, and environmental creation. With over 100 lessons, you'll gain not only the technical know-how but also the creative insights to bring your visions to life.Your course project will be to stylized 3D environment inspired by the grandeur of ancient Egypt. Your class project will engage you in practical, hands-on learning, where you ll apply concepts covered in the lessons. You'll start with basic greyboxing to establish your scene's layout and structure, progressing to intricate details like crafting architectural elements and lifelike foliage. This journey will enhance your skills in UV unwrapping, texture application, and cloth simulation, culminating in a beautifully rendered and artistically rich 3D environment. This project is designed to be both challenging and rewarding, perfectly suited for both beginners and seasoned 3D artists, and will serve as a showcase of your newfound skills in 3D environment design with Blender.Key Highlights in Blender 4 The Ultimate Guide :1. Foundation in Blender Basics: Begin with an understanding of Blender's interface and asset management. Learn how to set up projects efficiently and store files using Blender's Asset Manager.2. Resource and Reference Mastery: Discover the art of managing resources and references in Blender, including creative AI assistance with ChatGPT, and techniques for 3D environment design.3. Advanced Modeling Techniques: Dive into greybox modelling and lighting, explore structural elements, and create natural elements with geometry nodes.4. Texturing and Material Application: From crafting stylized pillars and applying textures to designing archways and beams, gain proficiency in texture application and UV unwrapping.5. Architectural and Environmental Design: Learn to model intricate architectural features like doors, windows, and balconies, and integrate them into your 3D scenes.6. Sculpting and Prop Modeling: Delve into the art of sculpting details and modelling unique props to enhance your scenes.7. Realistic Environment Creation: Get hands-on experience in terrain detailing, light source modelling, and scene optimization for creating immersive environments.8. Final Compositions and Rendering: Conclude your learning experience by finalizing compositions and mastering the rendering process.Dive into our Download Pack Blender 4 The Ultimate Guide comes with a massive resource pack including 4 x geometry nodes (chain geometry node, palm tree geometry node, grapevine geometry node, planks geometry node), 1 x displacement modifier terrain setup, multiple reference plants and foliage (4 x ferns, 4 x plants, 8 x grape bundles), and 1 x human reference. You will also find 31 different types of textures and shaders and 120 x texture maps. The resource pack also has 1 x terrain, 1 x rock, 1 x stone, 1 x wall, 4 x wood, 2 x metal, 1 x gold, 1 x cloth, 3 x windows, 4 x painted wood pieces, 1 x rope, 1 x palm, 1 x set of tiles, 1 x water, 1 x carpets, 1 x linen, 1 x basket weave, 3 x clay and soil, 2 x coloured stone.All these resources are set out in individual .blend files with their asset manager, making it easy to use in this and other projects. All geometry nodes are set up and can be used in other projects, except for commercial use.Course OutlineSection 1 - Introduction to Blender and Asset ManagementExplore the art of configuring resource packs in Blender, tailored to enhance your 3D design experience. Develop skills in setting up efficient references, crucial for detailed 3D environment design.Section 2 - Resource and Reference Management in BlenderOur focus is not just on the aesthetics; we delve deep into the compositional aspects to ensure every element harmonizes perfectly. Greyboxing plays a pivotal role here, where we meticulously outline our buildings. This method guarantees that each structure interlocks seamlessly, offering an impressive silhouette while maintaining realistic proportions.We emphasize the use of human references for scaling, ensuring your environment is not only visually stunning but also proportionately accurate. Join us in this meticulous planning stage, where your vision for a majestic Egyptian landscape begins to take shape, setting the stage for a breathtaking 3D rendering experience.Leverage the power of AI with ChatGPT to generate creative references, adding depth to your projects. Gain mastery in blocking out 3D scenes using primitives, a foundational skill for any designer. Delve into greyboxing, an essential technique for environmental planning and design.Section 3 - Advanced Greybox Modeling and LightingElevate your 3D scene designs with advanced elevation techniques in greybox modelling. Explore the intricacies of designing functional and aesthetically appealing staircases, using human reference scales for accuracy. Illuminate your greybox environments with lighting skyboxes, adding mood and depth to your creations.Section 4 - Structural Elements and GreyboxingThe resource pack provided in the course is a treasure trove of exotic foliage, including ferns and preset bushes, designed to give your scene a more organic and lifelike appearance.Plan and integrate windows and balconies into your 3D models, ensuring they complement the overall structure. Discover the art of roof shape planning in Blender, an essential skill for creating diverse building designs. Learn to consider structural supports in your scenes, adding realism and stability to your models. Master archway design techniques, enhancing the architectural appeal of your greyboxed environments.Section 5 - Creating Natural Elements with Geometry NodesUnleash your creativity by crafting lifelike palm trees using Blender s geometry nodes. Learn to adjust these stylized 3D palm trees for seamless integration into your scene, enhancing the environmental realism.Section 6 - Pillar Design and Texture ApplicationDelve into the creation of stylized pillars, a key architectural element in any environment. Understand the importance of seams and sharps in Blender for refined modelling. Master UV unwrapping techniques for pillars, ensuring accurate texture application. Discover the basics of texture import and material setup, a vital step in bringing your models to life. Apply textures to your pillars, enhancing their realism and aesthetic appeal.Section 7 - Architectural Features and Asset ManagementDesign complex archways, learning to create shapes and forms that define your scenes. Create decorative beams, adding intricate details to your models. Explore variations in stylized beams, enhancing the diversity of your designs. Organize your pillars and archways efficiently using Blender's Asset Library, streamlining your workflow. Integrate these structural elements into your scenes, ensuring a cohesive and realistic environment.Section 8 - Door Design and Asset CreationModel your first 3D door asset, focusing on style and environmental fit. Stylize doors to match the aesthetic of your surroundings, ensuring design consistency. Create realistic metal hinges, adding a functional aspect to your doors. Convert and adjust your doors into usable 3D assets, ready for integration into various scenes.Section 9 - Window Design and Texture UtilizationCraft a unique, stylized window in Blender, paying attention to design details that make it stand out. Illuminate your windows using atlased textures, a technique that adds depth and realism to your scenes.Section 10 - Rooftop and Staircase Design in 3DModel aesthetically pleasing rooftops, a vital element in defining your building's character. Construct staircases with precision using Blender's measurement systems, ensuring functionality and design harmony. Add style to your staircases, blending them seamlessly into your environment. Utilize the Array Modifier for efficient staircase modelling, saving time without sacrificing quality. Design stylized tiles for your staircases, adding a unique touch to your architectural elements.... and many more lessons focusing on doorway design, texturing, balcony design, cloth simulation for shades, and rendering techniques. This course is a gift that keeps on giving with an immense amount of learning potential in the course sections that follow.Summing it all up Blender 4 The Ultimate Guide is more than just tutorials; it's an interactive learning experience that will elevate your skills in 3D design, texturing, lighting, and environmental creation. Join us at 3D Tudor and transform your artistic journey with Blender.Let's reshape the world of 3D modelling together! Blender 4 The Ultimate Guide will not only grant you access to high-quality content but also become part of a thriving community of learners. Whether you're kickstarting a new career, enhancing your existing skills, or pursuing a personal project, we're here to guide you every step of the way.Don't just dream of being good at 3D modelling; take Blender 4 The Ultimate Guide and lay the foundation to become a professional.All you need now is time to refine the skills you learn here. Join us, and let's reshape the world of 3D modelling together.See you in the course, and until then, happy modelling everyone!Neil 3D Tudor

Overview
Section 1: Introduction

Lecture 1 Introduction

Section 2: Introduction to Blender and Asset Management

Lecture 2 Lesson 1 Blender Basics Overview[Resource Pack]

Lecture 3 Lesson 2 Setting Up New Projects in Blender

Lecture 4 Lesson 3 Mastering Blender Asset Manager Setup

Lecture 5 Lesson 4 Efficiently Storing Files in Blender's Asset Manager

Section 3: Resource and Reference Management in Blender

Lecture 6 Lesson 5 Resource Pack Configuration for Blender Courses

Lecture 7 Lesson 6 Efficient Reference Setup for 3D Environment Design

Lecture 8 Lesson 7 Generating Creative References with ChatGPT AI

Lecture 9 Lesson 8 Techniques for Blocking Out 3D Scenes Using Primitives

Lecture 10 Lesson 9 Mastering Greyboxing for 3D Environmental Design

Section 4: Advanced Greybox Modeling and Lighting

Lecture 11 Lesson 10 Elevation Techniques for Greybox 3D Scenes

Lecture 12 Lesson 11 Designing 3D Greybox Staircases

Lecture 13 Lesson 12 Implementing Lighting Skyboxes for Greybox Environments

Section 5: Structural Elements and Greyboxing

Lecture 14 Lesson 13 Planning Windows and Balconies in 3D Models

Lecture 15 Lesson 14 Roof Shape Planning in Blender

Lecture 16 Lesson 15 Structural Support Considerations in Blender Scenes

Lecture 17 Lesson 16 Arcway Design Techniques for Greyboxing

Section 6: Creating Natural Elements with Geometry Nodes

Lecture 18 Lesson 17 Crafting Palm Trees Using Geometry Nodes

Lecture 19 Lesson 18 Adjusting Stylized 3D Palm Trees for Scene Integration

Section 7: Pillar Design and Texture Application

Lecture 20 Lesson 19 Crafting Stylized Pillars in Blender

Lecture 21 Lesson 20 Introduction to Seams and Sharps in Blender

Lecture 22 Lesson 21 Techniques for UV Unwrapping Pillars

Lecture 23 Lesson 22 Basics of Texture Import and Material Setup

Lecture 24 Lesson 23 Applying Textures to Pillars for Enhanced Realism

Section 8: Architectural Features and Asset Management

Lecture 25 Lesson 24 Designing Archways in Blender

Lecture 26 Lesson 25 Creating Decorative Beam Elements

Lecture 27 Lesson 26 Variations in Stylized Beams

Lecture 28 Lesson 27 Organizing Pillars and Archways Using the Asset Library

Lecture 29 Lesson 28 Integrating Pillars and Archway Supports into Scenes

Section 9: Door Design and Asset Creation

Lecture 30 Lesson 29 Modeling Your First Door Asset in 3D

Lecture 31 Lesson 30 Stylizing Doors to Match Environmental Aesthetics

Lecture 32 Lesson 31 Creating Realistic Metal Hinges

Lecture 33 Lesson 32 Adjusting Doors and Converting them into 3D Assets

Section 10: Section 9 - Window Design and Texture Utilization

Lecture 34 Lesson 33 Crafting a Stylized Window in Blender

Lecture 35 Lesson 34 Using Atlased Textures to Illuminate Windows

Section 11: Rooftop and Staircase Design in 3D

Lecture 36 Lesson 35 Modeling an Aesthetic Rooftop

Lecture 37 Lesson 36 Constructing Staircases with Precision Measurement Systems

Lecture 38 Lesson 37 Adding Style to Staircases

Lecture 39 Lesson 38 Utilizing the Array Modifier for Staircase Modeling

Lecture 40 Lesson 39 Designing Stylized Tiles for Staircases

Section 12: Doorway Design and Wood Texturing

Lecture 41 Lesson 40 Understanding Normals and Doorway Modeling

Lecture 42 Lesson 41 Techniques for Unwrapping Door Frames to Enhance Wood Grain

Lecture 43 Lesson 42 Finalizing Doorway Entrances

Lecture 44 Lesson 43 Decorating Doorway Entrances with Beams

Section 13: Entrance Beautification with Foliage and Pottery

Lecture 45 Lesson 44 Adding Foliage Ferns to Enhance Entrance Appeal

Lecture 46 Lesson 45 3D Modeling of Plant Pots

Lecture 47 Lesson 46 Techniques for Modeling and Unwrapping Spherical Roofs

Section 14: Section 13 - Advanced Door Design and Texture Application

Lecture 48 Lesson 47 Modeling Another Stylized Door in Blender

Lecture 49 Lesson 48 Techniques for Applying Textures to Doors

Section 15: Enhancing Windows with Mirror Modifiers and Cloth Physics

Lecture 50 Lesson 49 Modeling Double-Framed Windows Using Mirror Modifiers and Loop Tools

Lecture 51 Lesson 50 Creating Curtains with Cloth Physics Simulation

Lecture 52 Lesson 51 Techniques for Window Mesh Cleanup and Stylization

Lecture 53 Lesson 52 Using Geometry Nodes for Balcony Base Planks

Lecture 54 Lesson 53 Modeling Support Structures for Balconies

Section 16: Balcony Design and UV Mapping

Lecture 55 Lesson 54 Attaching Balconies to Walls with Chain Geometry Nodes

Lecture 56 Lesson 55 Modeling Attachments for Balcony Rooftops

Lecture 57 Lesson 56 UV Unwrapping and Straightening Wood Supports

Section 17: Enhancing Back Entrances and Staircases

Lecture 58 Lesson 57 Working on the Backside Entrance Design

Lecture 59 Lesson 58 Creating Curved Staircases for Back Entrances Using Simple Deform

Section 18: Advanced Window Modeling and Texturing

Lecture 60 Lesson 59 Modeling a 3-Framed Window Asset by Merging Primitive Shapes

Lecture 61 Lesson 60 Fixing Mesh Gaps in Window Frames

Lecture 62 Lesson 61 Texturing Three-Piece Windows

Section 19: Creating Window Variants and Scene Placement

Lecture 63 Lesson 62 Creating Window Variants for Diverse Design

Lecture 64 Lesson 63 Strategically Placing Doors and Windows in the Scene

Section 20: Cloth Shades and Sculpting Details

Lecture 65 Lesson 64 Working with Cloth Simulations for Shades

Lecture 66 Lesson 65 Sculpting Additional Details Using Sculpt Mode

Lecture 67 Lesson 66 Texturing Cloth Shades for Realism

Section 21: Texturing and Supporting Main Building Structures

Lecture 68 Lesson 67 Adding Texture to Main Building Structures

Lecture 69 Lesson 68 Wrapping Stone Supports Around Main Building Structures

Section 22: Camera Framing and Render Setup

Lecture 70 Lesson 69 Setting Up Main Composition for Camera Framing and Rendering

Lecture 71 Lesson 70 Resolving Texturing Issues in Rendered Material Shaders

Section 23: Stylized Architectural Elements and Material Application

Lecture 72 Lesson 71 Modeling a Stylized Archway

Lecture 73 Lesson 72 Creating Fancy Stylized Balcony Railings

Lecture 74 Lesson 73 Adding Materials to Marble Railings

Lecture 75 Lesson 74 Creating Stylized D cor for Railings

Section 24: Balcony Flooring and Tile Design

Lecture 76 Lesson 75 Working on Balcony Flooring Designs

Lecture 77 Lesson 76 Creating Stylized Tiles Using a Material Atlas

Lecture 78 Lesson 77 Applying Fancy Tiles to Marble Balconies and Reusing in Other Spaces

Section 25: Roof Design and Balcony Attachments

Lecture 79 Lesson 78 Creating a Stylized Rounded Roof

Lecture 80 Lesson 79 Adding Roof Attachments to Stylized Balconies

Section 26: Decorative Elements and Prop Modeling

Lecture 81 Lesson 80 Modeling Plant Vases for Enhanced Aesthetics

Lecture 82 Lesson 81 Creating a Stylized Barrel

Lecture 83 Lesson 82 Finalizing and Texturing the Stylized Barrel

Lecture 84 Lesson 83 Crafting a Woven Basket for Scene Detailing

Section 27: Modeling and Unwrapping Unique Props

Lecture 85 Lesson 84 Modeling Fabric Bags for Scene Enhancement

Lecture 86 Lesson 85 Unwrapping Decimated Mesh with the Bisect Tool

Lecture 87 Lesson 86 Recentering Structural Decorations for Symmetry

Lecture 88 Lesson 87 Adding Structural Supports to Balconies

Section 28: Balcony Design and Decorative Detailing

Lecture 89 Lesson 88 Creating Radial Balcony Railings for Unique Designs

Lecture 90 Lesson 89 Adding Support Elements to Railings for Stability

Lecture 91 Lesson 90 Creating Balcony Shade Decorations for Visual Appeal

Section 29: Section 28 - Foliage Integration and Geometry Nodes Application

Lecture 92 Lesson 91 Crafting a Wood Frame for Grape Foliage Sections

Lecture 93 Lesson 92 Adding Grape Berries for Realistic Detail

Lecture 94 Lesson 93 Utilizing Ivy Geometry Nodes for Dynamic Foliage

Section 30: Palm Tree Replacement and Texture Adjustment

Lecture 95 Lesson 94 Replacing Palm Tree Mesh for Improved Quality

Lecture 96 Lesson 95 Altering Palm Tree Leaf Textures for a More Stylized Look

Section 31: Section 30 - Prop Modeling and Texture Application

Lecture 97 Lesson 96 Modeling Crate Props Using the Solidify Modifier

Lecture 98 Lesson 97 Sculpting Rocks with the 'Extra Object' Add-On

Lecture 99 Lesson 98 Techniques for UV Unwrapping Rocks

Lecture 100 Lesson 99 Modeling Carpet Assets with Curve Spirals

Lecture 101 Lesson 100 Applying Textures to Carpet for Realism

Section 32: Well Design and Complementary Prop Creation

Lecture 102 Lesson 101 Modeling a Bucket for the Well

Lecture 103 Lesson 102 Crafting a Stylized Well

Lecture 104 Lesson 103 Creating a Rope Using Curve Nurbs

Lecture 105 Lesson 104 Texturing the Stylized Well for Realism

Section 33: Section 32 - Render Compositor Setup and Adjustment

Lecture 106 Lesson 105 Setting Up Render Compositor Layers for Enhanced Visuals

Lecture 107 Lesson 106 Adjusting Compositor Layers for Optimal Results

Section 34: Section 33 - Light Source Modeling and Scene Optimization

Lecture 108 Lesson 107 Modeling Additional Light Sources for Scene Illumination

Lecture 109 Lesson 108 Adjusting the Lantern Asset and Adding Textures

Lecture 110 Lesson 109 Tweaking Light Strength for Scene Balance

Lecture 111 Lesson 110 Cleaning Up the Scene to Enhance Performance

Lecture 112 Lesson 111 Attaching Additional Lanterns for Ambient Lighting

Section 35: Section 34 - Terrain Detailing and Texturing Techniques

Lecture 113 Lesson 112 Adding Detail to Terrain for Realism

Lecture 114 Lesson 113 Applying Terrain Texture Using Vertex Painting

Lecture 115 Lesson 114 Creating Opacity Masks for Refined Edges

Lecture 116 Lesson 115 Cleaning Up Tiles on Terrain for Consistency

Section 36: Section 35 - Finalizing Composition and Rendering

Lecture 117 Lesson 116 Finalizing the Composition and Preparing for Rendering

Lecture 118 Lesson 117 Final Thoughts and Reviewing Our Completed Work

Blender enthusiasts interested in learning about the AAA game art workflow in Blender 4, Beginners in 3D art and modelling who wish to learn the fundamentals of Blender and the process of creating stylized 3D models, from the ground up, Digital artists and hobbyists looking to transition into 3D modelling, particularly in creating stylized art for the gaming and animation industries, Intermediate 3D modellers seeking to refine their skills in Blender and expand their expertise in creating AAA-quality stylized art, Professionals in the gaming and animation sectors who aim to master advanced techniques in asset management and workflow optimization within Blender, Creative 3D artists with a passion for gaming and fantasy art, aspiring to translate their ideas into high-quality 3D models and environments, Educators and trainers in digital art and 3D modelling looking for comprehensive resources to enhance their curriculum or self-learning journey, Anyone interested in the art of stylized 3D modelling and looking for a thorough, step-by-step approach to master Blender and its tools for creating captivating digital art


441569856_the_blender_4_ultimate_guide.jpg


dd8cd00b14ccae297fbbc2983982500a.jpg


Project- Flame Browser And Downloader For Android Smartphone
Published 6/2023
MP4 | Video: h264, 1280x720 | Audio: AAC, 44.1 KHz
Language: English | Size: 37.73 GB | Duration: 70h 12m

Build the whole project in this course and learn Android App Development


What you'll learn
Basic to Advance level Android programming
Create your own multi tab browser and multi segment downloader!
Enhance your coding skills by learning useful topics
Publish your app live for the audience and start your Android App Developer journey

Requirements
Only basic programming experience is needed.

Description
I am author of GinxDroid Browser and Downloader. In this course we will build Flame Browser and Downloader for Android Smartphone. It will be multi tab browser with attached multi segment downloader. You will gain knowledge about how real world android apps are developed and published. You can refer this project for your future app development. Some highlighted features that we are going to develop are Themes, Tab Manager (by creating out custom layout manager for RecyclerView), Multi segement downloader to boost download speed, Refresh download address functionality to refresh expired links, version control system (VCS), VCS operations, animations, prorgessbars - indeterminate and determinate, using third party libraries, attributing third party libraries properly, debugging, using lint tools to perform linting to mitigate warnings and errors, speed dials, history, bookmarks, homepages, splashscreen, launcher icon, notification, services, popup window, alert dialogs, fragmens, various layouts (how to use them in real world app effectively) and lot more development stuff is waiting for you in this course. And at the end we will publish production build live on Google Play Store! All this is witihin a single course! More that 200 code along sessions. Each session will start with introduction and ends with a section wrap up and quiz.

Overview
Section 1: Introduction

Lecture 1 Course Introduction

Lecture 2 Project Introduction

Section 2: Getting Started with Android Studio IDE

Lecture 3 Installing Android Studio (Part I)

Lecture 4 Installing Android Studio (Part II)

Lecture 5 Tweaking Android Studio settings

Lecture 6 Increasing Android Studio performance

Lecture 7 Overview of various tabs of Android Studio

Section 3: Projects in Android Studio and basic concepts

Lecture 8 Creating new project in Android Studio

Lecture 9 Overview of Android Manifest file

Lecture 10 Overview of Gradle Scripts

Lecture 11 Creating device profile in AVD and launching our app in AVD

Lecture 12 Creating new activity

Lecture 13 Activity Life Cycle

Lecture 14 View in android

Section 4: Version Control System (VCS)

Lecture 15 VCS - Introduction

Lecture 16 Adding Github account and sharing project on Github

Lecture 17 gitignore file - track and untrack files in VCS

Lecture 18 commit and push

Lecture 19 revert old commit and push

Lecture 20 checkout and revert commit

Section 5: Starting development of Flame Browser & Downloader and creating Themes Module.

Lecture 21 Layouts in Android - General Introduction

Lecture 22 Creating necessary attributes and declaring resources for our application

Lecture 23 Android Material Design - Getting Started

Lecture 24 Adding Bottom App Bar and Floating Action Button

Lecture 25 Theme Module - Introduction

Lecture 26 Creating DatabaseHandler (SQLiteOpenHelper) class

Lecture 27 Database CRUD operations (DB Tables creation, first initialization)

Lecture 28 Inserting Themes in Database and Updating old Database Schema

Lecture 29 Creating Modal Bottom Sheet in Android - Themes Sheet

Lecture 30 Creating Themes Sheet Layout and understanding build types

Lecture 31 RecycleView in android - General Introduction

Lecture 32 Creating adapter class for our RecycleView

Lecture 33 Showing our theme models to user

Lecture 34 Making Bottom Sheet top corners rounded

Lecture 35 Adding Dark Themes column to existing database

Lecture 36 Creating utility database functions related to our themes module

Lecture 37 Custom alert dialogs in android (continuing development of our themes module)

Lecture 38 Creating theme resources for our app

Lecture 39 Creating application level class for making themes persistant

Lecture 40 Creating base activity and applying our themes in that base activity

Lecture 41 Creating enable night mode for web pages functionality

Lecture 42 Creating Quick Action buttons for themes module

Lecture 43 Tweaking first initialization

Lecture 44 Wrapping up our themes module

Section 6: Creating Tab Manager Skeleton

Lecture 45 Creating adapter class for Tab Manager - RecyclerView

Lecture 46 Addition of new tab in tab manager - creating some helper functions

Lecture 47 Starting creation of custom layout manager - CustomHorizontalManager

Lecture 48 Continuing creation of CustomHorizontalManager

Lecture 49 Creating functionality for minimizing expanded tab

Lecture 50 Creating functionality for maximizing minimized tab

Lecture 51 Creating tab preview screen before scrolling functionality

Lecture 52 Creating scrolling functionality

Lecture 53 Creating scrollLeft and scrollRight functions

Lecture 54 Removing tab from tab manager

Lecture 55 Creating tab removal case in CustomHorizontalManager

Lecture 56 Creating Swipe Gesture for removing tab

Lecture 57 Wrapping up tab manager skeleton section

Section 7: Creation of Screen One that is Default Home Page

Lecture 58 Glimpse of two screens and upgrading Gradle plugin to V8

Lecture 59 Adding bottom bar for tab

Lecture 60 Designing top bar

Lecture 61 Creating Default Home Page layout

Lecture 62 Adding WebView and ProgressBar in Tab layout

Lecture 63 Using RecycledViewPool and creating QuickLinksRVHomePageAdapter

Lecture 64 Creating Quick Link item related database functions

Lecture 65 Continuing development of QuickLinksRVHomePageAdapter

Lecture 66 Creating TextDrawable class

Lecture 67 Wrapping creation of default home page section

Section 8: WebView - Creating basic functionality, creating tab preview

Lecture 68 What is WebView in android?

Lecture 69 Rendering first Webpage and Tweaking WebView related settings

Lecture 70 Showing webpage URL in top bar

Lecture 71 Showing progress of webpage to user

Lecture 72 Creating tab preview and showing it

Lecture 73 Fixing tab preview glitch

Lecture 74 Section wrap up

Section 9: Building menu for app

Lecture 75 Introduction

Lecture 76 Referencing menu structure of our ready project

Lecture 77 Creating layout for menu sheet

Lecture 78 RVIndicator class development - Part I

Lecture 79 RVIndicator class development - Part II and showing MenuSheet to user

Lecture 80 Cretion of MenuHelper class for showing Menu RecyclerView

Lecture 81 Creating adapter for Menu RecyclerView

Lecture 82 Creating menu screen one layout

Lecture 83 Creating menu screen two

Lecture 84 Showing our final menu to user

Lecture 85 Creating functionality for bottom buttons of our menu

Lecture 86 Hiding bottom bar when keyboard is visible and fixing view full screen bug

Lecture 87 Creating web mode functionality

Lecture 88 Continuing creation of menu screen one buttons functionality

Lecture 89 Showing web page title and favicon to user

Lecture 90 defining case 9 and 10 in CustomLayoutManager

Lecture 91 Calling close this tab after making inner structure ready for closing tab

Lecture 92 Creating functionality for close this tab button

Lecture 93 Creating functionality for find in page button

Lecture 94 Creating functionality for share, copy and print buttons

Lecture 95 Creating text scaling functionality

Lecture 96 Creating settings activity before wrapping menu section

Lecture 97 Wrapping up menu section

Lecture 98 Important note before moving to next section

Section 10: Creation of Home Page, History, Bookmarks and Speed Dial module

Lecture 99 Creating database related functions for home page module

Lecture 100 Adding home page URL in database

Lecture 101 Different webpage as home page not rendering - bug fix

Lecture 102 Making go to home page functionality

Lecture 103 Creating layout for manage home pages

Lecture 104 Creating hiding functionality for manage home pages search box

Lecture 105 Creating home page item row for RecyclerView

Lecture 106 Creating MangeHomePagesRVAdapter

Lecture 107 Creaeting functionality for deleting home page item

Lecture 108 Creating necessary database tables and methods

Lecture 109 Finally using ManageHomePagesRVAdapter with RecyclerView

Lecture 110 Creating functionality for bookmark this button

Lecture 111 Creating manage bookmarks functionality

Lecture 112 Creating BookmarksHelper class

Lecture 113 Creating case 6 and 4 in CustomHorizontalManager

Lecture 114 Creating add to speed dial functionality

Lecture 115 Creating menu for quick link item

Lecture 116 Creating functionality for open in background button of quick link menu

Lecture 117 Changing speed dial name functionality

Lecture 118 Creating remove speed dial functionality

Lecture 119 Creating history item related database functions

Lecture 120 Storing history item in database

Lecture 121 Creating manage history activity and its layout

Lecture 122 Creating ManageHistoryRVAdapter

Lecture 123 Creating row layout for history RecyclerView

Lecture 124 Testing manage history functionality after creating adapter for RecyclerView

Lecture 125 Creating swipe gesture for removing history item

Lecture 126 Creating clear history functionality

Lecture 127 Creating history helper class

Lecture 128 Wrapping up History, Bookmarks and Speed Dial section

Section 11: Search Engines and Search History for our browser

Lecture 129 Section introduction

Lecture 130 Creating database table and necessary helper functions

Lecture 131 Popup Window in android for showing search engines

Lecture 132 Creating adapter for RecyclerView which is present in Popup Window

Lecture 133 Fixing search engine adapter errors

Lecture 134 Using search engine adapter with RecyclerView

Lecture 135 Opening search engine selector PopupWindow from default home page

Lecture 136 Creating our search widget module

Lecture 137 Showing our search widget to user

Lecture 138 Creating search history table and its helper methods in DatabaseHandler

Lecture 139 Creating item row layout for search history RecyclerView

Lecture 140 Creating adapter for search history RecyclerView

Lecture 141 Using adapter with RecyclerView of our search widget module

Lecture 142 Creating voice launcher related functions

Lecture 143 Continuing creation of voice launcher functionality

Lecture 144 Handling microphone and DRM content request

Lecture 145 Creating manage search history activity and its related database functions

Lecture 146 Creating manage search history

Lecture 147 Section wrap up

Section 12: Settings and Site settings

Lecture 148 Creating site settings table in database and its related methods

Lecture 149 Creating site settings activity

Lecture 150 Referencing site settings activity views and making them functional

Lecture 151 Using our stored site settings

Lecture 152 Using site settings in our WebView

Lecture 153 Implementing location functionality

Lecture 154 Creating tips sheet

Lecture 155 Creating layout for clear records sheet

Lecture 156 Creating clear records functionality

Lecture 157 Creating share link of this app and reset settings functionality

Lecture 158 Creating about this app activity

Lecture 159 Creating legal information activity

Lecture 160 Creating credits activity

Lecture 161 Wrapping up section

Section 13: Launcher icon and splash screen and handling new intents and other functions

Lecture 162 Creating launcher icon for app

Lecture 163 Creating splash screen for app

Lecture 164 Handling new intent in MainActivity

Lecture 165 Creating necessary database table and functions for storing recent sites

Lecture 166 Creating settings for storing recent sites

Lecture 167 Getting current URLs from tab manager

Lecture 168 Defining case 7 and 8 in CustomHorizontalManager

Lecture 169 Creating open recent sites functionality

Lecture 170 Creating incognito mode

Lecture 171 Creating incognito clear records and enabling safe browsing

Lecture 172 Imp Note: Fixing user agent string

Lecture 173 Creating functionality for showing video in fullscreen mode

Lecture 174 Creating case 5 in CustomHorizontalManager

Lecture 175 Fixing error

Lecture 176 Creating onConfigurationChanged and tweaking manifest file

Lecture 177 Section wrap up

Section 14: Creating webpage menu, back button, popup blocker and other functionality

Lecture 178 Overriding back button functionality of device for our app

Lecture 179 Pause, Resume and Destroy WebView

Lecture 180 Creating file chooser callback

Lecture 181 Creating webpage menu layout

Lecture 182 Creating webpage menu

Lecture 183 Creating CustomHorizontalManager remaining methods

Lecture 184 Creating Popup Blocker

Lecture 185 Creating QR scanner functionality

Lecture 186 IMP NOTE: for improving tab manager performance

Lecture 187 Creating show connection information functionality

Lecture 188 Showing our app tutorial to user

Lecture 189 Section wrap up

Section 15: Creating Downloader for our Browser! - Adding and showing download tasks in UI

Lecture 190 Downloader section introduction (about development process of downloader)

Lecture 191 Creating downloader related database tables

Lecture 192 Creating DownloadTask model

Lecture 193 Creating database function for adding download task

Lecture 194 Adding extra coulmns in user preferences table

Lecture 195 Creating layout for storage path not choosen dialog

Lecture 196 Creating onListenDownload

Lecture 197 Creating select download path activity result launcher

Lecture 198 Creating download task fetcher and using it

Lecture 199 Creating HumanReadableFormat helper class

Lecture 200 Starting development of DownloadTaskFetcher class

Lecture 201 Creating HelperUtil class

Lecture 202 Continuing development of DownloadTaskFetcher class

Lecture 203 Creating layout of AddNewDTaskSheet

Lecture 204 Continuing developement of AddNewDTaskSheet

Lecture 205 Designing FirstActivity layout

Lecture 206 Fixing themes related bug and creating DownloaderSettings activity

Lecture 207 Creating DownloaderSettings activity layout

Lecture 208 Making DownloaderSettings activity views functional

Lecture 209 Making save image menu button functional

Lecture 210 Creating FragmentStateAdapter

Lecture 211 Creating editLLLinearLayout in activity_first.xml file

Lecture 212 Referencing editLL and its views and passing them to adapters

Lecture 213 Creating layouts for RecyclerViewAdapter's ViewHolder item

Lecture 214 Referencing views from layout in ViewHolder of RecyclerViewAdapter

Lecture 215 Creating database functions that will return task IDs

Lecture 216 Writing onBind code for RecyclerViewAdapter

Lecture 217 Defining functions of RecyclerViewAdapter

Lecture 218 Creating layout for CompletedRecyclerViewAdapterls ViewHolder

Lecture 219 Defining CompletedRecyclerViewAdapter functions

Lecture 220 LocalBroadcastManager and BroadcastReceiver - introduction and using them

Lecture 221 Creating BatteryOptimization sheet

Lecture 222 Asking post notifications permission from user

Lecture 223 Defining methods of FirstActivity

Lecture 224 Section wrap up

Section 16: Downloading our download task and showing it in FirstActivity

Lecture 225 Creating necessary database functions for downloading DownloadTask

Lecture 226 Creating CustomNotificationGenerator class

Lecture 227 Starting development of DownloadingService

Lecture 228 Defining DownloadsExecutor class in DownloadingService

Lecture 229 Start defining run method of DownloadingService

Lecture 230 Defining DownloadsExecutor methods

Lecture 231 Defining DownloadingService methods

Lecture 232 Continuing development of DownloadsExecutor

Lecture 233 Defining exception occurred methods

Lecture 234 Defining methods related to exception occurred methods

Lecture 235 Creating remaining exception occurred related methods

Lecture 236 Creating and defining necessary classes

Lecture 237 Creating necessary classes that will download segments of download task

Lecture 238 Adding one permission in manifest file and defining onStartCommand

Lecture 239 Section wrap up

Section 17: Wiring downloader with user interface

Lecture 240 Wiring download now, pause and resume UI with downloader

Lecture 241 Fixing UI not updating glitch

Lecture 242 Fixed progress bars not updating glitch

Lecture 243 Creating layout for popup error details dialog

Lecture 244 Coding methods for showing popup error details dialog

Lecture 245 Creating start from beginning method

Lecture 246 Defining methods related to onStartCommand code

Lecture 247 Creating normal message popup dialog

Lecture 248 Creating layout for refresh download address dialog

Lecture 249 Accessing refresh download address views & creating RefreshAddress thread

Lecture 250 Defining run method of RefreshTask

Lecture 251 Reviewing todos

Lecture 252 Starting creation of multi-select-delete functionality

Lecture 253 Defining onLongClickListener for MaterialCardView

Lecture 254 Changing onCreateListener for making multi-select functional

Lecture 255 Tweaking onBind function for showing MaterialCardView as checkd or unchecked

Lecture 256 Creating methods related to multi-select and delete

Lecture 257 Creating delete dialog layout

Lecture 258 Defining create delete popup methods

Lecture 259 Defining delete tasks

Lecture 260 Creating multi-select-delete related methods in CompletedRecyclerViewAdapter

Lecture 261 Creating onLongClickListener for CompletedRecyclerView item

Lecture 262 Defining onClickListener for CompletedRecyclerView item

Lecture 263 Defining onClickListeners and testing multi-select-delete functionality

Lecture 264 Creating activity - FileDetails layout

Lecture 265 Defining code in FileDetails and fixing some warnings

Lecture 266 Overriding FirstActivity methods

Lecture 267 Fixing MainActivity todo

Lecture 268 Committing our code

Lecture 269 Creating app and ad unit in AdMob dashboard

Lecture 270 Continuing AdMob banner ad implementation process

Lecture 271 Defining methods in FirstActivity for showing banner ads

Lecture 272 Creating consent message in AdMob

Lecture 273 Testing AdMob banner ads

Section 18: Preparing our app for final release and publishing it in Google Play Store

Lecture 274 Analyzing code before preparing bundle

Lecture 275 Doing final steps before bundling our app

Lecture 276 Genererating bundle of our app

Lecture 277 Publishing our app

Beginner android devs. and advanced android devs. who are curious about Android programming fundas!


442076189_project_flame_browser_and_downloader_for_android_smartphone.jpg


Zurück
Oben Unten