• Regeln für den Video-Bereich:

    In den Börsenbereich gehören nur Angebote die bereits den Allgemeinen Regeln entsprechen.

    Einteilung

    - Folgende Formate gehören in die angegeben Bereiche:
    - Filme: Encodierte Filme von BluRay, DVD, R5, TV, Screener sowie Telesyncs im Format DivX, XviD und x264.
    - DVD: Filme im Format DVD5, DVD9 und HD2DVD.
    - HD: Encodierte Filme mit der Auflösung 720p oder darüber von BluRay, DVD, R5, TV, Screener sowie Telesyncs im Format x264.
    - 3D: Encodierte Filme von BluRay, die in einem 3D Format vorliegen. Dies gilt auch für Dokus, Animation usw.
    - Serien: Cartoon/Zeichentrick, Anime, Tutorials, Dokumentationen, Konzerte/Musik, Sonstiges sind demnach in die entsprechenden Bereiche einzuordnen, auch wenn sie beispielsweise im High Definition-Format oder als DVD5/DVD9/HD2DVD vorliegen. Ausnahme 3D.
    - Bereich Englisch: Englische Releases gehören immer in diesen Bereich.
    - Bereich Talk: Der Bereich, in dem über die Releases diskutiert werden kann, darf, soll und erwünscht ist.


    Angebot/Beitrag erstellen

    - Ein Beitrag darf erst dann erstellt werden, wenn der Upload bei mindestens einem OCH komplett ist. Platzhalter sind untersagt.
    - Bei einem Scenerelease hat der Threadtitel ausschließlich aus dem originalen, unveränderten Releasenamen zu bestehen. Es dürfen keine Veränderungen wie z.B. Sterne, kleine Buchstaben o.ä. vorgenommen werden. Ausnahme Serienbörse:
    - Bei einem Sammelthread für eine Staffel entfällt aus dem Releasename natürlich der Name der Folge. Beispiel: Die Simpsons S21 German DVDRip XviD - ITG
    - Dementsprechend sind also u.a. verboten: Erweiterungen wie "Tipp", "empfehlenswert", "only", "reup", usw. / jegliche andere Zusatzinformation oder Ergänzung, welche nicht in obiger Beschreibung zu finden ist.

    Aufbau des Angebots und Threadtitel

    Der Titel nach folgendem Muster erstellt zu werden. <Name> [3D] [Staffel] [German] <Jahr> <Tonspur> [DL] [Auflösung] <Quelle> <Codec> - <Group>
    Beispiel: The Dark Knight German 2008 AC3 DVDRip XviD - iND
    Beispiel: The Dark Knight 2008 DTS DL BDRip x264 - iND
    Beispiel: The Dark Knight 2008 AC3 DL BDRip XviD - iND
    Beispiel: The Dark Knight German 2008 AC3 720p BluRay x264 iND
    Beispiel: The Dark Knight 2008 DTS DL 1080p BluRay x264 iND
    Beispiel: Die Simpsons S01 German AC3 DVDRip XviD iND
    Beispiel: Die Simpsons S20 German AC3 720p BluRay x264 iND
    Beispiel: Sword Art Online II Ger Sub 2014 AAC 1080p WEBRip x264 - peppermint
    Entsprechend sind also u.a. verboten: Sonderzeichen wie Klammern, Sterne, Ausrufezeichen, Unterstriche, Anführungszeichen / Erweiterungen wie "Tipp", "empfehlenswert", "only", "reup", usw. / jegliche andere Zusatzinformation oder Ergänzung, welche nicht in obiger Beschreibung zu finden ist
    Ausnahmen hiervon können in den Bereichen geregelt sein.

    Die Beiträge sollen wie folgt aufgebaut werden:
    Überschrift entspricht dem Threadtitel
    Cover
    kurze Inhaltsbeschreibung
    Format, Größe, Dauer sind gut lesbar für Downloader außerhalb des Spoilers zu vermerken
    Nfo sind immer Anzugeben und selbige immer im Spoiler in Textform.
    Sind keine Nfo vorhanden z.B. Eigenpublikationen, sind im Spoiler folgende Dateiinformationen zusätzlich anzugeben :
    Quelle
    Video (Auflösung und Bitrate)
    Ton (Sprache, Format und Bitrate der einzelnen Spuren)
    Untertitel (sofern vorhanden)
    Hosterangabe in Textform außerhalb eines Spoiler mit allen enthaltenen Hostern.
    Bei SD kann auf diese zusätzlichen Dateiinformationen verzichtet werden.

    Alle benötigten Passwörter sind, sofern vorhanden, in Textform im Angebot anzugeben.
    Spoiler im Spoiler mit Kommentaren :"Schon Bedankt?" sind unerwünscht.


    Releases

    - Sind Retail-Release verfügbar, sind alle anderen Variationen untersagt. Ausnahmen: Alle deutschen Retail-Release sind CUT, in diesem Fall sind dubbed UNCUT-Release zulässig.
    - Im Serien-Bereich gilt speziell: Wenn ein Retail vor Abschluss einer laufenden Staffel erscheint, darf diese Staffel noch zu Ende gebracht werden.62
    - Gleiche Releases sind unbedingt zusammenzufassen. Das bedeutet, es ist zwingend erforderlich, vor dem Erstellen eines Themas per Suchfunktion zu überprüfen, ob bereits ein Beitrag mit demselben Release besteht. Ist dies der Fall, ist der bereits vorhandene Beitrag zu verwenden.
    - P2P und Scene Releases dürfen nicht verändert oder gar unter einem iND Tag eingestellt werden.


    Support, Diskussionen und Suche

    - Supportanfragen sind entweder per PN oder im Bereich Talk zu stellen.
    - Diskussionen und Bewertungen sind im Talk Bereich zu führen. Fragen an die Uploader haben ausschließlich via PN zu erfolgen, und sind in den Angeboten untersagt.
    - Anfragen zu Upload-Wünschen sind nur im Bereich Suche Video erlaubt. Antworten dürfen nur auf Angebote von MyBoerse.bz verlinkt werden.


    Verbote

    - Untersagt sind mehrere Formate in einem einzigen Angebotsthread, wie beispielsweise das gleichzeitige Anbieten von DivX/XviD, 720p und 1080p in einem Thread. Pro Format, Release und Auflösung ist ein eigener Thread zu eröffnen.
    - Grundsätzlich ebenso verboten sind Dupes. Uploader haben sich an geeigneter Stelle darüber zu informieren, ob es sich bei einem Release um ein Dupe handelt.
    - Gefakte, nur teilweise lauffähige oder unvollständige Angebote sind untersagt. Dies gilt auch für eigene Publikationen, die augenscheinlich nicht selbst von z.B. einer DVD gerippt wurden. Laufende Serien, bei denen noch nicht alle Folgen verfügbar sind, dürfen erstellt und regelmäßig geupdatet werden.
    - Untersagt sind Angebote, welche nur und ausschließlich in einer anderen Sprache als deutsch oder englisch vorliegen. Ausnahmen sind VORHER mit den Moderatoren zu klären.


    Verstoß gegen die Regeln

    - Angebote oder Beiträge, die gegen die Forenregeln verstoßen, sind über den "Melden"-Button im Beitrag zu melden.
  • Bitte registriere dich zunächst um Beiträge zu verfassen und externe Links aufzurufen.


Englische Tutorials

The Complete 2020 Unreal Masterclass: Build 2D And 3D Games

7oajn9a8abqzy8sypn8keorf13.jpg


The Complete 2020 Unreal Masterclass: Build 2D And 3D Games
Last updated 12/2019
MP4 | Video: h264, 1280x720 | Audio: AAC, 44.1 KHz
Language: English | Size: 12.73 GB | Duration: 18h 29m

Learn video game development and how to build impressive games from scratch with the Unreal Engine


What you'll learn
Build classic 2D and 3D platformer games in Unreal engine 4
Create multiple small games of different genres
Develop games from scratch

Requirements
The (free) Unreal Engine 4. We will walk you through the simple installation and setup process.
A computer with an Internet connection. This course is suitable for Mac or PC.

Description
This project is the world's biggest on-demand tutorial series designed to teach ANYONE how to code and build impressive games with the Unreal Engine.Benefits of Learning UnrealPopular - Unreal is a free game development engine used by developers all the way from beginner indie developers to AAA studios. The community is large and available for help.Powerful - Unreal is a powerful engine, with a huge library of image assets available for you to use as much as humanly possible, saving hours of development time.High Definition - Unreal is one of the main engines to use because it is so good at making good looking and high quality games. Unreal has high fidelity, meaning you can zoom in and still have high quality images.Coding Optional - The best part about Unreal is their blueprint system, letting you build games without coding. We have been using Unreal technologies since UDK and are delighted to see that the blueprint system is incredibly robust and resource-efficient.Resource-Efficient - You can minimize loss of performance by a large amount simply by using Blueprints.Other Industries - Unreal is for more than just game development. You can get hired in filmmaking, architectural design and product visualization, to name a few.For instance, Mcclaren Automotive uses Unreal to let users visualize their own unique luxury car before building it. Unreal Engine has even been used to build Star Wars-themed areas in Disney World and Disneyland.The Weather Channel used mixed reality to visualize Hurricane Florence's floods.
Overview
Section 1: Unreal Overview
Lecture 1 Unreal Overview - Part 1
Lecture 2 Unreal Overview - Part 2
Lecture 3 Unreal Overview - Part 3
Section 2: Create a quick shooter game
Lecture 4 Crash course - Shooter - Part 1
Lecture 5 Crash course - Shooter - Part 2
Lecture 6 Crash course - Shooter - Part 3
Lecture 7 Crash course - Shooter - Part 4
Lecture 8 Crash course - Shooter - Part 5
Section 3: Unreal Platform Switcher
Lecture 9 Crash course - Platform Switcher - Part 1
Lecture 10 Crash course - Platform Switcher - Part 2
Lecture 11 Crash course - Platform Switcher - Part 3
Lecture 12 Crash course - Platform Switcher - Part 4
Section 4: Unreal FPS
Lecture 13 Crash Course - FPS Shooter - Part 1
Lecture 14 Crash Course - FPS Shooter - Part 2
Lecture 15 Crash Course - FPS Shooter - Part 3
Section 5: Developing a Turret-Based Game
Lecture 16 Crash Course - Turret - Part 1
Lecture 17 Crash Course - Turret - Part 2
Lecture 18 Crash Course - Turret - Part 3
Lecture 19 Crash course - Turret - Part 4
Section 6: Create a Runner Switcher
Lecture 20 Crash course - Runner Switcher - Part 1
Lecture 21 Crash Course - Runner Switcher - Part 2
Lecture 22 Crash Course - Runner Switcher - Part 3
Lecture 23 Crash course - Runner Switcher - Part 4
Lecture 24 Course Files
Section 7: Learning more about the Unreal engine
Lecture 25 Getting Started In The Unreal Engine
Lecture 26 Moving around the Unreal Engine
Lecture 27 Moving Objects Around
Lecture 28 Adding Objects to the Scene
Lecture 29 Adding in Lights
Lecture 30 Adding Components to Objects
Lecture 31 Saving work
Lecture 32 Intro to Blueprints
Lecture 33 Level Blueprints and Object Blueprints
Lecture 34 Changing Components in the Object Tree
Lecture 35 Introduction to the Common Kinds of Variables
Lecture 36 Setting Variables and Capitalization
Lecture 37 Getting Setting and Converting Variables
Lecture 38 Printing to the Log and Using Variables
Section 8: Learning about Rapid Prototyping
Lecture 39 Prototyping the Level
Lecture 40 Making a playable game
Lecture 41 Adding Hit Logic
Lecture 42 Counter to Cube Destructions
Lecture 43 Adding a Timer
Lecture 44 Rounding up
Lecture 45 Light on the Projectile
Lecture 46 Random Color
Lecture 47 Spot Lights
Lecture 48 Wrapping Up Project
Section 9: Prototyping a Shooting game
Lecture 49 Setting up Prototype
Lecture 50 Shoot Gallery
Lecture 51 Set up levels
Lecture 52 Ball Physics
Lecture 53 Create a Spawner
Lecture 54 Impulses
Lecture 55 Destroying the balls
Lecture 56 Adding Explosion to the ball
Lecture 57 More on Spawning objects
Lecture 58 Heads up display
Lecture 59 Refactoring
Lecture 60 Adding Timer
Lecture 61 Testing Prototype-Fix
Lecture 62 Wrapping up
Section 10: Prototyping a Shootdown game
Lecture 63 Prototyping the Level
Lecture 64 Changing the FPS character
Lecture 65 Disabling the barrier collision
Lecture 66 A target to fire at
Lecture 67 Ball Health and Transform
Lecture 68 Adding Spawner
Lecture 69 Ball above the spawner
Lecture 70 Scoring System
Lecture 71 Refactoring Code
Lecture 72 Kill all Ball
Lecture 73 Fixing Explosion problem
Lecture 74 Optimizing Explosions
Lecture 75 Adding Final ball
Lecture 76 Testing the No Gravity
Lecture 77 Spawner Bouncing ball
Lecture 78 Adding impulse
Lecture 79 Adding timer
Lecture 80 Destroying classes
Lecture 81 Purple Kill all
Lecture 82 Conclusion of Section
Section 11: About fundamentals in Multiplayer
Lecture 83 Intro to Blueprints
Lecture 84 Adding Player Starts
Lecture 85 Debug UI
Lecture 86 Adding Collectables
Lecture 87 Adding a box-collected UI
Lecture 88 Updating the UI
Lecture 89 Fixing the Problem
Section 12: Fundamentals of a Battle Royale
Lecture 90 Start the Royale
Lecture 91 Multiplayer set up
Lecture 92 Player Colors
Lecture 93 Colors with code
Lecture 94 Player Counter
Lecture 95 Server Authority
Lecture 96 Setting up Tag
Section 13: "The Floor is Lava"
Lecture 97 Setting up the game
Lecture 98 Lava Actor Set up
Lecture 99 Logs and Redundancies
Lecture 100 Checking Level map
Lecture 101 Setting up Tag Cube
Lecture 102 Gamemode Variables
Lecture 103 Setting up Box Rules
Lecture 104 Bugs and Issues
Lecture 105 Closing Remarks
Section 14: Building an advanced shooter
Lecture 106 Getting Started
Lecture 107 Loading Animations
Lecture 108 Setting up character
Lecture 109 Pinning the gun to the player
Lecture 110 Player Projectile
Lecture 111 Projectile Spawning
Lecture 112 Projectile Velocity
Lecture 113 Player Health
Lecture 114 Health Pickups
You're an absolute beginner who needs to build a larger portfolio,You're a programmer who wants to upskill to game development,You're curious about the Unreal Engine but have struggled to find a clear series of tutorials to finish a project,You want to build a game to show your friends and family,You want to learn to code by building hands-on projects,You're a professor/teacher who needs to make a game development curriculum,You want to take your education into your hands by learning online
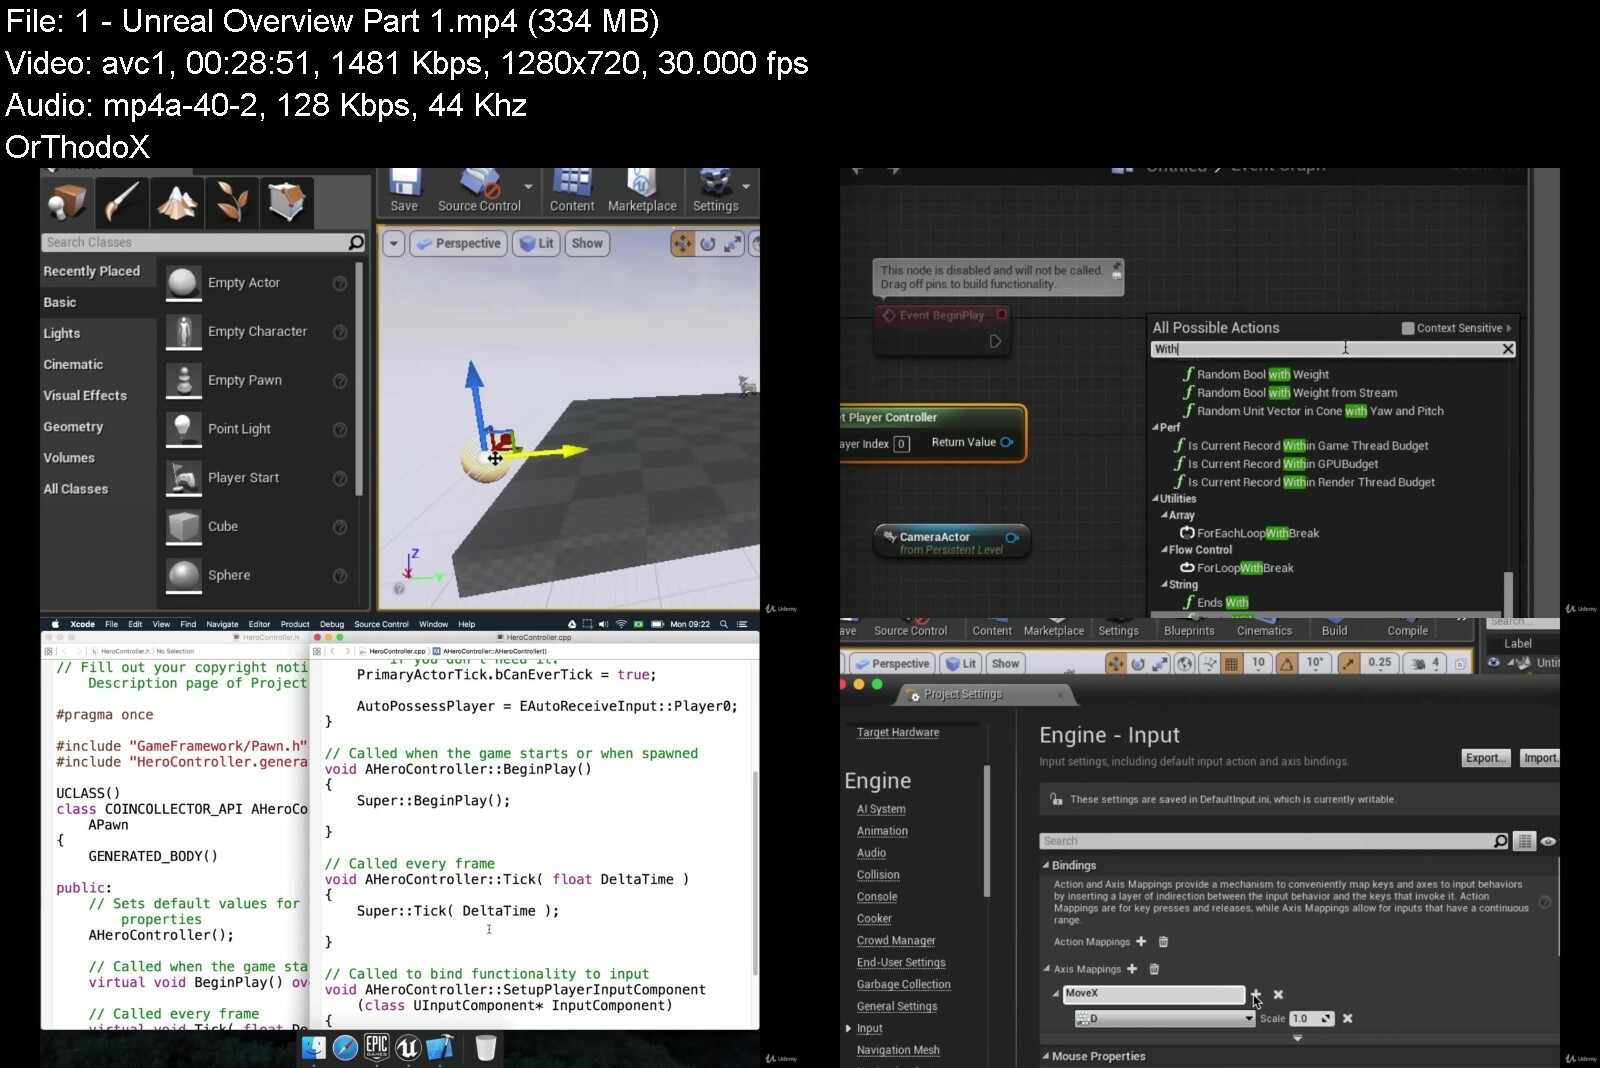


thecomplete2020unrealfye01.jpg


Download from RapidGator


Download from Keep2Share


Download from NitroFlare


Unity Game Development : Build 5 Games With Unity & C#

18910541d4f2pcdg4.jpg


Unity Game Development : Build 5 Games With Unity & C#
Last Updated 06/2022
MP4 | Video: h264, 1280x720 | Audio: AAC, 44.1 KHz, 2 Ch
Genre: eLearning | Language: English + srt | Duration: 121 lectures (22h 43m) | Size: 12.3 GB


Learn Unity Game Development & C# Scripting. Build 5 Complete 2D & 3D Games with Unity & C#. ( Unity 2022 Updated )


What you'll learn
Build 5 Simple Fun Game With Unity
Finish Your First Game in One Hour
Create Animated Game Menu and UI
Create Awesome Visuals using Particle Effects
Learn 2D Features Of Unity
Learn C# From Scratch
Create fully Functional Games
Learn Useful Unity Tips & Tricks
Requirements
Unity Personal Edition and Visual Studio or Any other Compatible code editor is required to follow along
Basic knowledge of Unity & C# is helpful but not mandatory
Description
Want to Learn How to build Games by actually building Small , Simple and Fun Games?
Then this is the perfect course for you.
After Finishing this course You will be able to build 5 Fully functional Games with Unity and C#.
List Of The Games You Will Build:
2D Target Shooting Game
Save The Bunny Game
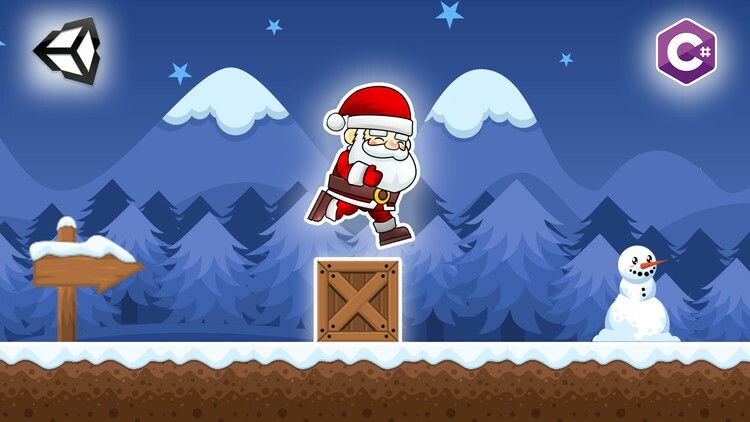
Santa Run Endless runner Game
Monster Candy Eater Game
3D Endless Game
I have taught Unity Game Development & C# Scripting to thousands of people on my Youtube Channel: Charger Games. I love teaching complex concepts in a simple way, so even if you have no previous coding experience, no need to worry, I'm gonna teach you everything step by step in the perfect order.
Learn the basic concepts, tools, and functions that you will need to build fully functional Games with C# and the Unity game engine.
Build a strong foundation in Unity Game Development with this course.
Get Started with Unity's 2D Components
Build 5 Fully functional Games with Unity
Learn Basics of C# Programming
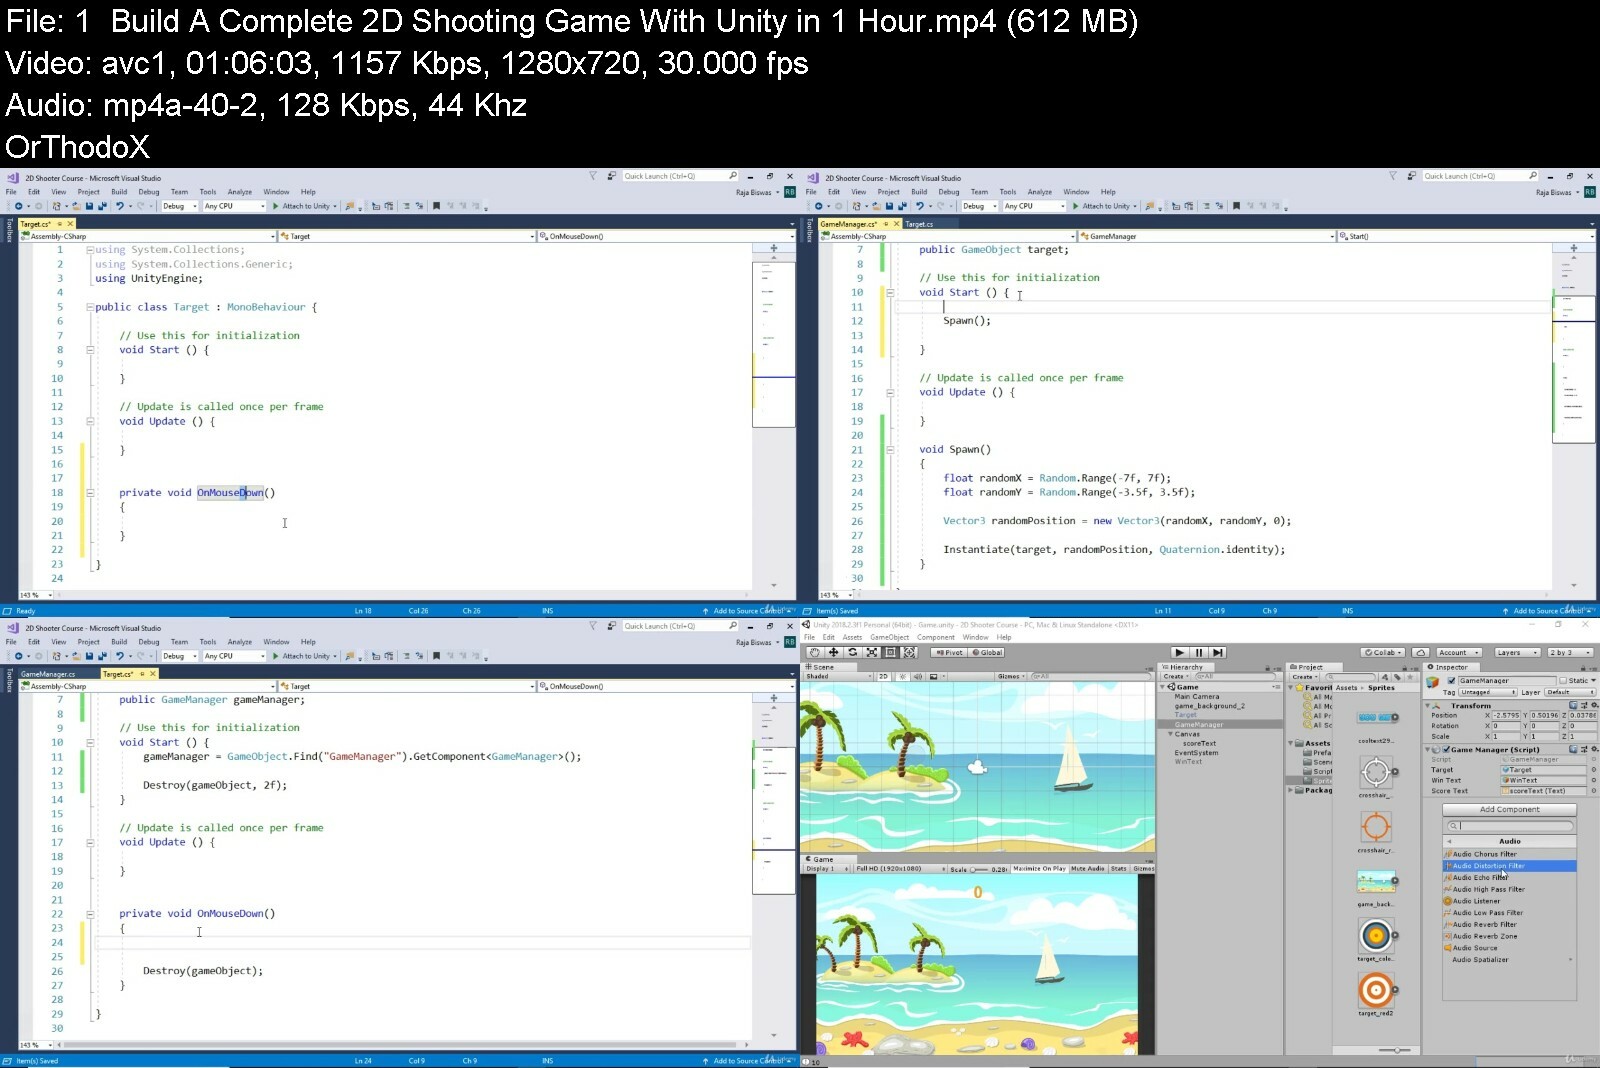
Create your first working game in 1 Hour
Learn to Build a finished game
Create your portfolio of Game Projects
A Powerful Skill at Your Fingertips Learning the fundamentals of Unity 2D & 3D Game Development puts a powerful and very useful tool at your fingertips. Unity is free, easy to learn, has excellent documentation, and is the game engine used for building games.
Jobs in unity game development are plentiful, and being able to learn C# Scripting along with Unity game development will give you a strong background to more easily build awesome games.
Content and Overview Suitable for beginning programmers, through this course of 100+ lectures and 20+ hours of content, you'll learn all of the Unity 2D Game Development fundamentals and establish a strong understanding of the concept behind Game Programming , Design and Development .
Starting with the installation of the Unity , Visual Studio , this course will take you through the process of learning game development with unity by building 5 awesome 2D & 3D Game Projects . You will build your first 2D game in 1 hour.
For the beginner programmers there's a separate section about C# Scripting, which will teach the fundaments of C# Scripting for game development in Unity.
With these basics mastered, the course will take you through building different example games with unity to learn more about the process of creating mobile android games with unity.
Students completing the course will have the knowledge to create fully functional Games with Unity and C# or use their C# skills to Build any other useful thing that they want.
Complete with working files, you'll be able to work alongside the author as you work through each concept, and will receive a verifiable certificate of completion upon finishing the course.
Who this course is for
Anyone who wants to Learn Game Development by building real practical projects
Beginner C# Programmers who are curious about Game Development
Unity & C# Developers willing to Brush up their Skills


unitygamedevelopmentbrifet.jpg


Learn Blazor while creating an Inventory Management System

4562950d77824fdi3.jpg


Learn Blazor while creating an Inventory Management System
Published 08/2022
MP4 | Video: h264, 1280x720 | Audio: AAC, 44.1 KHz, 2 Ch
Genre: eLearning | Language: English + srt | Duration: 77 lectures (12h 22m) | Size: 6 GB


Create an App with .NET 6, Blazor Server, Entity Framework Core, ASP.NET Core Identity


What you'll learn
Build an Inventory Management System with Blazor
Razor / Blazor Components
Forms Submission, Validation
Custom Validation with ValidationAttribute
ASPNET Core Identity
Dependency Injection
Clean Architecture with Use Case Driven Development
Entity Framework Core connecting to SQL Server
Create two type of data stores (In-Memory plugin and EF Core plugin) with repository pattern as plugins following clean architecture
Requirements
Basic HTML
Intermediate C#
Good understanding of OOP, esp. the usage of interface (although Dependency Injection is thoroughly covered in this course)
It is best if you have a little bit experience with ASP Dot Net Core. But don't worry too much, I will help you with that too.
Description
Blazor (.NET 6 Blazor) is Microsoft latest SPA application framework. With Blazor you can build reactive full stack single page web applications with C# without much help from JavaScript. More and more companies are adopting Blazor as part of their technology stack. If you haven't started learning Blazor, now is the time to do so.
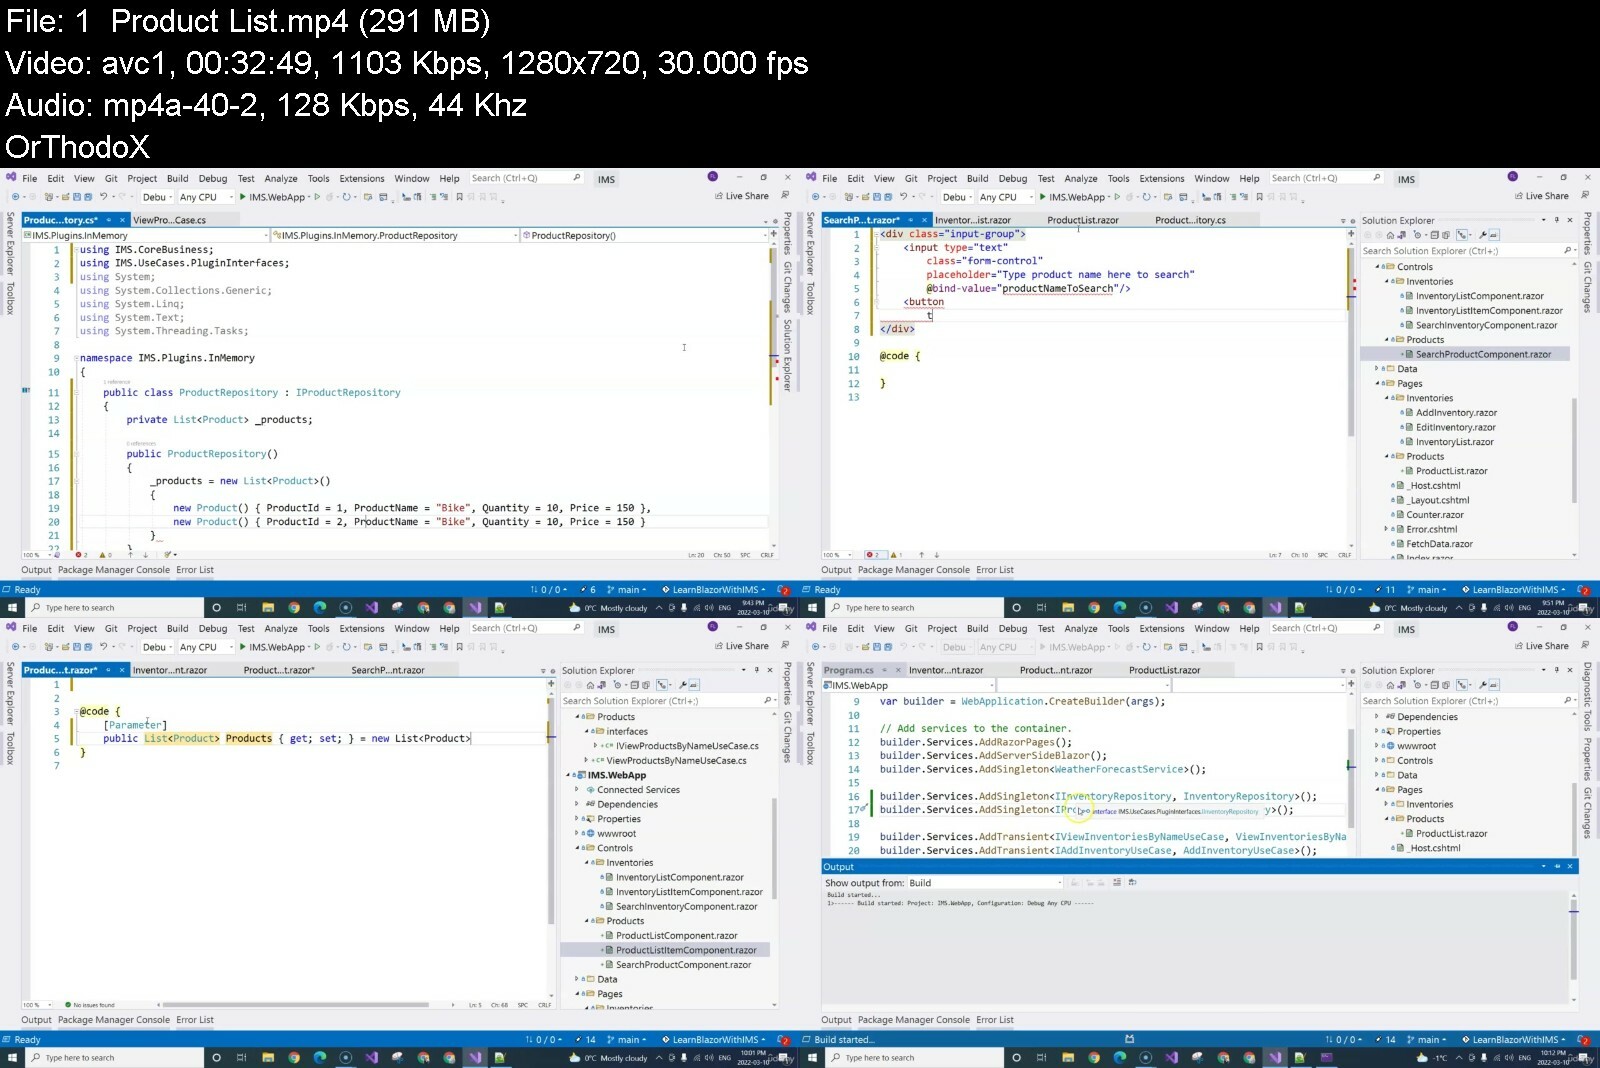
This course takes you onto a journey of creating an Inventory Management System with Blazor Server in .NET 6, Entity Framework Core, SQL Server and ASP.NET Core Identity. We are going to use Clean Architecture with use case driven development. All core concepts of Blazor are covered while we are implementing each feature of this application. It is really good for someone who hasn't learned Blazor yet. But if you are already familiar with Blazor and are looking for a project to practice, this course will suit you well too. Plus, those lessons of Blazor's concepts will serve as a refresher.
The course covers the following technical topics
ASP.NET Core Blazor Server
Dependency Injection
Authentication and Authorization with ASP.NET Core Identity
Policy based Authorization
Entity Framework Core
HTML
Bootstrap
Software Design
Clean Architecture
Repository for encapsulating data accessing details
Use Case Driven Development
By the end of the course, you will
Be able to independently build web applications with Blazor.
Be able to use Entity Framework Core to work with SQL Server database.
Be able to protect web applications with Identity.
Understand and be able to Implement Clean Architecture.
And much more...
At the end of the course, you will become a full stack web developer knowing how to create web applications with Microsoft's latest application framework: ASP.NET CORE 5 Blazor.
Whether you're new to ASP.NET Core Blazor or have worked with it for a bit, but are looking for a course to fill in the gaps, you will enjoy this course. Since this course not only cover the basics, but goes into each topic in depth.
PREREQUISITES
Intermediate C# (you should have at least 3 - 6 months experience programming in C#)
Basic HTML
Basic SQL Server
Previous knowledge of ASP.NET Core is nice to have, but it is not required since I will cover it in the course.
The Course Structure
Although this is course is all about practice, all core concepts of Blazor, Entity Framework Core, ASP.NET Core Identity etc. are covered while each feature of the app is being implemented. Coding along is highly recommended.
Who this course is for
C# developers who want to become full stack developers without the hassle of mastering JavaScript.
Developers who work with Razor pages and/or MVC along with front end frameworks/libraries and would prefer work with less JavaScript.
Developers with some experience in Blazor who is looking for a mid-size project to practice.
Developers who are curious about Mirosoft's newest SPA application framework: Blazor.
Developers who want to learn about implementing Clean Architecture.
Who this course is for
C# developers who want to become full stack developers without the hassle of mastering JavaScript.
Developers with some experience in Blazor who is looking for a mid-size project to practice
Developers who work with Razor pages and/or MVC along with front end frameworks/libraries and would prefer work with less JavaScript.
Developers who are curious about Mirosoft's newest SPA application framework: Blazor.
Developers who want to learn about implementing Clean Architecture.
Developers who are overwhelmed by the changes of other SPA frameworks and would like to learn something more stable


learnblazorwhilecreat7nfit.jpg


Download from RapidGator


Download from Keep2Share


Download from NitroFlare

 
Complete Oracle Javafx Bootcamp | Build Real Javafx Projects

5wh3ehwbfwlbyqnpz27xh1uibv.jpg


Complete Oracle Javafx Bootcamp | Build Real Javafx Projects
Last updated 8/2022
MP4 | Video: h264, 1280x720 | Audio: AAC, 44.1 KHz
Language: English | Size: 6.56 GB | Duration: 12h 58m

Become a better Java developer. Build real Java projects using JavaFX technology. Build up your Java skill with JavaFX


What you'll learn
Skills that will allow you to apply for jobs and become a better JavaFX developer
You will setup JavaFX plugin
You will use Lambda expression in JavaFX
You will set up and use Scene Builder with Eclipse IDE
You will Style JavaFX projects with CSS and how to use the CSS Documentation
You will work with ComboBox in JavaFX
You will create ListView in JavaFX
You will create TreeView in JavaFX
You will learn all about File Chooser and how to work with File Chooser in JavaFX
You will master how to use JavaFX properties
You will learn how to create ProgressBar and ProgressIndicator in JavaFX
You will learn how to create Slider with TextField in JavaFX
You will learn how to create MenuBar, MenuItems and so on
You will learn how to use CheckBoxes in JavaFX
You will learn how to create RadioButton in JavaFX
You will learn how to create a TableView
You will learn how to use DatePicker
You will learn all about WebView
You will learn how to build Charts such as PieChart and LineChart in JavaFX

Requirements
This course requires the knowledge of basic Java programming
You must have a good computer system. A computer (Windows/Mac/Linux)
You must have active internet connection to download necessary tools to get started with Java programming Your computer system must have 2GB RAM and above to run java programs smootly

Description
Complete Oracle JavaFX Bootcamp! Build Real Projects in 2021 starts from the very beginning by teaching you Javafx basics and programming fundamentals, and then going into advanced topics and different career fields in JavaFX so you can get real life practice and be ready for the real world. You will learn the following in this course: You will learn how to setup JavaFX pluginYou will learn how to use Lambda expression in JavaFXYou will learn how to set up and use Scene Builder with Eclipse IDEYou will learn how to Style JavaFX projects with CSS and how to use the CSS DocumentationYou will learn how to work with ComboBox in JavaFXYou will learn how to create ListView in JavaFXYou will learn how to create TreeView in JavaFXYou will learn all about File Chooser and how to work with File Chooser in JavaFXYou will master how to use JavaFX propertiesYou will learn how to create ProgressBar and ProgressIndicator in JavaFXYou will learn how to create Slider with TextField in JavaFXYou will learn how to create MenuBar, MenuItems and so onYou will learn how to use CheckBoxes in JavaFXYou will learn how to create RadioButton in JavaFXYou will learn how to create a TableViewYou will learn how to use DatePickerYou will learn all about WebViewYou will learn how to build Charts such as PieChart and LineChart in JavaFXWhy Must I Take This Course And What Benefit Is It To ME As JavaFX Developer?This is the only course on the internet that will help you to become a certified and successful JavaFX developer with an in-depth knowledge of the entire aspect of JavaFX development and prepare you with the required skills necessary to build you to face job interviews and get employed as a full stack JavaFX developer. Emenwa Global instructors are industry experts with years of practical, real-world experience building software at industry leading companies. They are sharing everything they know to teach thousands of students around the world, just like you, the most in-demand technical and non-technical skills (which are commonly overlooked) in the most efficient way so that you can take control of your life and unlock endless exciting new career opportunities in the world of technology, no matter your background or experience.
Overview
Section 1: Getting started with JavaFX programming
Lecture 1 Introduction to JavaFX programming
Lecture 2 How to setup JavaFX in eclipse
Lecture 3 Your First JavaFx Project
Section 2: Basics of JavaFX programming with Scene Builder
Lecture 4 How to use Lambda expression in JavaFX
Lecture 5 Download and Installation of Scene Builder in JavaFX
Lecture 6 Your first project using Scene Builder in JavaFX
Lecture 7 How to add MainController class in JavaFX
Lecture 8 How to work with Label in JavaFX with Scene Builder
Lecture 9 How to Style with CSS in JavaFX
Lecture 10 How to use CSS reference Documentation
Section 3: How to work with ComboBox in JavaFX
Lecture 11 How to work with ComboBox in JavaFX
Lecture 12 How to add Action Event in ComboBox
Lecture 13 How to add more features to ComboBox
Lecture 14 How to use FXCollections in ComboBoX
Section 4: How to create a ListView in JavaFX
Lecture 15 How to create a ListView in JavaFX
Lecture 16 How to add more items to the ListView
Lecture 17 How to printout ListView items
Lecture 18 How to create ListView using FXCollections in JavaFX
Section 5: How to create a TreeView in JavaFX
Lecture 19 How to create a TreeView in JavaFX
Lecture 20 How to add sub-Nodes in TreeView
Lecture 21 How to add icons in TreeView
Lecture 22 How to add MouseClick Event in TreeView
Section 6: How to create a File Chooser
Lecture 23 How to create a File Chooser
Lecture 24 How to filter files in File Chooser
Lecture 25 How to select Multiple files in File Chooser
Section 7: How to use JavaFX properties
Lecture 26 How to use JavaFX properties
Lecture 27 How to create ProgressBar and ProgressIndicator
Lecture 28 How to create a slider with TextField
Lecture 29 How to create MenuBar in JavaFX
Lecture 30 How to use CheckBoxes in JavaFX
Lecture 31 How to create Radio Button in JavaFX
Lecture 32 How to create a TableView in JavaFX
Lecture 33 How to create Date and Time using DatePicker
Lecture 34 How to use WebView in JavaFX
Section 8: How to build a Charts in JavaFX
Lecture 35 How to build a PieChart in JavaFX
Lecture 36 How to add MouseClick Event to PieChart
Lecture 37 How to create LineChart in JavaFX
Lecture 38 How to add Multiple Lines to LineChart
Lecture 39 How to add MouseClick Event to LineChart
Lecture 40 How to create a Tooltip in LineChart
Section 9: How to work with Media Player in JavaFX
Lecture 41 How to work with Media Player in JavaFX
Lecture 42 How to add controls to Media Player in JavaFX
Lecture 43 How to add volume control to Media Player in JavaFX
Section 10: How to Build a simple Calculator in JavaFX
Lecture 44 How to Build a simple Calculator in JavaFX
Lecture 45 How to create a ModelView for Calculator
Lecture 46 How to create a Contrroller Class for Calculator
Section 11: Login Page in JavaFX
Lecture 47 How to create a simple Login Page in JavaFX
Lecture 48 How to open a Second Form in Login Page
Lecture 49 How to add Images to Login Page
Section 12: Database Management System in JavaFX
Lecture 50 Complete Database SQlite Setup On Desktop
Lecture 51 How to create SQlite Database in Firefox for JavaFX Database Management
Lecture 52 How to create Tables in Database
Lecture 53 How to create classes for Database
Lecture 54 How to connect to Database using connection class
Lecture 55 How to connect to Connection Class from Login Model
Lecture 56 How to successfully get results from your Database connection
Lecture 57 How to create a Login page for Students Portal
Lecture 58 How to open Database Table in Students Portal
Lecture 59 How to auto-close Login Page
Lecture 60 How to populate Students Data on the Table (Part 1)
Lecture 61 How to populate Students Data on the Table (Part 2)
Lecture 62 How to add New Students Data into your Database
Lecture 63 How to clear TextFields in Database
Lecture 64 Assignment to improve your Java programming skills
Section 13: Bonus Lecture
Lecture 65 Bonus Lecture
Lecture 66 Congratulations on your journey. Keep Learning...
Anyone who wants to learn how to code JavaFX,Anyone looking to level up their skills and master a new programming language,Anyone who wants to master javaFX programming


completeoraclejavafxbnhffk.jpg


Code with Mosh - Complete SQL Mastery

rl4kfbu1smicielatwx3g1i86.jpg


Code with Mosh - Complete SQL Mastery
MP4 | Video: h264, 1280x720 | Audio: AAC, 44.1 KHz, 2 Ch
Genre: eLearning | Language: English | Duration: 155 Lessons (10h 48m) | Size: 14.5 GB


Everything You Need to Design and Query Databases in One Course

Big databases are everywhere these days. Facebook, Netflix, Uber, Airbnb use SQL-driven databases - to name just a few.
So, to be a successful developer or data scientist you need to know SQL inside-out.
SQL isn't complicated - or at least it doesn't need to be, so long as you learn it the right way.
Problem is - too many other courses out there jump around, skipping important concepts or simply teaching things badly.
That's why this course goes further than most. You'll get in-depth knowledge and skills that are built-up sequentially to make sure you don't have any gaps.
It takes you from whatever level you're at to advanced skills, without delay - using real-life examples and applicable concepts to get you ready for any SQL job or project
Clear and concise, packed with plenty of exercises, solutions and free of "fluff".
By the end of this course, you'll be able to.
Write SQL queries with confidence
Design and optimize relational databases
Secure your databases
What You'l Learn...
I've put a lot of thought and time into making this course the most complete SQL course available on the market at the moment.
Every module contains information and activities that are relevant to real-life jobs or the kind of tasks you may get on interview.
Write complex SQL queries
Joins (inner, outer, natural, cross)
Views
Stored procedures
Functions
Events
Triggers
Transactions
Concurrency
Use indexing for performance
Design relational databases
Secure databases
And much, much more!
Who is this course for?
Anyone who wants to learn to design and query relational databases
Computer science students who want to better understand SQL
Anyone pursuing a job in back-end development, database administration or data science
SQL developers who want to brush up on their SQL skills


completesqlmasteryvhd92.jpg


Develop and Deploy MEAN Stack Project on Azure Cloud

qgnjvxhlij72uor219ivl36d9b.jpg


Develop and Deploy MEAN Stack Project on Azure Cloud
Published 08/2022
Genre: eLearning | MP4 | Video: h264, 1280x720 | Audio: AAC, 44.1 KHz
Language: English | Size: 6.17 GB | Duration: 67 lectures • 12h 31m


What you'll learn
You will learn about every component of MEAN stack
You will learn everything in practical hands-on approach including debugging skills
You will learn to create RESTful API using NodeJS with Express and MongoDB
You will build Angular & Bootstrap based application and integrate it with RESTful API's
You will learn everything about public cloud services
You will create and use most popular Azure cloud services
You will learn the industry standard way of building and deploying software using CICD pipelines on Azure DevOps
You will learn the end to end cycle of software development to deployment to shipping it for production in a controlled automated process

Requirements
Basic knowledge of HTML, CSS, JavaScript
Basics of MEAN stack application development

Description
This is a practical hands-on based fullsatck course. It covers all the concepts that one needs to start building end to end application using MEAN stack technology. The course is structured in such a way that you will learn everything by implementing the concepts through project based approach.
Following are the topics that is covered in this course
What is mongoDB, how to install mongoDB
Different concepts of NoSQL
Hands-on implementation of various query on mongoDB client
Setting up git bash
Creating github repositories and setting them up in local
Installing and setting up the code editor
Installing nodejs
Learning everything about nodejs and npm package manager
Installing various npm packages
What is ExpressJS
How to start writting RESTful API's using Express JS
How to connect your Express API's to MongoDB
How to create MongoDB schemas with mongoose
Creating a CRUD operation through handson project
What is Angular framework
How to create Angular project
How to create components in Angular project
How to create services in Angular project
Installing and using Bootstrap in Angular application
Consuming RESTful API's from Angular application
Dynamic Routing in Angular application
Submitting form in Angular application
Form validation in Angular application
Parsing JSON data in Angular application
You will learn to use POSTMAN for testing your RESTful API's
Committing and pushing code to github repository both for frontend and backend project
You will learn many more concepts and techniques that will help you in building any MEAN stack application but also it will help you in your MEAN stack interview.
You will get complete source code for frontend and backend project
Who this course is for
Anyone who wants to become fullstack developer using MEAN stack
Anyone who wants to learn the industry way of building and deploying software to production in a controlled automated way.
Anyone who wants to learn the CICD, DevOps way of working using the most popular cloud service i.e Azure


developanddeploymeansiuf8l.jpg


Download from RapidGator


Download from Keep2Share


Download from NitroFlare

 
Erstelle Android Apps, Die Geliebt Werden!

foub0hsrakfs0tsnlpg8lbdfss.jpg


Erstelle Android Apps, Die Geliebt Werden!
Zuletzt aktualisiert am 12/2018
MP4 | Video: h264, 1280x720 | Audio: AAC, 44.1 KHz
Language: Deutsch | Size: 19.49 GB | Duration: 31h 25m

Lerne Android Apps zu entwickeln, in dem Du echte Apps wie Uber und Instagram Klons erstellst. zZgl Android Wear


What you'll learn
Du wirst in der Lage sein jede Idee die Du hast in einer App umzusetzen
Apps in den Google Play Store hochladen um Geld mit Google Pay und Google Ads zu verdienen
Ein professioneller App Entwickler, um z.B. als Freelancer zu arbeiten
Du kannst Dich dann für Junior Softwareprogrammierer Rollen bewerben.

Requirements
Ein Windows PC, Linux oder Mac wird benötigt
Keinerlei Programmierkenntnisse nötig - Ich bringe Dir alles was Du wissen musst bei.

Description
Vom Anfänger zum App Entwickler - in sechs Wochen!

Bist Du Bereit für Google's Android M (6)?

Es spielt hierbei keine Rolle ob Du ein blutiger Anfänger bist, oder bereits programmieren kannst. JETZT ist die Zeit um auf den Android M Zug aufzuspringen und sich das Goldene Ticket in Appentwickler Himmel zu ergattern (bevor es die Tickets vergriffen sind)!

Android M ist eine MEGA Chance. Ob Du nun Dein Einkommen, Deine Karriere verbessern willst, oder wer weiß... vielleicht sogar der nächste Mark Zuckerberg werden willst!

Werde Teil einer App Entwickler Community und arbeite an der Google's bester und benutzerfreundlichsten Plattform überhaupt.

Ja, in sechs Wochen könntest Du einer der ersten sein die Android M App Entwickler Spezialist ist. Einer der tolle Apps wie Uber, Instagram usw. entwickelt, während er Programmieren lernt. Das macht extrem Spaß und ermöglicht Dir Dein Wissen direkt dauerhaft zu speichern.

Warum warten, bis die anderen Deine Ideen umsetzen und Du nichts davon hast?

Ich garantiere Dir (oder Du kriegst Dein Geld zurück), KEIN anderer Kurs wird Dir dieses Selbstvertrauen, Wissen und diese Tiefe liefern.

Interessiert? Ok, hier ist eine kleiner Überblick was du erhältst.

Du lernst die richtigen Techniken und Herangehensweisen für die Entwicklung kennen. Verwendest dazu Java und Android Studio. Ich lehre Dich wie Du echte und vermarktbare Apps wie Uber und Snapchat Klons erstellst.

Genau wie in meinem Kompletten Webentwickler Kurs, welcher bereits über 10000 Studenten beigebracht hat wie man Programmiert, ist dieser Kurs Projektbasiert. Also nicht dauernd nur Theorie, sondern jede Menge Praxis. Das heißt Du lernst hier auf dem effektivsten und spaßigsten Wege.

· Du beginnst mit dem Download von Android Studio und der Umsetzung eines simplen Währungsrechners.

· Dann erstellst Du eine Gehirntraining App und eine Lieblingsorte App, bevor wir uns an die Klone von Uber und Instagram machen. Dabei werden wir dann Parse verwenden.

· Du kriegst einen kompletten Guide wie Du Deine Apps dann auf den Google Play store laden kannst und mit Google Ads Umsatz generieren kannst.

· Zu guter letzt werden wir sogar Android Wear behandeln. Die Zukunft von Wearables!

Wie unterscheidet sich der Kurs von anderen?

· Er ist vom erfolgreichen Dozenten mit über 16000 Studenten und über 300 fünf Sterne Bewertungen.

· Du kriegst Support von Denis in den Kursforen

· Du kriegst Zugriff auf Projekt basiertes Lernen, d.h. erstellen von echten Apps und keine langweilige und trockene Theorie.

Warum solltest Du überhaupt die Android App Entwicklung lernen?

· Android ist mit Abstand die größte Mobile Plattform mit über 80% Marktanteil und über 1mrd. Geräten die allein 2015 verkauft wurden.

· Nicht nur das, Du kannst Android auf Windows, Mac und Linux entwickeln.

· Werbungbasierter Umsatz ist auf Android verbreiteter und einfacher zu nutzen als auf iOS

Für wen ist der Kurs?

· Für jeden der programmieren lernen möchte. Java ist eine super Programmiersprache um mit dem Programmieren zu beginnen.

· Alle die App Entwickler werden wollen. Das ist ein kompletter Kurs. Er wird dir alles beibringen was Du dazu wissen musst.

· Alle die wissen wollen wie Computer funktionieren. Programmieren ist mehr als nur die Erstellung von Apps. Es ist zu verstehen wie ein Computer funktioniert. Das kann dir auch in anderen Bereichen helfen.

Der Komplette Android M App Entwickler zielt darauf seinen Teilnehmern die Erstellung darin vor allen anderen beizubringen.

Warum ist der Kurs das Richtige für Dich?

Wenn Du nach einem Karrierewechsel suchst, oder etwas Geld nebenbei machen willst, oder vielleicht sogar einfach nur etwas neues kreieren willst. Der komplette Android M Entwickler Kurs ist dafür da, dich in nur sechs Wochen (oder mit Deiner eigenen Geschwindigkeit) zum App Entwickler zu machen.

· Extrem preziese und einfach zu verstehende Taktiken

· Wichtige Tipps und Tricks die Du direkt anwenden kannst

· Logisches Lernen mit Deiner eigenen Geschwindigkeit.

· Einfach verständliche und Kristallklare Definitionen.

· Vorsichtig zusammengestellte, getestete Lernstrategien.

Wer bin ich?

Ich bin Denis und Ersteller der Erfolgreichsten Videokurse auf Udemy. Für einige meiner Kurse habe ich mit Rob Percival zusammengearbeitet. Er ist der Ersteller der erfolgreichsten Programmierkurse überhaupt. Du kannst also nur das Beste erwarten. Ich freue mich diesen Android Kurs zu meiner Liste toller Kurse hinzufügen zu können.

Ich habe einen Bachelor im Ingenieurswesen und liebe Programmieren und Kurse erstellen.

Die letzten Monate habe ich mich intensiv mit Android M beschäftigt um diesen Kurs zum besten Android Kurs in Deutschland zu machen.

Mein Ziel ist es, jedem der Interesse am Programmieren hat vom Anfänger zum Profi in kurzer Zeit zu machen. Dazu habe ich eine Webseite erstellt, auf der meine Teilnehmer zusätzlich zu den Videos auch Artikel zu den Themen erhalten.

Warum bin ich so überzeugt von meinen Kursen? Weil ich durchweg positives Feedback von meinen Teilnehmern erhalte und ständige daran arbeite, meine Kurse und meine Präsentationsfähigkeiten zu verbessern.

Hier ein Beispiel eines Feedbacks meines Java Kurses:"Gute Geschwindigkeit und sehr verständlich erklärt. Ich habe schon viele Java Video Tutorials gesehen, aber dies ist bisher das Beste! Dem Zuschauer wird alles recht simpel erklärt und man kann dem ganzen sehr gut folgen! Hier hat sich die Investition mal ausgezahlt"

Overview

Section 1: Was beinhaltet dieser Kurs?

Lecture 1 Was beinhaltet dieser Kurs?

Lecture 2 WICHTIG - Wie du das meiste aus dem Kurs holst

Lecture 3 FAQ - Häufig gestellte Fragen

Lecture 4 Gute Fragen stellen & Deinen Code Debuggen

Section 2: Einführung in Android Studio

Lecture 5 Einführung

Lecture 6 WICHTIG: Android Studio Versionen

Lecture 7 Android Studio auf Windows installieren

Lecture 8 Wichtiger Hinweis!

Lecture 9 Android Studio Übersicht

Lecture 10 Öffnen eines Beispiel Projekts

Lecture 11 Öffnen eines Beispiel Projects (Android Studio Dateien)

Lecture 12 Ich habe einen AMD Prozesser. Der Emulator lahmt, was nun?

Lecture 13 Text Formattieren

Lecture 14 Text Formattieren (Android Studio Dateien)

Lecture 15 Buttons

Lecture 16 Buttons (Android Studio Dateien)

Lecture 17 TextFields

Lecture 18 TextFields (Android Studio Dateien)

Lecture 19 Nachrichten anzeigen lassen

Lecture 20 Nachrichten anzeigen lassen (Android Studio Dateien)

Lecture 21 Bilder

Lecture 22 Bilder (Android Studio Dateien)

Lecture 23 Währungsrechner

Lecture 24 Währungsrechner (Android Studio Dateien)

Section 3: Einführung in Java

Lecture 25 Einführung

Lecture 26 Hello World in Java

Lecture 27 Hello World in Java (Java Dateien)

Lecture 28 Variablen

Lecture 29 Variablen (Java Dateien)

Lecture 30 Arrays und Maps

Lecture 31 Arrays und Maps (Java Dateien)

Lecture 32 If Statements

Lecture 33 If Statements Java Dateien

Lecture 34 Höher oder niedriger

Lecture 35 Höher oder niedriger (Android Studio Dateien)

Lecture 36 Schleifen (Loops)

Lecture 37 Schleifen (Loops) - (Java Dateien

Lecture 38 Klassen und Objekte

Lecture 39 Klassen und Objekte (Java Dateien)

Lecture 40 App Nummer Formen

Lecture 41 App Nummer Formen (Android Studio Dateien)

Section 4: Medien: Bilder, Videos und Sound

Lecture 42 Einführung

Lecture 43 Layout

Lecture 44 Layout (Android Studio Dateien)

Lecture 45 Verblassungsanimationen

Lecture 46 Verblassungs Animationen (Android Studio Dateien)

Lecture 47 Andere Animationen

Lecture 48 Andere Animationen (Android Studio Dateien)

Lecture 49 Spiel Tic Tac Toe

Lecture 50 Spiel Tic Tac Toe (Android Studio Dateien)

Lecture 51 Video

Lecture 52 Video (Android Studio Dateien)

Lecture 53 Audio kontrollieren

Lecture 54 Audio kontrollieren (Android Studio Dateien)

Lecture 55 Audio und Lautstärkeregler

Lecture 56 Audio und Lautstärkeregler (Android Studio Dateien)

Lecture 57 Grid Layouts

Lecture 58 Grid Layout (Android Studio Dateien)

Lecture 59 App Simple Sätze

Lecture 60 App Simple Sätze (Android Studio Dateien)

Section 5: Android Features - Fortgeschritten

Lecture 61 Einführung

Lecture 62 List Views

Lecture 63 List Views (Android Studio Dateien)

Lecture 64 Timer in Android

Lecture 65 Timer in Android (Android Studio Dateien)

Lecture 66 App: Eieruhr

Lecture 67 App Eieruhr (Android Studio Dateien)

Lecture 68 Zeigen und verstecken von UI Elementen

Lecture 69 Zeigen und verstecken von UI Elementen (Android Studio Dateien)

Lecture 70 App: Gehirntrainer

Lecture 71 App: Gehirntrainer (Android Studio Dateien)

Lecture 72 Try und Catch

Lecture 73 Try und Catch (Android Studio Dateien)

Lecture 74 Downloaden von Web Inhalten

Lecture 75 Downloaden von Webinhalten (Android Studio Dateien)

Lecture 76 Downloaden von Bildern

Lecture 77 Downloaden von Bildern (Android Studio Dateien)

Lecture 78 Fortgeschrittene String Manipulation

Lecture 79 App: Errate den VIP

Lecture 80 App: Errate den VIP (Android Studio Dateien)

Lecture 81 JSON Data verarbeiten

Lecture 82 JSON Data verarbeiten (Android Studio Dateien)

Lecture 83 App: Wie ist das Wetter

Lecture 84 App: Wie ist das Wetter (Android Studio Dateien)

Section 6: Maps und Standort

Lecture 85 Einführung

Lecture 86 Maps in Deinen Apps verwenden

Lecture 87 Maps in deinen Apps Verwenden (Android Studio Dateien)

Lecture 88 Maps anpassen

Lecture 89 Maps anpassen (Android Studio Dateien)

Lecture 90 Benutzerstandort ziehen

Lecture 91 Benutzerstandort ziehen (Android Studio Dateien)

Lecture 92 Standort auf der Karte anzeigen

Lecture 93 Standort auf der Karte anzeigen (Android Studio Dateien)

Lecture 94 Informationen über Standorte erhalten

Lecture 95 Informationen über Standorte erhalten (Android Studio Dateien)

Lecture 96 App: Wandereruhr

Lecture 97 App: Wandereruhr (Android Studio Dateien)

Lecture 98 Eine neue Activity hinzufügen

Lecture 99 Eine neue Activity hinzufügen (Android Studio Dateien)

Lecture 100 App: Lieblingsorte

Lecture 101 App: Lieblingsorte (Android Studio Dateien)

Section 7: Permanente Datenspeicherung

Lecture 102 Einführung

Lecture 103 Daten permanent speichern

Lecture 104 Daten permanent speichern (Android Studio Dateien)

Lecture 105 Action Bar anpassen

Lecture 106 Action Bar anpassen (Android Studio Dateien)

Lecture 107 Alert Dialoge verwenden

Lecture 108 Alert Dialoge verwenden (Android Studio Dateien)

Lecture 109 App: Notizen

Lecture 110 App: Notizen (Android Studio Dateien)

Lecture 111 SQLite Datenbanken

Lecture 112 SQLite Datenbanken (Android Studio Dateien)

Lecture 113 SQLite erweitert

Lecture 114 Webviews

Lecture 115 Webviews (Android Studio Dateien)

Section 8: Instagram Klon

Lecture 116 Instagram Intro

Lecture 117 Parse aufsetzen

Lecture 118 Parse Browser einstellen

Lecture 119 Einführung in Parse

Lecture 120 Einführung in Parse (Android Studio Dateien)

Lecture 121 Fortgeschrittene Queries

Lecture 122 Fortgeschrittene Queries (Android Studio Dateien)

Lecture 123 Parse Benutzer

Lecture 124 Parse Benutzer (Android Studio Dateien)

Lecture 125 Login & Signup

Lecture 126 Login & Signup (Android Studio Dateien)

Lecture 127 Fortgeschrittenes Keyboard Management

Lecture 128 Fortgeschrittenes Keyboard Management (Android Studio Dateien)

Lecture 129 Benutzerliste anzeigen

Lecture 130 Benutzerliste anzeigen (Android Studio Dateien)

Lecture 131 Bilder von der Kamera importieren

Lecture 132 Bilder von der Kamera importieren (Android Studio Dateien)

Lecture 133 Benutzerfeeds anzeigen

Lecture 134 Benutzerfeeds anzeigen (Android Studio Dateien)

Section 9: Uber Klon

Lecture 135 Einführung

Lecture 136 Einführung Uber

Lecture 137 Einführung Uber (Android Studio Dateien)

Lecture 138 Uber Login Seite

Lecture 139 Uber Login Seite (Android Studio Dateien)

Lecture 140 Die Rider Activity

Lecture 141 Die Rider Activity (Android Studio Dateien)

Lecture 142 Die Driver (Fahrer) Activity

Lecture 143 Die Driver (Fahrer) Activity (Android Studio Dateien)

Lecture 144 Den Standort des Fahrers dem Nutzer anzeigen

Lecture 145 Den Standort des Fahreres dem Nutzer anzeigen (Android Studio Dateien)

Section 10: Flappy Bird Klon

Lecture 146 Einführung

Lecture 147 Einführung in GDX

Lecture 148 Einführung in GDX (Android Studio Dateien)

Lecture 149 Mit Sprites arbeiten

Lecture 150 Mit Sprites arbeiten (Android Studio Dateien)

Lecture 151 Mit Sprites interagieren

Lecture 152 Mit Sprites interagieren (Android Studio Dateien)

Lecture 153 Die Rohre einbauen

Lecture 154 Die Rohre einbauen (Android Studio Dateien)

Lecture 155 Kollisionserfassung

Lecture 156 Kollisionserfassung (Android Studio Dateien)

Lecture 157 Punkte zählen

Lecture 158 Punkte zählen (Android Studio Dateien)

Lecture 159 Game Over Bildschirm

Lecture 160 Game Over Bildschirm (Android Studio Dateien)

Section 11: Die Extras

Lecture 161 Einführung

Lecture 162 Mit Bluetooth arbeiten

Lecture 163 Mit Bluetooth arbeiten (Android Studio Dateien)

Lecture 164 Version Control verwenden

Lecture 165 Version Control verwenden (Android Studio Dateien)

Lecture 166 Werbung mit Admob einbauen

Lecture 167 Werbung mit Admob einbauen (Android Studio Dateien)

Lecture 168 Lokale Notifikationen

Lecture 169 Lokale Notifikationen (Android Studio Dateien)

Section 12: Android Wear Mini- Kurs

Lecture 170 Hello Worlds mit Android Wear

Lecture 171 Hello World mit Android Wear (Android Studio Dateien)

Lecture 172 Apps für verschiedene Watch Faces anpassen

Lecture 173 Apps für verschiedene Watch Faces anpassen (Android Studio Dateien)

Lecture 174 App: Menschenzähler

Lecture 175 App: Menschenzähler (Android Studio Dateien)

Lecture 176 Mit Cards arbeiten

Lecture 177 Mit Cards arbeiten (Android Studio Dateien)

Lecture 178 Mit Listen Arbeiten

Lecture 179 Mit Listen Arbeiten (Android Studio Dateien)

Lecture 180 Stimmeingabe

Lecture 181 Stimmeingabe (Android Studio Dateien)

Lecture 182 Mit dem Handy kommunizieren

Lecture 183 Mit dem Handy kommunizieren (Android Studio Dateien)

Lecture 184 Notifikationen

Lecture 185 Notifikationen (Android Studio Dateien)

Lecture 186 Custom Watch Faces

Lecture 187 Custom Watch Faces (Android Studio Dateien)

Section 13: Eine Marketing Webseite erstellen

Lecture 188 Einführung

Lecture 189 Wordpress aufsetzen

Section 14: Twitter Klon

Lecture 190 Einführung

Lecture 191 Signup Login

Lecture 192 Signup Login (Android Studio Dateien)

Lecture 193 Following und Unfollowing von Nutzern

Lecture 194 Following und Unfollowing von Nutzern (Android Studio Dateien)

Lecture 195 Tweets senden

Lecture 196 Tweets senden (Android Studio Dateien)

Lecture 197 Deinen Twitter Feed sehen

Lecture 198 Deinen Twitter Feed sehen (Android Studio Dateien)

Section 15: Snapchat Klon

Lecture 199 Einführung

Lecture 200 Login & Signup

Lecture 201 Login & Signup (Android Studio Dateien)

Lecture 202 Die Benutzerliste

Lecture 203 Die Benutzerliste (Android Studio Dateien)

Lecture 204 Bilder verschicken

Lecture 205 Bilde verschicken (Android Studio Dateien)

Lecture 206 Bilder empfangen

Lecture 207 Bilder empfangen (Android Studio Dateien)

Section 16: Bonus

Lecture 208 Bonus Lektion - andere Kurse von mir stark reduziert

• Alle die App Entwickler werden wollen. Das ist ein kompletter Kurs. Er wird Dir alles beibringen was Du dazu wissen musst.,Für jeden der Programmieren lernen möchte. Java ist eine super Programmiersprache um mit dem Programmieren zu beginnen.,• Alle die wissen wollen wie Computer funktionieren. Programmieren ist mehr als nur die Erstellung von Apps. Es ist zu verstehen wie ein Computer funktioniert. Das kann dir auch in anderen Bereichen helfen.

Homepage


142diedriverfahreract71f5n.jpg


Complete Wordpress Theme Developer Course With Bootstrap

34wuyeyx9bqisf8jlensnkrigj.jpg


Complete Wordpress Theme Developer Course With Bootstrap
Last updated 8/2017
MP4 | Video: h264, 1280x720 | Audio: AAC, 44.1 KHz
Language: English | Size: 5.02 GB | Duration: 26h 18m

Build fully functioning modern WordPress themes including page builders, responsive and the WordPress REST API.


What you'll learn
How to sell your themes to other webmasters
Develop a complete theme from scratch using concepts presented in this course
Know how to set up the exact development environment perfect for theme development.
Learn how to identify their theme to the WordPress system
Build important theme features including the header, footer and sidebar
Add important information to blog posts including permalinks, author information and publish date
Develop custom templates which include multi-column templates with sidebars and full page templates
Create a search form and search results page
Create dedicated categories & tags page and to recognize the difference between both
Create a tag cloud
Add theme support for featured images, HTML5, menus and more
Create menus and theme locations for those menus
Distribute custom post types
Work with the WordPress customizer
Build customizer sections, controls, panels and settings
Include page builders with the TGM Activation plugin
Recognize coding best practices and how to use the Theme Check plugin to inspect a theme before submitting to the WP review team
Build child themes
Use version control and know the importance of it
Create special templates
Use the WP REST API to quickly display posts without loading the web browser.

Requirements
Basics of PHP
A basic working knowledge of WordPress
Comfort of working with text editors

Description
If you ever wanted to build a complete WordPress theme, this course is perfect for you. Not only do we provide over 20 hours of instruction building themes; we provide advanced topics that will make your theme more popular that also gets approved faster by the WordPress theme review team including
Set up your ideal development environment including PHP, MySQL, and moreBuild sections, panels, and controls for the WordPress customizerWordPress coding best practicesAutomatically recommend and/or require page builders with your themeUse version control (the basics) to make sure your theme development is a smooth processCreate a theme that follows coding best practice and standardsDevelop a complete theme from a static responsive theme from scratchMake your theme compatible with WooCommerceDisplay posts quickly with the WP REST APIHow to earn revenue from your themes, how much to charge for your themes and which websites are the best marketplaces for your themes.Package page builders and other plugins with your theme from WordPress, Guthub or in a separate directorVersion control of your themes using Git and Github

COMING in MAY AND JUNE 2017: BOOTSTRAP-THEME-MANIA!...We will build a Bootstrap theme as part of all of the concepts taught in this course!
You can already see the Static Bootstrap theme in section 22. We are still creating that brand new theme, you can follow along. We upload videos for this new section a little at a time.

Overview

Section 1: An Overview of the Entire Course from Start To Finish

Lecture 1 Introduction: 2 Different Themes: Which one should YOU develop first?

Section 2: Setting Up Our Development Environment

Lecture 2 Tools

Lecture 3 Downloading and Installing WordPress Onto Our Local Server

Lecture 4 Setting up our PHP Environment

Lecture 5 Creating a blank MySQL database

Lecture 6 Getting Dummy Content To Shape Our Theme

Lecture 7 Project: Create 3 posts and pages with Dummy Content

Lecture 8 One Additional Plugin for Dummy Content

Section 3: Identifying Our Theme To WordPress

Lecture 9 Creating a Name and Description

Lecture 10 Creating Our Theme Folder

Lecture 11 Creating our First Theme File

Lecture 12 Creating Our Theme's Screenshot

Lecture 13 Review of the Category Hierarchy Structure

Section 4: Building Our Theme Including a Zip File Of Our Completed Theme

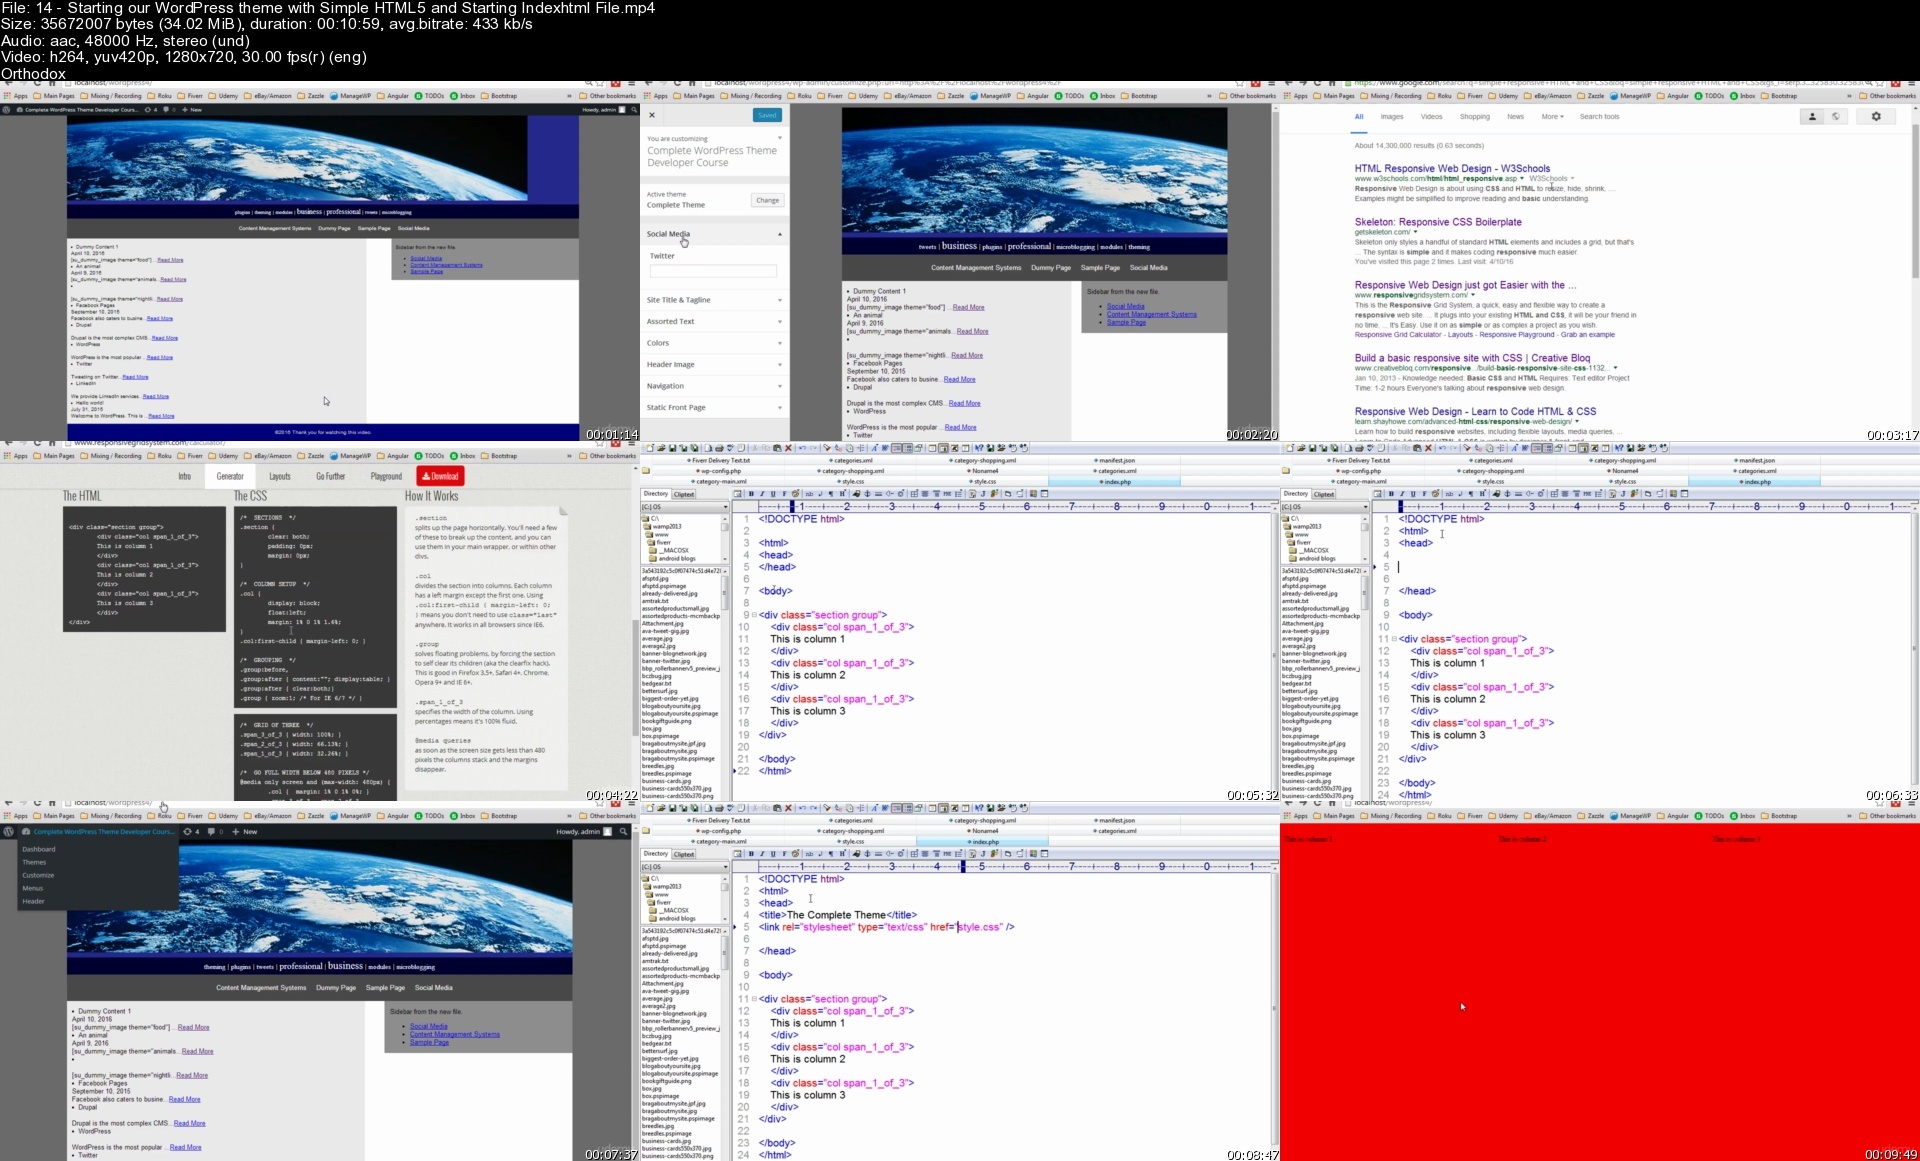
Lecture 14 Starting our WordPress theme with Simple HTML5 and Starting Index.html File

Lecture 15 Introducing Bloginfo()

Lecture 16 Creating Our Header

Lecture 17 Creating Our Footer

Lecture 18 Creating Our Sidebar

Lecture 19 Creating Custom Template Tags

Lecture 20 Review of the Sections That Help Build Our Theme

Section 5: Displaying Post and Pages

Lecture 21 Displaying Posts

Lecture 22 Displaying Pages

Lecture 23 Two Options On Creating A Custom Post Type For The Next Video

Lecture 24 Adding Permalinks and Publish Dates

Lecture 25 Display Random Posts

Lecture 26 Review Plus Ordering Posts in Ascending and Descending Order

Section 6: Building Our Theme's Inner Pages

Lecture 27 Developing Our Posts Template (Part 1 of 3)

Lecture 28 Developing Our Posts Template (Part 2 of 3)

Lecture 29 Alternative Way Of Displaying Post Content

Lecture 30 Developing Our Posts Template (Part 3 of 3)

Lecture 31 Developing Our Default Page Template

Lecture 32 Developing Variant Page Templates

Lecture 33 Developing Our Comments Template

Lecture 34 Review

Section 7: Search Forms and Search Results

Lecture 35 Displaying WordPress' Default Search Form

Lecture 36 Customizing Our Search Form

Lecture 37 Starting Our Search Results Template

Lecture 38 Adding Our Search Results Loop

Lecture 39 Add Featured Images To Search Results

Lecture 40 Adding Authors To Search Results

Section 8: Category and Tag Pages

Lecture 41 Developing Our Initial Category Template

Lecture 42 Review of the Category Hierarchy Structure

Lecture 43 Adding The Conditional Category Tag

Lecture 44 Developing Our Initial Tag Template

Lecture 45 Creating a Tag Cloud

Section 9: Adding Theme Support

Lecture 46 What Is Theme Support

Lecture 47 Overview of add_theme_support()

Lecture 48 Adding HTML 5 Markup Support

Lecture 49 Theme Support Only For The Admin

Section 10: Menus and Theme Locations

Lecture 50 What Are Theme Locations?

Lecture 51 Creating Our First Theme Location

Lecture 52 Displaying Our Menu

Lecture 53 Adding Our Other Menus

Lecture 54 Menu Placeholders

Lecture 55 Submenus and Menu Depth

Section 11: Custom Post Types

Lecture 56 Creating A Post Type

Lecture 57 Adding Taxonomies

Lecture 58 Adding Custom Field Support

Lecture 59 Supporting Featured Images

Lecture 60 Displaying Custom Post Types

Section 12: Theme Customizer

Lecture 61 Introducing the Theme Customizer

Lecture 62 Customizer Sections & Controls

Lecture 63 Displaying Customizer Data (Part 1)

Lecture 64 Displaying Customizer Data (Part 2)

Lecture 65 Colors From 3 Different Controls

Lecture 66 Project: Restaurant Menu

Lecture 67 Project: Restaurant Google Map

Lecture 68 Project: Restaurant Hours of Operations (Part 1)

Lecture 69 Project: Restaurant Hours of Operations (Part 2)

Lecture 70 Panels

Lecture 71 Active Callback (Part 1)

Lecture 72 Active Callback (Part 2)

Lecture 73 Image Uploads

Lecture 74 Conclusion & Project

Section 13: Page Builders

Lecture 75 Intro to Page Builders

Lecture 76 TGM Plugin Activation

Lecture 77 Adding Our Plugins

Lecture 78 Project: Find Page Builders

Lecture 79 Pre-packaging Page Builders

Section 14: Coding Best Practices

Lecture 80 WordPress Coding Standards

Lecture 81 Project: Best Practices

Lecture 82 Theme Check

Section 15: Child Themes

Lecture 83 Starting Our Child

Lecture 84 Giving Birth To Our Child Theme and Modifying It

Lecture 85 Project: Fun With The Child

Lecture 86 Conclusion

Section 16: Version Control

Lecture 87 Git

Lecture 88 Version Control Plugins

Lecture 89 Conclusion

Section 17: Special Templates

Lecture 90 Woocommerce Template

Lecture 91 Front Page Template

Lecture 92 Front Page and Customizer

Lecture 93 Front Page Template Tags

Lecture 94 Page ID Templates

Lecture 95 Conditional Template Tags

Lecture 96 Conclusion

Section 18: Building a Theme From Static HTML

Lecture 97 Start Our Theme

Lecture 98 Adding Our Header and Footer

Lecture 99 Customizing the Blurb

Lecture 100 Looping in our Posts and a Coding Project Part 1

Lecture 101 Looping in our Posts and a Coding Project Part 2

Lecture 102 Single Blog Post Template

Lecture 103 Single Blog Post Template (Part 2)

Lecture 104 Subsequent Post Links

Lecture 105 Page Template (Part 1)

Lecture 106 Page Template (Part 2)

Lecture 107 Categories and Tags

Lecture 108 Adding Our Sidebar

Lecture 109 Hard Code Cleanup: Footer Sidebars

Lecture 110 Hard Code Cleanup: Logo

Lecture 111 Hard Code Cleanup: Rest of Theme

Lecture 112 Creating Our Child Theme

Lecture 113 Hard Code Cleanup: Learn More Button

Lecture 114 Hard Code Cleanup: Social Media Icons

Lecture 115 Adding Inner Page Sidebar

Lecture 116 Project: Find a New Static Theme

Lecture 117 Adding Our Header Background

Section 19: Answers to Popular Theme Development Questions

Lecture 118 Should my theme include a "Theme Options" section or the "Customizer"?

Lecture 119 How many sidebars can my theme include?

Lecture 120 How much CSS should my child theme's style.css include?

Lecture 121 Do I really have to use version control for my themes?

Lecture 122 What effect does theme support have on my theme's popularity?

Section 20: Displaying Posts Using the WordPress Rest API (WP REST API)

Lecture 123 Quick Intro to the WP REST API and how to get it up on your WordPress website.

Lecture 124 Testing That Your WordPress site Supports The API

Lecture 125 Writing Our Javascript Code to Display Our Posts

Lecture 126 Writing HTML and Minimal PHP to Change Our Posts Without Additional Page Loading

Lecture 127 Using Postman to Test URLS in WP REST API

Lecture 128 Project: Create a Search Engine Using the WordPress REST API

Section 21: How to Make Money With Your WordPress Themes

Lecture 129 Introduction to Making Money With WordPress Themes: Strategies for Charging

Lecture 130 Where to Sell Your Themes Online

Lecture 131 How much to charge

Lecture 132 NPM - Node Package Manager Website Perhaps? Just a simple untested suggestion...

Section 22: Develop a Wordpress Theme From a Static Bootstrap Theme

Lecture 133 Downloading our Static Bootstrap Theme

Lecture 134 Examining Your Static Bootstrap Files

Lecture 135 Creating the prep files to identify your theme to WordPress.

Lecture 136 Adding BlogInfo to make our theme come alive

Lecture 137 Adding the WordPress site title to your theme

Lecture 138 Adding our header to the theme

Lecture 139 Adding our footer file to the theme

Lecture 140 Adding our first section with the Theme Customization API

Lecture 141 Exercise: Adding the second Home Page section with the Theme Customizer API

Lecture 142 Double Checking Your Work From The Previous Exercise

Lecture 143 Adding the Green Boxes in our Bootstrap Theme to the Customizer

Lecture 144 Exercise Review: Adding the other 3 green boxes and a Learn More button

Lecture 145 Organizing your sections into Panels

Lecture 146 Changing the logo using the Customizer

Lecture 147 PROJECT: Making the Static Banners and their Headings Dynamic In the Customizer

Lecture 148 Adding the Black Bar for Admin Users

Lecture 149 Adding the Icons Above Our Green Boxes

Lecture 150 Adding our Logo Bar With the Logos Custom Post Type

Lecture 151 Adding the Logo Bar Title In The Customizer

Lecture 152 Converting our Static Inner Pages from HTML to WordPress templates in PHP

Lecture 153 Checking the Results of Our Exercise Where We Converted the Other 3 Static Pages

Lecture 154 Creating Our Default Page Template

Lecture 155 Adding our Header Menu and Relocating our Menu Code

Lecture 156 Cleaning Up Our Default Template with the page.php file.

Lecture 157 Cleaning up our About Us Template

Lecture 158 Fill in the Missing Code for the Four Remaining Templates

Lecture 159 Coding the Page Title and Content for the Remaining Inner Pages

Lecture 160 Adding Custom Fields to Our Pricing Table Page Template

Lecture 161 Creating a Custom Field Out Of the Pricing Button

Lecture 162 Starting Our First Two Footer Sidebars

Lecture 163 Finishing Our Last Two Footer Sidebars

Lecture 164 Adding a Customizer Section for the Footer Copyright Line

Lecture 165 Demonstrating Our Footer Line With the Customizer

Lecture 166 Adding Alt Tags To The Logo Bar

Lecture 167 Removing The Rest Of The Hard-Coding Our Inner Page Templates and Finishing Them

Lecture 168 Our Theme is Complete! One more small change is required.

This course is perfect for PHP developers interested in developing WordPress plugins

Homepage


14startingourwordpresy3f7t.jpg


Complete Unity® and Android Development: Build Games & Apps

13541966a7e2xvf38.jpg


Complete Unity® and Android Development: Build Games & Apps
Last Updated 04/2019
MP4 | Video: h264, 1280x720 | Audio: AAC, 44.1 KHz, 2 Ch
Genre: eLearning | Language: English + srt | Duration: 401 lectures (40h 17m) | Size: 7.75 GB

Learn to code & build beginner Android apps! And make a Legend of Zenda game in Unity®. Make unique game art in Blender


What you'll learn
Build a 3D "Legend of Zenda" game in Unity Technologies from scratch.
Navigate the Unity® and Blender interfaces
Build 3D models for the game in Blender.
Integrate the art from Blender into Unity®.
Build video game levels and scenes.
Code in Java and C#.
Build Android apps.


Requirements
To follow along with the Unity® part, you will need the following programs: Blender (for 3D modeling and texturing), Photoshop or a free program like Gimp (for 2D art and some texturing), and Unity® (for game set-up and coding).
The C# coding section might be overwhelming for someone who has never coded before. Some coding experience is recommended.
Some Blender experience for model creation. If you're a beginner, download the models and import into Unity.
Unity® and Blender are free to download. Please download and install Unity® and Blender before purchasing this course.
This course was recorded on a Mac computer, but you can use Unity® and Blender on a PC.
For the Android part, please have a working computer onto which you can install Android Studio 2.2.
Java coding skills are helpful but not required.
Eclipse.


Description
"Incredibly essential for a beginner such as myself. I have attempted to figure out Unity on my own and was completely lost even with the system's free tutorials. This is giving me exactly what I need to know in a step-by-step explanation"

"It's really good so far, they are not making me paste lots of code like other tutorials which means I can learn." - Eivis T.

"Very detailed explanation." - Gonzalo C.

-------------------------------------------------------------------------------------------------------------------------------

This beginner's course has 2 parts! In Part 1, you build a 3D Legend of Zenda game in Unity® and Blender. In Part 2, you learn Android app development by making apps from scratch.

This course is unique because we make both the code and the art for the game from scratch. We teach you the fundamentals of designing, coding, and modeling a 3D game.

First you design the game "The Legend of Zenda" and its functionality in Unity®. You learn how to code in C# and build video game levels.

Don't worry if you've never coded before. We start simple and add more to the game as the course goes on.

Included in this course is material for beginners to get comfortable with the interfaces. Please note that we reuse this material in similar courses because it is introductory material. You can find some material in this course in the following related courses

Unreal Engine 4 & Android Development: Make 6 Games, 12 Apps

The ultimate Android course for complete beginners

Universal App Development: Code and Make Apps in C# and Java

Complete Unity and Android Development: Build Games and Apps

Create 19 Low Poly Models & Your First 3D RPG In Unity® C#

Complete Unity and Android Development: Build Games and Apps

C# Masterclass: Make RPG & Mobile Games in Unity & Blender

Build "The Legend Of Zenda" Game in Unity and Blender

Make a 3D Unity Action Game & Low Poly Buildings in Blender

Professional Game Development: 3D Modeling and Unity C#

28 Low Poly Models and a Unity® Game - Complete 3D Developer

Why Unity®?

Unity® is one of the most popular platforms in game development. You can use Unity® to build 2D and 3D games. Unity® is cross-platform, which means it is easy to use with other platforms.

Then you create the 3D models for the game in Blender. You build all the art assets for the game, including the characters, weapons, cannon, dungeon, and temple. You learn how to integrate your art from Blender into Unity®.

Why Blender?

Blender, like Unity®, is a popular production suite that is free to download. Blender is a revolutionary tool for making 3D art digitally. With Blender, you can make art assets for games, like we do in this course.

Have you ever wanted to learn how to make Android apps? Chances are you have tried but haven't got anywhere. Sometimes the tutorials are either too basic or too complex. What you need is a pre-planned curriculum that shows you how to build apps.

Look no further because this course is the Number 1 course that will show you how to build apps for Android. Reach a ton of people with your amazing idea today.

Enroll today!

Who this course is for
Anyone who wants to learn Unity® or Blender.
Anyone who wants to learn game development.
The Unity portion assumes you know a little about Unity® and Blender
Complete beginners who want to learn to code for Android app development

Homepage


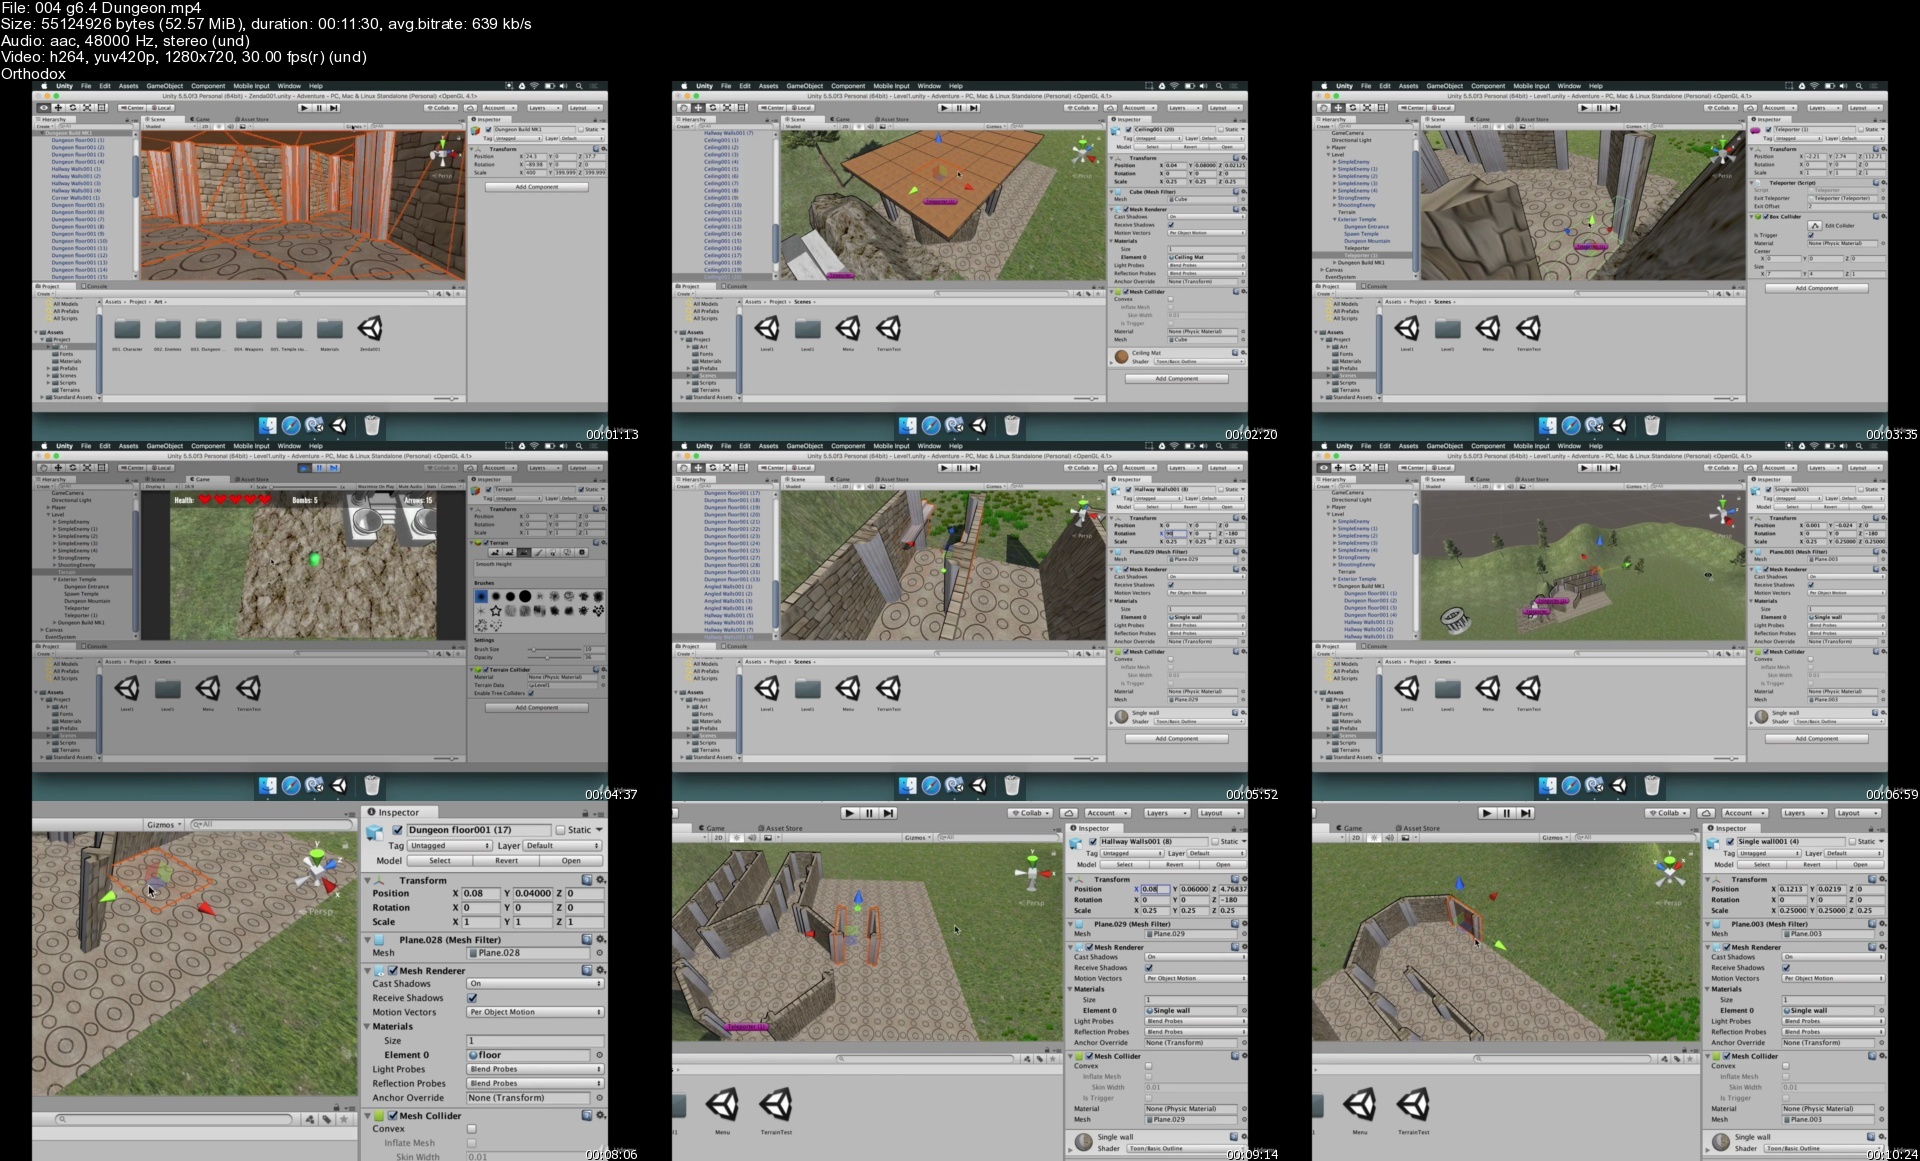
004g6.4dungeons1of48.jpg


Learn Unity'S Entity Component System To Optimise Your Games

zccdtgpjls5ikrgpkoypygtedo.jpg


Learn Unity'S Entity Component System To Optimise Your Games
Last updated 5/2022
MP4 | Video: h264, 1280x720 | Audio: AAC, 44.1 KHz
Language: English | Size: 8.83 GB | Duration: 13h 9m

Update your Unity programming skills to take advantage of the new Data Orientated Technology Stack and Burst Compiler


What you'll learn
Take existing Unity projects created without the use of DOTs and convert them to employ parallel processing and the entity component system.
The advantages and disadvantages of using DOTs.

Requirements
Students should have a strong working understanding of the Unity game engine.
Students should be proficient in C#

Description
Unity's new Data-Oriented Technology Stack (DOTS) and Entity Component System (ECS) programming paradigm have been developed to optimize game development and open up new ways of accessing memory and parallel processing for developing high-performance C# code that takes advantage of contemporary multicore computers. Through the use of the Burst Compiler, your game programs become native code, able to run faster on multiple threads thus pushing the boundaries of the size of your virtual environments and the simultaneous processing of tens of thousands of game objects.In this course, Penny demystifies Unity's new DOTS architecture and introduces intermediate Unity users to ECS by upgrading classic Unity projects and developing a multitude of examples of the use of DOTS concentrating on the most popular game mechanics. Using her internationally acclaimed teaching style and knowledge from over 25 years working with games, graphics and having written two award-winning books on games AI, Penny will take you from familiar object-oriented programming and upgrade your skill to the more memory efficient and optimized entity component architecture. Throughout, you will follow along with hands-on workshops designed to take you through every step of becoming familiar with ECS. You will build on numerous scenarios that examine the basics of ECS programming through the new DOTS-specific math and physics libraries.While DOTS is still in preview, this course aims to assist you in understanding how it works and how games are constructed with it. The knowledge you obtain will further your ability to decipher future released Unity ECS tech demos and handle API updates.This course requires Unity 2019.3.0f6. and the Hybrid Renderer Package 0.3.3.Learn how to program and work with:Entities and ComponentsThe C# Job SystemsCollision SystemsTrigger SystemsUser Input to Control EntitiesInterfacing with classic Unity and game objects to entity-based systems.Contents and OverviewThe course begins with a section that compares the old way of working with game objects in Unity, through to the creation of a complete ECS system using the exact same scenario in each instance to give you time to compare the programming methods and optimizations gained through implementing DOTS.Following this, you will dive deeper into the creation and debugging of entities while learning how to tag, identify and add data to them with custom components. You will also learn how to find entities once they are injected into the game environment and to access and manipulate them at runtime.After you've become comfortable with the nature of entities, you will discover how the new math library can be used to replicate many of the functions you've become familiar with in the Unity Mathf API. The content will cover transformation, rotations, slerps, pivoting, following waypoints and pursuing and fleeing from targets. A space-based scenario will be created with several planets and thousands of spacecraft programmed to attack, by generating even more thousands of bullets and finally explosions.Next, you'll build a blocky Minecraft inspired landscape from cubes that can be infinitely generated in any direction by implementing Perlin Noise and examining how parallel processing (achieved through the C# Jobs system) dramatically speeds up processing that has in the past been limited to the main thread.On completion of this exercise, a thorough examination of the new DOTS physics capabilities will take place. All the classic Unity elements you've become used to will be replicated via the new physics API and ECS job systems. You will learn about collisions, triggers, camera tracking, bullet physics and the basics of recreating Newtonian physics for moving dynamic and kinematic entities.The course ends with a challenge and project to recreate a third person shooter in which a single player takes on a swarm of zombies.At the completion of this course, you will be familiar with DOTS and the ECS and be able to further your skills by interpreting and making sense of the Unity tech demos as they are released, presenting updated API and introducing more and more functionality into DOTS.What students are saying about Penny's courses:Excellent course!! I am already in game development industry and there is one quote here that "Whenever you are not able to solve complex problem, its the right time to get back to the BASICS"She is the best teacher ever in this platformMost instructors are very smart people. Some are good at teaching and some are not. Penny is great at describing complex concepts without going down a dark cerebral rabbit hole that so many instructors feel obligated to do. It's like they need to demonstrate their knowledge by explaining every tiny aspect. Penny does not go there. She explains things clearly but does not overwhelm the student with more than they need to know.

Overview

Section 1: Introduction

Lecture 1 Welcome

Lecture 2 What Version of Unity Should I Use?

Lecture 3 What Version of Unity Should I Use 2.0.

Lecture 4 Information Relevant to this Course

Lecture 5 Join the H3D Student Community

Lecture 6 Contacting H3D

Lecture 7 FAQs

Section 2: DOTS in a Nutshell

Lecture 8 Understanding DOTS

Lecture 9 Comparing the Old & the New Part 1

Lecture 10 Comparing the Old & the New Part 2

Lecture 11 Comparing the Old & the New Part 3

Lecture 12 Comparing the Old & the New Part 4

Lecture 13 Comparing the Old & the New Part 5

Lecture 14 Your First ECS Challenge

Lecture 15 Parallel Computing

Lecture 16 Structures, Classes and Blittable Types

Section 3: Working with Entities

Lecture 17 Creating and Debugging Entities

Lecture 18 Accessing and Modifying Entity Data

Lecture 19 Adding IComponentData Challenge

Lecture 20 Performing Entity Queries

Lecture 21 Entity Query Interface Challenge

Lecture 22 Adding an Entity from Monobehaviour at Runtime

Lecture 23 Constructing an Entity from Scratch

Lecture 24 Constructing Sheep Entities from a Mesh Challenge

Section 4: Transformation Mathematics in DOTS

Lecture 25 Performing Translations

Lecture 26 Performing Rotations

Lecture 27 Performing a Slerp to Face a Target

Lecture 28 Rotating Around a Pivot Point

Lecture 29 Pivoting Challenge

Section 5: Working with Custom Components

Lecture 30 Getting Player Transformations into Entities

Lecture 31 Adding and Setting Data Values in a Custom Components

Lecture 32 Updating Custom Component Values

Lecture 33 Waypoint Follow Challenge

Section 6: Project: Space Wars Simulation

Lecture 34 Finding Closest Planet

Lecture 35 Attacking and Retreat Movement

Lecture 36 Spawning an Entity from an Entity Part 1

Lecture 37 Spawning an Entity from an Entity Part 2

Lecture 38 Spawning Entities from Another Location Part 1

Lecture 39 Spawning Entities from Another Location Part 2

Lecture 40 Restricting the Lifetime of an Entity

Lecture 41 Restricting the Lifetime of an Entity Update

Lecture 42 Implementing Line of Sight in an Entity

Lecture 43 Faking Collisions

Lecture 44 Instantiating Explosions

Lecture 45 A System for Scaling Particles

Section 7: Project: Infinite Cube World

Lecture 46 Creating a Landscape with Cubes

Lecture 47 Using Perlin Noise for Height

Lecture 48 Enhanced Perlin Heights

Lecture 49 Changing Materials on an Entity

Lecture 50 Identifying Bottlenecks and Solutions to FPS Drop

Lecture 51 Scrolling the Landscape with the Player

Section 8: DOTS Physics

Lecture 52 The Physics Components

Lecture 53 An ECS Physics-Based Character Controller

Lecture 54 Spawning Multiple Physics Entities

Lecture 55 Shooting Physics Bullets Challenge

Lecture 56 Moving a Bullet with Physics

Lecture 57 Upgrading a Package

Lecture 58 Detecting Collisions

Lecture 59 Using Custom Values in a Collision Event

Lecture 60 Destroying an Entity on Collision

Lecture 61 Entity Tracking with the Camera

Lecture 62 Detecting Physics Triggers

Lecture 63 Converting to a Dynamic Character

Lecture 64 Using Custom Values in a Trigger Event

Section 9: Raycasting

Lecture 65 Starting with a Tower Defence Setup

Lecture 66 Performing a Raycast Hit Part 1

Lecture 67 Performing a Raycast Hit Part 2

Lecture 68 Destroying an Entity Hit by a Raycast

Lecture 69 Performing Raycast Distance Hits P1

Lecture 70 Performing Raycast Distance Hits P2

Lecture 71 Locating and Following The Closest Physics Entity

Lecture 72 Destroying Tracked Physics Entity

Lecture 73 Destroying Zombie Challenge P1

Lecture 74 Destroying Zombie Challenge P2

Section 10: Final Words

Lecture 75 Some Final Words from Penny

Lecture 76 Where to now?

Professionals and students who are comfortable using Unity but would like to upgrade their skills to implement the new Unity DOTS system.

Homepage


9comparingtheoldthenecxdvw.jpg


React 2021 Par La Pratique, De A À Z (Évolution Progressive)

czd8fhyhv6r8uhvgdzeog5rdht.jpg


React 2021 Par La Pratique, De A À Z (Évolution Progressive)
Last updated 2/2022
MP4 | Video: h264, 1280x720 | Audio: AAC, 44.1 KHz
Language: French | Size: 6.68 GB | Duration: 13h 26m

Apprenez les bases de React et ses modules importants dont React-Router V5/Axios/React-Bootstrap en créant 4 applis


What you'll learn
Développer des applications avec la librairie React
Communiquer avec des serveurs et API REST (axios)
Mettre en place de manière basique un serveur Firebase et une database
Créer des sites internet "Single page" avec le module React-Router
Mettre en ligne ses applications et sites internet développés avec React sur un serveur Apache
Utiliser Bootstrap avec et sans React-Bootstrap

Requirements
Avoir de bonnes connaissances en Javascript (+ connaître bootstrap, HTML, CSS)

Description
Le cours utilise la version 5 de REACT ROUTER. La V6 est disponible depuis fin 2021. Pour suivre cette formation, je vous inviterai à utiliser la même version que moi et à regarder la documentation relative aux mises à jours de la V6.Nouveau 2021 : Ajout de 2 modules sur les Hooks (1,5h) : - Introduction aux Hooks- 5ème mini-projet utilisant les hooksREACT 2020 par la pratique, de A à Z (évolution progressive) :Avec ce cours, vous apprendrez les bases de la librairie JavaScript REACT au travers de 4 applications différentes.C'est l'un des "cours de fin de parcours" que je propose dans le cursus JavaScript H2PROG ; il en contient 10 autres permettant d'apprendre ce langage de programmation, les bases de données (MongoDB / SQL), l'architecture MVC, la programmation Serveur, la programmation Front-End ....Un niveau Intermédiaire :Même si j'explique tout ce qui est réalisé, il vous faudra disposer de bonnes bases en programmation JavaScript pour suivre ce cours dans de bonne conditions ! Je ne recommande pas à un débutant en programmation de démarrer son apprentissage par l'utilisation d'un Framework ou d'une librairie (en particulier REACT).La progression normale d'un apprenti développeur est la suivante : Algorithmique -> langage de programmation -> framework / librairieLe niveau est cependant "Débutant" en ce qui concerne la librairie REACT.Le cours...... permettra d'apprendre les bases de la librairie et toutes les notions fondamentales pour l'utiliser dans de bonnes conditions. Vous aurez des diapositives de synthèse téléchargeables que vous pourrez imprimer et utiliser au besoin dans la poursuite de votre apprentissage.La première application...... contiendra toutes les bases de la librairie et sera un "gros" exercice du cours. Nous rajouterons en plus deux notions fondamentales liées aux sites et applications web avec : la création de formulaires avec React, l'utilisation des modules Formik et Yup pour valider les formulairesNous créerons une application permettant de gérer des livres (CRUD front-End).La deuxième application...... permettra de mettre en pratique tous vos acquis et rajoutera la possibilité d'échanger avec un "serveur" tels que Firebase. Nous créerons sur ce dernier une base de données qui contiendra plusieurs informations que nous pourrons récupérer dans notre application grâce à Axios. Nous verrons également comment envoyer des informations au serveur. Nous programmerons une application permettant de créer des personnages (type RPG).La troisième application...... permettra encore plus de pratique sur les fondamentaux, l'utilisation des compétences apprises dans la deuxième application, en particulier sur le module Axios. Nous communiquerons avec une API REST (REST Countries) pour récupérer des données et les traiter en Front avec React. Nous en profiterons pour apprendre comment créer un site web complet via l'utilisation de React RouterNous créerons un site permettant d'afficher tous les pays du monde (drapeau, nom, capitale ....), depuis une l'API REST Countries.La quatrième application...... permettra de consolider les acquis des 3 premières et de créer un site web supplémentaire avec 3 pages (la page d'accueil, l'application, la page de contact). Cette application fournira l'occasion d'installer le module React-Bootstrap et de voir comment il s'utilise en combinaison avec React-Router. Nous ajouterons une application permettant de lister tous les établissements publics Français, en utilisant une API REST du gouvernement.Nous verrons enfin comment mettre en ligne ce site internet sur un serveur Apache!L'objectif...Avec plus de 10 heures d'enregistrements, vous disposerez du nécessaire pour développer sereinement des applications et sites internet Front-end avec la librairie REACT. A l'issue de cette formation vous pourrez rajouter cette nouvelle compétence sur votre CV.Les applications sont disponibles en ligne et sont testables !Merci et à très vite !Matthieu de H2PROG.

Overview

Section 1: Introduction

Lecture 1 Introduction

Lecture 2 Qui suis-je ?

Lecture 3 Conseils pour suivre la formation

Lecture 4 Le parcours de formation

Lecture 5 Installations

Lecture 6 Installation de Visual Studio Code

Lecture 7 Installation de Node.JS

Lecture 8 Qu'est ce que REACT ?

Lecture 9 PDF

Section 2: Initialisation

Lecture 10 Avant de démarrer

Lecture 11 Création de la première application

Lecture 12 Le JSX

Section 3: Les composants

Lecture 13 Composants simples

Lecture 14 Des composants plus "complexes"

Lecture 15 Des composants dans des composants

Lecture 16 Passage d'informations à un composant

Lecture 17 Classes

Lecture 18 Synthèse

Section 4: Le states

Lecture 19 Le principe

Lecture 20 Cycle de vie

Lecture 21 L'horloge & setState

Lecture 22 setState

Lecture 23 Synthèse

Section 5: Structuration (Dossier, CSS ...)

Lecture 24 Restructuration du dossier SRC

Lecture 25 Le CSS dans REACT

Lecture 26 Tests et ternaires

Lecture 27 Synthèse

Section 6: Les événements

Lecture 28 Le clic sur un bouton

Lecture 29 Evénements et states

Lecture 30 Modifier une personne

Lecture 31 Synthèse

Section 7: Propriété "children"

Lecture 32 L'utilisation de la propriété "children"

Lecture 33 Synthèse

Section 8: Les listes

Lecture 34 Listes et fonction map

Lecture 35 La propriété "key"

Lecture 36 Synthèse

Section 9: Projet 1 : Les livres et un CRUD Front-End

Lecture 37 Présentation du projet et choix des composants

Lecture 38 Création du projet

Lecture 39 Ajout de bootstrap

Lecture 40 Composant "Titre"

Lecture 41 Créer un Snippet

Lecture 42 Changer la police

Lecture 43 Composant Bouton

Lecture 44 Composant Livres

Lecture 45 Liste de livres

Lecture 46 Composant Livre

Lecture 47 Supprimer un livre

Lecture 48 Bouton d'ajout d'un livre

Lecture 49 Composant formulaire d'ajout

Section 10: Les formulaires dans REACT

Lecture 50 Création du formulaire d'ajout

Lecture 51 Soumission du formulaire

Lecture 52 Ajout du livre dans les states

Lecture 53 Fermer le formulaire

Lecture 54 La modification d'un livre

Lecture 55 Composant Alert

Lecture 56 Synthèse

Section 11: La validation des formulaires

Lecture 57 Le formulaire d'ajout d'un livre avec Formik

Lecture 58 La validation des saisies avec Formik

Lecture 59 La validation des saisies avec YUP

Section 12: Projet 2 : Créateur de personnages (Ajout de firebase)

Lecture 60 Présentation du projet

Lecture 61 Préparation du projet

Lecture 62 Composants bouton et titre

Lecture 63 Composant CreateurPersonnage

Lecture 64 Composant ImagePerso

Lecture 65 Les flèches

Lecture 66 Changer d'image

Lecture 67 Points de caractéristiques

Lecture 68 Les boutons liés aux caractéristiques

Lecture 69 La mise à jours des points de caractéristiques dans les states

Lecture 70 Affichage des armes

Lecture 71 Sélectionner une arme

Lecture 72 Bouton "créer" et "réinitialiser"

Section 13: Firebase & Database & Axios

Lecture 73 Création de la DB

Lecture 74 Axios & Firebase

Lecture 75 Enregistrer les personnages

Lecture 76 Lister les personnages créés

Lecture 77 Rafraîchissement des données

Section 14: Projet 3 : API REST & Axios

Lecture 78 Présentation du projet

Lecture 79 Création du projet

Lecture 80 Utilisation de l'API REST

Lecture 81 Filtrer sur les pays

Lecture 82 La pagination

Section 15: Routage

Lecture 83 Attention : Comptabilité V5 - V6

Lecture 84 Les bases du routage

Lecture 85 NavBar

Lecture 86 Afficher un pays (étape1)

Lecture 87 Afficher un pays (étape 2)

Lecture 88 Erreur 404

Lecture 89 Paramétrage des NavLinks

Lecture 90 Mise en ligne

Lecture 91 Synthèse sur le routage

Section 16: Projet 4

Lecture 92 Présentation du projet

Lecture 93 Structure du site

Lecture 94 React router

Lecture 95 NavBar avec React-Bootstrap et React-Router

Lecture 96 La page d'accueil

Lecture 97 Erreur 404

Lecture 98 Page contact et formulaire

Lecture 99 Validation du formulaire avec Formik et Yup

Lecture 100 Page localisation (étape 1)

Lecture 101 Page localisation (étape 2)

Section 17: Introduction aux Hooks

Lecture 102 Les hooks

Lecture 103 useState

Lecture 104 useState et les objets

Lecture 105 useEffect

Lecture 106 Hook personnalisé

Section 18: Projet 5 : Utilisation des connaissances sur les hooks

Lecture 107 Présentation du projet

Lecture 108 Les bases du projet

Lecture 109 Lister les formations

Lecture 110 Hook personnalisé : useLoadData

Lecture 111 Filtrer par catégorie

Section 19: Bonus - Mes autres cours

Lecture 112 Continuer son apprentissage

Développeur web,Etudiant en développement,Reconversion professionnelle

Homepage


35laproprietekeysqdcsh.jpg


Lerne Flutter & Dart Und Erstelle Native Ios & Android Apps

okdxf54f5n0kmc0rwqypgjjf1q.jpg


Lerne Flutter & Dart Und Erstelle Native Ios & Android Apps
Zuletzt aktualisiert am 2/2020
MP4 | Video: h264, 1280x720 | Audio: AAC, 44.1 KHz
Language: Deutsch | Size: 17.89 GB | Duration: 37h 29m

Eine vollständige Anleitung zum Flutter SDK & Flutter Framework zum Erstellen nativer iOS- und Android-Anwendungen


What you'll learn
Erstelle ansprechende native mobile Anwendungen für Android und iOS.
Nutzen Funktionen wie Google Maps, die Gerätekamera, Authentifizierung und vieles mehr!
Lerne alle Grundlagen und erweiterten Funktionen, die Du in keinem anderen Kurs finden wirst.

Requirements
Anfänger und erfahrene Entwickler, die daran interessiert sind, in die Entwicklung mobiler Anwendungen mit einer Sprache für beide Plattformen einzusteigen.
Erfahrene iOS- oder Android-Entwickler, die plattformübergreifende (iOS + Android) Anwendungen mit einer einzigen Programmiersprache erstellen möchten.

Description
Nimm am umfangreichsten und meistverkauften Flutter-Kurs teil und lerne, wie man erstaunliche iOS- und Android-Anwendungen erstellt!Du musst nicht Android/ Java und iOS/ Swift lernen, um echte native mobile Anwendungen zu erstellen!Flutter - ein von Google entwickeltes Framework - ermöglicht es Dir, im Handumdrehen eine Sprache zu lernen (Dart) und schöne native mobile Apps zu erstellen. Flutter ist ein SDK, das das Werkzeug zur Verfügung stellt, um Dart Code in nativen Code zu kompilieren, und es bietet Dir auch einen reichen Satz von vorgefertigten und vorgefertigten Oberflächenelementen (so genannte Widgets), mit denen Du Deine Benutzeroberflächen zusammenstellen kannst.Flutter ist extrem im Trend und wird für große Google-Apps wie ihre Adwords-App verwendet - sie ist jetzt als "ready for production" markiert, daher ist es jetzt an der Zeit, einzusteigen und es zu lernen!Dieser Kurs vermittelt Flutter & Dart von Grund auf, KEINE Vorkenntnisse über eine der beiden sind erforderlich! Und Du brauchst sicherlich keine Android- oder iOS-Entwicklungserfahrung, da die ganze Idee hinter Flutter darin besteht, nur eine Sprache zu lernen.Du wirst Flutter nicht nur in der Theorie lernen, sondern wir werden während dieses Kurses mehrere, realistische Apps erstellen. Diese Apps werden sowohl alle wichtigen Grundlagen als auch erweiterte Funktionen wie Google Maps, die Gerätekamera, das Hinzufügen von Animationen und mehr enthalten!Mit Flutter kannst Du Code nur einmal schreiben und Deine Apps sowohl im Apple AppStore als auch im Google Play veröffentlichen.Verwende Googles Material Design, um schöne, aber vollständig anpassbare Apps im Handumdrehen und mit fast null Aufwand zu erstellen. Du kannst die reichhaltige Widgetsuite Flutter bietet, um gängige Oberflächenelemente wie Buttons, Switches, Formulare, Symbolleisten, Listen und mehr hinzuzufügen - oder Du erstellst einfach Deine eigenen Widgets - Flutter macht das auch kinderleicht.Hier ist, was im Kurs enthalten ist:Detaillierte Installationsanweisungen für MacOS und WindowsEine gründliche Einführung in Flutter, Dart und das Konzept der Widgets.Eine Übersicht über die integrierten Widgets und wie Du Deine eigenen Widgets hinzufügen kannst.Debugging-Tipps & TricksSeitennavigation mit Registerkarten, seitlichen Schubladen und stapelbasierter NavigationZustandsverwaltungslösungenHandhabung und Validierung von BenutzereingabenVerbindung Deiner Flutter-App mit Backend-Servern durch Senden von Http-AnfragenBenutzerauthentifizierungHinzufügen von Google MapsVerwendung von nativen Gerätefunktionen wie der KameraHinzufügen von schönen Animationen und SeitenübergängenSo veröffentlichest Du Deine App in den App StoresUnd vieles mehr!

Overview

Section 1: Einleitung

Lecture 1 Einleitung

Lecture 2 Was ist Flutter?

Lecture 3 Die Flutter Architektur verstehen

Lecture 4 Wie Flutter & Dart Code zu nativen Apps kompiliert

Lecture 5 Flutter macOS Setup

Lecture 6 macOS Entwicklungsumgebung

Lecture 7 Flutter Windows Setup

Lecture 8 Windows Entwicklungsumgebung

Lecture 9 Flutter & Material Design

Lecture 10 Kursübersicht

Lecture 11 Wie du das meiste aus dem Kurs holst

Lecture 12 Nützliche Ressourcen und Links

Section 2: Flutter Grundlagen[QUIZ APP]

Lecture 13 Kapiteleinführung

Lecture 14 Ein neues Projekt erstellen

Lecture 15 Eine Übersicht der generierten Dateien und Ordner

Lecture 16 Mehr über Git (Versionskontrolle)

Lecture 17 Analyse der Default App

Lecture 18 Dart Grundlagen Teil 1

Lecture 19 Dart Grundlagen Teil 2

Lecture 20 Dart Grundlagen - Zusammenfassung

Lecture 21 Eine App von Grund auf Entwickeln

Lecture 22 Hinweis Virtualisierung Einstellungen

Lecture 23 Eine App im Emulator testen

Lecture 24 Klassen Konstruktoren und Named Arguements

Lecture 25 Erste Zusammenfassung und weitere Syntax

Lecture 26 Einen Widget Tree entwickeln

Lecture 27 Sichtbare (Input/Output) & unsichtbare (Layout/Control) Widgets

Lecture 28 Layout Widgets hinzufügen

Lecture 29 Funktionen mit Buttons verbinden

Lecture 30 Anonyme Funktionen

Lecture 31 Widget Data aktualisieren (bzw. StatelessWidget falsch verwenden)

Lecture 32[DART DEEP DIVE] Listen verstehen

Lecture 33 Richtiges Aktualisieren mit Stateful Widgets

Lecture 34 Ein kurzer Blick unter die Haube

Lecture 35 Private Properties verwenden

Lecture 36 Erstellen eines neuen, benutzerdefinierten Widgets

Lecture 37 Erste Styling- und Layout-Schritte

Lecture 38 Enum & mehrere Konstruktoren

Lecture 39 Offizielle Dokumente & Der Widget-Katalog

Lecture 40 Callback-Funktionen übergeben

Lecture 41 Einführung von Maps

Lecture 42 Zuordnung von Listen zu Widgets

Lecture 43 final vs const

Lecture 44 Einführung von "if"-Statements

Lecture 45[DART DEEP DIVE] Mehr zu "if"-Anweisungen

Lecture 46[DART DEEP DIVE] Der "null" Wert

Lecture 47 Widgets bedingt ausgeben

Lecture 48 Aufteilen der App in Widgets

Lecture 49 Berechnen einer Gesamtpunktzahl

Lecture 50 Getters & "else-if"

Lecture 51 Quiz zurücksetzen

Lecture 52 Zusammenfassung

Lecture 53 Kapitel Ressourcen

Section 3: Apps auf unterschiedlichen Geräten Testen und Debuggen

Lecture 54 Kapitel Einführung

Lecture 55 Ausführen der App auf einem echten Android-Gerät

Lecture 56 Ausführen der App auf einem iOS-Emulator

Lecture 57 Ausführen der App auf einem echten iOS-Gerät

Lecture 58 Arbeiten mit den Emulatoren / Verwendung der Emulatoren

Lecture 59 Fehlermeldungen verstehen & Fehler beheben

Lecture 60 Verwendung des Debuggers

Lecture 61 Erste Schritte mit den Dart DevTools

Lecture 62 Verständnis des Repaint Rainbow

Lecture 63 Zusammenfassung der Dart DevTools

Lecture 64 Nützliche Ressourcen & Links

Section 4: Widgets, Styling, Logik hinzufügen -[PERSÖNLICHE AUSGABEN APP]

Lecture 65 Kapitel Einführung

Lecture 66 Ein Überblick über die Core Flutter Widgets

Lecture 67 Planen der App

Lecture 68 Kombinieren von Widgets

Lecture 69 Verstehen der Spaltenausrichtung

Lecture 70 Kein Widget: Hinzufügen eines Transaktionsmodells & Transaktionsdaten

Lecture 71 Mapping von Daten in Widgets

Lecture 72 Erstellen eines benutzerdefinierten Listenelements

Lecture 73 Styling eines Containers

Lecture 74 Text stylen

Lecture 75 Mehr styling

Lecture 76 Container vs Spalten vs Zeilen

Lecture 77 Verwendung der String-Interpolation

Lecture 78 Installation von externen Paketen & Formatierung von Daten

Lecture 79 DateFormat Patterns

Lecture 80 Hinzufügen von Texteingabe-Widgets (TextField)

Lecture 81 Abrufen von Benutzereingaben

Lecture 82 Aufteilen der App in Widgets

Lecture 83 Widgets verbinden & Daten / Status verwalten

Lecture 84 Benutzertransaktionen zur Liste hinzufügen

Lecture 85 Die Liste scrollbar machen!

Lecture 86 Arbeiten mit ListViews

Lecture 87 Input etwas anpassen

Lecture 88 Hinzufügen von AppBar-Buttons und Floating Action-Buttons

Lecture 89 Zeigen eines Model Bottom Sheets

Lecture 90 Verbesserung und Styling des Modal Bottom Sheets

Lecture 91 Konfigurieren und Verwenden von Designs/Themes

Lecture 92 Custom Fonts & arbeiten mit Text Themes

Lecture 93 Hinzufügen von Bildern zur App

Lecture 94 Planung des Chart Widgets

Lecture 95 Durchlaufen von Listen

Lecture 96 Mehr über "for" Loops

Lecture 97 Ableitung der letzten Transaktionen

Lecture 98 Erstellen von Balken für unser Chart

Lecture 99 Füllen des Charts mit Werten

Lecture 100 Fertigstellung der Chart Bars

Lecture 101 Flexibel & Erweitert: Deep Dive

Lecture 102 Hinzufügen eines ListTile Widgets

Lecture 103 Verbesserung des Overall Charts

Lecture 104 Widgets & Konfigurieren von Widgets - Zusammenfassung / Übersicht

Lecture 105 Erste Schritte mit der Datumsauswahl

Lecture 106 Anzeigen eines DatePicker

Lecture 107 Transaktionen mit einem Datum hinzufügen

Lecture 108 Transaktionen löschen & IconButtons verwenden

Lecture 109 Der App den letzten Schliff geben

Lecture 110 Zusammenfassung

Lecture 111 Nützliche Ressourcen & Links

Section 5: Responsive und Adaptive Benutzeroberflächen und Apps

Lecture 112 Modul Einführung

Lecture 113 Was bedeutet "Responsive" und "Adaptive"?

Lecture 114 Beispiele: Wo wir die App verbessern können!

Lecture 115 Größen dynamisch berechnen

Lecture 116 Arbeiten mit dem "textScaleFactor".

Lecture 117 Verwendung des LayoutBuilder Widgets

Lecture 118 Steuern der Geräteausrichtung

Lecture 119 Darstellung alternativer Landscape Content - 1

Lecture 120 Fertigstellen des Landscape Mode

Lecture 121 Anzeigen verschiedener Inhalte basierend auf der Geräteausrichtung

Lecture 122 Respektieren der Softkey-Insets

Lecture 123 Verwendung der Gerätegröße unter Bedingungen

Lecture 124 Verwalten des MediaQuery-Objekts

Lecture 125 Überprüfen der Geräteplattform

Lecture 126 Cupertino (iOS) Widgets verwenden

Lecture 127 Verwendung der SafeArea

Lecture 128 Mehr Cupertino Styles

Lecture 129 Verwendung von Cupertino-Buttons

Lecture 130 Erstellen von benutzerdefinierten adaptiven Widgets

Lecture 131 Zusammenfassung

Lecture 132 Nützliche Ressourcen & Links

Section 6: Widget & Flutter Internals - Deep Dive

Lecture 133 Modul Einführung

Lecture 134 Das vorliegende Problem

Lecture 135 Widget Tree & Element Tree - Was, Warum und Wie?

Lecture 136 Wie Flutter den Bildschirm wiederherstellt und neu anzeigt

Lecture 137 Wie Flutter build() ausführt

Lecture 138 Verwendung von "const" Widgets & Konstruktoren

Lecture 139 Schreiben von gutem Code

Lecture 140 Extrahieren von Widgets

Lecture 141 Verwendung von Builder-Methoden

Lecture 142 Den Lebenszyklus eines Widgets verstehen

Lecture 143 Aufrufen von super.initState() etc.

Lecture 144 Verständnis des App-Lebenszyklus

Lecture 145 Kontext verstehen

Lecture 146 Ein Problem mit Listen & Stateful Widgets

Lecture 147 Verständnis der Problemursache

Lecture 148 Tasten Verwenden

Lecture 149 Zusammenfassung

Lecture 150 Nützliche Ressourcen & Links

Section 7: Navigation & mehrere Bildschirme (MEALS APP)

Lecture 151 Einführung

Lecture 152 App planen

Lecture 153 Beginnend mit der App - Hinzufügen von Basisdaten

Lecture 154 Erstellen eines Grid & Arbeiten mit linearen Gradienten

Lecture 155 Registrieren eines Bildschirms als Hauptbildschirm

Lecture 156 Styling & Theming

Lecture 157 Navigieren zu einer neuen Seite

Lecture 158 Datenübergabe über den Konstruktor

Lecture 159 Named Routes verwenden & Daten mit Named Routes übergeben

Lecture 160 Tiefer in Named Routes eintauchen

Lecture 161 Hinzufügen eines Essens-Modells & Daten

Lecture 162 Auswahl der Mahlzeiten für eine ausgewählte Kategorie

Lecture 163 Rezeptpositionen anzeigen & Netzwerkbilder verwenden

Lecture 164 Fertigstellung des Elements der Speiseliste

Lecture 165 Navigieren zur Detailseite der Mahlzeit

Lecture 166 onGenerateRoute & onUnknownRoute

Lecture 167 Fertigstellung der Detailseite der Mahlzeit

Lecture 168 Hinzufügen einer TabBar zur Appbar

Lecture 169 Hinzufügen einer unteren TabBar

Lecture 170 Hinzufügen einer benutzerdefinierten Drawer

Lecture 171 Links zum Drawer hinzufügen

Lecture 172 Seiten ersetzen (statt schieben)

Lecture 173 Poppen von Seiten & Zurückgeben von Daten

Lecture 174 Hinzufügen von Filter Switches

Lecture 175 Hinzufügen von Filter Logic

Lecture 176 Hinzufügen eines "Mark as Favorite" Feature

Lecture 177 Ein Problem

Lecture 178 Zusammenfassung

Lecture 179 Nützliche Ressourcen & Links

Section 8: State Management[SHOP APP]

Lecture 180 Kapitel Einführung

Lecture 181 App planen

Lecture 182 Daten Model definieren

Lecture 183 Arbeiten an den "Produkt" Grid- und Item-Widgets

Lecture 184 Styling & Theming der App

Lecture 185 Hinzufügen der Navigation zur App

Lecture 186 Warum StateManagement? Und was ist "State" und "StateManagement"?

Lecture 187 Verständnis des "Provider"-Pakets & -Ansatzes

Lecture 188 Arbeiten mit Providers & Listeners

Lecture 189[DART DEEP DIVE] Vererbung ("extends") vs Mixins ("with")

Lecture 190 Bereitstellung von non-Objekts

Lecture 191 "Hören" an verschiedenen Orten & Wegen

Lecture 192 Verwendung verschachtelter Modelle & Provider

Lecture 193 Erkundung alternativer Provider-Syntaxen

Lecture 194 Verwendung von "Consumer" anstatt "Provider.of"

Lecture 195 Local State vs App-wide State

Lecture 196 Hinzufügen der Shopping Cart Data

Lecture 197 Arbeiten mit mehreren Providers

Lecture 198 Anschluss des Cart Providers

Lecture 199 Arbeiten am Shopping Cart & Anzeigen einer Summe

Lecture 200 Anzeigen einer Liste von Cart Items

Lecture 201 Warenkorb-Elemente löschbar machen

Lecture 202 Hinzufügen von Produktdetaildaten

Lecture 203 Bereitstellen eines Auftragsobjekts

Lecture 204 Hinzufügen von Bestellungen

Lecture 205 Hinzufügen eines Bestell Screens

Lecture 206 Verwenden eines Side Drawers

Lecture 207 Bestellungen erweiterbar machen & Stateful Widgets vs. Provider

Lecture 208 Zusammenfassung

Lecture 209 Nützliche Ressourcen & Links

Section 9: Mit Benutzereingaben und Forms arbeiten[SHOP APP]

Lecture 210 Einführung

Lecture 211 Snackbars & Widerrufen der "In den Warenkorb" Aktionen

Lecture 212 Alert Dialog anzeigen

Lecture 213 Eine "Produkte verwalten" Seite hinzufügen

Lecture 214 "Produkte bearbeiten" Screen und ein Problem

Lecture 215 Verwendung von Formularen & Arbeiten mit Formulareingaben

Lecture 216 ListView oder Column

Lecture 217 Verwaltung des Fokus der Formulareingabe

Lecture 218 Mehrzeilige Eingaben & Objekte löschen

Lecture 219 Image Input & Image Preview

Lecture 220 Formulare übermitteln

Lecture 221 Benutzereingabe überprüfen

Lecture 222 Hinzufügen der Validierung zu allen Eingaben

Lecture 223[OPTIONAL] arbeiten mit Regular Expressions

Lecture 224 Neue Produkte speichern

Lecture 225 Produkte und Zeit aktualisieren

Lecture 226 Benutzern das Löschen von Produkten ermöglichen

Lecture 227 Zusammenfassung

Lecture 228 Nützliche Ressourcen & Links

Section 10: HTTP Request senden[SHOP APP]

Lecture 229 Modul Einführung

Lecture 230 On Device vs Web Storage

Lecture 231 Wie man Flutter zu einer Datenbank verbindet

Lecture 232 Unser Backend vorbereiten

Lecture 233 Wie man einen HTTP Request sendet

Lecture 234 Einen POST Request senden

Lecture 235 Mit Futures in Dart arbeiten

Lecture 236[DART DEEP DIVE] Futures & Async Code

Lecture 237 Anzeigen eines Ladeindikators

Lecture 238 Fehlerbehandlung mit Leichtigkeit

Lecture 239 Arbeiten mit "async" & "await"

Lecture 240 Abrufen von Data, initState & "of(context)"

Lecture 241 Wie man abgerufene Daten transformiert

Lecture 242 Implementieren von Pull-to-Refresh

Lecture 243 Aktualisierung von Daten über PATCH-Requests

Lecture 244 Optimistische Aktualisierung nutzen

Lecture 245 Erstellen von benutzerdefinierten Ausnahmen und mehr Fehlerbehandlung

Lecture 246 Eine Herausforderung für Sie!

Lecture 247 Den Status "Favorit" optimistisch aktualisieren

Lecture 248 Speichern von Aufträgen im Web

Lecture 249 Bestellungen einholen & ein Problem beheben

Lecture 250 Verwendung des "FutureBuilder" Widgets & Verbesserung des Codes

Lecture 251 Zusammenfassung

Lecture 252 Nützliche Ressourcen & Links

Section 11: Benutzerauthentifizierung implementieren[SHOP APP]

Lecture 253 Kapitel Einführung

Lecture 254 Wie Authentifizierung funktioniert

Lecture 255 Backend vorbereiten

Lecture 256 Hinzufügen des Auth Screen

Lecture 257 Hinzufügen der Benutzerregistrierung

Lecture 258 Dem Benutzer das Einloggen ermöglichen

Lecture 259 Authentifizierungsprobleme lösen

Lecture 260 Verwaltung des Auth Token lokal (in der App)

Lecture 261 Verwendung des "ProxyProviders" und Anhängen des Token an ausgehende Http-Reques

Lecture 262 Probleme bei Provider Packages verhindern

Lecture 263 Hinzufügen des Token zu allen Requests

Lecture 264 Verbinden des Status "Favorit" mit Benutzern

Lecture 265 Produkte an Benutzer anhängen & Nach Ersteller filtern

Lecture 266 Bestellungen an Benutzer anhängen

Lecture 267 Hinzufügen einer Abmeldefunktionalität

Lecture 268 Benutzer automatisch abmelden (nach einiger Zeit)

Lecture 269 Benutzer automatisch anmelden

Lecture 270 Zusammenfassung

Lecture 271 Nützliche Ressourcen & Links

Section 12: Animationen Hinzufügen[SHOP APP]

Lecture 272 Einführung

Lecture 273 Animationen von Grund auf (vollständig manuell gesteuert)

Lecture 274 Verwendung des "AnimatedBuilder"-Widgets

Lecture 275 Arbeiten mit dem "AnimatedContainer".

Lecture 276 Mehr eingebaute Animations- und Übergangs-Widgets

Lecture 277 Einblenden geladener Bilder (und Anzeigen eines Platzhalters)

Lecture 278 Hinzufügen eines "Hero"-Übergangs

Lecture 279 Arbeiten mit Slivers

Lecture 280 Üben: Animieren von Auftragsboxen

Lecture 281 Zusammenfassung

Lecture 282 Nützliche Ressourcen & Links

Section 13: Verwendung nativer Gerätefunktionen (Kamera, Karten,...)[GREAT PLACES APP]

Lecture 283 Kapitel Einführung

Lecture 284 Planen der App

Lecture 285 PlaceList & Place Provider Einrichtung

Lecture 286 Hinzufügen des Bildschirms "Add Place" & einer Bildeingabe

Lecture 287 Verwendung von Image Picker & der Gerätekamera

Lecture 288 Speichern des Bildes auf dem Dateisystem (auf dem Gerät)

Lecture 289 Verwaltung von Daten und Bildern über das Provider Package

Lecture 290 Testen auf realen Geräten

Lecture 291 Vorbereiten von SQLite

Lecture 292 Speichern und Abrufen von Daten mit SQLite

Lecture 293 Hinzufügen einer Location-Input & des "location"-Pakets

Lecture 294 Abrufen der Benutzerkoordinaten

Lecture 295 Anzeigen eines Schnappschusses für eine statische Karte

Lecture 296 Darstellung einer dynamischen Karte (über Google Maps)

Lecture 297 Ermöglicht es Benutzern, einen Standort auf der Karte auszuwählen.

Lecture 298 Speichern des Standorts in SQLite

Lecture 299 Hinzufügen von"Place Detail"-Bildschirm & Öffnen der Karte im "readonly"-Mode

Lecture 300 Zusammenfassung

Lecture 301 Nützliche Ressourcen & Links

Section 14: Ausführen von Native Swift, ObjectiveC, Java oder Kotlin Code

Lecture 302 Einführung

Lecture 303 Verwenden des richtigen Project Setups

Lecture 304 Senden eines Methodenaufrufs von Flutter aus

Lecture 305 Ausführen von Android-Code

Lecture 306 Ausführen von iOS-Code

Lecture 307 Zusammenfassung

Lecture 308 Nützliche Ressourcen & Links

Section 15: App im App Store veröffentlichen

Lecture 309 Einführung

Lecture 310 App Einstellungen vorberieten

Lecture 311 Third Party Services vorbereiten

Lecture 312 Icon uns Splash Screen vorbereiten

Lecture 313 Android App veröffentlichen

Lecture 314 iOS App Veröffentlichen

Lecture 315 Nützliche Ressourcen & Links

Section 16: Zusammenfassung und nächste Schritte

Lecture 316 Du hast es geschafft!

Lecture 317 Deine nächsten Schritte um ein toller Entwickler zu werden

Lecture 318 Wie man erfolgreiche Apps plant und entwickelt

Grundlegende Programmiersprachenkenntnisse werden sehr helfen, sind aber nicht erforderlich.,Du brauchst NICHTs über Flutter oder Dart zu wissen,Du musst weder iOS (Swift/ObjectiveC) noch Android (Java) kennen.

Homepage


298speicherndesstandocid59.jpg


Zurück
Oben Unten