


• Regeln für den Video-Bereich:

    In den Börsenbereich gehören nur Angebote die bereits den Allgemeinen Regeln entsprechen.

    Einteilung

    - Folgende Formate gehören in die angegeben Bereiche:
    - Filme: Encodierte Filme von BluRay, DVD, R5, TV, Screener sowie Telesyncs im Format DivX, XviD und x264.
    - DVD: Filme im Format DVD5, DVD9 und HD2DVD.
    - HD: Encodierte Filme mit der Auflösung 720p oder darüber von BluRay, DVD, R5, TV, Screener sowie Telesyncs im Format x264.
    - 3D: Encodierte Filme von BluRay, die in einem 3D Format vorliegen. Dies gilt auch für Dokus, Animation usw.
    - Serien: Cartoon/Zeichentrick, Anime, Tutorials, Dokumentationen, Konzerte/Musik, Sonstiges sind demnach in die entsprechenden Bereiche einzuordnen, auch wenn sie beispielsweise im High Definition-Format oder als DVD5/DVD9/HD2DVD vorliegen. Ausnahme 3D.
    - Bereich Englisch: Englische Releases gehören immer in diesen Bereich.
    - Bereich Talk: Der Bereich, in dem über die Releases diskutiert werden kann, darf, soll und erwünscht ist.


    Angebot/Beitrag erstellen

    - Ein Beitrag darf erst dann erstellt werden, wenn der Upload bei mindestens einem OCH komplett ist. Platzhalter sind untersagt.
    - Bei einem Scenerelease hat der Threadtitel ausschließlich aus dem originalen, unveränderten Releasenamen zu bestehen. Es dürfen keine Veränderungen wie z.B. Sterne, kleine Buchstaben o.ä. vorgenommen werden. Ausnahme Serienbörse:
    - Bei einem Sammelthread für eine Staffel entfällt aus dem Releasename natürlich der Name der Folge. Beispiel: Die Simpsons S21 German DVDRip XviD - ITG
    - Dementsprechend sind also u.a. verboten: Erweiterungen wie "Tipp", "empfehlenswert", "only", "reup", usw. / jegliche andere Zusatzinformation oder Ergänzung, welche nicht in obiger Beschreibung zu finden ist.

    Aufbau des Angebots und Threadtitel

    Der Titel nach folgendem Muster erstellt zu werden. <Name> [3D] [Staffel] [German] <Jahr> <Tonspur> [DL] [Auflösung] <Quelle> <Codec> - <Group>
    Beispiel: The Dark Knight German 2008 AC3 DVDRip XviD - iND
    Beispiel: The Dark Knight 2008 DTS DL BDRip x264 - iND
    Beispiel: The Dark Knight 2008 AC3 DL BDRip XviD - iND
    Beispiel: The Dark Knight German 2008 AC3 720p BluRay x264 iND
    Beispiel: The Dark Knight 2008 DTS DL 1080p BluRay x264 iND
    Beispiel: Die Simpsons S01 German AC3 DVDRip XviD iND
    Beispiel: Die Simpsons S20 German AC3 720p BluRay x264 iND
    Beispiel: Sword Art Online II Ger Sub 2014 AAC 1080p WEBRip x264 - peppermint
    Entsprechend sind also u.a. verboten: Sonderzeichen wie Klammern, Sterne, Ausrufezeichen, Unterstriche, Anführungszeichen / Erweiterungen wie "Tipp", "empfehlenswert", "only", "reup", usw. / jegliche andere Zusatzinformation oder Ergänzung, welche nicht in obiger Beschreibung zu finden ist
    Ausnahmen hiervon können in den Bereichen geregelt sein.

    Die Beiträge sollen wie folgt aufgebaut werden:
    Überschrift entspricht dem Threadtitel
    Cover
    kurze Inhaltsbeschreibung
    Format, Größe, Dauer sind gut lesbar für Downloader außerhalb des Spoilers zu vermerken
    Nfo sind immer Anzugeben und selbige immer im Spoiler in Textform.
    Sind keine Nfo vorhanden z.B. Eigenpublikationen, sind im Spoiler folgende Dateiinformationen zusätzlich anzugeben :
    Quelle
    Video (Auflösung und Bitrate)
    Ton (Sprache, Format und Bitrate der einzelnen Spuren)
    Untertitel (sofern vorhanden)
    Hosterangabe in Textform außerhalb eines Spoiler mit allen enthaltenen Hostern.
    Bei SD kann auf diese zusätzlichen Dateiinformationen verzichtet werden.

    Alle benötigten Passwörter sind, sofern vorhanden, in Textform im Angebot anzugeben.
    Spoiler im Spoiler mit Kommentaren :"Schon Bedankt?" sind unerwünscht.


    Releases

    - Sind Retail-Release verfügbar, sind alle anderen Variationen untersagt. Ausnahmen: Alle deutschen Retail-Release sind CUT, in diesem Fall sind dubbed UNCUT-Release zulässig.
    - Im Serien-Bereich gilt speziell: Wenn ein Retail vor Abschluss einer laufenden Staffel erscheint, darf diese Staffel noch zu Ende gebracht werden.62
    - Gleiche Releases sind unbedingt zusammenzufassen. Das bedeutet, es ist zwingend erforderlich, vor dem Erstellen eines Themas per Suchfunktion zu überprüfen, ob bereits ein Beitrag mit demselben Release besteht. Ist dies der Fall, ist der bereits vorhandene Beitrag zu verwenden.
    - P2P und Scene Releases dürfen nicht verändert oder gar unter einem iND Tag eingestellt werden.


    Support, Diskussionen und Suche

    - Supportanfragen sind entweder per PN oder im Bereich Talk zu stellen.
    - Diskussionen und Bewertungen sind im Talk Bereich zu führen. Fragen an die Uploader haben ausschließlich via PN zu erfolgen, und sind in den Angeboten untersagt.
    - Anfragen zu Upload-Wünschen sind nur im Bereich Suche Video erlaubt. Antworten dürfen nur auf Angebote von MyBoerse.bz verlinkt werden.


    Verbote

    - Untersagt sind mehrere Formate in einem einzigen Angebotsthread, wie beispielsweise das gleichzeitige Anbieten von DivX/XviD, 720p und 1080p in einem Thread. Pro Format, Release und Auflösung ist ein eigener Thread zu eröffnen.
    - Grundsätzlich ebenso verboten sind Dupes. Uploader haben sich an geeigneter Stelle darüber zu informieren, ob es sich bei einem Release um ein Dupe handelt.
    - Gefakte, nur teilweise lauffähige oder unvollständige Angebote sind untersagt. Dies gilt auch für eigene Publikationen, die augenscheinlich nicht selbst von z.B. einer DVD gerippt wurden. Laufende Serien, bei denen noch nicht alle Folgen verfügbar sind, dürfen erstellt und regelmäßig geupdatet werden.
    - Untersagt sind Angebote, welche nur und ausschließlich in einer anderen Sprache als deutsch oder englisch vorliegen. Ausnahmen sind VORHER mit den Moderatoren zu klären.


    Verstoß gegen die Regeln

    - Angebote oder Beiträge, die gegen die Forenregeln verstoßen, sind über den "Melden"-Button im Beitrag zu melden.
  • Bitte registriere dich zunächst um Beiträge zu verfassen und externe Links aufzurufen.

*** Bestes IPTV *** bester Preis *** gratis Test ***


Englische Tutorials

Realistic Character Making in Blender

4787744d265251fes.jpg


Realistic Character Making in Blender
Published 07/2022
MP4 | Video: h264, 1280x720 | Audio: AAC, 44.1 KHz, 2 Ch
Genre: eLearning | Language: English + srt | Duration: 54 lectures (27h 10m) | Size: 24 GB


Sculpt realistic characters using blender only


What you'll learn
Sculpting the female head
Texturing workflow
Skin shading process
Creating hair in blender
Rendering with cycles

Requirements
I expect you have some sort of basic blender experience.
You should have blender 3.2 installed on your computer.

Description
Do you have problems understanding the workflow for realistic character creation in Blender only?

Then I welcome you to Nexttut education's Realistic Character Making in Blender course.

WHY SHOULD YOU LEARN FROM ME

My name is Daniel da Costa and I have been a 3D character artist for about 10 years now. I have worked for TV commercials, movie agencies and 3D animation studios, currently I'm working as a freelance character artist and 3D tutor.

By the end of this course

● You'll be able to sculpt realistic characters using blender and you'll get a great sense of the head construction from start to finish.

● You'll be able to model, sculpt, make retopology, UV mapping, texture, shading, grooming and render of realistic characters.

WHAT WILL I LEARN

● Blender Sculpting System

● Blocking head guidelines

● Sculpting the female head

● Making Retopology

● Head UV mapping

● Texturing workflow

● Skin shading process

● Creating hair in blender

● Rendering with cycles

COURSE PROJECTS

We will start with a sphere using our sculpt system. Then we will make the general blocking of the head. I will explain what you should watch for in an initial sculpting. Then we will make the hair block and torso, always starting the model from the top to the bottom. Then we will make the eyelashes and eyebrows using particle system, then it we are going to make the hair too. After that we will work on the eyes shading, unwrap the head and start the texture process. After we're done with our female model and texture, we will start refining the shading and finished with the render.

IS THIS COURSE RIGHT FOR ME

● I have designed this course for intermediate 3d modelling students, who want to model realistic female characters for cinematic industry but they struggle to get it because they don't find a tutorial which is step by step, no fast forward, no skip and coming from a production artist who is doing this for years.

● The course is also for artists who want to speed up their workflow in Blender and improve their skill in making female heads, and all processes from sculpt to render.

WHO IS NOT THE IDEAL STUDENT

This course is not designed for absolute Blender beginners. This course doesn't cover the entire body it only focuses on the face.

WHAT SHOULD I KNOW OR HAVE FOR THE COURSE

● I expect you have some sort of basic Blender experience.

● You should have Blender 3.2 installed on your computer.

JOIN ME NOW

So if you want to model realistic characters, then join me now, and take your skills to the next level. Don't forget that investing in yourself will pay for the rest of your life. Hope to see you in the course.

Who this course is for
This course is not designed for absolute Blender beginners and those who wants hyper realistic full body. This Course only cover the Face making.



realisticcharactermakpdizc.jpg


The Whole Damn Store

j7tdrqgs9vwxpuwwyfllgolcdn.png


The Whole Damn Store
MP4 | Video: h264, yuv420p, 1920x1080 | Audio: aac, 44100 Hz | Duration: 33h 41m | 23.6 GB
Genre: ELearning | Language: English

This package includes EVERY VIDEO IN THE STORE:

ANIMATING WALK CYCLES

CONSTRUCTING THE HEAD/STYLIZING PORTRAITS

DRAWING HELICOPTERS/PLANES

FORESHORTENING: CREATING DYNAMIC POSES AND BUILDING INTUITION

DIGITAL PAINTING 4: UNDERSTANDING AND PAINTING SKIN TONES

DIGITAL PAINTING 3: WARM AND COOL COLOR PALETTES

DIGITAL PAINTING 2: UNDERSTANDING SHADOWS AND EDGES
DRAWING LIKE A PAINTER

DIGITAL FIGURE PAINTING: PAINTING THE FIGURE IN VALUES

DIGITAL PAINTING 1: SHAPES, EDGES, VALUES

DYNAMIC POSES - FIGHTING GESTURES

CHARACTER DESIGN 4: THUMBNAIL TO FINISHED SKETCH + SHAPE STUDY

CHARACTER DESIGN 3: MODIFYING ANATOMICAL SHAPES

CHARACTER DESIGN 2: DESIGNING WITH LINE & VARIATIONS IN COSTUME

CHARACTER DESIGN 1: IDEATION AND THUMBNAILING

ANIMAL ANATOMY 3: ADDING GESTURE TO ANIMAL SKETCHES

ANIMAL ANATOMY 2: MUSCULAR ANATOMY OF QUADRUPEDS

ANIMAL ANATOMY 1: BONY ANATOMY OF BIG CATS

CLOTH AND DRAPERY 2: MOVEMENTS IN CLOTH

CLOTH AND DRAPERY 1: THE TYPES OF FOLDS
ENVIRONMENT SKETCHING 1: EXTERIORS AND PROPS

ENVIRONMENT SKETCHING 2: INTERIORS AND PROPS

VARIATIONS IN ANATOMY 1: INTRO TO FACIAL FEATURES

LIGHTING 1: VALUES, SHADOWS, LIGHT PLACEMENT

POSING CHARACTERS 4: CREATING POSE SHEETS

POSING 3: CREATING DEPTH WITH FORESHORTENING AND OVERLAP

POSING 2: ROTATION AND RANGE OF MOTION

POSING 1: CINEMATOGRAPHIC PRINCIPLES AND STATIC POSES

ANATOMY 4: ARM AND HAND

ANATOMY 3: LEG AND FOOT

ANATOMY 2: BONES AND MUSCLES OF THE TRUNK

ANATOMY 1: HEAD AND NECK

INTRO TO DYNAMIC SKETCHING

Homepage

thewholedamnstore4xebx.jpg


Project City - Film making 101

ri21gxbbf0jjls51vzdrhw1fch.jpg


Project City - Film making 101
MP4 | Video: h264, yuv420p, 1920x1080 | Audio: aac, 16000 Hz | Duration: 69h 05m | 39.7 GB
Genre: eLearning | Language: English

In this course you can create a pilot tv show or movie. Rad will teach classes on all the topics above plus stream the process as He and Andra create a project along side students so you can see real world application of the lesson plans. Theoretical ideas are great, but there is nothing more valuable than seeing a real world application of these concepts and where they work and where you sometimes completely throw out the rules.

I love the idea of learning by doing. In this course you will jump into the deep end head first and attempt to create a movie or tv show while learning all the fundamentals of that process. It may seem a little overwhelming, but I think students should just make the best tv show/film they can make without the pressure of it being perfect. As they say, finished is better than perfect. Depending on student's schedules, they can also just board 1 scene of their project as well.

Homepage

filmmaking10140ix0.jpg


Realistic Fantasy Game Environment in Maya & Unreal Engine

t1fad9wxtyhvn5xy399qis7ewo.jpg


Realistic Fantasy Game Environment In Maya & Unreal Engine
Last updated 3/2021
MP4 | Video: h264, 1280x720 | Audio: AAC, 44.1 KHz
Language: English | Size: 26.73 GB | Duration: 29h 48m

Learn How to Make a Professional Game Environment using Maya, Substance Designer, Marmoset, Unreal, Speedtree, Photoshop


What you'll learn
Blockout 3D environment for accurate scale and composition
Proper way of baking and texturing
Make believable tileable edge damages
Create realistic rocks, grass, trees, and moss
Create special effects like fog
Lighting and setup in game engine

Requirements
You must have basic knowledge of Maya, Zbrush, Substance Designer & Painter, Photoshop, Marmoset Toolbag, Speedtree and Unreal Engine

Description
Instructor InfoEmiel Sleegers always had love for video games and when he was young, he started using Unity3D for programming but he found himself gravitating more towards the art of making games. Now he is currently working as a Senior 3D Artist at FlippedNormals. He contributed to creating AAA games such as Forza Horizon 3 and The Division 2. His all time favorite game is The Last of Us and that video game is what inspired him to want to work in the game industry. His advice for beginner artists is to focus on one aspect of gaming that they are passionate about, stick to it and get better at it. His hobbies include anything related to games or films, whether it be working on personal projects, freelance work or going out for movies.*Course Info*Hello everyone! And welcome to this very exciting tutorial course on how to create a game environment from start to finish.My name is Emiel Sleegers, I am a senior 3d environment artist who have years of experience working for AAA game studios and I will be your tutor for this course.In this course we will go over on how to create a Realtime game environment completely from scratch.That means that we will make it 100% from start to finish and we will have 95% of this tutorial in real time.For this course we will be using Maya, Zbrush, Substance painter and designer, a tiny little bit of photoshop, marmoset toolbag, Speedtree and unreal engine 4.I know, I know it might sound like a lot of programs but I will make sure that everything in this tutorial is easy to understand and follow.Now, this tutorial is targeted towards intermediate artists, these are artists who are already familiar with the tools I just mentioned but just want to learn the workflows and techniques to creating a video game environment.As a quick little overview.We will start this course off with going over our reference and discussing on how we are going to create this environment.We will then start by making a nice blockout of the environment so that we have accuracy in the scaling and composition.We will first focus on the rocks since those are one of the main components in this tutorial.This means we will first complete all the rock sculpts in Zbrush. Setup the low poly in maya and bake the rocks in marmoset toolbag. Then we will create a rock material inside of substance designer and a special material inside of unreal engine to make the rocks look amazing. For this we also need to quickly create a special mask in substance painter which will give us control over the dirt amount and highlights of the rocks.After we have done all that we will move on to our moss system, since this is probably the second most important thing in this environment.I will start by creating a moss material inside of substance designer.Then I will show you how to use this material to create both procedural moss and hand made fuzzy moss for all your rocks.Finally, we will start by setting up our environment, doing lighting and composition passes. We will create some foliage inside of speedtree and placing it in our scene. We will create our temple building along with special tileable edge damages. And once we are happy with the entire environment, I will show you how to create some final portfolio screenshots and flythroughs.If you follow this course you will have a very solid foundation and skillset to tackle almost any kind of game environment, no matter if it is organic or urban.So why don't you come and join me at victory3d and we can get this course started!

Overview

Section 1: Introduction

Lecture 1 Introduction

Lecture 2 Going Over Our Reference

Section 2: Blockout & Sculpting

Lecture 3 Modeling Our Blockouts Part 1

Lecture 4 Modeling Our Blockouts Part 2

Lecture 5 Modeling Our Blockouts Part 3

Lecture 6 Modeling Our Blockouts Part 4

Lecture 7 Modeling Our Blockouts Part 5

Lecture 8 Setting Up Our Blockout in Unreal Engine Part 1

Lecture 9 Setting Up Our Blockout in Unreal Engine Part 2

Lecture 10 Setting Up Our Blockout in Unreal Engine Part 3

Lecture 11 Sculpting Our Round Cliff Part 1

Lecture 12 Sculpting Our Round Cliff Part 2

Lecture 13 Sculpting Our Round Cliff Part 3

Lecture 14 Sculpting Our Round Cliff Part 4

Lecture 15 Sculpting Our Cliff Edge A

Lecture 16 Sculpting Our Cliff Edge B

Section 3: Materials, Unwrapping & Baking

Lecture 17 Creating Our Rock Material Part 1

Lecture 18 Creating Our Rock Material Part 2

Lecture 19 Creating Our Rock Material Part 3

Lecture 20 Creating Our Rock Material Part 4

Lecture 21 Creating Our Rock Material Part 5

Lecture 22 Creating Our Rock Material Part 6

Lecture 23 Creating Our Rock Material Part 7

Lecture 24 Creating Our Moss Material Part 1

Lecture 25 Creating Our Moss Material Part 2

Lecture 26 Optimizing Our Rocks

Lecture 27 UV Unwrapping Our Rocks Part 1

Lecture 28 UV Unwrapping Our Rocks Part 2

Lecture 29 Baking Our Rocks

Lecture 30 Creating Our Rock Master Shader in Unreal Engine Part 1

Lecture 31 Creating Our Rock Master Shader in Unreal Engine Part 2

Lecture 32 Creating Our Rock Master Shader in Unreal Engine Part 3

Lecture 33 Creating Our Rock Master Shader in Unreal Engine Part 4

Lecture 34 Doing Our First Lighting Pass

Section 4: Moss, Floors, & Stones

Lecture 35 Creating Our Fuzzy Moss System Part 1

Lecture 36 Creating Our Fuzzy Moss System Part 2

Lecture 37 Creating Our Fuzzy Moss System Part 3

Lecture 38 Creating Our Floors Part 1

Lecture 39 Creating Our Floors Part 2

Lecture 40 Creating Our Floors Part 3

Lecture 41 Creating Our Floors Part 4

Lecture 42 Creating Our Floors Part 5

Lecture 43 Improving Our Rocks

Lecture 44 Creating Our Stone Pile Part 1

Lecture 45 Creating Our Stone Pile Part 2

Lecture 46 Creating Our Stone Pile Part 3

Lecture 47 Creating Our Stone Pile Part 4

Lecture 48 Creating Our Stone Pile Part 5

Lecture 49 Improving Our Moss

Lecture 50 Working on Composition Part 1

Lecture 51 Working on Composition Part 2

Section 5: Temple, Foliage, & Bridge

Lecture 52 Creating Our Temple Part 1

Lecture 53 Creating Our Temple Part 2

Lecture 54 Creating Our Temple Part 3

Lecture 55 Creating Our Temple Part 4

Lecture 56 Creating Our Temple Part 5

Lecture 57 Creating Our Temple Part 6

Lecture 58 Creating Our Temple Part 7

Lecture 59 Creating Our Temple Part 8

Lecture 60 Creating Our Foliage Part 1

Lecture 61 Creating Our Foliage Part 2

Lecture 62 Creating Our Foliage Part 3

Lecture 63 Creating Our Foliage Part 4

Lecture 64 Creating Our Foliage Part 5

Lecture 65 Creating Our Foliage Part 6

Lecture 66 Creating Our Bridge Part 1

Lecture 67 Creating Our Bridge Part 2

Lecture 68 Creating Our Bridge Part 3

Lecture 69 Creating Our Bridge Part 4

Lecture 70 Creating Our Bridge Part 5

Lecture 71 Creating Our Bridge Part 6

Lecture 72 Creating Our Bridge Part 7

Lecture 73 Creating Our Bridge Part 8

Lecture 74 Creating Our Bridge Part 9

Section 6: Tweaks & Polishes

Lecture 75 Working More on Our Composition

Lecture 76 Doing Our Final Lighting Pass Part 1

Lecture 77 Doing Our Final Lighting Pass Part 2

Lecture 78 Creating Our Corner Damage Part 1

Lecture 79 Creating Our Corner Damage Part 2

Lecture 80 Creating Our Corner Damage Part 3

Lecture 81 Doing Our Final Polish Part 1

Lecture 82 Doing Our Final Polish Part 2

Lecture 83 Doing Our Final Polish Part 3

Lecture 84 Doing Our Final Polish Part 4

Anyone who wants to boost their skills as an environment artist


realisticfantasygameeawfmo.jpg


Learners Guide To 3D Character Creation Vol 1: Zbrush 2021

0tkq2urbbmpkgf9mnnjfqnrc5f.jpg


Learners Guide To 3D Character Creation Vol 1: Zbrush 2021
Last updated 3/2021
MP4 | Video: h264, 1280x720 | Audio: AAC, 44.1 KHz
Language: English | Size: 46.92 GB | Duration: 47h 3m

A Course for All levels in Learning How to Create 3D*Characters, by Sculpting and Retopologizing through Zbrush 2021


What you'll learn
Learning to sculpt 3D Characters in Zbrush 2021 with 2D or 3D reference aids in split screen workflow

Requirements
Either a Free demo or copy of Zbrush 2021
(Optional but recommended ) Wacom Tablet

Description
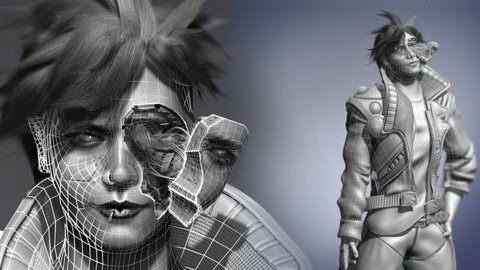
Hello and Welcome to Learners Guide to 3D Character Creation Vol 1: Zbrush & Retopology A new course dedicated to teaching how to sculpt, retopologize, 3D*Characters all within Zbrush!Here not only are we focused on teaching you how to make 3D characters but also give emphasis through the course in "practicing" your skills as a sculptor OR beginner sculptor when creating 3D characters, therefore we chose a fun character theme challenge : The Cyberpunk Hacker! To that end, we crafted a course that will deliver 2 new unique approaches in teaching character creation by affording you the opportunity to sculpt through Split Screen Mode OR Multiple 2D*Orthographic References - Split Screen Mode was introduced back in Zbrush version 2019.1 which has become more of a updated method of practicing your sculpting techniques geared toward the beginner but also intermediate users who are interested. This is where we the instructors break up our character into sections of decimated meshes and demonstrate how they would be imported into your zbrush file. Next we go over the basics of how to turn on split screen mode in your Zbrush viewport to have 2 screens, our mesh on the left and your mesh on the right! From there you interactively work with us when we sculpt this character out! ( checkout our the promotional video above right corner for demonstration in what to expect). - Multiple 2D*Orthographic References - Of course for more intermediate to advance users don't need to take Split Screen Mode approach, alternatively we will be providing you multiple 2D*orthographic references of the character in many of the areas to help aid in your sculpting process as we guide you in the sculpting of this character course.Feel free to learn through either approach OR*a combinations of both!What we will teachZBRUSH CHARACTER SCULPTING: - A*quick section breakdown to the basics of Zbrush for the beginner so no one gets left behind before we start. - How to create your own base mesh from scratch. (In addition we will be supplying you our own course learning base mesh for you to use as a bonus option) - How to pull clothing off of a blank base mesh to*sculpt full body clothing of a Cyberpunk Character as is done commonly in the industry pipeline. - Illustrate how to create seams utilizing fun combinations such as group loops with masking - Learn to craft hair within Zbrush through it's built in hair system Fibermesh, and demonstrate several methods to apply the hair upon the meshRETOPOLOGIZING: - Learn several methods of retopologizing (process of creating Low Rez 3D models from High Rez sculpted meshes) Those methods below are: 1. The first is: Is an auto retopologizing approach with Zremesher 3.0 utilizing the Zremesher Guides Lines Brush as a method of directing clean edge flow. 2. The second method is a manual retopologizing approach where we use Zmodelers 3D modeling tool Edge Extrusion to provide more flexible option in 3D Character Modeling, over a finished High Rez sculpt.- (Disclaimer - this course is*a 2 part course series with this first course being the focus of 3D character sculpting, retopologizing*a character into a low rez character model as a primary focus of curriculum. The upcoming second course focuses more to UVing, texturing and rendering)

Overview

Section 1: Section 1: What to Expect

Lecture 1 What To Expect

Section 2: Section 2: Zbrush Intro and Basics

Lecture 2 Introduction To Zbrush

Lecture 3 UI Breakdown

Lecture 4 Masking And Grouploops

Lecture 5 Secondary Sculpting Tools

Lecture 6 Spacebar Trick

Lecture 7 Creating Customized UI Pop Up Menu

Lecture 8 Practice Session 1: Base Mesh Creation

Lecture 9 Practice Session 2: Base Mesh Creation

Lecture 10 Practice Session 3: Base Mesh Creation

Lecture 11 Practice Session 4: Base Mesh Creation

Lecture 12 Practice Session 5: Base Mesh Creation

Section 3: Section 3 Getting Started & Blocking Out

Lecture 13 Lesson 1: Setting up with Provided References

Lecture 14 Lesson 2: Extracting out Primary Fabric Base Meshes

Section 4: Sculpting Shirt

Lecture 15 Lesson 3: Cleaning up Shirt Extraction for Wrinkle Sculpting

Lecture 16 Lesson 4: Sculpting Wrinkles

Section 5: Sculpting Pants

Lecture 17 Lesson 5: Cleaning Up Base Mesh

Lecture 18 Lesson 6: Sculpting Wrinkles with Additional Brushes

Lecture 19 Lesson 7: Seam Sculpting Through Panel Loops

Lecture 20 Lesson 8 Secondary Blockout

Lecture 21 Lesson 9 Detailing Side

Lecture 22 Lesson 10: Pant Trims

Section 6: Sculpting Jacket

Lecture 23 Lesson 11 Cleaning Up Base Mesh Jacket

Lecture 24 Lesson 12 Separate Apparels

Lecture 25 Lesson 13 Separate Apparels Part 2

Lecture 26 Lesson 14 Separate Apparels Part 3

Lecture 27 Lesson 15 Creating and Collar Base Mesh Through Live Booleans

Lecture 28 Lesson 16 Creating Neck Collar Base Mesh with Bend Curves

Lecture 29 Lesson 17 Creating Sash by Combining Dynamesh and ZRemesher

Lecture 30 Lesson 18 Detachable Piece Placemets Part 1

Lecture 31 Lesson 19 Detachable Piece Placemets Part 2

Lecture 32 Lesson 20 Wrinkle Sculpting

Lecture 33 Lesson 21 Cleaning up and Adjusting Part 1

Lecture 34 Lesson 22 Cleaning up and Adjusting Part 2

Lecture 35 Lesson 23 Creating Pads Strips

Lecture 36 Lesson 24 Creating Front Overlay

Lecture 37 Lesson 25 Creating Collar

Lecture 38 Lesson 26 Creating Base Mesh Shoulder

Lecture 39 Lesson 27 Creating Nodules

Lecture 40 Lesson 28 Creating Sash 1

Lecture 41 Lesson 29 Creating Sash 2

Lecture 42 Lesson 30 Creating Sash 3

Section 7: Sculpting Belt & Shoes / Clean Up

Lecture 43 Lesson 31 Clean Up and Belt Block Out

Lecture 44 Lesson 32 Belt Detailing 1

Lecture 45 Lesson 33 Belt Detailing 2

Lecture 46 Lesson 34 Shoe BLock Out

Lecture 47 Lesson 35 Shoe Detailing 1

Lecture 48 Lesson 36 Shoe Detailing 2

Section 8: Sculpting Head

Lecture 49 Faces Breakdown

Lecture 50 Lesson 37 Setting up Head Reference

Lecture 51 Lesson 38 Blocking Out Eyes

Lecture 52 Lesson 39 Eyes Refinement

Lecture 53 Lesson 40 Blocking Out Nose

Lecture 54 Lesson 41 Blocking Out Mouth

Lecture 55 Lesson 42 Detailing Mouth

Lecture 56 Lesson 43 Blocking Out Ear

Lecture 57 Lesson 44 Blocking Out Ear 2

Lecture 58 Lesson 45 Eye and Ear Refinement

Lecture 59 Lesson 46 Eyelashes and Eye Shape

Lecture 60 Lesson 47 Skin Pores and Painting Ghost Eyes

Section 9: Creating Detachable Face

Lecture 61 Lesson 48 Creating Face Cavity

Lecture 62 Lesson 49 Creating Detachable Face

Lecture 63 Lesson 50 Detachable Face Back Side

Lecture 64 Lesson 51 Detachable Face Detailing Thickness

Lecture 65 Lesson 52 Detachable Face Creating Wires Part 1

Lecture 66 Lesson 53 Detachable Face Creating Wires Part 2

Lecture 67 Lesson 54 Detachable Face Placement

Lecture 68 Lesson 55 Detachable Face Fine Wires

Section 10: Hair Creation with Fibermesh

Lecture 69 Lesson 56 Base Mesh Hair Part 1 Stroke Modification

Lecture 70 Lesson 57 Base Mesh Hair Part 2 Application of Base Mesh Tubes

Lecture 71 Lesson 58 Fibermesh Basics

Lecture 72 Lesson 59 Hair_Strand Construction

Lecture 73 Lesson 60 Hair Strand Application Break Down

Lecture 74 Lesson 61 Hair Strand Application Front

Lecture 75 Lesson 62 Hair Mid_Section

Lecture 76 Lesson 63 Hair Mid_Section Part 2

Lecture 77 Lesson 64 Hair End Section

Lecture 78 Lesson 65 Side Hair

Lecture 79 Lesson 66 Bonus Detailing

Section 11: Retopologizing

Lecture 80 Retopologizing What To Expect

Lecture 81 Lesson 67 Retopologizing Shirt

Lecture 82 Lesson 68 Retopologize Pant Trims

Lecture 83 Lesson 69 Retopologize Pants Part 1

Lecture 84 Lesson 70 Retopologize Pants Part 2

Lecture 85 Lesson 71 Retopologize Pants Part 3

Lecture 86 Lesson 72 Organizing Jacket For Retopology

Lecture 87 Lesson 73 Jacket Retopology

Lecture 88 Lesson 74 Jacket Retopology 2

Lecture 89 Lesson 75 Jacket Retopology 3

Lecture 90 Lesson 76 Jacket Retopology 4

Lecture 91 Lesson 77 Jacket Retopology 5

Lecture 92 Lesson 78 Shoulder Armor

Lecture 93 Lesson 79 Shoulder Armor 2

Lecture 94 Lesson 80 Shoulder Armor 3

Lecture 95 Lesson 81 Trim Pads_Retoopo

Lecture 96 Lesson 82 Jacket Trim

Lecture 97 Lesson 83 Jacket Discs

Lecture 98 Lesson 84 Shoulder Nodules

Lecture 99 Lesson 85 Jacket_Fold

Lecture 100 Lesson 86 Collar_1

Lecture 101 Lesson 87 Collar_2

Lecture 102 Lesson 88 Sash

Lecture 103 Lesson 89 zipper

Lecture 104 Lesson 90 Main_belt

Lecture 105 Lesson 91 Belt Pieces

Lecture 106 Lesson 92 Shoe Pieces

Lecture 107 Lesson 93 Shoe Main

Lecture 108 Lesson 94 Shoe Soles

Lecture 109 Lesson 95 Hands Part 1

Lecture 110 Lesson 96 Hands Part 2

Lecture 111 Lesson 97 Hands Part 3

Lecture 112 Lesson 98 Hands Part 4

Lecture 113 Lesson 99 Shins

Lecture 114 Lesson 100 Face_Retopology Eyes

Lecture 115 Lesson 101 Face_Retopology Nose

Lecture 116 Lesson 102 Face_Retopology Mouth

Lecture 117 Lesson 103 Face_Retopology Ear 1

Lecture 118 Lesson 104 Face_Retopology Ear 2

Lecture 119 Lesson 105 Face_Retopology Connecting

Lecture 120 Lesson 106 Face_Retopology Connecting 2

Lecture 121 Lesson 107 Face_Retopology Connecting 3

Lecture 122 Lesson 108 Face_Retopology Connecting 4

Lecture 123 Lesson 109 Face_Retopology Neck

Lecture 124 Lesson 110 Face_Retopology Cleanup

Lecture 125 Lesson 111 Face_Retopology Cleanup 2

Lecture 126 Lesson 112 Eyes

Lecture 127 Lesson 113 Retopolgizing Wires

Lecture 128 Lesson 114 Retopolgizing Segments

Lecture 129 Lesson 115 Retopolgizing Slug Tube

Lecture 130 Lesson 116 Retopolgizing Detachable Face

Lecture 131 Lesson 117 Retopolgizing Detachable Face 2

Lecture 132 Lesson 118 RetopolgizinG Back Piece

Section 12: Exporting Mesh and Posing Character

Lecture 133 Lesson 119 Exporting High Rez

Lecture 134 Lesson 120 Exporting Low Rez & UVS

Lecture 135 Lesson 121 Posing_Character

Lecture 136 Bonus Rendering Part 1

Lecture 137 Bonus Rendering Part 2

Anyone who wants to learn how to create 3D Characters


learnersguideto3dcharfjd5x.jpg


Complete Modular Environments in Unreal Engine 5

cshhupery9642yd7eik2droens.jpg


Complete Modular Environments In Unreal Engine 5
Published 7/2022
MP4 | Video: h264, 1280x720 | Audio: AAC, 44.1 KHz
Language: English | Size: 34.86 GB | Duration: 38h 39m

Create Modular Environments in Unreal Engine 5, Blender, Zbrush, Substance Painter, and Substance Designer.


What you'll learn
Make Modular Environments
Create Tiling Geometry and Material
Creating Lighting For Game Environments
Create AAA Props

Requirements
I expect you to have some sort of basic software experience, in Unreal Engine 5, Blender, Zbrush, Substance Painter, and Substance Designer.

Description
Do you want to learn about Modularity in Environment Art?Then I welcome you to Nexttut education's Complete Modular Environments in Unreal Engine 5 course.WHY SHOULD YOU LEARN FROM ME:My name is Arash and I have been a 3D character artist for games for some time now. I have a background in teaching Game-Art related content and I feel confident that you are going to learn a lot from this course.By the end of this course:● You will have the knowledge to create Modular Environments● You will be able to create a decent game environmentWHAT WILL I LEARN:● Modular Theory and Systems● Creating Tiling materials and variations● Working in UE5 to create game environments● Creating Second UV masks to add more detail in materialsCOURSE PROJECTS:We will start by talking about modularity theory and its benefits and disadvantages, and offer some solutions to cure some problems. Then start working on the planning stage to make sure that we have a strong ground to stand on top of. Then we create the block-out to make sure that our ideas are correct, then start to add iteration on top of iteration to finalize the environment. In the way, we will learn about tiling geometry, tiling materials, displacing simple geometry to create complex details, creating good-looking materials, lighting and many more.IS THIS COURSE RIGHT FOR ME:● This course is for students who know something about environment art and want to learn more new techniques● The course is also for artists who want to speed up their workflow in Modular Environment Creation for Games and improve their skill in making good-looking yet. Performant levels.WHO IS NOT THE IDEAL STUDENT:This course is not designed for 3D beginnersWHAT SHOULD I KNOW OR HAVE FOR THE COURSE:I expect you to have some sort of basic software experience, in Unreal Engine 5, Blender, Zbrush, Substance Painter, and Substance Designer.JOIN ME NOW:So if you want to make Modular Environments for Games, then join me now, and take your skills to the next level. Don't forget that investing in yourself will pay for the rest of your life. Hope to see you in the course.

Overview

Section 1: Introduction

Lecture 1 Introduction

Lecture 2 Download Project Files

Lecture 3 What Is Modularity

Lecture 4 The Planning Stage

Lecture 5 The Blockout Phase

Lecture 6 Some Bolckout Techniques

Section 2: Chapter 2 - The Blockout

Lecture 7 Blockout The Residential

Lecture 8 Residential In Unreal Engine

Lecture 9 Finishing The Residential

Lecture 10 Blockout The Museum

Lecture 11 Export Museum Kit To UE5

Lecture 12 Finishing The Buildings

Lecture 13 Finishing The Blockout

Section 3: Chapter 3 - Creating AAA Art _ First Iteration

Lecture 14 Fixing Some Problems

Lecture 15 Substance 3D Designer

Lecture 16 Brick Mat Big Shapes

Lecture 17 Brick Mat Surface Carving

Lecture 18 Brick Mat Finalize Height

Lecture 19 Brick Mat Base Color Big

Lecture 20 Brick Mat Base Color Medium

Lecture 21 Brick Mat Roughness

Lecture 22 Brick Kit Modularity

Lecture 23 Brick Kit In UE5

Lecture 24 Roof Kit Base In Blender

Lecture 25 Bake The Roof In Substance

Lecture 26 Roof Mat Height

Lecture 27 Roof Mat Base Color

Lecture 28 Roof Mat Roughness

Lecture 29 Roof Kit In Creation

Lecture 30 Alter The Red Brick Mat

Lecture 31 Create The Alley Kit

Lecture 32 Concrete Mat Big Shapes

Lecture 33 Concrete Mat Surface Damage

Lecture 34 Concrete Mat Colors Big

Lecture 35 Concrete Mat Roughness

Lecture 36 Museum Kit Finished

Lecture 37 Intro To Zbrush

Lecture 38 Sculpt Tiles In Zbrush

Lecture 39 Substance 3D Designer Bake

Lecture 40 Testing Patterns In SD

Lecture 41 Street Mat Height

Lecture 42 Finalizing Steet Mat

Lecture 43 Finishing Sidewalk Kit

Lecture 44 Finalizing First Iteration

Section 4: Chapter 4 - Creating AAA Art _ Second Iteration

Lecture 45 Some Quick Words

Lecture 46 Pillar Sculpt In Zbrush

Lecture 47 Finalizing Brick Pillars

Lecture 48 Ornaments For Moulding

Lecture 49 Baking Ornaments In SD

Lecture 50 Preparation For Workflow

Lecture 51 Residential Trimsheet

Lecture 52 Museum Trimsheet

Lecture 53 Baking Trimsheets

Lecture 54 Texture And Export Trims

Lecture 55 Quick Fix To Trimsheets

Lecture 56 Shape Breakers

Lecture 57 Pillar Caps Blockout

Lecture 58 Pillar Caps Sculpt

Lecture 59 Unwrapping Caps And Guards

Lecture 60 Baking Caps And Guards

Lecture 61 Texturing Caps And Guards

Lecture 62 Blockout The Museum Pillars

Lecture 63 Circular Pillar Caps

Lecture 64 Finalizing Caps Bockout

Lecture 65 Sculpting Museum Pieces

Lecture 66 Sculpting Museum Pillars

Lecture 67 LowPoly Pillars

Lecture 68 The Prefab System

Lecture 69 Unwrapping Museum Pillars

Lecture 70 Bake And Texture Museum Kit

Lecture 71 Testing The Progress In UE5

Lecture 72 Prefab For Windows

Lecture 73 Residential Window Blockout

Lecture 74 Baking The Windows

Lecture 75 Making Residential Windows

Lecture 76 Making Museum Windows

Lecture 77 Attic Window Blockout

Lecture 78 Residential Door BlockOut

Lecture 79 Finalized Residential Door

Lecture 80 Finalizing Residential Kit

Lecture 81 Museum Windows Blockout

Lecture 82 Finalizing The Geometry

Lecture 83 Unwrapping Shop Window

Lecture 84 Baking Shop Window

Lecture 85 Baking Museum Doors

Lecture 86 Texture Residential Special

Lecture 87 Texture Museum Specials

Section 5: Chapter 5 - Material Creation And Lighting

Lecture 88 Material Functions

Lecture 89 Base Color Controls

Lecture 90 All Of Material Controls

Lecture 91 Vertex Blending

Lecture 92 Residential Second UV RGB

Lecture 93 Finish Residential Building

Lecture 94 Museum Second UV RGB

Lecture 95 Using Vertex Color

Lecture 96 Finishing The Vertex Paint

Lecture 97 Some Scene Corrections

Lecture 98 Lighting And Post Process

Lecture 99 Camera Placement

Section 6: Conclusion

Lecture 100 Thank you

Lecture 101 Bonus Lecture

● This course is for students who know something about environment art and want to learn more new techniques


completemodularenvirot6drh.jpg


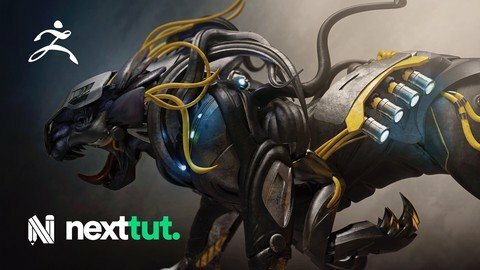
Hard Surface Creature Creation In Zbrush | Intermediate User

ilj9rb8hgoszk099m7rq1u0dzr.jpg


Hard Surface Creature Creation In Zbrush | Intermediate User
Last updated 5/2020
MP4 | Video: h264, 1280x720 | Audio: AAC, 44.1 KHz
Language: English | Size: 7.04 GB | Duration: 10h 9m

Improve your hard surface creature sculpting and create stunning sci fi, robotic, hard surface creatures using Zbrush.


What you'll learn
Hard surface mechanical part
Designing Creatures with hard surface and organic elements
Creating Armor
Working with fabrics for joints
Rendering in keyshot

Requirements
Basic Zbrush and Keyshot knowledge

Description
Student ReviewsGanesh says : This course is perfect for creating Sci-Fi Robotic concepts using Zbrush, great techniques covered to create Hard surface concepts in no time.Alfonso Romero says : Even While Having A Cold, Richie Jon Mason Delivers Another Well Executed Course. Cheers to Udemy, NextTut & Mr. Mason for their efforts.Hi, would you like to be able to create really cool creatures with hard surface partsWell if so this course is definitely for you !Welcome to Nexttut education's Hard Surface Creature Creation in Zbrush | Intermediate User course .My name is Richie Jon mason . I am a self taught 3D artist, in the past I have worked for 3D artist and 3D world magazine, Nissan. I was also a 3D artist at Guerilla games . Currently working at Warcradle studiosAt the end of the course , you will be able sculpt hard surface creatures using zbrush and keyshot with confidence, you will be able to create a hard surface creature with ease and use the techniques to go on and create your own models.We will cover in this courseSculpt overall shape of our CreatureAdding mechanical partWorking with fabrics for jointsCreating outer ArmorMaking custom insertsPosing The characterGetting it ready to send to keyshotRendering in keyshot then bringing the files into photoshopFirst we will look at our base mesh, then we will roughly sculpt out the panel placements . We'll go over each piece individually creating Armor and fabrics, deciding which parts to switch out with hard surface , when were happy with that we will start painting the organic parts, and then before moving to keyshot we will go though the model and prepare it ready for keyshot .Once we have it into keyshot we will start adding materials and find the best render settings then move the images into photoshop fir our final composite imageI made this course for intermediate Zbrush users but any one can download zbrush and keyshot and just start creating with only what zbrush comes with . All default settings, all real time, no speed ups, no skipping and completely step by step.So enrol now and start creating, Hard surface creature model today.

Overview

Section 1: Introduction

Lecture 1 Introduction

Lecture 2 Building a Custom UI

Section 2: Sculpting the Creature

Lecture 3 Looking at Concepts and Starting the Sculpt

Lecture 4 Sculpting the Head Part 1

Lecture 5 Sculpting the Head Part 2

Lecture 6 Sculpting the Head Part 3

Lecture 7 Adding A Tongue

Lecture 8 Sculpting the Head Part 4

Lecture 9 Adding Spikes to the Head

Lecture 10 Looking at the Body

Lecture 11 Starting the Hard Surface

Lecture 12 Creating the arm Panels

Lecture 13 Creating the Arm Panels part 2

Lecture 14 Creating the Arm Panels part 3

Lecture 15 Creating the Paw part 1

Lecture 16 Creating the Paw part 2

Lecture 17 Creating the Paw part 3

Lecture 18 Creating Fabric Connectors

Lecture 19 Making Connector Plates

Lecture 20 Creating the Extra Legs

Lecture 21 Using Transpose Master to Change Multiple Subtools

Lecture 22 Working on the Body

Lecture 23 Define the Face

Lecture 24 Creating Fluid for Keyshot

Lecture 25 Making the Tail

Lecture 26 26 Working on the back Leg part 1

Lecture 27 Working on the Legs part 2

Lecture 28 Making tech holders

Lecture 29 Making Robot Tentacles

Lecture 30 Adding the Robot Tentacles

Lecture 31 Creating Teeth and Gums

Lecture 32 Going back to the feet

Lecture 33 Creating big Machine Parts

Lecture 34 Making the big Pipes

Lecture 35 Working On The Feet

Lecture 36 Re mesh The Face

Lecture 37 Making A Face Screen

Lecture 38 Fabric Sleeves

Lecture 39 Details To The Sleeve

Section 3: Poly Painting and Posing

Lecture 40 Poly Paint The Face

Lecture 41 Posing the Creature

Section 4: Rendering and Compositing

Lecture 42 Rendering In Keyshot

Lecture 43 Rendering In Keyshot Part 2

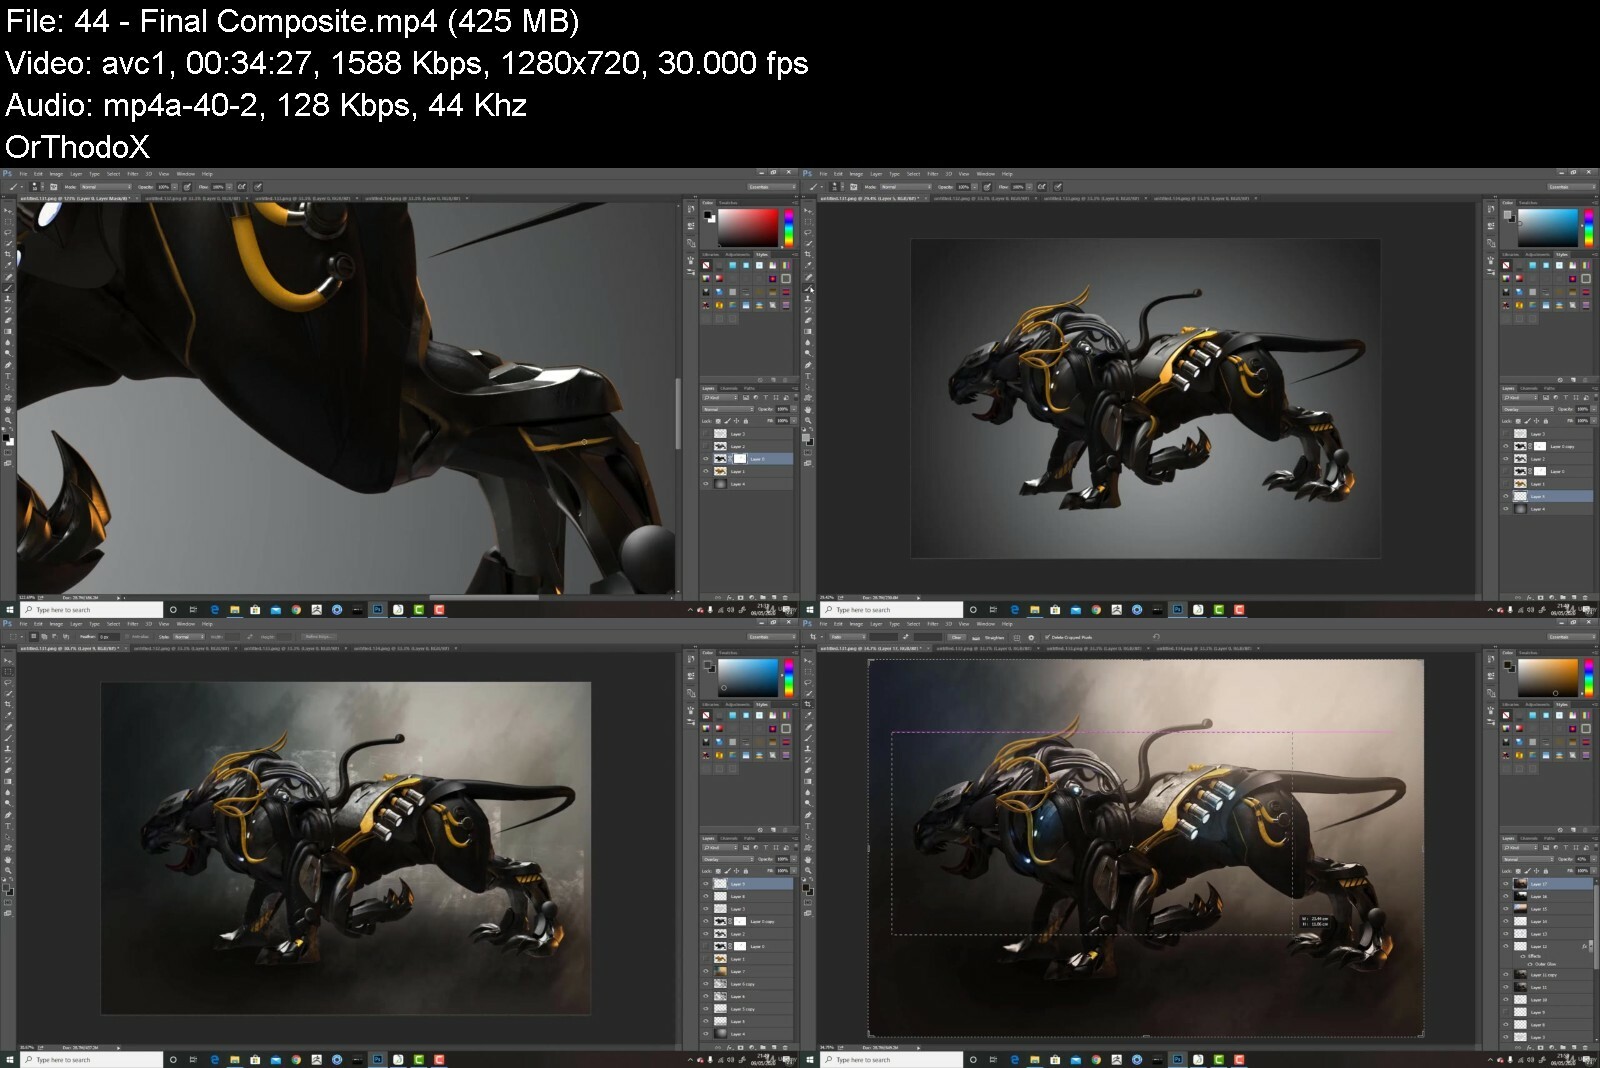
Lecture 44 Final Composite

Character artist or intermediate level students who wants learn or improve their hard surface sculpting skill in Zbrush.


hardsurfacecreaturecr3jd8h.jpg


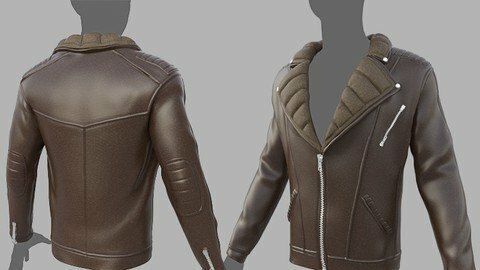
Creating A Jacket Using Marvelous Designer and Zbrush

hmbkazyzczrupsncf2sopbli0m.jpg


Creating A Jacket Using Marvelous Designer And Zbrush
Last updated 7/2019
MP4 | Video: h264, 1280x720 | Audio: AAC, 44.1 KHz
Language: English | Size: 6.20 GB | Duration: 7h 51m

Learn the Basics of Creating Garment Cloth Jacket for Character in Marvelous Designer and Sculpt in Zbrush


What you'll learn
Create more believable cloth for characters
Understand Marvelous Designer's UI and Navigation
Sculpt garment details in Zbrush
Create clean and workable patterns
Create and manage seams efficiently

Requirements
No knowledge required for Marvelous Designer & Keyshot. This is for absolute Marvelous Designer beginners. But basic knowledge is required for Zbrush & Photoshop

Description
Instructor InfoManuel Rondon is currently working as a freelance 3D artist and college instructor. He loves both jobs because they allow him to work on what he is passionate about while still having some creative freedom. His advice for students who are just starting out and want to make it in the industry is to be knowledgeable and be open to different areas of 3D art as this can give you more opportunities for jobs. As you gain more experience, you can then specialize in characters, textures, or animations but in the beginning, it's best to wear as many hats as possible. Course Info*In this course, you will learn the proper workflow when using Marvelous Designer. We will start with an introduction to Marvelous Designer, then we will move on to create a winter leather jacket. After this, we will take it into Zbrush to make some changes and we'll render it later on in Keyshot. Finally we will take all the renders from Keyshot and do a composition inside Photoshop. Mavelous Designer makes garment creation much easier than most solutions that is why it is widely used in many professional studios to create clothing for characters.

Overview

Section 1: Introduction

Lecture 1 Introduction

Lecture 2 Introduction to Marvelous Designer Part I

Lecture 3 Introduction to Marvelous Designer Part II

Section 2: Building the Jacket in Marvelous Designer

Lecture 4 Setting Up the References

Lecture 5 Making the Main Body of the Jacket

Lecture 6 Sewing the Sleeves

Lecture 7 Creating the Other Sleeve

Lecture 8 Creating the Collar

Lecture 9 Adding the Final Details

Lecture 10 Exporting to ZBrush

Section 3: Adding Details in Zbrush

Lecture 11 Adding Details in Zbrush Part I

Lecture 12 Creating a Stitch Brush in Zbrush

Lecture 13 Adding Details in Zbrush Part II

Lecture 14 Adding Details in Zbrush Part III

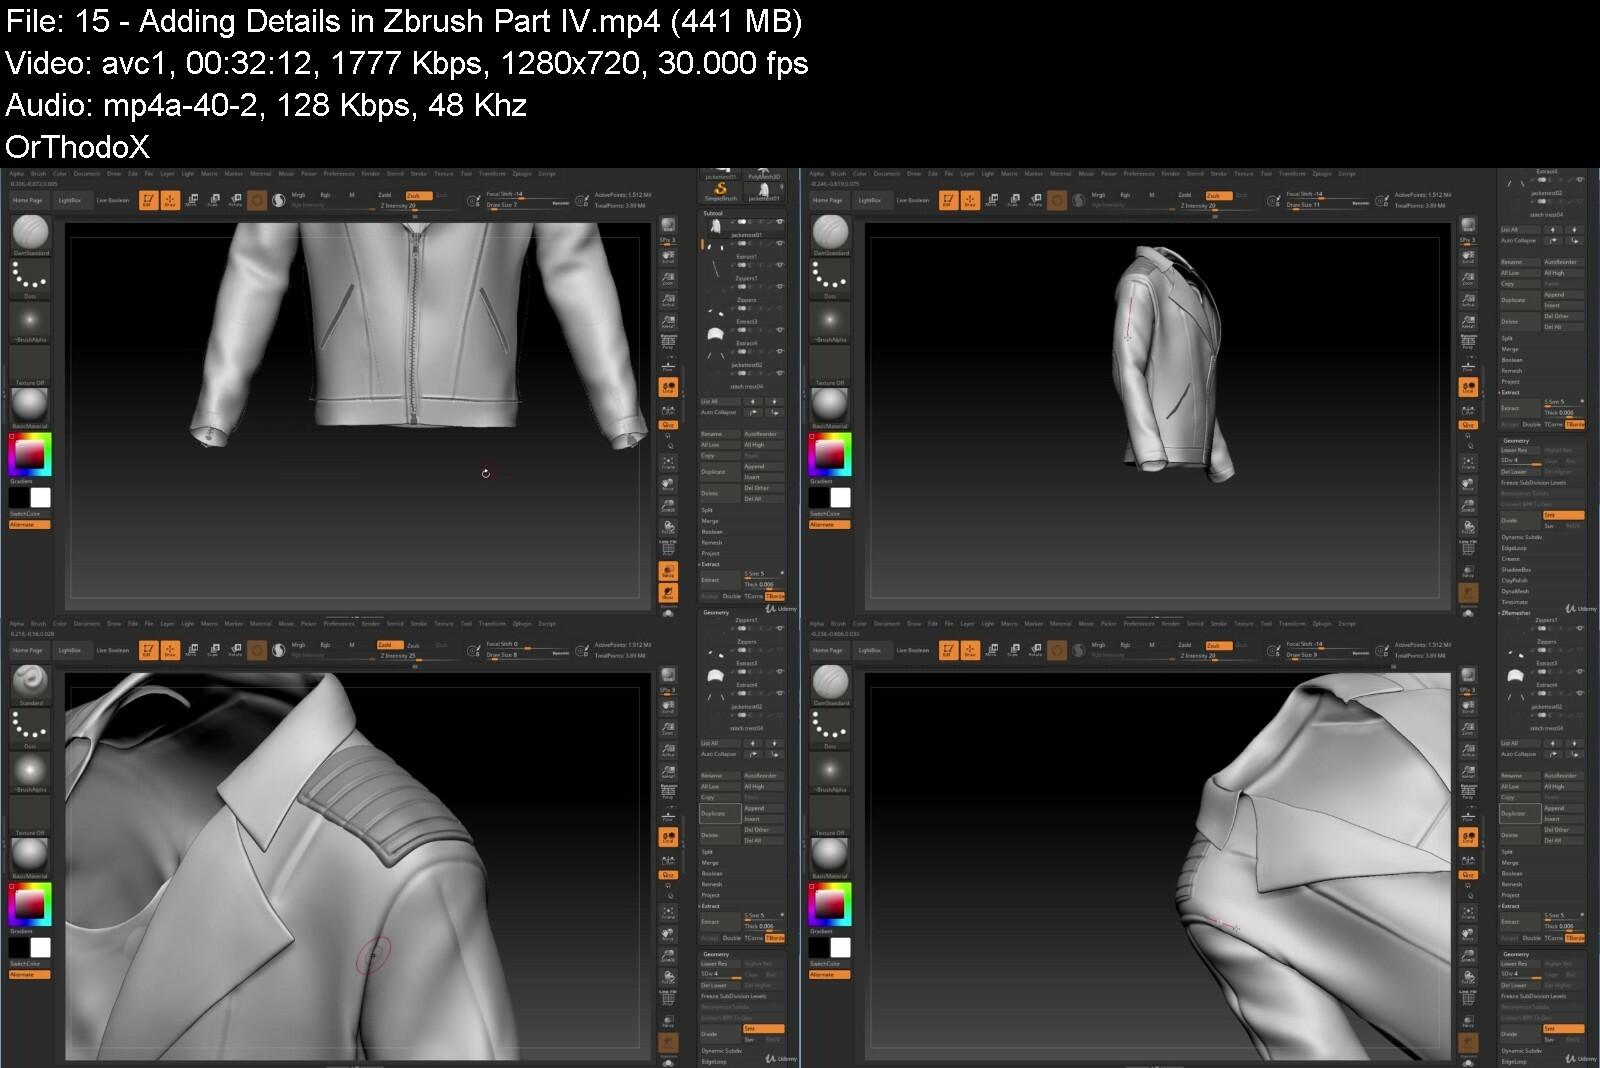
Lecture 15 Adding Details in Zbrush Part IV

Lecture 16 Adding Details in Zbrush Part V

Lecture 17 Adding Details in Zbrush Part VI

Lecture 18 Adding Details in Zbrush Part VII

Lecture 19 Creating Another Type of Stitch Brush

Lecture 20 Fixing the Interior of the Jacket

Lecture 21 Refining the Jacket Part I

Lecture 22 Refining the Jacket Part II

Lecture 23 Final Requirements and Exporting

Section 4: Rendering in Keyshot and Compositing in Photoshop

Lecture 24 Rendering in Keyshot Part I

Lecture 25 Rendering in Keyshot Part II

Lecture 26 Compositing in Photoshop

Section 5: BONUS

Lecture 27 Importing a Custom Model to Marvelous Designer

Anyone who wants to create realistic garment more efficiently,Anyone who wants to get better at character creation as creating cloth is a huge part of being a character artist


creatingajacketusingmnjfj1.jpg


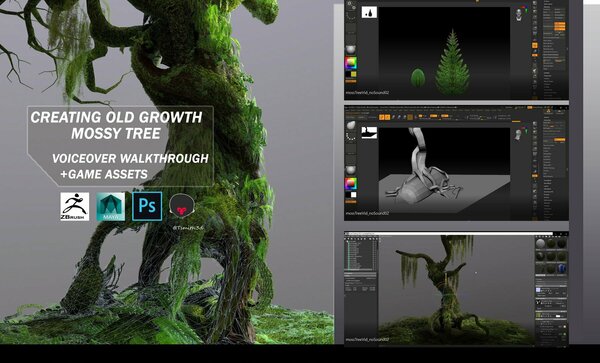
Creating Old Growth Mossy Tree: Tutorial and Game Assets

file8oc17.jpg


Creating Old Growth Mossy Tree: Tutorial and Game Assets
Instructors: Tyler Smith 2 Lessons | Duration: 3h 10m
Video: MP4 1920x1080 48 KHz | English
Intermediate Level | Size: 5.6 GB

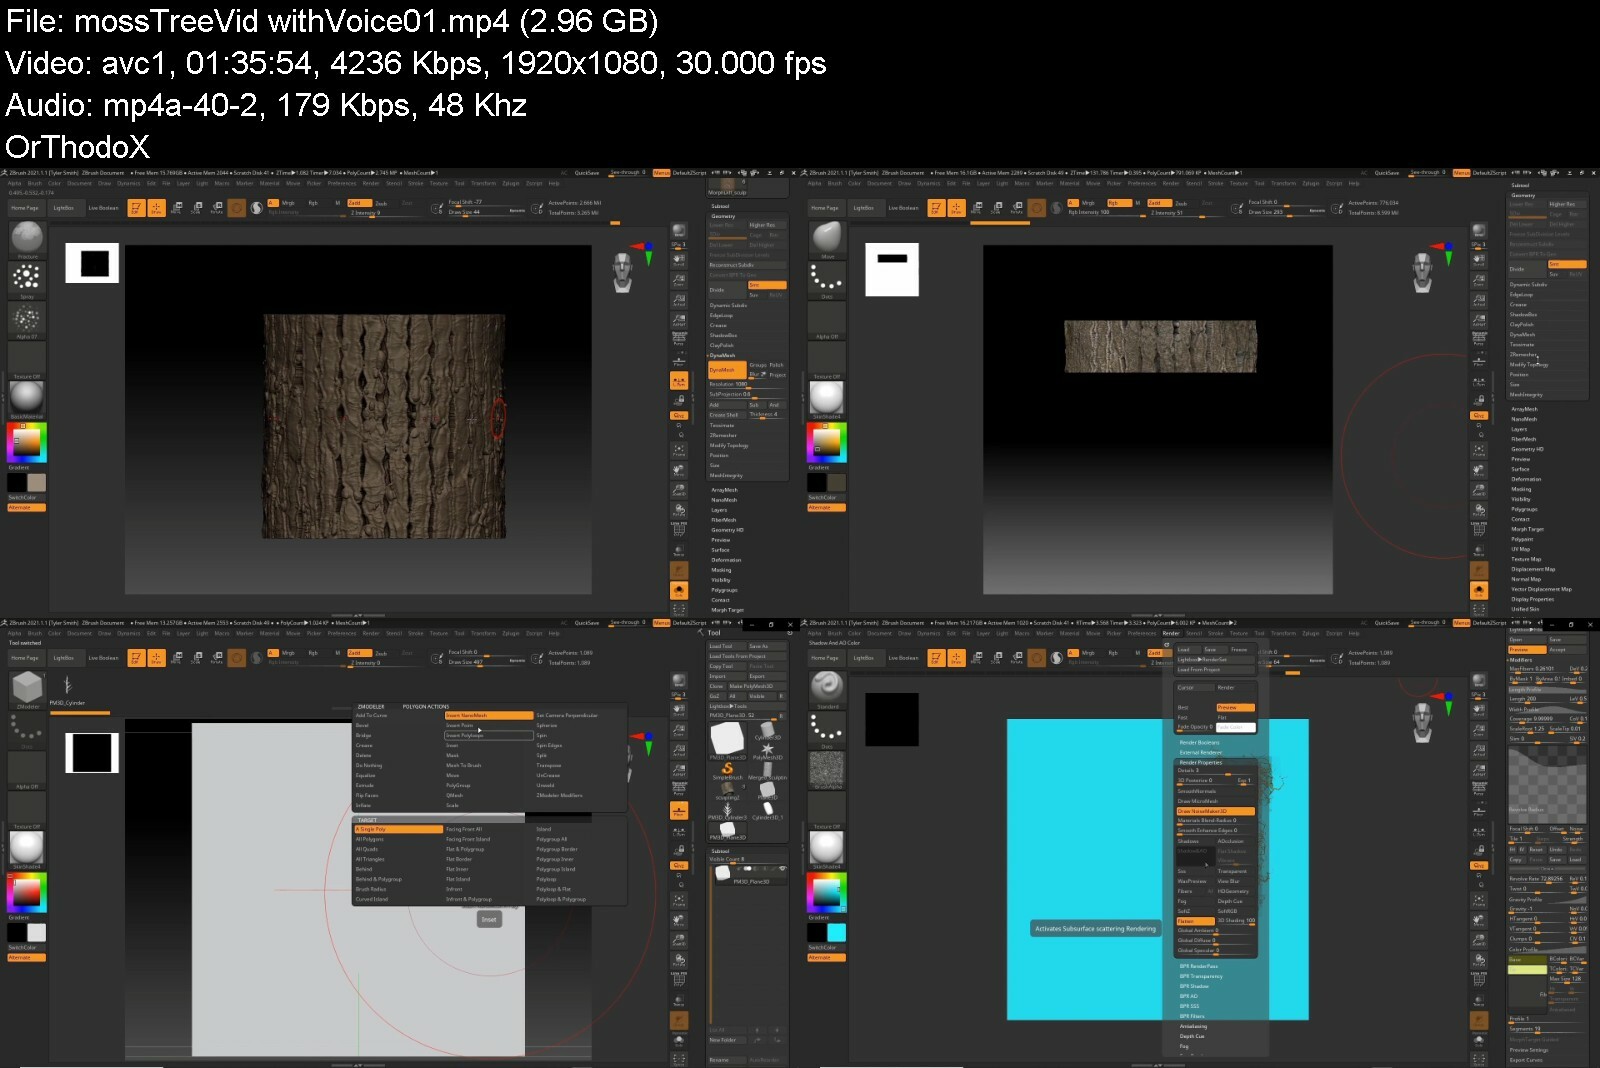
This tutorial includes a full walkthrough of first creating a series of materials including tree bark, 2 types of moss, and a collection of leaf foliage cards. I'll be going through how you can use Zbrush to create these materials without having to use any other software. After completing the materials and assets I will be going through the workflow on how to create an entire old growth moss covered tree game asset without having to leave Zbrush. Concluding the walkthrough will be importing the final FBX of the old growth tree into Marmoset for material set up and final render composition.

Skill Level

Intermediate Level, you should be familiar with the basic menus and workflows with Zbrush, Maya, Photoshop, and Marmoset

Contents

- Three and a half hour walk through covering the entire tree creation from scratch in Zbrush to final low res mesh render in Marmoset.

- 1080 Resolution

-Zbrush (2021) files

-FBX files for tree mesh and foliage card assets

-Texture files For foliage cards and tilling materials

-Marmoset web file and scene file (Marmoset Toolbag 3)

creatingoldgrowthmossi2f37.jpg


Autocad 2021- 2019 Mechanical 2D And 3D For Beginners To Adv

2ebbmpuoawdgehy1gybzvu7idp.jpg


Autocad 2021- 2019 Mechanical 2D And 3D For Beginners To Adv
Last updated 9/2020
MP4 | Video: h264, 1280x720 | Audio: AAC, 44.1 KHz
Language: English | Size: 15.96 GB | Duration: 27h 44m

AutoCAD 2021 Mechanical Engineering course to learn design, drawing and drafting in 2D and 3D


What you'll learn
AutoCAD 2021: 2D as well as 3D even student is a beginner.
All Coordinate system
All Basic Commands and their uses
All 3D commands and their uses

Requirements
Need a Laptop which can easily run AutoCAD Software

Description
AutoCAD 2021 Mechanical Engineering course is the amazing course, which is having basics commands, 2D and of course 3D as well designed by a decade experienced highly qualified faculty member, even you beginner or you know about AutoCAD*even then this course will help you in every aspects especially for mechanical engineers to design any challenging design by using AutoCAD.Here are several features of this course-1. More than 10 years of experience instructor2. The course is from scratch to advanced level3. More than 25 hours of course content4. More than 30 practice sets5. You will Learn 2 D and 3 D both6. The version you will learn that is 2019, which is the advanced one.and lot more.

Overview

Section 1: Introduction

Lecture 1 Introduction

Lecture 2 Line Command

Lecture 3 Limits

Lecture 4 Units

Section 2: Coordinate Systems

Lecture 5 Absolute Coordinate System

Lecture 6 Relative Coordinate System

Lecture 7 Polar Coordinate System

Lecture 8 From Command

Section 3: 2D Commands & 3D Commands

Lecture 9 Circle

Lecture 10 Offset and Trim

Lecture 11 Trim

Lecture 12 Properties

Lecture 13 Status Toolbar and Grips

Lecture 14 Practice of Toolbar and Grips Commands

Lecture 15 Polyline and Polyline Edit

Lecture 16 Arc

Lecture 17 Rectangle

Lecture 18 Polygon

Lecture 19 Ellipse

Lecture 20 Hatch

Lecture 21 Spline

Lecture 22 Xline and Ray

Lecture 23 Point Divide & Measure

Lecture 24 Miscellaneous Drawings

Lecture 25 Move and Copy

Lecture 26 Rotate

Lecture 27 Mirror

Lecture 28 Scale and Stretch

Lecture 29 Fillet

Lecture 30 Fillet, Chamfer Blend

Lecture 31 Rectangular Array

Lecture 32 Polar Array

Lecture 33 Path Array

Lecture 34 Draw Order

Lecture 35 Modify Toolbar

Lecture 36 Modify Miscellaneous

Lecture 37 Parametric Constraint

Lecture 38 Enquiry

Lecture 39 Object Selection

Lecture 40 Practice Session- 1

Lecture 41 Practice Session- 2

Lecture 42 Zoom and Pan

Lecture 43 Block

Lecture 44 Attributes

Lecture 45 Block Editor

Lecture 46 Block Miscellaneous

Lecture 47 Design Centre and Tool Palette

Lecture 48 Layers Part- 1

Lecture 49 Layers Part- 2

Lecture 50 Layout

Lecture 51 Plot

Lecture 52 Single Line Text

Lecture 53 M Text

Lecture 54 Text Miscellaneous

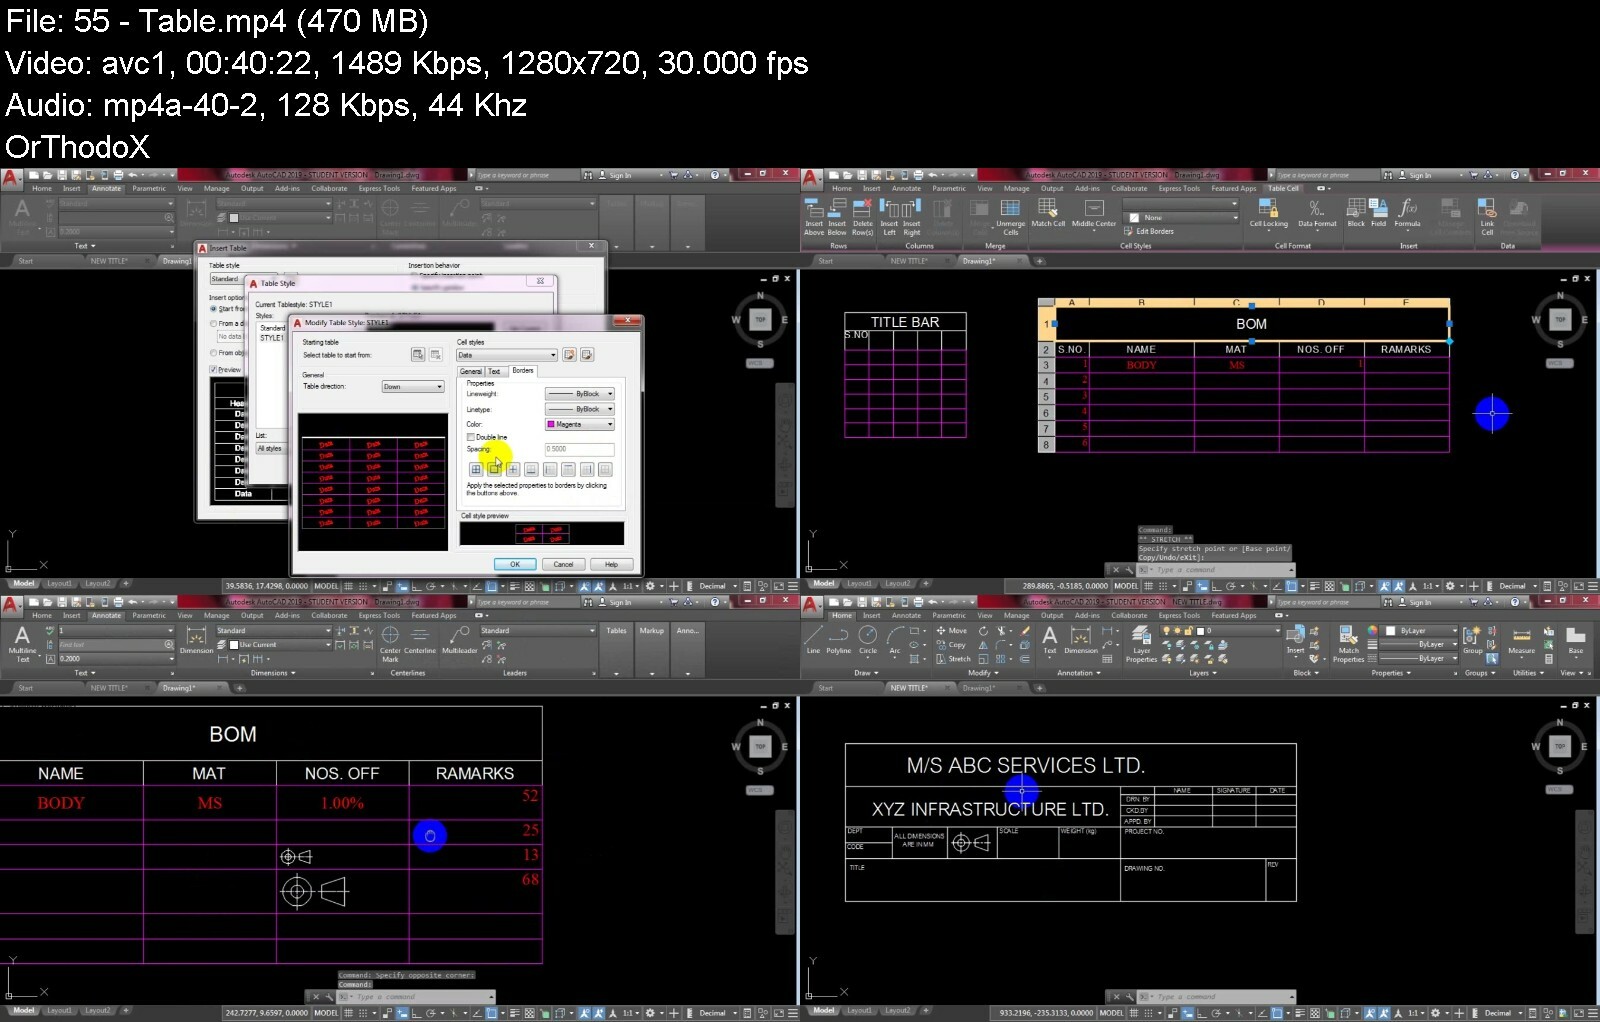
Lecture 55 Table

Lecture 56 Template

Lecture 57 Dimension Style

Lecture 58 Dimension Tools

Lecture 59 Fit Tolerance

Lecture 60 Geometric Tolerance

Lecture 61 Quick and Multi-leader

Lecture 62 Alternate Units

Lecture 63 Annotative

Lecture 64 XRef

Lecture 65 Data Extraction

Lecture 66 Gear Drafting

Lecture 67 Thread

Lecture 68 Super Hatch

Lecture 69 Visual Style

Lecture 70 UCS Tool Bar

Lecture 71 Isoplane

Lecture 72 Express Tool

Lecture 73 Union Subtraction

Lecture 74 Extrude and Rev

Lecture 75 Array 3D

Lecture 76 Practice of 3D- 1

Lecture 77 Practice of 3D- 2 Home Structure

Lecture 78 Sweep

Lecture 79 Loft

Lecture 80 Modeling

Lecture 81 Solid Editing Part- 1

Lecture 82 Edit Edges

Lecture 83 Edit Face

Lecture 84 Solid Edit Extra

Lecture 85 Section

Lecture 86 Solid Profile

Lecture 87 Projected Views

Lecture 88 Nut and Bolt Modeling

Lecture 89 Gear

Lecture 90 Material

Lecture 91 3 D Dimensions

Students wanted to Learn Designing,Students wanted to design nut, bolt or mechanical components,Students wanted to work in design deparment,Students are studying mechanical engineering,Students wanted to do job in automobile industry as design engineer


autocad20212019mechanv5fyo.jpg


3D Game Character Creature - Full Complete Pipeline

jqgbsno4bpda2wfksvajjljcp6.jpg


3D Game Character Creature - Full Complete Pipeline
Last updated 2/2019
MP4 | Video: h264, 1280x720 | Audio: AAC, 44.1 KHz
Language: English | Size: 13.02 GB | Duration: 14h 18m

Learn How to Model sculpt and Texture a Character Creature using Zbrush, Maya, Substance Painter, Photoshop, Unreal


What you'll learn
Create a full body character suitable for games
Understand the reasons behind retopologizing
Design creatures in a logical and creative manner
Create skin and eye textures
Understand how to make clean production-ready topology
Texture and light for presentation

Requirements
Basic knowledge of ZBrush, Maya, Substance, Marmoset, Photoshop, Unreal

Description
Instructor InfoAbraham Leal is the Director and Founder of Critical Hit Studio &*Academy. With the studio and academy, he is proud to be able to spread his artistic knowledge to everyone in his hometown and is extremely excited to be working on big entertainment projects in Mexico. What inspired Abraham to be a 3D artist is The Hobbit book and all the lore that surrounds it. Being able to tell stories and share his own voice is what motivates him to create and imagine new and exciting characters. Prior to becoming a 3D artist, he was going to medical school and he decided to do a complete 180 and get into Digital Design and Entertainment Production. When he quit medical school, he couldn't draw, paint, or sculpt to save his life but he was so convinced of his definite desire and worked hard to turn it into a reality. His advice to artists who want to get into the 3D industry is to practice properly, be patient and stay humble. He believes in always having a goal in mind, and always open to learning and improving. Course Info*Throughout this course, we are going to be focusing on the creation of a video game-ready character. We are going to be bringing in an interesting character to life. We will go through the whole process of character game creation starting from design, proportion, anatomy, and diving in to the entire pipeline until we arrive to a production-ready character. We will go deep into the creation of the high poly, low poly, retopologizing, UV mapping, texturing, material setup, rendering, lights, post-production, and at the end putting the character into a game engine to make sure everything is working properly.

Overview

Section 1: Introduction

Lecture 1 Introduction

Section 2: Vol. 1: Sculpting the Creature

Lecture 2 Volume 1 Overview

Lecture 3 Proportions and Base Mesh

Lecture 4 Torso

Lecture 5 Arms

Lecture 6 Legs

Lecture 7 Head

Lecture 8 Design Adjustments

Lecture 9 Head Details Part 1

Lecture 10 Head Details Part 2

Lecture 11 Torso Details

Lecture 12 Back Details

Lecture 13 Light Test

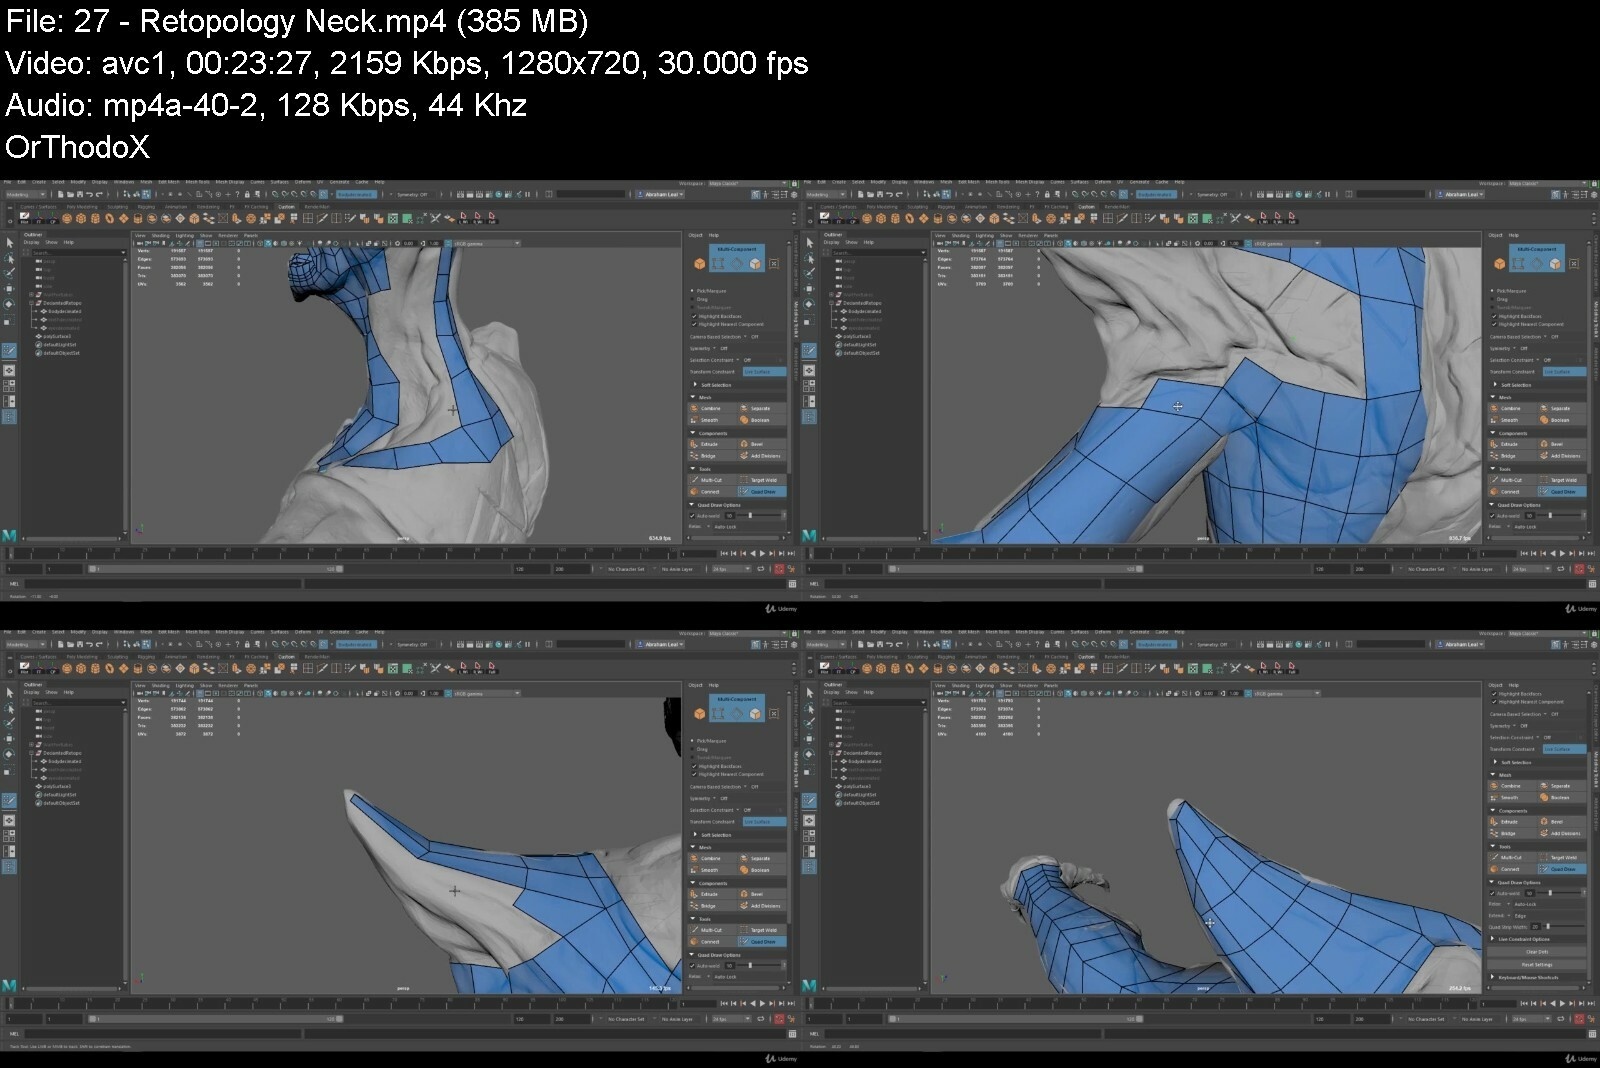
Lecture 14 Arms Details

Lecture 15 Hands Details

Lecture 16 Feet Details

Lecture 17 Micro Details

Lecture 18 Character Details

Lecture 19 Marmoset Quickview

Section 3: Vol. 2: Retopologizing, Unwrapping, Texturing, Setting up for Presentation

Lecture 20 Volume 2 Overview

Lecture 21 Retopology Intro

Lecture 22 Retopology Tools

Lecture 23 Retopology Torso

Lecture 24 Retopology Face Main Loops

Lecture 25 Retopology Face Main Details

Lecture 26 Retopology Head

Lecture 27 Retopology Neck

Lecture 28 Retopology Back

Lecture 29 Retopology Legs

Lecture 30 Retopology Legs Details

Lecture 31 Retopology Feet

Lecture 32 Retopology Forearm Fingers

Lecture 33 Retopology Hands

Lecture 34 Retopology Final Steps

Lecture 35 UVs Part 1

Lecture 36 UVs Part 2

Lecture 37 UVs Part 3

Lecture 38 UVs Cleanup

Lecture 39 Normal Map and Baking

Lecture 40 Useful Maps and Initial Colors

Lecture 41 Color Layering Part 1

Lecture 42 Color Layering Part 2

Lecture 43 Color Details and Fake SSS

Lecture 44 Glossiness

Lecture 45 Color Details

Lecture 46 TrueSSS and Final Details

Lecture 47 Eye Texturing

Lecture 48 Marmoset Material Setup

Lecture 49 Light Setup

Lecture 50 Photoshop Post Production

Lecture 51 Final Video

Anyone who want to create an interesting character for games


3dgamecharactercreatuqbfjz.jpg


3D Reference Modeling Using Blender 2.8

gotf5ubcsc5aced5ig1oz0vfe4.jpg


3D Reference Modeling Using Blender 2.8
Last updated 8/2020
MP4 | Video: h264, 1280x720 | Audio: AAC, 44.1 KHz
Language: English | Size: 8.19 GB | Duration: 9h 5m

BIGGEST 3D modeling course for beginners with projects on face, hair, eyebrows, lip, nose, eyes, jaw, ears and more...


What you'll learn
Master the navigation controls and modes you need to become a Blender expert.
Build your first projects including UV editing and texturing.
Sculpt your first face with dynamic topology, hair and more details.
Add extreme detail to your character's hair and learn how to create different hair types.
Learn how to detail hair.
Restructure the face and detail eyebrows to perfection.
Add details to the lips, nose and eyes with restructuring and fine sculpting.
Perform a full facial restructure, including jaws and eyes, with detailed Blender tools.
Complete your massive portfolio project by adding the final perfect touches to your model.
Detail the ears, learn subsurface scattering, and much more.

Requirements
No experience necessary

Description
In this course we'll learn how to recreate a scene based on photo reference. This course will mainly be specific to modeling techniques, which can be used to create any kind of scene. Mostly modeling work based on plans and photo references. So when you are in need of unique models, proper dimensions in a scene, or you would like to add your models to a real image, it may be a problem at first, but we'll focus on discussing many techniques to solve the issue. By the end of this training, you'll be able to expertly model a scene from photo reference.Blender is amazing, free 3D modeling software like Maya!Absolutely no experience necessary. You'll start with a complete introduction to Blender 2.8 that is perfect for absolute beginners and can also be used a review.Then you'll jump into the core topics you need to learn in Blender by building practical examples and hands-on projects. You'll learn everything you need to become a 3D modeler. This includes:1. Blender FundamentalsLearn core topics with immediate examples. Master the navigation controls and modes you need to become a Blender expert. Build your first projects including UV editing and texturing.2. Reference Modelling Learn topics like Reference Modeling Setup, Basic Mesh Nose, Lips, Eyes, and Topology Fix.3. Face DetailsLearn topics like Face Detail Readjustments, Neck Construction, and Ear Mesh.4. FixesLearn topics like Topology Fixes and Asymmetrical Fixes.5. UVsLearn how to do UV unwrapping, Texture Stencil Painting, and Texture UV Layout Export.6. TexturingLearn how to Texture FixingHead and Face Modeling for Beginners in Blender HDIf you get one 3D modeling course this year, get this one. Don't miss out while prices have dropped.Join the community. Enroll now!

Overview

Section 1: Introduction

Lecture 1 Introduction

Lecture 0 Blender 2.8 Nav Controls

Lecture 0 Blender 2.8 Objectedit Modes

Lecture 0 Blender 2.8 Qol Changes

Lecture 0 X-ray

Lecture 0 Basic Tools

Lecture 0 Mirroring

Lecture 0 Mesh Options

Lecture 0 Snap Mode

Lecture 0 Object Explorer

Lecture 0 Materials

Lecture 0 Combine and Separate

Lecture 0 Object Merge

Lecture 0 UV Editing Basics

Lecture 0 UV Texturing

Section 2: Reference Modelling

Lecture 2 Reference Modeling Setup

Lecture 3 Basic Mesh Nose

Lecture 4 Basic Mesh Lips

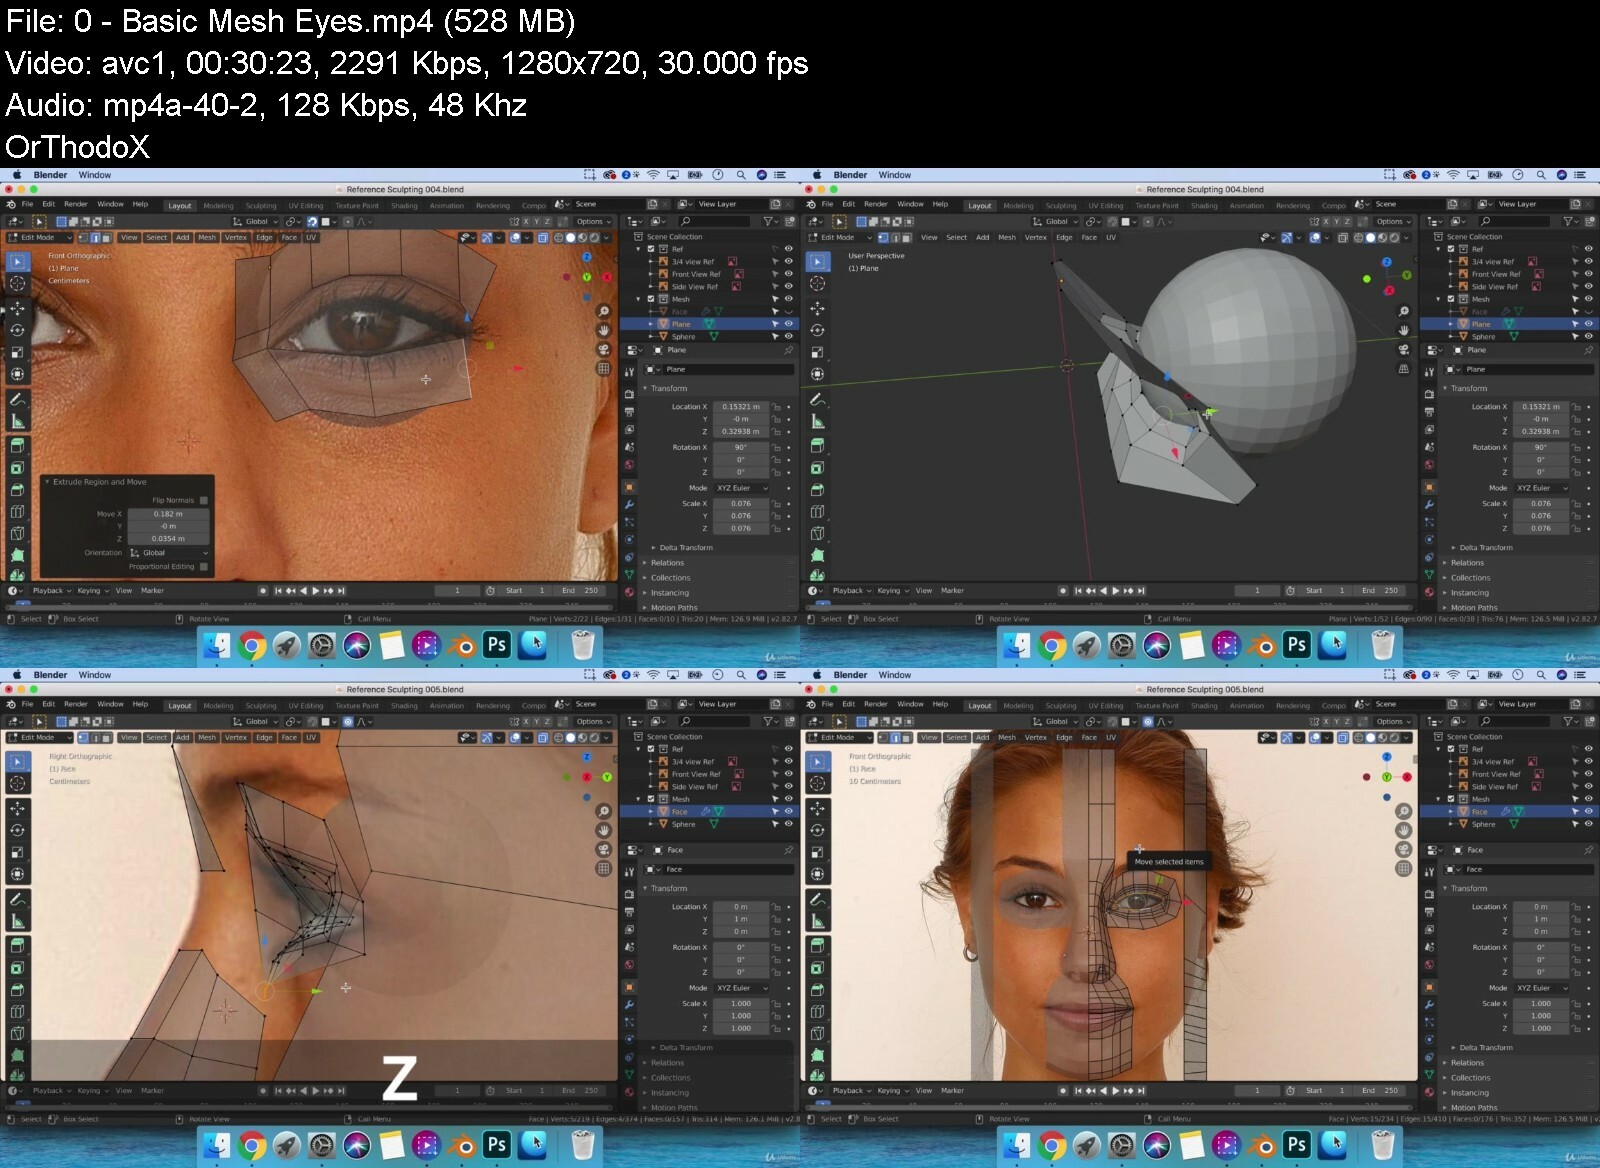
Lecture 0 Basic Mesh Eyes

Lecture 0 Basic Mesh Topology Fix

Lecture 5 Face Topology Filling

Lecture 6 Face Topology Filling (cont'd)

Lecture 7 Back Of Head Mesh

Section 3: Face Details

Lecture 8 Face Detail Readjustments

Lecture 0 Neck Construction

Lecture 9 Ear Mesh

Lecture 0 Ear Connection

Section 4: Fixes

Lecture 10 Topology Fixes

Lecture 11 Asymmetrical Fixes

Lecture 0 Asymmetrical Fixes (cont'd)

Section 5: UVs

Lecture 12 UV Unwrapping

Lecture 13 Texture Stencil Painting

Lecture 14 Texture UV Layout Export

Section 6: Texturing

Lecture 15 Texture Fixing

Lecture 16 Texture Fixing Part 2

Lecture 17 Texture Fixing Part 3

Absolute beginners to 3D modeling,3D modelers who need to sculpt heads and faces,Modelers from Maya who want to use free 3D modeling software (Blender),Anyone who needs 3D characters including game developers and 3D animators


3dreferencemodelingusn2dd8.jpg


Zurück
Oben Unten