


• Regeln für den Video-Bereich:

    In den Börsenbereich gehören nur Angebote die bereits den Allgemeinen Regeln entsprechen.

    Einteilung

    - Folgende Formate gehören in die angegeben Bereiche:
    - Filme: Encodierte Filme von BluRay, DVD, R5, TV, Screener sowie Telesyncs im Format DivX, XviD und x264.
    - DVD: Filme im Format DVD5, DVD9 und HD2DVD.
    - HD: Encodierte Filme mit der Auflösung 720p oder darüber von BluRay, DVD, R5, TV, Screener sowie Telesyncs im Format x264.
    - 3D: Encodierte Filme von BluRay, die in einem 3D Format vorliegen. Dies gilt auch für Dokus, Animation usw.
    - Serien: Cartoon/Zeichentrick, Anime, Tutorials, Dokumentationen, Konzerte/Musik, Sonstiges sind demnach in die entsprechenden Bereiche einzuordnen, auch wenn sie beispielsweise im High Definition-Format oder als DVD5/DVD9/HD2DVD vorliegen. Ausnahme 3D.
    - Bereich Englisch: Englische Releases gehören immer in diesen Bereich.
    - Bereich Talk: Der Bereich, in dem über die Releases diskutiert werden kann, darf, soll und erwünscht ist.


    Angebot/Beitrag erstellen

    - Ein Beitrag darf erst dann erstellt werden, wenn der Upload bei mindestens einem OCH komplett ist. Platzhalter sind untersagt.
    - Bei einem Scenerelease hat der Threadtitel ausschließlich aus dem originalen, unveränderten Releasenamen zu bestehen. Es dürfen keine Veränderungen wie z.B. Sterne, kleine Buchstaben o.ä. vorgenommen werden. Ausnahme Serienbörse:
    - Bei einem Sammelthread für eine Staffel entfällt aus dem Releasename natürlich der Name der Folge. Beispiel: Die Simpsons S21 German DVDRip XviD - ITG
    - Dementsprechend sind also u.a. verboten: Erweiterungen wie "Tipp", "empfehlenswert", "only", "reup", usw. / jegliche andere Zusatzinformation oder Ergänzung, welche nicht in obiger Beschreibung zu finden ist.

    Aufbau des Angebots und Threadtitel

    Der Titel nach folgendem Muster erstellt zu werden. <Name> [3D] [Staffel] [German] <Jahr> <Tonspur> [DL] [Auflösung] <Quelle> <Codec> - <Group>
    Beispiel: The Dark Knight German 2008 AC3 DVDRip XviD - iND
    Beispiel: The Dark Knight 2008 DTS DL BDRip x264 - iND
    Beispiel: The Dark Knight 2008 AC3 DL BDRip XviD - iND
    Beispiel: The Dark Knight German 2008 AC3 720p BluRay x264 iND
    Beispiel: The Dark Knight 2008 DTS DL 1080p BluRay x264 iND
    Beispiel: Die Simpsons S01 German AC3 DVDRip XviD iND
    Beispiel: Die Simpsons S20 German AC3 720p BluRay x264 iND
    Beispiel: Sword Art Online II Ger Sub 2014 AAC 1080p WEBRip x264 - peppermint
    Entsprechend sind also u.a. verboten: Sonderzeichen wie Klammern, Sterne, Ausrufezeichen, Unterstriche, Anführungszeichen / Erweiterungen wie "Tipp", "empfehlenswert", "only", "reup", usw. / jegliche andere Zusatzinformation oder Ergänzung, welche nicht in obiger Beschreibung zu finden ist
    Ausnahmen hiervon können in den Bereichen geregelt sein.

    Die Beiträge sollen wie folgt aufgebaut werden:
    Überschrift entspricht dem Threadtitel
    Cover
    kurze Inhaltsbeschreibung
    Format, Größe, Dauer sind gut lesbar für Downloader außerhalb des Spoilers zu vermerken
    Nfo sind immer Anzugeben und selbige immer im Spoiler in Textform.
    Sind keine Nfo vorhanden z.B. Eigenpublikationen, sind im Spoiler folgende Dateiinformationen zusätzlich anzugeben :
    Quelle
    Video (Auflösung und Bitrate)
    Ton (Sprache, Format und Bitrate der einzelnen Spuren)
    Untertitel (sofern vorhanden)
    Hosterangabe in Textform außerhalb eines Spoiler mit allen enthaltenen Hostern.
    Bei SD kann auf diese zusätzlichen Dateiinformationen verzichtet werden.

    Alle benötigten Passwörter sind, sofern vorhanden, in Textform im Angebot anzugeben.
    Spoiler im Spoiler mit Kommentaren :"Schon Bedankt?" sind unerwünscht.


    Releases

    - Sind Retail-Release verfügbar, sind alle anderen Variationen untersagt. Ausnahmen: Alle deutschen Retail-Release sind CUT, in diesem Fall sind dubbed UNCUT-Release zulässig.
    - Im Serien-Bereich gilt speziell: Wenn ein Retail vor Abschluss einer laufenden Staffel erscheint, darf diese Staffel noch zu Ende gebracht werden.62
    - Gleiche Releases sind unbedingt zusammenzufassen. Das bedeutet, es ist zwingend erforderlich, vor dem Erstellen eines Themas per Suchfunktion zu überprüfen, ob bereits ein Beitrag mit demselben Release besteht. Ist dies der Fall, ist der bereits vorhandene Beitrag zu verwenden.
    - P2P und Scene Releases dürfen nicht verändert oder gar unter einem iND Tag eingestellt werden.


    Support, Diskussionen und Suche

    - Supportanfragen sind entweder per PN oder im Bereich Talk zu stellen.
    - Diskussionen und Bewertungen sind im Talk Bereich zu führen. Fragen an die Uploader haben ausschließlich via PN zu erfolgen, und sind in den Angeboten untersagt.
    - Anfragen zu Upload-Wünschen sind nur im Bereich Suche Video erlaubt. Antworten dürfen nur auf Angebote von MyBoerse.bz verlinkt werden.


    Verbote

    - Untersagt sind mehrere Formate in einem einzigen Angebotsthread, wie beispielsweise das gleichzeitige Anbieten von DivX/XviD, 720p und 1080p in einem Thread. Pro Format, Release und Auflösung ist ein eigener Thread zu eröffnen.
    - Grundsätzlich ebenso verboten sind Dupes. Uploader haben sich an geeigneter Stelle darüber zu informieren, ob es sich bei einem Release um ein Dupe handelt.
    - Gefakte, nur teilweise lauffähige oder unvollständige Angebote sind untersagt. Dies gilt auch für eigene Publikationen, die augenscheinlich nicht selbst von z.B. einer DVD gerippt wurden. Laufende Serien, bei denen noch nicht alle Folgen verfügbar sind, dürfen erstellt und regelmäßig geupdatet werden.
    - Untersagt sind Angebote, welche nur und ausschließlich in einer anderen Sprache als deutsch oder englisch vorliegen. Ausnahmen sind VORHER mit den Moderatoren zu klären.


    Verstoß gegen die Regeln

    - Angebote oder Beiträge, die gegen die Forenregeln verstoßen, sind über den "Melden"-Button im Beitrag zu melden.
  • Bitte registriere dich zunächst um Beiträge zu verfassen und externe Links aufzurufen.

*** Bestes IPTV *** bester Preis *** gratis Test ***


Englische Tutorials

Autocad : 2D And 3D Modelling
eqyua6xogvlbdeo3c9xwit8ip4.jpg


Autocad : 2D And 3D Modelling
Last updated 7/2021
MP4 | Video: h264, 1280x720 | Audio: AAC, 44.1 KHz
Language: English | Size: 7.88 GB | Duration: 18h 18m

For Civil , Mechanical Engineers , Architects And Designers


What you'll learn
2D Drafting And 3D Modelling

Requirements
Operating Level Knowledge of Computer

Description
About AutoCAD SoftwareAutoCAD stands for Autodesk Computer-Aided Design. It is a drafting and design software application developed and marketed by Autodesk. The AutoCAD software is used in industries, by architects, machine drawings, designers, graphic designers, city planners, managers, and other professionals worldwide.About The CourseThis course is designed for beginner and intermediate users. User without any prior knowledge of software can easily learn the course. The course is compatible with almost all the versions of AutoCAD.Course is properly divided into sections. Each tool is taught with proper examples along with shortcut keys and commands. Examples are carefully chosen so as to give the proper understanding of the tool is an easy way. Projects at the end of the course use all the tools and commands which are learnt in previous lectures.Key Features of The CourseComplete course which includes 2D drafting and 3D Modelling.Need no prior knowledge of any softwareStarts from basics and proceeds to advanced featuresIncludes shortcut keys and commands for toolsPDF files are provided as attachment with lectures2D and 3D projects at the course endSeparate projects for Civil And Mechanical EngineersCivil Engineering Projects2D Floor Plan2D Elevation3D Sofa Model3D Home ElevationMechanical Engineering ProjectsShock up spring AssemblyNut Bolt AssemblyBall BearingWho this course is for:· Civil Engineers· Architects· Mechanical Engineers· Interior Designers· Students· Working Professionals

Overview

Section 1: Introduction

Lecture 1 New File, Open File , Save And Save As

Lecture 2 AutoCAD Environment

Lecture 3 Unit And Dimension Style

Lecture 4 Basic Drawings

Lecture 5 Navigation Tools

Lecture 6 Osnap . Undo And Workspace Settings

Section 2: Drawing Objects

Lecture 7 Line Tool

Lecture 8 Example : Line Tool

Lecture 9 Object Snap Tracking

Lecture 10 Polar Tracking

Lecture 11 Dynamic Input

Lecture 12 PolyLine

Lecture 13 MultiLine And MultiLine Style

Lecture 14 Setting Unit In Feet And Inches

Lecture 15 Example : Feet And Inches Unit

Lecture 16 Circle and Arc Tools

Lecture 17 Example : Circle Tool

Lecture 18 Polygon And Rectangle Tools

Lecture 19 Example : Polygon and Rectangle Tool

Lecture 20 Ellipse And Donut

Lecture 21 Region , Union , Subtract and Intersect

Lecture 22 Grid

Lecture 23 LIMITS Command

Lecture 24 Practice Example 1

Lecture 25 Practice Example 2

Section 3: Modifying Objects

Lecture 26 Offset , Move And Copy

Lecture 27 Example : Offset

Lecture 28 Example : Copy

Lecture 29 Mirror, Trim And Extend

Lecture 30 Example : Mirror And Trim

Lecture 31 Rectangular Array , Polar Array And Path Array

Lecture 32 Example : Array

Lecture 33 Rotate, Fillet And Chamfer

Lecture 34 Example : Rotate

Lecture 35 Break, Break At a Point And Stretch Tools

Lecture 36 Align And Scale Tool

Section 4: Object Selection Techniques

Lecture 37 Selection Techniques Part 1

Lecture 38 Selection Techniques Part 2

Section 5: Text

Lecture 39 Single Line Text

Lecture 40 Multiline Text

Lecture 41 Text Style

Lecture 42 Example : Text

Section 6: Table

Lecture 43 Table Creation

Lecture 44 Table Style

Lecture 45 Example : Table

Section 7: Hatching

Lecture 46 Hatching Part 1

Lecture 47 Hatching Part 2

Lecture 48 Gradient

Lecture 49 Example : Hatch

Section 8: Dimensions

Lecture 50 Linear, Aligned, Radius And Diameter

Lecture 51 Angular, Continue, Base Line , Quick , Arc Length And Jogged Dimensions

Lecture 52 Ordinate Dimension And Dimension Style

Lecture 53 Leader Tool And Multi Leader Style

Section 9: Blocks

Lecture 54 Creating And Inserting Block

Lecture 55 Write Block And Design Center

Lecture 56 Example : Blocks

Section 10: Area

Lecture 57 Calculating Area

Lecture 58 Example : Area Calculation

Section 11: Isometric Drawing

Lecture 59 Isometric Drawing

Lecture 60 Isometric Dimension

Lecture 61 Isometric Example 1

Lecture 62 Isometric Example 2

Section 12: Layers

Lecture 63 Layers Part 1

Lecture 64 Layers Part 2

Lecture 65 Example : Layers

Section 13: 3D Modelling Tools

Lecture 66 3D Environment , Views And Workspace

Lecture 67 Visual Style , Orbit And Materials

Lecture 68 Revolve , Union , Subtract And Intersect

Lecture 69 3D Dimensions

Lecture 70 Press Pull , Fillet , Chamfer , Sweep And Shell

Lecture 71 3D Objects

Section 14: 3D Models

Lecture 72 3D Model 1

Lecture 73 3D Model 2

Lecture 74 3D Model 3

Lecture 75 3D Model 4

Section 15: Printing And Plotting

Lecture 76 Print options

Lecture 77 Layouts

Section 16: Civil Engineering Projects 2D and 3D

Lecture 78 Floor Plan Part 1

Lecture 79 Floor Plan Part 2

Lecture 80 2D Elevation

Lecture 81 3D Sofa Model

Lecture 82 3D Home Model Part 1

Lecture 83 3D Home Model Part 2

Lecture 84 3D Home Model Part 3

Lecture 85 3D Home Model Part 4

Lecture 86 3D Home Model Part 5

Section 17: Mechanical Engineering Models

Lecture 87 Model 1

Lecture 88 Model 2

Lecture 89 Model 3

Civil, Architectural, Interior Decorators, Electrical and Mechanical Engineers


autocad2dand3dmodellib7eoz.jpg


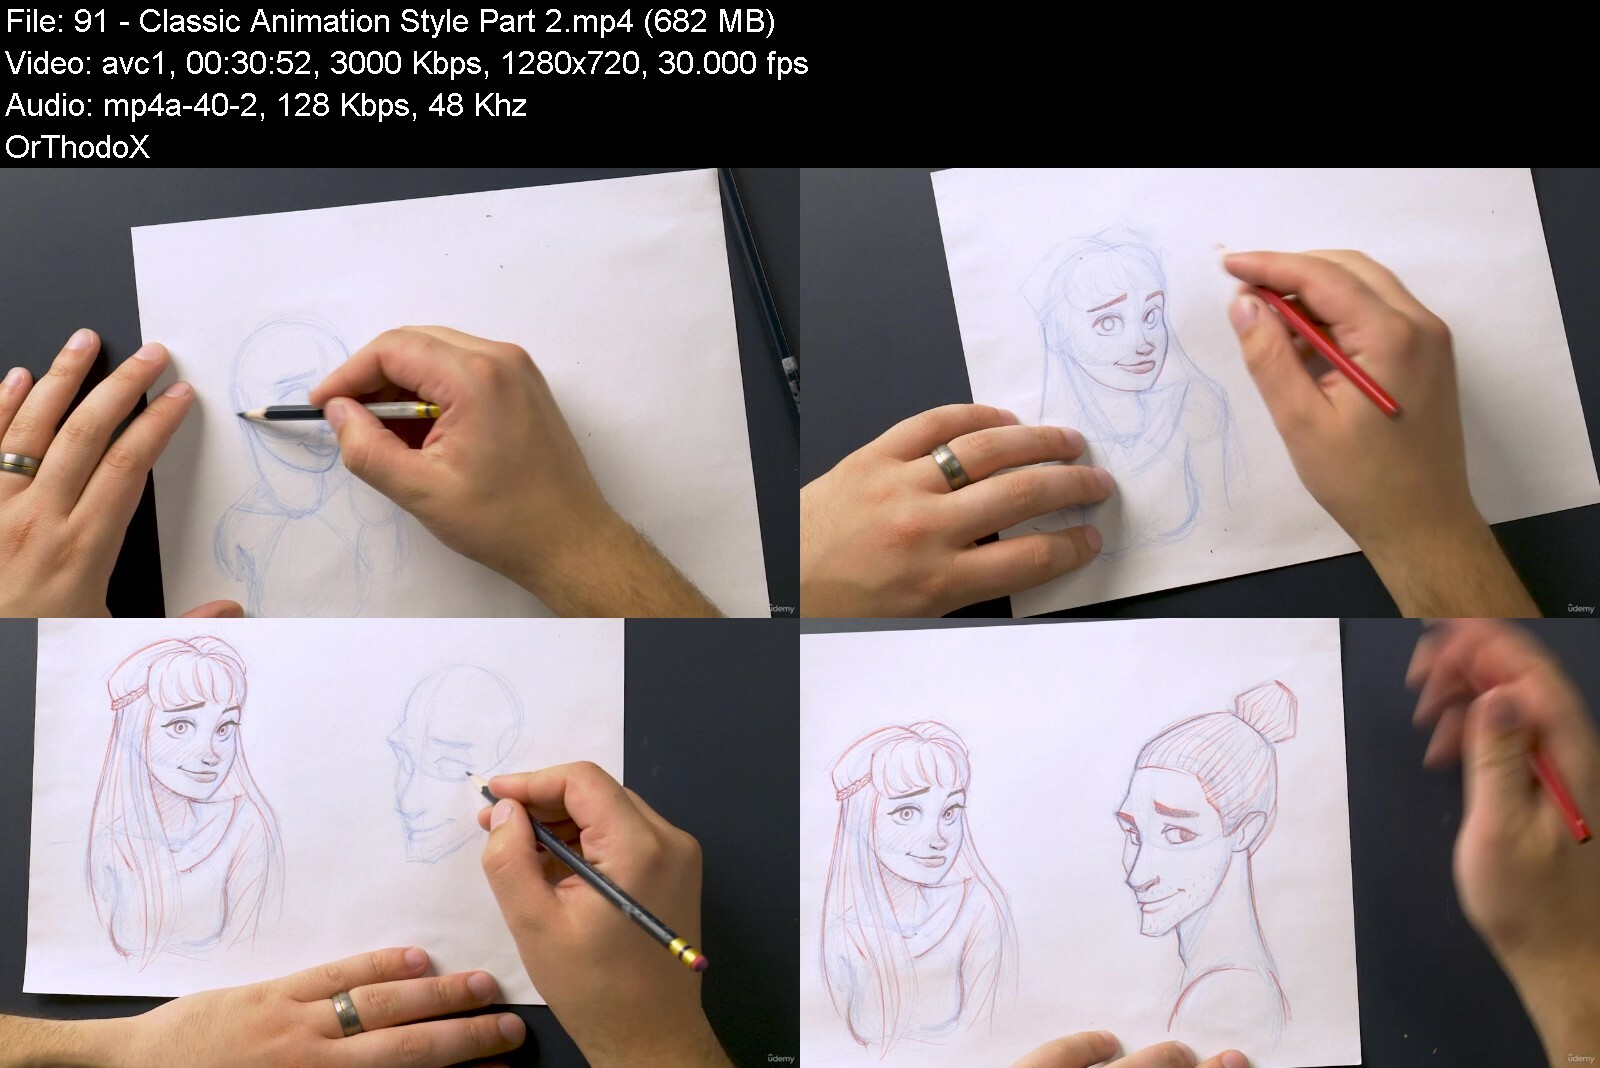
Character Art 2022

eciw8iemvoavaslyunpxt8bevg.jpg


Character Art 2022
Last updated 3/2022
MP4 | Video: h264, 1280x720 | Audio: AAC, 44.1 KHz
Language: English | Size: 13.24 GB | Duration: 23h 57m

Learn How To Draw & Design Characters. Obtain Valuable Drawing & Design Skills For Animation, Cartoons, & Video Games!


What you'll learn
How to design unforgettable characters
How to draw character body and poses
How to draw different styles of characters

Requirements
Paper & Pencil
Or digital means of drawing
A willingness to work hard and learn

Description
Join over 30,000 achieving student and start making your art dreams a reality through your drawings.NOW YOU CAN FIT ART SCHOOL IN YOUR POCKET.This course combines a simple effective teaching system with easy to follow videos and tons of projects to work on. And a mind-blowing 24 hours of video content straight to your fingertips. This will take you from beginner to advanced in how ever long you want it to take because its completely self guided. Take it at your own pace. PREVIEW SECTION 12 OF THE COURSE.If you scroll to section 12 you can watch the entire character design process through a two part film that demos a character design form start to finish. This course will teach you everything you need to know to design unbelievable characters. YOU'LL GAIN INSTANT ACCESS TO:12 sections - 95 lectures New and improved character design skills Access to The Artist Inner Family Facebook GroupQ&A Support through out the entire courseDownloadable resourcesStudent discounts to future courses100% absolutely no questions asked money back guarantee (for 30 Day) All future updates to the courseCAN YOU GIVE ME A QUCK RUN DOWN?Yes! Here's what you'll learn:Drawing fundamentalsStory tellingPencil controlDynamic posesStyle developmentBody proportions Drawing body formsDrawing facesDrawing handsForeshorteningGesture & PosesFacial expressionsHair & Costume Anime Disney animationComicPixar styleCharacter design demoFacebook groupTAKE A CLOSER LOOK.Section 2 You'll dive right into your first character drawings. It's never fun to listen to a bunch of lectures on theory for the first few hours of a course. It's much more fun to actually do. So you'll already be drawing characters by lecture 3. You'll get to draw a male and female character in this section. You can preview this section for free if you want to get a taste of the course. Section 3This section is called Learning The Fundamentals of Character Design because you will be learning everything you need to know in order to build a strong foundation. You'll learn everything from the drawing hierarchy to how line, shapes, and form are used in stages to create character designs.Section 4Welcome to drawing boot camp. This sections name comes form the fact that you will go through exercises that will strengthen you drawing ability. This includes pencil control, muscle memory, speed control, and pressure control. All of which are extremely important to character design. We call this section drawing boot camp because you'll change after going through it. Section 5Next your going to receive some extremely useful training. This whole section is on drawing the human body. You'll need the ability to draw the human form if your going to create good character designs. Through out this training you will learn how to draw every individual part of the human body from different angles and in different poses. This section breaks down the human body into simple to understand shapes and forms that you can replicate over and over again. And don't worry, you'll learn how to draw the male and the female forms.Section 6This section is all about how to pose that body that you're now an expert at drawing. In order to create exceptional character designs you need to know how to draw poses that are dynamic and have attitude. You'll learn all the different ways to make a pose dynamic and how to express a characters attitude, emotion, and just give them that appealing look. Trust me. By the end of this section you'll get it like a professional. Section 7The most important part of character design is always telling a story. Here you'll learn how to tell a story through your characters expression. First you need to know how to draw certain expression. Once you've mastered your character expressions you can start mixing and matching eye and mouth expressions to get a wide variety of emotions. Creating good expressions is the secret of the pros. Section 8You probably don't want your characters to be naked and bald so in this section you'll learn all about hair & costume design. Hairstyles and costumes are really what make characters iconic and memorable. So you'll learn all about how to give your character their "Thing" that will distinguish them form other characters. Section 9This section of the course will give you some very practical knowledge and skills in drawing characters in different genres. Character design is broken up into different genres. You'll be taught in-depth how to draw anime, Disney animation, comic, and Pixar cartoon styled characters over the course of 5 lectures. You won't want to miss this section!Section 10At this point you have acquired all the necessary skills and knowledge to design your own characters from start to finish. So now its time to put it all together. You'll get to watch a two part video of me designing a dragon slayer character from start to finish. This section demonstrates a character being imagined and developed right before your eyes. Theres no better way to learn than to watch others. WHY THIS IS THE BEST COURSE TO BUY.As an instructor I have always worked hard to build courses that are simple for students to understand and implement. I wanted to build a course that could take a student with little or no drawing skills and shape them up into a decent character designer in a short period of time. My company Jaysen Batchelor Education is committed to developing courses that exceed expectations and provide value above and beyond what is payed for. If you're not happy with the course you can always get a 100% money back guarantee within the first 30 days of purchasing the course. The refund process is hassle free and you won't be asked why. But I have a feeling you won't want to refund this course. This all comes under one convenient easy to use platform. Plus you will get fast, friendly, responsive support on the Udemy Q&A section of the course or direct message. I will be here for you every step of the way! So what are you waiting for? Sign up now and lets change your art world today!
Overview

Section 1: Introduction

Lecture 1 Introduction

Lecture 2 The Tools You'll Need

Section 2: Lets Draw Some Characters

Lecture 3 Drawing Character Roughs

Lecture 4 Refining Character Drawings

Lecture 5 Printable Step by Step How to Draw A Character Cheat sheet

Section 3: Learn The Fundamentals of Character Design

Lecture 6 The Drawing Fundamental Pyramid

Lecture 7 Line Fundamentals In Characters

Lecture 8 Shape Fundamentals In Characters

Lecture 9 Form Fundamentals In Characters

Lecture 10 Line Shape & Form Assignment

Lecture 11 Highlights & Shadows In Character Design

Lecture 12 Value Fundamentals In Characters

Lecture 13 Detail In Your Character Designs

Lecture 14 Contrast In Character Design

Lecture 15 Telling Story In Your Character Design

Lecture 16 Drawing Studies

Lecture 17 How Studies Apply to Character Design

Lecture 18 The Motivation Secret

Lecture 19 Section 3 Conclusion

Lecture 20 Section 3 Project

Section 4: Drawing Boot Camp

Lecture 21 Pencil Control Exercise

Lecture 22 How To Warmup

Lecture 23 Drawing 3D Forms In Characters

Lecture 24 How To Rotate 3D Forms In Your Head

Lecture 25 What Is A Dynamic Drawing!

Lecture 26 How To Create Depth In Your Character Designs

Lecture 27 How To Draw Light & Loose

Lecture 28 Line Weight In Character Design

Lecture 29 Refining Your Character Drawing In 3 Steps

Lecture 30 Developing Your Style

Lecture 31 Using Reference In Character Design

Lecture 32 How To Build Your Visual Library

Lecture 33 Checking Your Character Design For Fundamentals

Lecture 34 Section 4 Conclusion

Lecture 35 Section 4 Assignment

Section 5: Drawing The Human Form Training

Lecture 36 Introduction To Drawing Character Forms & Proportions

Lecture 37 Learn The Proportions Of The Human Body

Lecture 38 Line In The Body Form

Lecture 39 Shape In The Body Form

Lecture 40 Form In The Body Form

Lecture 41 Drawing The Head From Scratch

Lecture 42 Drawing The Face

Lecture 43 Learn To Draw Head Poses

Lecture 44 Drawing The Neck & Shoulders From Scratch

Lecture 45 Learn To Draw Neck & Shoulder Poses

Lecture 46 Drawing The Chest From Scratch

Lecture 47 Understanding The Chest Form

Lecture 48 Learn To Draw Chest Poses

Lecture 49 How To Draw Breast

Lecture 50 Drawing The Male Torso

Lecture 51 Drawing The Female Torso

Lecture 52 Drawing The Arms From Scratch

Lecture 53 Drawing The Legs From Scratch

Lecture 54 Learn To Draw Arm & Leg Poses

Lecture 55 Drawing The Feet From Scratch

Lecture 56 Drawing Hands From Scratch

Lecture 57 Drawing The Body Forms Togather

Lecture 58 Drawing Eyes From Scratch

Lecture 59 Drawing The Ear From Scratch

Lecture 60 Drawing The Lips From Scratch

Lecture 61 Drawing The Nose From Scratch

Lecture 62 Introduction To Facial Expressions

Lecture 63 Drawing Makeup

Lecture 64 Adjusting Character Proportions

Lecture 65 How To Draw A Balanced Character

Lecture 66 Drawing Foreshortening Like A Pro

Lecture 67 Section 5 Conclusion

Section 6: Character Gesture & Pose

Lecture 68 Introduction To Gesture & Line Of Action

Lecture 69 Line Of Action

Lecture 70 Drawing Action Poses

Lecture 71 Drawing Body Forms In Perspective

Lecture 72 Dynamic Axis In Poses

Lecture 73 Learning To Draw Dynamic Poses

Lecture 74 Drawing Simple Body Gestures

Lecture 75 Drawing Body Gestures With Form

Lecture 76 Gesture Drawing Session Assignment

Lecture 77 Differences In The Male & Female Forms

Lecture 78 Drawing Character Silhouettes

Lecture 79 Character Design Layout

Section 7: Character Expression And Emotion

Lecture 80 Drawing Eye Expressions

Lecture 81 Drawing Mouth Expressions

Lecture 82 Drawing Character Expression Sheets Part 1

Lecture 83 Drawing Character Expression Sheets Part 2

Section 8: Shading Your Characters

Lecture 84 Introduction To Shading Characters

Section 9: Hair & Costume Design

Lecture 85 Drawing Directional Hair

Lecture 86 Blocking Out Hair Shapes

Lecture 87 Blocking Out Costume Shapes

Lecture 88 Designing Your Character Costume

Section 10: Character Design Styles

Lecture 89 Anime Style Character Drawing

Lecture 90 Classic Animation Style Part 1

Lecture 91 Classic Animation Style Part 2

Lecture 92 Comic Style Character Drawing

Lecture 93 Cartoon Style Character Drawing

Section 11: Character Design Demos

Lecture 94 Character Design Demo One Part 1

Lecture 95 Character Design Demo One Part 2

Lecture 96 Realistic Character Design Demo

Section 12: Course Conclusion

Lecture 97 Course Conclusion

Section 13: Old Lectures

Lecture 98 Character Drawing Part 1

Lecture 99 Character Drawing Part 2

Section 14: Bonus Lecture

Lecture 100 Bonus Lecture

Student wanting to learn how to design characters,Students wanting to add a new skill to their tool belt,Students Willing to take action and start drawing amazing artwork,Students willing to put in some time to gain a new skill

Homepage


characterarti1d3k.jpg


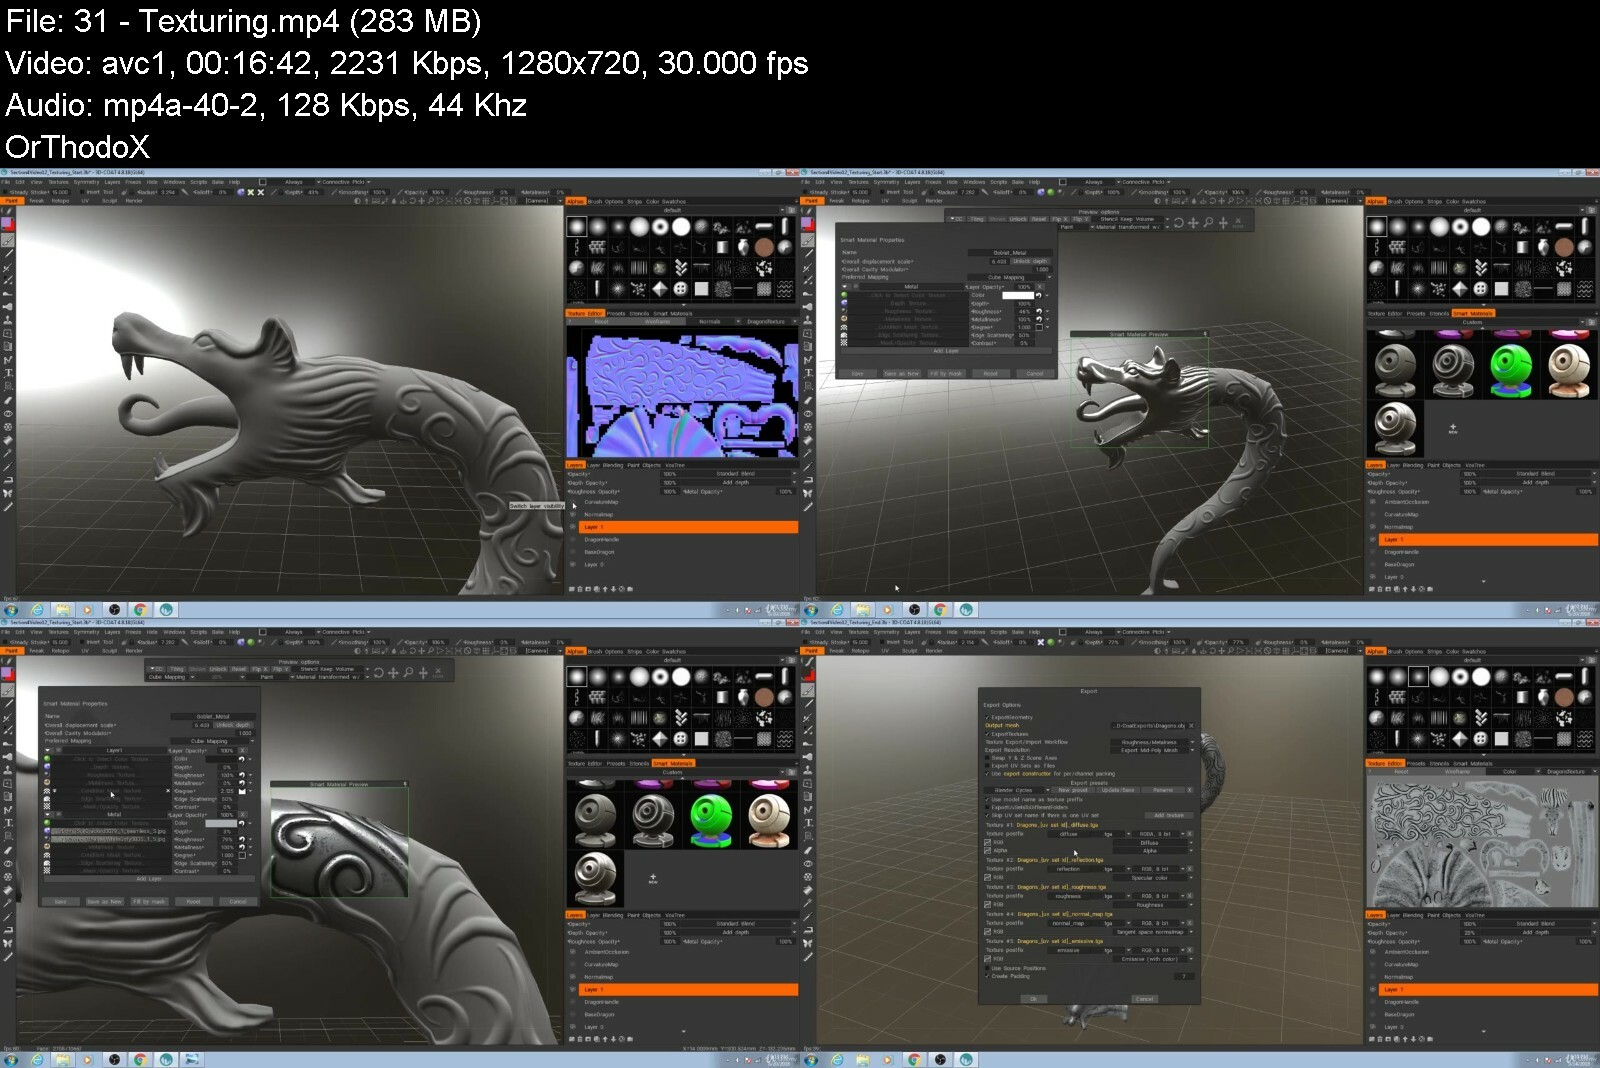
Advanced Prop Modeling - 3D Modeling In Blender

cswpksf2cqq234ablexlcmhcy9.jpg


Advanced Prop Modeling - 3D Modeling In Blender
Last updated 9/2018
MP4 | Video: h264, 1280x720 | Audio: AAC, 44.1 KHz
Language: English | Size: 6.98 GB | Duration: 6h 4m

Learn advanced 3D modeling, texturing, and rendering with Blender and 3D-Coat by creating a 3D asset and final image.


What you'll learn
Use 3D modeling in Blender to create a prop model that can be used as a game asset or in video for your projects, games, movies, or clients.
Make amazing looking 3D models by using advanced techniques, tips, and tricks with the popular Blender and 3D-Coat software.
Save time and money by creating your own 3D models, quickly and efficiently.
Learn 3D modeling, texturing, rendering, and exporting with Blender, the world's premiere 3D application for creating amazing game assets.

Requirements
Students who want to follow along with the project should have the newest version of Blender installed. We will be using the most current version at the time of this recording, but the tools and techniques are generally the same as other versions.
A basic understanding of the software Blender and 3D Coat is needed for this advanced course as we will discuss more advanced modeling tools and object management systems.
If you are new to Blender or 3D modeling, you may want to check out "Game Asset Crash Course - 3D Modeling in Blender and 3D-Coat" before watching this course.

Description
Get*up to speed on the techniques and pipelines to used create an advanced prop model in Blender!This online course will teach you how to use Blender and 3D-Coat to create a*PRACTICAL*REAL*WORLD ASSET*for your next project!Do you want to take your*3d modeling, texturing, and rendering, skills to the next level?Have you spent time and energy Googling Blender tutorials online, only to find out that it never covers exactly what you need?Do your 3D renders look plain and boring, and you want to know how to take your 3D models to the next level?If you answered yes to any of these questions,*you're*in the right place!*I know it can be frustrating watching other people post gorgeous looking renders*and game assets*online, while always wondering how they did it. You can spend hours or even days trying to find the right tutorial online to recreate a 3D asset.*Even then they don't always cover the complete pipeline from start to finish.That's why we*created this course - to teach people just like you how to easily get started with Blender.This course has been specifically designed with you in mind*and we*have developed a system to allow you to learn just what you need to know, only when you need it.*Have fun while learning!*Learn by actually doing!After enrolling in this course, you'll be taken through a complete advanced*project that will show you how to recreate a 3D asset from start to finish.*Follow along and practice while learning!Downloadable project files make it easy*to follow along and practice.The best part about a course like this is that you won't waste time learning tools and functions inside of Blender*that you will never use. Most courses will tell you about every little part of the program, which is daunting to most people.*Advanced Prop Modeling - 3D Modeling in Blender*will*show you the necessary tools as you apply them.This course will cover every aspect of:Blender and 3D-Coat's Interface and How to Navigate It3D Modeling a Complicated*3D AssetUV*Unwrapping, UV*Mapping and Understanding How UVs WorkHow Normals Work and How to Bake Textures Into Your ModelTexturing Your 3D*Models the Smart WayRendering and Compositing the Final Imageand so much more!Whether you want to create 3d assets just for fun, or you work in a production studio and need this information done right this instant, this course is for you. We will guide you every step of the way and are here to make sure you succeed in your ventures. We*are*always available to answer any messages, discussions, questions, or feedback that you have.Get a Certificate of Completion when you finish the course!With our 30-Day 100% money back guarantee, there's no reason hesitate!ENROLL*NOW

Overview

Section 1: Welcome to Advanced Prop Modeling - 3D Modeling in Blender

Lecture 1 Project Outline

Lecture 2 Setting Up the Project

Lecture 3 Setting Up the Reference

Section 2: Hard Surface Modeling

Lecture 4 Creating the Base (Part 1)

Lecture 5 Creating the Base (Part 2)

Lecture 6 Creating the Stem (Part 1)

Lecture 7 Creating the Stem (Part 2)

Lecture 8 Building the Base of the Bowl

Lecture 9 Creating the Bowl Base Details

Lecture 10 Creating the Glass

Lecture 11 Creating the Upper Glass Details

Lecture 12 Creating the Glass Details (Part 1)

Lecture 13 Creating the Glass Details (Part 2)

Lecture 14 Finalizing the Meshes

Section 3: UV Unwrapping

Lecture 15 Creating the Seams

Lecture 16 Optimizing the Hard Surface UVs

Lecture 17 Baking Normal Bevels

Section 4: Organic Modeling

Lecture 18 Basics of 3D Coat

Lecture 19 Creating the Base Shapes for the Dragon Handles

Lecture 20 Sculpting Smaller Forms

Lecture 21 More Specialized Sculpting Tools

Lecture 22 Finishing the Dragon Handles

Lecture 23 Starting the Stem Dragon

Lecture 24 Setting up the Stem Body

Lecture 25 Making the Stem Dragon Body

Lecture 26 Finishing the Stem Dragon

Lecture 27 Retopology

Lecture 28 Retopology (Part 2)

Lecture 29 UV Unwrapping

Lecture 30 Baking Texture Maps

Lecture 31 Texturing

Section 5: Finishing the Model and Textures

Lecture 32 Sculpting Hard Surface Pieces

Lecture 33 Baking Hard Surface Pieces

Lecture 34 Finishing Texturing

Lecture 35 Setting Up the Final Asset

Section 6: Shading and Rendering

Lecture 36 The Node Editor

Lecture 37 More Advanced Shaders

Lecture 38 Lighting the Subject

Lecture 39 Creating the Render

Lecture 40 Compositing the Final Image

This course is geared to anyone who wants to learn how to use Blender as well as Advanced 3D modeling, texturing, rendering, and exporting techniques.,This course is geared towards those who are already comfortable using Blender, as advanced techniques will be used throughout this course. It may not be suitable for beginners, and so you may want to watch "Game Asset Crash Course - 3D Modeling in Blender and 3D-Coat" course first to familiarize yourself with the software before continuing.,Anyone who is looking for a complete Blender course that explains every tool and facet of the application should not take this course. This is a course that provides a practical project for 3D artists in real world settings, so not every tool and function will be explained.


advancedpropmodeling3qyf2y.jpg


Creating Destroyed Assets for Games: In-Depth Tutorial Course

creatingdestroyedasse6xeq7.jpg


Creating Destroyed Assets for Games: In-Depth Tutorial Course
Emiel Sleegers | Duration: 27h 12m | Video: H264 1920x1080 | Audio: AAC 44,1 kHz 2ch | 16 GB | Language: English

Learn how a professional environment artist works when creating destroyed assets for games. You'll learn techniques like correct asset planning, creating modular assets, creating destroyed concrete and pillars, creating destroyed wood/flooring, creating rubble piles, simulating debris, and more!

All the modeling will be done in 3DS Max, However, we have also included bonus chapters on how to do non-universal techniques in Maya and Blender. The of the techniques used are universal and can be replicated in any other 3d modeling package. Sculpting will be done in Zbrush and mask/material creation will be done in Substance Painter and a little bit of Substance Designer. The entire level will be set up in Unreal Engine 5 and we will also use a bit of photoshop and DaVinci resolve.

At the end of this course, you will have a deep understanding of how to create destruction for games. Please note although all textures are included we will not go over how to create them, this course is solely focused on creating the destroyed assets and doing some level art.

Homepage


creatingdestroyedasseyii16.jpg


Canva Course 2022: Become A Canva Expert

47505441f803k1ise.jpg


Canva Course 2022: Become A Canva Expert
Published 08/2022
MP4 | Video: h264, 1280x720 | Audio: AAC, 44.1 KHz, 2 Ch
Genre: eLearning | Language: English + srt | Duration: 83 lectures (13h 28m) | Size: 12.5 GB


Learn New Way of Designing Amazing Graphics Using Canva With No Prior Experience


What you'll learn
Learn the fundamentals of Canva & graphic design while having fun
Build a strong brand identity & a brand style guide for your business
Discover how to make a positive first impression with all your designs
Learn the smart Canva workflow that will allow to create final assets that are reusable and that continually save you time
Learn to create animated graphics, ebooks, videos, presentations, and much more
Tips and tricks to use in designs which scream 'Professional Designer' to your audience
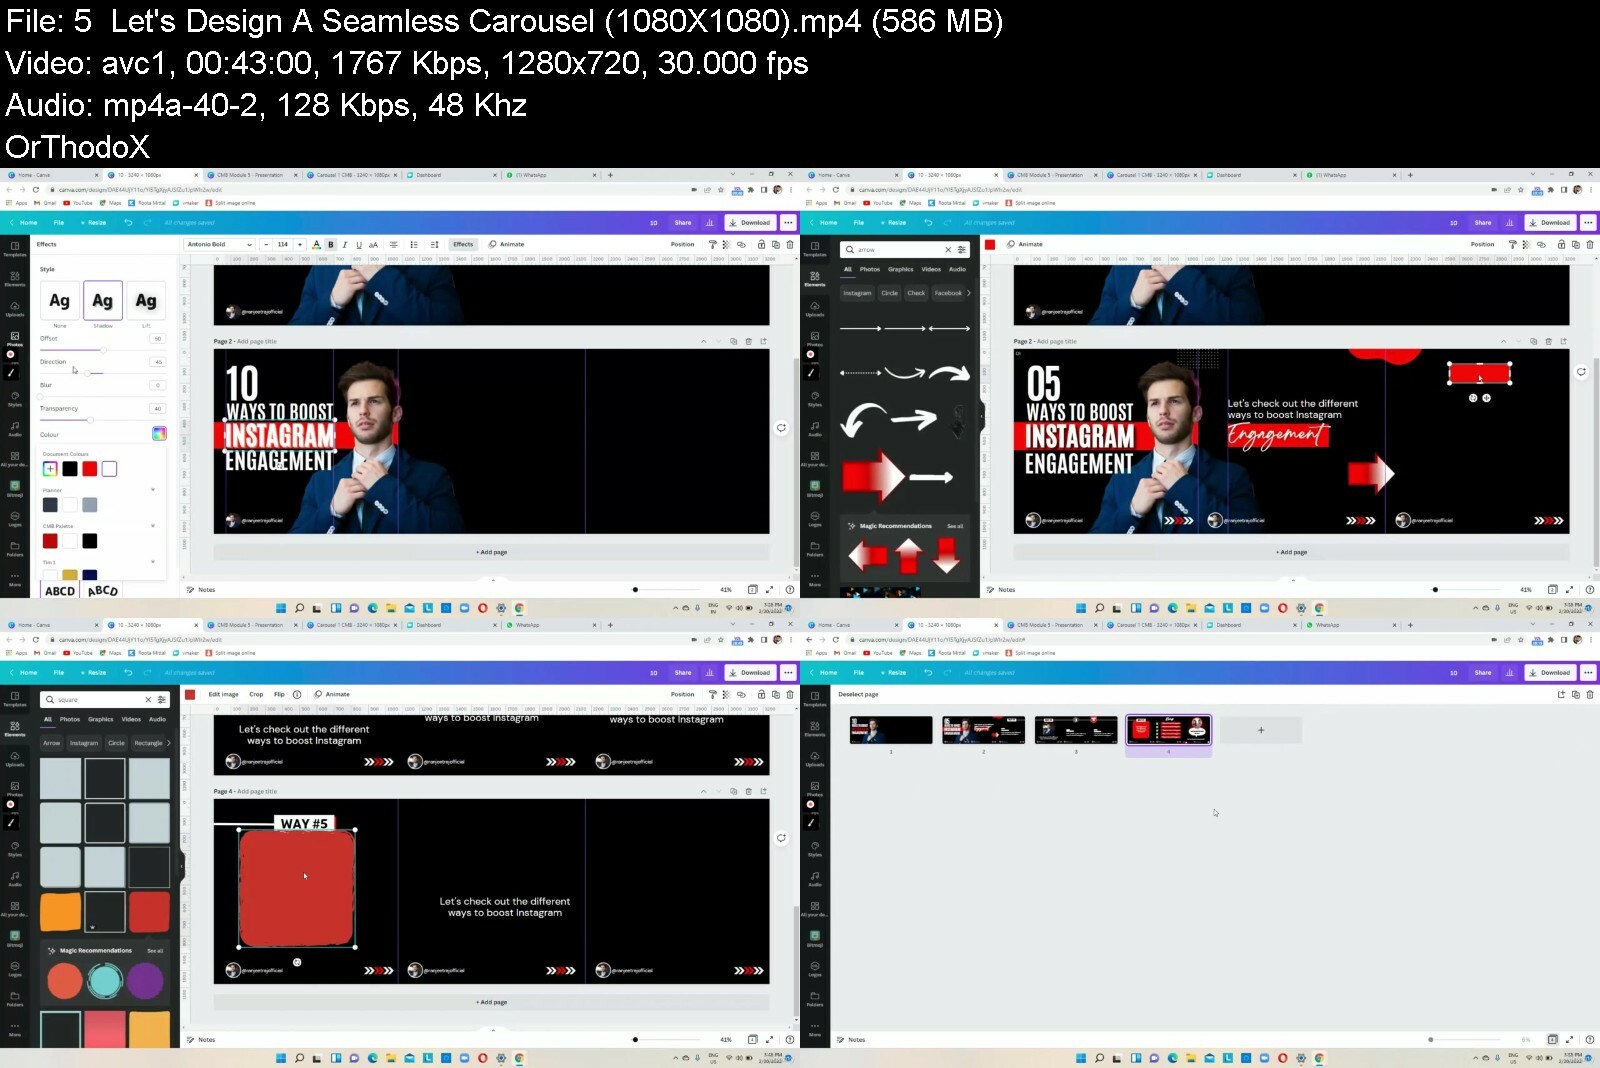
Master the art of designing seamless carousels and all graphics that are important to build digital presence on social media
Learn the secrets to start your journey as an International Freelancer and get paid over $1000/month

Requirements
You will need a laptop or desktop computer and an Internet connection. No previous design skills required.
Having a Canva account (a free version is enough) and a basic knowledge on how to use it
Willingness to learn and play

Description
We know, it can be really hard to create that one piece of design that people can't say no to.

Even the perfect designs comes back for revisions, but you know, it is what it is. As a designer you should be ready for this, but what if you are not good at using tools like Adobe Photoshop or Illustrator?

Does that mean you cannot make good designs that makes your client say WOW in the first look?

Of course you can! That is where Canva comes into picture.

Canva is THE BEST tool all around the web that can help you in designing beautiful graphics in no time.

- No stress over monthly subscription charges as it is completely free

- 1000s of Pre-made design templates are available for you to use

- Super user-friendly interface

and what not!!

If you're still reading this then you are someone who want professional quality Graphic Designs but don't want to pay a Designer or spend hours of precious time learning complicated and expensive software?

And guess what? You don't have to!

So, if you're tired of

The steep learning curve of other software

Staring at a blank page

Spending too much time on your designs and marketing assets

Creating designs that leave you disappointed

Well, worry no more, because it's here!

This course is a step-by-step comprehensive framework that will help to transform you from a beginner to an expert Canva graphics designer and also help you to start your journey as an international freelancer.

See what's waiting for you inside once you enroll.

Introduction to Canva

Graphic Design Principles & Basics

Canva Brand Kit & Important Features

Designing Instagram Graphics On Canva

Seamless Carousel Designing Mastery

Social Media Graphics Mastery

All About Freelancing

Top notch designing videos from basic to advance at one place. No more scrolling through the internet for tutorials. Avoid wastage of time and grab this opportunity right now.

This course will help you to become a Top-notch designer even if you are completely beginner at it!

By the end of this Canva Master Course you will have created a full set of consistent visuals that will actually help you promote your brand. You will have mastered Canva and will be able to use it to produce any kind of visuals you need in the future, allowing you to save time, money and take your design skills to the next level!

So what are you waiting for? Click on Enroll Now! See you on the other side

Who this course is for
Virtual Assistants - Who need to create professional graphics & designs for their clients
Content Creators - Who need to produce graphics without wanting to spend hours learning expensive, complicated software
Graphic Design Enthusiasts - Beginner designers and anyone interested in graphic designing
Social Media Managers - Who want to learn an in-demand skill and help brands in growing their visual influence
Freelancers - Who wants to boost their career on Fiverr, Upwork, etc
Business Owners - Who wants to create a strong brand identity


canvacourse2022becomek1dpt.jpg


Character Creation For Game | Complete Pipeline

ifz2xunwzrt1a05nugj0v1sfdg.jpg


Character Creation For Game | Complete Pipeline
Last updated 1/2021
MP4 | Video: h264, 1280x720 | Audio: AAC, 44.1 KHz
Language: English | Size: 12.18 GB | Duration: 15h 21m

Learn the entire pipeline from sculpting to texturing with Zbrush, Topogun, Maya, Substance Painter & Marmoset toolbag.


What you'll learn
Making Shirt, Jacket & Pant in Marvelous Designer
Learning Different Type of Folds
Retopology
UV Unwrapping
Texturing Skin and Clothing
Creating Hair Cards
Rendering for presentation shots

Requirements
Basic knowledge of Zbrush
No Marvelous Designer knowledge required

Description
Do you want to make the entire character by yourself starting from sculpting to texturing and hair cards ?Welcome to Nexttut Education's Character Creation for Game | Complete Pipeline CourseINSTRUCTOR : My name is Masuk Ahemad, I am a 3d modelling and texturing artist. I have been working in production since 20. Currently I am working at Little red zombie studio in India.GOAL OF*THE*COURSE : At the end of this course, you will be able to use Marvelous Designer & Zbrush workflow to create high quality realistic clothing for AAA game male characters and you will be able to Retopo your Zbrush character sculpt and create the low poly version for game, texture skin and clothing and create game ready hair for your character and render images for presentation.YOU WILL LEARN :In this course, we will be covering:Sculpting the base bodyCreating cloth patterns in MDRefining the wrinkles and folds in ZbrushAdding memory foldsAdding Wear & TearPosing the CharacterRendering for presentationRetopology methodUV UnwrappingTexturing Skin and clothingCreating Hair cardsRendering for presentation shotsFirst we are going to model the base body in Zbrush then I will export the model into Marvelous Designer. There I will create pattern for shirt, inner jacket and pant. Don't worry if don't know anything about Marvelous Designer. I have covered the basics of MD before I create the clothes.Once I am happy with the overall look & feel of the folds and wrinkles then I will move to Zbrush. There I am gonna clean up the MD mesh and refine the fold and wrinkles. After that I will add some tertiary level details such as small wrinkles, memory folds, wear & tear.After completing the clothing, I will Work on the head, hand, hair & shoe to complete the character. And finally I will pose the character and render for final presentation image. and then take that to Topogun to do the low poly version then we are gonna move to Maya for UV unwrapping. once I am done with UV I will use Marmoset toolbag to bake all the maps I need for texturing. then I will use the very powerful Substance painter to texture tho clothe and the skin. Finally I am going to show you how to create hair using hair card Technic and render some final images which you can use for your portfolio.IDEAL*STUDENTS : I have design this course keeping in mind the students who struggles to model realistic clothing for characters. This course is also for artist who wants to speed up their cloth modeling workflow by replacing the old school hand sculpting method to MD & Zbrush workflow. I have also designed this course for Intermediate modeling students and artist who wants to texture their Zbrush high poly characters and create hair for real time games but they don't have any step by step tutorial to follow. In this course I have used Zbrush, Maya, Topogun, Substance painter and Marmoset toolbag so make sure you have installed these software in order to follow the course properly.WHO*IS*NOT*THE*IDEAL*STUDENT :This course is not for absolute zbrush beginners, as I haven't spent mush time on zbrush basics. so I expect you to have some sort of zbrush basic experience. 30 DAYS*MONEY*BACK : There is a 30 days money back guaranty so there isn't any risk to enroll to the course. So enroll now and take your Zbrush sculpt and make it game ready with beautiful textures and Hair. The tiny investment you make for this course will pay you for the rest of your life.

Overview

Section 1: Introduction

Lecture 1 My Tools and References

Lecture 2 My Zbrush UI

Lecture 3 Download Resources

Section 2: Blocking out the character in Zbrush

Lecture 4 Blocking out the body

Lecture 5 Preparing the model for MD

Section 3: Blocking out Clothing in Marvelous Designer

Lecture 6 A brief Introduction to Marvelous Designer

Lecture 7 Clothing in Marvelous 1

Lecture 8 Clothing in Marvelous 2

Lecture 9 Clothing in Marvelous 3

Lecture 10 Clothing in Marvelous 4

Lecture 11 Clothing in Marvelous 4 part2

Lecture 12 Exporting mesh out of Marvelous Designer

Section 4: MD to Zbrush

Lecture 13 Creating a clean mesh for Zbrush

Lecture 14 Preparing the model for sculpting

Section 5: Detailing the Clothing in Zbrush

Lecture 15 Essential Concepts for Sculpting Clothing

Lecture 16 Proportions and cleanup

Lecture 17 Secoundary folds and seams

Lecture 18 Tertiary folds and wear and tear

Lecture 19 Shoes and belt

Section 6: Detailing the Character in Zbrush

Lecture 20 Sculpting the head

Lecture 21 Sculting the hands

Section 7: Rendering the Character for Presentation

Lecture 22 Posing the Character

Lecture 23 BPR Rendering

Lecture 24 Compositing in Photoshop

Section 8: Preparing The model for Retopology

Lecture 25 Cleaning up the jacket

Lecture 26 Cleaning up the shirt and the sweater

Lecture 27 Cleaning up the pants

Lecture 28 Decimating the model

Lecture 29 Exporting the model

Section 9: Retopology in Topogun

Lecture 30 Introduction to Topogun

Lecture 31 Retopologizing the jacket back part -1

Lecture 32 Retopologizing the jacket back part -2

Lecture 33 Retopologizing the jacket front part -1

Lecture 34 Retopologizing the jacket front part -2

Lecture 35 Retopologizing the jacket sleeves part -1

Lecture 36 Retopologizing the jacket sleeves part -2

Lecture 37 Retopologizing the Sweater

Lecture 38 Retopologizing the Sweater

Lecture 39 Retopologizing the pants part -1

Lecture 40 Retopologizing the pants part -2

Lecture 41 Retopologizing the pants part -2

Lecture 42 Retopologizing the head - Eyes and Nose

Lecture 43 Retopologizing the head - Ears

Lecture 44 Retopologizing the head - Mouth and cheeks

Lecture 45 Finalizing the head

Lecture 46 Cleaning up the head in Maya

Lecture 47 Retopologizing the head - eyeballs

Lecture 48 Retopologizing the hands

Lecture 49 Retopologizing the Shoes and belt

Lecture 50 cleaning up the mesh

Section 10: UV-ing the Character

Lecture 51 UV-ing the upper clothing

Lecture 52 Packing the upper clothing

Lecture 53 UV-ing the lower clothing

Lecture 54 UV-ing the heads and hands

Section 11: Baking the model in Marmoset Toolbag

Lecture 55 Preparing the model for baking

Lecture 56 Baking the character

Lecture 57 Cleaning up the normal map

Section 12: Texturing the clothing

Lecture 58 Introduction to substance painter

Lecture 59 Adding base material to the clothing

Lecture 60 Adding colour variation to the clothing

Lecture 61 Detailing the shoe and the belt

Lecture 62 Adding dirt to the upper clothing

Lecture 63 Adding damages to the lower clothing

Lecture 64 Adding damages to the upper clothing

Section 13: Texturing the Skin

Lecture 65 Texturing the head - sub dermis layer

Lecture 66 Texturing the head - Skin layer

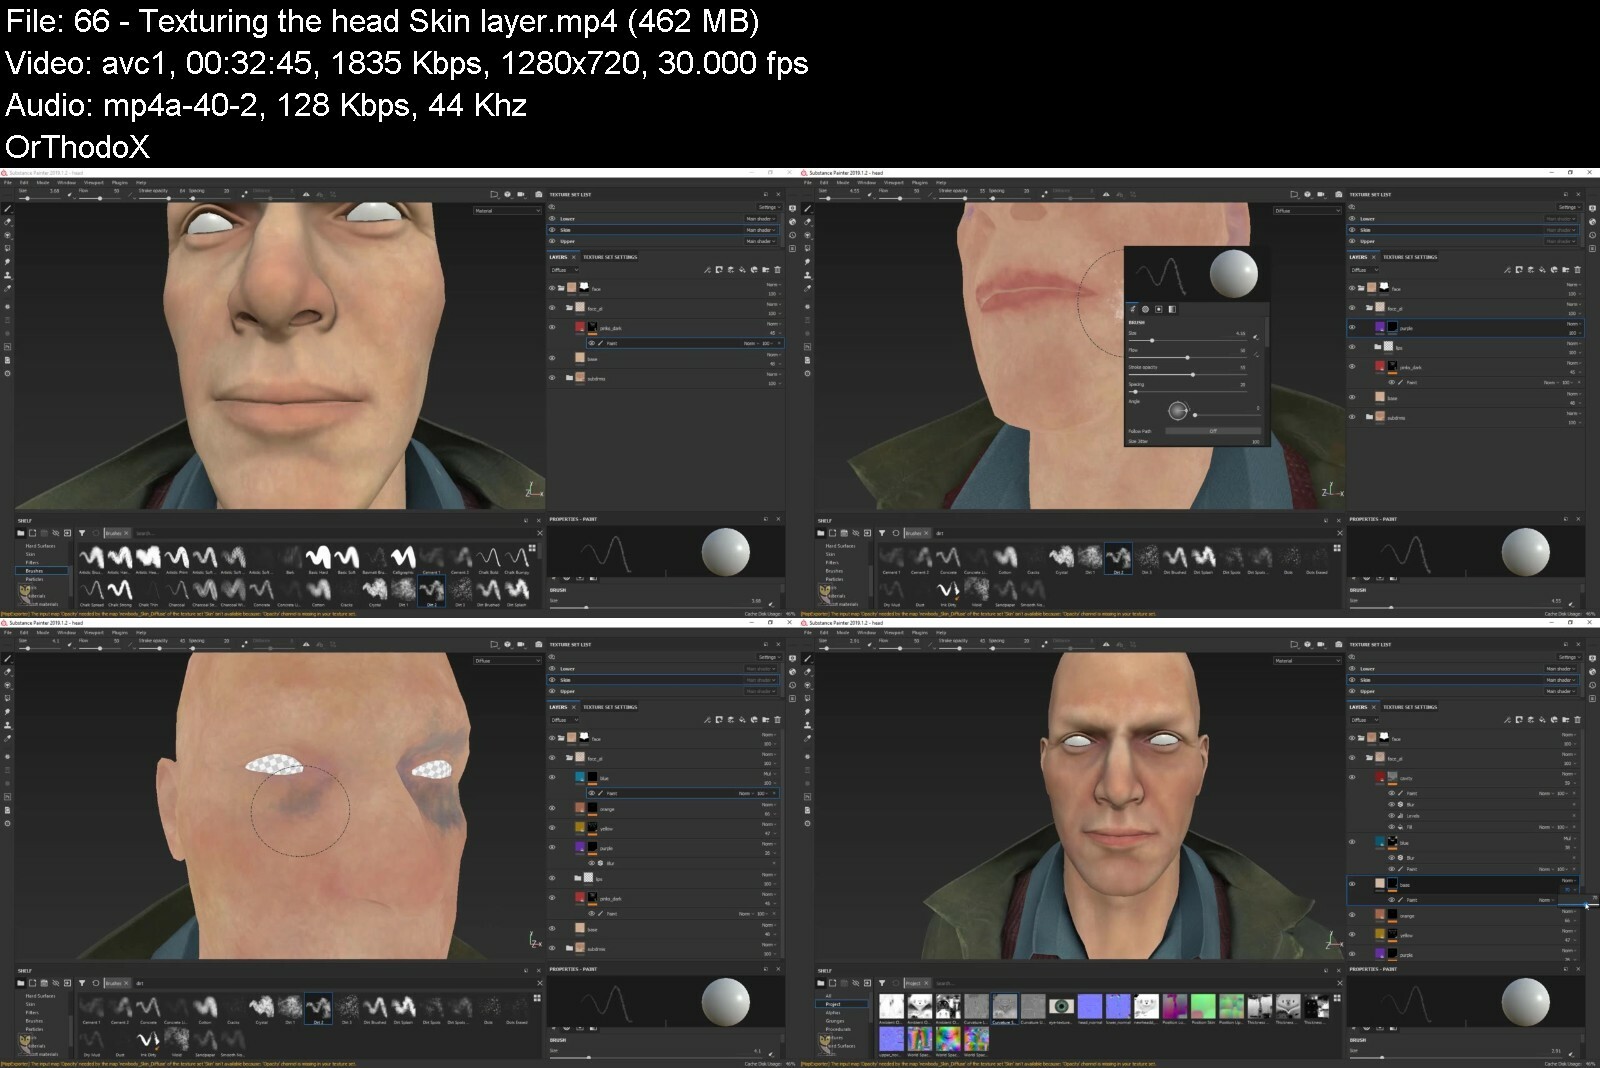
Lecture 67 Texturing the head - Irregularities layer

Lecture 68 Texturing the head - Eyes and Additional maps

Lecture 69 Texturing the hands

Lecture 70 Exporting the textures

Section 14: Setting up the Marmoset toolbag

Lecture 71 Setting up the marmoset file

Lecture 72 Lighting the Scene

Section 15: Hair

Lecture 73 Creating the Hair alpha

Lecture 74 Creating the Hair cards

Lecture 75 Final Render

Section 16: Conclusion

Lecture 76 Goodbye

Lecture 77 Bonus Lecture : What should be your next course

Intermediate modeling students and artist who wants to texture their Zbrush high poly characters and create hair cards for real time games but you don't have any step by step tutorial to follow along.,Students who struggles to model realistic clothing for characters.,Artist who wants to speed up their cloth modeling workflow by replacing the old school hand sculpting method to MD & Zbrush workflow.


charactercreationforgrycm9.jpg


Catia Academy: A Comprehensive Course On Catia V5

0kk3n94ryjlyydkz3xi36hsdyi.jpg


Catia Academy: A Comprehensive Course On Catia V5
Last updated 7/2022
MP4 | Video: h264, 1280x720 | Audio: AAC, 44.1 KHz
Language: English | Size: 12.56 GB | Duration: 21h 22m

An Ultimate CATIA V5 Course with Quizzes & Hands-On Training: Learn Parts, Surface, Sheet-Metal, Simulations & Drafting


What you'll learn
Confidently able to create 3D Models. & Assemblies.
Able to use CATIA DMU Kinematics for Simulation & Motion Analysis.
Able to use CATIA Generative Sheet Metal interface to create Sheet Metal Designs.
Able to use CATIA Drafting interface to create Drawing Sheets of Parts, Assemblies & Sheet Metals.
Able to work in Generative Shape Design(Surfacing) interface in CATIA, to create locomotives designs.
Perfect course to prepare for CATIA Dassault Certification Program for Structural Designs.

Requirements
No prior knowledge required, just need desire to learn.
Any Version of CATIA V5.

Description
This is a full-length course on CATIA V5. This course will take you on a journey from nothing to a certified CATIA Designer. We have tried to make this course so comprehensive that you can get almost all demanding topics necessary in industries. This course includes all the tools that are required to create the basic and complex structures on the interfaces like Part Designs, Assembly Designs & Generative Sheet Metal Designs.-------------------------------------------------------------------Why you should take this course?Firstly this course is made by the professional expert, who has more than 5 years of teaching experience and he knows how to make student understand every tools and topics.There are 120+ Lectures covering almost all the tools that is important for 3D Modelling in CATIA.This Course is made using*CATIA*V5 R19 version but you can able to work on any version of CATIA*V5.We keep on upgrading this course according to the feedback of the students, and all the upgrades are always free once you enrolled.We have covered the DMU*Kinematics Section in CATIA, with every details that you require for creating the simulation of the product.We have also included Video Examples for Assembly & Simulation of Various Product, Like Engine, CAM*Follower, Shaper Mechanism. So that you understand the Assembly & Simulation clearly.We have also covered Generative Shape Design(Surfacing), which is the most important module in CATIA. We have also included Generative Sheet Metal Design that is one of the strong part of CATIA.We are always there to help you, just ask your doubts, we will clear them as soon as possible.Topics That We Cover In this Course.Sketcher: We will learn basic tools that are required for sketching your 2D Designs, We will learn about basic shapes, basic modification tools, and some advanced tools.Part Design: In this module, we learn to create 3D Models, we will going to spend a good time here learning all the tools used to create and modify models.Assembly Designs: Assembly is yet another important topic in which we will learn how to assemble parts and sub-assemblies to create a complete product. Here we will be going to use different constraints for our assemblies.DMU*Kinematics: This is a very interesting module in which we will learn to simulate the product that we will create in an assembly, we will learn to create manual as well as automatic joints, there will be lots of examples as well that will help you to clear out your concepts.Sheet Metal: Sheet Metal is one of the most popular interfaces in CATIA, In this module, we will going to learn, how to create bends and cuts in the sheets and we will also going to different kinds of the stamping process.Generative Shape Designs(Surfacing): This is the most important module in CATIA. CATIA*is widely used in locomotive industries for creating outer bodies of locomotives, that is majorly done in Generative Surface Design(Surfacing) Only.Drafting: In this, we will going to learn to produce our model into the drawing sheets with different views, like Standard Views, Section Views, etc. We are also going to see various annotations like Dimensions, text, etc., We will learn to create drawings of Parts, Assemblies, and Sheet Metals as well.Overview of What you will learn?Brief understanding of the interface of the CATIA Workbench.How to create sketches using different sketch tools.How to use constraints to define your sketch.How to create 3D Models with different Modelling tools like, PAD,*Pocket, Shaft, Multi-section solid.How to create User Defined references, like Reference Plane, Points & Line.How to apply different materials and create rendering of the parts and product.How to use Different Pattern tools available in CATIA.We will cover some advance modelling tools, like Rib, Multi-Section with Guide Curve, etc.How to assemble the parts in Assembly design workbench.Some Important Assembly Features, like Multi-Installation, Define Multi Installation.After Assembly, we will simulate the product with DMU*Kinematics Workbench.How to manually create simulation joints like, Revolute, Cylindrical, Planer Joints, etc.How to use "Assembly Constraints Conversion" tool for converting assembly joints into simulation joints.We will create sheet metal parts using "Generative sheet metal design interface"We will going to see tools like Flanges, Wall edge, Extrusion, Default Stamping tools.We will going to create user stamp as well and we will create dining plates and different exercises with that.Finally we end this course with Drafting, we create standard drafting using First & Third angle projections.We will see different view tools, like Section View, Projection View, etc.We will learn different annotations like dimensions, text, leader.We will also learn to create Assembly drafting and Sheet Metal Drafting.So, Overall it's a complete course to learn CATIA. And Don't worry about your doubts, we are always there to help you during this course, Just Ask!

Overview

Section 1: Let's Get Started with Basic Shapes

Lecture 1 An Introduction to CATIA V5.

Lecture 2 An Introduction to Sketcher Workbench.

Lecture 3 Toolbars that we will cover.

Lecture 4 Grids, Line & Profile Commands.

Lecture 5 Different Types of Lines.

Lecture 6 EXERCISE TIME! Your First Exercise.

Lecture 7 Circles & Arcs.

Lecture 8 IMPORTANT! Dimensional & Geometrical Constraints.

Lecture 9 Geometrical Constraints & Constraints Features.

Lecture 10 EXERCISE TIME! Use of Constraints.

Lecture 11 Pre-Defined Toolbar.

Lecture 12 Reset your Workspace.

Section 2: Let's Learn About Operation Toolbars

Lecture 13 Trim & Break.

Lecture 14 Quick Trim, Close & Complement.

Lecture 15 Working with "Corner".

Lecture 16 Some More Properties of Corner.

Lecture 17 Adding Chamfers to a Sketch.

Lecture 18 EXERCISE TIME! Grab the basics.

Section 3: Let's Learn About Sketch Transformation Toolbars

Lecture 19 Sketch Transformation: Translate.

Lecture 20 Sketch Transformation: Rotate.

Lecture 21 Sketch Transformation: Scale & offset.

Lecture 22 More Properties of Offset.

Lecture 23 Sketch Transformation Part 4: Mirror & Symmetry.

Lecture 24 EXERCISE TIME! Use of Mirror & Offset.

Lecture 25 EXERCISE TIME! Use of Rotate & Offset.

Section 4: Let's Get Started with Part Design Interface

Lecture 26 An Introduction to Part Design Workbench.

Lecture 27 Sketch Based Feature: Pad Feature.

Lecture 28 Conditions for PAD.

Lecture 29 Different Display Features & Use of Body Surface.

Lecture 30 Table Support & Mouse Handling.

Lecture 31 Parametric Nature of the Software.

Lecture 32 EXERCISE TIME! Use of PAD Feature.

Lecture 33 Properties of PAD: Lecture 1.

Lecture 34 Properties of PAD: Lecture 2.

Lecture 35 Sketch Based Feature: Pocket Feature.

Lecture 36 EXERCISE TIME! Use of PAD & Pocket Feature.

Lecture 37 Sketch Based Feature: Multi-PAD & Multi-Pocket.

Section 5: Let's Learn more about Part Design

Lecture 38 Sketch Based Feature: Shaft & Groove.

Lecture 39 More Properties of Shaft & Groove.

Lecture 40 Dress Up Features: Shell & Multi Shell.

Lecture 41 EXERCISE TIME! Use of Shaft & Shell.

Lecture 42 Object Color & Object Transparency.

Lecture 43 Applying Material from Material Library.

Lecture 44 Creating Custom Materials.

Lecture 45 Measuring Tools in CATIA.

Lecture 46 Edge Fillet, Face-Face Fillet & Tri tangent Fillet.

Lecture 47 Properties of Fillets.

Lecture 48 Properties of Fillets(Continue)

Lecture 49 Variable Radius Fillet.

Lecture 50 Creating Chordal Fillets.

Lecture 51 Dress Up Feature: Chamfer Edge.

Lecture 52 Exercise Time! Use of fillets.

Lecture 53 Project 3D Element.

Lecture 54 Creating Stiffeners.

Lecture 55 Creating Sections by Stiffener.

Lecture 56 Exercise Time: Use of Stiffener.

Lecture 57 Exercise Time: Stiffener for Circular Sections.

Section 6: Let's Learn About 3D Transformation Features

Lecture 58 Using Translate Feature.

Lecture 59 Symmetry, Rotate & Axis-Axis.

Lecture 60 Use of Rectangular Pattern.

Lecture 61 Properties of Pattern.

Lecture 62 Use of Circular Pattern.

Lecture 63 Creating User Pattern.

Lecture 64 3D Transformation Features Part 5: Scaling & Affinity.

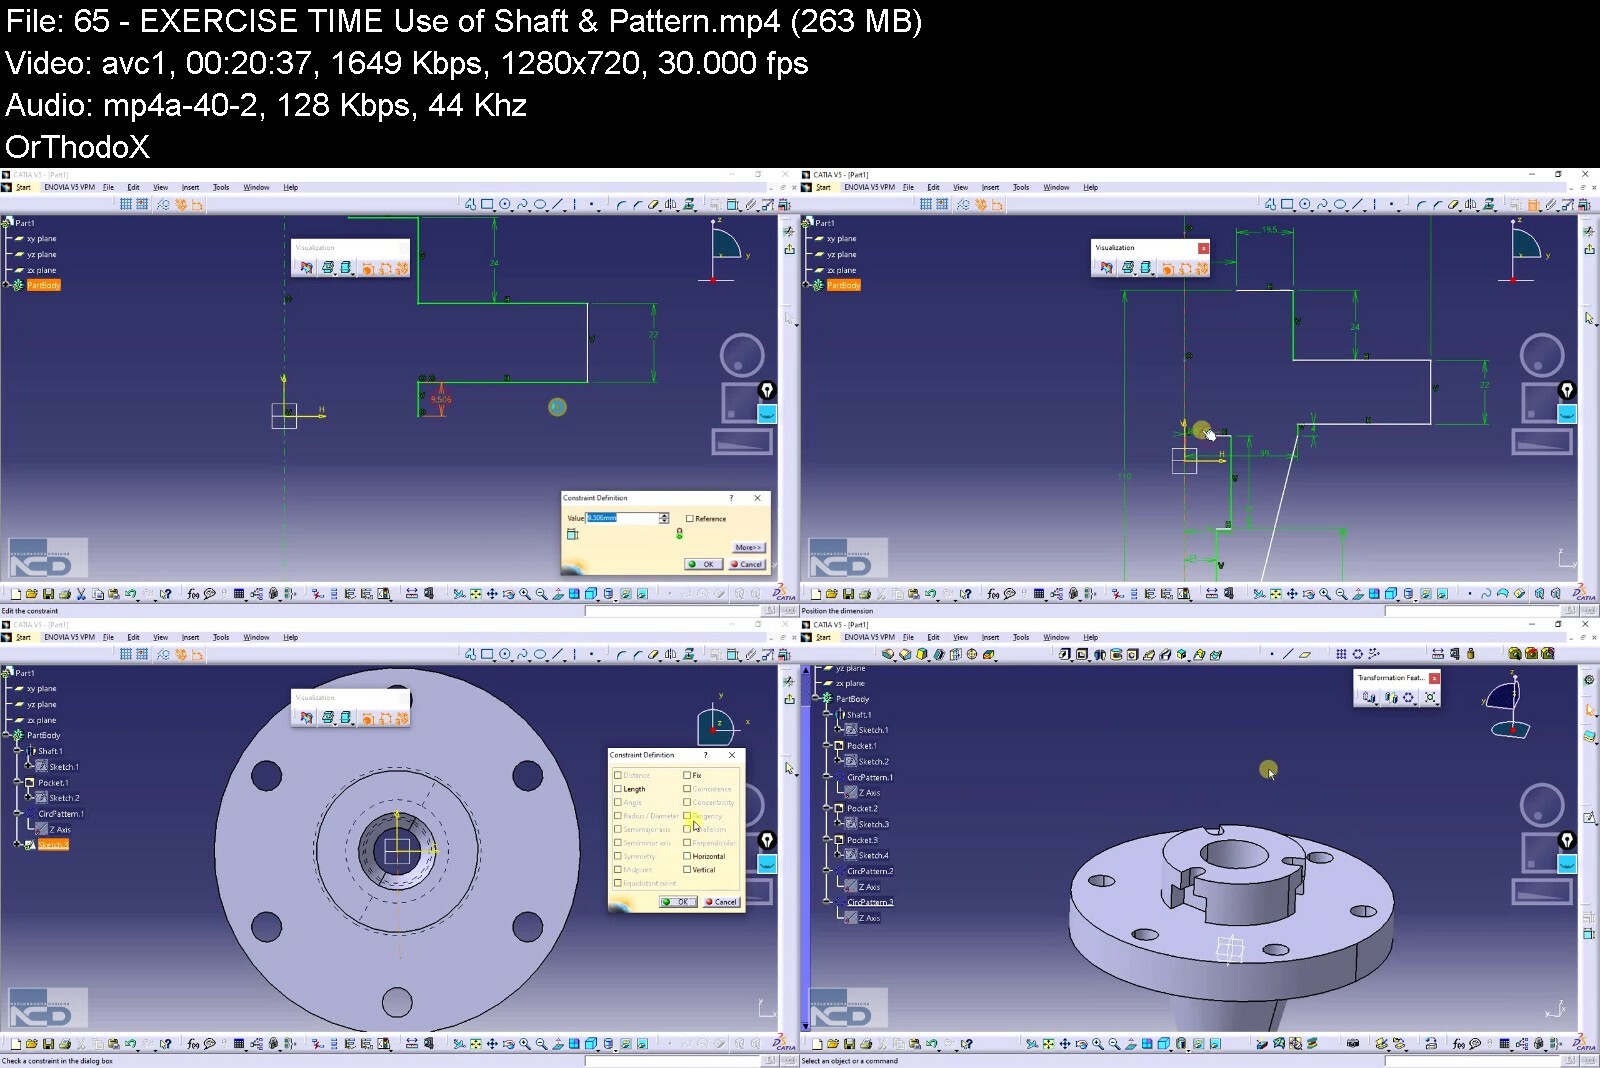
Lecture 65 EXERCISE TIME! Use of Shaft & Pattern!

Section 7: Let's Get to know some Reference Elements

Lecture 66 Reference Elements: Part 1: Reference Points.

Lecture 67 Reference Elements: Part 2: Reference Planes.

Lecture 68 Reference Elements: Part 3: Reference Line.

Section 8: Let's Learn Some Advance Modelling Tools

Lecture 69 Advance Modeling Tools Part 1: Rib & Slot.

Lecture 70 Advance Modeling Tools Part 2: Helix.

Lecture 71 EXERCISE TIME! Use of Rib Feature.

Lecture 72 Advance Modeling Tools Part 3: Multi-Section Solid.

Lecture 73 Multi-Section Solid: Part 2.

Lecture 74 Multi-Section Solid: Part 3.

Lecture 75 Exercise Time! Use of Multi Section.

Lecture 76 Muti-Section Solid with Guide Curve: Part 1.

Lecture 77 Multi-Section Solid with Guide Curve: Part 2.

Section 9: Let's Get Started with Assembly Design Interface

Lecture 78 Introduction to An Assembly Design.

Lecture 79 Bush & Shaft Assembly: Part 1.

Lecture 80 Bush & Shaft Assembly: Part 2.

Lecture 81 Manipulation Tools.

Lecture 82 Assembly Constraints Part 1: Coincident & Contact Constraints.

Lecture 83 Assembly Constraints Part 2: Offset, Fix & Angle Constraints.

Lecture 84 Assembly Constraints Part 3: Quick & Fix Together Constraints.

Lecture 85 EXERCISE TIME! Single Cylinder Engine Assembly.

Section 10: Let's Get Some Handy Tools in an Assembly

Lecture 86 Designs Library: Catalog.

Lecture 87 Fast Multi-Installation & Edit Multi-Installation.

Lecture 88 Existing Components with Positioning.

Lecture 89 Some More Features in Move Toolbar.

Section 11: Let's Gets Started with DMU Kinematics

Lecture 90 Introduction to DMU Kinematics.

Lecture 91 Concept of Hide & Show Elements.

Lecture 92 Kinematics Joint Part 1: Revolute Joint.

Lecture 93 Revolute Joint: Lecture 2.

Lecture 94 Kinematics Joint Part 2: Cylindrical Joint & Joint Analysis.

Lecture 95 Kinematics Joint Part 3: Screw Joint.

Lecture 96 Kinematics Joint Part 4: Prismatic Joint.

Lecture 97 Assembly Constraints Conversion.

Lecture 98 EXERCISE TIME! Simulating Single Cylinder Engine.

Lecture 99 The Feature: Simulation.

Section 12: Let's Get Started with Generative Sheet Metal Design Interface

Lecture 100 Introduction to Sheet Metal in CATIA.

Lecture 101 Providing Sheet Metal Parameters.

Lecture 102 Wall Features Part 1: Wall & Wall on Edge.

Lecture 103 Swept Wall Features.

Lecture 104 Properties of Bend Extremities.

Lecture 105 Wall Features Part 2: Extrusion.

Lecture 106 Cutting & Stamping Part 1: Cut Out & Hole

Lecture 107 Corner Relief, Fold & Unfold View, Corner, Chamfer.

Lecture 108 Stamping Feature :part 1

Lecture 109 Stamping Feature :part 2

Lecture 110 User Stamp: Part 1

Lecture 111 User Stamp: Part 2

Lecture 112 EXERCISE TIME! Creating Dining Plate.

Lecture 113 The Bending Part 1: Bend & Conical Bend.

Lecture 114 The Bending Part 2: Bend From Flat.

Lecture 115 Transformation Features in Sheet Metal.

Lecture 116 The Rolled Walls Part 1: Rolled Wall.

Lecture 117 The Rolled Walls Part 2: Hopper.

Section 13: Let's Get Started with Generative Shape Design Interface

Lecture 118 Introduction to Surfacing.

Lecture 119 Extrude & Revolve Feature.

Lecture 120 Sphere & Cylinder Feature.

Lecture 121 Use of Split Tool.

Lecture 122 Trim Tool, Difference between Trim & Spilt.

Lecture 123 Fill Surface.

Lecture 124 Properties of Fill Surface.

Lecture 125 Blend Feature.

Lecture 126 Properties of Blend.

Lecture 127 Fillets: Conventional Fillets.

Lecture 128 Fillets: Shape Fillets

Lecture 129 Offset in Surface.

Lecture 130 Variable Offset.

Lecture 131 Rough Offset.

Lecture 132 Translate, Rotate & Symmetry.

Lecture 133 Scaling, Affinity & Axis-Axis.

Lecture 134 Creating Patterns.

Section 14: Let's Learn About Wireframes.

Lecture 135 Introduction to Wireframe Toolbar.

Lecture 136 Creating Points.

Lecture 137 Creating Lines.

Lecture 138 Creating Planes.

Lecture 139 Creating Helix.

Lecture 140 Creating Spiral.

Lecture 141 Projection & Combine Curve.

Lecture 142 Projection(Continue), Intersection, Parallel Curves.

Section 15: Let's Get Started with Drafting Interface

Lecture 143 Introduction to Drafting in CATIA.

Lecture 144 Creating First Drawing Sheet using Standard Views.

Lecture 145 The View Toolbar Part 1: Projections.

Lecture 146 The View Toolbar Part 2: Sections.

Lecture 147 The View Toolbar Part 3: Detail & Clipping View.

Lecture 148 The View Toolbar Part 4: Break & Break Out View.

Lecture 149 The Annotations Part 1: Generating Dimensions.

Lecture 150 The Annotations Part 2: Text & Tables.

Lecture 151 Bonus Lecture: Writing Text on 3D Model.

Lecture 152 Creating & Editing Sheets.

Lecture 153 Creating Custom Sheet Format

Lecture 154 Introduction to An Assembly Drafting.

Lecture 155 Creating & Exporting Exploded View.

Lecture 156 Generating Balloons/Numbering & Bill of Material.

Lecture 157 Customizing Bill of Material.

Lecture 158 Filling Out Vacant Columns.

Lecture 159 Complete Assembly Drafting & Creating PDFs.

Lecture 160 Finally! Sheet-Metal Drafting: Flat Pattern View.

Lecture 161 Conclusion!

Individuals intending to learn the basics of CATIA.,Individuals who wants to get started with 3D modeling.,Individuals wanting to get a better job via CATIA skills.,Designers, Engineers, Makers, and Hobbyist.,Individuals who want to create their carrier in Product Design.,Individuals who wants to learn the basics of CATIA DMU Kinematics.,Individuals who wants to learn the basics of CATIA Sheet Metal.


catiaacademyacomprehevye6r.jpg


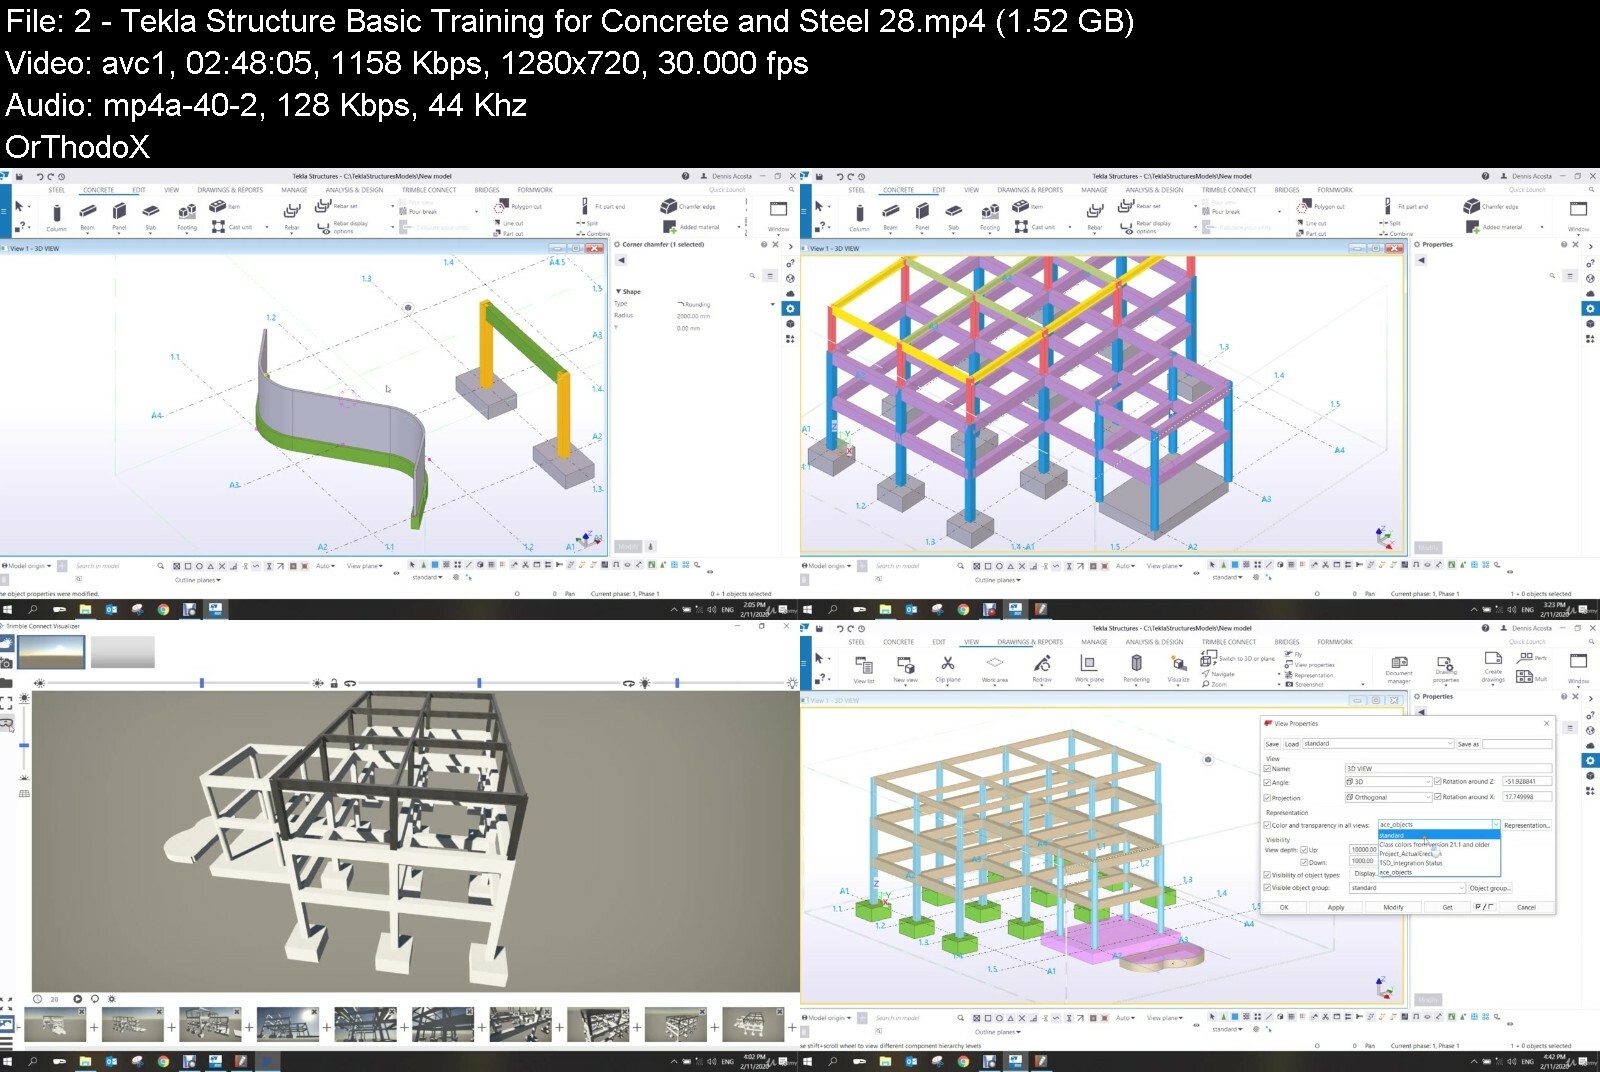
Tekla Structures 2020 Basic Training

fm5brkq4tizxm3ktgwpsvuqccw.jpg
a

Tekla Structures 2020 Basic Training (Bridge)
Last updated 5/2021
MP4 | Video: h264, 1280x720 | Audio: AAC, 44.1 KHz
Language: English | Size: 5.80 GB | Duration: 11h 27m

Bridge Modelling and Drawings


What you'll learn
Student will Learn how to use Tekla Structures for Bridge Modelling and Detailing

Requirements
Basic Engineering and Drafting Knowledge

Description
This is an actual training session with an example for hands-on, the training consist of many topics which is listed below:For Building and Bridge· Create View (plans and elevation)· Changing UCS· Creating Grids (straight and diagonal grid)· Copy and move commands (linear, rotate and mirror)· Create 3D model (column, beam, wall, slab etc.)· Creating curve beams· Construction points and construction lines· Filter (selection filter and view filter)· Object representation· Inserting DWG file to Tekla Structures· Adding reinforcements (single and group)· Adding Mesh· Creating concrete connections· Using detailing tools (polygon cut, line cut, part cut, fit part end, split and combine)· Creating General Arrangement drawings· Creating Cast Unit drawings· Creating Reports· Create 3D model (Box Girder.)· Adding Reinforcement to Box Girder· Creating Sketch Parametric Cross Section for Bridge· Adding Templates- Setting up a Drawing Lay Out· Creating Box Girder drawingsIn this course, you will learn how to create a full structural model using foundations, columns, beams, beam system, floors. The course will show you how to prepare the model for the preparation of General Arrangement drawings, cast unit drawings. The course contains Concrete bridge structure examples. You will learn how to annotate, tag, detail, your model, along with creating and printing sheets. Other topics will be discussed in the course like creating several types of schedules, how to import CAD files. The course will show you how to deal with Concrete connections along with concrete reinforcement (several examples of using different techniques for rebar detailing). Finally you will learn how to use Tekla Structures for bridge and Concrete modelling and detailing.

Overview

Section 1: Tekla Structures 2020 Basic Training for Bridge

Lecture 1 Grids and Basic Elements

Lecture 2 Filter and Detailing Tools

Lecture 3 Connection and Profiles

Lecture 4 Sketch Parametric Cross Section

Lecture 5 Reinforcements

Lecture 6 Box Girder Rebars and Drawings

Draftsman and Detailers


teklastructures2020balueq0.jpg


2D to 3D Zbrush and 3D for Beginners

yla6pm4kcgpzhdgrigee4zpchl.jpg


2D To 3D Zbrush And 3D For Beginners
Published 7/2022
MP4 | Video: h264, 1280x720 | Audio: AAC, 44.1 KHz
Language: English | Size: 8.18 GB | Duration: 11h 36m

Learn to Design Intuitively in Zbrush


What you'll learn
Learn the Basics of 3D and Modeling
Learn the basics of using Zbrush, no experience necessary.
Be able to sculpt and create models in 3D
Understand how to use Dynamesh and Zremesh
Learn how to projection paint textures from a 2D image on to a model.
Learn how to use Snapshot 3D, an image-based mesh creation tool in Zbrush.
Learn how to author content for the Metaverse
Learn about subdivision smoothing

Requirements
Copy of Zbrush 2021 or above. A free 30 day trial is available. Other versions(Core, Mini) will not work because they do not offer all of the tools used in the tutorials.
Any software that can author png images with an alpha. I will use Illustrator, but any software can do.

Description
In this course, you will learn about 3D design for products, Metaverse, and 3D printing using Zbrush and basic 2D elements. While this course is geared towards 2D graphic designers looking to expand their horizons, literally anyone with a desire to learn about 3D can take this course.For graphic designers that are new to 3D, using this tool will help you bridge the gap between 2D*and 3D design. Most 3D software requires a lot of technical knowledge and takes a long time to create content. Zbrush works in a more intuitive way than traditional artists and designers can understand better. The problem is that Zbrush has a very complicated UI. I help you navigate that and get right to the buttons and tools that you need to begin designing today! We will cover the basic document setup and everything else needed to get you up and running with Zbrush. The basics of 3D geometry and other components like lights and camerasWorking with a real-world scale between different programs and geometry.Knowing the different file formats of ZbrushCreating geometry from 2D imagesPainting textures on models using 2D images.Creating objects for the metaverse.Creating Objects for 3D printing.Creating content for Spark AR, Snap Lens, and other mobile devices, like OculusZbrush is a powerful and intuitive tool that is both modeler and texturing software. It differs from other 3D*softeware in its artist's focused feature set. This allows the designer to focus more on the form and less on the technical details to make it possible.

Overview

Section 1: Introduction

Lecture 1 Introduction

Lecture 2 3D and Design

Lecture 3 Why Zbrush?

Section 2: 3D Basics

Lecture 4 Geometry

Lecture 5 Geometry Slide

Lecture 6 File Formats

Lecture 7 File Formats Slide

Lecture 8 Geometry Components - Faces, Edges, and Vertices

Lecture 9 Geometry Components Slide

Lecture 10 Geometric Components - UV's

Lecture 11 UV Slide

Lecture 12 Geometric Components - Color

Lecture 13 Color Slide

Lecture 14 Geometric Components - Materials and Shaders

Lecture 15 Materials Slide

Lecture 16 CAD vs Geometry and how we can use CAD in 3D and Product Design

Lecture 17 CAD Slide

Lecture 18 PBR and Materials

Lecture 19 PBR and Materials Slide

Lecture 20 Geometric Components - Lights

Lecture 21 Lights Slide

Lecture 22 Geometric Components - Cameras and Views

Lecture 23 Camera Slide

Lecture 24 Orthographic vs Perspective

Lecture 25 The 3D World and its Coordinates

Lecture 26 Coordinates Slide

Lecture 27 World And Scale

Lecture 28 Scale Slide

Lecture 29 Zbrush and Scale

Lecture 30 Zbrush Scale Slide

Section 3: Zbrush Basics, Getting Started

Lecture 31 2.5D mode Vs. 3D mode

Lecture 32 2D v 3D Slide

Lecture 33 Navigation and Main Keys

Lecture 34 Navigation Slide

Lecture 35 Zbrush UI

Lecture 36 UI Slide

Lecture 37 Zbrush Canvas

Lecture 38 Canvas Slide

Lecture 39 Zbrush File Formats - Tool/File/Doc & Image formats

Lecture 40 File Slide

Lecture 41 Zplugins

Lecture 42 Zplugins Slide

Lecture 43 Tools and Subtools

Lecture 44 Tools Slide

Lecture 45 Importing Geometry and types

Lecture 46 Masking and Hiding Geometry

Lecture 47 Masking Slide

Lecture 48 The 3D Gizmo or Transpose Tool

Lecture 49 Gizmo Slide

Lecture 50 Dynamesh Basics

Lecture 51 Dynamesh Part 2

Lecture 52 Dynamesh Slide

Lecture 53 Polygroups

Lecture 54 Polygroups Slide

Lecture 55 Z Remesh

Lecture 56 ZRemesh Slide

Lecture 57 Dynamesh - Zremesh- Subdivded Surface Flow

Lecture 58 Basic Brushes in Zbrush

Lecture 59 Brushes Slide

Lecture 60 Z-Modeler

Lecture 61 Z-Modeler Slide

Lecture 62 IMM Brushes

Lecture 63 IMM Slide

Lecture 64 Paint Brush

Lecture 65 Paint Brush Slide

Lecture 66 Mood Boards, Reference and Pure Ref

Lecture 67 Reference Slide

Lecture 68 Spotlight

Lecture 69 Spotlight Slide

Lecture 70 Render Basics

Lecture 71 Render Slide

Lecture 72 Render NPR

Lecture 73 NPR Slide

Lecture 74 Zbrush and Photoshop Plugin

Lecture 75 Zbrush Photoshop plugin Slide

Section 4: 2D to 3D

Lecture 76 Silhouette and Blocking

Lecture 77 Snapshot Part 1

Lecture 78 Snapshot Part 2

Lecture 79 Snapshot Part 3

Lecture 80 Snapshot Slide

Lecture 81 Working with Logos

Lecture 82 Creating Snapshot Assets

Lecture 83 Creating Snapshots Slide

Lecture 84 Boolean Mesh and Folder Stacks

Lecture 85 Projection Painting Using a picture to paint texture.

Lecture 86 Remesh, UV map

Lecture 87 Reprojecting Hi poly to low Poly to Bake Maps for export

Lecture 88 Render With Keyshot

Lecture 89 Export as FBX into Blender Cycles Render

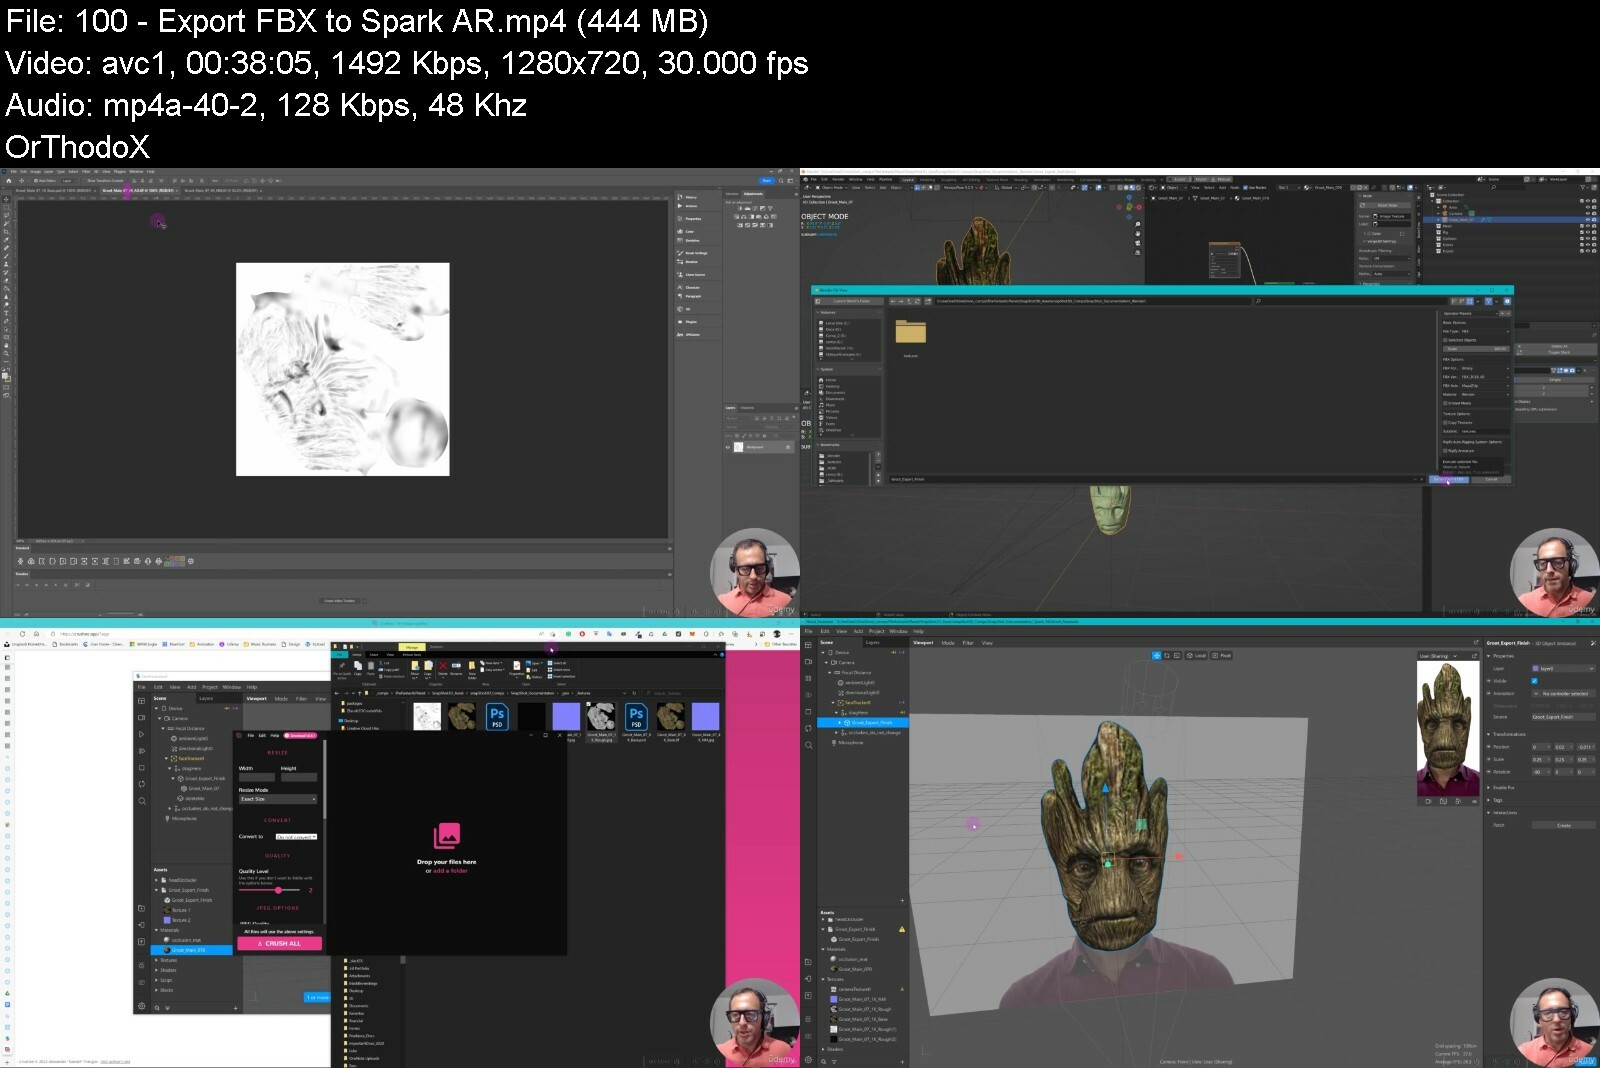
Section 5: Make a photorealistic Spark AR Mask in Zbrush from a 2D image

Lecture 90 Concept Brief - Create an AR mask

Lecture 91 Gathering Reference and Pure Reference

Lecture 92 Creating the Snapshot and Spotlight assets in Illustrator

Lecture 93 Dynamesh Part1

Lecture 94 Dynamesh Part2

Lecture 95 Zremeshing the mask

Lecture 96 UV Mapping the mask

Lecture 97 Subdividing the mesh.

Lecture 98 Projection Painting the Picture from Spotlight

Lecture 99 Baking the maps for export Multi map Export plugin

Lecture 100 Export FBX to Spark AR

2D Artists looking to enter the 3D space.,Design Professionals looking to leverage Zbrush to intuitively design in 3D,Anyone interested in starting to learn to create 3D items for the Metaverse or 3D printing using the best software available today, Zbrush.


2dto3dzbrushand3dforb7fddy.jpg


Coursera - Google UX Design Professional Certificate

1200x600uxdv1d4n.jpg


Coursera - Google UX Design Professional Certificate
MP4 | Video: h264, 1280x720 | Audio: AAC, 44.1 KHz, 2 Ch
Genre: eLearning | Language: English | Duration: 23h 30m | Size: 8 GB

This is your path to a career in UX design. In this program, you'll learn in-demand skills that will have you job-ready in less than 6 months. No degree or experience required

Build job-ready skills by learning from the best
Get started in the high-growth field of user experience (UX) design with a professional certificate from Google. Learn UX design foundations, including user empathy, building wireframes and prototypes, and conducting research to test your designs.

Common job titles: User Experience (UX) designer, UI Designer, Interaction Designer, Visual Designer, Product Designer

¹Burning Glass Labor Insight Report data (median with 0-5 years experience), United States, 4/1/21-3/31/22.
²Career improvement (e.g. new job/career, promotion, raise) within 6 mos. of completion based on cert. grad survey responses, U.S. 2021.

$92,000
median entry-level salary¹

75%
of Google certificate grads report career improvement²

99,000
in-demand job openings in UX design¹

150+
Connect with over 150 U.S. employers post-completion

Skills you will gain
User Experience (UX)

UX Research

Wireframe

Prototype

User Experience Design (UXD)

Usability Testing

mockup

Figma

Adobe XD

UX design jobs

About this Professional Certificate
Prepare for a career in the high-growth field of UX design, no experience or degree required. With professional training designed by Google, get on the fast-track to a competitively paid job. There are currently 99,000 U.S. job openings in UX design with a median entry-level salary of $92,000.¹

User experience (UX) designers focus on the interaction that users have with products, like websites, apps, and physical objects. They make those everyday interactions useful, enjoyable, and accessible.

Over 7 courses, gain in-demand skills that will prepare you for an entry-level job.

You will create designs on paper and in digital design tools like Figma and Adobe XD. By the end of the certificate program, you will have a professional UX portfolio that includes three end-to-end projects, so that you're ready to apply for jobs. Upon completion, you can directly apply for jobs with Google and over 150 U.S. employers, including Walmart, Best Buy, and Astreya.

75% of Google Career Certificate Graduates in the United States report an improvement in their career trajectory (e.g. new job or career, promotion or raise) within 6 months of certificate completion²

¹US Burning Glass Labor Insight Report salary data (median with 0-5 years experience) and job opening data. Data for job roles relevant to featured programs (4/01/2021 - 3/31/22).

²Based on program graduate survey responses, United States 2021

What you will learn
Follow the design process: empathize with users, define pain points, ideate solutions, create wireframes and prototypes, test and iterate on designs

Understand the basics of UX research, like planning research studies, conducting interviews and usability studies, and synthesizing research results

Apply foundational UX concepts, like user-centered design, accessibility, and equity-focused design

Create a professional UX portfolio that includes 3 end-to-end projects: a mobile app, a responsive website, and a cross-platform experience

Homepage


01useadesignsystemlibi8dyd.jpg


Mastering Microcontroller and Embedded Driver Development

6432062ee79tgew7.jpg


Mastering Microcontroller and Embedded Driver Development
Last updated 2/2023
Created by FastBit Embedded Brain Academy,Kiran Nayak
MP4 | Video: h264, 1280x720 | Audio: AAC, 44.1 KHz, 2 Ch
Genre: eLearning | Language: English + srt | Duration: 278 Lectures ( 28h 32m ) | Size: 10.2 GB

(MCU1) Learn bare metal driver development using Embedded C: Writing drivers for STM32 GPIO,I2C,SPI,USART from scratch


What you'll learn
Understand Right ways of Handling and programming MCU Peripherals
Develop Peripheral drivers for your Microcontroller
Understand complete Driver Development steps right from scratch for GPIO,SPI,I2C and USART.
Learn Writing peripheral driver headers, prototyping APIs and implementation
Explore MCU data sheets, Reference manuals, start-up Codes to get things done
Learn Right ways of handling/configuring Interrupts for various peripherals
Learn about Peripheral IRQs/Vector table/NVIC interfaces and many
Learn about Configuration/status/Control registers of various Peripherals
Demystifying behind the scene working details of SPI,I2C,GPIOs,USART etc.
Explore hidden secretes of MCU bus interfaces, clock sources, MCU clock configurations, etc.
Understand right ways of enabling/configuring peripheral clocks/serial clocks/baud rates of various serial protocols
Learn about MCUs AHB, APB bus protocols
Learn about different MCU clocks like HCLK, PCLK, PLL,etc
Learn to capture/decode/analyze traces of serial protocols on Logic analyzer
Learn about Quick ways of debugging peripheral issues with case studies


Requirements
Basic knowledge of C programming
If you are completely new to MCU and C programming language then you are advised to finish our "Embedded C" course for absolute beginners first


Description
>> Your Search for an in-depth microcontroller programming course ends here !!<<<Course code: MCU1Learn bare-metal driver development using Embedded C : Writing drivers for STM32 GPIO,I2C, SPI,USART from scratchEnglish Subtitles/CCs are enabled for this course.Update 6: videos are updated with the latest STM32CUBEIDEUpdate 5: All drivers are developed in a live session with step-by-step coding and added stm32-Arduino communication exercises using SPI and I2C.Update 4: Dedicated support team is assigned to address student's Q/AUpdate 3: English Closed captions are fixedUpdate 2 : Added Bus matrix / memory map /vector table /interrupt design discussion with code examples.Update 1: Eclipse IDE setup for ARM Cortex M based MCUs addedThe course is designed for beginners to advanced audiences.Brief Description:This course Demystifies the internal working of the Microcontroller and its Peripherals.Coding for the Peripherals STEP-BY-STEP and Developing software drivers entirely from scratch by extracting maximum information from Datasheets, Reference manuals, specs, etcProtocol Decoding Using logic analyzers, Debugging, Testing along with Hints and Tips.Long Description:Learning Embedded System Programming can be a challenge. Since it's a relatively complex field, there's no actual gold standard yet for how things are practiced, or taught, which can frustrate people who are just trying to learn new things and couldn't connect the dots.This is the motivation behind creating this course to help engineers and students learn different aspects of embedded systems by providing high-quality advanced lectures at a relatively low price.Master Behind the Scene working;created this course because I believe your time is precious, and you shouldn't have to hunt around to get a practical foundation In Embedded System Programming. In this course, you will learn to write your peripheral driver for most commonly used peripherals such as GPIOs, I2C, SPI, USART, etc., and the exciting thing is that you will learn everything from scratch.No 3rd party libraries!No blind coding!Write your driver APIs by dealing with the peripheral registers of the MCU!Code and Implement APIs from scratch, diving into the datasheet and reference manual of the MCU. I will thoroughly explain how to extract the maximum information from datasheets, Technical Reference manuals to configure and handle peripherals. These techniques you can go and apply to any MCUs you have at your hand.In this course, I will walk you through step-by-step procedures on configuring various Peripherals like GPIOs, SPI, USART, I2C by taking you into the reference manual and datasheet. We will develop a fully working driver code, interrupt handlers, sample application everything from scratch to understand the big picture.In each lecture, I assure you that you will learn something new to use in your work or projects. You'll find yourself handling these peripherals with much more clarity. You will be able to speculate and debug the problem quickly. I'll show you tricks and tips to debug the most common issues using debugging tools such as logic analyzers.This is not the Arduino style of programming:I believe Arduino is for quick prototyping of projects/products but not for mastering the working of micro-controllers and their peripherals. Unlike Arduino programming, where you develop a quick solution and prototyping of products using third-party libraries, this course is entirely different. In this course, no 3rd party libraries are used. Everything we will code by referring to the technical reference manual of the MCU and will create our own library. The Power of this approach is that you can quickly speculate problems and debug like a pro when things go wrong in your project due to bugs. If one thing me and my students are good at is "debugging,." To achieve good debugging skills, it's essential to code by understanding how things work behind the scene but not by blindly using some third-party libraries, and that's the biggest TAKE away from this course.The course is designed and explained so that it is generic across any microcontroller. The code we develop can be used as templates to quickly build a peripheral driver for your MCUs on-chip peripherals.Software/Hardware used:In this course, the code is developed so that it can be ported to any MCU you have at your hand. If you need any help porting these codes to different MCUs, you can always reach out to me! The course is strictly not bound to any 1 type of MCU. So, if you already have any Development board that runs with an ARM-Cortex M3/M4 processor, I recommend you continue using it. But if you don't have any development boards, then check out the below Development boards.1. STM32F407xx based Discovery board ( This is the board used in this course)MCU Vendor: STMicroelectronicsIDE: STM32CUBEIDE (Free)My promise:I am confident that this course will save you many hours of studying/experimenting/googling time to learn about MCU programming. I will personally answer your questions about this material, either privately or in a group discussion. If you are not satisfied, for any reason, you can get a full refund from Udemy within 30 days. No questions asked. But I am confident you won't need to. I stand behind this course 100% and am committed to helping you.Learning order of FastBit Embedded Brain Academy Courses,If you are a beginner in the field of embedded systems, then you can take our courses in the below-mentioned order.This is just a recommendation from the instructor for beginners.1) Microcontroller Embedded C Programming: absolute beginners(Embedded C)2) Embedded Systems Programming on ARM Cortex-M3/M4 Processor(ARM Cortex M4 Processor specific)3) Mastering Microcontroller with Embedded Driver Development(MCU1)4) Mastering Microcontroller: TIMERS, PWM, CAN, RTC,LOW POWER(MCU2)5) Mastering Microcontroller: STM32-LTDC, LCD-TFT, LVGL(MCU3)6) Embedded System Design using UML State Machines(State machine)7) Mastering RTOS: Hands-on FreeRTOS and STM32Fx with Debugging(RTOS)8) ARM Cortex M Microcontroller DMA Programming Demystified(DMA)9) STM32Fx Microcontroller Custom Bootloader Development(Bootloader)10) Embedded Linux Step by Step using Beaglebone Black(Linux)11) Linux device driver programming using Beaglebone Black(LDD1)

Who this course is for
Professionals interested in exploring Embedded systems
Hobbyists and students who want to start their career in Embedded world
If you think about 'embedded' then think about taking this course. you will not be disappointe
This Course may not be suitable for those people who are looking for quick prototyping using boards such as Arduino

Homepage


002structuringperiphe3rdhw.jpg


Spiritual Healing After A Divorce Or Break-Up

fsgmw3iivpvz04aarnrv0hpe70.jpg


Spiritual Healing After A Divorce Or Break-Up
Last updated 1/2022
MP4 | Video: h264, 1280x720 | Audio: AAC, 44.1 KHz
Language: English | Size: 7.19 GB | Duration: 9h 26m

Use a powerful combinationof holistic healing techniques to heal after heartbreak.


What you'll learn
Why a divorce or break-up affects us so deeply
How to understand your grief around the relationship and "what could have been"
How to cleanse your space and mindset for healing
How to release old attachments to people no longer in your life
Why the seven chakras are all affected by the pain of heartbreak
How to clear and realign your chakras through holistic techniques such as meditation, rituals, and colour therapy

Requirements
An open mind and willingness to participate in spiritual, holistic healing
No previous spiritual knowledge is required - all will be explained
A desire to find and maintain self love and self awareness

Description
Has a divorce, separation or break-up left you feeling miserable, stuck, and disconnected from a thriving world? These are all symptoms of a spiritual imbalance caused by the grief of separation. This course is designed to heal the wounds of a break-up using a holistic range of spiritual techniques that have given relief to the heartbroken for thousands of years.This course featuresExercises to understand the grief of separationCleansing ritual to clear your space for spiritual workA spiritual divorce ceremony to release old attachmentsSeven steps to spiritual healing, based on the seven chakrasEach step includes meditations, workbooks, physical routines, and key questions to understand and unravel your spiritual blockagesSubliminal clearing statements to play while you sleepColour therapy practices to amplify your healingFollow this course at your own pace, we recommend doing one module per week for eight weeks. This allows you to make significant progress while allowing time to reflect on the lessons of each module.WHO THIS COURSE IS FORAnyone going through a break-up, divorce, or separationAny timeline: whether the break-up was a day, a year or a decade ago, you can still begin healing nowEveryone open to spiritual and holistic healing techniques such as meditation (no experience needed, just an open mind!)

Overview

Section 1: Balanced breakups

Lecture 1 Introduction

Lecture 2 Understanding your grief

Lecture 3 Spiritual Divorce

Lecture 4 Clearing your Space

Lecture 5 Release Attachments meditation

Lecture 6 Clearing statements while you sleep

Section 2: Root Chakra

Lecture 7 Red In colour therapy

Lecture 8 What are Chakras?

Lecture 9 Is your Root Chakra balanced?

Lecture 10 Finances after a breakup

Lecture 11 How to ground yourself?

Lecture 12 Root Chakra Meditation

Lecture 13 Root Chakra Exercises

Section 3: Sacral Chakra

Lecture 14 Orange in colour therapy

Lecture 15 What is your auric field?

Lecture 16 Addictions

Lecture 17 Creativity

Lecture 18 The Sacral Chakra

Lecture 19 Sacral Chakra meditation

Lecture 20 Exercises for the Sacral Chakra

Section 4: Solar Plexus Chakra

Lecture 21 Yellow in colour therapy

Lecture 22 Adapting to others

Lecture 23 How to ease stress and anxiety?

Lecture 24 Finding your Confidence and joy

Lecture 25 Solar Plexus Chart

Lecture 26 Solar Plexus Meditation

Lecture 27 Exercises for the Solar Plexus Chakra

Section 5: Heart Chakra

Lecture 28 Green in colour therapy

Lecture 29 Heart Chakra chart

Lecture 30 Living in gratitude

Lecture 31 Creating change

Lecture 32 Visualisation exercise

Lecture 33 Heart Chakra meditation

Lecture 34 Heart Chakra Exercises

Section 6: Throat Chakra

Lecture 35 Blue in Colour Therapy

Lecture 36 Learning to communicate

Lecture 37 Messages in the water

Lecture 38 Throat chakra chart

Lecture 39 Throat chakra meditation

Lecture 40 Throat Chakra Exercises

Section 7: Third Eye Chakra

Lecture 41 Indigo in colour therapy

Lecture 42 Third eye chakra chart

Lecture 43 Gut versus ego

Lecture 44 Heavy or light

Lecture 45 Living in the question

Lecture 46 Third eye chakra sleep meditation

Section 8: Crown Chakra

Lecture 47 Violet in colour therapy

Lecture 48 Crown chakra chart

Lecture 49 The little soul and the sun

Lecture 50 Ho'oponopono

Lecture 51 Crown chakra meditation

Anyone going through a break-up, divorce, or separation,Any timeline: whether the break-up was a day, a year or a decade ago, you can still begin healing now,Everyone open to spiritual and holistic healing techniques such as meditation (no experience needed, just an open mind!),Anyone wanted to guide and help others going through a separation

Homepage


36learningtocommunica02e1n.jpg


Zurück
Oben Unten