


• Regeln für den Video-Bereich:

    In den Börsenbereich gehören nur Angebote die bereits den Allgemeinen Regeln entsprechen.

    Einteilung

    - Folgende Formate gehören in die angegeben Bereiche:
    - Filme: Encodierte Filme von BluRay, DVD, R5, TV, Screener sowie Telesyncs im Format DivX, XviD und x264.
    - DVD: Filme im Format DVD5, DVD9 und HD2DVD.
    - HD: Encodierte Filme mit der Auflösung 720p oder darüber von BluRay, DVD, R5, TV, Screener sowie Telesyncs im Format x264.
    - 3D: Encodierte Filme von BluRay, die in einem 3D Format vorliegen. Dies gilt auch für Dokus, Animation usw.
    - Serien: Cartoon/Zeichentrick, Anime, Tutorials, Dokumentationen, Konzerte/Musik, Sonstiges sind demnach in die entsprechenden Bereiche einzuordnen, auch wenn sie beispielsweise im High Definition-Format oder als DVD5/DVD9/HD2DVD vorliegen. Ausnahme 3D.
    - Bereich Englisch: Englische Releases gehören immer in diesen Bereich.
    - Bereich Talk: Der Bereich, in dem über die Releases diskutiert werden kann, darf, soll und erwünscht ist.


    Angebot/Beitrag erstellen

    - Ein Beitrag darf erst dann erstellt werden, wenn der Upload bei mindestens einem OCH komplett ist. Platzhalter sind untersagt.
    - Bei einem Scenerelease hat der Threadtitel ausschließlich aus dem originalen, unveränderten Releasenamen zu bestehen. Es dürfen keine Veränderungen wie z.B. Sterne, kleine Buchstaben o.ä. vorgenommen werden. Ausnahme Serienbörse:
    - Bei einem Sammelthread für eine Staffel entfällt aus dem Releasename natürlich der Name der Folge. Beispiel: Die Simpsons S21 German DVDRip XviD - ITG
    - Dementsprechend sind also u.a. verboten: Erweiterungen wie "Tipp", "empfehlenswert", "only", "reup", usw. / jegliche andere Zusatzinformation oder Ergänzung, welche nicht in obiger Beschreibung zu finden ist.

    Aufbau des Angebots und Threadtitel

    Der Titel nach folgendem Muster erstellt zu werden. <Name> [3D] [Staffel] [German] <Jahr> <Tonspur> [DL] [Auflösung] <Quelle> <Codec> - <Group>
    Beispiel: The Dark Knight German 2008 AC3 DVDRip XviD - iND
    Beispiel: The Dark Knight 2008 DTS DL BDRip x264 - iND
    Beispiel: The Dark Knight 2008 AC3 DL BDRip XviD - iND
    Beispiel: The Dark Knight German 2008 AC3 720p BluRay x264 iND
    Beispiel: The Dark Knight 2008 DTS DL 1080p BluRay x264 iND
    Beispiel: Die Simpsons S01 German AC3 DVDRip XviD iND
    Beispiel: Die Simpsons S20 German AC3 720p BluRay x264 iND
    Beispiel: Sword Art Online II Ger Sub 2014 AAC 1080p WEBRip x264 - peppermint
    Entsprechend sind also u.a. verboten: Sonderzeichen wie Klammern, Sterne, Ausrufezeichen, Unterstriche, Anführungszeichen / Erweiterungen wie "Tipp", "empfehlenswert", "only", "reup", usw. / jegliche andere Zusatzinformation oder Ergänzung, welche nicht in obiger Beschreibung zu finden ist
    Ausnahmen hiervon können in den Bereichen geregelt sein.

    Die Beiträge sollen wie folgt aufgebaut werden:
    Überschrift entspricht dem Threadtitel
    Cover
    kurze Inhaltsbeschreibung
    Format, Größe, Dauer sind gut lesbar für Downloader außerhalb des Spoilers zu vermerken
    Nfo sind immer Anzugeben und selbige immer im Spoiler in Textform.
    Sind keine Nfo vorhanden z.B. Eigenpublikationen, sind im Spoiler folgende Dateiinformationen zusätzlich anzugeben :
    Quelle
    Video (Auflösung und Bitrate)
    Ton (Sprache, Format und Bitrate der einzelnen Spuren)
    Untertitel (sofern vorhanden)
    Hosterangabe in Textform außerhalb eines Spoiler mit allen enthaltenen Hostern.
    Bei SD kann auf diese zusätzlichen Dateiinformationen verzichtet werden.

    Alle benötigten Passwörter sind, sofern vorhanden, in Textform im Angebot anzugeben.
    Spoiler im Spoiler mit Kommentaren :"Schon Bedankt?" sind unerwünscht.


    Releases

    - Sind Retail-Release verfügbar, sind alle anderen Variationen untersagt. Ausnahmen: Alle deutschen Retail-Release sind CUT, in diesem Fall sind dubbed UNCUT-Release zulässig.
    - Im Serien-Bereich gilt speziell: Wenn ein Retail vor Abschluss einer laufenden Staffel erscheint, darf diese Staffel noch zu Ende gebracht werden.62
    - Gleiche Releases sind unbedingt zusammenzufassen. Das bedeutet, es ist zwingend erforderlich, vor dem Erstellen eines Themas per Suchfunktion zu überprüfen, ob bereits ein Beitrag mit demselben Release besteht. Ist dies der Fall, ist der bereits vorhandene Beitrag zu verwenden.
    - P2P und Scene Releases dürfen nicht verändert oder gar unter einem iND Tag eingestellt werden.


    Support, Diskussionen und Suche

    - Supportanfragen sind entweder per PN oder im Bereich Talk zu stellen.
    - Diskussionen und Bewertungen sind im Talk Bereich zu führen. Fragen an die Uploader haben ausschließlich via PN zu erfolgen, und sind in den Angeboten untersagt.
    - Anfragen zu Upload-Wünschen sind nur im Bereich Suche Video erlaubt. Antworten dürfen nur auf Angebote von MyBoerse.bz verlinkt werden.


    Verbote

    - Untersagt sind mehrere Formate in einem einzigen Angebotsthread, wie beispielsweise das gleichzeitige Anbieten von DivX/XviD, 720p und 1080p in einem Thread. Pro Format, Release und Auflösung ist ein eigener Thread zu eröffnen.
    - Grundsätzlich ebenso verboten sind Dupes. Uploader haben sich an geeigneter Stelle darüber zu informieren, ob es sich bei einem Release um ein Dupe handelt.
    - Gefakte, nur teilweise lauffähige oder unvollständige Angebote sind untersagt. Dies gilt auch für eigene Publikationen, die augenscheinlich nicht selbst von z.B. einer DVD gerippt wurden. Laufende Serien, bei denen noch nicht alle Folgen verfügbar sind, dürfen erstellt und regelmäßig geupdatet werden.
    - Untersagt sind Angebote, welche nur und ausschließlich in einer anderen Sprache als deutsch oder englisch vorliegen. Ausnahmen sind VORHER mit den Moderatoren zu klären.


    Verstoß gegen die Regeln

    - Angebote oder Beiträge, die gegen die Forenregeln verstoßen, sind über den "Melden"-Button im Beitrag zu melden.
  • Bitte registriere dich zunächst um Beiträge zu verfassen und externe Links aufzurufen.

*** Bestes IPTV *** bester Preis *** gratis Test ***


Englische Tutorials

Complete Human Figure Anatomy Drawing Course Hd
gm6j22lr9uczrahc9wzuvr0fyz.jpg


Complete Human Figure Anatomy Drawing Course Hd
Last updated 12/2020
MP4 | Video: h264, 1280x720 | Audio: AAC, 44.1 KHz
Language: English | Size: 41.43 GB | Duration: 92h 3m

Learn to Draw the Human Figure from your Mind Step-by-Step using a Proven Drawing System that Works for Artists


What you'll learn
At the end of this course you will be able to draw human figures for all types of artwork
You will know all the bones and muscles of the human figure

Requirements
You will need an HB pencil of your choice and a sketchbook to keep all drawings in one place

Description
You Can Learn How To Draw Human Figure Anatomy Today!Proven Step-by-Step System Anyone Can Follow To Draw From The MindThe Complete Human Figure Anatomy Drawing Course HD is 92 hours of industrial art learn-to-draw training exercises spanning 243 drawing lessons.This course is used in over 172 Countries with a very high success rate.These drawing classes are designed to teach YOU, the art student the art of drawing human figures from the mind with bliss.First students must understand human anatomy drawing from the ground up. You will create in your sketchbook your very own figure drawing reference guides by creating over 243+ human anatomy drawings.You, of course, are going to master making pencil drawings when you do so many figure sketching lessons. This course makes it easy to draw all types of poses including male action poses and female action poses, once you learn all aspects of anatomy drawing.This drawing course has easy to learn how to draw human Anatomy Drawings tutorials for beginners, where you will learn all human muscles and surface anatomy of the human figure as well as figure sketching process and human proportions.Here are a few Testimonials from our site:"When it comes to the human body this is perhaps the greatest video instructional series that I have ever seen." - BlenderNation"This course is an excellent hands-on detailed walk through the process of drawing the human figure based on a systematic structure of anatomical study, and a solid foundation for serious figure drawing" - Gerrit Verstraete, founder, Drawing Society of Canada." I am in awe of how well the Lessons taught me the invention of the figure, and how deeply seated that information now is in my mind." - Diane Kraus (Illustrator)"The training included on 'The Complete Human Figure Anatomy Drawing Course HD' is nothing short of remarkable. I am not even halfway through this (stunningly) comprehensive series of anatomy drawing videos, and I would urge anyone with the slightest interest in fine art to invest in this training without hesitation" - Jimmy S. (Multimedia Producer/Visual Effects Artist)"I learned more usable knowledge in the first 7 Lessons than all the other books combined." - -Bryan Bray (Management is my day job. Web Design and Graphic Design is my love.)

Overview

Section 1: Proportions and Human Skull

Lecture 1 001 - Introduction Video to the concept of Invention

Lecture 2 002 - Core Structure of the Human Figure

Lecture 3 003 - Back view of your invention

Lecture 4 004 - Side view of your invention

Lecture 5 005 - Your First Milestone

Lecture 6 006 - The birth of discovery

Lecture 7 007 - The Secrets of the Masters

Lecture 8 008 - Discovering The Invention Of The Human Head

Lecture 9 009 - The Formulas for the Side View of the Human Head - Phase 1

Lecture 10 010 - The Formulas for the Side View of the Human Head - Phase 2

Lecture 11 011 - The Formulas for the Side View of the Human Head - Phase 3

Lecture 12 012 - The Formulas for the Front View of the Human Head

Lecture 13 013 - The Journey to 3/4 view of Human Skull - Part 1

Lecture 14 014 - The Journey to 3/4 view of Human Skull - Part 2

Lecture 15 015 - The Journey to 3/4 view of Human Skull - Part 3

Lecture 16 016 - The Journey to 3/4 view of Human Skull - Part 4

Lecture 17 017 - The Journey to 3/4 view of Human Skull - Part 5

Lecture 18 018 - The Journey to 3/4 view of Human Skull - Part 6

Lecture 19 019 - Conclusion of the invention of the Human Skull

Section 2: Chest Cavity & Scapula

Lecture 20 020 - Formulas for Front View of Chest Cavity

Lecture 21 021 - Formulas for Side View of Chest Cavity

Lecture 22 022 - Formulas for Back View of Chest Cavity

Lecture 23 023 - The 3/4 view of the invention of the Chest Cavity

Lecture 24 024 - A Switch in Thinking

Lecture 25 025 - Understanding Basic Design of Scapula and Formulas

Lecture 26 026 - The Formulas for Front and Back View of Scapula

Lecture 27 027 - The Fitting of Scapula on Chest Cavity

Lecture 28 028 - The Fitting of Scapula on Chest Cavity - View from Front

Lecture 29 029 - The Fitting of Scapula on Chest Cavity - View from Side

Lecture 30 030 - Second Milestone

Section 3: Spine & Pelvis

Lecture 31 031 - The Invention of The Spine - Part 1

Lecture 32 032 - The Invention of The Spine - Part 2

Lecture 33 033 - The Invention of The Spine - Part 3

Lecture 34 034 - The Invention of The Spine - Part 4

Lecture 35 035 - The Invention of The Spine - Part 5

Lecture 36 036 - The Invention of The Spine - Part 6

Lecture 37 037 - The Invention of The Spine - Part 7

Lecture 38 038 - The Invention of The Pelvis

Lecture 39 039 - The Formulas for the Front Pelvis

Lecture 40 040 - The Formulas for the Back View of Pelvis

Lecture 41 041 - The Formulas for the Side View of Pelvis

Lecture 42 042 - Fitting the Pelvis on to Chest Cavity

Lecture 43 043 - Fitting the Pelvis on to Chest Cavity - Side & Back View

Section 4: Femur, Tibia, Fibula

Lecture 44 044 - Front Formulas of the invention of Femur

Lecture 45 045 - Side Formulas of the invention of Femur

Lecture 46 046 - Back Formulas of the invention of Femur

Lecture 47 047 - Fitting the Femur using a different Artistic Thinking

Lecture 48 048 - Front Formulas for the invention of the Tibia and Fibula

Lecture 49 049 - Side Formulas for the invention of the Tibia and Fibula

Lecture 50 050 - Back Formulas for the invention of the Tibia and Fibula

Lecture 51 051 - Fitting the Tibia and Fibula on to the Skeleton

Lecture 52 052 - The invention of the Foot

Lecture 53 053 - Formulas of Top View of the invention of Foot

Lecture 54 054 - Formulas of Outer View of the invention of Foot

Lecture 55 055 - Formulas of inner View of the invention of Foot

Lecture 56 056 - Formulas of Front & Back View of the invention of Foot

Lecture 57 057 - The Moment of Eureka

Lecture 58 058 - The Power of the Formulas understood for Foot

Section 5: Clavicle, Humerus & Hand

Lecture 59 059 - The invention of the Clavicle

Lecture 60 060 - The Formulas of the invention of Humerus

Lecture 61 061 - Fitting the Humerus on to the Human Being

Lecture 62 062 - The invention of the Radius & Ulna

Lecture 63 063 - Formulas for Front & Back view of Radius and Ulna

Lecture 64 064 - Fitting the Radius & Ulna on to the Human Being

Lecture 65 065 - Formulas for the Human Hand - Part 1

Lecture 66 066 - Formulas for the Human Hand - Part 2

Lecture 67 067 - Formulas for the Human Hand - Part 3

Lecture 68 068 - Formulas for the Human Hand - Part 4

Lecture 69 069 - Conclusion of the Skeleton - Front View

Lecture 70 070 - Conclusion of the Skeleton - Back View

Lecture 71 071 - Conclusion of the Skeleton - Side View

Lecture 72 072 - Conclusion of the Skeleton - Front 3/4 View

Lecture 73 073 - Conclusion of the Skeleton - Back 3/4 View

Lecture 74 074 - Conclusion of the Skeleton - Final

Section 6: Muscles of Human Head

Lecture 75 075 - The Muscles of The Human Head -Part 1

Lecture 76 076 - The Muscles of The Human Head -Part 2

Lecture 77 077 - The Muscles of The Human Head -Part 3

Lecture 78 078 - The Muscles of The Human Head -Part 4

Lecture 79 079 - The Muscles of The Human Head -Part 5

Lecture 80 080 - The Muscles of The Human Head -Part 6

Lecture 81 081 - The Muscles of The Human Head -Part 7

Lecture 82 082 - The Muscles of The Human Head -Part 8

Lecture 83 083 - The Muscles of The Human Head -Part 9

Lecture 84 084 - The Muscles of The Human Head -Part 10

Lecture 85 085 - The Muscles of The Human Head -Part 11

Lecture 86 086 - The Muscles of The Human Head -Part 12

Lecture 87 087 - The Muscles of The Human Head -Part 13

Lecture 88 088 - The Muscles of The Human Head -Part 14

Lecture 89 089 - The Muscles of The Human Head -Part 15

Lecture 90 090 - The Muscles of The Human Head -Part 16

Lecture 91 091 - The Muscles of The Human Head -Part 17

Lecture 92 092 - The Muscles of The Human Head -Part 18

Lecture 93 093 - The Muscles of The Human Head -Part 19

Lecture 94 094 - The Muscles of The Human Head -Part 20

Lecture 95 095 - The Muscles of The Human Head -Part 21

Lecture 96 096 - The Muscles of The Human Head -Part 22

Lecture 97 097 - The Muscles of The Human Head -Part 23

Lecture 98 098 - The Muscles of The Human Head -Part 24

Lecture 99 099 - The Muscles of The Human Head -Part 25

Lecture 100 100 - The Muscles of The Human Head -Part 26

Lecture 101 101 - The Muscles of The Human Head -Part 27

Lecture 102 102 - The Muscles of The Human Head -Part 28

Lecture 103 103 - The Muscles of The Human Head -Part 29

Section 7: Muscles of Human Neck

Lecture 104 104 - Creating The Powerful Mannequin System - Part 1

Lecture 105 105 - Creating The Powerful Mannequin System - Part 2

Lecture 106 106 - Creating The Powerful Mannequin System - Part 3

Lecture 107 107 - Creating The Powerful Mannequin System - Part 4

Lecture 108 108 - Creating The Powerful Mannequin System - Part 5

Lecture 109 109 - Creating The Powerful Mannequin System - Part 6

Lecture 110 110 - The Muscles of The Human Neck - Part 1

Lecture 111 111 - The Muscles of The Human Neck - Part 2

Lecture 112 112 - The Muscles of The Human Neck - Part 3

Lecture 113 113 - The Muscles of The Human Neck - Part 4

Lecture 114 114 - The Muscles of The Human Neck - Part 5

Lecture 115 115 - The Muscles of The Human Neck - Part 6

Lecture 116 116 - The Muscles of The Human Neck - Part 7

Lecture 117 117 - The Muscles of The Human Neck - Part 8

Lecture 118 118 - The Muscles of The Human Neck - Part 9

Lecture 119 119 - The Muscles of The Human Neck - Part 10

Section 8: Muscles of Human Torso

Lecture 120 120 - The Muscles of The Torso - Part 1

Lecture 121 121 - The Muscles of The Torso - Part 2

Lecture 122 122 - The Muscles of The Torso - Part 3

Lecture 123 123 - The Muscles of The Torso - Part 4

Lecture 124 124 - The Muscles of The Torso - Part 5

Lecture 125 125 - The Muscles of The Torso - Part 6

Lecture 126 126 - The Muscles of The Torso - Part 7

Lecture 127 127 - The Muscles of The Torso - Part 8

Lecture 128 128 - The Muscles of The Torso - Part 9

Lecture 129 129 - The Muscles of The Torso - Part 10

Lecture 130 130 - The Muscles of The Torso - Part 11

Lecture 131 131 - The Muscles of The Torso - Part 12

Lecture 132 132 - The Muscles of The Torso - Part 13

Lecture 133 133 - The Muscles of The Torso - Part 14

Lecture 134 134 - The Muscles of The Torso - Part 15

Lecture 135 135 - The Muscles of The Torso - Part 16

Lecture 136 136 - The Muscles of The Torso - Part 17

Lecture 137 137 - The Muscles of The Torso - Part 18

Lecture 138 138 - Conclusion of Muscles of The Torso

Section 9: Muscles of Human Arm

Lecture 139 139 - The Muscles of the Arm - Part 1

Lecture 140 140 - The Muscles of the Arm - Part 2

Lecture 141 141 - The Muscles of the Arm - Part 3

Lecture 142 142 - The Muscles of the Arm - Part 4

Lecture 143 143 - The Muscles of the Arm - Part 5

Lecture 144 144 - The Muscles of the Arm - Part 6

Lecture 145 145 - The Muscles of the Arm - Part 7

Lecture 146 146 - The Muscles of the Arm - Part 8

Lecture 147 147 - The Muscles of the Arm - Part 9

Lecture 148 148 - The Muscles of the Arm - Part 10

Lecture 149 149 - The Muscles of the Arm - Part 11

Lecture 150 150 - The Muscles of the Arm - Part 12

Lecture 151 151 - The Muscles of the Arm - Part 13

Lecture 152 152 - The Muscles of the Arm - Part 14

Lecture 153 153 - The Muscles of the Arm - Part 15

Lecture 154 154 - The Muscles of the Arm - Part 16

Lecture 155 155 - The Muscles of the Arm - Part 17

Section 10: Muscles of Human Hand

Lecture 156 156 - The Muscles of the Hand - Part 1

Lecture 157 157 - The Muscles of the Hand - Part 2

Lecture 158 158 - The Muscles of the Hand - Part 3

Lecture 159 159 - The Muscles of the Hand - Part 4

Lecture 160 160 - The Muscles of the Hand - Part 5

Lecture 161 161 - The Muscles of the Hand - Part 6

Lecture 162 162 - The Muscles of the Hand - Part 7

Lecture 163 163 - The Muscles of the Hand - Part 8

Lecture 164 164 - The Muscles of the Hand - Part 9

Lecture 165 165 - The Muscles of the Hand - Part 10

Lecture 166 166 - The Muscles of the Hand - Part 11

Section 11: Muscles of Human Pelvis

Lecture 167 167 - The Muscles of the Pelvis & Leg - Part 1

Lecture 168 168 - The Muscles of the Pelvis & Leg - Part 2

Lecture 169 169 - The Muscles of the Pelvis & Leg - Part 3

Lecture 170 170 - The Muscles of the Pelvis & Leg - Part 4

Lecture 171 171 - The Muscles of the Pelvis & Leg - Part 5

Lecture 172 172 - The Muscles of the Pelvis & Leg - Part 6

Lecture 173 173 - The Muscles of the Pelvis & Leg - Part 7

Lecture 174 174 - The Muscles of the Pelvis & Leg - Part 8

Lecture 175 175 - The Muscles of the Pelvis & Leg - Part 9

Lecture 176 176 - The Muscles of the Pelvis & Leg - Part 10

Lecture 177 177 - The Muscles of the Pelvis & Leg - Part 11

Lecture 178 178 - The Muscles of the Pelvis & Leg - Part 12

Section 12: Muscles of Human Leg & Foot

Lecture 179 179 - The Muscles of the Foot - Part 1

Lecture 180 180 - The Muscles of the Foot - Part 2

Lecture 181 181 - The Muscles of the Foot - Part 3

Lecture 182 182 - The Muscles of the Foot - Part 4

Lecture 183 183 - The Muscles of the Foot - Part 5

Lecture 184 184 - The Muscles of the Foot - Part 6

Lecture 185 185 - The Muscles of the Foot - Part 7

Lecture 186 186 - Conclusion of The Human Being - Part 1

Lecture 187 187 - Conclusion of The Human Being - Part 2

Lecture 188 188 - Conclusion of The Human Being - Part 3

Lecture 189 189 - Conclusion of The Human Being - Part 4

Section 13: Mannequin System

Lecture 190 01 - Introduction to the Mannequin

Lecture 191 02 - Wrapping Muscles on Mannequin Pose 1

Lecture 192 03 - Wrapping Muscles on Mannequin Pose 2

Lecture 193 04 - Wrapping Muscles on Mannequin Pose 3

Lecture 194 05 - Wrapping Muscles on Mannequin Pose 4

Lecture 195 06 - Wrapping Muscles on Mannequin Pose 5

Lecture 196 07 - Wrapping Muscles on Mannequin Pose 6

Lecture 197 08 - Wrapping Muscles on Mannequin Pose 7

Lecture 198 09 - Wrapping Muscles on Mannequin Pose 8

Lecture 199 10 - Wrapping Muscles on Mannequin Pose 9

Lecture 200 11 - Wrapping Muscles on Mannequin Pose 10

Lecture 201 12 - Wrapping Muscles on Mannequin Pose 11

Lecture 202 13 - Wrapping Muscles on Mannequin Pose 12

Lecture 203 14 - Wrapping Muscles on Mannequin Pose 13

Lecture 204 15 - Wrapping Muscles on Mannequin Pose 14

Lecture 205 16 - Wrapping Muscles on Mannequin Pose 15

Lecture 206 17 - Wrapping Muscles on Mannequin Pose 16

Section 14: Advance Figure Sketching

Lecture 207 01 - Figure Sketching Process - Male Pose 1

Lecture 208 02 - Figure Sketching Process - Male Pose 2

Lecture 209 03 - Figure Sketching Process - Female Pose 3

Lecture 210 04 - Figure Sketching Process - Female Pose 4

Lecture 211 05 - Figure Sketching Process - Male Pose 5

Lecture 212 06 - Figure Sketching Process - Female Pose 6

Lecture 213 07 - Figure Sketching Process - Male Pose 7

Lecture 214 08 - Figure Sketching Process - Male Pose 8

Lecture 215 09 - Figure Sketching Process - Male Pose 9

Lecture 216 10 - Figure Sketching Process - Male Pose 10

Lecture 217 11 - Figure Sketching Process - Female Pose 11

Lecture 218 12 - Figure Sketching Process - Female Pose 12

Lecture 219 13 - Figure Sketching Process - Male Pose 13

Lecture 220 14 - Figure Sketching Process - Male Pose 14

Lecture 221 15 - Figure Sketching Process - Male Pose 15

Lecture 222 16 - Figure Sketching Process - Male Pose 16

Lecture 223 17 - Figure Sketching Process - Male Pose 17

Lecture 224 18 - Figure Sketching Process - Male Pose 18

Lecture 225 19 - Analyzing Your Drawings for Formulas

Section 15: Ecorche Figure Drawing

Lecture 226 Ecorche Figure Drawing - Part 1

Lecture 227 Ecorche Figure Drawing - Part 2

Lecture 228 Ecorche Figure Drawing - Part 3

Lecture 229 Ecorche Figure Drawing - Part 4

Lecture 230 Ecorche Figure Drawing - Part 5

Lecture 231 Ecorche Figure Drawing - Part 6

Lecture 232 Ecorche Figure Drawing - Part 7

Lecture 233 Ecorche Figure Drawing - Part 8

Lecture 234 Ecorche Figure Drawing - Part 9

Lecture 235 Ecorche Figure Drawing - Part 10

Lecture 236 Ecorche Figure Drawing - Part 11

Lecture 237 Ecorche Figure Drawing - Part 12

Lecture 238 Ecorche Figure Drawing - Part 13

Section 16: Conceptual Illustration Drawing

Lecture 239 Conceptual Illustration Drawing - Part 1

Lecture 240 Conceptual Illustration Drawing - Part 2

Lecture 241 Conceptual Illustration Drawing - Part 3

Lecture 242 Conceptual Illustration Drawing - Part 4

Lecture 243 Conceptual Illustration Drawing - Part 5

Section 17: Pose Tool 3D on Android & iOS

Lecture 244 Pose Tool 3D create any pose on your mobile device

This course is designed for all artists,This course is also designed for artists who wish to understand human figure drawing for illustration

Homepage

88088themusclesofthehimczs.jpg


Complete Autocad 2D&3D Basic+Advanced Level Course-2016-2022

gew86lmzqjkr9vkqjsxuae9fw7.jpg


Complete Autocad 2D&3D Basic+Advanced Level Course-2016-2022
Last updated 5/2022
MP4 | Video: h264, 1280x720 | Audio: AAC, 44.1 KHz
Language: English | Size: 15.43 GB | Duration: 31h 12m

A Complete AutoCAD 2D&3D Course From Beginners To Expert


What you'll learn
To learn all basic and advanced AutoCAD 2D&3D toolbars
To learn advanced Blocks and Dynamic Block
To learn Basic Sketch Practice, Floor Plan & House Elevation drawing,
To learn Circuit Diagram drawing
To learn Steel Structure and Mechanical drawing
To Prepare for AutoCAD Interview and Exams
To Create Drawing Sheet, BOM and Layout usage
To learn Sheet set Manager and Xref Features
To learn Annotative Features
To learn Pressure vessel and Oil & Gas industrial drawing

Requirements
Basic Knowledge of Engineering
Laptop / Computer (With AutoCAD 2022 Version)

Description
AutoCAD one of the most powerful design and drafting software. All the engineering professionals must to learn this software. This course will make you better professional AutoCAD Designer or Engineer. All the Tools and command clearly explained and practically made for all level students.Architects, Steel Structural Engineers, Mechanical Engineers, Electrical and Electronic Engineers and Civil Engineers this course will helps you to improve your design and drafting knowledge in professional wayWell planned training and clear explanation of AutoCAD toolsThis course will teach you all the basic and advanced feature of AutoCAD 2D&3DThis course will teach you to create accurate dimensional objectsThis course will teach you layers functions and its managementThis course will teach you various status bar actionsThis course will teach you Quick tools operationsThis course will teach you better understanding of model space and layout spaceThis course will teach you to create drawing sheets with using attributes and fieldsThis course will teach you to create blocks and advanced level dynamic blocksThis course will teach you to work with parametric features using Geometric and dimensional constraintsThis course will teach you to create sheet set manager and advanced features of view port controlThis course will teach you to work with external referencesThis course will teach you to create Annotative objects and its usesThis course will teach you how to use express toolPractice drawing and quizzes at the end of every sectionAdvanced practice and projects in end of this courseAfter this course you will get knowledge to handle Any AutoCAD related jobsDon't wait, Let's Start your good Steps your lifeBest of Luck

Overview

Section 1: Let's Start Autocad Introduction

Lecture 1 Introduction

Lecture 2 User Interface

Lecture 3 Workspace Switching

Lecture 4 How to Set AutoCAD Classic Toolbar

Lecture 5 Start New Drawing

Lecture 6 Units

Lecture 7 Limits

Lecture 8 Create your own template

Lecture 9 Open Existing Drawing

Lecture 10 How to Use Keyboard and Mouse In AutoCAD

Lecture 11 Navigation Toolbar

Lecture 12 Select Objects in Drawing

Lecture 13 Status Bar Introduction

Lecture 14 Practice Drawing

Section 2: Draw Toolbar-1

Lecture 15 Create Line

Lecture 16 Absolute Co-ordinate System

Lecture 17 Relative Co-ordinate System

Lecture 18 Polar Co-ordinate System

Lecture 19 Create polyline

Lecture 20 Create Circle

Lecture 21 Create Arc

Lecture 22 Create Rectangle

Lecture 23 Create Polygon

Lecture 24 Create Ellipse

Lecture 25 Create Hatch

Lecture 26 Create Origin in Hatch

Lecture 27 Create Associative in Hatch

Lecture 28 Create Island Detection in Hatch

Lecture 29 Create Separate Hatch

Lecture 30 Create Gradient

Lecture 31 Create Boundary

Lecture 32 Practice Drawing

Section 3: Draw Toolbar-2

Lecture 33 Create spline

Lecture 34 Create Construction Line

Lecture 35 Create Ray

Lecture 36 Create Points and Change Point Type

Lecture 37 Create Divide

Lecture 38 Create measure

Lecture 39 Create wipeout

Lecture 40 Create Donut

Lecture 41 Create Revision Clouds & REVCLOUDARCVARIANCE

Lecture 42 Practice drawing

Section 4: Modify Toolbar-1

Lecture 43 Move

Lecture 44 Copy

Lecture 45 Stretch

Lecture 46 Rotate

Lecture 47 Mirror

Lecture 48 Scale

Lecture 49 Trim in AutoCAD 2021 and Above Version

Lecture 50 Trim in AutoCAD 2020 and Below Version

Lecture 51 Extend in AutoCAD 2021 and Above Version

Lecture 52 Extend in AutoCAD 2020 and Below Version

Lecture 53 Fillet

Lecture 54 Chamfer

Lecture 55 Blend Curves

Lecture 56 Rectangular Array

Lecture 57 Polar Array

Lecture 58 Path Array

Lecture 59 Erase

Lecture 60 Explode

Lecture 61 Offset

Lecture 62 Practice drawing

Section 5: Modify Toolbar-2

Lecture 63 Lengthen

Lecture 64 Align

Lecture 65 Edit Polyline

Lecture 66 Break

Lecture 67 Join

Lecture 68 Reverse

Lecture 69 Copy Nested Objects

Lecture 70 Delete Duplicate Objects (Overkill)

Lecture 71 Draw Order

Lecture 72 Grips Multifunction

Lecture 73 Practice Drawing

Section 6: Status Bar

Lecture 74 Grid (F7)

Lecture 75 Snap (F9)

Lecture 76 Ortho mode (F8)

Lecture 77 Polar Tracking (F10)

Lecture 78 Dynamic input (F12)

Lecture 79 Object Snap (Osnap-F3)

Lecture 80 More Object Snap (Shift + Right Click)

Lecture 81 Quick Properties

Lecture 82 Selection Cycling

Lecture 83 Coordinates in Status Bar

Lecture 84 Lock User Interface (Lock UI)

Lecture 85 Clean Screen (Ctrl+0)

Lecture 86 Line Weight

Lecture 87 Infer Constraints

Lecture 88 Units in Status Bar

Lecture 89 Practice Drawing

Section 7: Utilities

Lecture 90 Measure Distance, Radius, Angle & Coordinates

Lecture 91 Measure area

Lecture 92 Quick Measure

Lecture 93 Quick Select & Select All

Lecture 94 Quick Calculator

Section 8: Object Properties

Lecture 95 Object Color

Lecture 96 Object Line weight and Transparency

Lecture 97 Object Line Type & Match Properties

Lecture 98 Property Pallet & List

Section 9: Dimensions

Lecture 99 Create Dimension Linear

Lecture 100 Create Dimension Aligned

Lecture 101 Create Dimension Angular

Lecture 102 Create Dimension Arc Length

Lecture 103 Create Dimension Radius

Lecture 104 Create Dimension Diameter

Lecture 105 Create Dimension Jogged

Lecture 106 Create Dimension Ordinate

Lecture 107 Create Dimension Continue

Lecture 108 Create Dimension Baseline

Lecture 109 Modify Dimensions

Lecture 110 Create Multiple Types Of Dimension Using DIM

Lecture 111 Create New Dimension Style

Lecture 112 Modify Dimension Style

Lecture 113 Create Dimension Style Override

Lecture 114 Compare Dimension Style

Lecture 115 Create Primary Units & Alternate Units In Dimension Style

Lecture 116 Create Tolerance Using Various Method

Lecture 117 Break Dimension or Extension Line

Lecture 118 Adjust Space Between Dimension

Lecture 119 Add or Remove Jog line In Dimension

Lecture 120 Add or Remove Inspection Information In Dimension

Lecture 121 Update Dimensions

Lecture 122 Reassociate

Lecture 123 Rotate Dimension Text Angle

Lecture 124 Justifies Dimension Text

Lecture 125 Create Center Mark

Lecture 126 Create Center Line

Lecture 127 Practice Drawing

Section 10: Leader Line

Lecture 128 Create Quick Leader

Lecture 129 Quick Leader Settings

Lecture 130 Create Multileader (MLD)

Lecture 131 Options in Multileader

Lecture 132 Modify Multileader

Lecture 133 Create New Multileader Style

Lecture 134 Create Datum for Feature Control Frame (GD&T)

Lecture 135 Create Feature Control Frame (GD&T)

Lecture 136 Practice Leader

Section 11: Text

Lecture 137 Create & Modify Single Line Text

Lecture 138 Create New Text Style

Lecture 139 Create & Modify Multi Line Text

Lecture 140 Practice Text

Section 12: Tables

Lecture 141 Create & Modify Table (TB)

Lecture 142 Add Symbols in Table

Lecture 143 Export and Import in Table

Lecture 144 Create New Table Styles

Lecture 145 Table Properties

Lecture 146 Practice Table

Section 13: Layers

Lecture 147 Create New Layer in Layer Properties Manager

Lecture 148 Create Layer filters

Lecture 149 Copy Object to New Layer

Lecture 150 Create Layer status

Lecture 151 Create Layer walk

Lecture 152 Create Layer Merge

Lecture 153 Layer Delete (Laydel)

Lecture 154 More Layer tools

Lecture 155 Practice Layer

Section 14: Block

Lecture 156 Create Block

Lecture 157 Modify Block

Lecture 158 Redefine Block & Delete Block

Lecture 159 Insert Block

Lecture 160 Blocks Palette

Lecture 161 Write block

Lecture 162 By Block and By Layer Difference

Lecture 163 Edit Block In Place

Lecture 164 Practice block

Section 15: Attributes in Block

Lecture 165 Create Block with Attribute

Lecture 166 Modify Attributes Text

Lecture 167 Hide Attribute, Retain Attribute Display, Explode Attributes (Burst)

Lecture 168 Create Drawing Sheet & Titile Block Using Attributes

Lecture 169 Block Attribute Manager

Lecture 170 Practice Attributes Block

Section 16: Groups

Lecture 171 Create & Modify Group

Lecture 172 Group Manager

Lecture 173 Practice Group

Section 17: Parametric features

Lecture 174 Introduction to Parametric Constraint

Lecture 175 Infer Constraints

Lecture 176 Delete & Hide Constraint

Lecture 177 Auto constraint

Lecture 178 Geometric constraints

Lecture 179 Dimensional constraints

Lecture 180 Parameters Manager

Lecture 181 Practice Parametric Feature

Section 18: Dynamic blocks

Lecture 182 Dynamic blocks Introduction

Lecture 183 Create & Modify Dynamic Block-1

Lecture 184 Create & Modify Dynamic Block-2

Lecture 185 Polar Parameters & Stretch Action in Dynamic Block

Lecture 186 Point/Rotate Parameter and Move/Rotate Action in Dynamic Block

Lecture 187 Create Dynamic Block Using Constraint

Lecture 188 Create Dynamic Block Using Visibility Parameter

Lecture 189 Create Dynamic Block Using Lookup Parameter

Lecture 190 Create Dynamic Block Using Block Table-1

Lecture 191 Create Dynamic Block Using Block Table-2

Lecture 192 Create Dynamic Block Using Array Action

Lecture 193 Practice Dynamic Block

Section 19: External Reference

Lecture 194 External Reference Introduction

Lecture 195 Attach External Reference DWG File

Lecture 196 Attach External Reference PDF File

Lecture 197 Attach External Reference Image File

Lecture 198 Clip External Reference

Lecture 199 Attach & Overlay Difference

Lecture 200 External Reference Palette

Lecture 201 Compare Feature in External Reference

Lecture 202 Practice External Reference (Xref)

Section 20: Model, Layout, Print and Publish

Lecture 203 Arrange Drawing and Print from Model Space

Lecture 204 Layout or Paper Space Introduction

Lecture 205 Drawing Sheet Size

Lecture 206 Page Setup Manager

Lecture 207 Create View Port

Lecture 208 Create View Port Scale

Lecture 209 Layer Control in Viewport

Lecture 210 Plot From Model space and Layout space

Lecture 211 Create Color Plot Style Table

Lecture 212 Practice Drawing

Section 21: Sheet Set

Lecture 213 Sheet Set Introduction

Lecture 214 Create Views in Model Space

Lecture 215 Create Title Block and Template

Lecture 216 Create Label Block

Lecture 217 Create Callout Block

Lecture 218 Create Sheet Set

Lecture 219 Create New Sheet & Views

Lecture 220 Add Callout Blocks

Lecture 221 Publish in sheet set

Lecture 222 eTransmit sheet set

Section 22: Advanced Tools

Lecture 223 Autodesk Design Review Tool

Lecture 224 DWG Compare tool

Lecture 225 Create Your Own Tool Panel

Lecture 226 Layer Translator

Lecture 227 Create Custom Line Type with Text, Symbol

Lecture 228 Create Custom Line Type with Shape

Lecture 229 Design Center Tool of Autocad

Lecture 230 Tool Palettes

Lecture 231 Purge

Lecture 232 Audit

Lecture 233 Recover AutoCAD Drawings

Lecture 234 Reset Default

Lecture 235 Practice Drawing

Section 23: Express Tool

Lecture 236 Arc Aligned Text

Lecture 237 Modify Text Using Express Tool (Explode Text, Change case etc..)

Lecture 238 Convert to Mtext

Lecture 239 Auto Number

Lecture 240 Enclose in Object

Lecture 241 Remote Text & Text Mask

Lecture 242 Modify Commands Express Tool

Lecture 243 Break Line Symbol

Lecture 244 Super Hatch

Lecture 245 Command Aliases

Section 24: Annotative Objects

Lecture 246 Annotative Object Introduction

Lecture 247 Create Annotative Hatch

Lecture 248 Create Annotative Dimension

Lecture 249 Create Annotative Text

Lecture 250 Create Annotative Multileader

Lecture 251 Create Annotative Block

Section 25: Practice drawing and Projects-1

Lecture 252 Practice Drawing - 1

Lecture 253 Practice Drawing - 2

Lecture 254 Practice Drawing - 3

Lecture 255 Practice Drawing - 4

Lecture 256 Practice Drawing - 5

Lecture 257 Practice Drawing - 6

Lecture 258 Practice Drawing - 7

Lecture 259 Practice Drawing - 8

Lecture 260 Practice Drawing - 9

Lecture 261 Practice Drawing - 10

Section 26: Practice drawing and Projects-2

Lecture 262 Create Floor Plan drawing - Wall

Lecture 263 Create Floor Plan drawing - Add Doors

Lecture 264 Create Floor Plan drawing - Add Window

Lecture 265 Create Floor Plan drawing - Add Furniture Block

Lecture 266 Create Floor Plan drawing - Add Text

Lecture 267 Create Floor Plan drawing - Dimensions

Lecture 268 Create Front Elevation

Section 27: Practice drawing and Projects-3

Lecture 269 Mobile Incoming Call Indicator Circuit Diagram

Section 28: Practice drawing and Projects-4

Lecture 270 Create Elbow Sectional View

Lecture 271 Create Weld Neck Flange

Section 29: Projects-5 (Pressure Vessel)

Lecture 272 Create Pressure Vessel Shell Barrel

Lecture 273 Create Dished End

Lecture 274 Create Saddle Support Side View

Lecture 275 Create Saddle Support Elevation View

Lecture 276 Create Nozzle

Lecture 277 Create Lifting Lug

Section 30: AutoCAD 3D Introduction

Lecture 278 2D to 3D Workspace Switching

Lecture 279 3D Navigation Tool Bar

Lecture 280 View Control

Lecture 281 View Cube

Lecture 282 Visual Style Control

Lecture 283 Full Navigation Wheel

Section 31: Solid Primitive

Lecture 284 Box

Lecture 285 Cylinder

Lecture 286 Cone

Lecture 287 Sphere

Lecture 288 Pyramid

Lecture 289 Wedge

Lecture 290 Torus

Lecture 291 Poly Solid

Section 32: User coordinate system (UCS)

Lecture 292 User coordinate system (UCS)

Lecture 293 Dynamic UCS

Section 33: Solid Modeling

Lecture 294 Extrude

Lecture 295 Loft

Lecture 296 Revolve

Lecture 297 Sweep

Lecture 298 Presspull

Section 34: Boolean Operations

Lecture 299 Union

Lecture 300 Subtract

Lecture 301 Intersect

Section 35: Solid Editing

Lecture 302 Solid History

Lecture 303 Slice

Lecture 304 Interfere

Lecture 305 Extract Edges

Lecture 306 Imprint

Lecture 307 Color Edges

Lecture 308 Copy edge

Lecture 309 Extrude Faces

Lecture 310 Taper Faces

Lecture 311 Move Faces

Lecture 312 Copy Faces

Lecture 313 Offset Faces

Lecture 314 Delete Faces

Lecture 315 Rotate Faces

Lecture 316 Color Faces

Lecture 317 Fillet Edge

Lecture 318 Chamfer Edge

Lecture 319 Shell

Lecture 320 Separate

Lecture 321 Thicken

Lecture 322 3D Mirror

Lecture 323 3D Align

Lecture 324 Array Tool in 3D

Section 36: Gizmo Tool

Lecture 325 Move Gizmo

Lecture 326 Rotate Gizmo

Lecture 327 Scale Gizmo & No Gizmo

Section 37: Section

Lecture 328 Create Section Plane

Lecture 329 Live Section

Lecture 330 Add Jog

Lecture 331 Generate Section

Lecture 332 Flatshot

Section 38: Selection

Lecture 333 Culling

Lecture 334 Filters (Vertex, Edge, Face, etc)

Section 39: Layout for 3D Drawing

Lecture 335 Create 2D Views in Layout Using 3D Model

Lecture 336 Create Sectional View

Lecture 337 Create Detail View

Lecture 338 Add Dimension & Text

Section 40: 3D Practice Project-1

Lecture 339 Create 3D Model

Lecture 340 Create Dimension in 3D Model

Lecture 341 Arrange Drawing Inside Layout

Lecture 342 Add Dimensions, Text & Plot Drawing

Section 41: Model View Port

Lecture 343 Create & Modify Model space viewports

Section 42: Visual Style Edges

Lecture 344 No Edges, Iso Lines & Facet Edges, Hide

Section 43: Visual Style Face Color Mode

Lecture 345 Normal, Monochrome, Tint, Desaturate

Section 44: Face Style

Lecture 346 Realistic face style, Warm cool face style & No face style

Lecture 347 Control X-Ray Effect

Section 45: Lights

Lecture 348 Create Point Light

Lecture 349 Create Spot Light

Lecture 350 Create Distant Light

Lecture 351 Create Web Light

Lecture 352 Shadows

Section 46: Material

Lecture 353 Material Browser Introduction

Lecture 354 Apply Material to 3D Model

Lecture 355 Material Editor

Lecture 356 Materials Textures Editor

Lecture 357 Material Mapping

Lecture 358 Remove Material

Lecture 359 Create Material with Lighting Effect

Lecture 360 Apply Material to 3D Model Using Attach By Layer

Section 47: Camera

Lecture 361 Create Camera

Section 48: Sun Location

Lecture 362 Add Sun Location

Section 49: Render

Lecture 363 Add Render Environment

Lecture 364 Create Render & Save as Image

Section 50: Walkthrough Animation

Lecture 365 Create Walkthrough Animation Video

Section 51: 3D House Practice Project-2

Lecture 366 Create Walls & Floors

Lecture 367 Create Sitout Floor & Steps

Lecture 368 Create 3D Doors

Lecture 369 Create 3D Windows

Lecture 370 Create Elevation work

Section 52: Keyboard Shortcuts

Lecture 371 2D & 3D Keyboard Shortcuts

AutoCAD beginners,AutoCAD advanced learners,AutoCAD Modeler,AutoCAD Detailer,AutoCAD Designer,AutoCAD Draftsman,Civil Draftsman,Civil Engineers,Mechanical Engineers,Design Engineers,Anyone interested in AutoCAD,Anyone interested in Oil & Gas,Anyone interested in Process plant,Anyone interested in Boiler,Anyone interested in Steel Structure,Pre-Engineering Building (PEB) Designer,Cad Operator,Cad Supervisor,Fabricator,Welder,AutoCAD Supervisor,Worker,Architectural Draftsman,Architectural Designer,Civil Designer,Electrical Designer,Electrical Draftsman,Electrical Engineer,Electronic Draftsman,Electronic Designer,Electronic Engineer,Mechanical Engineer,Mechanical Designer,Mechanical Draftsman,Anyone interested in pressure vessel,Anyone interested in pressure parts

Homepage


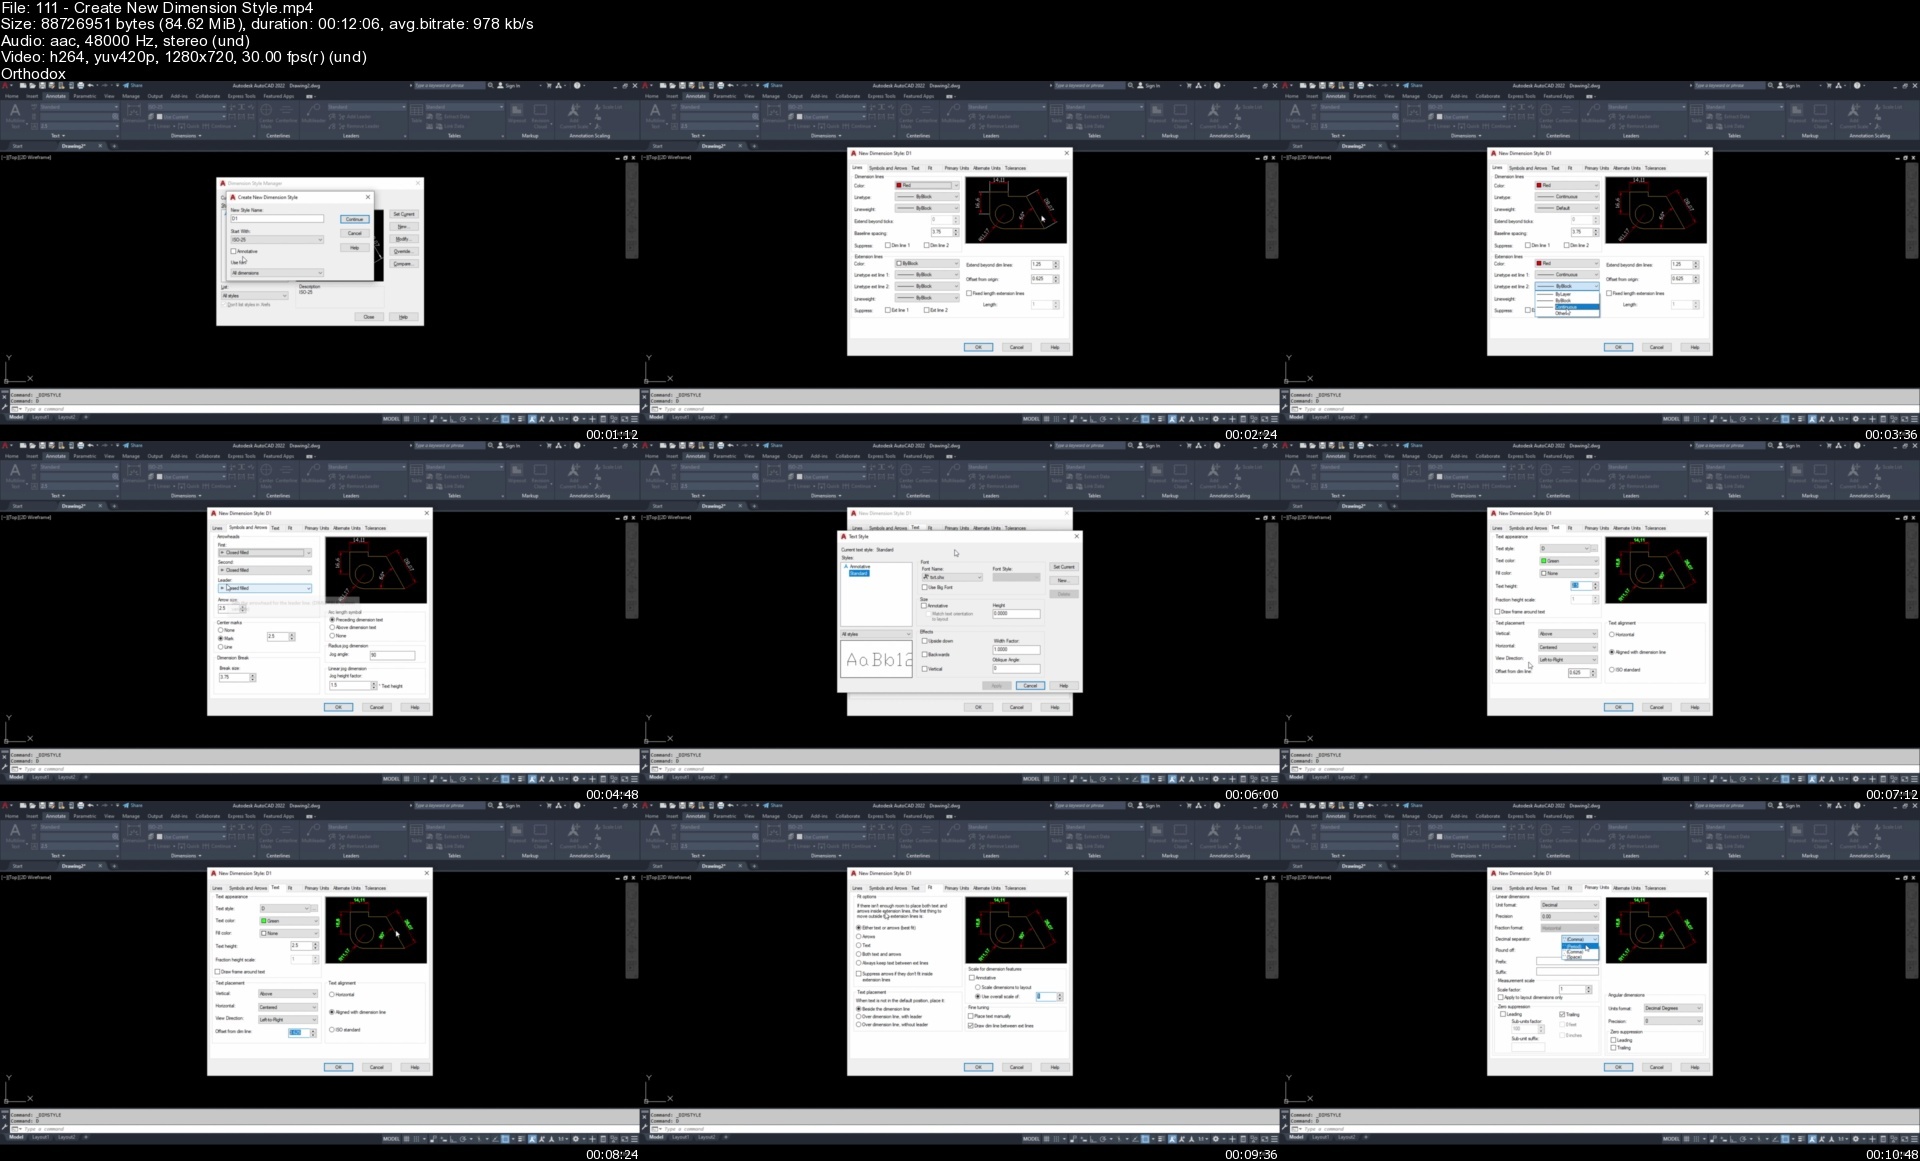
111createnewdimension1de3r.jpg


Cubic Worlds - Create Stunning Low Poly Animations in Blender (Chapters 1-10)

cubicworldscreatestunuvidr.jpg


Cubic Worlds - Create Stunning Low Poly Animations in Blender (Chapters 1-10)
CGBoost
Instructors: Zach Reinhardt
10 chapters | Duration: 22+ hrs
Video: MP4 1920x1080 84 KHz | English
Level: INTERMEDIATE | Size: 23.4567 GB

Learn how to tell your stories with low poly animations in Blender.

Ever wanted to tell your stories in 3D, in a simple but powerful way?

Cubic worlds is just that. This course teaches you how to build and animate beautiful low poly 3D scenes from scratch, in a distinct style, using only free tools.

Creating stunning 3D animations can be a very complex and time-consuming task.

With Cubic Worlds we are going for a simplified "LEGO" approach, we build everything using only cubes, combined with advanced animation and rendering techniques.

It's time to impress your friends and followers with your beautiful 3D animated stories.

Part 1 - Campfire Scene Creation
6 chapters80+ lessons10+ hrs running time

Part 2 - Characters & Machines
3 chapters60+ lessons10+ hrs running time

Part 3 - Scene Breakdowns
1 chapter12 lessons~1:40 hrs running time

Homepage

1000familytripanimatigfftd.jpg


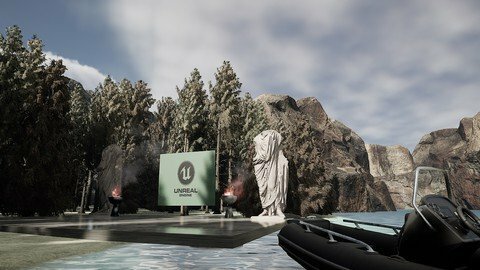
Unreal Engine 5: Complete Beginners' Course For Animation

hdretgqqy7vujabigsox8xud7z.jpg


Unreal Engine 5: Complete Beginners' Course For Animation
Published 7/2022
MP4 | Video: h264, 1280x720 | Audio: AAC, 44.1 KHz
Language: English | Size: 6.85 GB | Duration: 7h 31m

From scratch to fully utilizing the Sequencer for Animations and Cinematics


What you'll learn
Download, launch and navigate Unreal Engine 5
Building scenes within Unreal Engine
Importing and migrating assets between projects
Using the Sequencer for animations and how to render

Requirements
No prior experience is required. We'll go through everything from downloading the engine all the way to rendering the final animation

Description
Unreal Engine 5: Complete Beginner's Course for Cinematic AnimationsLearn Unreal Engine 5 through this step by step guide to get you from knowing nothing about 3D engines, to making your very own cinematic animations with it.This class is based on the production ready version of Unreal Engine 5 (April 2022 release). You can also use the Early Access version, the only difference will be the toolbar layout, otherwise everything else should be the same.Unreal Engine is one of the best game engines but equally has all the tools that can also be used in filmmaking and it has been applied by all levels of professionals in the industry.The course will go through everything you require, including:Unreal Engine WalkthroughProject creationWorking with FoliageQuixel Bridge for free 3D assetsThe Epic Marketplace for sourcing for free and paid asset packsMixamo for free characters and animationsWorking with Particle simulation (Fire & Smoke)Working with physics simulation on charactersUse of the sequencer for animationTaking screenshots in the projectMovie render queueAdding sound and camera effectsFeel free to reach out to me at any point during the course. I'll be available to answer all the questions Let's kick off this journey together, see you in the first class!

Overview

Section 1: Introduction

Lecture 1 Introduction

Lecture 2 Downloading Unreal Engine 5

Lecture 3 User Interface & Navigation

Lecture 4 Adding Assests to the Scene

Lecture 5 Types of Lights

Lecture 6 Landscape Creation & Natural Lighting

Lecture 7 Materials & Landscape Tools

Section 2: Sourcing for 3D Assets

Lecture 8 Megascans

Lecture 9 Foliage

Lecture 10 The Epic Marketplace

Lecture 11 Migrating Assets between Projects

Lecture 12 Mixamo: Downloading Characters & Animations

Section 3: Project Creation

Lecture 13 Building the Scene

Lecture 14 Adding Trees & Fire

Lecture 15 Post Processing Volume

Lecture 16 Adding a Camera to the Sequencer

Lecture 17 Adding Animations to the Sequencer

Lecture 18 Adding Physics Simulation to the Character

Lecture 19 Adding Particle Simulation

Lecture 20 Animating the Camera

Section 4: Exporting and Editing of the Animation

Lecture 21 Rendering & Exporting Frames

Lecture 22 Taking Screenshots

Lecture 23 Merging Frames in DaVinci Resolve

Lecture 24 Colour Correction in DaVinci Resolve

Lecture 25 Adding Camera Shake in DaVinci Resolve

Lecture 26 Adding Sound in DaVinci Resolve

Lecture 27 Final Render & Conclusion

Beginner 3d artists interested in creating 3d animations

Homepage


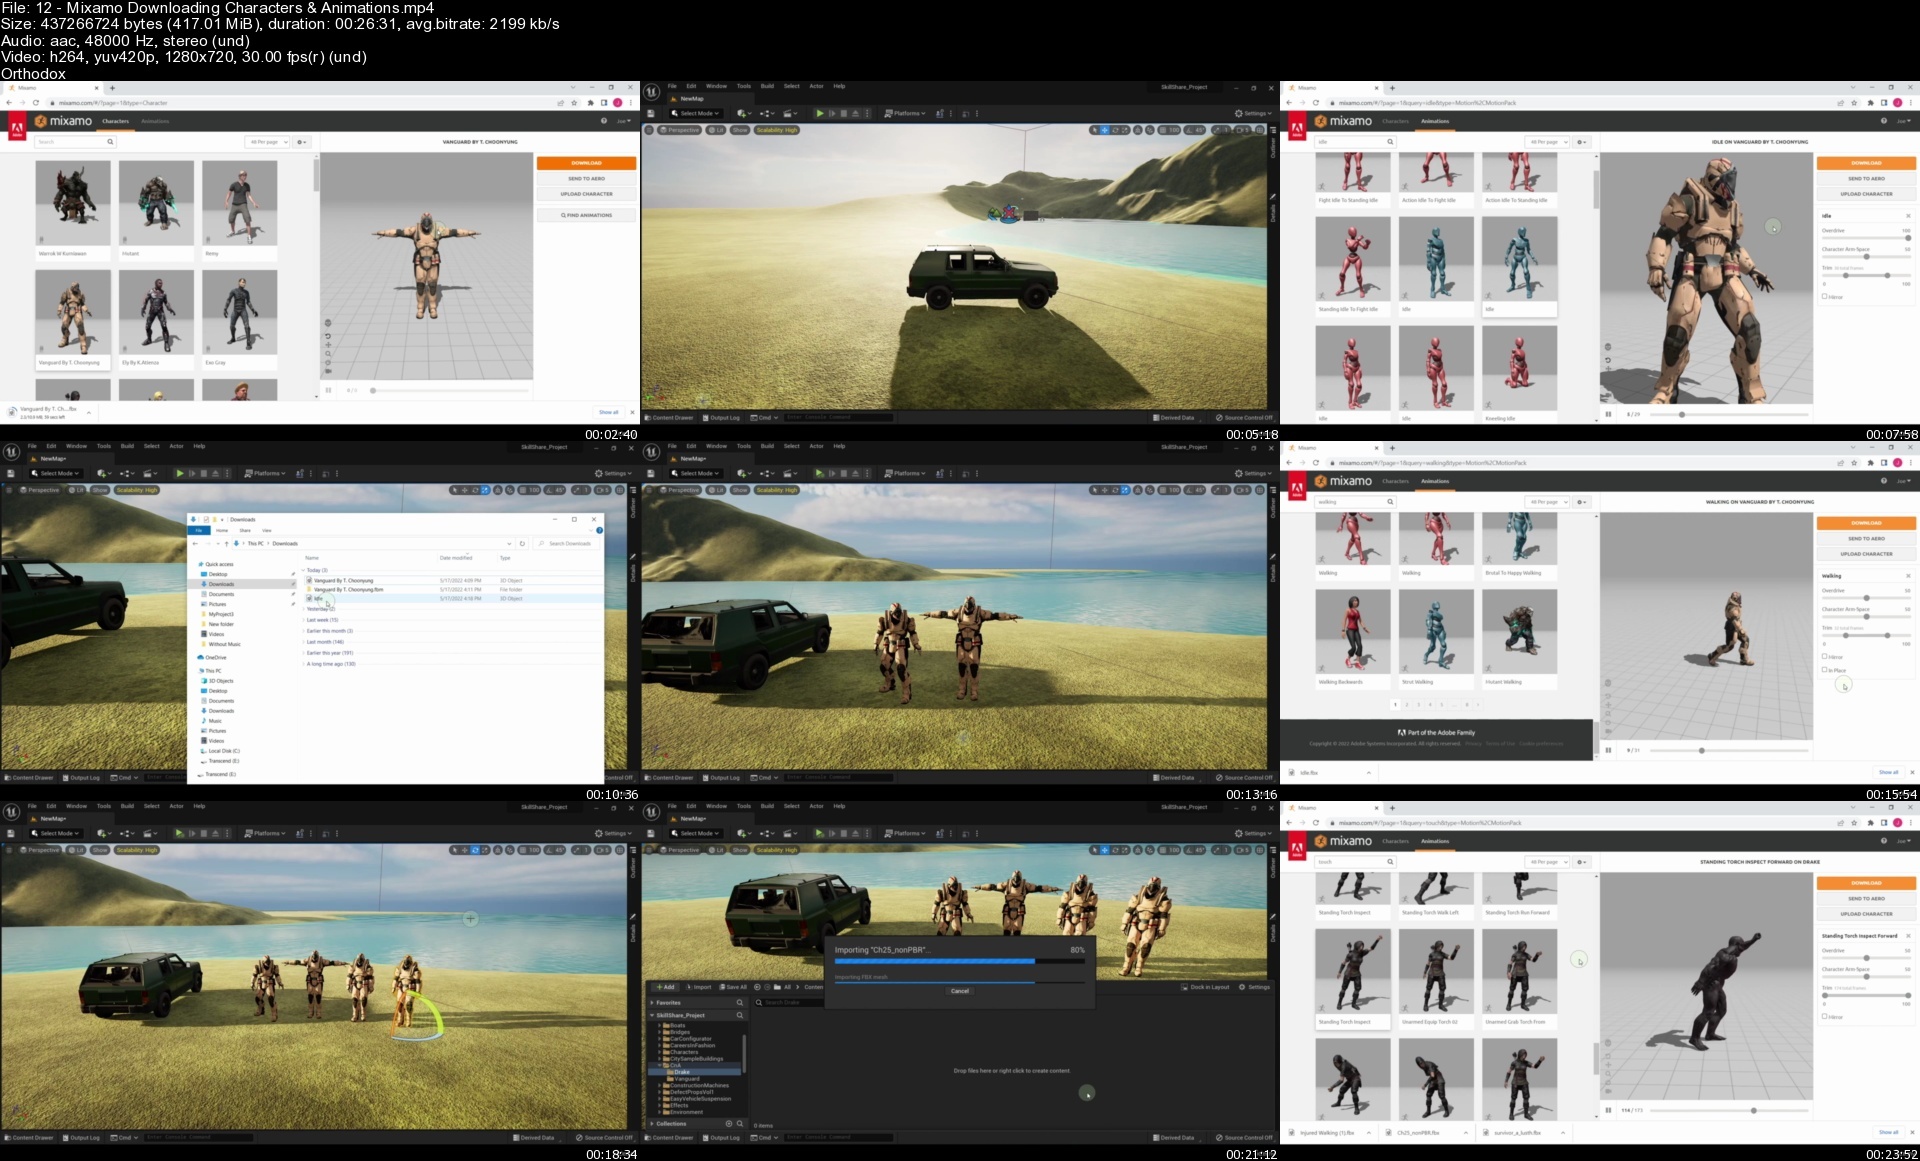
12mixamodownloadingchsgid7.jpg


Outgang Studio - Laura Gallagher

wwhivn2tny9xjofj8gfggpmebr.jpg


Outgang Studio - Laura Gallagher
MP4 | Video: h264, yuv420p, 1280x720 | Audio: aac, 48000 Hz | Duration: 127h 15m | 61.4 GB
Genre: eLearning | Language: English

some courses re-use certain clips, those have been redirected to via shortcuts to avoid duplicates, also some clips (not many) are on their official youtube, those i just linked to the relevant youtube clips, not sure if i did everything right

Welcome to Outgang
Become a better character artist

100+ hours of classes on sculpting in Zbrush, Marvelous Designer, facial anatomy, Substance Painter, Substance Designer and more.

Outgang is Laura Gallagher's initiative to provide affordable, high quality education and other tools to character artists worldwide.

Laura is a veteran of the games industry, having worked almost ten years at Eidos Montreal and over two years at Guerrilla Games, in both instances up to the role of Lead Character Artist. Laura worked on franchises including Deus Ex, Tomb Raider, Marvel and Horizon.

Laura has been teaching character art since 2012, most prominently as a university lecturer at NAD/UQAC in Montreal and online for CGMA. Over the years she mentored a sizeable number of apprentice character artists that have gone on to succeed in their chosen industry.

Laura's teaching approach is centered on developing key problem-solving skills and critical reflection to allow artists not only to solve the creative challenges they now face, but the challenges they will face in the future.

Homepage

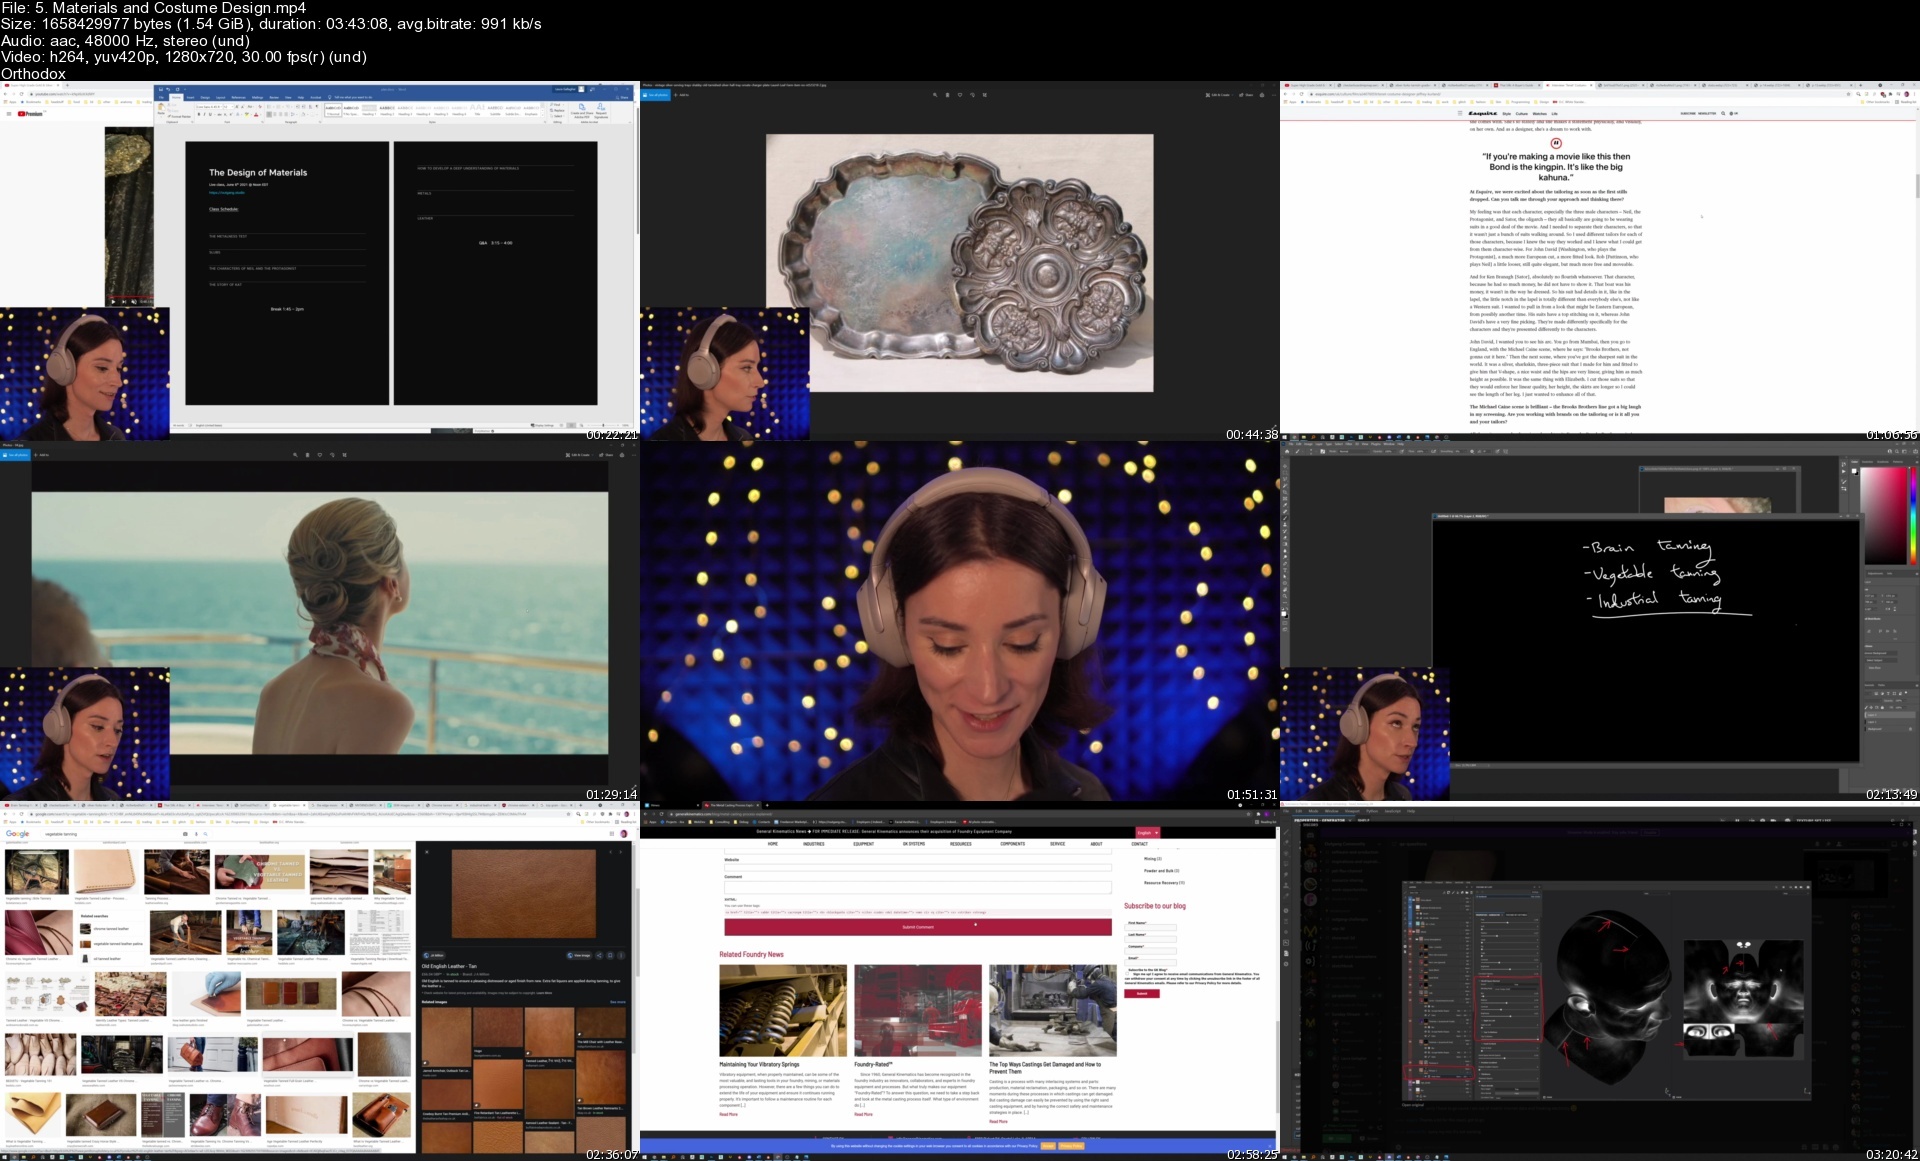
5.materialsandcostumefeivw.jpg


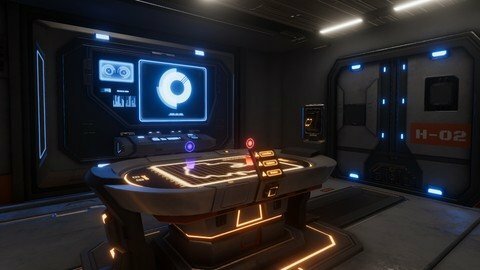
Sci-Fi 3D Game Environment Design Modeling & Texturing

6m98yun9waizoiqijljgmddi1n.jpg


Sci-Fi 3D Game Environment Design Modeling & Texturing
Last updated 10/2019
MP4 | Video: h264, 1280x720 | Audio: AAC, 44.1 KHz
Language: English | Size: 22.69 GB | Duration: 27h 6m

Learn How to Create a Sci-fi Scene using 3ds Max, Substance, Photoshop & Unity


What you'll learn
Create a 3D environment suitable for games
Learn High Definition Rendering Pipeline in Unity
Bake clean maps and create Trim Sheets
Gain understanding on how to create realistic lighting to set the mood
Create UV layouts correctly and efficiently
Learn how to apply dirt and grime using Substance

Requirements
Basic knowledge of 3ds Max, Substance Painter, Photoshop, and Unity

Description
Instructor InfoManuel Rondon is currently working as a freelance 3D artist and college instructor. He loves both jobs because they allow him to work on what he is passionate about while still having some creative freedom. His advice for students who are just starting out and want to make it in the industry is to be knowledgeable and be open to different areas of 3D art as this can give you more opportunities for jobs. As you gain more experience, you can then specialize in characters, textures, or animations but in the beginning, it's best to wear as many hats as possible. Course Info In this course, you will learn how to build a professional sci-fi environment from scratch using 3ds Max, Substance, Photoshop and Unity. You will be taken through the whole workflow from the initial modeling to the final built and render within Unity. As a freelancer, being efficient is a very valuable asset. In this course, you will learn how to save lots of time when building an complete detailed environment. Making an environment for games is an exciting task and hope you join this journey of taking a small 2d concept to the final 3d game-ready level.

Overview

Section 1: Introduction

Lecture 1 Introduction

Section 2: Modeling

Lecture 2 Intro to Project

Lecture 3 Scene Blockout

Lecture 4 Floor Modeling Part 1

Lecture 5 Floor Modeling Part 2

Lecture 6 Palm Reader Modeling

Lecture 7 Computer Panel Modeling

Lecture 8 Trim Sheet Part 1

Lecture 9 Trim Sheet Part 2

Lecture 10 Trim Sheet Part 3

Lecture 11 Table Modeling Part 1

Lecture 12 Table Modeling Part 2

Lecture 13 Table Modeling Part 3

Lecture 14 Table Modeling Part 4

Lecture 15 Door Modeling Part 1

Lecture 16 Door Modeling Part 2

Lecture 17 Door Modeling Part 3

Lecture 18 Door Modeling Part 4

Lecture 19 Computer Modeling Part 1

Lecture 20 Computer Modeling Part 2

Lecture 21 Scene Fixes

Lecture 22 Wall Modeling Part 1

Lecture 23 Wall Modeling Part 2

Lecture 24 Wall Modeling Part 3

Lecture 25 Wall Modeling Part 4 (Roof Elements)

Lecture 26 Final Modeling Refinements

Lecture 27 Gadget Modeling

Section 3: Unwrapping

Lecture 28 Unwrapping Intro

Lecture 29 UVW1

Lecture 30 Unwrapping the Door Part 1

Lecture 31 Unwrapping the Door Part 2

Lecture 32 Unwrapping the Table Part 1

Lecture 33 Unwrapping the Table Part 2

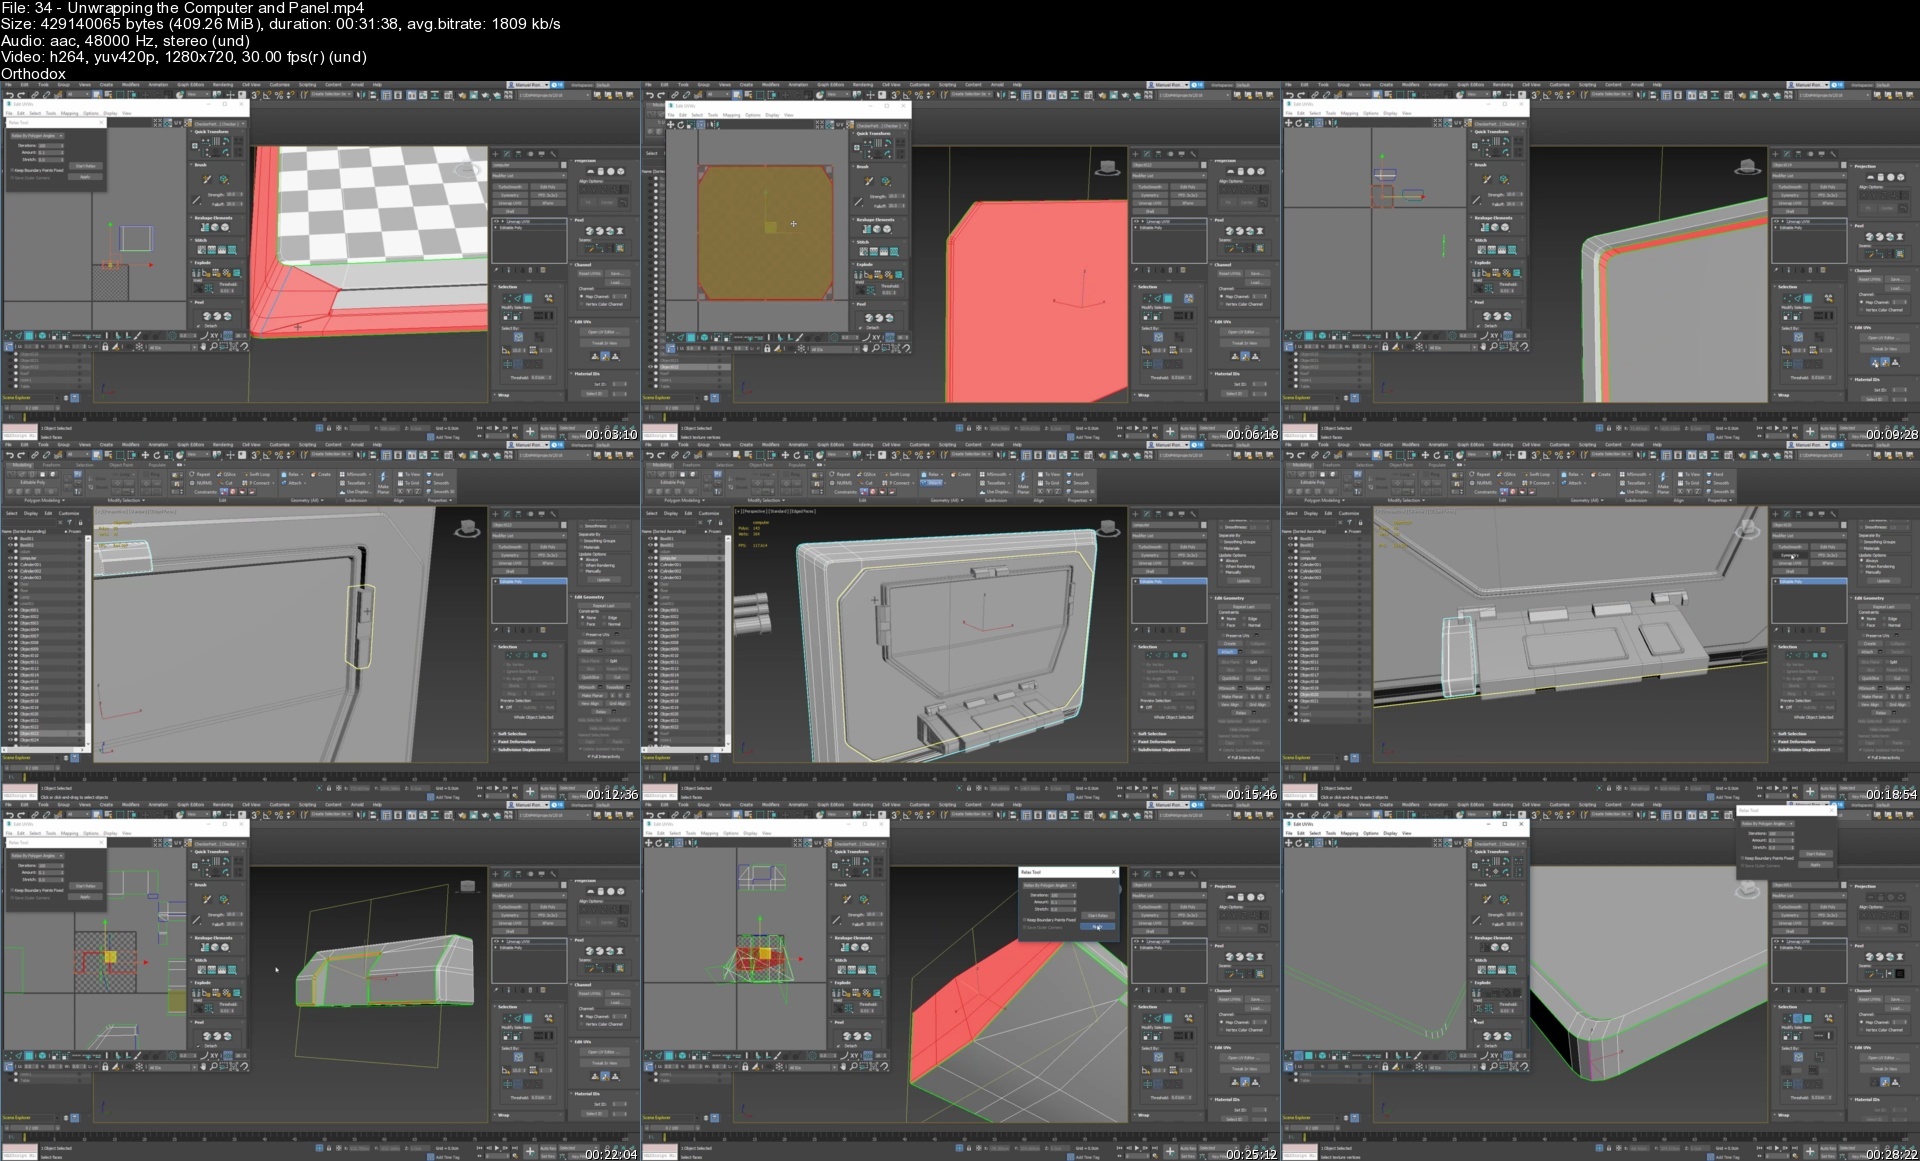
Lecture 34 Unwrapping the Computer and Panel

Lecture 35 Unwrapping the Walls Part 1

Lecture 36 Unwrapping the Walls Part 2

Lecture 37 Unwrapping Wall Panels

Lecture 38 Unwrapping the Gadget

Lecture 39 Trim Sheet 2 Part 1

Lecture 40 Trim Sheet 2 Part 2

Lecture 41 Trim Sheet 2 Part 3

Lecture 42 Unwrapping the Floor and Adding the Trim

Lecture 43 Adding the Trim to the Computer Panel

Lecture 44 Adding the Trim to the Roof

Lecture 45 Adding the Trim to the Roof Column

Section 4: Texturing

Lecture 46 Asset Preparation

Lecture 47 Adding Details in Substance Painter

Lecture 48 Adding Details to the Door

Lecture 49 Creating the Materials

Lecture 50 Texturing the Door

Lecture 51 Door Weathering

Lecture 52 Texturing the Door Wall

Lecture 53 Texturing the Palm Reader

Lecture 54 Extra Wall Detail

Lecture 55 Door Wall Final Touches

Lecture 56 Texturing the Roof

Lecture 57 Texturing the Columns

Lecture 58 Texturing the Roof Column

Lecture 59 Texturing the Lamp

Lecture 60 Texturing the Floor Part 1

Lecture 61 Texturing the Floor Part 2

Lecture 62 Computer Wall Texturing (Photoshop)

Lecture 63 Computer Wall Texturing Part 1

Lecture 64 Computer Wall Texturing Part 2

Lecture 65 Computer Wall Texturing Part 3

Lecture 66 Computer Wall Texturing Part 4

Lecture 67 Creating an Alpha Symbol

Lecture 68 Computer Wall Render and Fixes

Lecture 69 Creating a Tiling Alpha in Photoshop

Lecture 70 Texturing the Table in Photoshop

Lecture 71 Adding Details to the Table

Lecture 72 Adding Color to the Table Part 1

Lecture 73 Adding Color to the Table Part 2

Lecture 74 Texturing Wall A

Lecture 75 Texturing Wall B

Lecture 76 Texturing Remaining Walls

Lecture 77 Gadget Texturing

Section 5: Unity Setup

Lecture 78 Unity Intro

Lecture 79 Unity Fixes

Lecture 80 Preparing the Textures for Unity HDRP

Lecture 81 Setting up Unity

Lecture 82 Working in Unity Part 1

Lecture 83 Working in Unity Part 2

Lecture 84 Working in Unity Part 3

Lecture 85 Working in Unity Final

Lecture 86 BONUS LECTURE

Lecture 87 BONUS LECTURE (Setting up HDRP Manually)

Anyone who wants to know how to create a 3D game environment,Anyone who wants to take their 3D environment creation skills to the next level

Homepage


34unwrappingthecomputrfedl.jpg


The Spiritual Person'S Guide To Success (Certificate)

5lethbhkx8mspdjgzzddv0te8o.jpg


The Spiritual Person'S Guide To Success (Certificate)
Last updated 2/2020
MP4 | Video: h264, 1280x720 | Audio: AAC, 44.1 KHz
Language: English | Size: 7.12 GB | Duration: 5h 53m

Psychological and Biblical Principles that Conditions Habits for Success.


What you'll learn
Psychological and Biblical Principles that conditions the habits for success.
Recognize basic learning concepts that may contribute to success;
Distinguish the difference between positive and negative habits that may hinder success;
Explain and construct positive spiritual habits that promotes success.

Requirements
There are no requirements or prerequisites for taking this course.

Description
Some theorists believe that there is a library of collective knowledge, and our brain acts as a receptor to this universal intelligence. Though our mind cannot be seen, it is a part of a larger universal mind. The intellectual capability of the human mind is ever expanding.To become successful and fulfill your destiny, you must have the capability to think and process information on a higher level. This process can be learned. There is a Mystery Element to success that everyone has access to. You must be able to interpret data in all its mystery, that is not seen, whereas others can only receive and accept data that is seen. You have the ability to access your genus and expand your mindset with wisdom and knowledge correctly interpreted to create your own personal blueprint for your success.This course provides information on proven success strategies obtained through researching psychological and biblical principles to condition habits for success.Upon completion of this course, the student should be able to:· Develop an appreciation of the connection between psychology and spiritualism.· Identify the different types of success and determine personal focus.· Recognize the key elements needed to form positive habits and maintain them automatically.· Explain biblical knowledge of spirit-based living and operation.· Become familiar with the methods and techniques by which psychologists acquire an understanding of human behavior.· Develop a personal blueprint of success by using goal setting approaches and planning strategies.· Discover the personal meaning of the Mystery Element.· Explain the application process of the seven steps required when creating the habits for success.

Overview

Section 1: Introduction

Lecture 1 TME 1 - Intro to The Spiritual Person's Guide to Success

Lecture 2 Syllabus Review & Course Introduction

Lecture 3 TME 2 - The Mystery Element & Parapsychology

Section 2: The Psychology of Science & Behavior

Lecture 4 The Meaning of Success

Lecture 5 TME 3 - The Meaning of Success in Its Various Forms

Lecture 6 TME 4 - Destiny & Values

Section 3: Understanding the Habits for Success

Lecture 7 TME 5 - How Habits Predict Our Outcomes

Lecture 8 TME 6 - How Emotions Affect Our Behavior

Lecture 9 TME 7 - How to Eliminate Negative Behaviors & Adapt New Positive Behaviors

Section 4: The Psychology of Thought, Belief & Theories of the Collective Consciousness

Lecture 10 The Psychology of Thought, Belief & Theories of the Collective Consciousness

Lecture 11 TME 8 - The Power of Words

Lecture 12 TME 9 - The Psychology of the Mind & Consciousness

Lecture 13 TME 10 - The Psychology of Belief Systems

Lecture 14 TME 11 - The Connection Between Metaphysics & Consciousness

Lecture 15 TME 12 - Theories of Collective Unconsciousness

Section 5: The Psychology of Religion & Spirituality

Lecture 16 Religion vs Spirituality

Section 6: Psychology of Application - Building Your Mystery Element Blueprint to Success

Lecture 17 Psychology of Spiritual Application

Lecture 18 The Spirit of God is in You!

Lecture 19 The Armor of God - Finding Your Purpose

Lecture 20 Ask God & Declare in Faith - Faith Without Works is Dead

Lecture 21 Faith - Parable of the Sower - Work SMART!

Section 7: The Spiritual Person's Guide to Success Blueprint Worksheet

Lecture 22 An End of Course Thank You...

Anyone interested in learning psychological and biblical principles to condition habits for their own personal or financial success.

Homepage


9tme7howtoeliminatenenrfr3.jpg


Mastering Microcontroller: Timers, PWM, CAN, Low Power(MCU2)

pcdahffrfazf88fise0oq4odfk.jpg


Mastering Microcontroller: Timers, PWM, CAN, Low Power(MCU2)
Last updated 3/2023
MP4 | Video: h264, 1280x720 | Audio: AAC, 44.1 KHz
Language: English | Size: 14.31 GB | Duration: 21h 24m

Learn STM32 Timers, CAN, RTC, PWM, Low Power embedded systems and program them using STM32 Device HAL APIs step by step.


What you'll learn
You will learn from scratch about STM32 Timers : Basic and General Purpose Timers
Understand General purpose timer's Input capture and Output compare unit handling and Exercises
Handling of Timer interrupts : Time base interrupts, capture interrupts, compare interrupts
You will learn from scratch CAN Protocol, CAN Signalling, CAN Transceivers , Bus Access procedures
Understand CAN LOOPBACK mode, SILENT mode and NORMAL mode
Understand about CAN filtering
Learn about CAN interrupts
CAN Peripheral programming using STM32 device HAL drivers
You will master Low power modes of the MCU : SLEEP,STOP and STANDBY
You will understand different power domains of the MCU : VDD domain, 1.2V domain, backup domain
Understand Microcontroller Wakeup Procedures using : RTC, wakeup pins,EXTI,etc.
You will master RTC Features : CALENDAR, ALARM , TIME STAMP,WAKEUP UNIT
RTC interrupts and wake up procedures
Mastering Microcontroller Clocks Handling : HSE,HSI,LSE,LSI,PLL
Understand phase locked loop (PLL) programming
Learn PWM mode and Master through step by step code exercises
You should be able to quickly develop applications which involves STM32 Device HAL layer


Requirements
Basic knowledge of C Programming and Microcontroller could be added advantage but not mandatory


Description
Update: English closed captions have been added, transcript availableCourse code: MCU2>>Welcome to the course which teaches you advanced Micro-controller programming. In this course you are going to learn and master Timers , PWM, CAN, RTC, Low Power modes of STM32F4x Micro-controller with step by step guidance. Highly recommended if you are seeking a career in the domain of Embedded software. <<In this course, you will understand behind the scene working of peripherals with supportive code exercises. I have included various real-time exercises which help you to master every peripheral covered in this course and this course thoroughly covers both theory and practical aspects of Timers, PWM, CAN, RTC, Low Power modes of STM32F4x Micro-controller.In Timer Section the course covers,1. Simple time-based generation using the basic timer in both polling and interrupt mode2. Timer interrupts and IRQ numbers, ISR implementation, callbacks, etc3. General-purpose timer4. Working with Input Capture channels of General-purpose timer5. Interrupts, IRQs, ISRs, callbacks related to Input Capture engine of the general purpose timer6. Working with output capture channels of the General purpose timer7. Interrupts, IRQs, ISRs, callbacks related to Output Capture engine of the general purpose timer8. PWM generation using output capture modes9. PWM Exercises10. Step by Step code development process will help you to master the TIMER peripheralIn CAN Section the course covers,1. Introduction to the CAN protocol2. CAN frame formats3. Understanding a CAN node4. CAN signaling (single-ended signals vs differential signals ) \5. CAN Bus recessive state and dominant state6. CAN Bit timing Calculation \7. CAN network with Transceivers8. Exploring inside view of CAN transceivers9. CAN Self-test modes such as LOOPBACK, SILENT LOOPBACK, etc with code exercises.10. Exploring STM32 bXCAN peripheral11. self-testing of bxCAN peripheral with exercises12. bXCAN block diagram13. Tx/Rx path of the bxCAN Peripheral14. CAN frame filtering and executrices15. CAN in Normal Mode16. Communicating between 2 boards over CAN17. Code exercisesIn the Power Controller Section the course covers,1. ARM Cortex Mx Low Power Modes Normals Vs DeepSleep2. STM32 SLEEP mode3. STOP mode4. STANDBY mode5. Current measurement with different submode6. Waking up MCU by using wakeup pins, EXTI, RTC, etc7. Backup SRAM8. Step by Step coverage with lots of code exercises.In RTC Section the course covers,1. RTC functional block diagram2. RTC clock management3. RTC calendar unit4. RTC Alarm unit5. RTC wake-up unit6. RTC Time Stamp Unit7. waking up MCU using RTC events8. RTC interrupts9. and lots of other details with step by step code exercises.STM32 Device HAL framework1. STM32 Device Hal framework details2. APIs details3. Interrupt handling4. Callback implementation5. Peripheral Handling and configurations6. Step by Step explanation with code exercises.==> Important note: This course is NOT about auto-generating code using STM32CubeMx software<==Hardware used :STM32F446RE-NUCLEO BoardCAN Transceivers for CAN ExercisesIDE used :Eclipse-based OpenSTM32 SystemWorkbenchLearning order of FastBit Embedded Brain Academy Courses,If you are a beginner in the field of embedded systems, then you can take our courses in the below-mentioned order. This is just a recommendation from the instructor for beginners. 1) Microcontroller Embedded C Programming: absolute beginners(Embedded C)2) Embedded Systems Programming on ARM Cortex-M3/M4 Processor(ARM Cortex M4 Processor specific)3) Mastering Microcontroller with Embedded Driver Development(MCU1)4) Mastering Microcontroller: TIMERS, PWM, CAN, RTC,LOW POWER(MCU2)5) Mastering Microcontroller: STM32-LTDC, LCD-TFT, LVGL(MCU3)6) Embedded System Design using UML State Machines(State machine)7) Mastering RTOS: Hands-on FreeRTOS and STM32Fx with Debugging(RTOS)8) ARM Cortex M Microcontroller DMA Programming Demystified(DMA)9) STM32Fx Microcontroller Custom Bootloader Development(Bootloader)10) Embedded Linux Step by Step using Beaglebone Black(Linux)11) Linux device driver programming using Beaglebone Black(LDD1)

Overview
Section 1: Introduction

Lecture 1 what are we going to do in this course ?

Lecture 2 Important Note

Lecture 3 Source Code and Slides

Lecture 4 Rating and Review

Section 2: Development board details

Lecture 5 Note for the students

Lecture 6 About the development board used in this course

Lecture 7 Board Details and Locating Documents

Lecture 8 ST-Link Driver Installation

Lecture 9 ST Link Firmware Upgrade

Section 3: Hardware/Software Requirements

Lecture 10 Hardware/Software Requirements

Section 4: Installing OpenSTM32 System-Workbench

Lecture 11 Note for the students

Lecture 12 Downloading and Installing OpenSTM32 System-Workbench

Lecture 13 Installing OpenSTM32 System-Workbench

Lecture 14 STM32 CUBE mx installation

Section 5: STM32 HAL and Project Architecture

Lecture 15 Introduction to STM32 Cube Project Architecture

Lecture 16 Creating and Importing Project into OpenSTM32 System Workbench - Part1

Lecture 17 Understanding Project Hierarchy

Lecture 18 Project Layers Interaction

Lecture 19 STM32 Cube framework program flow-1

Lecture 20 STM32 Cube framework program flow-2

Lecture 21 HAL_Init()

Lecture 22 Understanding main.c msp.c and it.c

Lecture 23 Peripheral Handle Structure

Lecture 24 Linking Handle Structure and Peripheral

Lecture 25 STM32 HAL Header File Hierarchy

Section 6: Understanding STM32 HAL program flow with UART exercise

Lecture 26 Importing Source Codes

Lecture 27 Project Creation

Lecture 28 Low level Processor specific hardware initialization: Part 1

Lecture 29 Low level Processor specific hardware initialization: Part 2

Lecture 30 Low level Processor specific hardware initialization: Part 3

Lecture 31 Peripheral High Level Initialization

Lecture 32 Peripheral Low Level Initialization

Lecture 33 Peripheral Low Level Initialization : configuring Pin Packs

Lecture 34 Peripheral Low Level Initialization : Alternate function settings

Lecture 35 Peripheral Low Level Initialization : IRQ settings

Lecture 36 STM32 HAL Peripheral data handling APIs

Lecture 37 UART Data TXing : Part 1

Lecture 38 UART Data TXing : Part 2

Lecture 39 UART Data RXing: Intro

Lecture 40 Implementing UART DATA RXing in Polling mode

Lecture 41 UART Data RXing in Interrupt Mode : Part 1

Lecture 42 UART Data RXing in Interrupt Mode : Part 2

Lecture 43 UART Data RXing in Interrupt Mode : Part 3

Lecture 44 UART Data RXing in Interrupt Mode : Part 4

Section 7: Clocks and PLL Programming

Lecture 45 Introduction to different clock sources of the microcontroller

Lecture 46 Understanding methods to configure the SYSCLK

Lecture 47 Exploring clock handling APIs in RCC driver files

Lecture 48 Exercise : OSC Init and HSE bypass

Lecture 49 Exercise : Clock init implementation

Lecture 50 Exercise : SYSTICK configuration and summary

Lecture 51 Exercise : Testing

Lecture 52 Understanding HSI calibration

Lecture 53 PLL introduction and working principle

Lecture 54 Exercise : PLL Configuration via HSI Part 1

Lecture 55 Exercise : PLL Configuration via HSI Part 2

Lecture 56 Exercise : PLL Configuration via HSE

Lecture 57 Exercise : PLL Configuration for 180MHz

Lecture 58 Exercise : PLL Configuration for 180MHz implementation

Section 8: Timers

Lecture 59 Introduction to Timers

Lecture 60 Types of Timers

Lecture 61 Timer Availability in STM32 MCUs

Lecture 62 Timer Availability in STM32 MCUs : Summary

Lecture 63 STM32 Basic Timer Assembly

Lecture 64 Timer Exercise : Project creation

Lecture 65 Timer Exercise : Understanding Timer Clock (TIMx_CLK)

Lecture 66 Timer Exercise : Understanding Prescaler and Period(ARR)

Lecture 67 Timer Exercise : Period Value Calculation

Lecture 68 Timer Exercise : MSP Init Implementation

Lecture 69 Timer Exercise : Test

Lecture 70 Timer Exercise : Interrupt Mode

Lecture 71 Timer Exercise : 10 Micro timer base generation

Section 9: General Purpose Timer: Input Capture Unit

Lecture 72 Timer with input capture block

Lecture 73 Input Capture Exercise : working principle

Lecture 74 Input Capture Exercise : time base init

Lecture 75 Input Capture Exercise : Channel Configuration

Lecture 76 Input Capture Exercise : Channel Configuration Coding

Lecture 77 LSE Configuration

Lecture 78 Testing of LSE on MCO1 Pin

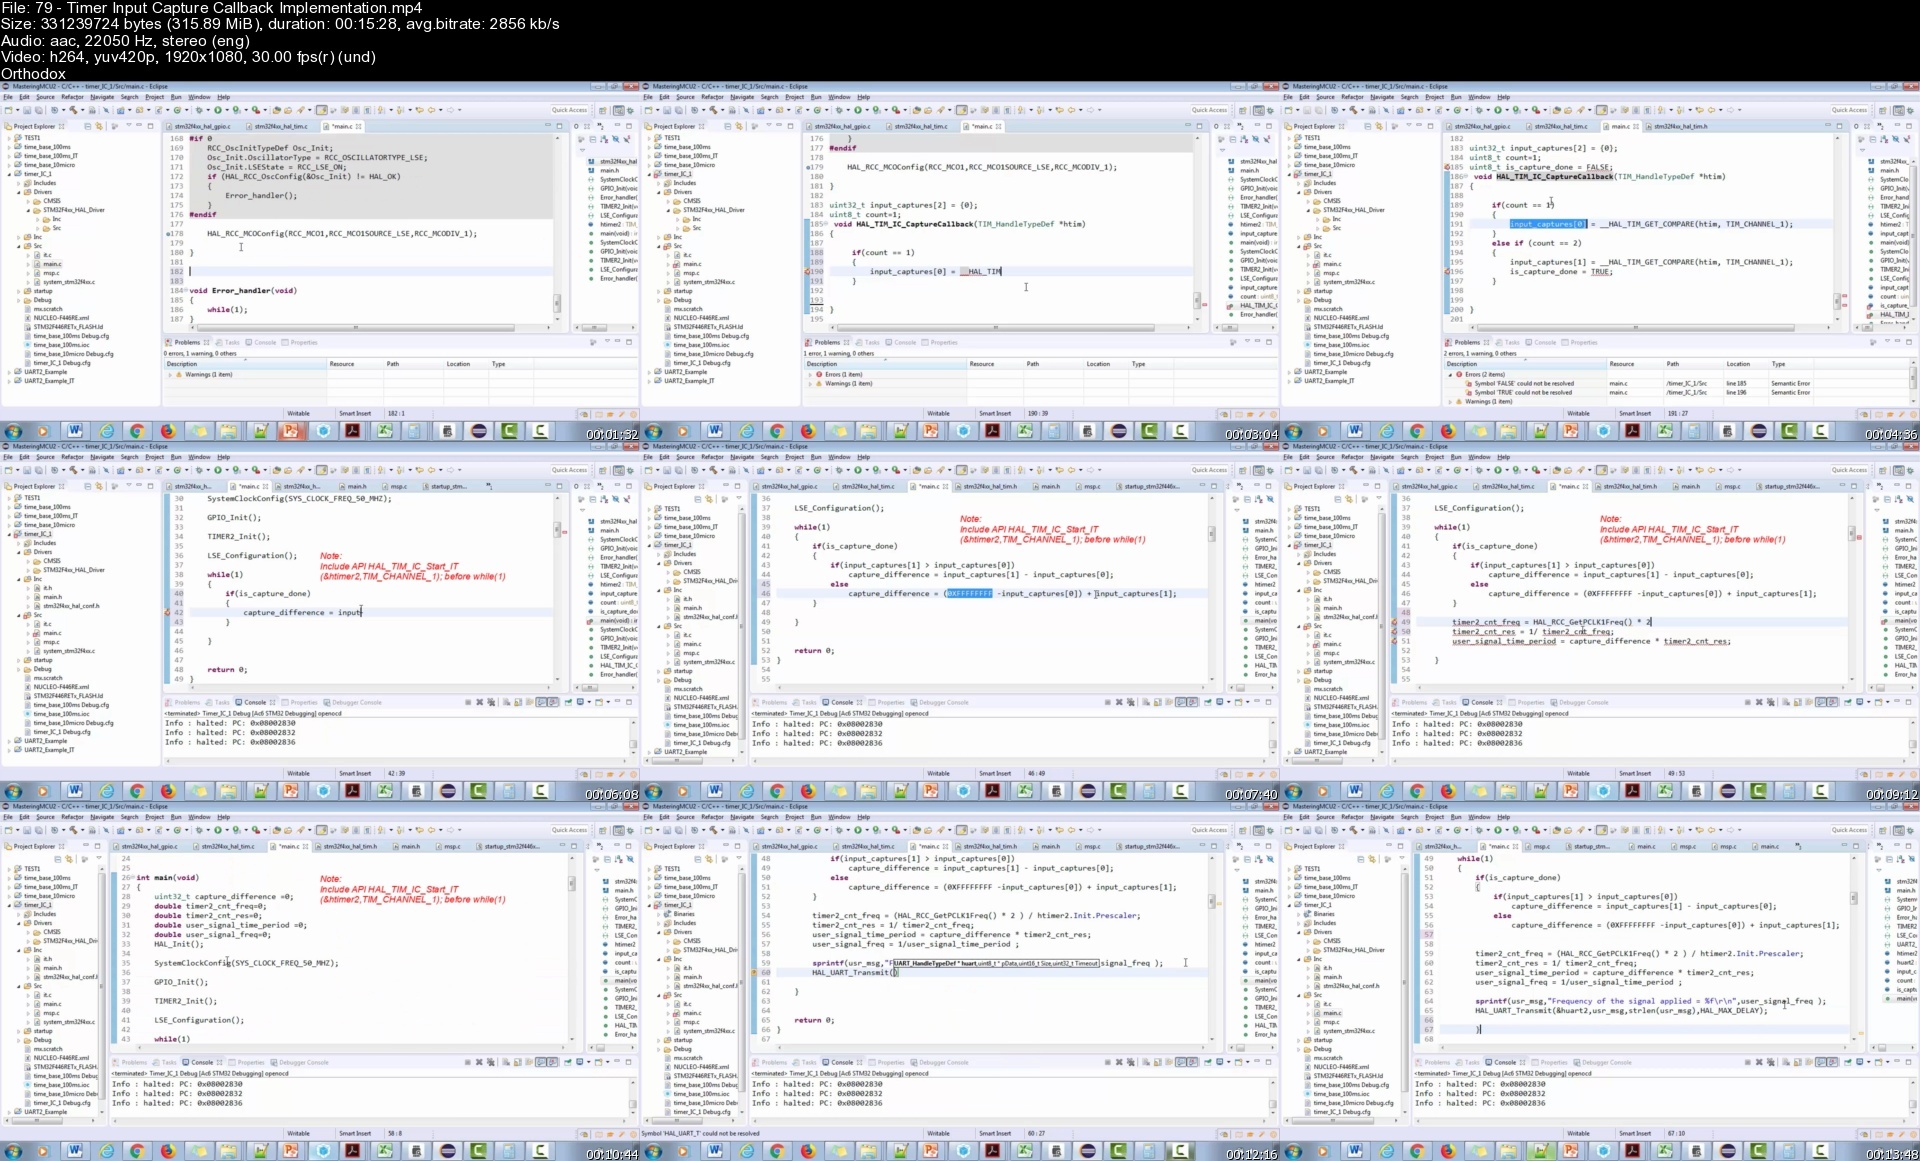
Lecture 79 Timer Input Capture Callback Implementation

Lecture 80 Input Capture Exercise : Testing

Lecture 81 Input Capture Exercise : Update on HSE

Lecture 82 Input Capture Exercise : with 4Mhz external signal

Lecture 83 Input Capture Exercise : with 50KHz external signal

Section 10: Timer's Output Compare unit

Lecture 84 Timer Output compare Introduction

Lecture 85 Output Compare Exercise : Project Creation

Lecture 86 Output Compare Exercise Coding : Part 1

Lecture 87 Output Compare Exercise Coding : Part 2

Lecture 88 Output Compare Exercise Coding : Part 3

Lecture 89 Output Compare Exercise Coding : Part 4

Lecture 90 Output Compare Assignment

Section 11: PWM

Lecture 91 PWM Introduction

Lecture 92 PWM Exercise : Part 1

Lecture 93 PWM Exercise : Part 2

Lecture 94 PWM Exercise : Part 3

Lecture 95 PWM Exercise : Part 4

Lecture 96 PWM Exercise : Part 5

Lecture 97 PWM Exercise : Part 6

Lecture 98 PWM Exercise : Part 7

Lecture 99 LED brightness control using PWM signal: Part 1

Lecture 100 LED brightness control using PWM signal: Part 2

Section 12: Controller Area Network Fundamentals

Lecture 101 CAN section introduction

Lecture 102 Introduction to CAN

Lecture 103 CAN's most attractive features

Lecture 104 Summary of CAN features

Lecture 105 Understanding a CAN and its parts

Lecture 106 CAN single ended signals Vs Differential signal

Lecture 107 Understanding CAN differential signals

Lecture 108 CAN Dominant and Recessive Signal states

Lecture 109 CAN signalling summary

Section 13: CAN frame formats

Lecture 110 CAN Message format explanation : Arbitration field

Lecture 111 Standard CAN Vs Extended CAN

Lecture 112 CAN Message format explanation : ACK bit

Lecture 113 ACK Summary

Lecture 114 CAN Message format explanation : EOF, IFS and SOF

Lecture 115 CAN remote frame

Section 14: CAN Bus Arbitration

Lecture 116 Understanding CAN bit wise arbitration

Section 15: STM32 bxCAN

Lecture 117 STM32 bxCAN introdcution

Lecture 118 STM32 bxCAN block diagram

Lecture 119 STM32 bxCAN self test modes

Lecture 120 Exercise : CAN loop back mode : Project Creation

Lecture 121 CAN bit timing calculation

Lecture 122 Exercise : CAN loop back mode : Coding init function

Lecture 123 Exploring bxCAN TX path

Lecture 124 Exercise : CAN loop back mode : Coding Tx function

Lecture 125 understanding bxCAN operating modes

Lecture 126 Exercise : CAN loop back mode : MSP code implementation

Lecture 127 CAN loopback connection details

Lecture 128 Exercise : CAN loop back mode : Testing and Protocol decoding

Lecture 129 STM32 bxCAN RX block diagram and acceptance filters

Section 16: bxCAN Frame filtering

Lecture 130 Understanding bxCAN acceptance filtering with examples

Lecture 131 Exploring filtering data structures

Lecture 132 Exercise : CAN loop back mode : Coding RX function

Lecture 133 Exercise : CAN filter config implementation and testing TX-RX

Section 17: CAN interrupts

Lecture 134 Understanding STM32 bxCAN Interrupt requests (IRQs)

Lecture 135 CAN LOOPBACK interrupt mode implementation Part -1

Lecture 136 CAN LOOPBACK interrupt mode implementation Part -2

Section 18: CAN normal mode and exercise

Lecture 137 Exercise : CAN Normal Node Introduction - Part-1

Lecture 138 Exercise : CAN Normal Node Project Creation- Part-2

Lecture 139 Exercise : CAN Normal Node Code Implementation - Part-3

Lecture 140 Exercise : CAN Normal Node Code Implementation - Part-4

Lecture 141 Exercise : CAN Normal Node Code Implementation - Part-5

Lecture 142 Exercise : CAN Normal Node Testing TX - Part-6

Lecture 143 Exercise : CAN Normal Node Testing TX - Part-7

Lecture 144 Exercise : CAN Normal Node RX Code implementation- Part-8

Lecture 145 Exercise : CAN Normal Node RX Code implementation- Part-9

Lecture 146 Exercise : CAN Normal Node Sending Remote Frame Part-10

Lecture 147 Exercise : CAN Normal Node Testing- Part-11

Lecture 148 Exercise : CAN Normal Node Testing TX at 1Mbit/sec - Part-12

Lecture 149 Exercise : CAN Normal Configuring acceptance filtering - Part-13

Lecture 150 Exercise : CAN Normal Configuring acceptance filtering - Part-14

Section 19: Low Power Modes

Lecture 151 Section Introduction

Lecture 152 MCU low power modes introduction

Lecture 153 Processor specific low power modes

Lecture 154 Entering normal and deep sleep modes

Lecture 155 Entering sleep mode using SLEEPONEXIT feature

Lecture 156 Exercise : Usage of SLEEPONEXIT feature

Lecture 157 waking up from SLEEPONEXIT feature

Lecture 158 Exercise : test SLEEPONEXIT feature -creating a project

Lecture 159 Exercise : Implementation and current measurement without SLEEPONEXIT feature

Lecture 160 Current measurement with SLEEPONEXIT feature

Lecture 161 SLEEPONEXIT Exercise summary

Section 20: Current reduction tips and tricks

Lecture 162 Tips to reduce current consumption

Lecture 163 Current measurement with increased HCLK frequency

Lecture 164 Current measurement with increased UART baudrate

Lecture 165 Clock gating and RCC Low power register settings

Lecture 166 IO analog mode and effect on current consumption

Lecture 167 Current measurement in IO analog mode

Section 21: WFI and WFE

Lecture 168 Understanding WFI instruction

Lecture 169 WFI Exercise Introduction

Lecture 170 WFI Exercise Implementation

Lecture 171 Understanding WFE and event register of ARM Cortex Mx processor

Lecture 172 WFE wake-up behavior and Comparison with WFI

Lecture 173 WFE exercise introduction

Lecture 174 WFE project explanation

Lecture 175 Generating Peripheral events in STM32 MCU

Lecture 176 WFE project implementation-Part1

Lecture 177 WFE project implementation-Part2

Lecture 178 Difference and similarity between WFI and WFE

Lecture 179 When to use WFE and WFI ?

Section 22: STM32 Low Power modes and Voltage domains

Lecture 180 MCU specific low power modes

Lecture 181 STM32 MCU voltage domains

Section 23: STM32 Voltage Regulator

Lecture 182 STM32 voltage regulator and its modes

Lecture 183 Voltage regulator Over Drive and Power Down mode

Section 24: Current Measurement and datasheet comparison : RUN Mode

Lecture 184 Current measurement with core-mark in Run mode-Part1

Lecture 185 Current measurement with core-mark in Run mode-Part2

Lecture 186 Run mode current measurement + HCLK180MHz+ all peripherals enabled

Lecture 187 Run mode current measurement + HCLK180MHz + all peripherals enabled + ART

Section 25: Current Measurement and datasheet comparison : SLEEP Mode

Lecture 188 SLEEP mode current measurement

Lecture 189 SLEEP mode and Voltage regulator settings to save current

Section 26: Current Measurement and datasheet comparison : STOP Mode

Lecture 190 STOP mode and wake-up latency

Lecture 191 STOP mode current measurement

Lecture 192 Microcontroller wake-up Pins discussion

Section 27: STM32 BACKUP SRAM and STANDBY MODE effect

Lecture 193 Understanding STM32 BACKUP SRAM

Lecture 194 Different types of MCU resets

Lecture 195 BACKUP SRAM exercise Intro

Lecture 196 Backup SRAM Exercise implementation part 1

Lecture 197 Backup SRAM Exercise implementation part 2

Section 28: RTC and RTC Calendar Block

Lecture 198 RTC Introduction

Lecture 199 RTC BCD programming example

Lecture 200 RTC block diagram and RTC Clock selection

Lecture 201 RTC and STM32 device HAL APIs explanation

Lecture 202 Exercise : RTC Calendar Part-1

Lecture 203 Exercise : RTC Calendar Part-2

Lecture 204 Exercise : RTC Calendar Part-3

Lecture 205 Exercise : RTC Calendar Part-4

Lecture 206 Exercise : RTC Calendar Testing

Lecture 207 Exercise : RTC Calendar Testing with system reset and STANDBY exit

Section 29: RTC Alarm

Lecture 208 RTC Alarm Introduction

Lecture 209 STM32 CUBE APIs for RTC Alarm Handling

Section 30: RTC Interrupts

Lecture 210 RTC Interrupts and IRQ numbers

Lecture 211 RTC Interrupts Summary

Section 31: RTC Alarm Exercises

Lecture 212 RTC Alarm Exercise-1

Lecture 213 RTC Alarm Exercise-1 Testing

Lecture 214 RTC Alarm Exercise-2

Lecture 215 RTC Alarm Exercise-2 Testing

Lecture 216 RTC Alarm Exercise-3

Lecture 217 RTC Alarm Exercise-4

Lecture 218 BONUS LECTURE

Professionals interested in exploring Embedded systems,Anyone who wants to start career in Embedded Systems,Anyone who wants to learn Microcontroller programming in depth,Students in the domain of Embedded Systems

Homepage


79timerinputcapturecaexf0e.jpg


The Environment Artist's Survival Kit: Learn how to create your own beautiful worlds using Unreal Engine

vripnkzypqdufnzmuuz1mb3emx.jpg


The Environment Artist's Survival Kit: Learn how to create your own beautiful worlds using Unreal Engine
André Felipe de Melo Mecheto | Duration: 10h 44m | Video: H264 1920x1080 | Audio: AAC 44,1 kHz 2ch | 6,63 GB | Language: English

Environment Art is Hard. Especially as a beginner, like yourself. There are a ton of workflows out there, and it can be very confusing for a beginner who is just trying to get a handle on the basics. That's why the Survival Kit was created.

This is an incredibly in-depth guide to environment art that was designed for beginners to help them get over the frustration of learning new workflows - and to show you the exact steps you need to take to start creating beautiful scenes in Unreal Engine, and other industry-standard software.

This course is different. Blindly following instructions isn't a very effective way to learn. The Environment Artist's Survival Kit was designed so that you aren't copying a scene another artist made. Each student will have time after each lesson to go off on their own and use what they learned to create their OWN art, unique to them.

Homepage


05unwrappingandbakingm6eg9.jpg


MindValley - Michael Beckwith - Life Visioning Mastery

nsvfttvadcg0jzgsaadlgk8ei7.png


MindValley - Michael Beckwith - Life Visioning Mastery
MP4 + MP3 + PDF | Video: 1280x720/640x360 | Audio: AAC 44.1 Khz , 2ch | Duration: 13h 28 min | Language: English | 6.5 GB

Gain a crystal-clear vision of the life & destiny you were born for
Discover a powerful universal principle that goes beyond traditional goal setting & manifesting to help you discover your soul's purpose for your life.
What if the path to your most fulfilling life has already been written by the Universe?

And all you needed to do was accept it? As per Dr. Michael Beckwith, there are no extra people on this planet. You were born for a special reason, a unique purpose that only you can fulfill. But have you discovered this purpose?

The best part is - The Universe is always on your side and is constantly working for you to realize your unique purpose. And when you do align with this - your life moves with a fluidity and ease that makes it seem magical.

Still, most people still feel so deeply dissatisfied with where their lives are heading. If it's heading anywhere at all. What if this is simply a sign that you need to change direction? Often, struggle is a form of 'autocorrect' from the Universe to warn you that you're moving away from your soul's true intention for your life.
As Michael Beckwith says: "I believe that you're great, that there's something magnificent about you. Regardless of what has happened to you in your life, regardless of how young or how old you think you might be, the moment you begin to think properly, there's something that is within you, there's power within you, that's greater than the world. It will begin to emerge. It will take over your life. It will feed you. It will clothe you. It will guide you, protect you, direct you, sustain your very existence, if you let it.

Explore The Highest Levels Of Spiritual Awareness. And Manifest Your True Life Vision.
The Life Visioning Mastery Quest by Dr. Michael Beckwith is designed to help you ascend through the 4 levels of spiritual awareness - each stage sparking profound awakenings as you become more aligned with your true essence.

This process goes far beyond traditional goal setting or visualization methods you may have tried in the past. Instead of intellectualizing your way to clarity, you rediscover yourself from a place of pure instinct and inspiration.

It's here that you gain complete clarity of what success and fulfillment truly mean to you - so you can blossom into the divine expression of who you really are.
This is how you rise above goals and pursuits that do not serve you. And release the sense of dissatisfaction or emptiness that comes with a spiritually misaligned life.
Instead, you are finally free to craft a life that sings to your soul.

day15manifestorconscibedj2.jpg


Concept Art Full Process | Medieval Scene

b9pdxudcfyo4avv10yk74wzc2q.jpg


Concept Art Full Process | Medieval Scene
MP4 | Video: h264, yuv420p, 1920x1080 | Audio: aac, 48000 Hz | Duration: 6h 25m | 10.8 GB
Genre: eLearning | Language: English

This tutorial shows my typical process from begining to end. The bulk of the work is done in Photoshop, with a lot of photobashing, but I will start from doodling to building a 3D scene in Blender, all the way to a polished, finished piece.

The photo pack that I used is provided with that tutorial.

This is not a beginner level tutorial, however, you don't need to be an expert either. Just being already familiar with Blender and Photoshop, will allow you to make your way through, and hopefully come out with an awesome piece!

What you get

- The medieval photopack that I shot and used for that tutorial - 395 4K photos from 4 different locations in the South West of France

- Over 3h30 of narrated videos

- Around 3 hours of Blender + Photoshop Timelapses videos

- 2 PSD and JPG files

Topics covered

-The use of references

- Sketching

- Composition

- Building a 3D scene

- Modeling and texturing simple 3D assets

- Photobashing

- Lighting

- Story Telling

Softwares used

- Blender

- Adobe Photoshop

Homepage

06photoshoptimelapsesr8cdl.jpg


Futuristic Sci-Fi Game Environment In Blender

tbjla7ybnmey000ymfapoceciu.jpg


Futuristic Sci-Fi Game Environment In Blender
Last updated 4/2020
MP4 | Video: h264, 1280x720 | Audio: AAC, 44.1 KHz
Language: English | Size: 17.92 GB | Duration: 18h 57m

Model, Unwrap, Bake & Texture a Game 3D Environment using Blender, Substance Painter, Marmoset Tool Bag & Unreal Engine


What you'll learn
High Poly to Low Poly Modeling
Proper way of unwrapping clean UVs
Creating professional baked maps
Normal map detailing & texturing
Game design level building
Art of effective lighting
Post processing and effects

Requirements
Basic knowledge of Blender, Marmoset Toolbag, Substance Painter, and Unreal Engine

Description
Instructor InfoEmiel Sleegers always had love for video games and when he was young, he started using Unity3D for programming but he found himself gravitating more towards the art of making games. Now he is currently working as an environment artist in Ubisoft. He contributed to creating AAA games such as Forza Horizon 3 and The Division 2. His all time favorite game is The Last of Us and that video game is what inspired him to want to work in the game industry. His advice for beginner artists is to focus on one aspect of gaming that they are passionate about, stick to it and get better at it. His hobbies include anything related to games or films, whether it be working on personal projects, freelance work or going out for movies. Course Info Hey everyone, my name is Emiel Sleegers. I'm a 3D artist currently working for one of the biggest game companies Ubisoft. Finding a Blender course on creating a game environment that will take your skills to a whole new level can be hard to find. But don't worry, I am here to show you my workflow that will guide you in creating a professional environment like you see in AAA video games that you play today.In this course, we will go through the entire pipeline of creating a game-ready environment. The major topics we will be covering are:High Poly to Low Poly Modeling using BlenderProper UV unwrapping in BlenderBaking maps in Marmoset ToolbagDetailing & Texturing in Substance PainterScene setup, lighting, & post effects in Unreal EngineBy the end of this course, you will be able to create a clean and amazing futuristic game environment.Before beginning this course, you should have a basic knowledge of Blender, Substance Painter, Marmoset Toolbag and Unreal Engine. If you want to be a 3D environment artist, you need to know the latest tools, methods, and strategies to better strengthen your skills to get closer to your goal. This course will put you ahead of 99.9% of all beginners out there when it comes to game environment creation. In this course, you will learn the proper workflow and techniques that will allow you to build a complete production-ready scene. If you are serious about elevating your skills, sign up for this course, at Victory3D.

Overview

Section 1: Introduction

Lecture 1 Introduction

Lecture 2 Going Over Our References

Lecture 3 Installing Our Plugins and Shortcuts

Section 2: Blockout & Modeling Phase

Lecture 4 Creating Our Blockout Part 1

Lecture 5 Creating Our Blockout Part 2

Lecture 6 Creating Our Blockout Part 3

Lecture 7 Creating Our Blockout Part 4

Lecture 8 Creating Our Floor Low Poly and Creating the Door Part 1

Lecture 9 Creating Our Door Part 2

Lecture 10 Creating Our Door Part 3

Lecture 11 Creating Our Door Part 4

Lecture 12 Creating Our Door Part 5

Lecture 13 Creating Our Door Part 6

Lecture 14 Creating Our Door Part 7

Lecture 15 Creating Our Door Part 8

Lecture 16 Creating Our Door Part 9

Lecture 17 Creating Our Wall Part 1

Lecture 18 Creating Our Wall Part 2

Lecture 19 Creating Our Wall Part 3

Lecture 20 Creating Our Second Wall Part 1

Lecture 21 Creating Our Second Wall Part 2

Lecture 22 Creating Our Second Wall Part 3

Lecture 23 Finishing Our Second Wall and Creating Our Closed Door

Lecture 24 Turning Our High Poly Into Low Poly Part 1

Lecture 25 Turning Our High Poly Into Low Poly Part 2

Lecture 26 Turning Our High Poly Into Low Poly Part 3

Lecture 27 Turning Our High Poly Into Low Poly Part 4

Section 3: UV Unwrapping & Baking

Lecture 28 UV Unwrapping Our Models Part 1

Lecture 29 UV Unwrapping Our Models Part 2

Lecture 30 UV Unwrapping Our Models Part 3

Lecture 31 UV Unwrapping Our Models Part 4

Lecture 32 Exporting Our Models for Baking

Lecture 33 Baking Our Models Part 1

Lecture 34 Baking Our Models Part 2

Section 4: Normal Map Detailing & Texturing

Lecture 35 Setting Up Our Substance Painter Scene

Lecture 36 Adding Normal Map Details to Our Door Part 1

Lecture 37 Adding Normal Map Details to Our Door Part 2

Lecture 38 Adding Normal Map Details to Our Back Door

Lecture 39 Adding Normal Map Details to Wall A

Lecture 40 Adding Normal Map Details to Wall B

Lecture 41 Exporting Our Models for Unreal & Setting up a Quick Preview

Lecture 42 Adding Extra Normal Map Details to All Meshes

Lecture 43 Creating the Final Texture for Our Door Part 1

Lecture 44 Creating the Final Texture for Our Door Part 2

Lecture 45 Creating the Final Texture for Our Door Part 3

Lecture 46 Creating the Final Texture for Our Door Part 4

Lecture 47 Creating the Final Texture for Our Floor

Lecture 48 Creating the Final Texture for Our Wall A Part 1

Lecture 49 Creating the Final Texture for Our Wall A Part 2 and Start on Wall B

Lecture 50 Creating the Final Texture for Our Wall B

Lecture 51 Creating the Final Texture for Our Backdoor

Section 5: Scene Setup, Lighting, Post Effect & Tweaks

Lecture 52 Setting up Our Unreal Project

Lecture 53 Building Our Level

Lecture 54 Setting up Our First Lighting Pass 1

Lecture 55 Setting up Our First Lighting Pass 2

Lecture 56 Going Over Post Effects & Material Polish

Lecture 57 Improving Our Floor Texture Part 1

Lecture 58 Improving Our Floor Texture Part 2

Lecture 59 Improving Our Door Texture

Lecture 60 Improving Our Wall Textures

Lecture 61 Improving Our Back Door Texture Part 1

Lecture 62 Improving Our Back Door Texture Part 2

Lecture 63 Final Polish of Our Scene

Anyone who wants to know how to create an AAA game environment,Anyone who wants to become a better artist

Homepage


29uvunwrappingourmodeetcji.jpg


Zurück
Oben Unten