• Regeln für den Video-Bereich:

    In den Börsenbereich gehören nur Angebote die bereits den Allgemeinen Regeln entsprechen.

    Einteilung

    - Folgende Formate gehören in die angegeben Bereiche:
    - Filme: Encodierte Filme von BluRay, DVD, R5, TV, Screener sowie Telesyncs im Format DivX, XviD und x264.
    - DVD: Filme im Format DVD5, DVD9 und HD2DVD.
    - HD: Encodierte Filme mit der Auflösung 720p oder darüber von BluRay, DVD, R5, TV, Screener sowie Telesyncs im Format x264.
    - 3D: Encodierte Filme von BluRay, die in einem 3D Format vorliegen. Dies gilt auch für Dokus, Animation usw.
    - Serien: Cartoon/Zeichentrick, Anime, Tutorials, Dokumentationen, Konzerte/Musik, Sonstiges sind demnach in die entsprechenden Bereiche einzuordnen, auch wenn sie beispielsweise im High Definition-Format oder als DVD5/DVD9/HD2DVD vorliegen. Ausnahme 3D.
    - Bereich Englisch: Englische Releases gehören immer in diesen Bereich.
    - Bereich Talk: Der Bereich, in dem über die Releases diskutiert werden kann, darf, soll und erwünscht ist.


    Angebot/Beitrag erstellen

    - Ein Beitrag darf erst dann erstellt werden, wenn der Upload bei mindestens einem OCH komplett ist. Platzhalter sind untersagt.
    - Bei einem Scenerelease hat der Threadtitel ausschließlich aus dem originalen, unveränderten Releasenamen zu bestehen. Es dürfen keine Veränderungen wie z.B. Sterne, kleine Buchstaben o.ä. vorgenommen werden. Ausnahme Serienbörse:
    - Bei einem Sammelthread für eine Staffel entfällt aus dem Releasename natürlich der Name der Folge. Beispiel: Die Simpsons S21 German DVDRip XviD - ITG
    - Dementsprechend sind also u.a. verboten: Erweiterungen wie "Tipp", "empfehlenswert", "only", "reup", usw. / jegliche andere Zusatzinformation oder Ergänzung, welche nicht in obiger Beschreibung zu finden ist.

    Aufbau des Angebots und Threadtitel

    Der Titel nach folgendem Muster erstellt zu werden. <Name> [3D] [Staffel] [German] <Jahr> <Tonspur> [DL] [Auflösung] <Quelle> <Codec> - <Group>
    Beispiel: The Dark Knight German 2008 AC3 DVDRip XviD - iND
    Beispiel: The Dark Knight 2008 DTS DL BDRip x264 - iND
    Beispiel: The Dark Knight 2008 AC3 DL BDRip XviD - iND
    Beispiel: The Dark Knight German 2008 AC3 720p BluRay x264 iND
    Beispiel: The Dark Knight 2008 DTS DL 1080p BluRay x264 iND
    Beispiel: Die Simpsons S01 German AC3 DVDRip XviD iND
    Beispiel: Die Simpsons S20 German AC3 720p BluRay x264 iND
    Beispiel: Sword Art Online II Ger Sub 2014 AAC 1080p WEBRip x264 - peppermint
    Entsprechend sind also u.a. verboten: Sonderzeichen wie Klammern, Sterne, Ausrufezeichen, Unterstriche, Anführungszeichen / Erweiterungen wie "Tipp", "empfehlenswert", "only", "reup", usw. / jegliche andere Zusatzinformation oder Ergänzung, welche nicht in obiger Beschreibung zu finden ist
    Ausnahmen hiervon können in den Bereichen geregelt sein.

    Die Beiträge sollen wie folgt aufgebaut werden:
    Überschrift entspricht dem Threadtitel
    Cover
    kurze Inhaltsbeschreibung
    Format, Größe, Dauer sind gut lesbar für Downloader außerhalb des Spoilers zu vermerken
    Nfo sind immer Anzugeben und selbige immer im Spoiler in Textform.
    Sind keine Nfo vorhanden z.B. Eigenpublikationen, sind im Spoiler folgende Dateiinformationen zusätzlich anzugeben :
    Quelle
    Video (Auflösung und Bitrate)
    Ton (Sprache, Format und Bitrate der einzelnen Spuren)
    Untertitel (sofern vorhanden)
    Hosterangabe in Textform außerhalb eines Spoiler mit allen enthaltenen Hostern.
    Bei SD kann auf diese zusätzlichen Dateiinformationen verzichtet werden.

    Alle benötigten Passwörter sind, sofern vorhanden, in Textform im Angebot anzugeben.
    Spoiler im Spoiler mit Kommentaren :"Schon Bedankt?" sind unerwünscht.


    Releases

    - Sind Retail-Release verfügbar, sind alle anderen Variationen untersagt. Ausnahmen: Alle deutschen Retail-Release sind CUT, in diesem Fall sind dubbed UNCUT-Release zulässig.
    - Im Serien-Bereich gilt speziell: Wenn ein Retail vor Abschluss einer laufenden Staffel erscheint, darf diese Staffel noch zu Ende gebracht werden.62
    - Gleiche Releases sind unbedingt zusammenzufassen. Das bedeutet, es ist zwingend erforderlich, vor dem Erstellen eines Themas per Suchfunktion zu überprüfen, ob bereits ein Beitrag mit demselben Release besteht. Ist dies der Fall, ist der bereits vorhandene Beitrag zu verwenden.
    - P2P und Scene Releases dürfen nicht verändert oder gar unter einem iND Tag eingestellt werden.


    Support, Diskussionen und Suche

    - Supportanfragen sind entweder per PN oder im Bereich Talk zu stellen.
    - Diskussionen und Bewertungen sind im Talk Bereich zu führen. Fragen an die Uploader haben ausschließlich via PN zu erfolgen, und sind in den Angeboten untersagt.
    - Anfragen zu Upload-Wünschen sind nur im Bereich Suche Video erlaubt. Antworten dürfen nur auf Angebote von MyBoerse.bz verlinkt werden.


    Verbote

    - Untersagt sind mehrere Formate in einem einzigen Angebotsthread, wie beispielsweise das gleichzeitige Anbieten von DivX/XviD, 720p und 1080p in einem Thread. Pro Format, Release und Auflösung ist ein eigener Thread zu eröffnen.
    - Grundsätzlich ebenso verboten sind Dupes. Uploader haben sich an geeigneter Stelle darüber zu informieren, ob es sich bei einem Release um ein Dupe handelt.
    - Gefakte, nur teilweise lauffähige oder unvollständige Angebote sind untersagt. Dies gilt auch für eigene Publikationen, die augenscheinlich nicht selbst von z.B. einer DVD gerippt wurden. Laufende Serien, bei denen noch nicht alle Folgen verfügbar sind, dürfen erstellt und regelmäßig geupdatet werden.
    - Untersagt sind Angebote, welche nur und ausschließlich in einer anderen Sprache als deutsch oder englisch vorliegen. Ausnahmen sind VORHER mit den Moderatoren zu klären.


    Verstoß gegen die Regeln

    - Angebote oder Beiträge, die gegen die Forenregeln verstoßen, sind über den "Melden"-Button im Beitrag zu melden.
  • Bitte registriere dich zunächst um Beiträge zu verfassen und externe Links aufzurufen.

*** Bestes IPTV *** bester Preis *** gratis Test ***


Englische Tutorials

David-Smith.jpg


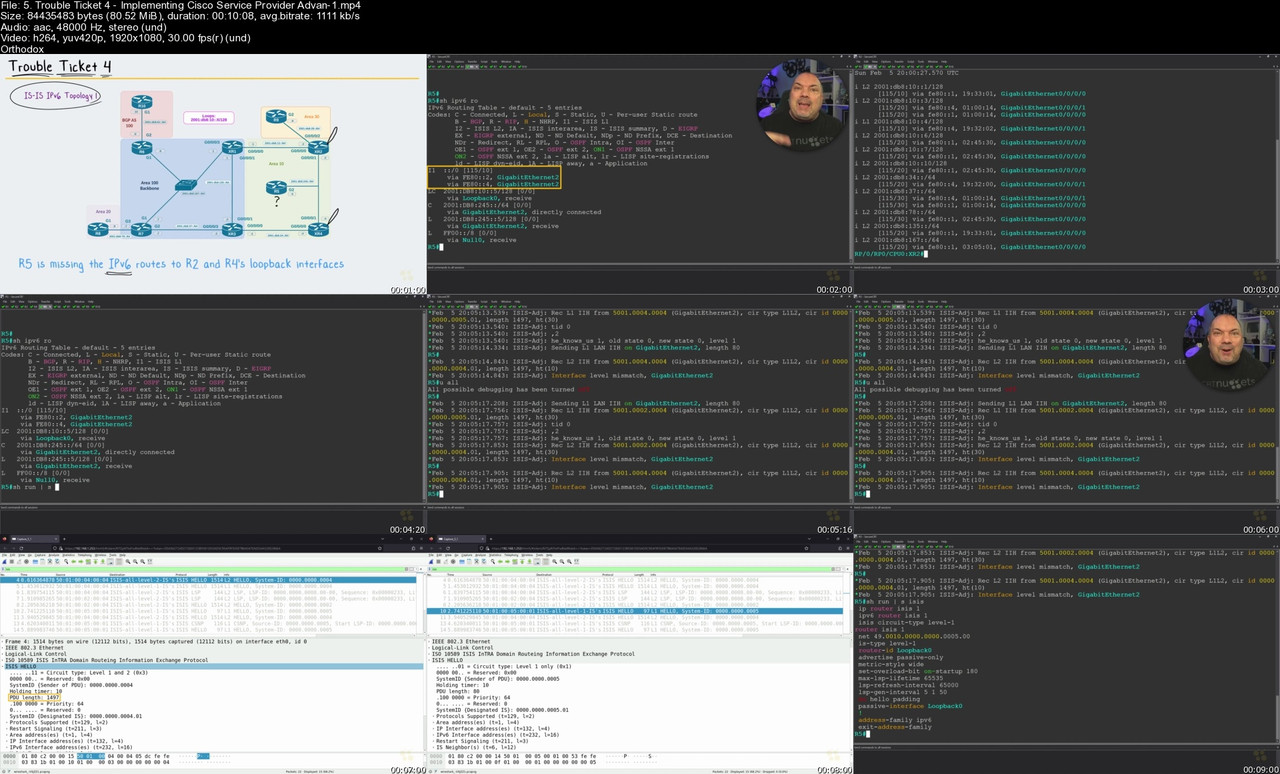
CBTNuggest - Cisco CCNP Implementing Cisco Service Provider Advanced Routing Solutions - 300-510 - SPRI
Released 9/2023
MP4 | Video: h264, 1920x1080 | Audio: AAC, 44.1 KHz, 2 Ch
Genre: eLearning | Language: English | Duration: 322 Lessons ( 45h 7m ) | Size: 33.6 GB

This advanced Cisco CCNP 300-510 SPRI training prepares network admins to maintain and operate some of the world's largest and most complex digital networks service provider networks with some of the most challenging protocols and tech

The 300-510 SPRI is one of the concentration exams you can choose to take as you pursue the CCNP Service Provider cert. After you take the core certification exam, 350-501 SPCOR, which is all about implementing and operating core network technologies for Cisco service provider networks, you can move onto implementing advanced routing solutions for Cisco service provider networks with the 300-510 SPRI.

The core CCNP Service Provider exam covers service provider architecture, services, networking, automation, and security. But this 300-510 SPRI course provides an in-depth understanding and first-hand experience deploying, maintaining, and operating advanced protocols related to unicast and multicast routing, routing policy, and manipulation, plus MPLS and segment routing.

Once you're done with this Cisco skills training, you'll know how to maintain and operate some of the world's largest and most complex digital networks service provider networks with some of the most challenging protocols and tech.

For anyone who manages network admins, this Cisco training can be used to onboard new network admins, curated into individual or team training plans, or as a Cisco reference resource.

Cisco CCNP 300-510 SPRI: What You Need to Know
This Cisco CCNP Service Provider training has videos that cover topics including

Integrating advanced routing technologies into your service provider network
Mastering routing protocols, multicast routing, policy language, and MPLS
Maintaining and operating the most advanced service provider network technologies

Who Should Take Cisco CCNP 300-510 SPRI Training?
This Cisco CCNP Service Provider training is considered associate-level Cisco training, which means it was designed for network admins. This service provider networking solutions skills course is designed for network admins with three to five years of experience with Cisco networking.

New or aspiring network admins. This 300-510 SPRI training would be a high hurdle for a brand new network administrator with no prior work experience. But if you've suddenly found yourself thrown into the deep end with a service provider network job, this course can make sense of some of the most challenging technologies and tools you'll run into.

Experienced network admins. Whether or not you master advanced routing solutions like unicast, multicast, MPLS, and segment routing is a personal choice for network administrators. If you like the feeling of being extremely knowledgeable about advanced but still fundamental parts of keeping a service provider network operational, this course opens up a world of expertise and mastery for you.


Homepage


5-Trouble-Ticket-4-Implementing-Cisco-Service-Provider-Advan-1-s.jpg


7f0b58f5ce51488fa653b1deda156959.jpg


3D Cars: Inside And Out
MP4 | Video: h264, yuv420p, 1920x1080 | Audio: aac, 44100 Hz | Duration: 35h 50m | 20.5 GB
Genre: eLearning | Language: English

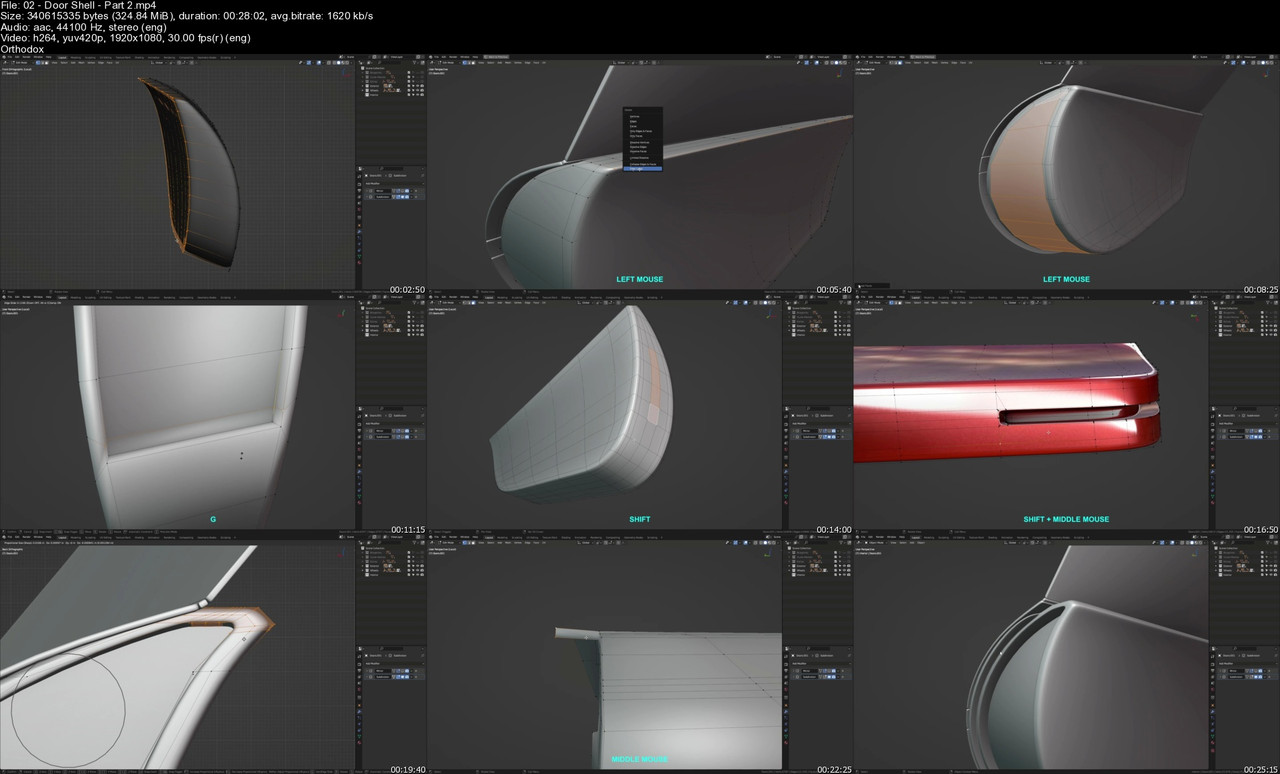
Here we go again, but this time the course is bigger, better, and there's a whole lot of new stuff, including a full interior. My past car modeling training has been studied by designers from industry giants like Hyundai, Volvo, and Ford, as well as from top gaming and film companies all over the world. And now I've taken those techniques and made them even better. In this step-by-step course we'll tackle an amazing car design by professional designer Lee Rosario, and I'll show you new ways to solve even the trickiest hard surface challenges with ease as we build this awesome car together from the first vertex to the final renders.

So join me in this car creation journey, and learn tons of techniques for hard surface modeling, shading, rendering, and compositing, all inside the free open source 3D software, Blender.

The Guide Mesh Technique Updated!

Subsurface modeling is an essential workflow for hard surface artists, but can quickly become a headache when adding details or cutouts to your model. Any modifications can easily ruin a curved surface, making the entire process frustrating and time-consuming. In this course, I ll show you a completely non-destructive technique I developed that avoids these problems entirely, so you can maintain your perfect curves without any hassle. Not only can you achieve perfect and seamless reflections more easily, but the workflow is actually enjoyable and much faster when you don t have to worry about every detail affecting your final result.

These techniques have also been significantly updated since my last course, making them easier and better than ever, and bringing us to the final evolution of what I call the Guide Mesh Technique.

Your browser does not support the video tag.

Using a Guide Mesh to maintain perfect reflections throughout all panels of the car.

Advanced Modeling Techniques

You'll learn about countless other modeling techniques and tools in this course as well, like how insanely powerful Blender's modifiers can be for complex modeling tasks. Modifiers are essential to an efficient and non-destructive workflow, and I'll show you a ton of different and unique ways to use them and combine them.

Your browser does not support the video tag.

Modifiers have unlimited potential for making your life easier.

And with so many different parts of a car to model, we'll need to approach different challenges using different modeling techniques, so you'll gain a thorough understanding of the thought process and how using the right tools the right way can save you a lot of time and effort.

Your browser does not support the video tag.

Knowing the right tools to use can give you perfect results fast.

Core Modeling Principles

Not only will you learn about advanced techniques that take the quality of your models to the next level, but we'll also dive deep into learning the core principles behind subsurface modeling and polygon modeling in general. Good modeling begins with a comprehensive understanding of the fundamentals like topology, efficiency, and what tools are best for the job.

On top of that, you'll learn about the thought process behind each step of the modeling process. Visualizing how the model should look in the end and being able to simplify complex modeling challenges each step of the way are all critical to an effective workflow.

Thinking ahead and planning out your topology is crucial for a successful project.

The Final Renders

After all the hard work that goes into the model, the next step is setting it up for renders you can be proud of. Getting the final render looking just right can bring out the best in your model and truly reflect your skills as a 3D artist.

We'll dive into all the elements that make a great render you can show off, including rigging the wheels and doors so we can pose them, creating highly customizable procedural shaders like realistic car paint with metallic flakes, setting up lighting and an environment, getting the perfect camera angles, and using Blender's compositing nodes to make the final shot really pop. And with plenty of room for customization, and several environments and lighting setups included in the training, you'll be able to make the results your own.

What you see here and in the gallery are actual results from the course!

Subtitles Coming Soon

This course is in English and will include English subtitles when the course is complete. If you would like subtitles in a different language then email me and let me know. I plan on offering automatic translations for other languages as well.


Homepage

02-Door-Shell-Part-2-s.jpg


08a4a110ade133a1831f1adb7ea033c9.jpg


Laravel 10 - Restaurant And Food Ordering Ecommerce (2023)
Published 9/2023
MP4 | Video: h264, 1280x720 | Audio: AAC, 44.1 KHz
Language: English | Size: 59.54 GB | Duration: 116h 23m

Building a Robust Restaurant and Food Ordering Platform Using Laravel 10, with Comprehensive Step-by-step Instructions


What you'll learn
Building a Restaurant and Food Ordering Ecommerce from Scratch
Laravel Fundamentals
Dynamic Drag and Drop Menu Builder
Live Chat Feature
Live Order Notification Feature
Advance Product Management System
Advanced Product Coupon
Handling Delivery Areas
Product Discount Feature
Product Wishlist Feature
Advanced Product Variants Feature
Order Management Feature
Advanced add-to-cart Feature
Custom Page Builder
Order Management Feature
Multiple Payment Gateways (PayPal, Stripe, Razorpay)
Image Upload System
Dynamic Mail Configuration
Dashboard Analytics
Blog Management System
Admin-User Password Change Option
Product Review & Rating
Dynamic News Letters
Dynamic Site settings module
Database Clearing module
Lecture By Lecture Git Source Code

Requirements
You have to know basic PHP
Basic HTML, CSS, Bootstrap, jQuery
Local Server : XAMPP/WAMP/MAMP/Laragon
Text Editor/IDE: Notepad++ / Sublime Text / Visual Studio Code / PhpStrom

Description
Welcome to "Laravel 10 - Restaurant and Food Ordering Ecommerce (2023)"! Are you ready to embark on an exciting journey into the world of Laravel and create a cutting-edge restaurant and food ordering ecommerce platform? This course is your ticket to mastering Laravel 10 and building a dynamic, real-world project that will set you apart as a professional developer in the competitive job market.Why Choose to Learn Laravel 10?Laravel 10, the latest iteration of the renowned PHP framework, is a game-changer for web development. Its robust feature set, enhanced performance, and vibrant community make it the ultimate choice for crafting scalable and high-performing web applications. Whether you're a seasoned developer or just starting out, Laravel 10 is your gateway to web development excellence.What Will You Achieve in This Course?In Laravel 10 - Restaurant and Food Ordering Ecommerce (2023), you'll acquire the skills and knowledge needed to build a feature-rich restaurant and food ordering platform. Our comprehensive curriculum covers a wide range of advanced functionalities, including:Building a Restaurant and Food Ordering Ecommerce Platform from ScratchMastering Laravel FundamentalsCreating a Dynamic Drag and Drop Menu BuilderBuilding a Live Chat FeatureBuilding Live Order NotificationsDeveloping an Advanced Product Management SystemBuilding an Advanced Product Coupon SystemManaging Delivery AreasImplementing Product Discount FeaturesEnabling Product Wishlist FunctionalityIncorporating Advanced Product VariantsStreamlining Order ManagementBuilding Add-to-Cart FeatureCreating a Custom Page BuilderIntegrating Multiple Payment Gateways (PayPal, Stripe, RazorPay)Implementing an Image Upload SystemBuilding Dynamic Email SettingsDynamic Dashboard AnalyticsSetting Up a Blog Management SystemAdmin-User Password Change OptionImplementing Product Review & Rating FeaturesManaging Dynamic NewslettersBuilding Dynamic Site Settings ModuleBuilding Database Clearing ModuleWhy Should You Select This Course?Uniquely different from other courses that merely scratch the surface, this course immerses you in the entire development process of a real-world project. Beyond coding, you'll gain invaluable insights into project management and industry best practices. Plus, you'll have lifetime access to both the course materials and the complete source code of the project.Upon completion, you'll possess a highly marketable skill set, positioning you to earn a lucrative income as a professional Laravel developer.Enroll today and take the first step toward a successful career in web development!

Overview
Section 1: Introduction

Lecture 1 Introduction

Section 2: Laravel Fundamental

Lecture 2 1_Getting Environment Ready - Getting Local Environment Ready for Windows

Lecture 3 2_Getting Environment Ready - Vs code Necessary Plugins for Laravel

Lecture 4 3_Installation And Setup - How To Install Laravel Installer And Setup Project

Lecture 5 4_Installation and Setup - Set Up Database Connection In Laravel

Lecture 6 5_Directory Structure - Laravel Folder Structure All You Need To Know

Lecture 7 6_Directory Structure - What Is Laravel Artisan

Lecture 8 7_Directory Structure - Basic Understanding About Artisan Tinker

Lecture 9 8_MVC Architecture - What Is MVC And How MVC Works In Laravel

Lecture 10 9_Routing - What Are Routes How To Work With Them

Lecture 11 10_Routing - Route Parameters

Lecture 12 11_Routing - All About Route Naming ,Grouping And Prefix

Lecture 13 12_Views - What Are Views How To Create Views In Laravel

Lecture 14 13_Views - Yield And Section Directive In Laravel

Lecture 15 14_Views - Useful Blade Directives

Lecture 16 15_Controller - What Are Controllers How To Create And Use Them

Lecture 17 16_Controller - Resource Controller

Lecture 18 17_Model - What Is Models How To Work With Them

Lecture 19 18_Migrations - What Is Migrations In Laravel And How To Use Them

Lecture 20 19_Eloquent - Working with Eloquent ORM

Lecture 21 20_Eloquent Relation - One To One

Lecture 22 21_Eloquent Relation- One To Many

Lecture 23 22_Form Handling - Discussing About Laravel Validation And Create A Form Design

Lecture 24 23_Form Handling - Adding Name And Dynamic Data In Form

Lecture 25 24_Form Handling - How To Use Form Validation To Validate User Input

Lecture 26 25_Form Handling - Handling Form Data

Lecture 27 26_Form Handling - How To Handle File Uploads

Lecture 28 27_Middleware - What Is Middleware And How To Use It

Lecture 29 28_Basic Authentication - Laravel User Authentication With Breeze

Lecture 30 29_Basic Authentication - How To Create Multi Authentication System (Part - 1)

Lecture 31 30_Basic Authentication - How To Create Multi Authentication System (Part - 2)

Lecture 32 31_Basic Authentication - How To Create Multi Authentication System (Part - 3)

Lecture 33 32_Basic Authentication - How To Create Multi Authentication System (Part - 4)

Lecture 34 33_Basic Authentication - How To Create Multi Authentication System (Part - 5)

Section 3: Environment Setup for Project

Lecture 35 1_Environment Setup- Essential Software s and Extensions for Development

Lecture 36 2_Environment Setup- Fixing VS Code Path issues

Section 4: Multi Auth Setup with Breeze

Lecture 37 1_Install Laravel 10 and Breeze Auth

Lecture 38 2_Multi Auth- Setting up Laravel Breeze Auth in Project

Lecture 39 3_Multi Auth- Add new Columns in Users Table

Lecture 40 4_Multi Auth- Add New Seeders for User and Admin

Lecture 41 5_Multi Auth- Create Dashboards for Users

Lecture 42 6_Multi Auth- Create Middleware for Multi Auth

Lecture 43 7_Multi Auth- Redirect to Dashboard Depending on Role

Lecture 44 8_Multi Auth- Create Separate Route Files for Admin

Section 5: Admin Panel Setup and Mastering

Lecture 45 1_Admin Setup - Overview of the Admin Template

Lecture 46 2_Admin Setup - Admin Panel Mastering (Part - 1)

Lecture 47 3_Admin Setup - Admin Panel Mastering (Part - 2)

Section 6: Frontend Template Setup and Mastering

Lecture 48 1_Frontend Setup - Overview of Frontend Template

Lecture 49 2_Frontend Setup - Mastering Frontend Template (Part - 1)

Lecture 50 3_Frontend Setup - Mastering Frontend Template (Part - 2)

Section 7: Login Pages Mastering

Lecture 51 1_Frontend - Login Page Mastering (Part - 1)

Lecture 52 2_Frontend - Login Page Mastering (Part - 2)

Lecture 53 3_Frontend - Registration Page Mastering

Lecture 54 4_Frontend - Forget Password Page Mastering

Lecture 55 5_Frontend - Reset Password Page Mastering

Lecture 56 6_Admin - Login Page Mastering (Part - 1)

Lecture 57 7_Admin - Login Page Mastering (Part 2)

Section 8: Admin and User Profile Update Feature

Lecture 58 1_Admin - Working on Admin Profile Update Feature (Part - 1)

Lecture 59 2_Admin - Working on Admin Profile Update Feature (Part - 2)

Lecture 60 3_Admin - Working on Admin Profile Update Feature (Part - 3)

Lecture 61 4_Admin - Working on Admin Password Update Feature

Lecture 62 5_Admin - Admin Avatar Update Feature (Part - 1)

Lecture 63 6_Admin - Admin Avatar Update Feature (Part - 2)

Lecture 64 7_Admin - Admin Avatar Update Feature (Part - 3)

Lecture 65 8_Admin - Admin Avatar Update Feature (Part - 4)

Lecture 66 9_Admin - Admin Logout Feature

Section 9: User Profile Update Feature

Lecture 67 1_Frontend - Mastering Frontend Dashboard

Lecture 68 2_Frontend - Profile Update Feature for Frontend (Part - 1)

Lecture 69 3_Frontend - Profile Update Feature for Frontend (Part - 2)

Lecture 70 4_Frontend - Profile Password Update Feature

Lecture 71 5_Frontend - Profile Image Update Feature (Part - 1)

Lecture 72 6_Frontend - Profile Image Update Feature (Part - 2)

Lecture 73 7_Frontend - Working with Logout Feature

Lecture 74 8_Frontend - Fixing the Multi Auth Login Issue

Section 10: Home Slider Feature

Lecture 75 1_Home Slider- Creating Necessary files

Lecture 76 2_Home Slider- Install and Setup of Laravel Yajrabox Datatables

Lecture 77 3_Home Slider- Defining migration communes

Lecture 78 4_Home Slider- Creating Factory for Slider Table

Lecture 79 5_Home Slider- Showing Data at Index Datatable

Lecture 80 6_Home Slider- Create Slider Feature (Part - 1)

Lecture 81 7_Home Slider- Create Slider Feature (Part - 2)

Lecture 82 8_Home Slider- Create Slider Feature (Part - 3)

Lecture 83 9_Home Slider- Update Slider Feature (Part - 1)

Lecture 84 10_Home Slider- Update Slider Feature (Part - 2)

Lecture 85 11_Home Slider- Update Slider Feature (Part - 3)

Lecture 86 12_Home Slider- Update Slider Feature (Part - 4)

Lecture 87 13_Home Slider- Delete Slider Feature (Part - 1)

Lecture 88 14_Home Slider- Delete Slider Feature (Part - 2)

Lecture 89 15_Home Slider- Fixing Index Page Table

Lecture 90 16_Home Slider- Fixing CSRF Issue After Redirect

Lecture 91 17_Home Slider- Show Sliders at Frontend

Lecture 92 18_Home Slider- Creating Delete Image Trait Method

Section 11: Why Choose Us Section

Lecture 93 1_Why choose us - Creating Necessary Files and Designs (Part - 1)

Lecture 94 2_Why choose us - Creating Necessary Files and Designs (Part - 2)

Lecture 95 3_Why choose us - Creating Migration Columns and Seed Data

Lecture 96 4_Why choose us - Showing Dynamic Titles in Title Form

Lecture 97 5_Why choose us - Working with Title Update Feature

Lecture 98 6_Why choose us - Creating Migration Columns and Seed Data For Why Chose Us Sect

Lecture 99 7_Why Choose Us - Working with Why Choose Us Create Form Design

Lecture 100 8_Why Choose Us - Handle the Create Form

Lecture 101 9_Why Choose Us - Showing Data at Index

Lecture 102 10_Why Choose Us - Working with Update Feature

Lecture 103 11_Why Choose Us - Working with Delete Feature

Lecture 104 12_Why Choose Us - Showing Dynamic Contents at Frontend

Section 12: Product Category Feature

Lecture 105 1_Product Category - Creating Necessary Files and Designs

Lecture 106 2_Product Category - Creating Migration Columns and Seeders

Lecture 107 3_Product Category - Working with Create Feature

Lecture 108 4_Product Category - Showing Data at Index Page

Lecture 109 5_Product Category - Working with Update and Delete Feature

Section 13: Product Create Feature

Lecture 110 1_Product - Creating Necessary Files and Designs

Lecture 111 2_Product - Creating Migration Columns and Seeders

Lecture 112 3_Product - Adding Seeder Data with Factory

Lecture 113 4_Product - Working with Create Feature (Part - 1)

Lecture 114 5_Product - Working with Create Feature (Part - 2)

Lecture 115 6_Product - Working with Create Feature (Part - 3)

Lecture 116 7_Product - Working with Create Feature (Part - 4)

Lecture 117 8_Product - Showing Data at Index Page

Lecture 118 9_Product - Working with Update Feature (Part - 1)

Lecture 119 10_Product - Working with Update Feature (Part - 2)

Lecture 120 11_Product - Working with Delete Feature

Section 14: Product Gallery Feature

Lecture 121 1_Product Gallery - Creating Necessary Files and Designs

Lecture 122 2_Product Gallery - Working with Create Feature

Lecture 123 3_Product Gallery - Showing Created Images and Working with Delete Feature

Section 15: Product Variants Feature

Lecture 124 1_Product Size Variant - Creating Necessary Files and Designs

Lecture 125 2_Product Size Variant - Working with Create Feature

Lecture 126 3_Product Size Variant - Showing Created Data and Working with Delete Feature

Lecture 127 4_Product Option Variant - Working with Create Feature

Lecture 128 5_Product Option Variant - Showing Created Datas

Section 16: Showing Products At Home Page

Lecture 129 1_Showing Products - Show Dynamic Product in Food Menu Section (Part - 1)

Lecture 130 2_Showing Products - Show Dynamic Product in Food Menu Section (Part - 2)

Lecture 131 3_Showing Products - Show Dynamic Product in Product View Page (Part - 1)

Lecture 132 4_Showing Products - Show Dynamic Product in Product View Page (Part - 2)

Lecture 133 5_Showing Products - Show Dynamic Product in Product View Page (Part - 3)

Lecture 134 6_Showing Products - Show Dynamic Products in Related Item Section

Lecture 135 7_Bug Fix - Fixing the Slug Update Issue

Section 17: General Settings

Lecture 136 1_General Settings - Creating Necessary Files and Designs

Lecture 137 2_General Settings - Working with Update Form (Part - 1)

Lecture 138 3_General Settings - Working with Update Form (Part - 2)

Lecture 139 4_General Settings - Accessing Settings Globally in Project (Part - 1)

Lecture 140 5_General Settings - Accessing Settings Globally in Project (Part - 2)

Lecture 141 6_General Settings - Showing Data at Settings Form

Lecture 142 7_General Settings - Forgetting Setting Cache

Lecture 143 8_General Settings - Showing Currencies

Lecture 144 9_General Settings - Making all the Static Currency Signs Dynamic

Section 18: Cart Feature

Lecture 145 1_Cart Feature - Working with Product Popup Modal (Part - 1)

Lecture 146 2_Cart Feature - Working with Product Popup Modal (Part - 2)

Lecture 147 3_Cart Feature - Working with Product Popup Modal (Part - 3)

Lecture 148 4_Cart Feature - Working with Product Popup Modal (Part - 4)

Lecture 149 5_Cart Feature - Working with Product Popup Modal (Part - 5)

Lecture 150 6_Cart Feature - Working with Product Popup Modal (Part - 6)

Lecture 151 7_Cart Feature - Working with Quantity Increment - Decrement

Lecture 152 8_Cart Feature - Adding Loader on Ajax Request

Lecture 153 9_Add to Cart - Installing Cart package

Lecture 154 10_Add to Cart - Working with Add to Cart Feature (Part - 1)

Lecture 155 11_Add to Cart - Working with Add to Cart Feature (Part - 2)

Lecture 156 12_Add to Cart - Working with Add to Cart Feature (Part - 3)

Lecture 157 13_Add to Cart - Working with Cart Validation

Lecture 158 14_Add to Cart - Showing Success Message And Handling Errors

Lecture 159 15_Add to Cart - Adding loader at Add to Cart Button

Lecture 160 16_Sidebar Cart - Showing Dynamic Cart Products at Sidebar

Lecture 161 17_Sidebar Cart - Showing Dynamic Cart Products With Ajax

Lecture 162 18_Sidebar Cart - Showing Dynamic Cart Calculation (Part - 1)

Lecture 163 19_Sidebar Cart - Showing Dynamic Cart Calculation (Part - 2)

Lecture 164 20_Sidebar Cart - Adding the Dynamic Cart Counter

Lecture 165 21_Sidebar Cart - Remove Product From Cart

Lecture 166 22_Sidebar Cart - Update Sidebar Cart After Remove Product

Lecture 167 23_View Page Add to Cart - Working with Product View Add to Cart Calculation

Lecture 168 24_View Page Add to Cart - Working with Quantity Increment - Decrement

Lecture 169 25_View Page Add to Cart - Working with Add to Cart Feature (Part - 1)

Lecture 170 26_View Page Add to Cart - Working with Add to Cart Feature (Part - 2)

Lecture 171 27_View Page Add to Cart - Adding Add to Cart Feature in Related Product Section

Section 19: Cart Page

Lecture 172 1_Cart Page - Creating Necessary Files and Designs

Lecture 173 2_Cart Page - Adding Dynamic Cart Product in Cart Page

Lecture 174 3_Cart Page - Working with Quantity Increment - Decrement (Part - 1)

Lecture 175 4_Cart Page - Working with Quantity Increment - Decrement (Part - 2)

Lecture 176 5_Cart Page - Working with Quantity Increment - Decrement (Part - 3)

Lecture 177 6_Cart Page - Working with Product Total Calculation

Lecture 178 7_Cart Page - Working with Remove Product

Lecture 179 8_Cart Page - Working with Cart Clear Feature

Section 20: Adding Product Quantity Field

Lecture 180 1_Quantity Field - Adding Quantity Field in Product Module

Lecture 181 2_Quantity Field - Quantity Validation For Cart (Part - 1)

Lecture 182 3_Quantity Field - Quantity Validation For Cart (Part - 2)

Lecture 183 4_Quantity Field - Adding Dynamic Stock Out Button

Section 21: Coupon Feature

Lecture 184 1_Coupon Feature - Creating Necessary Files and Designs

Lecture 185 2_Coupon Feature - Creating Migration Columns And Seeders

Lecture 186 3_Coupon Feature - Working with Create Feature (Part - 1)

Lecture 187 4_Coupon Feature - Working with Create Feature (Part - 2)

Lecture 188 5_Coupon Feature - Showing Contents in Index Page

Lecture 189 6_Coupon Feature - Working with Update and Delete Feature

Lecture 190 7_Frontend Coupon Feature - Implementing Coupon Feature (Part - 1)

Lecture 191 8_Frontend Coupon Feature - Implementing Coupon Feature (Part - 2)

Lecture 192 9_Frontend Coupon Feature - Implementing Coupon Feature (Part - 3)

Lecture 193 10_Frontend Coupon Feature - Implementing Coupon Feature (Part - 4)

Lecture 194 11_Frontend Coupon Feature - Fixing the Live Calculation Issue (Part - 1)

Lecture 195 12_Frontend Coupon Feature - Fixing the Live Calculation Issue (Part - 2)

Lecture 196 13_Frontend Coupon Feature - Fixing the Live Calculation Issue (Part - 3)

Lecture 197 14_Frontend Coupon Feature - Fixing the Live Calculation Issue (Part - 4)

Lecture 198 15_Frontend Coupon Feature - Adding Coupon Remove Feature

Section 22: Delivery Areas Feature

Lecture 199 1_Delivery Areas - Creating Necessary Files and Designs

Lecture 200 2_Delivery Areas - Working with Create Feature (Part - 1)

Lecture 201 3_Delivery Areas - Working with Create Feature (Part - 2)

Lecture 202 4_Delivery Areas - Showing Created Data at Index Page

Lecture 203 5_Delivery Areas - Working with Updated and Delete Feature

Section 23: Customer Address Feature

Lecture 204 1_Customer Address - Creating Necessary Files and Designs

Lecture 205 2_Customer Address - Creating Migration Columns

Lecture 206 3_Customer Address - Working with Create Feature (Part - 1)

Lecture 207 4_Customer Address - Working with Create Feature (Part - 2)

Lecture 208 5_Customer Address - Working with Create Feature (Part - 3)

Lecture 209 6_Customer Address - Showing Addresses in Index

Lecture 210 7_Customer Address - Working with Update Feature (Part - 1)

Lecture 211 8_Customer Address - Working with Update Feature (Part - 2)

Lecture 212 9_Customer Address - Working with Update Feature (Part - 3)

Lecture 213 10_Customer Address - Working with Update Feature (Part - 4)

Lecture 214 11_Customer Address - Working with Delete Feature

Lecture 215 12_Customer Address - Fixing the Select Input Design Issue

Section 24: Checkout Feature

Lecture 216 1_Checkout - Working with Checkout Page (Part - 1)

Lecture 217 2_Checkout - Working with Checkout Page (Part - 2)

Lecture 218 3_Checkout - Working with Checkout Page (Part - 3)

Lecture 219 4_Checkout - Calculation Cart Total With Delivery Amount (Part - 1)

Lecture 220 5_Checkout - Calculation Cart Total With Delivery Amount (Part - 2)

Section 25: Order Placing

Lecture 221 1_Order Placing - Working with Checkout Redirect (Part - 1)

Lecture 222 2_Order Placing - Working with Checkout Redirect (Part - 2)

Lecture 223 3_Order Placing - Showing Cart Calculation (Part - 3)

Lecture 224 4_Order Placing - Creating Model Migration and Columns for Order (Part -1)

Lecture 225 5_Order Placing - Creating Model Migration and Columns for Order (Part -2)

Lecture 226 6_Order Placing - Store The Order Details in Database (Part - 1)

Lecture 227 7_Order Placing - Store The Order Details in Database (Part - 2)

Lecture 228 8_Order Placing - Store The Order Details in Database (Part - 3)

Section 26: Payment Gateway Integration

Lecture 229 1_PayPal Setting- Creating Necessary Files and Designs

Lecture 230 2_PayPal Setting- Working with Form Handling (Part - 1)

Lecture 231 3_PayPal Setting- Working with Form Handling (Part - 2)

Lecture 232 4_PayPal Setting- Working with Form Handling (Part - 3)

Lecture 233 5_PayPal Setting- Making Settings Available Globally

Lecture 234 6_Paypal Integration - Opening a PayPal Sandbox Account

Lecture 235 7_PayPal Integration - Working with PayPal Integration (Part - 1)

Lecture 236 8_PayPal Integration - Working with PayPal Integration (Part - 2)

Lecture 237 9_PayPal Integration - Working with PayPal Integration (Part - 3)

Lecture 238 10_PayPal Integration - Working with PayPal Integration (Part - 4)

Lecture 239 11_PayPal Integration - Working with PayPal Integration (Part - 5)

Lecture 240 12_PayPal Integration - Order Payment Status Update (Part - 1)

Lecture 241 13_PayPal Integration - Order Payment Status Update (Part - 2)

Lecture 242 14_PayPal Integration - Send Order Placed Mail to User (Part - 1)

Lecture 243 15_PayPal Integration - Send Order Placed Mail to User (Part - 2)

Lecture 244 16_PayPal Integration - Adding Missing Column in Order Table

Lecture 245 17_PayPal Integration - Creating Success and Cancel Page

Lecture 246 18_PayPal Integration - Clearing the Session Data

Lecture 247 19_PayPal Integration - Fixing Redirect Issue

Lecture 248 20_PayPal Setting - Adding the Missing field in Gateway Setting

Lecture 249 21_Stripe Setting - Creating Necessary Files and Designs

Lecture 250 22_Stripe Setting - Handling Form Submitting

Lecture 251 23_Stripe Integration - Creating a Stripe Sandbox Account

Lecture 252 24_Stripe Integration - Working with Stripe Integration ( Part - 1)

Lecture 253 25_Stripe Integration - Working with Stripe Integration ( Part - 2 )

Lecture 254 26_Stripe Integration - Working with Stripe Integration ( Part - 3 )

Lecture 255 27_Stripe Integration - Working with Stripe Integration ( Part - 4 )

Lecture 256 28_Stripe Integration - Working with Stripe Integration ( Part - 5 )

Lecture 257 29_Razorpay Setting - Creating Necessary Files and Designs

Lecture 258 30_Razorpay Setting - Handling Create Form Submit

Lecture 259 31_Razorpay Integration - Working with Razorpay Integration (Part - 1)

Lecture 260 32_Razorpay Integration - Working with Razorpay Integration (Part - 2)

Lecture 261 33_Razorpay Integration - Working with Razorpay Integration (Part - 3)

Lecture 262 34_Razorpay Integration - Working with Razorpay Integration (Part - 4)

Lecture 263 35_Razorpay Integration - Working with Razorpay Integration (Part - 5)

Lecture 264 36_Razorpay Integration - Working with Razorpay Integration (Part - 6)

Lecture 265 37_Payment Page - Adding Conditions to Payment Buttons

Section 27: Handling Orders

Lecture 266 1_Handling Orders - Creating Necessary Files and Designs

Lecture 267 2_Handling Orders - Showing Orders in Datatable (Part - 1)

Lecture 268 3_Handling Orders - Showing Orders in Datatable (Part - 2)

Lecture 269 4_Handling Orders - Working with Order View Page (Part - 1)

Lecture 270 5_Handling Orders - Working with Order View Page (Part - 2)

Lecture 271 6_Handling Orders - Working with Order View Page (Part - 3)

Lecture 272 7_Handling Orders - Working with Order View Page (Part - 4)

Lecture 273 8_Handling Orders - Working with Order View Page (Part - 5)

Lecture 274 9_Handling Orders - Printing invoice (Part - 1)

Lecture 275 10_Handling Orders - Printing invoice (Part - 2)

Lecture 276 11_Handling Orders - Working with Order Status Update Feature (Part - 1)

Lecture 277 12_Handling Orders - Working with Order Status Update Feature (Part - 2)

Lecture 278 13_Handling Orders - Working with Order Status Update Feature (Part - 3)

Lecture 279 14_Handling Orders - Working with Order Delete Feature

Lecture 280 15_Handling Orders - Creating Order Status Pages (Part - 1)

Lecture 281 16_Handling Orders - Creating Order Status Pages (Part - 2)

Lecture 282 17_User Orders - Showing Orders at User Dashboard (Part - 1)

Lecture 283 18_User Orders - Showing Orders at User Dashboard (Part - 2)

Lecture 284 19_User Orders - Showing Dynamic Invoice details (Part - 1)

Lecture 285 20_User Orders - Showing Dynamic Invoice details (Part - 2)

Lecture 286 21_User Orders - Working with Invoice Print

Section 28: Real Time Notification

Lecture 287 1_Pusher Setting - Creating Pusher Account

Lecture 288 2_Pusher Setting - Working with Pusher Setting Form

Lecture 289 3_Real Time Notification - Installing and Setup Pusher and Echo

Lecture 290 4_Real Time Notification - Creating Event for Notification

Lecture 291 5_Real Time Notification - Working with Broadcasting (Part - 1)

Lecture 292 6_Real Time Notification - Working with Broadcasting (Part - 2)

Lecture 293 7_Real Time Notification - Working with Broadcasting (Part - 3)

Lecture 294 8_Real Time Notification - Adding Notification Design in Admin

Lecture 295 9_Real Time Notification - Showing Dynamic Realtime Notification ( Part - 1)

Lecture 296 10_Real Time Notification - Showing Dynamic Realtime Notification ( Part - 2)

Lecture 297 11_Real Time Notification - Storing Notification in Database

Lecture 298 12_Real Time Notification - Showing Order Date Time

Lecture 299 13_Real Time Notification - Working with Read Notification

Lecture 300 14_Real Time Notification - Moving the Event it s Own Place

Section 29: Real Time Chatting System

Lecture 301 1_Real Time Chatting - Mastering Chat Frontend Template

Lecture 302 2_Real Time Chatting - Mastering Chat Admin Template

Lecture 303 3_Real Time Chatting - Working With Message Sending Feature (Part - 1)

Lecture 304 4_Real Time Chatting - Working With Message Sending Feature (Part - 2)

Lecture 305 5_Real Time Chatting - Working With Message Sending Feature (Part - 3)

Lecture 306 6_Real Time Chatting - Show Chat User List at Admin (Part - 1)

Lecture 307 7_Real Time Chatting - Show Chat User List at Admin (Part - 2)

Lecture 308 8_Real Time Chatting - Show Chat User List at Admin (Part - 3)

Lecture 309 9_Real Time Chatting - Fetching User Messages Dynamically (Part - 1)

Lecture 310 10_Real Time Chatting - Fetching User Messages Dynamically (Part - 2)

Lecture 311 11_Real Time Chatting - Fetching User Messages Dynamically (Part - 3)

Lecture 312 12_Real Time Chatting - Working with Admin Message Sending Feature

Lecture 313 13_Real Time Chatting - Adding User Image on Message and Auto Scroll

Lecture 314 14_Real Time Chatting - Showing Dynamic Messages at Frontend

Lecture 315 15_Real Time Chatting - Working with Real Time Message Sending (Part - 1)

Lecture 316 16_Real Time Chatting - Working with Real Time Message Sending (Part - 2)

Lecture 317 17_Real Time Chatting - Working with Real Time Message Sending (Part - 3)

Lecture 318 18_Real Time Chatting - Working with Real Time Message Sending (Part - 4)

Lecture 319 19_Real Time Chatting - Fixing Some Design Issues ( Part - 1)

Lecture 320 20_Real Time Chatting - Fixing Some Design Issues ( Part - 2)

Lecture 321 21_Real Time Chatting - Showing New Message Notification

Lecture 322 22_Real Time Chatting - Senders Ordering Issue Fix

Lecture 323 23_Real Time Chatting - Working with Recent Message Notification (Part - 1)

Lecture 324 24_Real Time Chatting - Working with Recent Message Notification (Part - 2)

Lecture 325 25_Real Time Chatting - Remove Sending Label After Sending Message

Lecture 326 26_Real Time Chatting - Compiling Assets and Cleaning DB

Section 30: Todays Sale

Lecture 327 1_Todays Sale - Creating Necessary Files and Designs

Lecture 328 2_Todays Sale - Working with Create Feature (Part - 1)

Lecture 329 3_Todays Sale - Working with Create Feature (Part - 2)

Lecture 330 4_Todays Sale - Working with Create Feature (Part - 3)

Lecture 331 5_Todays Sale - Showing Created Data in Index

Lecture 332 6_Todays Sale - Working with Edit and Delete Feature

Lecture 333 7_Todays Sale - Showing Offer Product at Frontend

Lecture 334 8_Todays Sale - Working with Section Title

Section 31: Banner Slider

Lecture 335 1_Banner Slider - Creating Necessary Files and Designs

Lecture 336 2_Banner Slider - Working with Create Feature

Lecture 337 3_Banner Slider - Showing Created Data at Index

Lecture 338 4_Banner Slider - Working with Edit and Delete Feature

Lecture 339 5_Banner Slider - Showing Dynamic Contents at Frontend

Section 32: Chefs Section

Lecture 340 1_Chefs Section - Creating Necessary Files and Designs

Lecture 341 2_Chefs Section - Working With Create Feature (Part - 1)

Lecture 342 3_Chefs Section - Working With Create Feature (Part - 2)

Lecture 343 4_Chefs Section - Showing Created Data in Index

Lecture 344 5_Chefs Section - Working with Update and Delete Feature

Lecture 345 6_Chefs Section - Showing Dynamic Content at Homepage

Lecture 346 7_Chefs Section - Showing Dynamic Content at Chefs Page (Part - 1)

Lecture 347 8_Chefs Section - Showing Dynamic Content at Chefs Page (Part - 2)

Lecture 348 9_Chefs Section - Working with Section Titles

Section 33: App Banner Section

Lecture 349 1_App Banner - Creating Necessary Files and Designs

Lecture 350 2_App Banner - Working with Update Form (Part - 1)

Lecture 351 3_App Banner - Working with Update Form (Part - 2)

Lecture 352 4_App Banner - Working with Update Form (Part - 3)

Lecture 353 5_App Banner - Showing Dynamic Contents in Frontend

Section 34: Testimonial Section

Lecture 354 1_Testimonial Section - Creating Necessary Files and Designs

Lecture 355 2_Testimonial Section - Working with Create Feature

Lecture 356 3_Testimonial Section - Show Dynamic Contents in Index

Lecture 357 4_Testimonial Section - Working with Update and Delete Feature

Lecture 358 5_Testimonial Section - Working with Dynamic Titles

Lecture 359 6_Testimonial Section - Showing Dynamic Contents at the Frontend

Section 35: Counter Section

Lecture 360 1_Counter Section - Creating Necessary Files and Designs

Lecture 361 2_Counter Section - Working with Create Feature (Part - 1)

Lecture 362 3_Counter Section - Working with Create Feature (Part - 2)

Lecture 363 4_Counter Section - Showing Dynamic Data at Frontend

Section 36: Blog Feature

Lecture 364 1_Blog Category - Creating Necessary Files and Designs

Lecture 365 2_Blog Category - Working with Create Feature

Lecture 366 3_Blog Category - Working with Update and Delete Feature

Lecture 367 4_Blog - Creating Necessary Files and Designs

Lecture 368 5_Blog - Working with Create Feature (Part - 1)

Lecture 369 6_Blog - Working with Create Feature (Part - 2)

Lecture 370 7_Blog - Showing Dynamic Data in Index

Lecture 371 8_Blog - Working with Update and Delete Feature

Lecture 372 9_Blog - Showing Dynamic Blogs at Frontend (Part - 1)

Lecture 373 10_Blog - Showing Dynamic Blogs at Frontend (Part - 2)

Lecture 374 11_Blog - Working with Blog View Page (Part - 1)

Lecture 375 12_Blog - Working with Blog View Page (Part - 2)

Lecture 376 13_Blog - Working with Social Share Buttons (Part - 1)

Lecture 377 14_Blog - Working with Social Share Buttons (Part - 2)

Lecture 378 15_Blog - Working with Blog Next Previous Buttons

Lecture 379 16_Blog Comment - Working with Comment Section (Part - 1)

Lecture 380 17_Blog Comment - Showing Blog Comments at Backend

Lecture 381 18_Blog Comment - Working with Status Changing Feature

Lecture 382 19_Blog Comment - Showing Dynamic Comments on Frontend

Lecture 383 20_Blog - Working with Search Feature (Part - 1)

Lecture 384 21_Blog - Working with Search Feature (Part - 2)

Lecture 385 22_Blog - Showing Featured Blog at Frontend

Section 37: About Page

Lecture 386 1_About Page - Creating Necessary Files and Designs

Lecture 387 2_About Page - Working with Update Form (Part - 1)

Lecture 388 3_About Page - Working with Update Form (Part - 2)

Lecture 389 4_About Page - Showing Dynamic Contents at Frontend (Part - 1)

Lecture 390 5_About Page - Showing Dynamic Contents at Frontend (Part - 2)

Section 38: Privacy Policy and Terms Page

Lecture 391 1_Privacy Policy - Working with Privacy Policy page

Lecture 392 2_Terms and Conditions - Working with Terms and Conditions Page

Section 39: Contact Page

Lecture 393 1_Contact Page - Creating Necessary Files and Designs

Lecture 394 2_Contact Page - Working with Update Page

Lecture 395 3_Contact Page - Showing Dynamic Contents at Frontend

Lecture 396 4_SMTP Module - Working with SMTP Config Update Module ( Part - 1 )

Lecture 397 5_SMTP Module - Working with SMTP Config Update Module ( Part - 2 )

Lecture 398 6_SMTP Module - Setting Mail Config Dynamically

Lecture 399 7_Contact Mail - Working with Contact Mail Sending Feature (Part - 1)

Lecture 400 8_Contact Mail - Working with Contact Mail Sending Feature (Part - 2)

Section 40: Reservation Feature

Lecture 401 1_Reservation Time - Creating Necessary Files and Designs

Lecture 402 2_Reservation Time - Working with Create Feature

Lecture 403 3_Reservation Time - Working with Update and Delete Feature

Lecture 404 4_Reservation - Handling Reservation Form at Frontend (Part - 1)

Lecture 405 5_Reservation - Handling Reservation Form at Frontend (Part - 2)

Lecture 406 6_Reservation - Storing Reservation in Database

Lecture 407 7_Reservation - Showing Reservations at Backend

Lecture 408 8_Reservation - Working with Reservation Status Update Feature

Lecture 409 9_Reservation - Showing Reservation in User Frontend

Section 41: News Letter Feature

Lecture 410 1_News Letter - Working with News Letter Subscribe Feature (Part - 1)

Lecture 411 2_News Letter - Working with News Letter Subscribe Feature (Part - 2)

Lecture 412 3_News Letter - Working with News Letter Handle in Backend (Part - 1)

Lecture 413 4_News Letter - Working with News Letter Handle in Backend (Part - 2)

Section 42: Social Links Feature

Lecture 414 1_Social Links - Creating Necessary Files and Designs

Lecture 415 2_Social Links - Working with Create Feature

Lecture 416 3_Social Links - Working with Update and Delete Feature

Lecture 417 4_Social Links - Showing Social Links at Frontend

Section 43: Dynamic Footer

Lecture 418 1_Footer Info - Creating Necessary Files and Designs

Lecture 419 2_Footer Info - Working with Update Feature

Lecture 420 3_Footer Info - Showing Footer Info at Frontend

Section 44: Menu Builder Feature

Lecture 421 1_Menu Builder - Install and Setup Menu Builder Package

Lecture 422 2_Menu Builder - Working with Footer Menu One

Lecture 423 3_Menu Builder - Working with Footer Menu Two and Three

Lecture 424 4_Menu Builder - Working with Main Menu

Lecture 425 5_Menu Builder - Creating Seeders for Menu Builder

Lecture 426 6_Menu Builder - Creating Seeders for Menu Builder

Lecture 427 7_Menu Builder - Finishing Menu Builder

Section 45: Custom Page Builder

Lecture 428 1_Custom Page Builder - Creating Necessary Files

Lecture 429 2_Custom Page Builder - Working with Create Feature

Lecture 430 3_Custom Page Builder - Showing Created Data and Working with Update and Delete

Lecture 431 4_Custom Page Builder - Showing Custom Pages at Frontend

Section 46: Product Rating Feature

Lecture 432 1_Rating Feature - Working with Product Rating Feature (Part - 1)

Lecture 433 2_Rating Feature - Working with Product Rating Feature (Part - 2)

Lecture 434 3_Rating Feature - Working with Product Rating Feature (Part - 3)

Lecture 435 4_Rating Feature - Working with Product Rating Feature (Part - 4)

Lecture 436 5_Rating Feature - Showing Reviews at Backend (Part - 1)

Lecture 437 6_Rating Feature - Showing Reviews at Backend (Part - 2)

Lecture 438 7_Rating Feature - Showing Reviews at User Dashboard

Lecture 439 8_Rating Feature - Showing Averaged Ratings in Products

Section 47: Product Page

Lecture 440 1_Product Page - Showing Dynamic Products

Lecture 441 2_Product Page - Working with Search Feature

Lecture 442 3_Product Page - Adding Product Page in Menu Builder

Section 48: Wishlist Feature

Lecture 443 1_Wishlist Feature - Working with Wishlist Feature (Part - 1)

Lecture 444 2_Wishlist Feature - Working with Wishlist Feature (Part - 2)

Section 49: Admin Create Feature

Lecture 445 1_Admin Create - Creating Necessary Files and Designs

Lecture 446 2_Admin Create - Working With Create Feature

Lecture 447 3_Admin Create - Showing Created Contents at Frontend

Lecture 448 4_Admin Create - Working With Update and Delete Feature

Section 50: Setting Feature

Lecture 449 1_Settings Feature - Working with Logo Favicon Settings (Part - 1)

Lecture 450 2_Settings Feature - Working with Logo Favicon Settings (Part - 2)

Lecture 451 3_Settings Feature - Working with Logo Favicon Settings (Part - 3)

Lecture 452 4_Settings Feature - Showing Dynamic Contents in Frontend

Lecture 453 5_Contact Setting - Adding Dynamic Content Fields

Lecture 454 6_Appearance Setting - Working with Appearance Setting (Part - 1)

Lecture 455 7_Appearance Setting - Working with Appearance Setting (Part - 2)

Lecture 456 8_SEO Setting - Working with SEO Setting (Part - 1)

Lecture 457 9_SEO Setting - Working with SEO Setting (Part - 2)

Section 51: Dashboard Setup

Lecture 458 1_Admin Dashboard - Working with Admin Dashboard (Part - 1)

Lecture 459 2_Admin Dashboard - Working with Admin Dashboard (Part - 2)

Lecture 460 3_Admin Dashboard - Working with Admin Dashboard (Part - 3)

Lecture 461 4_Frontend Dashboard - Working with Frontend Dashboard

Section 52: Database Wipe Feature

Lecture 462 1_Database Wipe - Working with Database Wipe Feature (Part - 1)

Lecture 463 2_Database Wipe - Working with Database Wipe Feature (Part - 2)

Lecture 464 3_Database Wipe - Creating Necessary Seeders

Lecture 465 4_Database Wipe - Working with Destroy Feature

Lecture 466 5_Database Wipe - Checking and Fixing all Null Errors (Part - 1)

Lecture 467 6_Database Wipe - Checking and Fixing all Null Errors (Part - 2)

Lecture 468 7_Database Wipe - Deleting Updated files in DB Wipe

Lecture 469 8_Database Wipe - Fixing Some Issues on Navbar

Section 53: Finishing Up

Lecture 470 1_Admin Sidebar - Working with Admin Sidebar Ordering

Lecture 471 2_Admin Sidebar - Adding icons in Admin Sidebar

Lecture 472 3_Admin Sidebar - Working with Dynamic Sidebar Selection (Part - 1)

Lecture 473 4_Admin Sidebar - Working with Dynamic Sidebar Selection (Part - 2)

Lecture 474 5_Search Bar - Working with Nav Search Bar

Section 54: Bug Fixings

Lecture 475 1_Bug Fixings - Fixing Known Bug (Part - 1)

Lecture 476 2_Bug Fixings - Fixing Known Bug (Part - 2)

Lecture 477 3_Bug Fixings - Fixing Known Bug (Part - 3)

Aspiring developers looking to excel in Laravel.,Web developers eager to elevate their Laravel/PHP expertise.,Students seeking hands-on experience in building a comprehensive ecommerce project with Laravel.,University students tackling project assignments with Laravel.,Working professionals aiming to enhance their portfolios and career prospects with Laravel expertise.



428977664_laravel_10_restaurant_and_food_ordering_ecommerce_2023.jpg


d551f8b73f337e5e93cd5ebca1988ade.jpg


Microsoft Dynamics 365 Ce/ Crm Developer Complete Course
Published 8/2023
MP4 | Video: h264, 1280x720 | Audio: AAC, 44.1 KHz
Language: English | Size: 29.42 GB | Duration: 67h 42m

(Updated 2023) The Complete Dataverse (Dynamics 365/ Power Apps) Developer Course from Microsoft Certified Trainer


What you'll learn
Become an Expert in Microsoft Dataverse (Microsoft Dynamics 365 & Power Apps) Development.
Deep dive of Plugins with hands-on examples.
Understand Common Data Service (Microsoft Dynamics 365 & Power Apps) Architecture.
Learn debugging of Plugins and Workflows in Common Data Service (Microsoft Dynamics 365 & Power Apps).
Stand out in the crowd by learning advanced coding concepts in Common Data Service (Microsoft Dynamics 365 & Power Apps)
Step by step guide on writing custom business logic using Common Data Service SDK.
Extend Workflows with Custom Workflow Activities.
Drastically improve your code by following Microsoft recommended best practices.
Understand Common Data Service (Microsoft Dynamics 365 & Power Apps) Web Services and interact with them from custom code.

Requirements
Basic understanding of configuring entities, forms, workflows, solutions etc. in Dynamics 365 & Power Apps
Basic knowledge of C# or any other Object Oriented Programming language required.
Visual Studio Community Edition 2017 or Higher Installed.

Description
Do you want to become a Microsoft Dynamics 365 & Power Platform Technical Consultant or Developer? In fact, most of the Dynamics 365 profiles require you to be a developer. Though dealing with configuration is easy but learning to code in Microsoft Dynamics 365 or PowerApps is quite challenging. This course will address the problem.Targeted for beginners to advanced levels.Concentration on hands-onYou will be able to crack technical interview questions with ease.Lifetime access.This is a live course. Topics will be added or removed as per industry demand.Section 1: Introduction, Architecture, and Web Services1. Target Audience & Prerequisites2. Introduction & Why Custom Coding?3. Understanding the Architecture of Microsoft Dynamics 3654. Microsoft Dynamics 365 Web Services5. Prerequisite - Setting up Microsoft Dynamics 365 Online Trial Instance6. Prerequisite - Installation of Visual Studio 2017 Community Edition7. Prerequisite - Creating a Publisher and Solution - Getting Ready for DevelopmentQuiz 1: Web Services and ArchitectureSection 2: Fundamentals of Plugin Development8. Understanding the Plugin Pipeline9. Plugin Messages10. Hello World Plugin-Preparing Project Template11. Hello World Plugin - Writing Code12. Hello World Plugin - Deploying and Testing13. Reading Data from Primary Entity in Plugin14. Second Plugin - Creating a Task using Organization Web Service15. Deploying Task Plugin16. Understanding Plugin Pipeline Stages17. Third Plugin - Duplicate Check Plugin Development18. Third Plugin - Duplicate Check Plugin Deployment19. Plugin Troubleshooting - Tracing20. Debugging Plugins21. Images in Plugin & AdvantagesQuiz 2: PluginsSection 3: Plugin Development - Deep Dive - Advanced Topics of Microsoft Dynamics 36522. Impersonation in Plugins23. Pass data between plug-ins using Shared Variables24. Understanding Context.Depth in Plugin25. Plugin Isolation Mode or Trust26. Handling Configuration data in a Plugin27. Asynchronous PluginsSection 4: Custom Workflows in Microsoft Dynamics 36528. Introduction to Custom Workflows29. Creating Configuration Entity for Custom Workflow Demo30. Development of Custom Workflows31. Development of Custom Workflows (Continued)32. Deploying Custom Workflows33. Debugging Custom Workflows34. Using Assembly Versioning in Custom Workflows35. Comparison: Plugins Vs Workflows

Overview
Section 1: Introduction

Lecture 1 Introduction of Syllabus, Role and Project

Lecture 2 Power Platform Architecture, ER Diagram

Lecture 3 Working with Solutions

Lecture 4 Working with Dataverse Intro

Lecture 5 Dataverse Table Understanding

Lecture 6 CDD Document Preparation with ER Diagram

Lecture 7 Dataverse Data Modelling

Lecture 8 Dataverse Relationship Behavior

Lecture 9 Rollup Field Configurations

Lecture 10 Form Design

Lecture 11 Working with Views

Lecture 12 Alternate Keys

Lecture 13 Model Driven App Walkthrough

Lecture 14 Charts & Dashboards

Lecture 15 Working with Business Rules

Lecture 16 MDA Facts

Lecture 17 Canvas App Intro

Lecture 18 Canvas App CRUD

Lecture 19 Canvas App Filter Search Connector

Lecture 20 Canvas App Validation

Lecture 21 Canvas App Security

Lecture 22 Working with Custom Page

Lecture 23 Power Pages Intro

Lecture 24 Power Pages Forms and Lists

Lecture 25 Power Pages List Actions, Weblink Sets etc

Lecture 26 Power Pages Validation, jQuery

Lecture 27 Power Pages Web Template

Lecture 28 Power Pages Deployment Using CLI

Lecture 29 Power Automate Basics

Lecture 30 Automated Flow

Lecture 31 Scheduled Flow

Lecture 32 HTTP with Flow

Lecture 33 Desktop Flow

Lecture 34 Power Virtual Agent Intro

Lecture 35 PVA with Flow

Lecture 36 Power BI Intro

Lecture 37 Data Management & Auditing

Lecture 38 Report, Template, Language

Lecture 39 Outlook & SharePoint Integration

Lecture 40 Security Matrix Intro

Lecture 41 More about Security matrix

Lecture 42 Security & Workflow

Lecture 43 Workflow and Custom Action

Lecture 44 Business Process Flow

Lecture 45 AI Builder

Lecture 46 Command PowerFX

Lecture 47 Working with Client Script and Form Script JS

Lecture 48 JavaScript Scenarios

Lecture 49 Command JS Web API

Lecture 50 Ribbon Workbench Scenario

Lecture 51 Plugins

Lecture 52 Plugin Scenarios

Lecture 53 Debug Plugin Concept

Lecture 54 Plugin Images and Exceptions

Lecture 55 CWA and Custom API

Lecture 56 Custom API Plugin

Lecture 57 Console App

Lecture 58 Azure Integration

Lecture 59 Dynamics 365 Sales App

Lecture 60 Dynamics 365 CE Customer Service App

Lecture 61 D365 CE Legacy Marketing Module

This course is for those who wants to become a Functional Consultant, Technical Consultant, Developer, Business Analyst in Dynamics 365 and Power Platform,Solution Architects will get more details from this course


429220369_microsoft_dynamics_365_ce_crm_developer_complete_course.jpg


c927545a6715968b3989ccd28aa87ca3.jpg


Amazon Interview Questions - Data Structures & Algorithms
Published 9/2023
Created by Pratik Singhal
MP4 | Video: h264, 1280x720 | Audio: AAC, 44.1 KHz, 2 Ch
Genre: eLearning | Language: English | Duration: 248 Lectures ( 47h 24m ) | Size: 33.8 GB


Learn top questions asked in Amazon coding rounds


What you'll learn
Software Developers Preparing for Amazon Coding Interviews
Developers who want to work as software developers at Amazon
Software developers who want to practice Leetcode questions asked in Amazon Interviews
Software developers who want to practice leetcode problems in Java, Javascript, C++ or Python languages.

Requirements
Basic programming experience in any of the 4 languages: Java, JavaScript, C++ & Python

Description
Are you determined to secure a coveted position as a software engineer at Amazon? Prepare and excel in your Amazon coding interviews with confidence by enrolling in my comprehensive course. This course is laser-focused on the top problems commonly asked during Amazon interview rounds.What You'll Learn:Top Amazon Interview Problems: I've carefully curated a collection of the most frequently asked coding problems in Amazon interviews, ensuring you're thoroughly prepared for any challenge that comes your way.Step-by-Step Video Solutions: In my detailed video solutions, I guide you through each problem, step by step. You'll witness the entire problem-solving process, from understanding the problem's nuances to writing clean, efficient code. I code live in the recorded video solutions, enabling you to follow along and gain a deep understanding of the concepts.Multiple Programming Languages: Recognizing that candidates have different language preferences, I provide video solutions in four popular programming languages: Java, C++, Python, and JavaScript. Choose the language you're most comfortable with and master these problems with ease.Downloadable Code Files: In addition to video solutions, I offer downloadable code files for every problem. This allows you to dissect and analyze the code at your own pace, ensuring a thorough comprehension of each solution.Why Choose My Course:Expert Guidance: Learn from an experienced software engineer with a proven track record of acing Amazon coding interviews. Benefit from my insights, strategies, and effective problem-solving techniques honed through years of experience.Comprehensive Coverage: I leave no stone unturned. My course comprehensively covers a wide range of data structure problems that frequently appear in Amazon interviews, providing you with a well-rounded preparation.Multilingual Support: My course is accessible to learners worldwide, as I provide video solutions in four different languages. This flexibility ensures that you can understand and implement solutions comfortably in your preferred programming language.Don't miss out on this opportunity to excel in your Amazon coding interviews. Enroll now and take the first step toward securing your dream job at Amazon!

Who this course is for
Basic programming experieThis course is for software developers and students who want to practice for coding interviews at Amazon, in either of the 4 languages: Java, JavaScript, C++ & Python


429293828_amazon_interview_questions_-_data_structures__algorithms.jpg


30b071f182869e0eabe868d7c3784180.jpg


Become a Software Development Engineer
Published 8/2023
Created by Board Infinity
MP4 | Video: h264, 1280x720 | Audio: AAC, 44.1 KHz, 2 Ch
Genre: eLearning | Language: English | Duration: 171 Lectures ( 59h 41m ) | Size: 32.3 GB


Master C++ Data Structures: From Basic Arrays to Advanced Algorithmic Techniques.


What you'll learn
Acquire skills in C++ data structures, focusing on array operations, linked lists, trees, and graph representations.
Understand and implement key algorithmic paradigms, including brute force, backtracking, and recursion for problem-solving.
Master the essence of greedy algorithms, distinguishing scenarios for optimal local choices leading to global solutions.
Unravel the logic of dynamic programming, learning techniques to break down complex problems into approachable sub-problems.

Requirements
An understanding of basic C++ syntax and operations will be beneficial, though not mandatory.
Familiarity with fundamental programming concepts such as variables, loops, and conditionals.
If you're a complete beginner, don't be daunted! The course starts with foundational concepts, making it accessible and engaging even for those new to the domain.

Description
Welcome to "Mastering Data Structures & Algorithms with C++" your definitive guide to the transformative realm of computational problem-solving. This course seamlessly marries hands-on coding exercises with the pivotal theories of computer science. It will not only introduces you to the intricacies of coding but also instills a deep understanding of the underlying principles that drive each algorithm and data structure.In the first module, you'll embark on a journey exploring the foundational elements of data structures, initiating with arrays and linked lists, and then progressing to the complexities of trees and graphs. The subsequent module unfurls the world of algorithmic paradigms, where each lesson is a step towards honing your ability to design, implement, and optimize solutions in C++. As you navigate further, the intricacies of greedy algorithms await, offering insights into making optimal choices. The penultimate section offers a comprehensive study of dynamic programming, elucidating techniques to deconstruct vast problems into digestible chunks.By the course's culmination, you'll possess more than just coding proficiency; you'll have a holistic understanding of data structures and algorithms in C++. Armed with this knowledge, you're primed to tackle real-world challenges, ace tech interviews, and pioneer further into the vast expanse of computer science.

Who this course is for
This course is designed for beginners to advanced learners in computer science, aspiring software developers prepping for tech interviews, competitive programming enthusiasts, and tech professionals aiming to deepen their knowledge in data structures and C++.


429234669_become_a_software_development_engineer.jpg


cce1178dab08e3876ff240ad8ba49542.jpg


Unreal Engine 5 - Gameplay Ability System - Top Down RPG
Last updated 11/2023
Created by Stephen Ulibarri
MP4 | Video: h264, 1280x720 | Audio: AAC, 44.1 KHz, 2 Ch
Genre: eLearning | Language: English + srt | Duration: 428 Lectures ( 84h 48m ) | Size: 61 GB


Create a multiplayer RPG with Unreal Engine's Gameplay Ability System (GAS)!


What you'll learn
Unreal Engine's Gameplay Ability System
Multiplayer Gameplay Mechanics
Creation of a full RPG with Combat, Experience and Level Ups, Enemies, Spells, Menus, Game Saving, and much more
SOLID coding principles and AAA quality code architecture
How to determine which code goes in Blueprints and which code goes in C++ for optimal performance in a shipped game
Scalable, modular, maintainable, and expandable code that can serve as the foundation for any serious game
All core features of the Gameplay Ability System
Code debugging tools and practices

Requirements
Knowledge of the C++ Programming Language
Fundamentals of Unreal Engine C++ - have at least created one Unreal Engine C++ project

Description
This is the most comprehensive Unreal Engine course available. If you want to learn how to architect a fully-functional RPGgame, this course will give you the ability to do so with an expandable code base, architected with AAA quality code. If you've ever wondered where to draw the line between C++and Blueprints, this is the course for you. If you've ever wanted to create an RPG complete with a stats system, abilities, leveling up, spells, attributes, menus, all while keeping your code base clean and following best practices, this is the course for you. If you want to step up your Unreal Engine development capabilities and better understand the inner workings of the engine, this course is for you. If you have plans to make your own serious game with interconnecting systems, involving attributes, abilities, level ups, enemies and AI, and coded for multiplayer, this is the course for you!In this course, we will create a top-down RPGstyle game, filled with systems architected using Unreal Engine's built-in Gameplay Ability System(GAS). This is where you will learn how to architect a shipped game, and code it expertly so it can be easily expanded, upgraded, and maintained. We follow SOLIDcoding principles, and balance the Blueprint/C++ratio in a way that AAAshipped games do, such as Fortnite. My experience with AAAshipped game code, as well as consultations with industry veteran developers has allowed me to reveal to you the way a real shipped game's code base looks like. If you've ever wondered how much of a game can be kept in Blueprint versus C++, look no further. This course is the answer.The assets in this game project were made specifically for this course, and will be provided in an asset pack. This includes:Characters, including Aura, the main character, as well as enemy characters including Goblin Warriors, Goblin Rangers, a Goblin Shaman, Red and Black Demons, the Ghoul, and a Shroom.A modular dungeon pack that can be pieced together to make basic dungeonsAwaypoint shrine and obelisksParticle Niagara System Effects, including explosions, level up effects, slingshot rocks, hit impacts, electricity beams, fireballs, fire bolts, flames, stars for stun effects, and more!Sound effects for enemies, footsteps, spells, and more!Textures for the HUD, including high-quality buttons, frames, dynamically-animated spell globes, progress bars, XPbar, and more!Full animation sets for Aura and all enemiesMuch more!In this course, we will be covering the following topics:Setting up a Top-Down Project from scratchEnemy and item selection with outline effectsProper use of OOP and inheritance to create a character class hierarchyIntro to the Gameplay Ability System and the core classes that comprise itCustom Gameplay Ability System Components and Attribute Sets, and how to replicate AttributesAll important settings for all GASclasses and componentsHow to use Attributes for player stats, including Primary Attributes:Strength (increases physical damage)Intelligence (increases magical damage)Resilience (increases Armor and Armor Penetration)Vigor (increases Max Health)Secondary Attributes, based off of primary attributes and other custom variables:Armor (reduces damage taken, improves Block Chance)Armor Penetration (ignores percentage of enemy Armor, increases Critical Hit Chance)Block Chance (change to cut incoming damage in half)Critical Hit Chance (chance to double damage plus critical hit bonus)Critical Hit Damage (bonus damage added when a critical hit is scored)Critical Hit Resistance (reduces critical hit chance of attacking enemies)Health Regeneration (amount of Health restored every 1 second)Mana Regeneration (amount of Mana restored every 1 second)Max Health (maximum amount of Health obtainable)Max Mana (maximum amount of Mana obtainable)Vital Attributes - things like Health and Mana, which are dependent on all the other attributesGameplay Effects - classes in the GASsystem used to apply changes to attributesGameplay Tags - an essential part of GAS, which allows us to identify qualities, attributes, abilities, character classes, and any other thing we can imagineGame UI - how to handle complex UIin an RPGgame efficiently, in an organized, modular, and scalable manner. We cover different UIparadigms, from MVC(Model View Controller) and MVVM(Model View ViewModel, using Unreal Engine's new ViewModel feature)Full Attribute and Spell Menus, with upgrade abilities, spell trees, locked spell levels, spell upgrades by ability level, and moreAttributes - how to use Gameplay Attributes to represent player stats, and incorporate them into the gameplay mechanics by creating an Effect Application pipeline, allowing for calculations and results caused by phenomena in the game, such as combat damageGameplay Abilities - the heart of GAS. We create all manner of types of gameplay abilities to handle the casting of spells, handling important capabilities of the player character and enemy AI, and how to configure different abilities to suit your needs. Different RPGClasses - we implement different character RPGclasses including the Ranger, Warrior, and Elementalist, and do so in an easily-scalable manner so you can have any number of character class types in your gameDamage and Combat - we implement a full RPGstyle combat system with different damage types, damage resistances, and debuffs corresponding to damage types, and encode these calculations into our damage pipeline. All attributes, damage types, resistances and debuffs are functional in this game. All combat mechanics are displayed in some form of visual feedback to the player. This includes floating text for damage, changing color based on custom criteria, floating text to inform of critical hits, blocked hits, and critical blocked hits. We also implement knockback and stun mechanics in response to lightning damage, incapacitating the character/enemy, as well as fire debuffs, where characters are set ablaze and take fire damage while burning.Enemy AI- We implement the enemy behavior using Unreal Engine Behavior Trees and the Environment Query system (EQS) to provide customized behavior for the Ranged, Warrior, and Elementalist enemy types. Enemies can cast spells and summon AIminionsFading geometry when it gets in the way of the camera for a top-down gameAbility Cost and Cooldown (spells spend Attribute resources - in this game, spells cost Mana)Fully functional HUD with Equipped Spells, displaying spell cooldown timers, and experience (XP)The ability to assign Abilities to different inputs in the spell menu (assign FireBolt to the 1 key and Electrocute to the Left Mouse Button, swap them back, etc.)Experience and Level-Up System - We craft an experience system, awarding XPfor eliminating enemies, and leveling up when reaching XPthresholds for various abilities. XPand Level are displayed in the HUD, and Level Up messages and effects are as well. Leveling up is associated with gaining Attribute Points and Spell Points, which can be used to upgrade Attributes and Spell abilities in the Attribute and Spell Menus respectively, as well as topping off Health and Mana upon Leveling Up. (Basically, you will see enough examples of how to use this system that you'll be able to expand it with any functionality you want for your own games)Passive Spells - Spells that you can equip which remain active while they are equipped.A variety of Offensive Spells, showcasing different examples and features of GAS, including FireBolt, Electrocute, Arcane Shards, and FireBlast.Saving Progress and Level TransitionsIntermediate/Advanced Unreal Engine topics, including custom Async Tasks, Ability Tasks, Blueprint Function Libraries, Asset Managers, Singletons (and why these are only good for a VERYselect few cases), custom Gameplay Effect Contexts, NetSerialization, Struct Ops Type Traits, C++Lambdas, game mechanics algorithms, and oh, so much more.How to choose which functionality should go into C++versus Blueprint - This is one of the most valuable lessons, and is taught all throughout the course. Students often ask me "which functionality should go in C++versus in Blueprint?"This course is my answer. This is a serious-scale project foundation with over 100 hours of video, and no filler. The project is architected with approximately 50%Blueprints and 50%C++. Ishow you which functionality should be on the C++side, which functionality is more appropriate for Blueprints, and why. SOLIDCoding Principles and code architecture - We keep our code base clean in this project. Another question Ioften get is "Is this BESTCODINGPRACTICE???" This course is my answer to this question. This is an example of code you would see in a AAAgame, shipped to millions of players. Maintaining clean and modular code is essential to a serious game project that needs to be scalable, expandable, modular, maintainable, testable, performant, and efficient. This course will show you how.This is not a beginner course. Iexpect you to already understand the C++programming language and have at least created one Unreal Engine C++project. Irecommend that you take the following courses before this one, if you haven't already:Learn C++for Game Development, by Stephen UlibarriUnreal Engine 5 C++The Ultimate Game Developer Course, by Stephen UlibarriORalready have equivalent knowledge, whether you obtained it through self-study or other resources/tutorials. If you already have game development experience and feel like you can handle it, feel free to jump in!If the C++code seems too over your head, take a look at the above two courses, as they teach you everything you need to know to have a smooth and fun experience in this course. Everything that isn't covered in these two courses will be explained in depth, and I'm assuming you know nothing about GASor the advanced topics we cover in this course.This course is my best course yet, and I'm very proud to bring you the Unreal Engine 5 - Gameplay Ability System - Top Down RPG course, the result of nearly a year of painstaking development, research, consultation with professionals, and asset creation. After taking this course, you will understand Unreal Engine far better than the average developer, and you'll be empowered to create your own well-architected projects, large and small, and you'll bring value to your team, your company, your solo venture, and anyone/anything else you grace with your skillset.Join the course, join the awesome Druid Mechanics Discord Community, and invest in the biggest leap of your game development career.Stephen Ulibarri, founder of the Druid Mechanics Game Developer Community

Who this course is for
Those who wish to know how to architect a scalable and shippable game in Unreal Engine
Those who wish to know how to implement gameplay Attributes, Abilities, Experience, Level Ups, and how to maintain these in a clean code base
Those who wish to know how to handle game UI for complex systems in an efficient manner
Those who wish to create their own RPG, MOBA, Shooter Game, or any other type of game involving attributes, skills, spells, or other custom mechanics
Those who wish to know how to implement enemy AI with Behavior Trees and Environment Queries (EQS)
Those who have Unreal Engine experience and are looking to expand their skillset to create shippable games
Those who are looking for a comprehensive course on the Gameplay Ability System (GAS) so they can use it in their own game projects
Hobbyists and Professional Game Developers alike will benefit from this course
AAA developers who need to learn the fundamentals of GAS for their team's game project
Leaders of game development projects who need to understand how GAS works in Unreal Engine, its capabilities, limitations, and costs on time and effort for developers
Teams who need to architect their game project in a scalable manner, so it will be easily maintainable post-launch
Anyone who has created some basic Unreal Engine projects and is ready for some next level greatness!


428950593_unreal_engine_5_-_gameplay_ability_system_-_top_down_rpg.jpg


86dd6a68cbef9e3b8ab9417842c161a3.jpg


Creating Hero Assets for Games & Cinematics
MP4 | Video: h264, yuv420p, 2560x1440 | Audio: aac, 44100 Hz | Duration: 20h 11m | 26.1 GB
Genre: eLearning | Language: English

Learn how a professional prop artist works when creating assets for games & cinematics. In this course you will learn from start to finish how to create a high quality game asset including everything from Modeling, Sculpting, UV-Unwrapping, Texturing, Rendering and more.

BLENDER, SUBSTANCE, ZBRUSH AND MARMOSET TOOLBAG

This course will cover the complete process from start to finish on how to create hero assets for games. Some of the main topics we will cover are as followed

Proper project planning and creating a blockout of our asset.
Creating the low poly version.
Creating the base high poly version.
Sculpting any additional damages and details on our high poly.
Efficiently UV-Unwrapping and baking our model.
Creating our textures in multiple stages, Starting with height details, then base colors, then material definition and some final polish.
Rendering our asset in Marmoset Toolbag and creating final screenshots.

We will also cover a lot more information in-between these main topics.

The general takeaway of this course is that at the end, you will have the knowledge on how to create exactly what you see in the images, and you can apply this knowledge to almost any type of asset not just hero assets but also simple production assets.

20+ HOURS!

This course contains over 20+ hours of content You can follow along with every single step This course has been done 100% in real-time with narration except for a few timelapses for very repetitive tasks. However even the timelapsed chapters have narration.

This course has been divided up into easy-to-understand chapters.
We will start the course off by planning our asset and creating the blockout for proper scale and shape definition.

We will then start turning this blockout into a high quality low-poly model in which we will be using weighted normals for proper baking and smoothing.

Finally we will duplicate our low-poly and turn it into a high poly mesh. Of that mesh we will prepare some elements for Zbrush in which we can sculpt some additional damage details.

Once that is done we will UV-Unwrap our model and bake the high to low poly textures.

Then we will move over to Substance 3d Painter in which we texture our asset. Starting with creating the height map only details. Then we will move on to defining the base colors and finally we will refine and polish our texture.

We will end the course with setting up our asset in Marmoset Toolbag and creating some final render screenshots.

SKILL LEVEL
This game art tutorial is considered a intermediate course and we require students to have some familiarity with a 3d Modeling tool, Zbrush and Substance Painter Everything in this tutorial will be explained in detail but we will not be going over the very basics of the software mentioned below.

TOOLS USED

Blender
Zbrush
Substance Painter
Marmoset Toolbag 4

Please note that most techniques used are universal, so they can be replicated in almost any 3D software like Maya & 3DS Max.

YOUR INSTRUCTOR
Kobus Viljoen is a 3D Prop Artist currently working for FastTrack Studio, where he is responsible for creating high-quality assets for various un-announced projects.

CHAPTER SORTING
There s a total of 20 videos split into easy-to-digest chapters.
All the videos will have logical naming and are numbered to make it easy to find exactly the ones you want to follow.

SUBTITLES
Subtitles are offered for this tutorial in English, Spanish, and Chinese.
Please note the subtitles are auto generated and might not always be 100% accurate.

Chapters List
01-Creating Our Blockout.mp4
02-Creating Our Frames.mp4
03-Creating The Phone Booth Internals Part1.mp4
04-Creating The Phone Booth Internals Part2.mp4
05-Creating The Phone Booth Internals Part3.mp4
06-Creating The Phone Booth Internals Part4.mp4
07-Geomatry Cleanup.mp4
08-Creating Our High Poly Part1.mp4
09-Creating Our High Poly Part2.mp4
10-Sculpting Damages.mp4
11-Uv Unwrapping And Baking Our Phone Booth.mp4
12-Setting Up Substance Painter And Painting Height Details.mp4
13-Defining The Base Colors.mp4
14-Material Refinement Part1.mp4
15-Material Refinement Part2.mp4
16-Material Refinement Part3.mp4
17-Creating Our Decals And Branding.mp4
18-Setting Up Our Marmoset Scene.mp4
19-Polishing Our Texture.mp4
20-Creating Final Presentation Images.mp4


Homepage

429213019_creating_hero_assets_for_games_cinematics.jpg


886d7f022ec9dd2e1165a2d052ab2887.jpg


Personal Finance #11-Stock Investment -Equity Investments
Published 9/2023
Created by Robert (Bob) Steele
MP4 | Video: h264, 1280x720 | Audio: AAC, 44.1 KHz, 2 Ch
Genre: eLearning | Language: English | Duration: 121 Lectures ( 30h 29m ) | Size: 26.2 GB


Unlocking Financial Success: Mastering Stocks, Equities, and Mutual Funds


What you'll learn
Stock Market Fundamentals: Gain a comprehensive understanding of how the stock market operates, including primary and secondary markets & trading hours
Effective Buying and Selling: Learn the intricacies of buying and selling stocks efficiently, from executing trades to managing your investments effectively.
Investment Goals and Strategies: Develop a strategic approach to stock investing aligned with your personal financial goals and risk tolerance.
Brokerage Account Management: Discover the key elements of managing a brokerage account, including account types, fees, and account maintenance.
Differentiating Investment Approaches: Differentiate between investment and trading strategies, and understand the distinctions between stocks, ETFs, and mutual
Advanced Investment Instruments: Explore advanced investment instruments such as options, futures, and their role in a diversified portfolio.
Corporate Actions Impact: Understand how corporate actions, such as dividends, stock splits, and preferred stock issuance, impact your investment portfolio.
Analyzing Company Financials: Develop the skills to analyze a company's financial position, evaluate stock sectors, and make informed investment decisions.
Technical Analysis Mastery: Dive into technical analysis techniques to identify trends, patterns, and potential investment opportunities in stock trading.
Advanced Stock Concepts: Explore advanced stock concepts like convertible preferred stock, cumulative preferred stock, and earnings per share (EPS).
Financial Metric Proficiency: Master financial metrics including price-to-earnings (P/E) ratio, beta, and book value per share (BVPS)
Valuation Models: Gain expertise in valuation models such as the Dividend Discount Model (DDM) and learn investment strategies like dollar-cost averaging.
Dividend Reinvestment: Discover the benefits of dividend reinvestment plans (DRIP) and their impact on long-term investment growth.
Leveraging Margin and Short Selling: Explore advanced strategies like buying on margin and short selling to maximize investment opportunities.
Global Investment Strategies: Understand international investing using tools like the Capital Asset Pricing Model (CAPM) for diversified portfolios.
Dividend Income Estimation: Calculate crucial financial metrics including dividend yield, forward P/E ratio, and payout ratio.
Portfolio Optimization: Learn to optimize a diversified stock portfolio effectively by applying advanced techniques.
Asset Allocation Strategies: Explore asset allocation strategies for risk management and investment diversification.
Market Analysis: Apply technical and fundamental analysis to make informed investment decisions in varying market conditions.
Risk Management: Develop strategies to manage investment risks, including strategies for income, value, and growth stocks.
Investment Psychology: Understand the psychological aspects of investing and learn to make rational decisions amid market fluctuations.
Investment Regulations: Familiarize yourself with relevant investment regulations and ethical considerations in stock investing.

Requirements
Basic Financial Literacy: A fundamental understanding of financial concepts like income, expenses, assets, liabilities, and budgeting will be beneficial.
Computer Skills: Basic computer skills and access to spreadsheet software (e.g., Microsoft Excel or Google Sheets) for financial calculations and analysis.
Investment Curiosity: A desire to learn and explore the world of stock investing, equity markets, and mutual funds is the most critical prerequisite. An open mindset and willingness to engage with complex financial concepts are essential for success in this course.

Description
Welcome to this comprehensive course designed to empower you with the knowledge and skills required to navigate the intricate world of investing in stocks, equities, and mutual funds.Understanding the Stock Market:Our journey begins with a deep dive into the stock market. You'll gain a profound understanding of both primary and secondary markets, learning how stocks are bought and sold. Explore the fascinating inner workings of various stock exchanges, from their trading hours to their unique characteristics. Gain insight into the psychology of market participants and how market sentiment influences stock prices.Mastering Stock Investing:In this section, we demystify stock investing. Discover what it means to own a share in a company and learn the intricacies of trading stocks. We'll guide you through the process of selling your stock holdings and provide valuable insights into different stock categories, including income, value, and growth stocks. You'll also become well-versed in handling commissions and fees effectively.Exploring Investment Vehicles:Dive into the diverse array of investment options available. Navigate the world of individual stocks, exchange-traded funds (ETFs), and mutual funds. By understanding the unique features of each choice, you'll be equipped to make investment decisions aligned with your financial objectives. Explore how ETFs and mutual funds are structured, how they are traded, and their advantages and disadvantages.Mastering Stock Fundamentals:Develop the skills to analyze a company's financial health confidently. We'll explore both quantitative and qualitative methods for assessing a company's performance. Gain insights into stock sectors and learn how to interpret financial statements with precision. Learn how to conduct comprehensive fundamental analysis, including evaluating a company's income statement, balance sheet, and cash flow statement.Analyzing Stocks Like a Pro:Equip yourself with the tools used by seasoned investors. Unlock the potential of technical analysis and learn how to apply it to your investment strategies. Delve into the implications of corporate actions, such as stock splits and reverse stock splits, to make informed decisions. Learn how to use stock charts, technical indicators, and chart patterns to identify potential investment opportunities.Understanding Preferred Stocks:Venture into the world of preferred stocks. Discover various types, including cumulative, callable, and convertible preferred stocks. Gain insights into perpetual and adjustable-rate preferred stocks, broadening your investment horizons. Explore how preferred stocks differ from common stocks and bonds, and how to evaluate their suitability for your portfolio.Performance Evaluation and Risk Management:Learn to navigate stock valuation complexities. Master the art of calculating key metrics like Price-to-Earnings (P/E) ratios, Price/Earnings-to-Growth (PEG) ratios, and Beta. Dive deep into the Dividend Discount Model (DDM) to assess stock values accurately. Understand how to assess the risk associated with individual stocks and build a diversified portfolio to manage risk effectively.Strategies for Savvy Investing:Explore essential investment strategies like dollar-cost averaging and value averaging. Dive into Dividend Reinvestment Plans (DRIPs) and gain an in-depth understanding of buying on margin and short selling to make well-informed investment decisions. Learn about different investment styles, including value investing, growth investing, and income investing, and how to apply them to your portfolio.Global Investment Perspectives:Expand your investment horizons globally. Dive into the International Capital Asset Pricing Model (CAPM) and discover how to estimate dividend income effectively in a global context. Understand the factors that influence international stock markets and how to assess opportunities and risks when investing internationally.Calculating Returns with Precision:Unlock the secrets of investment returns. Learn how to calculate dividends, earnings per share (EPS), and the price-earnings ratio (P/E ratio) with precision. Explore various methods for projecting future returns with confidence. Understand the concept of total return and how it can impact your investment decisions.Join Us on a Journey to Financial Prosperity:This comprehensive course caters to both beginners and those with prior investment knowledge. Whether you aspire to build wealth, seek to grasp the intricacies of financial markets, or enhance your investment skills, this course is your gateway to success.Embark on a Path to Investment Expertise:Get ready to embark on a path toward financial prosperity and investment expertise. Enroll now and take the first step toward securing your financial future. Don't miss this opportunity to master the art of investing in stocks and mutual funds and gain the financial knowledge you need for a successful future. Start your journey today!

Who this course is for
Beginners: If you are new to the world of investing, this course provides a solid foundation. It starts with the basics and gradually progresses to more advanced topics, ensuring that newcomers can follow along and build confidence in their investment decisions.
Individual Investors: If you're an individual looking to grow your wealth through stock investments and mutual funds, this course offers practical insights, strategies, and tools to help you make informed choices.
Experienced Investors: Even if you have some experience in investing, this course can serve as a valuable refresher and provide you with new perspectives and strategies to optimize your investment portfolio.
Financial Professionals: Financial advisors, planners, and professionals in the finance industry can benefit from this course by gaining a deeper understanding of stock markets, equity investments, and mutual funds. It can enhance their ability to assist clients with investment decisions.
Anyone Seeking Financial Literacy: If you want to improve your financial literacy and make more informed decisions about your investments, retirement planning, or wealth management, this course offers valuable knowledge and tools.
Curious Learners: If you have a general interest in finance and want to explore the concepts and workings of the stock market, equity investments, and mutual funds, this course provides an accessible and engaging learning opportunity.


429245201_personal_finance_-11-stock_investment_-equity_investments.jpg


fcefee1e6334f253ce71d2c7398ce8a5.jpg


Ultimate 3D Content Creation with Blender. Beginner to Pro
Published 9/2023
Created by Barzu Ibrohimov
MP4 | Video: h264, 1280x720 | Audio: AAC, 44.1 KHz, 2 Ch
Genre: eLearning | Language: English | Duration: 222 Lectures ( 36h 1m ) | Size: 29.3 GB


Learn Blender from absolute zero to creating professional 3D models. Learn to create Game assets and realistic models


What you'll learn
Blender fundamentals. The User Interface. Navigating in the scene. Using shortcuts and more
Create any 3D model using the tools in Edit Mode
Speed up your modeling with Blender's powerful Modifiers
Create materials using image textures or Procedural textures.
Create real art using Texture Painting tools. Learn Texture Painting fully
Learn how to light and render your scenes. Learn light objects and rendering steps
Learn how to use Eevee and Cycles effectively
Work with the camera like a pro. Understand camera properties, camera rigging and more
Use addons to speed things up even more. Learn to use Quixel assets in Blender
Make characters or any organic shapes using Sculpting tools. Learn Sculpting fully
Get to know other powerful features of Blender like Geometry Nodes or VFX tools
Be confident with 3D Animation in Blender
Create 6 projects from scratch and challenge yourself

Requirements
A relatively new computer running on Windows, MacOS or Linux that supports Blender 3.0 +
No previous knowledge of Blender or anyother software is needed
Basic understanding of computer graphics and 3D design is a plus

Description
Welcome to one the biggest and most comprehensive courses on Blender. First of all, if you are reading this, thank you for checking this out! I am so confident to say that this course is easily one of the best courses available for learning Blender. It is completely new (Most parts are in Blender 3.5 - 3.6) and will be updated with major releases of Blender.Why am I so confident? Let me give you a few reasons why this course must be on your shelf if you are learning Blender. - This course is big but free from unnecessary details and boring long videos. In this course, I tried to save your precious time by showing the most important things, options or operations in short videos (You really feel it when you are watching the videos). I did my best to put in as much information in a single short video as possible.- This course contains some information that you can never find in other courses such as "How to optimize your scenes in Blender so that it never crashes" or "Copying Assigning Linking Duplicating materials. Selecting by materials" all in one short video.- This course is much better suited for a "learner" because it addresses so many problems that you come accross on any project. For example, we learn "Proper collection instancing", "How to detect and fix flipped normals easily", "How to quickly remove dublicates", "How to clean up the .blend file", "object mode scaling issues" and many more. I know what problems you might face because I have been teaching Blender to students in person for years and they always have these same problems.- This course is project based. we are going to create 6 projects from scratch. I will show you everything from modeling to texturing to lighting and rendering.- There is a crash course at the beginning if you want to quickly see the general steps of creating projects from start to finish in Blender.- Although the course is mainly focused on 3D content creation, there is a whole section containing all the general information about every other feature in Blender, such as Animation tools, Geometry Nodes, Grease Pencil and more.So, if you are looking for the one course that covers everything in Blender, this course is all you need.Thank you, see you inside the course!

Who this course is for
Virtually anyone who wants to learn Blender or who wants to improve their knowledge of this amazing piece of software


429286736_ultimate_3d_content_creation_with_blender-_beginner_to_pro.jpg


d81de4120dd47c252b98be0f673361dd.jpg


BIM Modeling Project- Architectural, Structural, Mechanical
Published 9/2023
Created by Ghasem Ariyani
MP4 | Video: h264, 1280x720 | Audio: AAC, 44.1 KHz, 2 Ch
Genre: eLearning | Language: English | Duration: 185 Lectures ( 31h 17m ) | Size: 27.3 GB


Mastering BIM Synergy: Uniting Architecture, Structure, and Mechanical Disciplines for Perfect Project Harmony


What you'll learn
Integrating Architecture, Structural, and Mechanical Disciplines
BIM Architectural Modeling Essentials
Advanced Techniques for Architectural Walls
Creating Detailed False Ceilings
Structural Modeling: Foundations and Substructures
Techniques for Columns
Modeling Beam Elements
HVAC Coordination and Modeling
Fire Protection Modeling
Modeling Plumbing and Water Supply Systems

Requirements
A Laptop and Autodesk Revit

Description
Note: The main difference in this course compared to others is that we have not confined ourselves to explaining simple techniques. Instead, we have conveyed the subject through challenging projects and specific tricks, which are the result of numerous experiences.Ready to transform your BIM skills into a competitive advantage?Curious about the backbone of your BIM project?Concerned about fire protection in your BIM projects?Our course offers a hands-on journey through the essential aspects of BIM, covering everything from architectural modeling to intricate structural and mechanical details. You'll learn how to kickstart your BIM projects, create stunning architectural walls, master false ceilings, and establish strong connections. Delve into the realm of structural modeling, handling foundations, substructures, columns, and beam elements. Get your hands dirty with HVAC coordination, ensuring seamless integration for MEP projects. Elevate your expertise with comprehensive fire protection modeling, covering sprinkler systems and equipment. Join us now and become a BIM pro with these advanced techniques and best practicesHeadlines:Integrating Architecture, Structural, and Mechanical DisciplinesBIM Architectural Modeling EssentialsAdvanced Techniques for Architectural WallsCreating Detailed False CeilingsStructural Modeling Foundations and Substructures Techniques for ColumnsModeling Beam ElementsHVAC Coordination and Modeling Fire Protection Modeling Modeling Plumbing and Water Supply SystemsIf you are currently a BIM modeler or planning to become one, it is essential not to limit yourself to any form. You should be able to manage any architectural design in the BIM process And in the end, you will be the hero of this training. Please watch this course and feel free to ask me any questions you have while watching it.

Who this course is for
BIM Modeler
BIM Coordinators
BIM Managers
Project Managers
Architectures
Mechanical Engineers


429194366_bim_modeling_project-_architectural_structural_mechanical.jpg


7787225e879323e88068643d702506e1.jpg


Complete Portrait Drawing Masterclass (Beginner To Advanced)
Published 9/2023
MP4 | Video: h264, 1280x720 | Audio: AAC, 44.1 KHz
Language: English | Size: 35.96 GB | Duration: 29h 9m

Hyper-realistic portrait drawing masterclass course from beginner to advanced


What you'll learn
The basics of drawing
Drawing facial features with a pencil in a principled way and completely similar to the model
Drawing from the model in two different ways
Familiarity with beginner and advanced painting tools
How to use drawing tools
Shading and making the drawing hyper-realistic
Hyperreal drawing of complete face and all facial features such as eyes, eyebrows, nose, lips, ears, hair, beard and mustache, etc.
Draw the face of whoever you want

Requirements
No requirements required
What is needed to take this course is drawing tools such as (pencil, charcoal, brushes...). And doing regular and continuous exercises. No background is required as this course is from beginner to advanced.

Description
Hi everyone. Welcome to the complete portrait drawing masterclass. In this course, all the necessary tips, tools, tutorials, basics and techniques for hyper realistic portrait drawing are provided..This course will show you how to start portrait painting and create advanced art in the simplest way in just one month..This course does not require any prior knowledge and teaches you all the steps to draw hyper realistic.Even if you have never painted before, by learning this course, you will be able to draw faces and facial features hyper realistic..In this course, you will learn how to draw facial features such as (eyes, eyebrows, eyelashes, nose, lips, ears, hair, mustache, beard, teeth, skin ) and get to know the tools, materials and techniques of drawing and shading in a new and simple way. .This course includes 29 hours of hyper realistic portrait painting training videos in the simplest possible way which starts with basics; how to draw lines.... until you learn how to draw a hyper-realistic portrait with easy techniques.Of all the subjects that artists decide to paint and draw , producing a hyper real painting is perhaps the most popular and engaging..For many amateur artists, the drawing of faces, portraits, and capturing a likeness of someone you know provides a difficult hurdle to overcome.In this portrait painting course, you will get acquainted with the basic techniques, tools and all the necessary training for drawing portraits and human faces hyper realistic ..This hyper-real portrait painting course , is for everyone interested in learning how to draw a realistic portrait.everyone from beginners to more advanced artists are welcome ..Even if you do not have experience in portrait painting, this course will turn you into an advanced artist in just one month..At the end of this course you will be able to paint any face you want , of celebrities, family, friends and anyone you want..Join us and enjoy drawing hyper realistic portrait easily and in just one month.. .

What you'll learnLearn the basics of portrait painting .Hyper Realistic shading with charcoal and brushes.Draw hyper realistic with charcoals and brushes (eyes, eyebrows, eyelashes, nose, lips, ears, hair, hands, skin, beard, mustache, teeth, neck).How to use tools (brushes , charcoals , All kinds of earesers , blending stumps , pens & pensils , ...) to draw hyper realistic portrait.Draw hyper realistic any face you want , of celebrities, family, friends and anyone you want..All the necessary techniques and tutorials for hyper real portrait painting

Overview
Section 1: Introduction

Lecture 1 Introduction

Lecture 2 what you will learn ?

Section 2: Basics of drawing

Lecture 3 How to draw lines

Lecture 4 light and dark shading

Lecture 5 light to dark and dark to light shading

Lecture 6 circle and sphere

Section 3: Drawing facial features just like your model ( sketching )

Lecture 7 Eyebrow model 1

Lecture 8 Eyebrow model 2

Lecture 9 Eyebrow model 3

Lecture 10 Eyes model 1

Lecture 11 Eyes model 2

Lecture 12 Nose model 1

Lecture 13 Nose model 2

Lecture 14 Lips model 1

Lecture 15 Lips model 2

Lecture 16 Ear model 1

Section 4: Tools

Lecture 17 Tools

Section 5: How to draw & shade facial features hyper-realistic (eyes different models)

Lecture 18 Eyes shading part 1

Lecture 19 eye shading part 2

Lecture 20 eye shading part 3

Lecture 21 eye shading part 4

Lecture 22 eye shading part 5

Lecture 23 eye shading part 6

Lecture 24 eye shading part 7

Lecture 25 eye shading model 2 part 1

Lecture 26 eye shading model 2 part 2

Lecture 27 eye shading model 2 part 3

Lecture 28 eye shading model 2 part 4

Lecture 29 eye shading model 2 part 5

Lecture 30 eye shading model 3 part 1

Lecture 31 eye shading model 3 part 2

Lecture 32 eye shading model 3 part 3

Lecture 33 eye shading model 3 part 4

Lecture 34 eye shading model 3 part 5

Lecture 35 eye shading model 3 part 6

Lecture 36 eye shading model 3 part 7

Lecture 37 eye shading model 3 part 8

Section 6: How to draw & shade facial features hyper-realistic ( nose )

Lecture 38 Nose shading part 1

Lecture 39 Nose shading part 2

Lecture 40 Nose shading part 3

Lecture 41 Nose shading model 2 part 1

Lecture 42 Nose shading model 2 part 2

Lecture 43 Nose shading model 2 part 3

Section 7: How to draw & shade facial features hyper-realistic ( lips )

Lecture 44 Lips shading part 1

Lecture 45 Lips shading part 2

Lecture 46 Lips shading part 3

Lecture 47 Lips shading model 2 part 1

Lecture 48 Lips shading model 2 part 2

Lecture 49 Lips shading model 2 part 3

Section 8: How to draw & shade facial features ( ear )

Lecture 50 ear shading part 1

Lecture 51 ear shading part 2

Lecture 52 ear shading part 3

Lecture 53 ear shading part 4

Lecture 54 ear shading part 5

Section 9: Beard and mustache drawing

Lecture 55 Beard and mustache part 1

Lecture 56 Beard and mustache part 2

Lecture 57 Beard and mustache part 3

Lecture 58 Beard and mustache part 4

Lecture 59 Beard and mustache part 5

Lecture 60 Beard and mustache 6

Section 10: How to draw hair hyper-realistic

Lecture 61 How to draw hair part 1

Lecture 62 How to draw hair part 2

Lecture 63 How to draw hair 3

Lecture 64 How to draw hair 4

Lecture 65 How to draw hair 5

Lecture 66 How to draw hair 6

Lecture 67 How to draw hair 7

Lecture 68 How to draw hair 8

Section 11: How to draw a full portrait ( sketching )

Lecture 69 Draw a full portrait part 1

Lecture 70 Draw a full portrait part 2

Lecture 71 Draw a full portrait part 3

Section 12: How to shade a full portrait hyper-realistic

Lecture 72 Portrait part 1

Lecture 73 Portrait part 2

Lecture 74 Portrait part 3

Lecture 75 Portrait part 4

Lecture 76 Portrait part 5

Lecture 77 Portrait part 6

Lecture 78 Portrait part 7

Lecture 79 Portrait part 8

Lecture 80 Portrait part 9

Lecture 81 Portrait part 10

Lecture 82 Portrait part 11

Lecture 83 Portrait part 12

Lecture 84 Portrait part 13

Lecture 85 Portrait part 14

Lecture 86 Portrait part 15

Lecture 87 Portrait part 16

Lecture 88 Portrait part 17

Lecture 89 Portrait part 18

Lecture 90 Portrait part 19

Lecture 91 Portrait part 20

All levels


429269859_complete_portrait_drawing_masterclass_beginner_to_advanced.jpg


Zurück
Oben Unten