

• Regeln für den Video-Bereich:

    In den Börsenbereich gehören nur Angebote die bereits den Allgemeinen Regeln entsprechen.

    Einteilung

    - Folgende Formate gehören in die angegeben Bereiche:
    - Filme: Encodierte Filme von BluRay, DVD, R5, TV, Screener sowie Telesyncs im Format DivX, XviD und x264.
    - DVD: Filme im Format DVD5, DVD9 und HD2DVD.
    - HD: Encodierte Filme mit der Auflösung 720p oder darüber von BluRay, DVD, R5, TV, Screener sowie Telesyncs im Format x264.
    - 3D: Encodierte Filme von BluRay, die in einem 3D Format vorliegen. Dies gilt auch für Dokus, Animation usw.
    - Serien: Cartoon/Zeichentrick, Anime, Tutorials, Dokumentationen, Konzerte/Musik, Sonstiges sind demnach in die entsprechenden Bereiche einzuordnen, auch wenn sie beispielsweise im High Definition-Format oder als DVD5/DVD9/HD2DVD vorliegen. Ausnahme 3D.
    - Bereich Englisch: Englische Releases gehören immer in diesen Bereich.
    - Bereich Talk: Der Bereich, in dem über die Releases diskutiert werden kann, darf, soll und erwünscht ist.


    Angebot/Beitrag erstellen

    - Ein Beitrag darf erst dann erstellt werden, wenn der Upload bei mindestens einem OCH komplett ist. Platzhalter sind untersagt.
    - Bei einem Scenerelease hat der Threadtitel ausschließlich aus dem originalen, unveränderten Releasenamen zu bestehen. Es dürfen keine Veränderungen wie z.B. Sterne, kleine Buchstaben o.ä. vorgenommen werden. Ausnahme Serienbörse:
    - Bei einem Sammelthread für eine Staffel entfällt aus dem Releasename natürlich der Name der Folge. Beispiel: Die Simpsons S21 German DVDRip XviD - ITG
    - Dementsprechend sind also u.a. verboten: Erweiterungen wie "Tipp", "empfehlenswert", "only", "reup", usw. / jegliche andere Zusatzinformation oder Ergänzung, welche nicht in obiger Beschreibung zu finden ist.

    Aufbau des Angebots und Threadtitel

    Der Titel nach folgendem Muster erstellt zu werden. <Name> [3D] [Staffel] [German] <Jahr> <Tonspur> [DL] [Auflösung] <Quelle> <Codec> - <Group>
    Beispiel: The Dark Knight German 2008 AC3 DVDRip XviD - iND
    Beispiel: The Dark Knight 2008 DTS DL BDRip x264 - iND
    Beispiel: The Dark Knight 2008 AC3 DL BDRip XviD - iND
    Beispiel: The Dark Knight German 2008 AC3 720p BluRay x264 iND
    Beispiel: The Dark Knight 2008 DTS DL 1080p BluRay x264 iND
    Beispiel: Die Simpsons S01 German AC3 DVDRip XviD iND
    Beispiel: Die Simpsons S20 German AC3 720p BluRay x264 iND
    Beispiel: Sword Art Online II Ger Sub 2014 AAC 1080p WEBRip x264 - peppermint
    Entsprechend sind also u.a. verboten: Sonderzeichen wie Klammern, Sterne, Ausrufezeichen, Unterstriche, Anführungszeichen / Erweiterungen wie "Tipp", "empfehlenswert", "only", "reup", usw. / jegliche andere Zusatzinformation oder Ergänzung, welche nicht in obiger Beschreibung zu finden ist
    Ausnahmen hiervon können in den Bereichen geregelt sein.

    Die Beiträge sollen wie folgt aufgebaut werden:
    Überschrift entspricht dem Threadtitel
    Cover
    kurze Inhaltsbeschreibung
    Format, Größe, Dauer sind gut lesbar für Downloader außerhalb des Spoilers zu vermerken
    Nfo sind immer Anzugeben und selbige immer im Spoiler in Textform.
    Sind keine Nfo vorhanden z.B. Eigenpublikationen, sind im Spoiler folgende Dateiinformationen zusätzlich anzugeben :
    Quelle
    Video (Auflösung und Bitrate)
    Ton (Sprache, Format und Bitrate der einzelnen Spuren)
    Untertitel (sofern vorhanden)
    Hosterangabe in Textform außerhalb eines Spoiler mit allen enthaltenen Hostern.
    Bei SD kann auf diese zusätzlichen Dateiinformationen verzichtet werden.

    Alle benötigten Passwörter sind, sofern vorhanden, in Textform im Angebot anzugeben.
    Spoiler im Spoiler mit Kommentaren :"Schon Bedankt?" sind unerwünscht.


    Releases

    - Sind Retail-Release verfügbar, sind alle anderen Variationen untersagt. Ausnahmen: Alle deutschen Retail-Release sind CUT, in diesem Fall sind dubbed UNCUT-Release zulässig.
    - Im Serien-Bereich gilt speziell: Wenn ein Retail vor Abschluss einer laufenden Staffel erscheint, darf diese Staffel noch zu Ende gebracht werden.62
    - Gleiche Releases sind unbedingt zusammenzufassen. Das bedeutet, es ist zwingend erforderlich, vor dem Erstellen eines Themas per Suchfunktion zu überprüfen, ob bereits ein Beitrag mit demselben Release besteht. Ist dies der Fall, ist der bereits vorhandene Beitrag zu verwenden.
    - P2P und Scene Releases dürfen nicht verändert oder gar unter einem iND Tag eingestellt werden.


    Support, Diskussionen und Suche

    - Supportanfragen sind entweder per PN oder im Bereich Talk zu stellen.
    - Diskussionen und Bewertungen sind im Talk Bereich zu führen. Fragen an die Uploader haben ausschließlich via PN zu erfolgen, und sind in den Angeboten untersagt.
    - Anfragen zu Upload-Wünschen sind nur im Bereich Suche Video erlaubt. Antworten dürfen nur auf Angebote von MyBoerse.bz verlinkt werden.


    Verbote

    - Untersagt sind mehrere Formate in einem einzigen Angebotsthread, wie beispielsweise das gleichzeitige Anbieten von DivX/XviD, 720p und 1080p in einem Thread. Pro Format, Release und Auflösung ist ein eigener Thread zu eröffnen.
    - Grundsätzlich ebenso verboten sind Dupes. Uploader haben sich an geeigneter Stelle darüber zu informieren, ob es sich bei einem Release um ein Dupe handelt.
    - Gefakte, nur teilweise lauffähige oder unvollständige Angebote sind untersagt. Dies gilt auch für eigene Publikationen, die augenscheinlich nicht selbst von z.B. einer DVD gerippt wurden. Laufende Serien, bei denen noch nicht alle Folgen verfügbar sind, dürfen erstellt und regelmäßig geupdatet werden.
    - Untersagt sind Angebote, welche nur und ausschließlich in einer anderen Sprache als deutsch oder englisch vorliegen. Ausnahmen sind VORHER mit den Moderatoren zu klären.


    Verstoß gegen die Regeln

    - Angebote oder Beiträge, die gegen die Forenregeln verstoßen, sind über den "Melden"-Button im Beitrag zu melden.
  • Bitte registriere dich zunächst um Beiträge zu verfassen und externe Links aufzurufen.

*** Bestes IPTV *** bester Preis *** gratis Test ***


Englische Tutorials

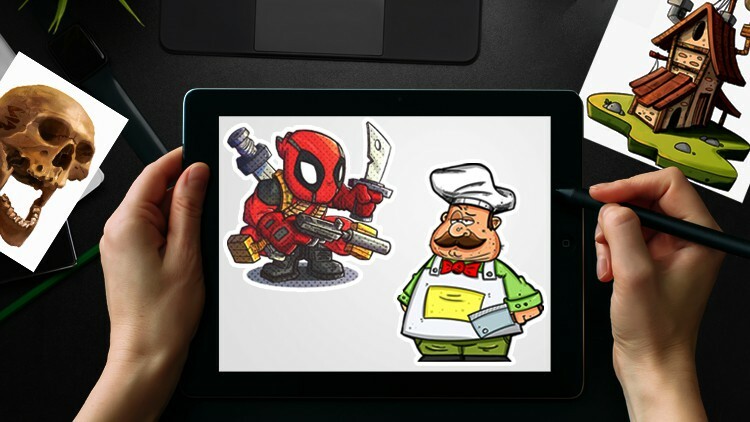
Ultimate Graphic Design: Create Beautiful 40+ Real Projects
r1bphy5udyzkmfnpyiybzupefd.jpg


Ultimate Graphic Design: Create Beautiful 40+ Real Projects
Last updated 5/2022
MP4 | Video: h264, 1280x720 | Audio: AAC, 44.1 KHz
Language: English | Size: 12.12 GB | Duration: 13h 43m

Create awesome thumbnails, banners, catalogues, Instagram & Facebook Graphics, Cards, CVs, Newsletters, and more!


What you'll learn
Practical Photoshop techniques that can be immediately applied
Graphic Design skills that are frequently needed in all manner of projects
You'll create, from scratch, Facebook Ads, Instagram Posts, Youtube Thumbnails, Newsletters, CVs, Business Cards, and much more
Professional Photoshop workflows that you can immediately incorporate into your projects

Requirements
Just about any version of Photoshop. Preferably Photoshop CC. CS6 is fine, but not ideal. Lightroom or Elements are not ok!
There will be a few cases where we'll use Adobe Illustrator, but just to copy-paste some resources, nothing more
You need a very BASIC understanding of Photoshop.

Description
Please go to lecture 4 to see all the projects included in this course!Hey! I'm Chris Barin, Adobe certified Photoshop instructor, web & app designer, and entrepreneur. This course is a must for everyone that needs any type of graphics for their business or career. This is all about content creation! You'll learn how to create all sort of designs that are very much required in today's digital age: Clickable Facebook Ads;Instagram Posts that will get you tons of likes;Youtube Thumbnails that will get you clicks;Newsletters that will improve your open-rate and click-through rate;CVs (Resumes) that will get you hired or promoted;Business cards that will make a lasting impression;Logo design principles that will leave you shocked!Product Catalogue for sales agents;Indoor Banner Ads for various promotions;Beautiful Cover images for your social media profiles;... and much more!All these projects are going to be done in Photoshop, but the great thing about it is you don't need any serious experience with it. As long as you have a very basic understanding of the program, I'll teach you everything you need to know. In case you never opened Photoshop and you have no clue about it, then this course may not be for you.Important Features Included:Course workbook: use it to get up and running fast. It contains answers to most questions, detailed explanations about certain techniques shown in the videos, and much more;Live chat: my students frequently find me on our Discord group chat. This is a free program where you can chat with my fantastic community of students, ask questions, and get help fast. I'm regularly on there!All the sources files are included (PSDs): this means you can quickly replace my content with yours and use my designs without any strings attached!Facebook group: get access to a private group of over 5.000 people who regularly share their designs, insights, and comments.Photoshop is not just about manipulating photos, making waist smaller or removing acne! Through this course you'll learn how to use it like the powerful tool it is and you'll be able to supercharge your career or personal projects.About Christian BarinI'm an Adobe Certified Instructor & Expert in Photoshop;Bestselling author on Udemy with 6 years of teaching experience and over 250.000 students;Incredible course reviews that are way above the category average as well as more minutes consumed by my students - this means my content kicks ass!MOST IMPORTANT: I'm a business owner and content creator. I constantly need high quality designs for my projects. I know what people and businesses require in today's social media age so I created this course around those needs.

Overview

Section 1: Discover the world of Graphic Design

Lecture 1 Welcome & how to use this course

Lecture 2 Quick answers to get started

Lecture 3 Download the Course Workbook & Resources

Lecture 4 See all the course projects here

Lecture 5 First exercise - have fun with it!

Lecture 6 How to make your life easier as a designer

Lecture 7 Graphic Design A Down-to-Earth Explanation

Lecture 8 Using Photoshop for Every Project

Lecture 9 Design Assets Explained

Lecture 10 Best sources for design assets

Lecture 11 Activity: Mix and Match Design Assets

Lecture 12 Optional Setting up Photoshop

Lecture 13 What does it take to create beautiful graphics?

Section 2: Design a Facebook Cover Project

Lecture 14 Introduction

Lecture 15 Best Project Settings & Aspect Ratios

Lecture 16 How to create great text for your project

Lecture 17 Selecting Image Assets

Lecture 18 Arranging the Assets on the Canvas

Lecture 19 Designing the Cover

Lecture 20 Typography for the Facebook Cover

Lecture 21 Fine Tuning the Cover

Lecture 22 Conclusion

Section 3: Design a Facebook Cover Project #2

Lecture 23 Introduction

Lecture 24 Analyze your assets and options

Lecture 25 Setting the project s foundation

Lecture 26 Creating a neutral background with a noise texture

Lecture 27 Sizing up the products correctly

Lecture 28 Creating shadows for the products

Lecture 29 Fine Tuning the Cover

Lecture 30 Using vector graphics to create version 2

Lecture 31 Creative Facebook cover iteration

Section 4: Create Clickable Youtube Thumbnails

Lecture 32 The connection between YouTube thumbnails & Views

Lecture 33 The power of a mockup

Lecture 34 The Absolute best way to design YouTube Thumbnails

Lecture 35 Classic YouTube Thumbnail Part 1

Lecture 36 Classic YouTube Thumbnail Part 2

Lecture 37 Abstract YouTube Thumbnail Part 1

Lecture 38 Abstract YouTube Thumbnail Part 2

Lecture 39 Choose your own style

Lecture 40 Before and After Thumbnail

Lecture 41 Illustration-based Thumbnail Part 1

Lecture 42 Illustration-based Thumbnail Part 2

Lecture 43 Personal Brand Thumbnail

Lecture 44 Text Behind & In Front of you

Lecture 45 Conclusions

Section 5: Designs for Instagram

Lecture 46 Introduction

Lecture 47 Instagram Content Creation Hack

Lecture 48 Clean Product Presentation Part 1

Lecture 49 Clean Product Presentation Part 2

Lecture 50 Instagram Mockups Easy!

Lecture 51 Inspirational Content Part 1

Lecture 52 Inspirational Content Part 2

Lecture 53 Black & White Content

Lecture 54 Food Content

Lecture 55 Personal Branding Part 1

Lecture 56 Personal Branding Part 2

Lecture 57 Content Striking Colors Part 1

Lecture 58 Content Striking Colors Part 2

Lecture 59 How to Post on Instagram from your Computer

Section 6: Designs for Facebook Ads

Lecture 60 Introduction

Lecture 61 Framing Facebook Ads & Quality Standards

Lecture 62 Colorful Product Ad Part 1

Lecture 63 Colorful Product Ad Part 2

Lecture 64 Colorful Product Ad Part 3

Lecture 65 Colorful Product Ad Part 4

Lecture 66 The question of stock photos & freebies in FB ads

Lecture 67 Vector Based Ad Part 1

Lecture 68 Vector Based Ad Part 2

Lecture 69 Vector Based Ad Part 3

Lecture 70 Vector Based Ad Part 4

Lecture 71 The Pros and Cons of People-based Facebook ads

Lecture 72 People-Based Facebook Ad Part 1

Lecture 73 People-Based Facebook Ad Part 2

Lecture 74 People-Based Facebook Ad Part 3

Lecture 75 Best Facebook Ad Template The Foundation

Lecture 76 Best Facebook Ad Template The Details

Lecture 77 Conclusions

Section 7: Design Business Cards

Lecture 78 Introduction

Lecture 79 Colorful Business card for the CEO The essentials

Lecture 80 Colorful Business card for the CEO The details

Lecture 81 Colorful Business card for the CEO Beautiful Icons

Lecture 82 What do simple and clean mean?

Lecture 83 Personal Branding Business Card

Lecture 84 Business Card Best Design Practices

Lecture 85 Corporate Business Card Foundation

Lecture 86 Corporate Business Card Icon Design

Section 8: Design Beautiful CVs (Resumes)

Lecture 87 CV (Curriculum Vitae) Designs in Today s Market

Lecture 88 Deciding on a CV style

Lecture 89 Setting the foundation of the CV

Lecture 90 Choosing a typeface really important!

Lecture 91 Rocking Typography

Lecture 92 Gorgeous icons for your CV

Lecture 93 Staying consistent in your design

Lecture 94 Negative space in a CV design

Lecture 95 Creating a timeline for your CV

Lecture 96 Final Thoughts for the Clean CV Project

Section 9: Design Another Beautiful CV

Lecture 97 Creative CV Design

Lecture 98 Modern Typography for a Creative CV

Lecture 99 Use Freepik to make your CV stand out!

Lecture 100 How to adjust vectors and add detailed icons

Lecture 101 Fine-tuning the CV

Lecture 102 The last 10% that makes all the differences!

Section 10: Design Great Newsletters

Lecture 103 Newsletters in today s market

Lecture 104 Newsletter styles

Lecture 105 Colorful Newsletter in Mailchimp & Photoshop

Lecture 106 Create a catchy newsletter hero-element in Photoshop

Lecture 107 Adding extra details

Lecture 108 The most important element: the CTA

Lecture 109 Create effective layouts in Mailchimp

Lecture 110 Inserting new content in Mailchimp

Lecture 111 Balancing graphics with content

Lecture 112 Design overview

Section 11: Create Animated Newsletters

Lecture 113 Animated Newsletter in Mailchimp & Photoshop

Lecture 114 Create the product presentation in Photoshop

Lecture 115 Animating the product presentation Method #1

Lecture 116 Animating the product presentation Method #2

Lecture 117 Create the call to action

Lecture 118 Creating a gift design for the newsletter in Photoshop

Lecture 119 Animating the gift box the lid

Lecture 120 Animating the gift box the stars & text

Section 12: Graphic Design Analysis with Chris Barin

Lecture 121 Introduction

Lecture 122 Mazda 3 Launch Ad

Lecture 123 Travel Agency Templates Good or bad?

Lecture 124 Original Design versus Templates

Lecture 125 Hiring People Through Beautiful Ads

Lecture 126 Premium Office Building Ad Shocking!

Lecture 127 Huge Telecom Company Blunder!

Lecture 128 50% for 5%

Lecture 129 The reason why most designs are cluttered

Lecture 130 Clich s and Stereotypes in Graphic Design

Section 13: Printed Design: Indoor Ad Banner

Lecture 131 Introduction

Lecture 132 Everything s about the Style Guide

Lecture 133 Indoor Ad Banner: Laying things out

Lecture 134 Indoor Ad Banner: Typography & Layout

Lecture 135 Indoor Ad Banner: Styling

Lecture 136 Indoor Banner: Final touches & Conclusions

Lecture 137 Extras: Create an indoor ad banner mockup

Lecture 138 Section conclusions

Section 14: Printed Design: Product Catalogue

Lecture 139 Introduction

Lecture 140 Set up the catalogue project in Photoshop

Lecture 141 Styling the cover of the catalogue

Lecture 142 Fine-tuning the cover

Lecture 143 Add something extra to the cover

Lecture 144 Interior page style: Typography

Lecture 145 Interior page style: Layout

Lecture 146 Styling large amounts of text

Lecture 147 Interior pages overview

Lecture 148 Conclusions

Section 15: What you need to know about Logo Design

Lecture 149 The Truth About Logo Design

Lecture 150 Should you design logos as a freelancer?

Lecture 151 Creating logos in Photoshop

Lecture 152 The complexity behind a logo

Lecture 153 Gathering information

Lecture 154 Worst techniques for logo design

Lecture 155 Best techniques for logo design

Section 16: Final thoughts

Lecture 156 Do this before you start freelancing

Lecture 157 Final thoughts

Anyone who wants to learn Graphic Design and create beautiful content,Business owners and entrepreneurs who need all sorts of graphics for their projects,Bloggers, Youtubers, and content creators in general will benefit tremendously from this course



ultimategraphicdesignnlecj.jpg


Canva Master Course | Learn Canva With Ronny

kp0t0ujjl8x1vv2hhn10houi0b.jpg


Canva Master Course | Learn Canva With Ronny
Last updated 10/2022
MP4 | Video: h264, 1280x720 | Audio: AAC, 44.1 KHz
Language: English | Size: 15.08 GB | Duration: 16h 41m

Discover Canva, Build your Brand & Grow your Business or Career with a Canva Certified Expert


What you'll learn
Discover all the latest features now available in Canva
Learn the fundamentals of Canva & graphic design while having fun
Build a strong brand identity & a brand style guide for your business
Use Canva to create 18 visuals you need to promote your business
Discover how to make a positive first impression with all your designs

Requirements
You will need a laptop or desktop computer and an Internet connection. No previous design skills required.

Description
** Fully updated in June 2022 // Brand New Course **What this course is all about?I'm sure you want to learn the latest cool things you can do with Canva right? If you do, you are in the right place my friend!This course will help you get started with Canva (so don t worry if you are a beginner) and then provide you with a roadmap that will push you to grow into a confident content creator.You will be creating visuals & animated GIFs for social media, you will edit all sorts of videos for TikTok, Instagram or YouTube, you ll be making your own website and design convincing pitch deck presentations.Why you should learn Canva with me?Since I first published this course (about 20.000 students ago), a lot of interesting things happened to me:I started a FB group that grew into one of the largest Canva communitiesI published around 300 Canva tutorials on YouTube and received close to 10M viewsI GOT HIRED BY CANVA!! and moved to Australia to work at their headquartersI became one of the first Canva Certified ExpertsI left Canva after 2 years to focus on Udemy and my YouTube channel which were both exploding!So yeah! A lot of good things have happened Being an official Canva ambassador (Canva Expert) and having worked at Canva for 2 years gives me a deep understanding of the platform, where it s going and how to best use it. As a Canva Expert, I get to test and access new features first and also receive VIP support from Canva to make sure I teach Canva in the best possible way to my community.How is this Canva Course Different?This course is different from the other courses about Canva on this platform. Let me tell you how:1/ It s a Master Course, meaning: we go deep. And not only do we go deep, we approach the learning experience in a very structured way. Progressively showing you all you can create with Canva. I left the course overview free to watch in the curriculum, so make sure to check it out.2/ You ll build your brand. The course will not only teach you how to use Canva, but will help you develop a brand identity for your business or organization. Your brand identity is indeed the foundation upon which you should build your company s communication. It includes your mission, vision, target audience, personality and core values. We will make sure to cover all these branding fundamentals before we start designing.3/ It s hands-on & practical. Instead of creating some random graphics to teach you how to use Canva, we will start by designing a Brand Style Guide. Of course, we will do this with Canva! Your Brand Style Guide will make sure everything else you design in this course is on-brand and ready to use in real life.4/ Become a confident content creator. You will then get to work, and lean on your Style Guide during the rest of the course to create a complete set of visuals and projects that will be useful to promote your brand or establish your online presence as a content creator.Here is a list of the 18 projects YOU will be designing in this course: Your Brand Style GuideA Profile Picture for Social MediaA Facebook PostA Facebook CoverA Facebook AdAn Instagram PostAn Instagram StoryA YouTube ThumbnailA YouTube Channel ArtAn InfographicA TikTok VideoA video tutorial for YouTubeAn Animated Social Media PostAn Animated GIFA Pitch Deck Presentation Charts & Graphs for your PresentationA Talking Presentation Your Canva Website THE PROMISEBy the end of this Canva Master Course you will have created a full set of consistent visuals that will actually help you promote your brand. You will have mastered Canva and will be able to use it to produce any kind of visuals you need in the future, allowing you to save time, money and take your design skills to the next level!Enroll now and let s get this party started!!

Overview

Section 1: Why You Need Canva

Lecture 1 What is Canva and how it can help you?

Lecture 2 Canva is changing and so is this course!

Lecture 3 Course Overview

Lecture 4 I need your review

Lecture 5 Why you should Become Better at Design?

Section 2: Canva Fundamentals

Lecture 6 Section Intro

Lecture 7 Discovering the Canva Homepage - Top Navbar

Lecture 8 Discovering the Canva Homepage - Left Navbar

Lecture 9 Discovering the Canva Homepage - Middle section

Lecture 10 Access thousands of Free Templates

Lecture 11 An overview of the Canva Editor

Lecture 12 Finding the Design Ingredients

Lecture 13 Working with Text

Lecture 14 Working with Photos

Lecture 15 Working with Colors

Lecture 16 Aligning & Layering Elements

Lecture 17 Premium elements Vs Free elements

Lecture 18 Downloading, Sharing & Publishing your Designs

Section 3: Canva PRO (The Paid Version)

Lecture 19 Section Intro

Lecture 20 Unlimited Content

Lecture 21 Collaborate with your Team

Lecture 22 Brand Kit Pro

Lecture 23 Background Remover

Lecture 24 Magic Resize

Lecture 25 Transparent Background

Lecture 26 Animation Pro

Lecture 27 Fonts Pro

Lecture 28 Schedule Social

Lecture 29 Should you upgrade?

Section 4: Creating your Brand Identity

Lecture 30 Section Intro

Lecture 31 Your Mission

Lecture 32 Your Vision

Lecture 33 Target Audience

Lecture 34 Brand Personality

Lecture 35 Core Values

Section 5: Designing your Brand

Lecture 36 Section Intro

Lecture 37 Finding the right template

Lecture 38 Setting up your Style Guide

Lecture 39 Adding your Content

Lecture 40 Styling your document

Lecture 41 Downloading & Publishing

Section 6: Designing for Social Media

Lecture 42 Section Intro

Lecture 43 Editing your Photos with Canva

Lecture 44 Profile Picture

Lecture 45 Facebook Post

Lecture 46 Facebook Cover

Lecture 47 Facebook Ad

Lecture 48 Instagram Post

Lecture 49 Instagram Story

Lecture 50 YouTube Thumbnail

Lecture 51 YouTube Channel Art

Lecture 52 Creating Infographics

Section 7: Creating Videos & Animations

Lecture 53 Section Intro

Lecture 54 Editing Videos with Canva

Lecture 55 The Recording Studio

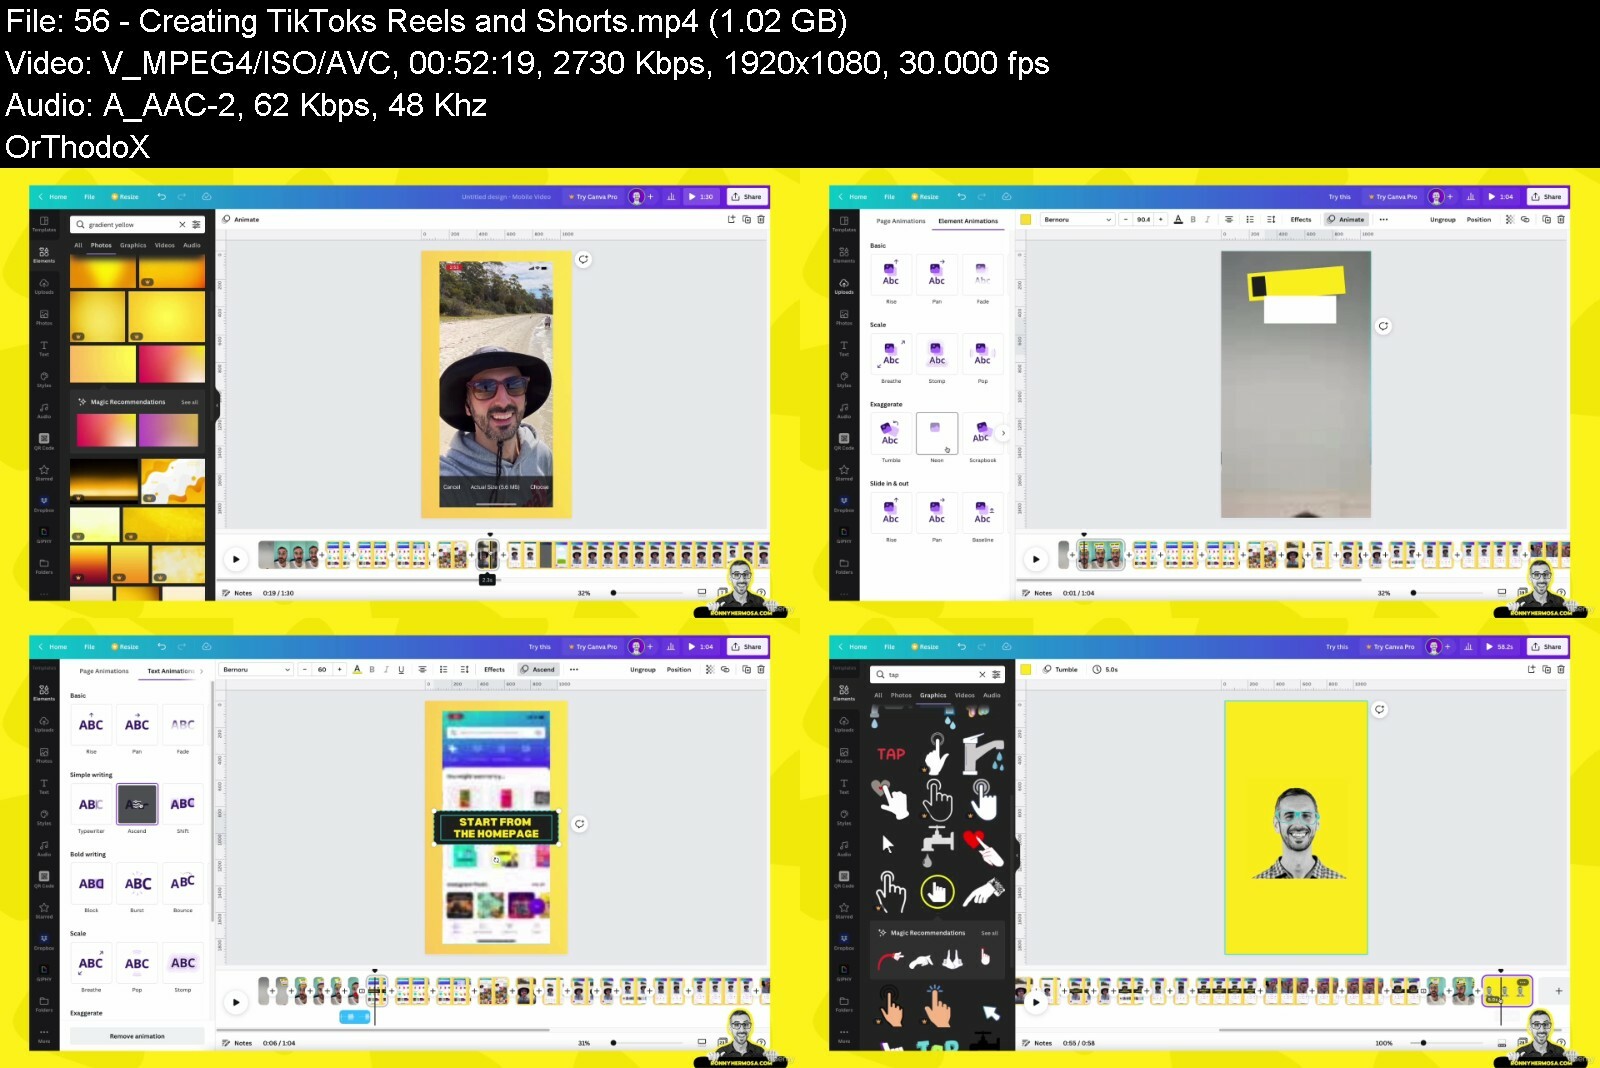
Lecture 56 Creating TikToks, Reels and Shorts

Lecture 57 Creating Tutorials and Educational Videos

Lecture 58 Designing Animated Social Media Posts

Lecture 59 Creating Animated GIFs

Section 8: Creating Awesome Presentations

Lecture 60 Why Canva is the new Powerpoint

Lecture 61 4 Design mistakes you need to avoid

Lecture 62 Sort this Out Before Creating your Slides

Lecture 63 Creating Wow Slides - Part 1

Lecture 64 Creating Wow Slides - Part 2

Lecture 65 Adding Charts and Graphs to your presentation

Lecture 66 Embedding Interactive Media to your Slides

Lecture 67 Delivering your presentation from Canva

Lecture 68 Recording Talking Presentations

Lecture 69 Sharing your presentation with your team & audience

Section 9: Designing your Website

Lecture 70 Section Intro

Lecture 71 Build simple Websites with Canva!

Lecture 72 Getting started with your Canva Website

Lecture 73 Building your Homepage

Lecture 74 Your Product or Service Pages

Lecture 75 Publishing your Website

Lecture 76 Tips to create better Websites with Canva

Lecture 77 Final Word

Section 10: BONUS

Lecture 78 Keep up with all the Canva UPDATES

Lecture 79 BONUS: Coupon Deals for other Courses + Freebies

Virtual assistants who need to create professional graphics, videos and websites for their clients,Social media managers and visual content creators,Entrepreneurs and small business owners who want to create a strong brand,Freelancers who want to boost their career on Fiverr, Upwork, etc.,Beginner designers and anyone interested in graphic design.,Anyone who wants to get started with video editing the easy way,Anyone who needs to create a website but have no idea how to code


canvamastercourselearuqc3j.jpg


Hollywood VFX with Maya and Nuke

wyamzxoy57lg39f26ecskz4ed1.png


Hollywood VFX with Maya and Nuke
MP4 | Video: h264, yuv420p, 1920x1080 | Audio: aac, 48000 Hz | Duration: 13h 35m | 10.3 GB
Genre: eLearning | Language: English

This class will teach you

what you need to know to create artwork
using the 3D Tool Maya
From HDRI to LookDev, lighting, final rendering,
image manipulation, and even the theories behind it.

Get access to the industry knowledge
and work process of 3D Artist Jun-Eun Kim
and tap into his 14 years
of Major Hollywood film-making experience.

Homepage

hollywoodvfxwithmayaaypf4n.jpg


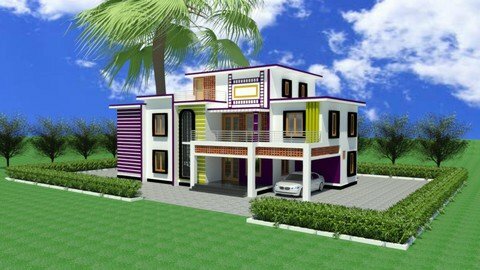
Revit Architecture Easy Way To Design Your House + Estimate

mq52npqsxqfzexu46tjgp1tcya.jpg


Revit Architecture Easy Way To Design Your House + Estimate
Published 7/2022
MP4 | Video: h264, 1280x720 | Audio: AAC, 44.1 KHz
Language: English | Size: 5.65 GB | Duration: 9h 20m

Advanced level house project and easy steps to design your house. This practice will make you better house designer


What you'll learn
To learn Advanced level BIM environment & concept about Revit Architecture
To learn advanced level House project Exterior & Interior design and detailing in Revit Architecture
To learn Schedule and Floor Plan Drawing Creation
To learn Material takeoff and estimation in house design
To learn Solar Study and Exterior Rendering
To learn Interior design and lighting and its rendering

Requirements
Laptop / Computer (With Revit 2019 to 2022 Software)
Basic computer Knowledge
Basic English
No need any other previous experience

Description
Revit Architecture Powerful Building Information Modeling (BIM) Software.In this Software you can Create accurate 3D Modeling with all engineering data it can built any kind of Building DesignYou will Learn Revit Architecture (Interior & Exterior) House design Training. In this Course you will get master knowledge in Revit Architecture House designYou will learn to create and work with Grid and LevelYou will learn to create any type of Architectural 3D model with Wall, Floor, Roof, Stair, Railing, etc.You will learn to place Doors and windows etc.You will learn to create Curtain wall with various placesYou will learn to create Structural and Architectural column You will learn to create of roofingYou will learn to create Interior Ceiling design and its LightingsYou will learn to create material and paint You will learn to create Topo surfaces and landscaping activities You will learn to create rooms and its area calculationYou will learn to create Schedule and its applicationYou will learn to create Filter and its usesYou will learn to create solar studyYou will learn to Place cameraYou will learn to create advanced level quick rendering methodsYou will learn to create 2D drawing and detailing inside RevitYou will learn to create accurate output files for Construction and ExecutionYou will learn to create step by step detailed lecture to create house project in end of this course After this course you will get knowledge to Design your house in Revit ArchitectureDon t wait, Let s Start your good Steps your lifeBest of Luck

Overview

Section 1: Introduction

Lecture 1 Course Introduction

Lecture 2 Revit Home Screen

Lecture 3 Start New Projects

Lecture 4 Save & Save as Project

Lecture 5 Open Existing Project

Lecture 6 Units

Section 2: User Interface

Lecture 7 Quick Access Toolbar

Lecture 8 File Menu

Lecture 9 Ribbon Toolbar

Lecture 10 Project Browser Palette

Lecture 11 Properties Palette

Lecture 12 Ribbon Temporary Contextual Tab

Lecture 13 Options Bar

Lecture 14 Status Bar

Lecture 15 View Control Bar

Lecture 16 Selection Control Bar

Lecture 17 Drawing Window

Lecture 18 Context Menu

Section 3: Navigation Toolbar

Lecture 19 Zoom

Lecture 20 Pan

Lecture 21 Orbit

Lecture 22 View Cube

Lecture 23 Navigation Wheel

Section 4: Start House Project

Lecture 24 Project Introduction

Lecture 25 Start House Project

Section 5: Datum

Lecture 26 Create Level

Lecture 27 Create Grid

Section 6: Foundation

Lecture 28 Create Pad Footing

Lecture 29 Create Foundation Column

Lecture 30 Create Foundation Beam

Lecture 31 Create Structural Column

Section 7: Walls & Floor

Lecture 32 Create Wall for Ground Floor

Lecture 33 Create Floor For Level-2

Lecture 34 Create Floor For First Floor

Lecture 35 Create Wall For First Floor

Lecture 36 Create Floor For Level-6 Part-1

Lecture 37 Create Floor For Level-6 Part-2

Lecture 38 Create Floor For Level-7

Lecture 39 Create Wall above Level-6

Lecture 40 Create Roof For Level-8

Lecture 41 Create Floor For Level-5

Lecture 42 Create Floor For Level-3

Lecture 43 Create Architectural Column For Sitout & Car porch

Lecture 44 Create Wall For Level-3

Lecture 45 Create Architectural Column For Balcony

Section 8: Door

Lecture 46 Place Main Door

Lecture 47 Place Room Door For Ground Floor

Lecture 48 Place Toilet Door For Ground Floor

Lecture 49 Place Arch Opening For Ground Floor

Lecture 50 Place Room Door For First Floor

Lecture 51 Place Toilet Door For First Floor

Lecture 52 Place Arch Opening For First Floor

Lecture 53 Place Door For Level-6

Section 9: Window

Lecture 54 Place Windows

Lecture 55 Place Toilet Ventilation Windows

Section 10: Staircase

Lecture 56 Create Staircase-1

Lecture 57 Create Staircase-2

Lecture 58 Create Floor Cutout in Level-4 For Staircase

Lecture 59 Create Handrail in Level-4 Cutout area

Lecture 60 Create Floor Cutout in Level-6 For Staircase

Lecture 61 Create Handrail in Level-6 Cutout area

Lecture 62 Create Floor Tile in Level-6

Lecture 63 Rearrange All Column Height

Section 11: Exterior Design

Lecture 64 Create Steps

Lecture 65 Create Sunshade for Windows

Lecture 66 Exterior Design-Wall Projections

Lecture 67 Create Parapet Wall

Lecture 68 Create Handrail For Exterior

Lecture 69 Create Wall Reveal-1

Lecture 70 Create Curtain Wall

Lecture 71 Create Sunshade for Curtain Wall area

Lecture 72 Create Wall Reveal-2

Lecture 73 Exterior Design-Extrusion-1

Lecture 74 Exterior Design-Extrusion-2

Lecture 75 Create Wall around the building

Section 12: Site Work

Lecture 76 Create Topo surface

Lecture 77 Create Sub region

Lecture 78 Place Plants

Lecture 79 Place Car

Section 13: Material & Paint

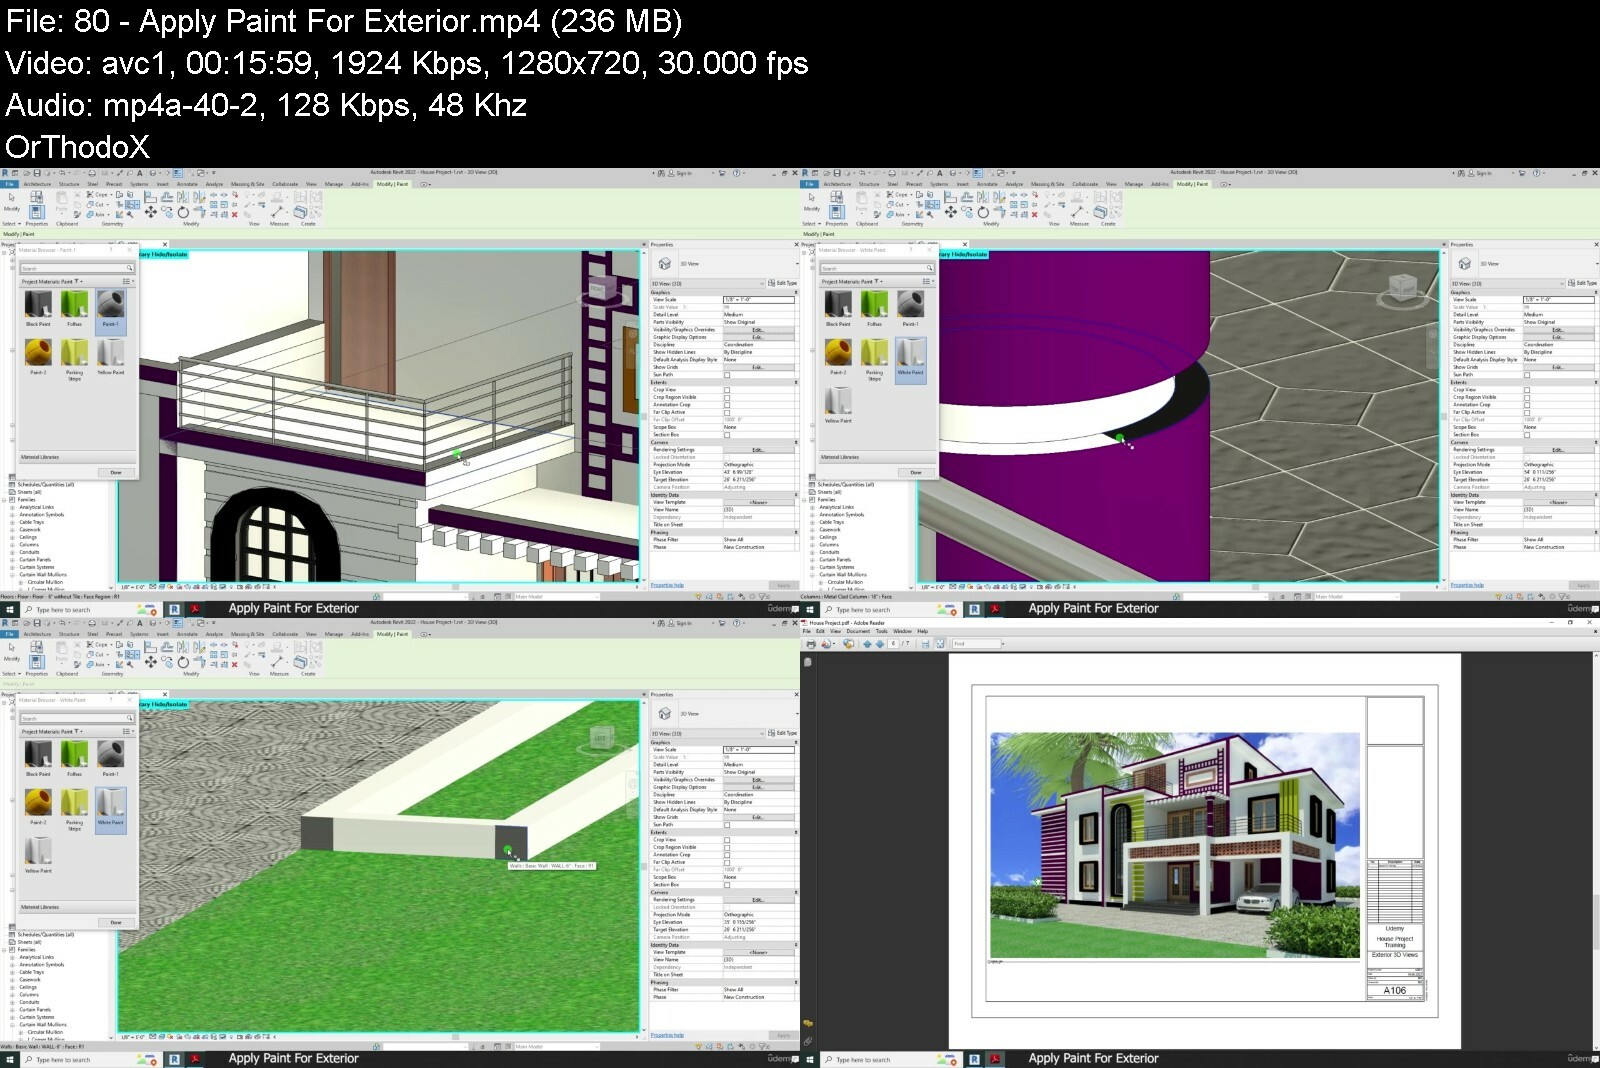
Lecture 80 Apply Paint For Exterior

Lecture 81 Apply Material to Windows and doors

Section 14: Exterior Rendering

Lecture 82 Place Camera For Exterior

Lecture 83 Sun settings & Shadows

Lecture 84 Exterior Rendering Part-1

Lecture 85 Exterior Rendering Part-2

Section 15: Interior Design

Lecture 86 Place Bed

Lecture 87 Place Sofa

Lecture 88 Place Table

Lecture 89 Place TV

Lecture 90 Place Cupboard

Lecture 91 Place Kitchen Table Set

Lecture 92 Place Washbasin For Dining Hall

Lecture 93 Place Sink For Toilet

Lecture 94 Place Water Closets (Toilet)

Lecture 95 Place Shower

Lecture 96 Place Tap For Toilet

Section 16: Interior Design Ceiling

Lecture 97 Create Ceiling Design-1

Lecture 98 Create Ceiling Design-2

Lecture 99 Place Ceiling Moon Light-1

Lecture 100 Place Ceiling Light-1

Lecture 101 Place Ceiling Light-2

Lecture 102 Place Ceiling Moon Light-2

Section 17: Interior Rendering

Lecture 103 Place Camera For Interior

Lecture 104 Interior Rendering Part-1

Lecture 105 Interior Rendering Part-2

Section 18: Room & Tag

Lecture 106 Create Room Tag For Ground Floor

Lecture 107 Create Room Tag For First Floor

Lecture 108 Create Room Tag For Second Floor (Level-6)

Lecture 109 Create Color Fill Legend

Section 19: Create Drawings

Lecture 110 Create Foundation Drawings

Lecture 111 Create Floor Plan Drawing Ground Floor

Lecture 112 Create Floor Plan Drawing First Floor

Lecture 113 Create Floor Plan Drawing Second Floor

Lecture 114 Create Elevation Drawing

Lecture 115 Create Exterior 3D View Drawing

Lecture 116 Create Interior 3D View Drawing

Lecture 117 Modify Title Block

Lecture 118 Add Revision To Drawing

Lecture 119 Print Drawing

Section 20: Schedule & Estimation

Lecture 120 Create 9" Wall Schedule

Lecture 121 Create 6" Wall Schedule

Lecture 122 Estimate Brick with Mortar & Plaster

Lecture 123 Estimate Brick Quantity & Price

Lecture 124 Create Curtain Wall Schedule

Lecture 125 Create Door Schedule

Lecture 126 Create Window Schedule

Lecture 127 Create Floor Schedule

Lecture 128 Create Architectural Column Schedule

Lecture 129 Create Staircase Schedule

Lecture 130 Create Railing schedule

Lecture 131 Create Structural Column Schedule

Lecture 132 Create Beam Schedule

Lecture 133 Create Pad Footing Schedule

Lecture 134 Create Casework Material Takeoff

Revit beginners,Revit advanced learners,Revit Modeler,Revit Designer,Architect,Civil Engineers,Architectural Engineers,Architectural Designers,Architectural Draftsman,Civil Draftsman,Mechanical Engineers,Design Engineers,Anyone interested in Architecture,Anyone interested in Civil,Anyone interested in Revit,Anyone interested in Revit Architecture,Anyone interested in BIM,Cad Operator,Cad Supervisor,Anyone interested in Autodesk,Anyone interested in 3D modeling,Anyone interested in Drafting,Anyone interested in Engineering Design,Anyone interested in Building Design,Anyone interested in Building Modeling,Anyone interested in House Design,Anyone interested in Villa Design,Anyone interested in Building information modeling,Anyone interested in home design,Anyone interested in Interior design,Anyone interested in Exterior design


revitarchitectureeasyvycfy.jpg


Drawing Nature - Quick Sketch Procreate Edition

uauue3sojb5n4cunz6bkuv6iuh.jpg


Drawing Nature - Quick Sketch Procreate Edition
Last updated 7/2021
MP4 | Video: h264, 1280x720 | Audio: AAC, 44.1 KHz
Language: English | Size: 8.89 GB | Duration: 6h 54m

Discover how to quickly draw & illustrate and color & paint flowers in Procreate


What you'll learn
Drawing flowers in a quick, yet convincing way in Procreate
Start with learning to draw a simple flower and eventually move on to complete scenes
Sketching in Procreate
Painting in Procreate
Creating captivating Backgrounds in Procreate
Capture what you observe quickly
Discover this very special Quick Sketch Method which is easy to adopt, yet easy to adapt to your own style, wishes and liking

Requirements
No prior experience needed at all
iPad
Procreate
Apple Pencil or other Pressure Sensitive Stylus is recommended
Procreate Pocket may work, but isn't tested

Description
It s here! My Drawing Nature Quick Sketch Flower Edition is now available for Procreate users!Nature is such a big source of inspiration for artists. The beauty of creation is simply stunning! No wonder it brings such joy to be able to capture some of this beauty in an artwork!Accomplishing this task, however, can be somewhat intimidating. Quite some people get stuck along the way and are not happy with the results they re getting. This can be frustrating, disheartening and quenching your creative flow.My name is Benjamin Aeilkema and I m an illustrator and Artist from The Netherlands. I love creating Artworks with all kinds of materials. Next to traditional media, I love the additional world of possibilities that opens to you when creating artworks digitally. Procreate has many awesome tools and features available to help lift your creative process to the next level!This course combines my successful Quick Sketch Method with discovering how to take advantage of many of the powerful tools Procreate offers for sketching, painting, and creating stunning backgrounds.Mastering these special techniques will totally change your approach to drawing flowers. There will be a transformation of your thinking pattern in where to start and where to end. This will deliver you from getting lost in the details and give you a new revolutionizing workflow.This is what students are saying about my Quick Sketch Flower Edition Art Class:I have learnt to be more observant and be more free with my strokes. He is very good and I really enjoyed my classes. (Brenda Clark)Excellent experience. Really easy to follow Ben's teaching, Quick sketch method is highly enjoyable to learn and there are many useful applications for this style. I know I will employ this technique often. (Cher Truax)This class is wonderful! Benjamin describes everything in an easy to understand fashion. The cadence of the class is excellent. I find that I can easily keep pace with what he is doing. This is the perfect class if you are looking to learn how to sketch things quickly or if you are already accomplished and would like to tune up your skills. His methods are easy to apply to other drawing subjects as well. (Lara Smoot)You will enjoy developing your Procreate skills along the way too. If you just started working with this digital illustration app, be at rest, the beginner steps are included for you. As you progress through the Art Class, you ll be discovering how to take advantage of some powerful tools for sketching and painting flowers, along with making great backgrounds. This will include features like: setting up a grid, using symmetry and warping.So come and join me in exploring all these different techniques. Step by step we ll end up with lovely sketches and paintings of flowers that will light up your day!Additional Information:Reference PDF s: Great Time Savers in PDF formatTo help you save time, I m providing you with handy books of references. Once you ve completed an assignment, there s no need to re-watch the video lesson. Instead, all my finished works are in these booklets. Just find the lesson you re on and compare your work to the finished assignment in the book. Again, this will save you time and allow you to keep on going.That s not all though, I ve also included photo references. You ll find photos of all the flowers I ve used in the lessons. This addition will help you to work in any season, regardless of which flowers do or don t grow. While I encourage you to get your own reference material, I understand that s not always possible. So, with these booklets you have plenty of reference material to get you started.Additional demos: Join me at workWouldn't it be great to see me at work, rather than only seeing me teach? Now you can. With these additional videos you get to join me at work. While working I've filmed projects from start to finish. Once you have gone through the complete Art Class, you can see how I actually use the techniques I teach. Even better, join me in recreating these projects yourself, using all that you've discovered.Enroll now to enjoy the wonder of this Quick Sketch Method Procreate Edition. See you inside.

Overview

Section 1: Introduction

Lecture 1 Introduction

Lecture 2 Support, Community and Feedback

Section 2: Materials

Lecture 3 What do you need for this Art Class?

Lecture 4 Materials List and Color Swatch

Section 3: Explaining the method

Lecture 5 The Quick Sketching Method

Section 4: Poppies with a Splash of Color

Lecture 6 Introduction

Lecture 7 Sketching

Lecture 8 Sketching different Angles

Lecture 9 Inking the Flowers

Lecture 10 Shading the Flowers

Lecture 11 A Splash of Color

Lecture 12 Adding a Background

Lecture 13 The Project

Section 5: Fun with Cornflowers

Lecture 14 Introduction

Lecture 15 Sketching

Lecture 16 Inking

Lecture 17 Shading

Lecture 18 Coloring

Lecture 19 Background

Lecture 20 Sketching Tricks

Lecture 21 Inking a different View

Lecture 22 Painting this View

Lecture 23 Tips and Tricks

Lecture 24 The Project

Section 6: Sketching Dandelions

Lecture 25 Introduction

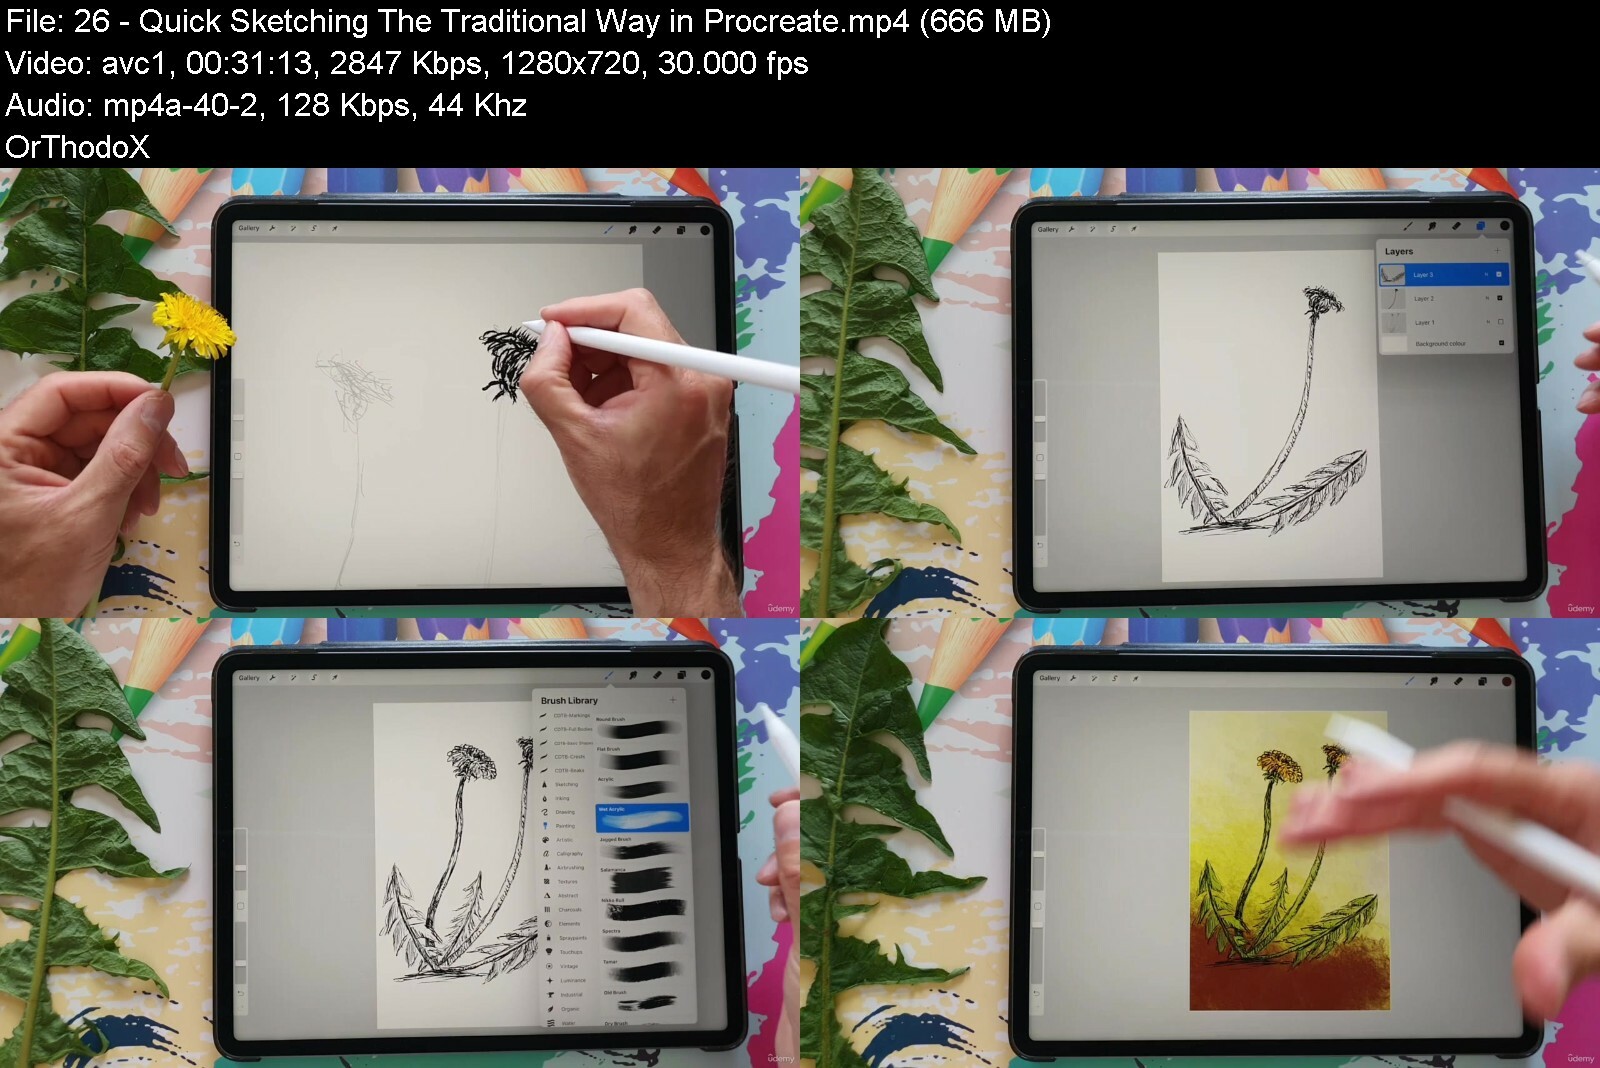
Lecture 26 Quick Sketching - The Traditional Way in Procreate

Lecture 27 The Project

Section 7: Going Crazy with Daisies

Lecture 28 Introduction

Lecture 29 Sketching Tricks

Lecture 30 Painting with Greys

Lecture 31 Playing with Effects

Lecture 32 The Project

Section 8: Working from Photos

Lecture 33 Introduction

Lecture 34 Importing a Photo

Lecture 35 Using a Reference

Lecture 36 Sketching from a Photo

Lecture 37 Using a Photo as Painting

Lecture 38 Painting over a Photo

Lecture 39 The Project

Section 9: Creating a Composition

Lecture 40 Introduction

Lecture 41 Defining a Composition

Lecture 42 Sketching and Shading

Lecture 43 Painting

Lecture 44 The Final Touches

Lecture 45 Drawing on Location

Lecture 46 The Project

Section 10: Work with me - The Demo's

Lecture 47 A lonely Flower

Section 11: Final Words.....

Lecture 48 Watch only when really done :)

Lecture 49 Bonus Lecture

Artists and non-artists of any level,Beginning artists,Intermediate artists,Anyone with a desire to draw nature with a fresh perspective,The lessons are presented with such simplicity and clarity that anyone can follow and do them, from beginner to advanced,Procreate enthusiasts,Procreate beginners,Procreate artists


drawingnaturequickskedefud.jpg


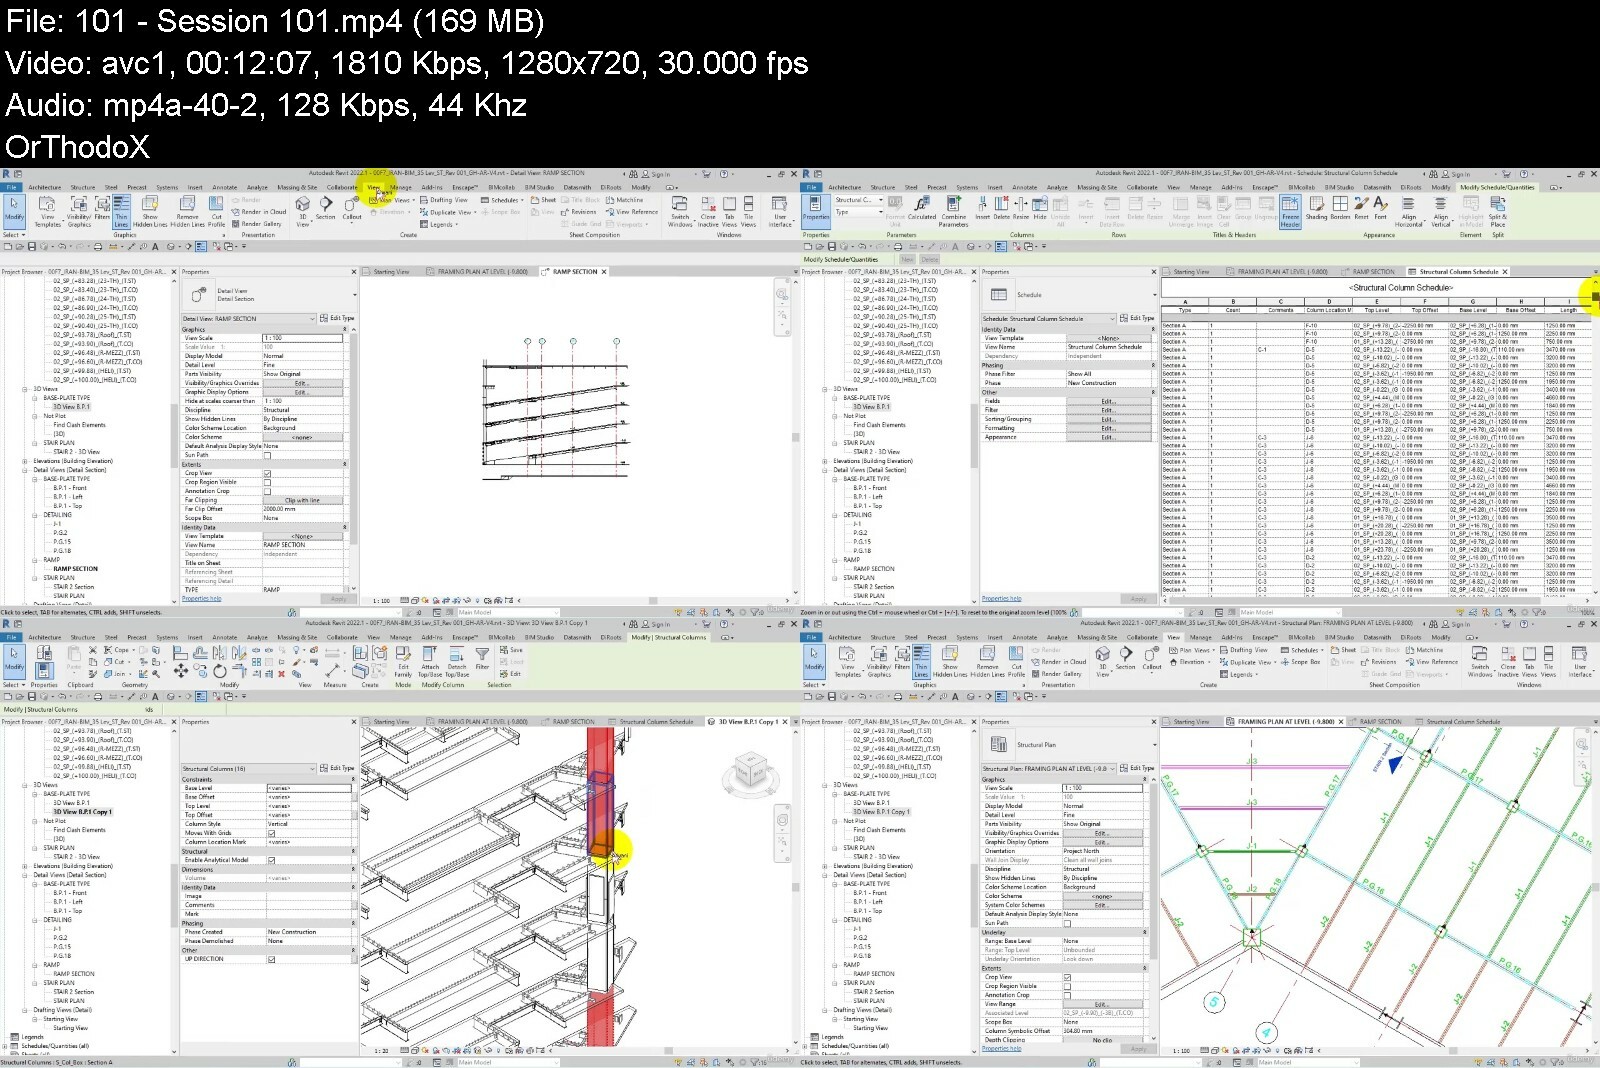
Revit Steel Structure Project Based Course in Revit

naysfo5uhaaevs8ifb6i20mdrg.jpg


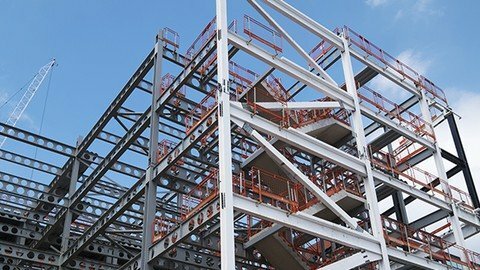
Revit Steel Structure- Project Based Course In Revit
Published 7/2022
MP4 | Video: h264, 1280x720 | Audio: AAC, 44.1 KHz
Language: English | Size: 10.02 GB | Duration: 14h 50m

Complete Modeling and Detailing of a Residential Building (full review)


What you'll learn
Integration of structural and analytical model
Direct connection between the model and other views
Creating details and shop drawings based on the 3D model
Communication between analytical software
3D Modeling with High LOD (Level Of Details)

Requirements
Basic knowledge about Autodesk Revit

Description
Revit Structure software is one of the most widely used software of Autodesk company in BIM (Building Information Modeling) projects for structural engineers. In this course, try a fully practical training for those interested in Revit Structure, especially civil engineers for structural modeling and explain the workflow in BIM modeling.This training course has 111 clips for about 20 hours, which is done in a completely professional manner on a project of implementing the steel structure modeling process with the BIM process.Project Information:Area: 32000 sqmNumber of floors: 35(6 floors of parking)Headlines of this course:project introductionInitial review of the AutoCAD file of the projectHow to create a report of issues in the received drawings for modelingHow to create Excel table for reportsThe concept of LOD in structural modelingThe meaning of LOD in structural modelingWhy should we care about LOD in modeling?Naming structure in BIM projectsCreate a template to start modelingLevel creation with DynamoHow to manage and import DWG drawings Create a WBS for the modeling processTips and techniques for applying Grids in modelingHow to create structural columns familyUse of structural connectionsPlacement of base plates in the projectProject foundation modelingUsing Splice Joint to connect between columnscreate project beamsModeling of beams of parking rampsModeling of stairs beamsCreate beam connectionsCheck the model in NavisworksReview of clashes in Navisworks How to fix detected clashesQuantity take-off and material take-offs of the projectCreating sheetsReview and presentation of models with EnscapeModel review in Bexel ManagerWork with the Assembly tool in Revit for structural elementsApart from the above topics, the training is full of practical tips and techniques for executive projects.

Overview

Section 1: Introducing the course file

Lecture 1 Session 1

Lecture 2 Session 2

Section 2: Writing a report from the received AutoCAD file

Lecture 3 Session 3

Lecture 4 Session 4

Section 3: Checking LOD in structural projects

Lecture 5 Session 5

Lecture 6 Session 6

Lecture 7 Session 7

Section 4: Naming system in modeling

Lecture 8 Session 8

Section 5: Beginning of the steel structure modeling process

Lecture 9 Session 9

Section 6: Creating Levels + Creating Levels with Dynamo and Excel

Lecture 10 Session 10

Lecture 11 Session 11

Lecture 12 Session 12

Lecture 13 Session 13

Section 7: Preparing the AutoCAD file to importing into Revit

Lecture 14 Session 14

Lecture 15 Session 15

Section 8: Creating Grids

Lecture 16 Session 16

Lecture 17 Session 17

Section 9: Creating Columns Family

Lecture 18 Session 18

Lecture 19 Session 19

Lecture 20 Session 20

Lecture 21 Session 21

Lecture 22 Session 22

Section 10: Add columns family in the project

Lecture 23 Session 23

Section 11: Creating Connection Families for Steel Columns

Lecture 24 Session 24

Lecture 25 Session 25

Lecture 26 Session 26

Lecture 27 Session 27

Lecture 28 Session 28

Lecture 29 Session 29

Lecture 30 Session 30

Lecture 31 Session 31

Lecture 32 Session 32

Lecture 33 Session 33

Section 12: Creating Base Plate Family

Lecture 34 Session 34

Lecture 35 Session 35

Lecture 36 Session 36

Lecture 37 Session 37

Lecture 38 Session 38

Section 13: Placement of Columns and Base Plates

Lecture 39 Session 39

Lecture 40 Session 40

Lecture 41 Session 41

Lecture 42 Session 42

Section 14: Foundation Modeling

Lecture 43 Session 43

Section 15: Splice Connection for Columns

Lecture 44 Session 44

Section 16: Modeling of underground beams and retaining walls

Lecture 45 Session 45

Lecture 46 Session 46

Lecture 47 Session 47

Lecture 48 Session 48

Section 17: Creating Embed Connection

Lecture 49 Session 49

Lecture 50 Session 50

Lecture 51 Session 51

Section 18: Shear Plate Connection for Connecting Beams

Lecture 52 Session 52

Lecture 53 Session 53

Section 19: Creating and Adding Studs

Lecture 54 Session 54

Lecture 55 Session 55

Section 20: Creating and Adding Cutters

Lecture 56 Session 56

Lecture 57 Session 57

Lecture 58 Session 58

Section 21: Creating Stairs with Connections

Lecture 59 Session 59

Lecture 60 Session 60

Lecture 61 Session 61

Lecture 62 Session 62

Lecture 63 Session 63

Lecture 64 Session 64

Lecture 65 Session 65

Section 22: Creating Ramps with Connections

Lecture 66 Session 66

Lecture 67 Session 67

Lecture 68 Session 68

Lecture 69 Session 69

Lecture 70 Session 70

Lecture 71 Session 71

Lecture 72 Session 72

Section 23: Checking Clashes in Navisworks and fixing them

Lecture 73 Session 73

Lecture 74 Session 74

Lecture 75 Session 75

Lecture 76 Session 76

Lecture 77 Session 77

Lecture 78 Session 78

Lecture 79 Session 79

Lecture 80 Session 80

Lecture 81 Session 81

Lecture 82 Session 82

Section 24: Model documentation

Lecture 83 Session 83

Lecture 84 Session 84

Lecture 85 Session 85

Lecture 86 Session 86

Lecture 87 Session 87

Lecture 88 Session 88

Lecture 89 Session 89

Lecture 90 Session 90

Lecture 91 Session 91

Lecture 92 Session 92

Lecture 93 Session 93

Lecture 94 Session 94

Lecture 95 Session 95

Lecture 96 Session 96

Lecture 97 Session 97

Lecture 98 Session 98

Lecture 99 Session 99

Lecture 100 Session 100

Lecture 101 Session 101

Lecture 102 Session 102

Lecture 103 Session 103

Lecture 104 Session 104

Lecture 105 Session 105

Lecture 106 Session 106

Lecture 107 Session 107

Lecture 108 Session 108

Lecture 109 Session 109

Lecture 110 Session 110

Lecture 111 Session 111

Structural Engineers,BIM Modelers,Project Managers,Civil Engineers


revitsteelstructureprszfgi.jpg


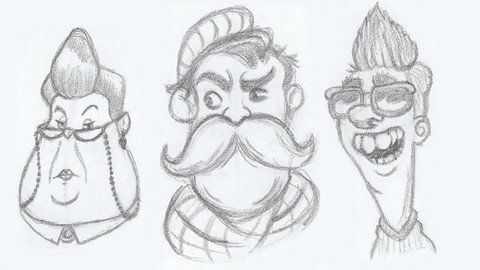
Ultimate Cartoon Drawing With Pencil: Caricature Skills

kyitel4za9yi6ucgh55rvrgetp.jpg


Ultimate Cartoon Drawing With Pencil: Caricature Skills
Published 7/2022
MP4 | Video: h264, 1280x720 | Audio: AAC, 44.1 KHz
Language: English | Size: 9.93 GB | Duration: 7h 51m

The Ultimate Caricature Drawing From Beginner to Advanced


What you'll learn
Students get acquainted with the rules and principles of work and are guided step by step to draw a cartoon and caricature characters
Increasing students' creativity in drawing cartoons
Students to be able to draw a character in different age ranges for male and female
Learning the basics of cartoon drawing using guide lines

Requirements
B and B2 Pencil, Etude and tip Etude, Etude eraser, Sharpener, Paper
Basic level of drawing

Description
If you decide to become a professional caricature and character designer or illustrator, and you can easily design different human characters.This class is for you.One of the most fascinating fields of pencil drawing, is drawing human caricatures.There are many types of caricatures due to exaggeration in different parts of the body. This means that several cartoons can be created from one character. That's why learning to draw cartoons helps a lot to increase your creativity. In this class, I will teach you how to draw all kinds of female cartoons. My focus in this class is teaching female cartoon head design. In this class, you will learn how to exaggerate different parts of the face, such as the size of the head, nose, mouth, teeth, eyes, eyebrows and hairstyle.This class is suitable for those who like to work in the field of cartoon and character design, animation, illustration, comics, and making computer games.In this class, the principles of caricature design are taught in a very simple and practical way with a pencil.You do not need expensive tools to start this class and you can become a character designer with a few pencils, paper, and accessories.I hope this class is useful for you. and Good luck

Overview

Section 1: Introduction

Lecture 1 Introduction

Lecture 2 The basics principle (exaggeration in the form of the nose)

Lecture 3 The basics principle (exaggeration in hair shape and face volume)

Lecture 4 The basics principle (exaggeration in hair shape and face volume)

Section 2: Fat and Big Faces of Male

Lecture 5 Chubby man with a mustache

Lecture 6 Mysterious man

Lecture 7 Serious man

Lecture 8 The villainous man

Lecture 9 Smiling chubby man

Lecture 10 Angry man

Lecture 11 Man with a plump face and glasses

Lecture 12 Man with a plump face and a big nose

Section 3: The Long Faces of Male

Lecture 13 Young man with a long nose

Lecture 14 Surprised young man

Lecture 15 Man with a long face and a big nose

Lecture 16 Young man with big teeth and glasses

Lecture 17 Gentleman man with long mustache

Lecture 18 Man with long face and short hair and mustache

Lecture 19 A man with a big beard, mustache and nose

Lecture 20 Cowboy Man

Section 4: Wide Faces of Male

Lecture 21 Young man with a big nose and mouth and a tattoo

Lecture 22 Young man with a very big mouth and nose

Lecture 23 Shy young man with big face

Lecture 24 Boy face with big nose

Lecture 25 Man face with small nose and eyes and big mouth

Section 5: Old Man's Faces

Lecture 26 Old man with a big nose

Lecture 27 Serious old man with big mustache and hat

Lecture 28 Old man with a big nose and a cigarette

Section 6: Fat and Big Faces of Female

Lecture 29 Chubby lady's face

Lecture 30 Angry girl's face

Lecture 31 The face of a serious woman

Section 7: The Long Faces of Female

Lecture 32 The face of a girl with big teeth

Lecture 33 The girl with a strange hairstyle and nose

Lecture 34 The proud woman's face

Section 8: Ladies' Fantasy Faces

Lecture 35 The fantasy face of a lady with a smiling face

Lecture 36 Fantasy face of a lady with glasses and smiling

Section 9: Women's Special Faces

Lecture 37 Girl's face with bangs hairstyle

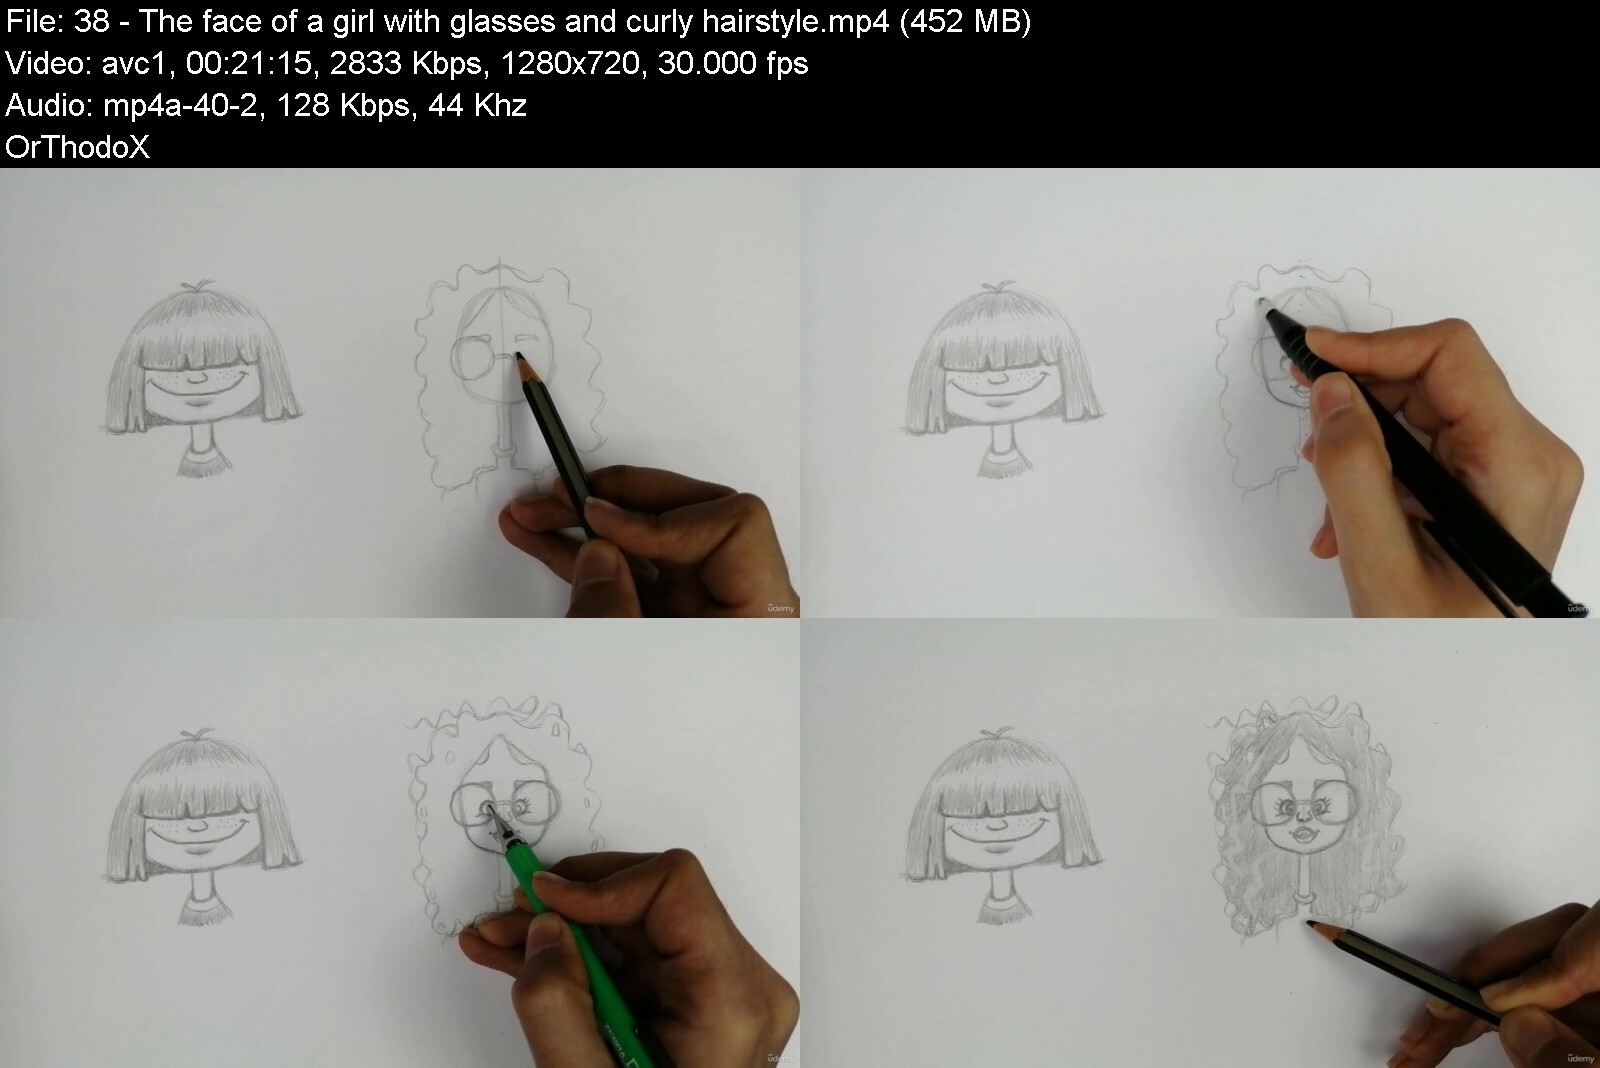
Lecture 38 The face of a girl with glasses and curly hairstyle

This class is suitable for those who like to work in the field of cartoon and character design, animation, illustration, comics, and making computer games.


ultimatecartoondrawina9eww.jpg


The comprehensive digital painting course from basic to pro

4341602e9354uri40.jpg


The comprehensive digital painting course from basic to pro
Last Updated 02/2022
MP4 | Video: h264, 1280x720 | Audio: AAC, 44.1 KHz, 2 Ch
Genre: eLearning | Language: English + srt | Duration: 22 lectures (14h 21m) | Size: 10.1 GB


Learn to draw characters and landscapes with Photoshop from basic to professional


What you'll learn
In the digital paint course, we get to know digital paint completely.
If you do not know how to work with Photoshop, there is no problem because we will learn Photoshop completely
After learning Photoshop, we will get acquainted with all the necessary tools to start digital painting, such as working with light and shadow professionally.
And after going through this process, we start doing projects in a project-oriented way in different styles and from the beginning to the end.

Requirements
The comprehensive digital painting training course has no prerequisites and you can use this extremely exciting course with any skill level.

Description
Do you want to be active and work professionally in the game, animation, illustration, fashion and other industries?

Do you want to get acquainted with one of the most lucrative works of the present age and become a professional in it?

Do you want to present your idea in the best possible way?

What are the advantages of this course over similar courses?

In this course, you will learn digital paint completely. Even those who do not know anything about Photoshop can learn it from the beginning in this course and then get acquainted with other things related to digital paint. Also, the project-oriented nature of this course distinguishes it from other competitors. This course has a very simple method of explanation while teaching complex issues.

What are the conditions for participating in the course?

The most important condition that you must have to attend the course is to have enough time to watch movies and do exercises.

After this period, can we execute any design we want?

Yes, exactly. By watching these videos, you will get used to the techniques and with a lot of practice, you can become a master yourself and execute any design.

If you do not know how to work with Photoshop, there is no problem because we will learn Photoshop completely.

Who this course is for
People who want to work in the game industry, animation, illustration, advertising, fashion, etc.
People who want to portray their pure ideas in the best possible way and present it.
People who really want to make money through digital painting.
People who love painting and art.


thecomprehensivedigitj9dkr.jpg


Learn Solidworks Mechanical Beginner To Advanced Guide

cxxbsafu0pq181uv1uhtc7fdjq.jpg


Learn Solidworks Mechanical Beginner To Advanced Guide
Last updated 7/2021
MP4 | Video: h264, 1280x720 | Audio: AAC, 44.1 KHz
Language: English | Size: 10.32 GB | Duration: 17h 48m

Learn SolidWorks Mechanical Engineer Beginner to Adv 3D Modeling, Surface Modeling, Assembly, Materials and Simulation.


What you'll learn
SolidWorks Software Introduction
SolidWorks 3D Modeling
SolidWorks Surface Modeling
SolidWorks Assembly
SolidWorks Materials and Simulation

Requirements
Need Computer Which can Run SolidWorks Software

Description
Learn SolidWorks Mechanical Engineer Beginner to Advanced Guide- 3D Modeling, Surface Modeling, Assembly, Materials and Simulation- This is course well designed so that every design lovers can understand, learn and implement to become next level designer whether wanted to design Car, Bike or anything else.Main Features of This Course-You will learn SolidWorks from Its 2020 Version which is very much fresh version of this software.Our instructor is educated from top reputed instituteYou will get step by step guide to get started and to become pro in this software.All Features is discussed in this course in very simplistic manner so that even beginner can able to understand.What you Will Learn in This Course-Well, details of the course content you can see below, but here I wanted to share with you some feature content of this course we will start from introduction with some basic commands, 3D modeling, surface modeling, assembly, materials and also simulation.Simulation part of very much important, please noted you will also learn about animation using SolidWorks Software, that's not all you will also learn about how to implement your basic knowledge in a project, because this course also included amazing project. Which is very much unique in this course.Who can Learn This Course?Any UG, PG or Research ScholarWanted to Become Designer in different sector Like AutomobileWanted to become teacher in design sector.Well, what you are waiting for?Click on Buy NowDon't Worry You have full 30 Days Money Back Guarantee.See you in course.Thank you

Overview

Section 1: SolidWorks Introduction

Lecture 1 Introduction

Lecture 2 Line Command

Lecture 3 Circle

Lecture 4 Spline

Lecture 5 Rectangle

Lecture 6 Arc and Ellipse

Lecture 7 Slot

Lecture 8 Polygon and Fillet

Lecture 9 Smart Dimensions

Lecture 10 Making and Selecting New Plane

Lecture 11 Trim

Lecture 12 Convert and Offset Entities

Lecture 13 Mirror

Section 2: 3D Modeling

Lecture 14 Extrude Boss/Base

Lecture 15 Revolved Boss/Base

Lecture 16 Lofted Boss/Base

Lecture 17 Swept Boss/Base

Lecture 18 Boundary Boss/Base

Lecture 19 Extrude Cut

Lecture 20 Revolved Cut

Lecture 21 Lofted Cut

Lecture 22 Swept Cut

Lecture 23 Boundary Cut

Lecture 24 Fillet

Lecture 25 Mirror and Linear Pattern

Lecture 26 Rib, Draft & Shell

Lecture 27 Some Other Features

Section 3: Surface Modeling

Lecture 28 Extrude Surface

Lecture 29 Revolved Surface

Lecture 30 Lofted Surface

Lecture 31 Swept Surface

Lecture 32 Boundary Surface

Lecture 33 Filled Surface

Lecture 34 Freeform

Lecture 35 Planer, Offset, Ruled

Lecture 36 Surface Flatten

Lecture 37 Fillet

Lecture 38 Face and Hole

Lecture 39 Extend, Trim and Knit

Lecture 40 Thicken and Cut

Section 4: Assembly

Lecture 41 Assembly

Lecture 42 Mates Part- 1

Lecture 43 Mates Part- 2

Lecture 44 SolidWorks Library

Lecture 45 Design Library

Lecture 46 Mates Part- 3

Lecture 47 Component Pattern

Lecture 48 Instant Sketch

Lecture 49 Edit Component And Exploded View

Section 5: Materials and Simulation

Lecture 50 Selection of Materials And Screen

Lecture 51 Animation And Motion Study

Section 6: Major Project- V6 Engine 3D Modeling

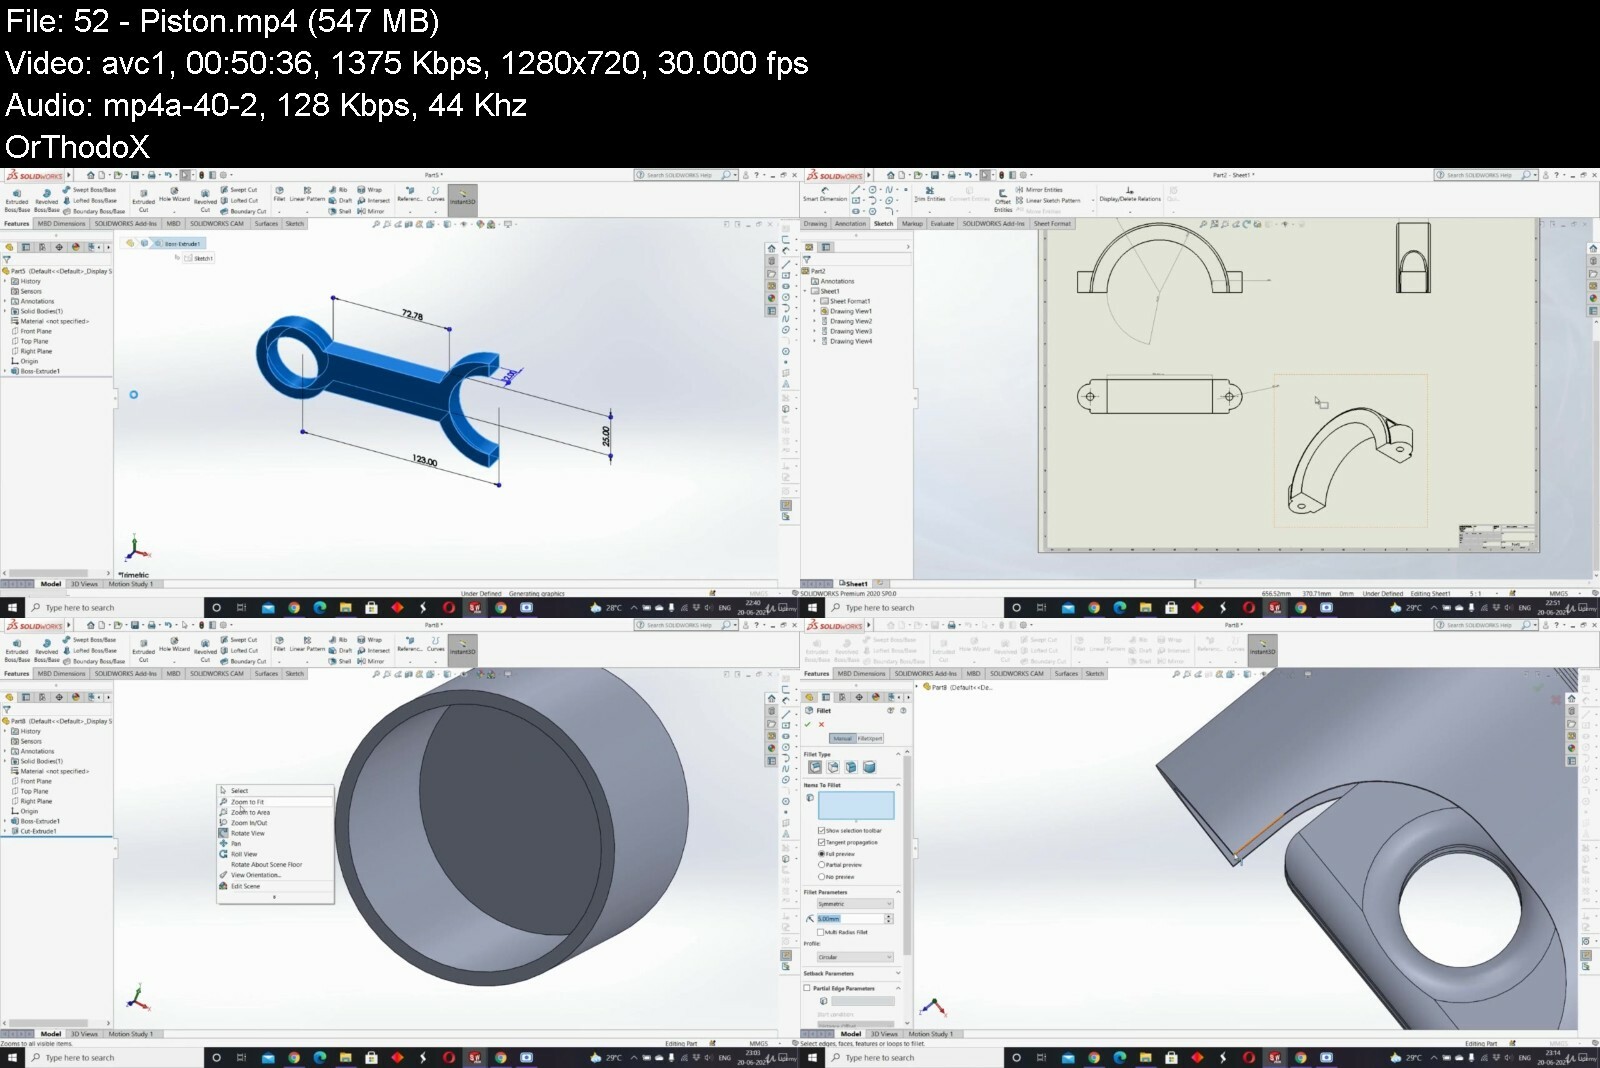
Lecture 52 Piston

Lecture 53 Crank Shaft

Lecture 54 Engine Body

Lecture 55 Oil Plate

Lecture 56 Side Cover

Lecture 57 Horse

Lecture 58 Air Filter

Lecture 59 Assembly

Any UG, PG or Research Scholar,Wanted to Become Designer in different sector Like Automobile,Wanted to become teacher in design sector.


learnsolidworksmechanb4iv6.jpg


Learn Autocad 2023- 21 Mechanical 2D And 3D Complete Course

v6erkaslsenq6lbbjruypz1ekk.jpg


Learn Autocad 2023- 21 Mechanical 2D And 3D Complete Course
Last updated 6/2022
MP4 | Video: h264, 1280x720 | Audio: AAC, 44.1 KHz
Language: English | Size: 11.62 GB | Duration: 27h 42m

Autodesk AutoCAD 2023- 21 for Mechanical Engineer, Beginner to Advanced AutoCAD Course for 2D, 3D and advanced commands.


What you'll learn
AutoCAD 2021: 2D as well as 3D even student is a beginner. (Beginning to Advanced Level)
All Coordinate system
All Basic Commands and their uses
All 3D commands and their uses

Requirements
Need a Laptop which can easily run AutoCAD Software

Description
Autodesk AutoCAD 2023- 2021 Course for Mechanical Engineering Students from right of beginning to advanced level- course is the amazing course, which is having basics commands, 2D and of course 3D as well designed by a decade experienced highly qualified faculty member, even you beginner or you know about AutoCAD even then this course will help you in every aspects especially for mechanical engineers to design any challenging design by using AutoCAD.Here are several features of this course-1. More than 10 years of experience instructor2. The course is from scratch to advanced level3. More than 25 hours of course content4. More than 30 practice sets5. You will Learn 2 D and 3 D both6. From assignments, which you will help you to practice drawings and designs as well.6. The version you will learn that is 2021, which is the advanced one.7. You will get auto-generated closed captioning in more than 6 languages (by Udemy)and lot more.This will help you to add extra skills to your resume, which will help you to get extra benefits to get better opportunity in future.Is This Course Money Back Guarantee?Yes, this course having full 30 days money back guarantee.What is the Educational Qualification of Instructor?MTech(Design) from NIT Kurukshetra.

Overview

Section 1: Introduction & Basic Commands

Lecture 1 Introduction

Lecture 2 Line Commands

Lecture 3 XY Line

Lecture 4 Inclined Line

Lecture 5 Solution of Assignment- 1

Lecture 6 Limit Command

Lecture 7 Units

Lecture 8 Absolute Coordinate System

Lecture 9 Relative Coordinate System

Lecture 10 Polar

Lecture 11 Properties

Lecture 12 Practice

Lecture 13 Point Command

Section 2: 2D Commands

Lecture 14 Arc

Lecture 15 Circle

Lecture 16 Object Snap

Lecture 17 Point Circle

Lecture 18 Tan Circle

Lecture 19 Polyline

Lecture 20 Rectangle

Lecture 21 Polygon

Lecture 22 Ellipse

Lecture 23 Construction Line

Lecture 24 Thread Part- 1

Lecture 25 Thread Part- 2

Lecture 26 Gear

Section 3: Editing & Miscellaneous Commands

Lecture 27 Offset

Lecture 28 Trim

Lecture 29 Hatch

Lecture 30 Spline

Lecture 31 Status Tool Bar

Lecture 32 Move & Copy

Lecture 33 Mirror & Rotate

Lecture 34 Stretch & Scale

Lecture 35 Fillet

Lecture 36 Array

Lecture 37 Properties

Lecture 38 Modify Miscellaneous

Lecture 39 Modify Edit

Lecture 40 Practice

Section 4: 3D Commands

Lecture 41 3D Introduction

Lecture 42 UCS

Lecture 43 Solids

Lecture 44 Revolve

Lecture 45 Sweep

Lecture 46 Loft

Lecture 47 Union and Subtraction

Lecture 48 3D Fillet

Lecture 49 3D Solid Editing

Lecture 50 Project View

Lecture 51 Viewport

Lecture 52 Section Plane

Lecture 53 3D Dimensioning

Lecture 54 Materials

Lecture 55 Isoplane

Lecture 56 3D Thread

Lecture 57 3D Gear

Section 5: More Miscellaneous Commands

Lecture 58 Single Line Text

Lecture 59 Multiline Text

Lecture 60 Express Tool

Lecture 61 Layers

Lecture 62 Dimension Style

Lecture 63 Dimension Tool

Lecture 64 Fit, Tolerance

Lecture 65 Quick Leader

Lecture 66 Layers

Lecture 67 Dimension Style

Lecture 68 Dimension Tool

Lecture 69 Fit Tool

Lecture 70 Quick Leader

Lecture 71 Geometric Tolerance

Lecture 72 Alternate Unit

Lecture 73 Define Block

Lecture 74 Define Attributes

Lecture 75 Welding

Lecture 76 Roughness

Lecture 77 Block Miscellaneous

Lecture 78 Zoom Command

Lecture 79 Selection Method

Lecture 80 External Reference

Lecture 81 Group Command

Lecture 82 Express Tool(Block Panel)

Lecture 83 Express Tool(Layout Panel & Dimension Panel)

Students wanted to Learn Designing,Students wanted to design gear, thread or mechanical components,Students wanted to work in design department,Students are studying mechanical engineering,Students wanted to do job in automobile industry as design engineer


learnautocad202321mecdkfo8.jpg


The Ultimate Blender 3D Modeling Guide

cqqvfirmwxml09cxboo4ohyfcb.jpg


The Ultimate Blender 3D Modeling Guide
Last updated 7/2022
MP4 | Video: h264, 1280x720 | Audio: AAC, 44.1 KHz
Language: English | Size: 7.95 GB | Duration: 9h 46m

Learn How to Model 3D Objects in Blender 2.8


What you'll learn
Students will learn the techniques and skills to modeling in Blender 2.8 so that they are able to model whatever objects they want
Students will model 20 different objects and in the process, will learn the modeling skills, techniques and modifiers for modeling
Students will learn how to create 20 different models

Requirements
Just download Blender 2.8 which is FREE and you are good to go!

Description
Want to learn 3D modeling and creating some cool objects in 3D!? Then get ready for an adventure!What is 3D modeling? 3D modeling is the process of creating 3 dimensional objects within a 3D program. In this course we will be creating things from a ship to a hat to a spaceship and more!If you know NOTHING about 3D, this course is for you. If you are familiar with 3D but would like to learn or get better with modeling, this is the course for you. In this course we will be MODELING 20 DIFFERENT things and along the way learn about modeling in 3D!We will learn some of the following:-Basics of modeling using vertices, edges and faces-Using Modifiers to help us facilitate the modeling process-Model 20 different objects so that you get the modeling workflow and skills needed to model what you wantBy the end of this course you will have the skills, confidence and know how to model objects in 3D. Using the skills learned here you will be well on your way to modeling and creating whatever you want!

Overview

Section 1: Getting Started in Blender 2.8 Basics

Lecture 1 Downloading & Installing Blender 2.8

Lecture 2 Blender's User Interface

Lecture 3 Navigating Around 3D Scene

Lecture 4 Manipulating 3D Objects

Lecture 5 Object & Edit Mode

Section 2: Modeling A Wine Glass

Lecture 6 Modeling A Wine Glass Spin Tool

Lecture 7 Modeling A Wine Glass Subdivision Surface

Section 3: Modeling Gears

Lecture 8 Modeling Gears Array Modifer

Lecture 9 Modeling Gears Edge Split Modifier

Lecture 10 Modeling Gears Boolean Modifier

Section 4: Modeling A Chain

Lecture 11 Modeling A Chain

Section 5: Modeling A Barrel

Lecture 12 Modeling A Barrel Lattices

Section 6: Modeling A Sword

Lecture 13 Modeling A Sword Part 1

Lecture 14 Modeling A Sword Part 2 Screw Modifier

Section 7: Modeling A Cowboy Hat

Lecture 15 Modeling A Cowboy Hat

Section 8: Modeling A Ring

Lecture 16 Modeling A Ring Skin Modifier

Section 9: Modeling An Apple

Lecture 17 Modeling An Apple

Section 10: Modeling A Building

Lecture 18 Modeling A Building

Section 11: Modeling A Simple Spaceship

Lecture 19 Modeling A Simple Spaceship

Section 12: Modeling A Spooky Tree

Lecture 20 Modeling A Spooky Tree

Section 13: Modeling A Bridge

Lecture 21 Modeling A Bridge

Section 14: Modeling A Chess Piece

Lecture 22 Modeling A Chess Piece

Section 15: Modeling A Clock

Lecture 23 Modeling A Clock

Section 16: Modeling A Crown

Lecture 24 Modeling A Crown

Section 17: Modeling A Couch

Lecture 25 Modeling A Couch

Section 18: Modeling A Pillar

Lecture 26 Modeling A Pillar

Section 19: Modeling A Temple

Lecture 27 Modeling A Temple

Section 20: Modeling A House

Lecture 28 Modeling A House Part 1

Lecture 29 Modeling A House Part 2

Section 21: Modeling A Ship

Lecture 30 Modeling A Ship Part 1

Lecture 31 Modeling A Ship Part 2

Lecture 32 Modeling A Ship Part 3

Lecture 33 Modeling A Ship Part 4

Lecture 34 Modeling A Ship Part 5

Section 22: Outro

Lecture 35 Outro & Goodbyes

Section 23: BONUS SECTION Modeling A Bike

Lecture 36 Making The Bike Frame Part 1

Lecture 37 Making The Bike Frame Part 2

Lecture 38 Making The Front Wheel

Lecture 39 Making The Front Wheel Part 2

Lecture 40 Making The Back Whee, Chain & Gears

Lecture 41 Making The Bike Pedals

Lecture 42 Making The Bike Seat

Lecture 43 Making The Handlebars

People looking to learn how to model different objects in Blender. Learn the basics and intermediates of modeling,This course is not for people who are advanced modelers already and already know modeling in Blender


theultimateblender3dm7mipu.jpg


Learn Solidworks From Zero to Professional By Practical way.

a1xcjcmyk4cbdsqg1gymionizo.jpg


Learn Solidworks From Zero to Professional By Practical way.
Published 07/2022
Genre: eLearning | MP4 | Video: h264, 1280x720 | Audio: AAC, 48.0 KHz
Language: English | Size: 5.71 GB | Duration: 45 lectures 9h 10m


What you'll learn
You will learn How to create 2D Sketch in Solidworks.
You will learn How to create 3D Part Modeling in Solidworks.
You will learn How to create Assembly and mates between Part in Solidworks.
You will learn How to create workshop Drawing, Drafting and annotation in Solidworks.
You will learn How to create Complete Advanced Project in Solidworks.


Requirements
There is no requirement you will learn every thing

Description
This Course is designed for Mechanical Engineering Students, Mechanical Engineers, and Draft men which need to Learn Basics of 3D modeling by Using Solid works software.
We are not just learning , We are Enjoying we will not learn basics only we will design much Advanced Project to Improve our Skills .
Sloidworks Identification : SolidWorks is a solid modeling computer-aided design (CAD) and computer-aided engineering (CAE) application published by Dassault Syst mes.According to the publisher, over two million engineers and designers at more than 165,000 companies were using SolidWorks as of 2013. Also, according to the company, fiscal year 2011 12 revenue for SolidWorks totaled $483 million.

Course Requirement

*Basic of Engineering.

Our Course will focus on Practical Method.

Course Content

1- 2D Sketch Basics.
*Line, Circle, Arc, Rectangle, Polygon, Offset, Fillet Chamfer, Patterns, Mirror, .etc.

2- Part 3D Modeling Basics.
*Extrude, Revolve, Sweep, Extrude cut,etc.

3- Assembly Basics.
*Insert Part, Standard Mates, Advanced Mates and Mechanical Mates, Explored view etc.

4-Draft&Annotation Basics.
* Create 3D views of Drawing, Dimensions, Details Views and Sheet format Basics.

5- Design Advanced Projects By using Solid works.
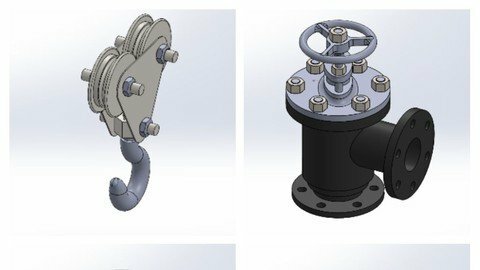
* Flexible Coupling.
*Machine Vise.
*Crane Hook.
*Safety Valve.
After finishing this Course you will be able to create any advanced Project By Using #Solidworks From A TO Z,
I hope this Course advance your career
Thanks.

Who this course is for
This Course Is designed for Mechanical Engineers, Mechatronics Engineers, Mechanical Engineer Students, Draftsman and any one interested in 3D Modeling.


learnsolidworksfromzecpdsd.jpg


Zurück
Oben Unten