


• Regeln für den Video-Bereich:

    In den Börsenbereich gehören nur Angebote die bereits den Allgemeinen Regeln entsprechen.

    Einteilung

    - Folgende Formate gehören in die angegeben Bereiche:
    - Filme: Encodierte Filme von BluRay, DVD, R5, TV, Screener sowie Telesyncs im Format DivX, XviD und x264.
    - DVD: Filme im Format DVD5, DVD9 und HD2DVD.
    - HD: Encodierte Filme mit der Auflösung 720p oder darüber von BluRay, DVD, R5, TV, Screener sowie Telesyncs im Format x264.
    - 3D: Encodierte Filme von BluRay, die in einem 3D Format vorliegen. Dies gilt auch für Dokus, Animation usw.
    - Serien: Cartoon/Zeichentrick, Anime, Tutorials, Dokumentationen, Konzerte/Musik, Sonstiges sind demnach in die entsprechenden Bereiche einzuordnen, auch wenn sie beispielsweise im High Definition-Format oder als DVD5/DVD9/HD2DVD vorliegen. Ausnahme 3D.
    - Bereich Englisch: Englische Releases gehören immer in diesen Bereich.
    - Bereich Talk: Der Bereich, in dem über die Releases diskutiert werden kann, darf, soll und erwünscht ist.


    Angebot/Beitrag erstellen

    - Ein Beitrag darf erst dann erstellt werden, wenn der Upload bei mindestens einem OCH komplett ist. Platzhalter sind untersagt.
    - Bei einem Scenerelease hat der Threadtitel ausschließlich aus dem originalen, unveränderten Releasenamen zu bestehen. Es dürfen keine Veränderungen wie z.B. Sterne, kleine Buchstaben o.ä. vorgenommen werden. Ausnahme Serienbörse:
    - Bei einem Sammelthread für eine Staffel entfällt aus dem Releasename natürlich der Name der Folge. Beispiel: Die Simpsons S21 German DVDRip XviD - ITG
    - Dementsprechend sind also u.a. verboten: Erweiterungen wie "Tipp", "empfehlenswert", "only", "reup", usw. / jegliche andere Zusatzinformation oder Ergänzung, welche nicht in obiger Beschreibung zu finden ist.

    Aufbau des Angebots und Threadtitel

    Der Titel nach folgendem Muster erstellt zu werden. <Name> [3D] [Staffel] [German] <Jahr> <Tonspur> [DL] [Auflösung] <Quelle> <Codec> - <Group>
    Beispiel: The Dark Knight German 2008 AC3 DVDRip XviD - iND
    Beispiel: The Dark Knight 2008 DTS DL BDRip x264 - iND
    Beispiel: The Dark Knight 2008 AC3 DL BDRip XviD - iND
    Beispiel: The Dark Knight German 2008 AC3 720p BluRay x264 iND
    Beispiel: The Dark Knight 2008 DTS DL 1080p BluRay x264 iND
    Beispiel: Die Simpsons S01 German AC3 DVDRip XviD iND
    Beispiel: Die Simpsons S20 German AC3 720p BluRay x264 iND
    Beispiel: Sword Art Online II Ger Sub 2014 AAC 1080p WEBRip x264 - peppermint
    Entsprechend sind also u.a. verboten: Sonderzeichen wie Klammern, Sterne, Ausrufezeichen, Unterstriche, Anführungszeichen / Erweiterungen wie "Tipp", "empfehlenswert", "only", "reup", usw. / jegliche andere Zusatzinformation oder Ergänzung, welche nicht in obiger Beschreibung zu finden ist
    Ausnahmen hiervon können in den Bereichen geregelt sein.

    Die Beiträge sollen wie folgt aufgebaut werden:
    Überschrift entspricht dem Threadtitel
    Cover
    kurze Inhaltsbeschreibung
    Format, Größe, Dauer sind gut lesbar für Downloader außerhalb des Spoilers zu vermerken
    Nfo sind immer Anzugeben und selbige immer im Spoiler in Textform.
    Sind keine Nfo vorhanden z.B. Eigenpublikationen, sind im Spoiler folgende Dateiinformationen zusätzlich anzugeben :
    Quelle
    Video (Auflösung und Bitrate)
    Ton (Sprache, Format und Bitrate der einzelnen Spuren)
    Untertitel (sofern vorhanden)
    Hosterangabe in Textform außerhalb eines Spoiler mit allen enthaltenen Hostern.
    Bei SD kann auf diese zusätzlichen Dateiinformationen verzichtet werden.

    Alle benötigten Passwörter sind, sofern vorhanden, in Textform im Angebot anzugeben.
    Spoiler im Spoiler mit Kommentaren :"Schon Bedankt?" sind unerwünscht.


    Releases

    - Sind Retail-Release verfügbar, sind alle anderen Variationen untersagt. Ausnahmen: Alle deutschen Retail-Release sind CUT, in diesem Fall sind dubbed UNCUT-Release zulässig.
    - Im Serien-Bereich gilt speziell: Wenn ein Retail vor Abschluss einer laufenden Staffel erscheint, darf diese Staffel noch zu Ende gebracht werden.62
    - Gleiche Releases sind unbedingt zusammenzufassen. Das bedeutet, es ist zwingend erforderlich, vor dem Erstellen eines Themas per Suchfunktion zu überprüfen, ob bereits ein Beitrag mit demselben Release besteht. Ist dies der Fall, ist der bereits vorhandene Beitrag zu verwenden.
    - P2P und Scene Releases dürfen nicht verändert oder gar unter einem iND Tag eingestellt werden.


    Support, Diskussionen und Suche

    - Supportanfragen sind entweder per PN oder im Bereich Talk zu stellen.
    - Diskussionen und Bewertungen sind im Talk Bereich zu führen. Fragen an die Uploader haben ausschließlich via PN zu erfolgen, und sind in den Angeboten untersagt.
    - Anfragen zu Upload-Wünschen sind nur im Bereich Suche Video erlaubt. Antworten dürfen nur auf Angebote von MyBoerse.bz verlinkt werden.


    Verbote

    - Untersagt sind mehrere Formate in einem einzigen Angebotsthread, wie beispielsweise das gleichzeitige Anbieten von DivX/XviD, 720p und 1080p in einem Thread. Pro Format, Release und Auflösung ist ein eigener Thread zu eröffnen.
    - Grundsätzlich ebenso verboten sind Dupes. Uploader haben sich an geeigneter Stelle darüber zu informieren, ob es sich bei einem Release um ein Dupe handelt.
    - Gefakte, nur teilweise lauffähige oder unvollständige Angebote sind untersagt. Dies gilt auch für eigene Publikationen, die augenscheinlich nicht selbst von z.B. einer DVD gerippt wurden. Laufende Serien, bei denen noch nicht alle Folgen verfügbar sind, dürfen erstellt und regelmäßig geupdatet werden.
    - Untersagt sind Angebote, welche nur und ausschließlich in einer anderen Sprache als deutsch oder englisch vorliegen. Ausnahmen sind VORHER mit den Moderatoren zu klären.


    Verstoß gegen die Regeln

    - Angebote oder Beiträge, die gegen die Forenregeln verstoßen, sind über den "Melden"-Button im Beitrag zu melden.
  • Bitte registriere dich zunächst um Beiträge zu verfassen und externe Links aufzurufen.

*** Bestes IPTV *** bester Preis *** gratis Test ***


Englische Tutorials

Narcissistic Abuse: Shadow Work, Healing And Rebirth
snqtfyns87adjx1z79p1gqsi9w.jpg


Narcissistic Abuse: Shadow Work, Healing And Rebirth
Last updated 7/2022
MP4 | Video: h264, 1280x720 | Audio: AAC, 44.1 KHz
Language: English | Size: 6.65 GB | Duration: 5h 45m

Dive Deep Into Survival and Recovery. Warrior Certificate Upon Completion.


What you'll learn
Understand the Dynamics of Abuse (Cycle, Triggers and Projection)
Get In-depth Education on Why it Happened (Self-Reflection Exercises to Connect the Dots)
Narcissist vs. Empath
Gain New insights About your Childhood (Toxic Parenting, Coping and Unmet Needs)
Learn How Trauma Expresses in your Life (Polarity Consciousness)
How to have Healthy Relationships (Healthy Life Skills)
Embark on a Personal Transformation (Breaking the Shackles of Abuse)

Requirements
No experience needed, but it is for people who are ready to break free from abuse (active stage). It's not for the faint-hearted so abuse victims that are on in the emotional turmoil stage would benefit from this course at a later time, when they want to get a clearer perspective of what happened to them.

Description
Welcome to this life changing course! First of all: I see you! I recognize your bravery from having had your heart torn to shreds and now looking for ways to make that beautiful heart a single piece again. I get it because I went through it too! You feel you will never trust anyone again and you seek out cues for potential threats: word salads, black and white thinking, love bombing signs, potential devaluation, control and coercion signs, giveaways of manipulative behavior and so forth. If you are really invested in your healing, you have started to really document yourself on the topic of "narcissists", often weeping while you research every time you find a resonance with your personal story. By now, you will probably have come to the crude realization that everyone in your life is a narcissist and spend a lot of time identifying narcissists in your day to day scenarios. And within this awful isolation from realizing the harder truths, you find you may never love again altogether. Here's the good news! They won't change, but you will! And this will change the entire dynamic of relating in the cycle of: persecutor, victim and savior. It will change it because you will be emotionally free, stop fearing narcissists and become an integrated and empowered FULL Warrior once again, who is able to discern and release triggers at will. You see, once we step out of the realms of labelling "angels and demons" and claim our shadow aspects, we stop projecting persecutors on the outside. This course is NOT for the faint hearted, it is brutal in shifting from victim to survivor. It has tons of emotional validation and also radical ownership which provides a full transformation. Note: if you are in the middle of the PTSD phase, experiencing high emotional distress and living with an abuser, please seek safety, support and contact the National Domestic Violence Hotline # 1-800-799-7233, 24/7. What you need the most right now is protection, care and nurture and maybe you can come back at a later time and do this course, when you want to understand what happened and how to break it at the core. I took it beyond the limits in my final experience because I wanted to get to the bottom of it, to the truth and the breakthrough, in other words I went to where it was really scary and I confronted it time and time again because I wanted to be whole again, no matter the cost. I wanted to get to the core both as a narcissistic abuse survivor and as a holistic practitioner and now I'd like to share with you all the pearls of wisdom I gathered from the pits and darkened alleys of the abuse cycle. These will provide a full return to WARRIOR status, with the discernment of the SAGE. If you are ready to shatter for once and for all the pattern of abuse in your life, enter this 360 degree approach to the abuse wound, that tailors both the conscious and unconscious mind in processing severe trauma coming from abusive dynamics. In it, you will find 18 mind blowing, raw, relatable and informative video lectures on abuse, trauma, emotional wounds and self-healing one back to wholeness and the full expression of who you are. NOTE: No one will grade you and you don't have to hand it in, but please get a notebook or laptop and complete the homework listed under downloadable resources at the end of each lecture, it will help you take everything you learned here to your life and gain new awareness into who you will become after this.Join me on this curated collection of lessons of 15+ years of exploring and undergoing Narcissistic Abuse. From validating the victim stage to future pacing into the survival status with the tools of understanding and honoring our own coping and emotions, this course will teach you to break the bondage of abuse. I took the long road to heal because I really wanted to understand the how and the why, but you don't have to...My goal is to empower people to be fully cognizant and aware, and reconnect with their intuition which will help them make the best decisions for themselves at each given moment. This course will awaken triggers, but we got to feel it to heal it. However, you will also stop fearing narcissists because I will give you in-depth information of their weaknesses. Fear is a powerful construct and can really make us continue to project the demons we fear on the outside. This course is about facing that fear and experiencing emotional coherence and transcendence, knowing that one day we will finally look back and have a good laugh at how real the human experience felt, when it was just another expression of our creative selves. Enter with caution, push through the uncomfortable parts (if they don't make sense right now because of the pain you are in, do it anyway), because they will at a later stage and you'll be glad you had a template for those new realizations. The final gift of this course is retrieving courage, because sometimes it takes bravery to truly be happy! Get through it at your own pace and get your Warriorhood Certificate in the end...Much love and see you on the other side!

Overview

Section 1: What is Narcissistic Abuse? Walking on Eggshells

Lecture 1 What is Narcissistic Abuse? Walking on Eggshells

Lecture 2 Making Peace with Being Sensitive

Section 2: How the Narcissist is Created (Ego vs Self)

Lecture 3 How the Narcissist is Created (Ego vs Self)

Section 3: Our First Groomers: Toxic Parents and The Inner Child

Lecture 4 Toxic Parents and The Inner Child

Lecture 5 Family Trauma and Siblings: The Golden Child Vs. The Scapegoat

Section 4: Types of Narcissists and Soul Fragmentation

Lecture 6 Types of Narcissists and Soul Fragmentation

Section 5: Childhood Trauma (Trails of Inadequacy)

Lecture 7 Childhood Trauma (Trails of Inadequacy)

Section 6: Narcissists (Polarity Consciousness)

Lecture 8 Narcissists (Polarity Consciousness)

Section 7: Narcissist Control Tactics

Lecture 9 Narcissist Control Tactics

Section 8: Struggles for the Empath After Abuse

Lecture 10 Struggles for the Empath After Abuse

Section 9: Freeing Yourself From Shame and Guilt

Lecture 11 Freeing Yourself From Shame and Guilt

Section 10: Validating Trauma and Survival (Self-Validation)

Lecture 12 Validating Trauma and Survival (Self-Validation)

Section 11: Understanding Our Wounds Connected to the Abuse

Lecture 13 Understanding Our Wounds Connected to the Abuse

Section 12: Relationships, Projections and Mirroring

Lecture 14 Relationships, Projections and Mirroring

Section 13: The After Effects of Narcissistic Abuse

Lecture 15 The After Effects of Narcissistic Abuse

Section 14: Thriving After Narcissistic Abuse (Integrated Lessons)

Lecture 16 Thriving After Narcissistic Abuse (Integrated Lessons)

Section 15: The Stockholm Syndrome and The Core of Abuse

Lecture 17 The Stockholm Syndrome and The Core of Abuse

Section 16: What is Self-Healing? Going Back to Whole

Lecture 18 What is Self-Healing? Going Back to Whole

Section 17: Afterthoughts: Self-Forgiveness

Lecture 19 Afterthoughts: Self-Forgiveness

Section 18: Sherlock Prevention List For Emotional Relationships

Lecture 20 Sherlock Prevention List and Closing Lecture

Section 19: Bonus Lecture

Lecture 21 Bonus Lecture

This course is for narcissistic abuse victims, abuse survivors, empaths and warriors who want to retrieve their full self after trauma.


narcissisticabuseshad29c95.jpg


Reading Angel And Oracle Cards (Beginners)

fyyku7gqe4qrmewfxlwxg1ei53.jpg


Reading Angel And Oracle Cards (Beginners)
Last updated 11/2022
MP4 | Video: h264, 1280x720 | Audio: AAC, 44.1 KHz
Language: English | Size: 9.41 GB | Duration: 7h 13m

Learn to read Angel and Oracle cards with ease and confidence, interpreting the messages sent to you from the angels


What you'll learn
create a solid foundation on which to receive advice and guidance from the angelic and spiritual realm through angel and/or oracle cards
choose your very first card deck, and all subsequent decks, and create an energetic connection with them
cleanse, energise, bless and care for your cards so you receive on-point guidance through them each and every time
what to do immediately upon receiving a card deck, how to cleanse and imprint your energy on it, and welcome it into your home and heart
formulate and phrase questions so you receive accurate guidance from the angelic realm through your cards
prepare you and your cards for a reading, opening up to the angelic realm, expanding your heart centre, whilst staying grounded
the situations and circumstances when you shouldn't give yourself a card reading and why, and how not to treat your cards
formulate and phrase questions to ask your cards, the type of questions to ask and what to avoid
clear guidance and rituals to follow before, during and after your reading so the guidance you receive is clear and actionable
interpret cards to receive the message the angels wish you to receive, using your intuition and without the need to refer to the guidebook

Requirements
This course is for beginners and those new to oracle and angel cards. You do not need a deck of oracle/angel cards at the start of the course. After the video "Choosing your First Deck" in Section 4, however, it's then beneficial to have a deck so you can continue the course, working and connecting with your deck, and practising the various exercises throughout the course. Should you wish to use the same deck I use throughout the course, it is Denise Linn's Gateway Oracle Cards.

Description
Through this course you shall build the solid foundations on which you will easily interpret the messages and guidance the angelic and spiritual realm are sending you through your angel and/or oracle cards. Acquire the knowledge and skills that ensure the messages you interpret through your cards are on-point and accurate each and every time.Remove the pressure of choosing the right card, the perfect card for your message. Eradicate the fear of getting a message wrong or interpreting it poorly. Eliminate the doubt that your knowledge and skills aren't on par and you won't receive the message and guidance the angels wish you to receive.This course is for beginners who wish to start their journey working with angel and oracle cards, and who want to start off on a right and solid footing.This course is also for those who already read their own angel and oracle cards regularly, and would prefer to read their cards more fluidly, using their intuition, and without leaning on the accompanying guidebook.We'll start at the very beginning, looking at what angel and oracle cards are, gradually guiding you through the maze of choosing your first and subsequent decks, how to receive, cleanse and welcome your cards until you are ready (and able) to read and interpret the messages the angels wish you to receive through your chosen card. No step of the process is overlooked or missed. You shall be guided gently and lovingly through each and every step along the way, leaving you confident and assured of the accuracy of the messages you are interpreting each and every time.With the aid of guided meditations, your connection with the angelic and spiritual realm will strengthen and grow.With the aid of exercises throughout this course, your skills will be honed and sharpened.I shall teach you how I work with my cards, how I connect with the angelic and spiritual realm, and how I interpret the messages they wish me to receive through my cards, so, by the end of this course, you'll be feeling exactly like this:"Wow I'm always surprised when readings are so spot on" ~*Camille"[My] reading was very insightful and helpful. I felt despondent before the reading and feeling very hopeful and excited now" ~ Helena"[My reading] was amazingly accurate and a real eye opener" ~*Louisa"An amazing experience all in all and a wonderful way to receive guidance and inspiration!" ~*MagsI, the angels and your spirit team, are looking forward to walking this beautiful and uplifting journey with you.Viv xx

Overview
Section 1: Course Introduction

Lecture 1 Course Introduction

Section 2: Course Preparation

Lecture 2 Join the Group

Lecture 3 Introduction to this Section

Lecture 4 Setting your Course Intention

Lecture 5 Opening Yourself Up

Lecture 6 Review & Looking Ahead

Section 3: Angel, Oracle and Tarot Cards

Lecture 7 Introduction to this Section

Lecture 8 What Are Angel and Oracle Cards?

Lecture 9 Difference Between Angel & Oracle Cards, and Tarot Cards

Lecture 10 Review & Looking Ahead

Section 4: Choosing Card Decks and Creating an Energetic Connection

Lecture 11 Introduction to this Section

Lecture 12 Choosing Your First Deck

Lecture 13 Examples of Angel and Oracle Card Decks

Lecture 14 Choosing Subsequent Decks

Lecture 15 Choosing a "Wrong" Deck

Lecture 16 Receiving your Card Deck

Lecture 17 Meeting your Cards

Lecture 18 Going into Detail

Lecture 19 Review & Looking Ahead

Section 5: Storing and Caring for your Cards

Lecture 20 Introduction to this Section

Lecture 21 How to Store your Cards

Lecture 22 Cleansing and Energising your Cards

Lecture 23 Your Cards and Other People

Lecture 24 Creating a Special Place

Lecture 25 Review & Looking Ahead

Section 6: Preparing for a Reading

Lecture 26 Introduction to this Section

Lecture 27 Why Prepare for a Reading?

Lecture 28 Preparing your Cards

Lecture 29 Preparing Yourself

Lecture 30 Preparing your Cards and Yourself at the Same Time

Lecture 31 Review & Looking Ahead

Section 7: Reading Ethics

Lecture 32 Introduction to this Section

Lecture 33 Reading Ethics

Lecture 34 Review & Looking Ahead

Section 8: Asking Questions

Lecture 35 Introduction to this Section

Lecture 36 How to Ask Questions

Lecture 37 Over-Complicated Questions & Asking on Behalf of Others

Lecture 38 Go-To-Questions

Lecture 39 Stuck on Repeat

Lecture 40 Review & Looking Ahead

Section 9: Choosing Cards

Lecture 41 Introduction to this Section

Lecture 42 Shuffling Cards

Lecture 43 Special Cards

Lecture 44 Choosing Cards

Lecture 45 Repeating Cards

Lecture 46 Review & Looking Ahead

Section 10: Interpreting Messages

Lecture 47 Introduction to this Section

Lecture 48 Intuition

Lecture 49 Interpreting your Card - First Steps

Lecture 50 Interpreting your Card - Next Steps

Lecture 51 Interpreting your Card - Final Steps

Lecture 52 Interpreting your Card - Bringing it Together

Lecture 53 Interpreting your Card - Example

Lecture 54 Review & Looking Ahead

Section 11: After your Reading

Lecture 55 Introduction to this Section

Lecture 56 After your Reading

Lecture 57 Review & Looking Ahead

Section 12: Closing

Lecture 58 Introduction to this Section

Lecture 59 Looking Back - What have you Learned?

Lecture 60 Reviewing your Course Intention

Lecture 61 What's Next?

Lecture 62 Closing Down

This course is designed for anyone new to angel and oracle cards, wishing to build a solid foundation for reading cards. It's also for those who already read angel and/or oracle cards for themselves and wish to do so more fluidly, using your intuition, and without leaning on the accompanying guidebook.


readingangelandoracleh3ef6.jpg


Complete Guide to Guardian Angels

13173206687m6czt.jpg


Complete Guide to Guardian Angels
Last Updated 04/2021
MP4 | Video: h264, 1280x720 | Audio: AAC, 44.1 KHz, 2 Ch
Genre: eLearning | Language: English + srt | Duration: 74 lectures (8h 25m) | Size: 10.7 GB


Reveal Your Abundant, Successful & Fulfilling Life Purpose with your Guardian Angel


What you'll learn
Discover what your Guardian Angel really looks like.
Become completely clear about how your Guardian Angel can help you.
Develop the ability to receive instant help and guidance from your Guardian Angel.
Learn a powerful manifesting process with your Guardian Angel.
Understand the personal meaning of your Guardian Angel's colours.
Understand the significance of your Guardian Angel's numbers.
Advance and progress your own personal and spiritual journey with your Guardian Angel's help.
Receive clear, instant and personal guidance every single day, from your Guardian Angel.

Requirements
An open heart and a readiness to learn are all that you need to bring with you.
A deck of Oracle Cards would be helpful but not essential. I share Denise Linn's 'Gateway Oracle' in this course and you might like to have those.

Description
The Complete Guide to Guardian Angels has been carefully designed to give you the keys to a successful and fulfilling relationship with your very own Guardian Angel.

Presented in a moreish and engaging format with beautiful visual images to ensure a confident and successful spiritual journey with your Guardian Angel, whatever your current level of experience.

The Complete Guide to Guardian Angels contains brand new and I believe, revolutionary, Guardian Angel information and is a powerful distillation of my whole life living with Angels and Guardian Angels.

See how Guardian Angels really look, discover exactly what their incredible colours mean for you, learn easily with clear explanations of your Guardian Angel's special number, and benefit from numerous opportunities to receive instant, personal guidance from your very own Guardian Angel.

I share my own spiritual philosophy to help you keep your relationship with your Guardian Angel clear, helpful and open to constant accurate guidance, with effective ways of making your relationship fit easily into your every day life, receiving guidance at times when your really need it!

For the first time ever, I share absolutely jaw dropping real life Guardian Angel stories, generous shared by clients whose Guardian Angels have absolutely blown their minds and continue to rock their world!

I believe that a clear knowledge of your subject will lead you to deep understanding and natural success. This course will give you clear and thorough understanding of your Guardian Angel's purpose, personal meaning of their role in your life and provide essential confidence which allow you to go from strength to strength and succeed in your unique Life Purpose with your Guardian Angel.

The Complete Guide to Guardian Angels will quickly and easily see you advance and grow your abundant, successful and fulfilling relationship with your Guardian Angel.

In The Complete Guide to Guardian Angels you will

Become completely clear about how your Guardian Angel can help you
Discover what your Guardian Angel really looks like
Develop the ability to receive instant help and guidance from your Guardian Angel
Learn a powerful manifesting process with your Guardian Angel
Understand the personal meaning of your Guardian Angel's colours and numbers
Advance your own personal and spiritual journey
Receive clear, instant and personal guidance from your Guardian Angel

The Complete Guide to Guardian Angels is highly recommended wherever you are on your spiritual journey and you will benefit equally as a complete beginner or a seasoned spiritual traveller.

I can't wait welcome you inside.

With love and happiness always,

Ros xxx

Who this course is for
The Complete Guide to Guardian Angels has been designed for all levels.
Complete beginners to Guardian Angels.
Those very familiar with Angels and Guardian Angels.
More experienced individuals wanting to accelerate their Guardian Angel connection.


completeguidetoguardimlc6p.jpg


Karmic Happiness: Take Easy Challenges for Lasting Happiness

47539480af6mbc1f.jpg


Karmic Happiness: Take Easy Challenges for Lasting Happiness
Published 07/2022
MP4 | Video: h264, 1280x720 | Audio: AAC, 44.1 KHz, 2 Ch
Genre: eLearning | Language: English + srt | Duration: 158 lectures (5h 20m) | Size: 5.3 GB


Learn powerful techniques to cleanse karmas, create good ones and find lasting happiness through our daily challenges


What you'll learn
Increase of happiness
Mental Welleing
Increase Confidence
Increase emotional intelligence

Requirements
There is no prerequisite. Any body wanting to increase happiness

Description
Learn scientifically proven techniques to open the doors of everlasting happiness in your life by cleansing your karmas!

Discover the ground-breaking 'Happiness Mantra' by completing karmic assignments and tasks. Also learn how to build positive karmas to be happy and get what you want in your life.

Learn techniques to break the chain of grief, sorrow and pain in your life and understand what real happiness is. These techniques will help you to experience inner transformation through which you can gain power to inspire and influence others.

Get permanent solutions to all of your problems and find out how to use karmic healing to be happier from your inner core forever.

Get permanent solutions to all of your problems and find out how to use karmic healing to be happier from your inner core forever.

Spend just 5 minutes a day, apply the principles in your actual life and start seeing the results immediately.

Complete the course just by watching easy-to-understand and fun-filled videos. Reading is not required at all.

Experience a gush of happiness by completing each step of the module and develop a heightened sense of self-esteem and confidence within yourself. Start your own chain of karmic goodness and break the never-ending cycle of bad karmas.

Who this course is for
By taking our Happiness Magik Course you will be surely making one of the best decisions of your life. Do you know why?. You will be uncovering some amazing secrets to happiness that will completely change your life. So, get started with this course right away!


karmichappinesstakeeai1e26.jpg


Triumph After Narcissistic Abuse

mtpdlhvjcug7lbs4uxklktdeqk.jpg


Triumph After Narcissistic Abuse
Last updated 9/2020
MP4 | Video: h264, 1280x720 | Audio: AAC, 44.1 KHz
Language: English | Size: 8.91 GB | Duration: 7h 12m

Rebuilding your life after a toxic relationship


What you'll learn
1. What is narcissistic personality disorder, how do narcissists think and what causes their confusing behavior.
2. How this personality disorder affects you and why you may be feeling like an empty shell of a person, thrown away or the subject in a smear campaign.
3. Concrete steps and tools to rewire your own thinking and change your habits to get you un-stuck and move much faster through this healing process.
4. Proven methods to regain your strength and rebuild your self-esteem.
5. How to set boundaries and identify red flags early in new relationships, so you are no longer vulnerable to toxic people.
6. Access to a private community of over 10,000 women that have shared experiences. This is a safe place to freely exchange ideas and find encouragement.

Requirements
There are no requirements or prerequisites

Description
If you have been mentally and emotionally abused and manipulated by a narcissist or other toxic person and have had enough of the gas-lighting, the flying monkeys, the love-bombing and the hoovering, you are in the right place. I am not a mental health professional. I was a victim too and I know how overwhelming it is, but I also know there is a way out!! I have dedicated years to studying and understanding the narcissist and now work as a professional transformational coach helping my clients achieve the lives and businesses of their dreams. I want to lend my skills to this brave community of survivors to help them thrive and prosper. I know you might not feel very brave, you might feel like you have been hit by a truck. I assure you, educating yourself and reaching out for help is very brave. I want to make that road shorter.You might feel like you are going crazy but you're not. And you don't have to accept the life your narcissist has defined for you. Learn how to redefine yourself and take control of your life again, stop the craziness and start healing. Narcissists leave a trail of pain and destruction behind them wherever they go and leave you to pick up the pieces and rebuild. The goal of this class is for you to gain the tools to achieve peace around the events that led you here and move forward in your life without regret, pain or mistreatment.

Overview

Section 1: Module 1

Lecture 1 Introduction

Lecture 2 What is a narcissist?

Lecture 3 Co-Dependency. How does this relate to NPD?

Lecture 4 What to do now.

Lecture 5 Is this really narcissistic personality disorder?

Section 2: Re-training your brain

Lecture 6 How your own brain is holding you back

Lecture 7 Stop the MADNESS!

Lecture 8 Guided meditation to reduce stress

Section 3: Where are you?

Lecture 9 Where did you go?

Lecture 10 Meeting your inner child

Lecture 11 Letting go of guilt and shame

Lecture 12 You are not your history

Lecture 13 Living in Awe

Section 4: Claiming you power back

Lecture 14 Taking your power back

Lecture 15 Are you giving your power away?

Lecture 16 Who is responsible for you and your feelings?

Lecture 17 How to successfully claim you power back

Section 5: More tricks our brain can play on us

Lecture 18 Overview

Lecture 19 Tricks our brains can play on us

Lecture 20 Dealing with lonelyness

Section 6: Next steps

Lecture 21 Setting clear boundaries

Lecture 22 Spotting red flags

Lecture 23 Now what, next steps

Anyone who is suffering from a toxic relationship.


triumphafternarcissiscaf66.jpg


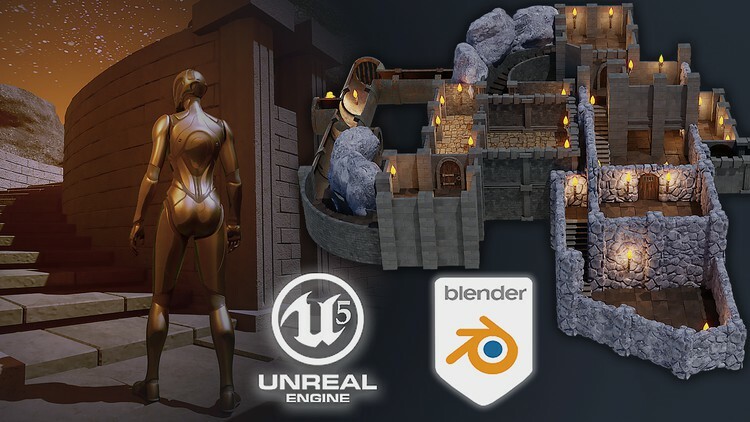
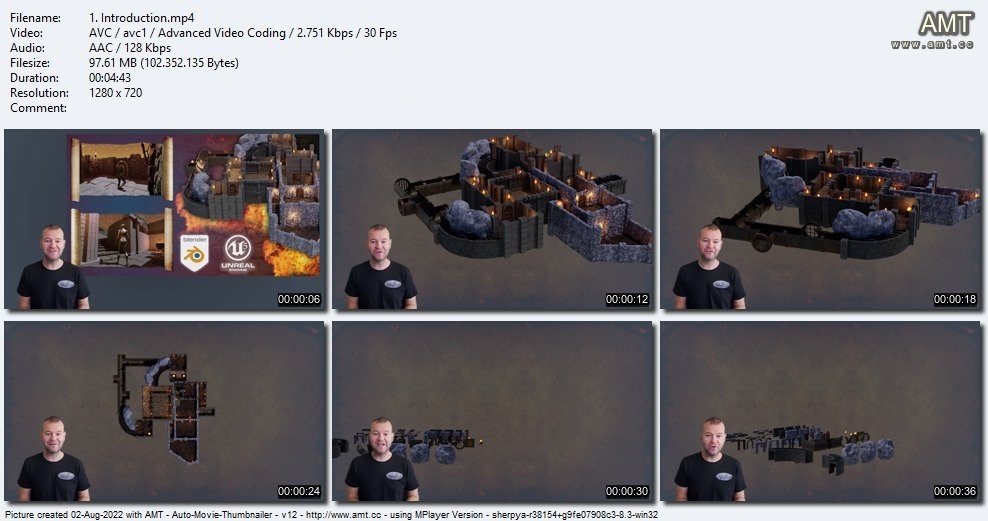
Blender 3 to Unreal Engine 5 Dungeon Modular Kitbash

4805880cc54zecsy.jpg


Blender 3 to Unreal Engine 5 Dungeon Modular Kitbash
Published 08/2022
MP4 | Video: h264, 1280x720 | Audio: AAC, 44.1 KHz, 2 Ch
Genre: eLearning | Language: English + srt | Duration: 137 lectures (26h 32m) | Size: 28 GB


Learn How to Create Massive RPG Worlds & Game Asset Modular Systems From Scratch


What you'll learn
• Building your own dungeon and walk around it like in a real RPG game
• Enjoying the 3D modelling to game environment transition from Blender to Unreal Engine 5 - the only one out there like it for all fantasy RPG fans
• Creating nearly 100 stunning medieval dungeon kitbash assets enabling you to build an underground dungeon environment unique to every student
• Building a massive dungeon complete modular system in Blender
• Using Blender 3 and understanding its new interface and shortcuts
• Maximising the potential of your references to develop strong game asset concepts
• Choosing to continue your modelling to game engine journey by completing the second (independent) part of the course in Unreal Engine 5
• Optimising modular system parts ready to export them into Unreal Engine 5
• Learn how to open a game door, custom collisions, and all about the Niagara fire systems
• Setting up your dungeon ready for walking through with your very own third-person character in Unreal Engine 5
• Creating animated stylized fire and lighting, including braziers, and flaming torches
• Maintaining and optimising medieval Europe aesthetics for a full medieval dungeon scene using an Unreal Engine 5 skybox
• Understanding modifier stacking
• A course within a course introduction into (a) Blender basics, (b) materials and textures, (c) seams, sharps, and UVs.
• Learning how to use HDRIs as 3D model backgrounds for your portfolio
• Complete UV Mapping Guide: UV mapping and UV unwrapping your model
• Learning how to use rendering to improve the quality of presentation for your 3D environment in Eevee and Cycles X
• Rendering an underground medieval dungeon to a high level for professional 3D artist portfolios
• Complete the course which is going to be the first steppingstone to creating your own 3D world and RPG game environment

Requirements
• To own a computer (Microsoft, Linux or Mac)
• To have downloaded Blender (available for free) and Unreal Engine 5
• A thirst to learn and excitement about 3D modelling and animation
• To download all course resources including a download pack

Description
Course Description

Have you ever wanted to build your own dungeon and walk around it like in a real RPG game?

Join 'Blender 3 to Unreal Engine 5 Dungeon Modular Kitbash' because there's nothing like it! Go on a journey of 3D modelling to game environment in Blender and Unreal Engine 5.

Whether you are a RPG fan or dungeons and dragons (DND) player who wants to walk through and experience a medieval dungeon environment, or a game designer who would like to design a medieval dungeon environment for games, this course is perfect for you!

You will become a dungeon master!

Build an intricate structure with winding walls and stairs using just a few parts and a lot of creativity.

Walk the halls of a dungeon lit by torches built entirely in Blender 3 and export it into Unreal Engine 5 (UE5) to make the lighting and atmospherics even more magical.

Our 'Blender 3 to Unreal Engine 5 Dungeon Modular Kitbash' top 5

- Build a massive dungeon complete modular system in Blender

- Set up your dungeon ready for walking through with your very own character

- Create animated stylized fire and lighting

- Learn how to create opening in game door, custom collisions, and all about the Niagara fire systems

- Enjoy completing a complete guide from Blender to Unreal Engine 5 - the only one out there like it for all fantasy RPG fans

This course will give you access to just over 27 hours of 3D art.

As a 2-1 course, you have the option to complete everything in Blender or move onto Unreal Engine 5 as well and truly bring your 3D game environment to life through 68 additional lessons!

This course will see you learn all the techniques pros use and how they use them. Learning how to achieve realism through aging your 3D game environments will be a central part of this course's learning objectives!

One of my biggest 'happy moments' in making games is being able to walk around and doors.

Yes, we will teach you how to OPEN DOORS.

Walk around your dungeon with the UE5 default character for the full immersive experience filled with wonder and the ominous feeling of fear about what is going on in the depths of the dungeon which we call the torture room!

Modeling

Our 'Blender 3 to Unreal Engine 5 Dungeon Modular Kitbash' will take you on a journey of building 90 medieval dungeon kitbash parts.

Join the craziest medieval dungeon course to create a modular system (aka kitbash) with infinite possibilities for your environment build. By completing the course, you will be able to build vast sewer networks and individual rooms on various levels including intricate chairs and doors that open using a third-person character.

You will be creating variations of walls, stairs, and sewer network parts to build a game environment unique to every student. Finally, optimize your modular system parts ready to export them into Unreal Engine 5.

Following the success of my latest courses, we will be modelling, texturing, and finalizing every individual asset before moving on to the next. Students have said that this has helped them in staying excited throughout the creation process, being able to see how their scene comes closer to the course preview step-by-step.

Of course, you could set yourself a challenge and diversify aspects of the medieval dungeon such as changing the textures, adding more rooms, or adding furniture assets to make your medieval dungeon more alive.

Texturing and Materials

'Blender 3 to Unreal Engine 5 Dungeon Modular Kitbash' will provide you with intensive learning all in one place, giving you access to over 16 references, 1 medieval dungeon floor plan, 32 custom cliff brushes, 1 HDRI, 55 Blender texture maps -including ambient occlusion, metalic, normal, roughness and specular, 33 Unreal Engine 5 texture maps - including base colour, normal, and combined ambient occlusion / metalic / roughness, 1 human scale .obj, 90 dungeon modular parts (in case you choose to move straight into Unreal Engine 5), and Unreal Engine 5 content such as the lava texture, water texture, waterfall animation sheet, and skybox.

The node wrangler is one of the best free built-in addons within Blender but most users are not even aware of it. This course will teach you how to create your materials, find out how to take all of those beautiful texture maps and make use of them.

Creating your materials or altering textures on the fly is something you will want to learn about. Maximising your knowledge of Blender's node system will raise the level of your textures and skill up your skill in working with materials.

Unreal Engine 5: Game Engine Integration

Continue your modelling to game engine journey by completing the second (independent) part of the course in Unreal Engine 5. We will be taking a deep dive into Epic's all new Unreal Engine 5.

Through 'Blender 3 to Unreal Engine 5 Dungeon Modular Kitbash' you will be learning everything right from importing individual models from Blender to having them work correctly in UE5. Through this course, you will learn the basics of bringing your games asset to life, rendered in real time.

Learn how to open a game door using blueprint coding, custom collisions, and all about the Niagara fire systems to create particle effects. Work towards setting up your dungeon ready for walking through with your very own third-person character in Unreal Engine 5.

Create animated stylized fire and lighting, including braziers, and flaming torches. Build a real game environment by setting up an 8k skybox and animated lava material to feature underneath your medieval dungeon.

We will look at how to import and use textures created specifically for Unreal Engine and use them to create the materials for our medieval dungeon environment. 'Blender 3 to Unreal Engine 5 Dungeon Modular Kitbash' will also be an introduction into how to set up files to create a clean UI. The skills you learn here are fully transferable to all your future builds.

Lighting & Rendering

When we look at renders of 3D models on social media, we can see a huge difference between models of different artists. Most of this can be normally attributed to not only the skills of the artist but part of it can be attributed to how they achieve realism in their models.

By joining 'Blender 3 to Unreal Engine 5 Dungeon Modular Kitbash', you will learn about specific types of in-built Blender lighting functionalities that will enhance the rainy weather atmosphere of your medieval farmstead.

We will be going through the many pitfalls and some technical details of what Blender render options to use for the specific machine you are using. I will also be introducing you to the all-new Cycles X Blender renderer and showing you how to render out your medieval dungeon in Eevee if you so choose.

Together, we will be creating a portfolio render for any multimedia site you wish to upload your completed model to.

'Blender 3 to Unreal Engine 5 Dungeon Modular Kitbash' is a complete guide into using Eevee and Cycles X for lighting, rendering, shadow.

Course Resources & Freebies

The 'Blender 3 to Unreal Engine 5 Dungeon Modular Kitbash' resource pack includes 16 references, 1 medieval dungeon floor plan, 32 custom cliff brushes, 1 HDRI, 55 Blender texture maps -including ambient occlusion, metalic, normal, roughness and specular, 33 Unreal Engine 5 texture maps - including base colour, normal, and combined ambient occlusion / metalic / roughness, 1 human scale .obj, 90 dungeon modular parts (in case you choose to move straight into Unreal Engine 5), and Unreal Engine 5 content such as the lava texture, water texture, waterfall animation sheet, and skybox.

Join this course and come be part of a 3D modelling journey of over 27 hours of learning that will see you go away with a game-ready AAA medieval game environment full of life and animation.

Check out the free introduction and I am sure you won't be able to put this course down!

Still unsure? Then, let me tell you what's unique about this course

- Creating 90 stunning medieval dungeon kitbash assets enabling you to build an underground dungeon environment unique to every student

- Building a massive dungeon complete modular system (aka kitbash) in Blender

- Choosing to continue your modelling to game engine journey by completing the second (independent) part of the course in Unreal Engine 5

- Optimising modular system parts ready to export them into Unreal Engine 5

- Learn how to open a game door, custom collisions, and all about the Niagara fire systems

- Setting up your dungeon ready for walking through with your very own third-person character in Unreal Engine 5

- Creating animated stylized fire and lighting, including braziers, and flaming torches

Let's create something history inspired and full of life this August!

To get you pumped, imagine how well this medieval dungeon environment fits in with your other 3D Tudor projects.

Be creative! Feature your medieval dungeon kitbash environment underneath a medieval castle keep with 'Creating a Modular Kitbash in Blender' or underneath a guard's tower instead. Also, think about creating an environment behind or above your scene, be it a medieval farm in the far distance using 'Blender 3 The Ultimate Medieval Scene Course', a church or an execution gallows staging area with 'Blender to Unreal Engine 5 | 3D Props | Medieval Gallows'. Use the full power of Blender 3 and Unreal Engine 5 (UE5) to your advantage.

You can include your medieval RPG dungeon environment as part of our 'Creating a Modular Kitbash in Blender' course, nearby to your medieval in or tavern based on 'Blender 2.8 Complete Beginners Guide to 3D Modelling a Scene', or next to your medieval well or windmill using 'Blender 2.8 Creating your First 3D Game Model' and 'Blender to Unreal Engine 5' respectively.

Until next time, happy modelling everyone!

Neil - 3D Tudor

Who this course is for
• Beginner 3D modellers eager to learn how to build medieval-themed AAA game-ready assets such as a medieval dungeon kitbash with multiple modular parts
• Enthusiasts of Blender who want to fast-track their understanding of its new and exciting changes
• Mid-Level 3D modellers who want to take their modelling to a new level and improve their workflow with tips and tricks
• RPG fans and dungeons and dragons (DND) players who want to walk through and experience a medieval dungeon environment
• Game designers who would like to design an RPG medieval dungeon environment for games in Unreal Engine 5


ubzf2gbnnsgxv7vkohbwrzufci.jpg


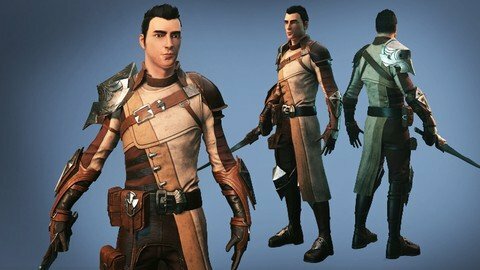
Male Character Creation - Complete Game Pipeline

hmds3qanukxhvppzlgga181eyw.jpg


Male Character Creation - Complete Game Pipeline
Last updated 5/2020
MP4 | Video: h264, 1280x720 | Audio: AAC, 44.1 KHz
Language: English | Size: 29.96 GB | Duration: 31h 22m

Learn how to Sculpt, Model, Texture, Bake, & Retopologize a Character using Zbrush, Maya, & Substance Painter


What you'll learn
How to sculpt an amazing male character
How to get a perfect proportion so the character looks great in clothing
Create realistic cloth and apply details
Model armor, sword, belt and other accessories
Learn important techniques for hard surface modeling
Create aging details such as scratches, damages, and dirt
Retopologizing for clean topology and animation-ready
Unwrap, bake and create textures
Post work and presentation

Requirements
Basic knowledge of Zbrush, Maya, Substance Painter, & Photoshop required

Description
Instructor InfoAbraham Leal is the Director and Founder of Critical Hit Studio &*Academy. With the studio and academy, he is proud to be able to spread his artistic knowledge to everyone in his hometown and is extremely excited to be working on big entertainment projects in Mexico. What inspired Abraham to be a 3D artist is The Hobbit book and all the lore that surrounds it. Being able to tell stories and share his own voice is what motivates him to create and imagine new and exciting characters. Prior to becoming a 3D artist, he was going to medical school and he decided to do a complete 180 and get into Digital Design and Entertainment Production. When he quit medical school, he couldn't draw, paint, or sculpt to save his life but he was so convinced of his definite desire and worked hard to turn it into a reality. His advice to artists who want to get into the 3D industry is to practice properly, be patient and stay humble. He believes in always having a goal in mind, and always open to learning and improving. Course Info*Would you like to know how to sculpt a high resolution full body character and take it to a complete low poly game ready mesh? Would you like to improve your skills as a 3D character artist to boost your portfolio? Then this course is for you.My name is Abraham Leal. I'm a professional 3D artist with several years of relevant experience and I am the owner of Critical Hit Studio. In this course, I will show you how to create a game character from start to finish.We will begin by sculpting our character in Zbrush. I will show you the important things you need to watch out for when sculpting a male character, and how to get a perfect proportion so the character will look great with clothing. We will create our cloth in Marvelous Designer and then add extra details in Zbrush to really bring out the quality. We will model our armor, sword and our accessories using Maya, we will cover techniques on how to create clean hard surface edges and a nice organic feel for some specific props. We will create details like scratches and damages to the armor, belt, straps, and the rest of our accessories to truly bring them to life. After creating our high resolution meshes, we will retopologize everything so we can have a clean topology that is animation-ready. Then we will unwrap our models, bake our maps and create our textures. We will then apply all of these textures to our character to further enhance it. Our final result will be an amazing full body male character fitted with clothing and props that is suitable for animation and game engine.From sculpting your character, to retopologizing and creating proper UVs, to texturing and presentation, by the end of this course, you will have a professional game-ready character. Commit to being the best artist you can be. Be actively engaged in the pursuit of success. When you put in the work with patience and effort, achievement will follow. Come and join me in this course at Victory3D.

Overview

Section 1: Introduction

Lecture 1 Introduction

Lecture 2 Project Breakdown

Section 2: Sculpting & Modeling

Lecture 3 Body Types BaseMesh

Lecture 4 Proportions and Body Adjustments

Lecture 5 Blocking of the Face

Lecture 6 Features of the Face Part 1

Lecture 7 Features of the Face Part 2

Lecture 8 Blocking of the Hair

Lecture 9 Sculpting the Ear and Model Preparation

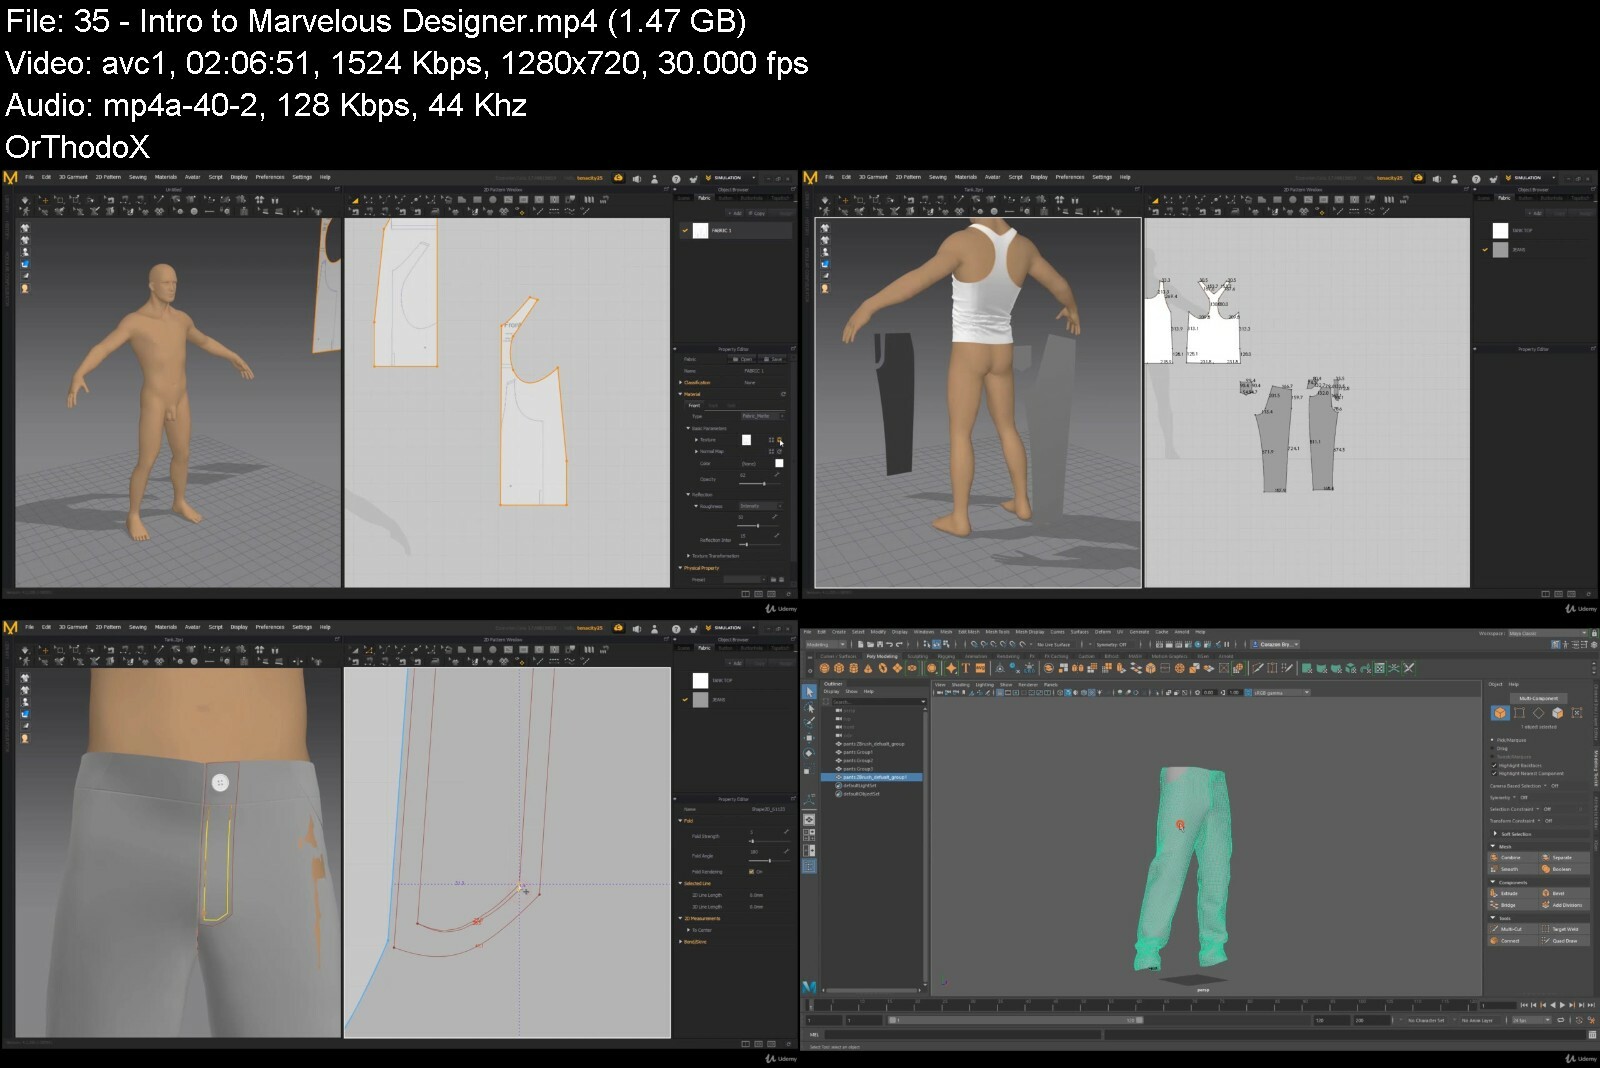
Lecture 10 Intro to Marvelous Designer

Lecture 11 Creating the Shirt

Lecture 12 Creating the Pants & Exporting Cloth

Lecture 13 Checkpoint and Adjustments

Lecture 14 Customization & Materials

Lecture 15 Sculpting Folds

Lecture 16 Sculpting Shirt Details

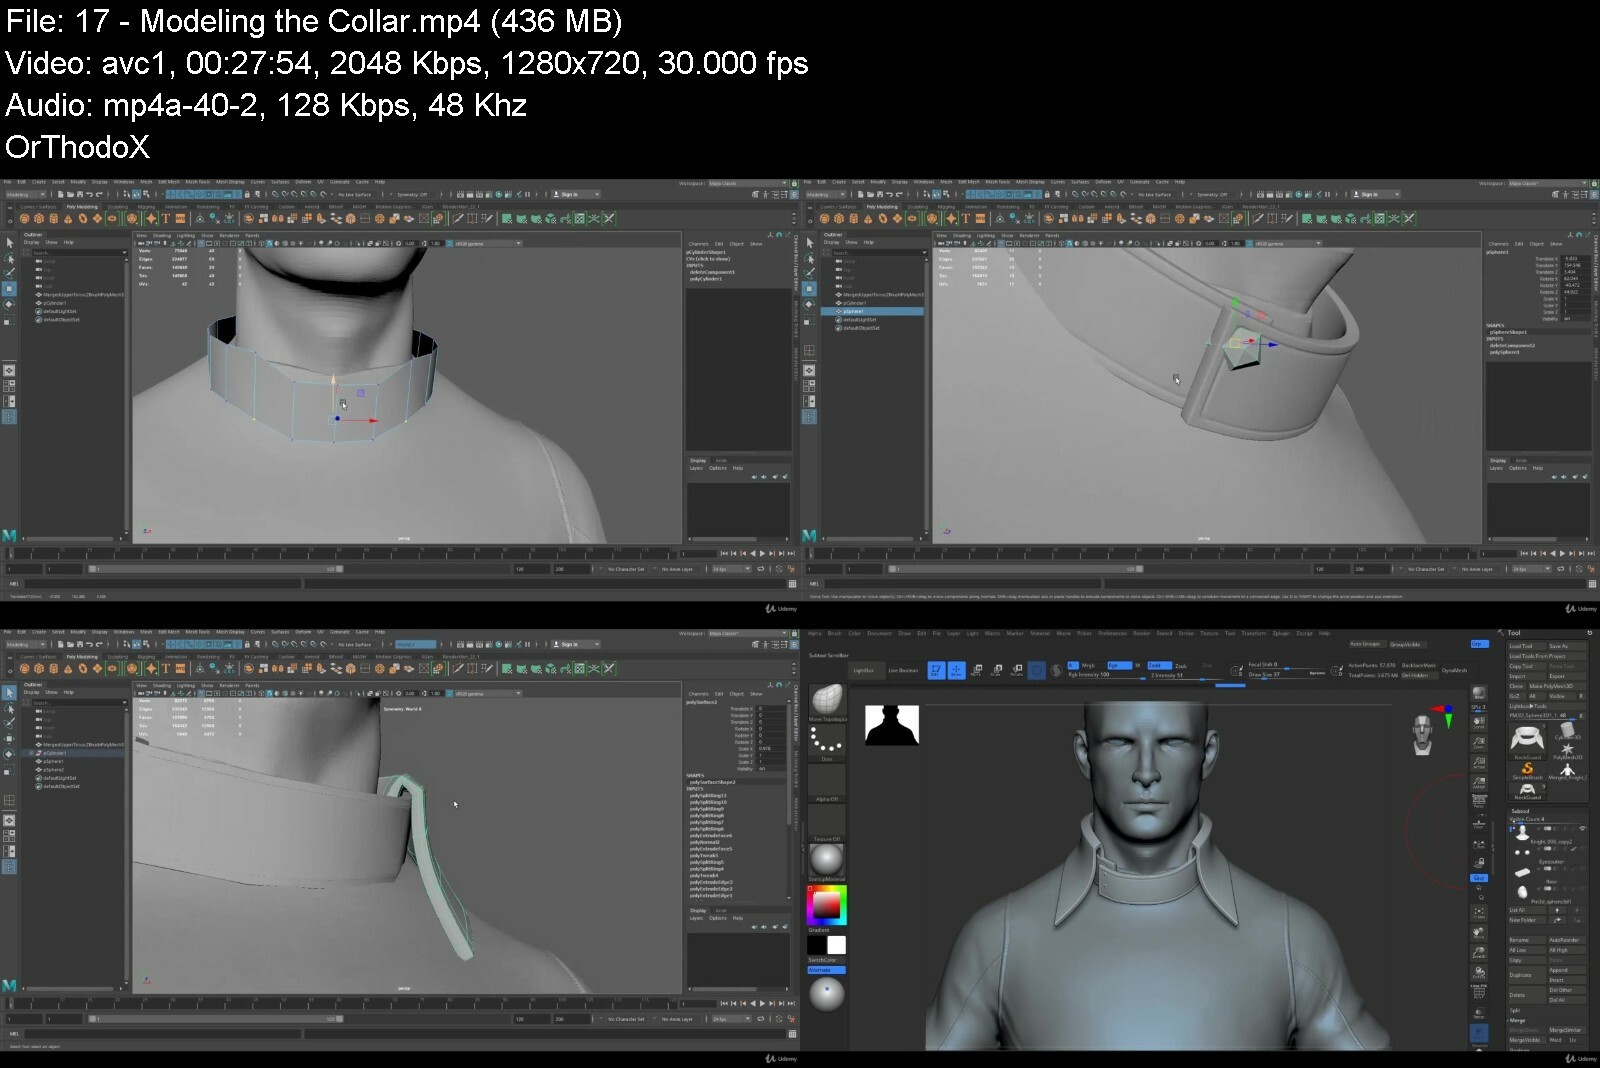
Lecture 17 Modeling the Collar

Lecture 18 Sculpting the Collar

Lecture 19 Modeling the Cape Part 1

Lecture 20 Modeling the Cape Part 2

Lecture 21 Modeling the Cape Part 3

Lecture 22 Modeling the Belt

Lecture 23 Modeling the Belt Buckle

Lecture 24 Modeling the Side Bag

Lecture 25 Modeling the Side Bag Insignia

Lecture 26 Modeling the Secondary Bag

Lecture 27 Modeling the Tertiary Bag

Lecture 28 Modeling the Chest Belt

Lecture 29 Modeling the Insignia

Lecture 30 Modeling the Shoulder Pad

Lecture 31 Modeling the Pants & Protection

Lecture 32 Modeling the Pants Straps

Lecture 33 Modeling the Shoulder Armor

Lecture 34 Modeling the Glove Part 1

Lecture 35 Modeling the Glove Part 2

Lecture 36 Modeling the Glove Part 3

Lecture 37 Modeling the Boot Part 1

Lecture 38 Modeling the Boot Part 2

Lecture 39 Modeling the Boot Part 3

Lecture 40 Organizing Props in Zbrush

Lecture 41 Sculpting Metal Props Part 1

Lecture 42 Sculpting Metal Props Part 2

Lecture 43 Sculpting Metal Props Part 3

Lecture 44 Sculpting the Braces

Lecture 45 Sculpting the Cape

Lecture 46 Sculpting the Pants

Lecture 47 Sculpting the Leg Protections

Lecture 48 Sculpting the KneePads and Bags

Lecture 49 Sculpting the Lower Cape

Section 3: Retopology

Lecture 50 Preparing the Model for Retopology

Lecture 51 Retopology of the Face Part 1

Lecture 52 Retopology of the Face Part 2

Lecture 53 Retopology of the Face Part 3

Lecture 54 Adding High Frequency Detail

Lecture 55 Retopology of the Neck Part 1

Lecture 56 Retopology of the Neck Part 2

Lecture 57 Retopology of the Shoulder Part 1

Lecture 58 Retopology of the Shoulder Part 2

Lecture 59 Retopology of the Chest Part 1

Lecture 60 Retopology of the Chest Part 2

Lecture 61 Retopology of the Chest Part 3

Lecture 62 Retopology of the Abdomen

Lecture 63 Deformation Test

Lecture 64 Retopology of the Hands Part 1

Lecture 65 Retopology of the Hands Part 2

Lecture 66 Retopology of the Hands Part 3

Lecture 67 Retopology of the Forearm Part 1

Lecture 68 Retopology of the Forearm Part 2

Lecture 69 Retopology of the Legs Part 1

Lecture 70 Retopology of the Legs Part 2

Lecture 71 Retopology of the Boots Part 1

Lecture 72 Retopology of the Boots Part 2

Lecture 73 Retopology of the Feet Part 1

Lecture 74 Retopology of the Feet Part 2

Lecture 75 Finishing the Pants

Lecture 76 Retopology of the Belt

Lecture 77 Combining the Body

Lecture 78 Retopology of the Metal Props Part 1

Lecture 79 Retopology of the Metal Props Part 2

Lecture 80 Retopology of the Leather Shoulder Pad

Lecture 81 Retopology of Bags Part 1

Lecture 82 Retopology of Bags Part 2

Section 4: Unwrapping, Baking & Texturing

Lecture 83 Preparing the Character for UVs

Lecture 84 UVs Process Overview

Lecture 85 Uving the Body

Lecture 86 Uving the Head

Lecture 87 Adding the Inner Mouth

Lecture 88 Uving the Props

Lecture 89 Organizing Our UVs

Lecture 90 Preparing the File for Baking

Lecture 91 Baking the Textures

Lecture 92 Reviewing the Bakes

Lecture 93 Texturing the Upper Body Part 1

Lecture 94 Adding the Missing Belt

Lecture 95 Texturing the Upper Body Part 2

Lecture 96 Texturing the Upper Body Part 3

Lecture 97 Damaging the Leather

Lecture 98 Aging the Metal

Lecture 99 Aging the Cloth

Lecture 100 Texturing the Props Part 1

Lecture 101 Texturing the Props Part 2

Lecture 102 Texturing the Face Part 1

Lecture 103 Texturing the Face Part 2

Lecture 104 Texturing the Face Part 3

Lecture 105 Exporting Textures

Lecture 106 Setting Up Shaders

Lecture 107 Creating the Eyes Part 1

Lecture 108 Creating the Eyes Part 2

Lecture 109 Setting Up the Eyes

Lecture 110 Creating a Lighting Setup

Lecture 111 Adding Detail to the Skin

Lecture 112 Fixing the Normal Maps

Lecture 113 Tweaking Eyes & Mouth

Section 5: Hair, Sword & Presentation

Lecture 114 Understanding the Hair

Lecture 115 Xgen Part 1

Lecture 116 Xgen Part 2

Lecture 117 Xgen Part 3

Lecture 118 Hair Bakes Setup

Lecture 119 Hair Shader Setup

Lecture 120 HairCard Workflow

Lecture 121 Hair Process 1

Lecture 122 Cinematic Lights

Lecture 123 Marmoset Post Processing

Lecture 124 Sword Part 1

Lecture 125 Sword Part 2

Lecture 126 Sword Part 3

Lecture 127 Final Render Setup

Anyone who wants to know how to make a game-ready character from start to finish,Anyone who wants to improve their skills as a 3D character artist


malecharactercreationydi20.jpg


Realistic Snowy Game Environment Creation

vvrwcnssapi2f8eb3nvbzdwde3.jpg


Realistic Snowy Game Environment Creation
Last updated 3/2019
MP4 | Video: h264, 1280x720 | Audio: AAC, 44.1 KHz
Language: English | Size: 21.90 GB | Duration: 21h 55m

Learn how to Model, Texture, & Light a Snow Game Environment using 3ds Max, Substance, Marmoset, & Unreal


What you'll learn
Create procedural texturing
Create realistic terrain, plants, and snow
Bake proper light maps
Become efficient in vertex painting
Create decals and texture variations

Requirements
Basic knowledge of 3ds Max, Substance Designer, Marmoset and Unreal

Description
Instructor InfoEmiel Sleegers always had love for video games and when he was young, he started using Unity3D for programming but he found himself gravitating more towards the art of making games. Now he is currently working as an environment artist in Ubisoft. He contributed to creating AAA games such as Forza Horizon 3 and The Division 2. His all time favorite game is The Last of Us and that video game is what inspired him to want to work in the game industry. His advice for beginner artists is to focus on one aspect of gaming that they are passionate about, stick to it and get better at it. His hobbies include anything related to games or films, whether it be working on personal projects, freelance work or going out for movies.*Course Info*In this course, we will go over how to create a snowy environment using 3ds Max, Substance Designer, Marmoset and Unreal. This environment will include having a snowy cabin with terrain, nice trees and plants and will be setup in Unreal Engine. We will learn how to create procedural textures in Substance Designer and we will go over how to edit those textures very quickly so we can have multiple variations. We will then go over how to model our cabin and foliage inside 3ds Max. Once all of that is done, we will go into Unreal Engine where we will set up our scene, our materials, and apply different variations such as dirtness, parallax, mapping, vertex painting, and many more. We will add decals to enhance the overall scene, do some nice lighting and finally polish the scene.

Overview

Section 1: Introduction

Lecture 1 Introduction

Section 2: Modeling, Unwrapping, & Texturing

Lecture 2 Going Over the Reference

Lecture 3 Creating the Cabin Blockout

Lecture 4 Creating the Final Cabin Model Part 1

Lecture 5 Creating the Final Cabin Model Part 2

Lecture 6 Creating the Final Cabin Model Part 3

Lecture 7 Creating the Door

Lecture 8 Creating the Windows

Lecture 9 Creating the Wood Texture Part 1

Lecture 10 Creating the Wood Texture Part 2

Lecture 11 Creating the Wood Texture Part 3

Lecture 12 Creating the Wood Texture Part 4

Lecture 13 Creating the Wood Texture Part 5

Lecture 14 Creating the Wood Texture Part 6

Lecture 15 Creating the Wood Texture Part 7

Lecture 16 Creating the Wood Texture Part 8

Lecture 17 Creating the Wood Texture Part 9

Lecture 18 Creating the Wood Texture Part 10

Lecture 19 Creating the Wood Texture Part 11

Lecture 20 Creating the Wood Texture Part 12

Lecture 21 Creating the Wood Texture Part 13

Lecture 22 Creating the Wood Texture Part 14

Lecture 23 Creating the Snow Texture Part 1

Lecture 24 Creating the Snow Texture Part 2

Lecture 25 Creating the Snow Texture Part 3

Lecture 26 Creating the Snow Texture Part 4

Lecture 27 Creating the Snow Texture Part 5

Lecture 28 Creating the Snow Texture Part 6

Lecture 29 Creating the Snow Texture Part 7

Lecture 30 Creating the Snow Texture Part 8

Lecture 31 Creating the Snow Texture Part 9

Lecture 32 Exporting Textures and Unwrapping the Cabin

Lecture 33 Unwrapping the Cabin 2

Lecture 34 Unwrapping the Cabin 3

Lecture 35 Unwrapping the Cabin 4

Lecture 36 Creating the Window Texture

Lecture 37 Adding Snow to the Cabin Roof

Lecture 38 Start Creating the Leaf Texture

Lecture 39 Finish Creating the Leaf Texture

Lecture 40 Modeling the Tree Part 1

Lecture 41 Modeling the Tree Part 2

Lecture 42 Creating the Terrain

Section 3: Setting Up in Unreal

Lecture 43 Setting Up A Basic Scene in Unreal

Lecture 44 Setting Up Our Materials Part 1

Lecture 45 Setting Up Our Materials Part 2

Lecture 46 Setting Up Our Materials Part 3

Lecture 47 Setting Up Our Materials Part 4

Lecture 48 Placing Our Trees and Painting the Terrain

Lecture 49 Doing Our First Lighting Pass

Lecture 50 Creating The Grass Part 1

Lecture 51 Creating The Grass Part 2

Lecture 52 Creating Decals Part 1

Lecture 53 Creating Decals Part 2

Lecture 54 Placing Our Decals

Lecture 55 Polishing Our Scene

Lecture 56 Outro

Anyone interested in creating a high quality game environment,Anyone who wants to learn how an AAA professional game artist approach environment creation


realisticsnowygameenvphcvl.jpg


BLENDER: Creating the Dune Ornithopter from start to finish

47560685759kqdrh.jpg


BLENDER: Creating the Dune Ornithopter from start to finish
Published 07/2022
MP4 | Video: h264, 1280x720 | Audio: AAC, 44.1 KHz, 2 Ch
Genre: eLearning | Language: English + srt | Duration: 162 lectures (49h 20m) | Size: 46 GB


Step by step we will learn how to create the Ornithopter from the Dune movie using Blender and substance painter


What you'll learn
Learn How to model the Ornithopter from start to finish with all steps covered
Learn how to unwrap inside Blender, we will unwrap all the parts.
Learn how to use UDIMs to create multiple UVs for one object to get high resolution result
Learn how to use Substance Painter to texture the Ornithopter

Requirements
A basic information about how to use Blender

Description
Hello everyone, my name is Marwan Hussein, and I welcome you to my new fantastic course.

How to create The Dune Ornithopter with Blender and Substance Painter from start to finish.

A lot of Blender users watch movies on TVs or on their computes, and most of them love to create something they liked on that screen, even me when I watch something on the screen I tell myself, I like to create that thing, it's nice challenging feeling the artist feels when he sees something interesting on the screen.

When I saw The Dune movie I loved a lot of stuff there, the thing I loved the most is the 2 set Ornithopter for the Fremen, at that time I decided to create this amazing artwork, it was very challenging, and not so quite easy to create but I did it in the end.

It was really nice journey of modeling and texturing ext...
When I completed the design I immediately started recording this course it was so challenging course I admitted, but the result was very nice and beautiful.

In this course we will cover modeling, we will model the Ornithopter from start to finish, I got all the Blueprint images ready in the Project folder section, download them from there to start the modeling journey.
In the modeling section, we will learn a lot of stuff, at the end of the day we want a clean and fast way to create all the Ornithopter parts so we need a good technique to achieve that, so that is what I'm about to teach you in that section.

After the modeling section, we will learn step by step how to unwrap all the parts, this section is a very good section for the student who has some problems understanding how the UV is created, we will create a lot of parts step by step until you master the unwrapping side.

When we complete unwrapping all the parts, we will learn how to use UDIMs to create multiple UVs for one object to get very high-resolution results, and that's very helpful for the close camera shots and for the artist who cares about the details.

Now the Dune Ornithopter is ready to take out of Blender to Substance Painter, and there we will learn step by step how to texture the 3D model there and how to take the advantage of the UDIMs to create highly details UV textures.
We are not finished there, after all of that we will send the model back to Blender and we will learn how to import all the UV textures in the correct way.

After the textured side is finished we will use the Armature ( the Bone system ) to rig the Ornithopter, we will create bones for the wings and for the legs, and for the body, we will add all the necessary bones to make the Ornithopter ready to fly or to bose it to take a nice shot, all of that we will do it step by step.

After the rigging section now we are ready to render the scene, but we need an environment to put the Ornithopter in, so we will learn how to create a nice environment to achieve that, we will use a nice technique to tile the texture without you notice the image repetition.

After we take the shots we will send the render result to photoshop to make some post-processing, and we will use the compositor as well to add the final touch for the next rendered images, which means we will learn how to post-processing the image in Blender and out of Blender.

In the end, I hope you find this course useful and entertaining, my name is Marwan Hussein and I hope you get the benefit from this course and all my courses.

Who this course is for
This course for intermediate Blender users who loves to create challenging projects


ljifg02icn9zxsauri7avqnc64.jpg


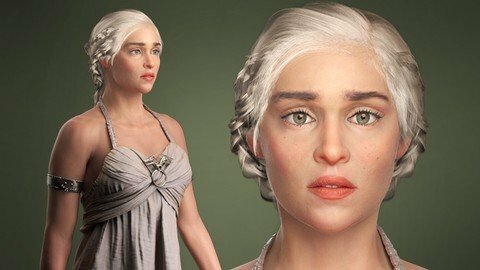
Female Character Portrait Creation - Complete Film Pipeline

rdnfetk3ommlitg26g6lpkxiw0.jpg


Female Character Portrait Creation - Complete Film Pipeline
Last updated 6/2020
MP4 | Video: h264, 1280x720 | Audio: AAC, 44.1 KHz
Language: English | Size: 42.94 GB | Duration: 53h 45m

Realistic Character Sculpting & Modeling using Zbrush, Mari, Marvelous Designer, Maya & Photoshop


What you'll learn
Sculpt a female character from head to toe
Sculpt believable clothing
Full body UDIM workflow
Marvelous to Maya Retopology and UV creation
Industry techniques for hand-painting detailed textures
Variety of retopology methods for movie characters
Realistic skin shader, metal & cloth materials
Creating convincing CGI eyes
Making realistic hair with Xgen
High quality lighting and rendering using Arnold

Requirements
Before starting this course, you should have a basic understanding of Zbrush, Maya, and Photoshop. No knowledge of Wrap, Marvelous Designer and Mari is needed as I will teach you the basics of these programs.

Description
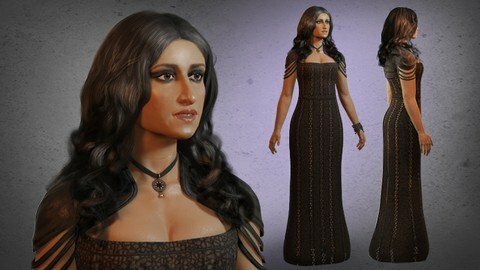
Corazon Bryant always had an artistic bone in her body. When she was only 2 years old, she would make detailed drawings on her mother's wall. Her mother loved the drawings so much, she decided to keep them. With the encouragement of her mother, she continued drawing and she only got better as time went by. When Corazon was in middle and high school, she earned money making portraits for her classmates and even for her teachers. She pursued a college degree in Media Arts & Animation and later worked for architectural and entertainment companies such as Camm Productions, ID DI Design, and PDT International. She also had an opportunity to do some freelance work for Mega Pickle Entertainment. While working as a 3D artist, she had a chance to teach 3D animation classes in an A+ school. This is when she found her true love - which is not only to talk about 3D endlessly but to also inspire greatness in young upcoming artists. Corazon is currently working on a new project called Victory 3D with fellow industry-experienced artists to provide an affordable and effective learning system that will make it easier for students to get a job in the 3D industry.Course InfoHave you been looking for a course that shows you how to make a realistic full body character, sculpt likeness, retopologize, unwrap, texture, and render all in one place? Then look no further. This course is for you. In this course, I will take you through the process of creating a beautiful female character and make it production-ready for films and animations.The main topics we will be covering are:-Sculpting a female character from head to toe -Sculpting believable clothing -Variety of retopology methods for movie characters -Full body UDIM workflow -Marvelous to Maya Retopology and UV creation -Industry techniques for painting detailed textures -Realistic skin shader, metal & cloth materials -Creating realistic hair in Xgen-High quality lighting and rendering using ArnoldBefore starting this course, you should have a basic understanding of Zbrush, Maya, and Photoshop. No knowledge of Wrap, Marvelous Designer and Mari is needed as I will teach you the basics of these programs.In this comprehensive course, we will begin by working on our female face and body using Zbrush. I will go over the major forms that you need to know to be able to produce a realistic female character. We will create details such as skin pores and tiny wrinkles to bring life to our character. We will learn about different ways of retopologizing our character, using automatic retopology and manual retopology using Wrap and Maya. We will generate our UV map for our character using the UDIM workflow. I will go over what UDIMs are, and why they are important when it comes to creating high resolution textures. You will learn how to simulate clothing using Marvelous Designer. We will then take our clothes in Maya to retopologize them to create a clean mesh, and then back into Zbrush to create major folds, minor folds, and memory folds. We will use Mari to hand paint our skin from scratch. I will show you exactly how to make different types of maps such as color map, specular map, and sss map step by step. We will create real world shaders such as silk, metal, and skin and we will go through the process of learning how to connect our maps properly. Then we move on to creating our hair using Zbrush and Maya. We will create our main hair using Fibermesh, then we go inside Maya to make Nhair for our braids that we will then use for our Xgen hair. We will create realistic eyebrows, eyelashes and peachfuzz all using one of the most powerful tools in Maya called Xgen. Last, I will show you how to create a nice clean render using Arnold and do some postwork in Photoshop to further enhance our image.By the end of this course, you will be able to create your own amazing female character that is fully ready for production.If you are ready to challenge yourself and get out of your comfort zone to be a great artist, then it's time for you to sign up for this course. There are no limitations on what you can be, have or do, as you are the master of your artistic journey. Make today the day that you take action, come and join this course at Victory3D.

Overview

Section 1: Introduction

Lecture 1 Introduction

Lecture 2 References

Section 2: Sculpting the Primary Forms & Accuracy Check

Lecture 3 Face Primary Forms 1

Lecture 4 Face Primary Forms 2

Lecture 5 Face Primary Forms 3

Lecture 6 Hair Place Holder

Lecture 7 Face Primary Forms 4

Lecture 8 Accuracy Check Front

Lecture 9 Accuracy Check Side

Lecture 10 Body Primary Forms 1

Lecture 11 Body Primary Forms 2

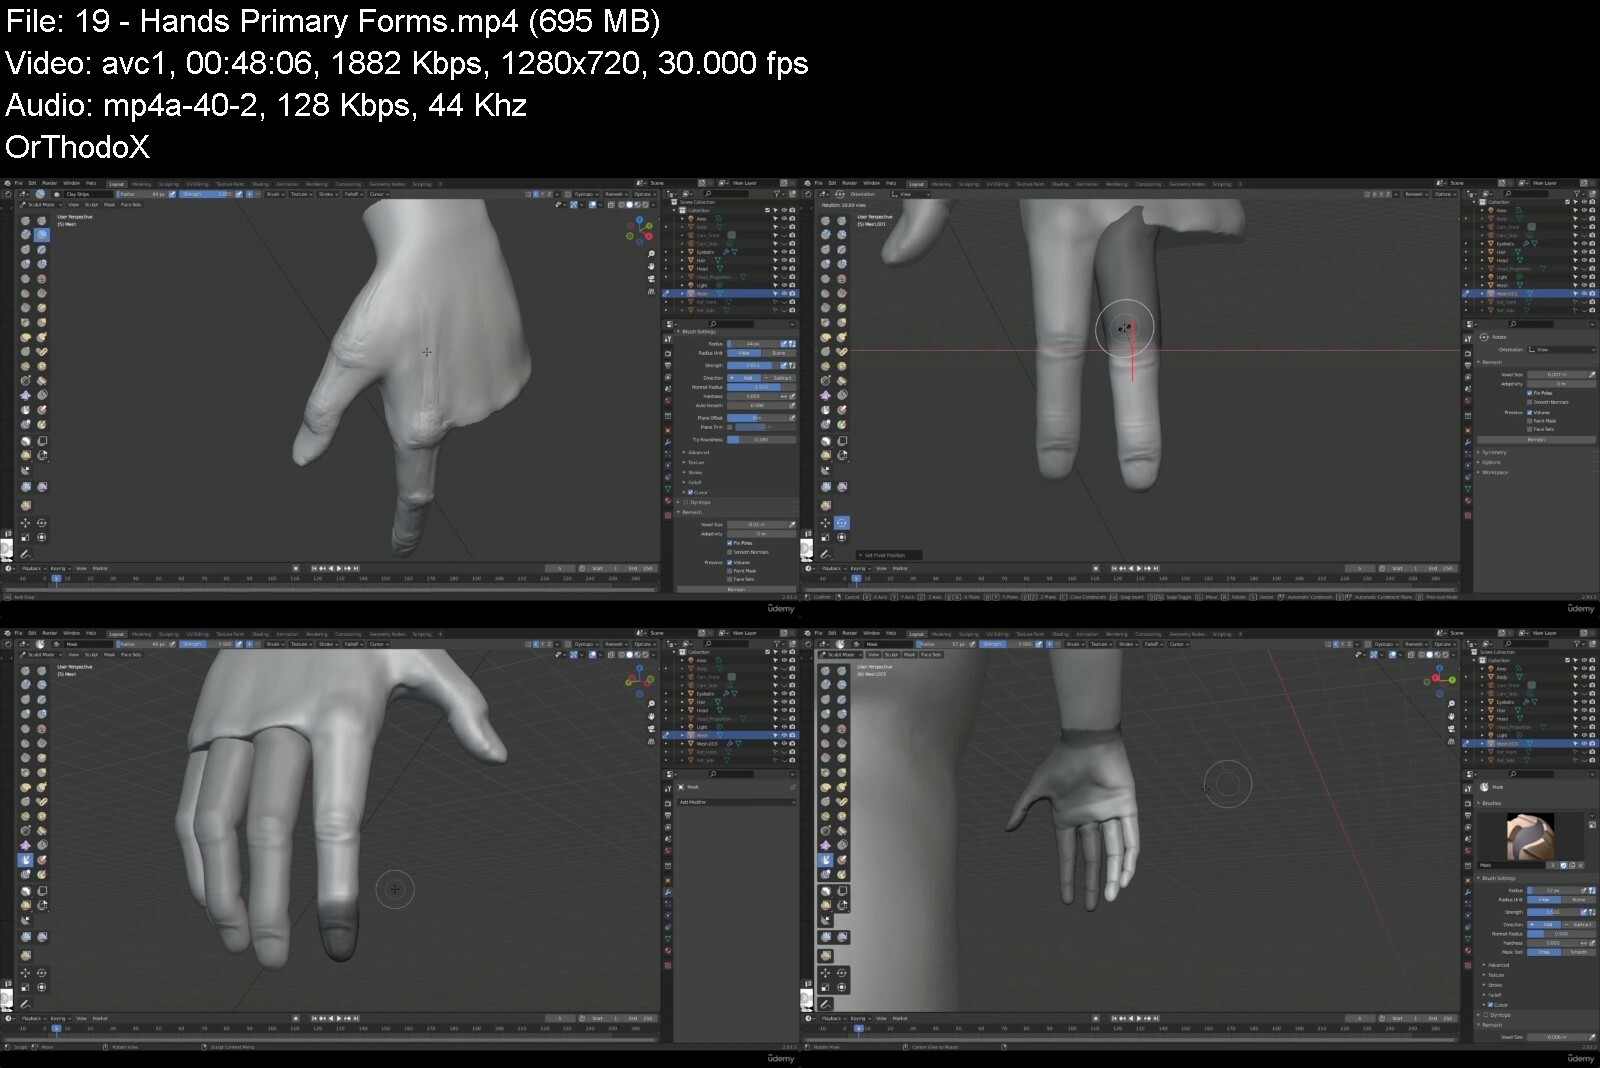
Lecture 12 Hands Primary Forms

Lecture 13 Feet Primary Forms

Lecture 14 Lips Primary Forms

Lecture 15 Fixing Primary Forms

Section 3: Retopo & Creating UDIMs

Lecture 16 Preparing for Retopo

Lecture 17 Retopo in Wrap

Lecture 18 Base Mesh Modifications

Lecture 19 UDIM Workflow

Lecture 20 Form Detail Projection

Section 4: Secondary Forms & Tertiary Details

Lecture 21 Face Secondary Forms 1

Lecture 22 Face Secondary Forms 2

Lecture 23 Body Secondary Forms

Lecture 24 Hands & Feet Secondary Forms

Lecture 25 Face Minor Details

Lecture 26 Breaking the Symmetry

Lecture 27 Lip Wrinkles & Noise

Lecture 28 Face Pores

Lecture 29 Face Wrinkles & Moles

Lecture 30 Neck Details

Lecture 31 Arm Details

Lecture 32 Hand Details 1

Lecture 33 Hand Details 2

Lecture 34 Form Tweaks

Section 5: Clothing Patterns, Retopo & UV Creation

Lecture 35 Intro to Marvelous Designer

Lecture 36 Creating Our Clothing Patterns

Lecture 37 Seaming & Simulating

Lecture 38 Front Dress Tweaks

Lecture 39 Dress Fabric Knot

Lecture 40 Export & Import the Dress

Lecture 41 Dress Tweaks

Lecture 42 Setting Up Our Dress in Maya

Lecture 43 Retopology Basics in Maya

Lecture 44 Retopologizing Our Dress

Lecture 45 Transferring Our UVs & Shape

Lecture 46 Add Thickness & Polish UVs

Section 6: Clothing & Accessories

Lecture 47 Sculpting Cloth 1

Lecture 48 Sculpting Cloth 2

Lecture 49 Sculpting Cloth 3

Lecture 50 Sculpting Cloth 4

Lecture 51 Sculpting Cloth 5

Lecture 52 Sculpting Cloth 6

Lecture 53 Creating the Dragon Ornament 1

Lecture 54 Creating the Dragon Ornament 2

Lecture 55 Dragon Teeth

Lecture 56 Dragon All

Lecture 57 Arm Bracelet Base

Lecture 58 Arm Bracelet Details

Lecture 59 Boots Base

Lecture 60 Boots Details

Lecture 61 Boots Strap

Lecture 62 Dragon Ornament Retopo

Lecture 63 Teeth Retopo & Unwrapping

Lecture 64 Arm Bracelet Unwrap

Lecture 65 Boots Retopo

Lecture 66 Boots Heels Retopo

Lecture 67 Boots Unwrap

Lecture 68 Polishing the Overall Sculpt

Lecture 69 Projecting the Other Accessories

Section 7: Fibermesh

Lecture 70 Preparing for Fibermesh

Lecture 71 Creating Our Fibermesh

Lecture 72 Creating Hairballs

Lecture 73 Styling Our Hair

Lecture 74 Adjusting Our Hair 1

Lecture 75 Adjusting Our Hair 2

Lecture 76 Hair Irregularity 1

Lecture 77 Hair Irregularity 2

Lecture 78 Hair Irregularity 3

Section 8: Posing & Creating Displacement Maps

Lecture 79 Posing

Lecture 80 Forms Fix

Lecture 81 Exporting Elements

Lecture 82 Real World Scale

Lecture 83 Exporting Displacement Maps

Lecture 84 Emblem Fix

Section 9: Creating Our Texture Maps

Lecture 85 Preparing for Painting

Lecture 86 Intro to Mari

Lecture 87 Color Map Creation 1

Lecture 88 Color Map Creation 2

Lecture 89 Color Map Creation 3

Lecture 90 Specular Map Creation

Lecture 91 SSS Map Creation

Lecture 92 Lights Setup

Lecture 93 Skin Shader

Section 10: Eye Creation

Lecture 94 Eye Modeling

Lecture 95 Unwrapping Our Eyes

Lecture 96 Detailing the Iris

Lecture 97 Sclera Material

Lecture 98 Iris Color Map

Lecture 99 Cornea Color & Displacement

Lecture 100 Setting Up Our Cornea

Lecture 101 Eye Tweaks

Lecture 102 Face Color Tweaks

Lecture 103 Tear Duct

Lecture 104 Caruncle

Section 11: Dress Setup, Materials & Teeth

Lecture 105 Dress Setup

Lecture 106 Silk Material

Lecture 107 Metal Material

Lecture 108 Extra Materials and Tweaks

Lecture 109 Teeth

Section 12: Hair Creation

Lecture 110 Hair Creation 1

Lecture 111 Backup Your Xgen

Lecture 112 Hair Creation 2

Lecture 113 Hair Creation 3

Lecture 114 Hair Creation 4

Lecture 115 Braids 1

Lecture 116 Braids 2

Lecture 117 Braids 3

Lecture 118 Eyebrows 1

Lecture 119 Eyebrows 2

Lecture 120 Eyebrows 3

Lecture 121 Eyebrows 4

Lecture 122 Lashes 1

Lecture 123 Lashes 2

Lecture 124 Lashes 3

Lecture 125 Peach Fuzz

Section 13: Rendering & Post-Work

Lecture 126 Rendering

Lecture 127 Enhancement

Anyone who wants to be a 3D character rockstar :)


femalecharacterportra7zc31.jpg


Stylized Pirate In Zbrush, Substance 3D Painter, Marmoset

xxen4ql7av6v9zz3shvftwdcdm.jpg


Stylized Pirate In Zbrush, Substance 3D Painter, Marmoset
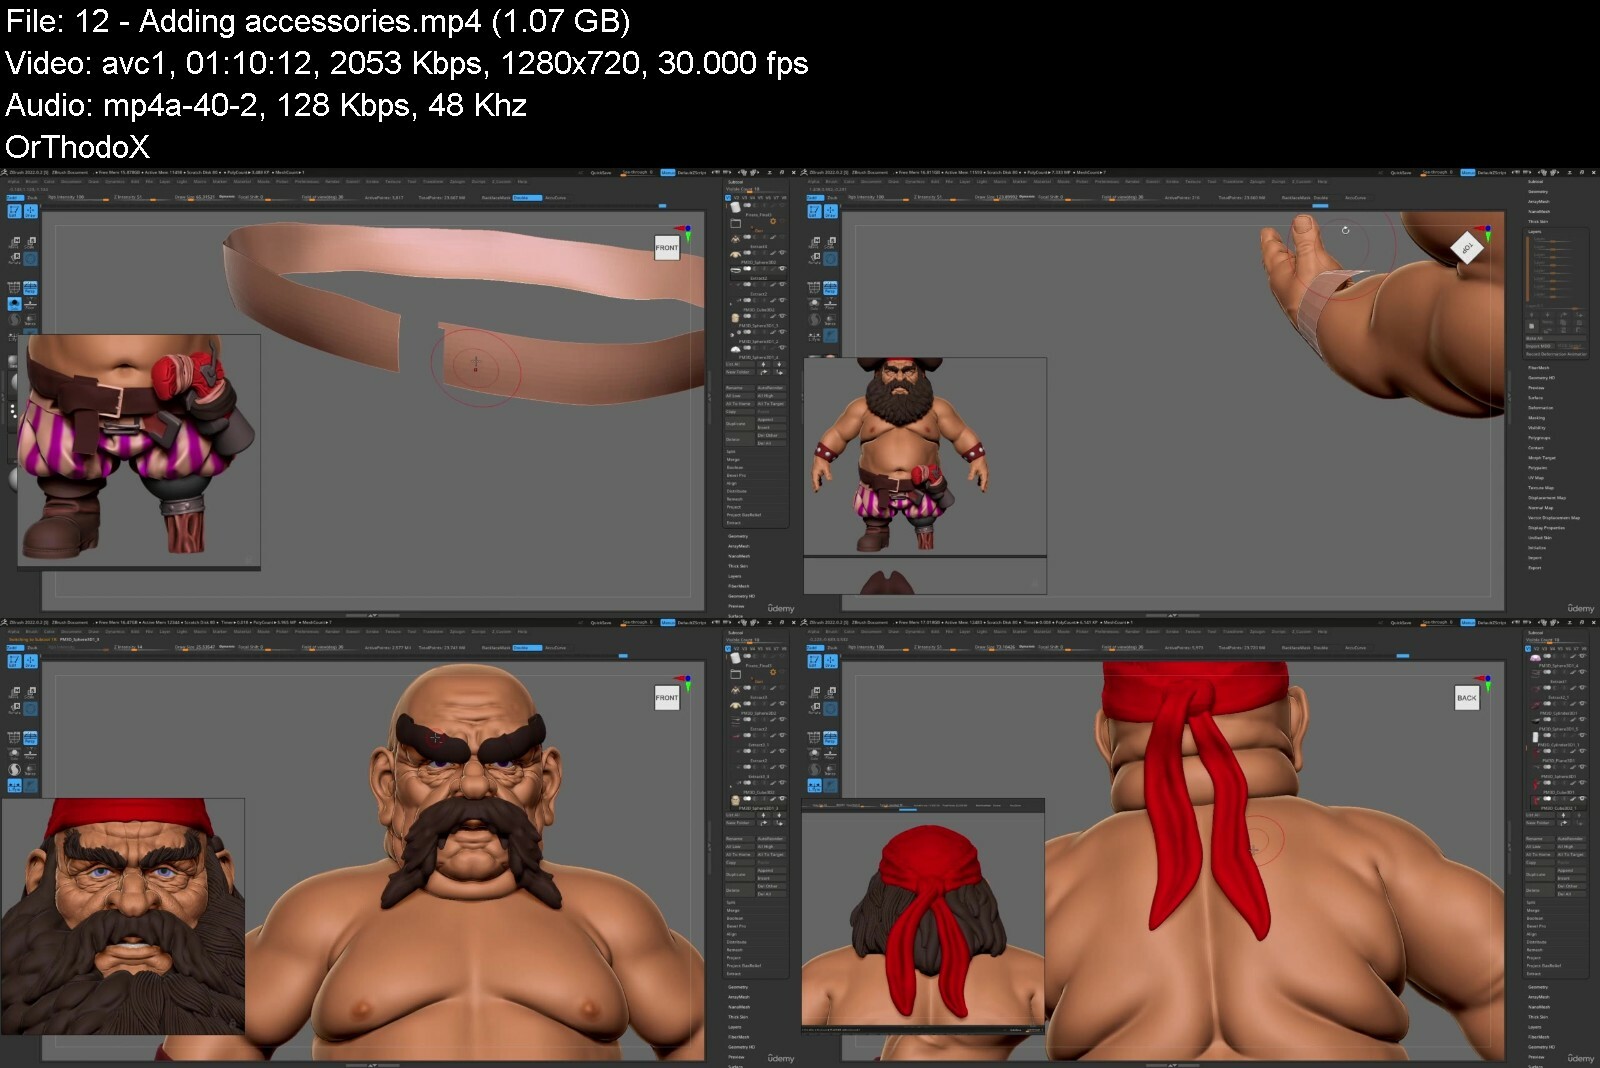
Published 8/2022
MP4 | Video: h264, 1280x720 | Audio: AAC, 44.1 KHz
Language: English | Size: 21.86 GB | Duration: 28h 36m

Step by step making a stylized character in Zbrush, Substance 3d Painter and Marmoset Toolbag 4


What you'll learn
Sculpting body
Adding Skin details, veins and many more
Making cool props such as cloth, sward, treasure chest, tobacco pipe
Creating environment props such as palm tree, rocks, sand, water
Making retopology from sculpted mesh
Making UV's
Texturing all props for stylized looks
Make custome materials
Texturin skin material for body and hands
Learning different technics for adding cool details, scratches, grunge, dirts, peeling effect
Overview rendering process for Marmoset toolbag
Explaine how to properly setup rendering configurations

Requirements
Zbrush basic knowledge
Substance 3d Painter basic knowledge

Description
Hello I want to share this course with you. We will make stylized Pirate model, also all props and accessories.This course is not only for beginners, but also for experienced students, who want to learn new tips and tricks. GOAL OF THE COURSE :At the end of this course you will be able to sculpt stylized character and modeling props. Also you will learn how to make a low poly meshes and UV's, achieve a stylized look for your textures in substance painer 3d and do a stunning renders in Marmoset Toolbag 4.This tutorial is STEP BY STEP, NO*FAST FORWARD, NO*SKIPS.I hope you will enjoy this course and don't miss this opportunity to start your career in 3d.IN THIS COURSE YOU WILL LEARN :Zbrush:- Stylized Anatomy- Accessories- Stylized Hair- Poly painting- Making greate topology with zremesher- Stylized props such as cloth, sward, treasure chest, tobacco pipe- Creating environment props such as palm tree, rocks, sand, water- Making low poly models- Making UV'sSubstance 3d Painter:- Baking maps- Texturing meshes- Texturin skin material for body and hands- Learning different technics for adding cool details, scratches, grunge, dirts- Creating stylized materialsMarmoset Toolbag 4:- Explaining render configuration- Explaining camera configuration- Explaining how to make greate render image

Overview

Section 1: Introduction

Lecture 1 Introduction

Lecture 2 Interface

Section 2: Pirate

Lecture 3 Making Body

Lecture 4 Blocking a head and hands

Lecture 5 Refining hands and face

Lecture 6 Continue to work on a face

Lecture 7 Continue to work on a model adding eyes

Lecture 8 Working on finger nails

Lecture 9 Making retopology of the body

Lecture 10 Making retopology of the face

Lecture 11 Making pants and boots

Lecture 12 Adding accessories

Lecture 13 Making a hat

Lecture 14 Making belts

Lecture 15 Making additional details

Lecture 16 Making additional details 2

Lecture 17 Making pants

Lecture 18 Making boots

Lecture 19 Making boots 2

Lecture 20 18 Making boots 3

Lecture 21 Pirate body texturing

Lecture 22 Pirate cloth texturing

Lecture 23 Pirate metal texturing

Section 3: Treasure chest

Lecture 24 Chest modeling 1

Lecture 25 Chest modeling 2

Lecture 26 Chest modeling 3

Lecture 27 Chest modeling 4

Lecture 28 Chest modeling 5

Lecture 29 Chest modeling 6

Lecture 30 Chest modeling 7

Lecture 31 Chest modeling 8

Lecture 32 Chest modeling 9

Lecture 33 Chest modeling 10

Lecture 34 Chest modeling 11

Lecture 35 Chest modeling 12

Lecture 36 Chest modeling 13

Lecture 37 Chest modeling 14

Lecture 38 Chest modeling 15

Lecture 39 Chest modeling 16

Lecture 40 Chest modeling 17

Lecture 41 Chest modeling 18

Lecture 42 Chest modeling 19

Lecture 43 Chest modeling 20

Lecture 44 Chest modeling 21

Lecture 45 Chest modeling 22

Lecture 46 Chest low poly

Lecture 47 Chest texturing

Section 4: Sward

Lecture 48 Sward modeling 1

Lecture 49 Sward modeling 2

Lecture 50 Sward modeling 3

Lecture 51 Sward modeling 4, low poly

Lecture 52 Sward Texturing

Section 5: Tobacco pipe

Lecture 53 Tobacco pipe modeling

Lecture 54 Tobacco pipe texturing

Section 6: Palm tree, Rock

Lecture 55 Palm tree modeling 1

Lecture 56 Palm tree modeling 2

Lecture 57 Palm tree modeling 3

Lecture 58 Rock modeling

Lecture 59 Palm tree, Rock Low Poly

Lecture 60 Palm tree, Rock texturing

Section 7: Sand, Water

Lecture 61 Sand, Water

Lecture 62 Sand, Water texturing

Section 8: Render

Lecture 63 Render

Beginers and intermediate students


stylizedpirateinzbrusref4w.jpg


Female Game Character Creation in Blender Tutorial

xzyaopko35zei7qg5uvwak9cdx.jpg


Female Game Character Creation In Blender Tutorial
Last updated 12/2021
MP4 | Video: h264, 1280x720 | Audio: AAC, 44.1 KHz
Language: English | Size: 37.81 GB | Duration: 40h 10m

Learn how to Create a Game Character using 100% Blender


What you'll learn
Understand likeness fundamentals
Sculpt the female anatomy
Create animation-friendly topology
Unwrap clean UVs
Texture realistic skin
Texture detailed dress
Create game hair cards
Render using Eevee
Composite final work for portfolio

Requirements
Basic knowledge of Blender required

Description
Hi everyone, welcome to Victory3D. My name is Corazon Bryant, professional 3d artist and educator. In this course, I will show you how to create a beautiful female character for games. Starting with a sphere, we will use Blender's sculpting tools to achieve an accurate female anatomy. I will dive into the important forms you need to know to make your female body believable. I will also show you how to build a sexy dress, shoes, necklace, and other accessories so our character will be ready for a ball. After we have our basic and primary forms down, we will move on to retopologizing. I will show you how to create a topology that is animation-friendly and that will also be perfect for adding high resolution details. After we retopologize, we will create UVs so we can create customize textures later on. We will create sculpting details such as skin folds, wrinkles, and pores. Once we have all of our details down, we will bake everything and create textures for our skin, dress, and accessories. Then on to creating our character's long hair. For the hair, I will show you how to create particle system and later use them for hair cards. Hair cards are very important part of the game creation process and in this course, you will learn how to professionally optimize hair to meet your poly count and budget needs. To finalize everything, we will do a realtime render using Eevee and I will show you how to composite your images so that you can have beauty shots you can use to amplify your portfolio. This course is 100% made in Blender. You won't need any expensive add-ons, everything that you need is within in the software program. You will be able to create a full body character ready for production all using Blender.Upgrade your skills today, come and join this course at Victory3D.

Overview
Section 1: Introduction

Lecture 1 Introduction

Lecture 2 Gathering References

Lecture 3 Female & Male Differences

Lecture 4 Types of Facial Features

Lecture 5 Intro to Sculpting

Section 2: Basic & Primary Forms

Lecture 6 Head Basic Forms 1

Lecture 7 Head Basic Forms 2

Lecture 8 Head Basic Forms 3

Lecture 9 Head Basic Forms Tweaks

Lecture 10 Tweaks & Make-Up

Lecture 11 Hair Place Holder & Tweaks

Lecture 12 Accuracy Check Front

Lecture 13 Accuracy Check Side

Lecture 14 Upper Body Basic Forms

Lecture 15 Lower Body Basic Forms

Lecture 16 Hands Basic Forms

Lecture 17 Feet Basic Forms

Lecture 18 Proportion

Lecture 19 Hands Primary Forms

Lecture 20 Feet Primary Forms

Lecture 21 Dress Basic Shape

Lecture 22 Shoe Basic Shape

Lecture 23 Extend Nails

Lecture 24 More Tweaks

Lecture 25 Real World Size

Lecture 26 Tweaks & Combine Mesh

Section 3: Retopology

Lecture 27 Intro to Retopology

Lecture 28 Essential Loops Face

Lecture 29 Essential Loops Upper Body

Lecture 30 Essential Loops Lower Body

Lecture 31 Essential Loops Hands & Feet

Lecture 32 Retopo Face

Lecture 33 Retopo Head

Lecture 34 Retopo Upper Body 1

Lecture 35 Retopo Upper Body 2

Lecture 36 Retopo Lower Body 1

Lecture 37 Retopo Lower Body 2

Lecture 38 Retopo Arms & Hands 1

Lecture 39 Retopo Hands 2

Lecture 40 Retopo Ears & Tweaks

Lecture 41 Topology Check 1

Lecture 42 Retopo Dress 1

Lecture 43 Retopo Dress 2

Lecture 44 Topology Check 2

Lecture 45 Retopo Shoe

Lecture 46 Topology Check 3

Section 4: Accessories

Lecture 47 Necklace Creation

Section 5: Unwrapping, Detailing, Texturing

Lecture 48 Intro to Unwrapping

Lecture 49 Unwrap Body

Lecture 50 Unwrap Dress & Shoes

Lecture 51 Unwrap Necklace & Pack Islands

Lecture 52 Organize UVs

Lecture 53 Project Details & Secondary Forms 1

Lecture 54 Paint Test

Lecture 55 HDRI & Tweaks

Lecture 56 Secondary Forms 2

Lecture 57 Tertiary Forms 1

Lecture 58 Tertiary Forms 2

Lecture 59 Teeth & Reprojection

Lecture 60 Redefining

Lecture 61 Micro Details 1

Lecture 62 Micro Details 2

Lecture 63 Bake Skin Details

Lecture 64 Dress Details

Lecture 65 Bake Dress Details

Lecture 66 Skin Texture 1

Lecture 67 Skin Texture 2

Lecture 68 Skin Roughness

Lecture 69 Skin Specular

Lecture 70 Dress Leather Part

Lecture 71 Dress Cotton Part

Lecture 72 Dress Pattern

Lecture 73 Necklace & Nails Texture

Section 6: Eye Creation & Adjustments

Lecture 74 Eye Modeling & UVs

Lecture 75 Eye Paint 1

Lecture 76 Eye Paint 2 & Caruncle

Lecture 77 Eye Bump Details

Lecture 78 Tear Duct & Skin Adjustments

Lecture 79 Asymmetry

Lecture 80 Fix Seams & Edits

Section 7: Hair Creation

Lecture 81 Hair Lower Hemisphere 1

Lecture 82 Hair Lower Hemisphere 2

Lecture 83 Hair Check

Lecture 84 Hair Upper Hemisphere 1

Lecture 85 Hair Upper Hemisphere 2

Lecture 86 Hair Upper Hemisphere 3

Lecture 87 Hair Break Up & Variance

Lecture 88 Eyebrows 1

Lecture 89 Eyebrows 2

Lecture 90 Eyebrows & Adjustments

Lecture 91 Top Eyelashes

Lecture 92 Bottom Eyelashes

Lecture 93 Hair Texture 1

Lecture 94 Hair Texture 2

Lecture 95 Hair Cards 1

Lecture 96 Hair Cards 2

Lecture 97 Hair Cards 3

Lecture 98 Hair Cards 4

Lecture 99 Hair Tweaks

Section 8: Posing, Touchups, Rendering & Compositing

Lecture 100 Posing

Lecture 101 Dress Touch-Ups

Lecture 102 Bracelet

Lecture 103 Rendering & Compositing

Anyone who wants to learn how to create a beautiful female game character


femalegamecharactercr14d6x.jpg


Zurück
Oben Unten