• Regeln für den Video-Bereich:

    In den Börsenbereich gehören nur Angebote die bereits den Allgemeinen Regeln entsprechen.

    Einteilung

    - Folgende Formate gehören in die angegeben Bereiche:
    - Filme: Encodierte Filme von BluRay, DVD, R5, TV, Screener sowie Telesyncs im Format DivX, XviD und x264.
    - DVD: Filme im Format DVD5, DVD9 und HD2DVD.
    - HD: Encodierte Filme mit der Auflösung 720p oder darüber von BluRay, DVD, R5, TV, Screener sowie Telesyncs im Format x264.
    - 3D: Encodierte Filme von BluRay, die in einem 3D Format vorliegen. Dies gilt auch für Dokus, Animation usw.
    - Serien: Cartoon/Zeichentrick, Anime, Tutorials, Dokumentationen, Konzerte/Musik, Sonstiges sind demnach in die entsprechenden Bereiche einzuordnen, auch wenn sie beispielsweise im High Definition-Format oder als DVD5/DVD9/HD2DVD vorliegen. Ausnahme 3D.
    - Bereich Englisch: Englische Releases gehören immer in diesen Bereich.
    - Bereich Talk: Der Bereich, in dem über die Releases diskutiert werden kann, darf, soll und erwünscht ist.


    Angebot/Beitrag erstellen

    - Ein Beitrag darf erst dann erstellt werden, wenn der Upload bei mindestens einem OCH komplett ist. Platzhalter sind untersagt.
    - Bei einem Scenerelease hat der Threadtitel ausschließlich aus dem originalen, unveränderten Releasenamen zu bestehen. Es dürfen keine Veränderungen wie z.B. Sterne, kleine Buchstaben o.ä. vorgenommen werden. Ausnahme Serienbörse:
    - Bei einem Sammelthread für eine Staffel entfällt aus dem Releasename natürlich der Name der Folge. Beispiel: Die Simpsons S21 German DVDRip XviD - ITG
    - Dementsprechend sind also u.a. verboten: Erweiterungen wie "Tipp", "empfehlenswert", "only", "reup", usw. / jegliche andere Zusatzinformation oder Ergänzung, welche nicht in obiger Beschreibung zu finden ist.

    Aufbau des Angebots und Threadtitel

    Der Titel nach folgendem Muster erstellt zu werden. <Name> [3D] [Staffel] [German] <Jahr> <Tonspur> [DL] [Auflösung] <Quelle> <Codec> - <Group>
    Beispiel: The Dark Knight German 2008 AC3 DVDRip XviD - iND
    Beispiel: The Dark Knight 2008 DTS DL BDRip x264 - iND
    Beispiel: The Dark Knight 2008 AC3 DL BDRip XviD - iND
    Beispiel: The Dark Knight German 2008 AC3 720p BluRay x264 iND
    Beispiel: The Dark Knight 2008 DTS DL 1080p BluRay x264 iND
    Beispiel: Die Simpsons S01 German AC3 DVDRip XviD iND
    Beispiel: Die Simpsons S20 German AC3 720p BluRay x264 iND
    Beispiel: Sword Art Online II Ger Sub 2014 AAC 1080p WEBRip x264 - peppermint
    Entsprechend sind also u.a. verboten: Sonderzeichen wie Klammern, Sterne, Ausrufezeichen, Unterstriche, Anführungszeichen / Erweiterungen wie "Tipp", "empfehlenswert", "only", "reup", usw. / jegliche andere Zusatzinformation oder Ergänzung, welche nicht in obiger Beschreibung zu finden ist
    Ausnahmen hiervon können in den Bereichen geregelt sein.

    Die Beiträge sollen wie folgt aufgebaut werden:
    Überschrift entspricht dem Threadtitel
    Cover
    kurze Inhaltsbeschreibung
    Format, Größe, Dauer sind gut lesbar für Downloader außerhalb des Spoilers zu vermerken
    Nfo sind immer Anzugeben und selbige immer im Spoiler in Textform.
    Sind keine Nfo vorhanden z.B. Eigenpublikationen, sind im Spoiler folgende Dateiinformationen zusätzlich anzugeben :
    Quelle
    Video (Auflösung und Bitrate)
    Ton (Sprache, Format und Bitrate der einzelnen Spuren)
    Untertitel (sofern vorhanden)
    Hosterangabe in Textform außerhalb eines Spoiler mit allen enthaltenen Hostern.
    Bei SD kann auf diese zusätzlichen Dateiinformationen verzichtet werden.

    Alle benötigten Passwörter sind, sofern vorhanden, in Textform im Angebot anzugeben.
    Spoiler im Spoiler mit Kommentaren :"Schon Bedankt?" sind unerwünscht.


    Releases

    - Sind Retail-Release verfügbar, sind alle anderen Variationen untersagt. Ausnahmen: Alle deutschen Retail-Release sind CUT, in diesem Fall sind dubbed UNCUT-Release zulässig.
    - Im Serien-Bereich gilt speziell: Wenn ein Retail vor Abschluss einer laufenden Staffel erscheint, darf diese Staffel noch zu Ende gebracht werden.62
    - Gleiche Releases sind unbedingt zusammenzufassen. Das bedeutet, es ist zwingend erforderlich, vor dem Erstellen eines Themas per Suchfunktion zu überprüfen, ob bereits ein Beitrag mit demselben Release besteht. Ist dies der Fall, ist der bereits vorhandene Beitrag zu verwenden.
    - P2P und Scene Releases dürfen nicht verändert oder gar unter einem iND Tag eingestellt werden.


    Support, Diskussionen und Suche

    - Supportanfragen sind entweder per PN oder im Bereich Talk zu stellen.
    - Diskussionen und Bewertungen sind im Talk Bereich zu führen. Fragen an die Uploader haben ausschließlich via PN zu erfolgen, und sind in den Angeboten untersagt.
    - Anfragen zu Upload-Wünschen sind nur im Bereich Suche Video erlaubt. Antworten dürfen nur auf Angebote von MyBoerse.bz verlinkt werden.


    Verbote

    - Untersagt sind mehrere Formate in einem einzigen Angebotsthread, wie beispielsweise das gleichzeitige Anbieten von DivX/XviD, 720p und 1080p in einem Thread. Pro Format, Release und Auflösung ist ein eigener Thread zu eröffnen.
    - Grundsätzlich ebenso verboten sind Dupes. Uploader haben sich an geeigneter Stelle darüber zu informieren, ob es sich bei einem Release um ein Dupe handelt.
    - Gefakte, nur teilweise lauffähige oder unvollständige Angebote sind untersagt. Dies gilt auch für eigene Publikationen, die augenscheinlich nicht selbst von z.B. einer DVD gerippt wurden. Laufende Serien, bei denen noch nicht alle Folgen verfügbar sind, dürfen erstellt und regelmäßig geupdatet werden.
    - Untersagt sind Angebote, welche nur und ausschließlich in einer anderen Sprache als deutsch oder englisch vorliegen. Ausnahmen sind VORHER mit den Moderatoren zu klären.


    Verstoß gegen die Regeln

    - Angebote oder Beiträge, die gegen die Forenregeln verstoßen, sind über den "Melden"-Button im Beitrag zu melden.
  • Bitte registriere dich zunächst um Beiträge zu verfassen und externe Links aufzurufen.

*** Bestes IPTV *** bester Preis *** gratis Test ***


Englische Tutorials

Charcoal Drawing- Learn To Draw With Charcoal

mycumeuf5eylbxvwy0sn2mudmi.jpg


Charcoal Drawing- Learn To Draw With Charcoal
Last updated 7/2020
MP4 | Video: h264, 1280x720 | Audio: AAC, 44.1 KHz
Language: English | Size: 13.38 GB | Duration: 10h 35m

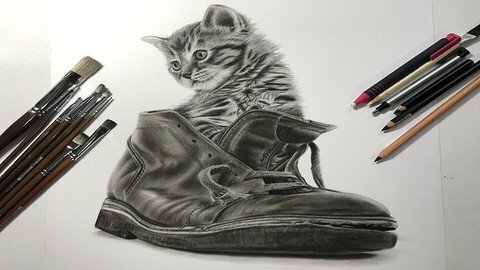
Learn How to Draw Realistic Cat and Shoe with Conte and Charcoal Pencil. Pencil Drawing is a Cool Art


What you'll learn
get acquainted with the material of Conte and charcoal and be able to draw animals like a cat
how to make a face volume
how to draw animal hair
how to create leather shoe texture

Requirements
Faber-Castel conte pencils, hard and soft
Paris conte Carbon B2 pencil
Charcoal (Crtia color)
Rough flat tip brushes
Soft flat tip brush
Different types of erasers (dough, etude, brush, electronic)
Sharpener
Cutter
Ruler
Sanding
Fabriano cardboard 220 g (low gram and no texture)

Description
In this course, you'll learn how to draw realistic cat and shoe with Conte and Charcoal pencil from the from the base. The course is supported with over 10.5 hours of clear content that I walk you through each step of the way.In this training course, we went to a draw a kind of animal and chose a cute kitten sitting in an old shoe. The reason for this choice, apart from the beauty of the model, is the potential of the model to teach animal hair and the texture of a leather shoe.Here's what you get with the course:- At the beginning of the video, we do the basic cat sketch tutorial together.- Then we put the sketching on the cardboard and start working from the eyes, then we draw the cat's nose and mouth, and then, while creating the cat's body volume, we also create the base of the cat's hair. In this step, we will learn to use rough and soft brushes to create hair texture together.- After creating the background and completing the cat's body volume, we add the darkness, using Etude and Mono zero erasers, and then using the hard pencil, we complete the hair on the cat's head, face, and body.- Then after completing the kitten, we go to the model's shoe. We apply the lining or background of the shoe's shades and slowly create the volume and darkness of the work. Then, using an eraser, we create the leather shape and complete the textures by adding details. Shoelaces also have their own unique texture, which will be taught in the videos.What else will you get?- Personal contact with me, the course tutor- Lifetime access to course materials- Understanding of how professional art is created-This all comes under one convenient easy to use platform. Plus you will get fast, friendly, responsive support on the Udemy Q&A section of the course or direct message.-I will be here for you every step of the way!-So what are you waiting for? Sign up now and change your art world today!
Overview
Section 1: Introduction
Lecture 1 Introduction
Section 2: Initial sketching of the cat
Lecture 2 The Project Main Picture
Lecture 3 Part 1
Lecture 4 Part 2
Lecture 5 Part 3
Section 3: creating the cat's eyes and nose
Lecture 6 creating the cat's eyes and nose
Section 4: working on the hair of the cat head
Lecture 7 Part 1
Lecture 8 Part 2
Section 5: basic work on the Cat's body hair
Lecture 9 basic work on the Cat's body hair
Section 6: creating lights and the complementary stage of the cat's head
Lecture 10 Part 1
Lecture 11 Part 2
Section 7: Lightening and creating the dark hairs of the cat's body
Lecture 12 Part 1
Lecture 13 Part 2
Section 8: completing the cat's hair
Lecture 14 Part 1
Lecture 15 Part 2
Lecture 16 Part 3
Section 9: basic work and creating the volume of shoe and shoelaces
Lecture 17 Part 1
Lecture 18 Part 2
Lecture 19 Part 3
Lecture 20 Part 4
Section 10: Shaping the stitches on the shoe and creating leather texture
Lecture 21 Part 1
Lecture 22 Part 2
Lecture 23 Part 3
Section 11: Applying the shoe volume
Lecture 24 Part 1
Lecture 25 Part 2
Lecture 26 Part 3
Lecture 27 Part 4
Lecture 28 Part 5
Lecture 29 Part 6
Section 12: Creating lights on leather and creating texture
Lecture 30 Part 1
Lecture 31 Part 2
Lecture 32 Part 3
Lecture 33 Part 4
Section 13: sketching the shoelaces textures
Lecture 34 Part 1
Lecture 35 Part 2
Lecture 36 Part 3
Section 14: creating the volume for the bottom of the shoe
Lecture 37 Part 1
Lecture 38 Part 2
Section 15: Creating light and texture of the bottom of shoe
Lecture 39 Creating light and texture of the bottom of shoe
Section 16: End of the work
Lecture 40 End of the work
There is no age limit for students, and this course is suitable for children from 12 years to adults who are interested and are able to recognize volume and texture and are somewhat familiar with primary sketching.,This course is designed for students interested in drawing, especially monochrome paintings with attractive charcoal technique,All students who are relatively familiar with drawing or who have already taken our sketching course can use the training in this course and be able to improve their artistic level by using more advanced levels of charcoal drawing course.


charcoaldrawinglearnt1aipc.jpg


Download from RapidGator


Download from DDownload


Portrait Drawing- Drawing A Beauty Girl With Colored Pencils

ynaisggktuks3smhvmwmyk9ih2.jpg


Portrait Drawing- Drawing A Beauty Girl With Colored Pencils
Last updated 2/2022
MP4 | Video: h264, 1280x720 | Audio: AAC, 44.1 KHz
Language: English | Size: 11.21 GB | Duration: 8h 50m

Comprehensive Hyper-real Portrait Drawing and Sketching, Art of Portrait Drawing & Shading step by step


What you'll learn
Learn how to paint different parts of the eye with a colored pencil.
Learn how to draw eyelashes and eyebrows, which is one of the most important and at the same time hard part of painting for students
Learn how to paint the nose step by step and with the correct execution of lights and shadows
Learn how to start with dark plans and get skin color with light layers of color, as well as how to create skin textures with a rechargeable eraser
we will get acquainted with how to perform model hair

Requirements
Faber Castell 36 Classic Color Pencils
Skin color tones of polychrome colored pencils
Mechanical eraser
Rechargeable eraser
Normal eraser
Normal pencil
cutter
Esteinbach cardboard
Ruler
Paper glue

Description
Colored pencil is one of the most exciting tools in painting that most people do not use because it is a very difficult and professional technique, but you should know that it is one of the tools in painting that can be used to create accurate and very professional paintings. Colored pencil is a tool that can be used to perform very small details inside the design so that we can have realistic drawings.In this painting course, we draw and paint the face of a young girl together, which is full of educational points, and by observing them, we can have an extraordinary and professional effect.As you will see in the tutorials, we first start painting and performing the model's eyes, it should be noted that the eyes are one of the most effective components in face painting, because they transmit all the senses of the face (sadness, happiness, etc.).So together we will learn how to perform this important part of the face easily and beautifully.Allow as much time as necessary to perform this part of the face.Be careful in performing the iris and the details in detail, and finally create the texture in the iris!Needless to say, you still have to use the dark to light method in all parts! We will create the lights to brighten the eyes and make a good sense, drawing the Eyelashes is difficult steps for students, but this difficulty can be relieved with a lot of practice !!We will teach you how to draw eyebrows! Exactly many students have trouble when performing eyebrows just like eyelashes. In these tutorials, you will see how to draw the eyebrows detail by detail, and you will become a professional by practicing in this section.In the forehead coloring part, as in all other parts, we start from the darkest color and we will teach you how to apply a very soft and natural skin with this method. In the next part, we will teach you how to perform the nose step by step. In performing the nose, you should pay attention to preserving the original shape of the nose by applying the lights and shadows correctly. One of the most important parts of the nose that you may not even think about is nostril, and it's resemblance with original model very effective in simulation and face painting compared to the model.In the continuation of this tutorial, you will learn how to apply face skin using dark and light color plans, and we will teach you how to create skin textures with a rechargeable eraser and then increase the volume of the face textures.To apply the lips, we use dark red and pink plans, and with light plans, we finish the coloring and create the necessary shine, We teach the method of creating lip textures, which are very important in the naturalness of the lips.We paint the parts of the chin as well as the cheeks and go to the final stages of painting, that is, teaching how to draw hair.
Overview
Section 1: Introduction
Lecture 1 Introduction
Lecture 2 The initial sketch of a young girl design with the checkered method
Lecture 3 Execution of the left iris and details of the iris
Lecture 4 Painting the white part of the eye
Lecture 5 Priming and painting the skin color behind the eyelid
Lecture 6 Drawing eyelashes and the lower eyelid
Lecture 7 Drawing the lower lashes and draw the eyebrows
Lecture 8 Execution of iris and whiteness of the right eye
Lecture 9 Priming and painting the back of the eyelid
Lecture 10 Apply the upper and lower eyelashes
Lecture 11 Drawing the Eyebrow and priming forehead
Lecture 12 Painting (skin color) forehead
Lecture 13 initial priming of nose color
Lecture 14 Creating volume and nose coloring
Lecture 15 Creating contrast for the nose
Lecture 16 Priming the left cheek
Lecture 17 Right cheek coloring
Lecture 18 Drawing the freckles of the face and priming the left cheek
Lecture 19 Coloring the left cheek
Lecture 20 Creating skin blemishes and priming the upper lip
Lecture 21 Upper lip painting and lower lip priming
Lecture 22 Completing lip color and apply textures and glosses
Lecture 23 Painting the skin above the lips and around
Lecture 24 Coloring the skin on the right side of the lips
Lecture 25 Smoothing facial skin
Lecture 26 Priming and chin coloring
Lecture 27 Drawing hair on the face
Lecture 28 Apply hair around the face
Lecture 29 Drawing hair strands and perform the neck
Anyone wanting to learn to draw beauty portrait with colored pencils,Students looking for shortcut to getting super high levels of details easily,All artists,This course is designed for students interested in drawing


portraitdrawingdrawin1ofmd.jpg


Download from RapidGator


Download from DDownload


Colored Ballpoint Pens Drawing: Art Of Portrait Drawing

i5b6vqjez2lghu6socedw1gi6t.jpg


Colored Ballpoint Pens Drawing: Art Of Portrait Drawing
Last updated 2/2019
MP4 | Video: h264, 1280x720 | Audio: AAC, 44.1 KHz
Language: English | Size: 6.22 GB | Duration: 4h 55m

How to Draw a Beautiful Portrait with Colored Ballpoint Pens: The Art of Drawing & Painting with Colored Ballpoint Pens


What you'll learn
Learn how to draw a beauty portrait with colored Ballpoint Pens
Learn how to color the skin
Learn how to draw the Face components
Learn how to draw the glasses
Learn how to draw the dress of the woman
Learn how to draw the hair of the woman
Learn how to use hatching and tonalities
Learn how to combine the colors in the Ballpoint Pen technique

Requirements
Colored Ball Point pens with different brands
Gel pens with transparent colors
Papers: Fabriano paper, beige Fabriano paper
Initial acquaintance with Colored Ballpoint Pen Technique

Description
In this course, you'll learn how to draw Beautiful portrait with colored Ballpoint pens from the ground up. The course is supported with over 5 hours of clear content that I walk you through each step of the way.Here's what you get with the course:- This course is a follow-up course for the Previous ballpoint paint training courses, which is a great practice training exercise.- In this course, you will experience how to color the skin and draw the faces and glasses, flowers, hair and clothes, and how to use the hatching and tonalities to create the volume and how combine the colors in the ballpoint pen technique.- This is an intermediate level educational course that the students can take part in this course after completing the Basic course.What else will you get?- Personal contact with me, the course tutor- Lifetime access to course materials- Understanding of how professional art is created- This all comes under one convenient easy to use platform. Plus you will get fast, friendly, responsive support on the Udemy Q&A section of the course or direct message.- I will be here for you every step of the way!So what are you waiting for? Sign up now and change your art world today!
Overview
Section 1: Introduction
Lecture 1 Introduction
Section 2: Working on the Face of Work
Lecture 2 The Project Main Picture
Lecture 3 Part 1
Lecture 4 Part 2
Lecture 5 Part 3
Lecture 6 Part 4
Lecture 7 Part 5
Lecture 8 Part 6
Lecture 9 Part 7
Lecture 10 Part 8
Lecture 11 Part 9
Lecture 12 Part 10
Lecture 13 Part 11
Lecture 14 Part 12
Lecture 15 Part 13
Lecture 16 Part 14
Lecture 17 Part 15
Lecture 18 Part 16
Lecture 19 Part 17
Lecture 20 Part 18
Section 3: Working on the Hair of Work
Lecture 21 Part 1
Lecture 22 Part 2
Lecture 23 Part 3
Lecture 24 Part 4
Lecture 25 Part 5
Lecture 26 Part 6
Lecture 27 Part 7
Lecture 28 Part 8
Lecture 29 Part 9
Section 4: Working on the Upper Part of Body
Lecture 30 Part 1
Lecture 31 Part 2
Lecture 32 Part 3
Lecture 33 Part 4
Lecture 34 Part 5
Lecture 35 Part 6
Section 5: Working on the dress of Work
Lecture 36 Part 1
Lecture 37 Part 2
Lecture 38 Part 3
Lecture 39 Part 4
Lecture 40 Part 5
Section 6: Working on the Rest of Work
Lecture 41 Part 1
Lecture 42 Part 2
Lecture 43 Part 3
Lecture 44 Part 4
Anyone wanting to learn work with ballpoint Pens,Anyone wanting to learn how to draw a beauty portrait with colored Ballpoint Pens,Anyone interested in starting to draw with colored ballpoint pens,Students who decided to create wonderful works with Ballpoint Pens,Students who don't have knowledge or have a little knowledge about ballpoint pens technique,Students who are motivated to create amazing artwork with ballpoint pens


coloredballpointpensd2afa0.jpg


Download from RapidGator


Download from DDownload


Human Style Anatomy Drawing Comprehensive Course

wlurmievqjz27lze6ugksibcfw.jpg


Human Style Anatomy Drawing Comprehensive Course
Last updated 5/2022
MP4 | Video: h264, 1280x720 | Audio: AAC, 44.1 KHz
Language: English | Size: 9.95 GB | Duration: 7h 45m

How to draw human anatomy and figures in various sports and dance styles. Drawing Anatomy with pencil


What you'll learn
After passing this course, the student will be able to draw various models of anatomies and personality
Human body figures in different genders can draw
Increase creativity in anatomy drawing
Ability to draw anatomy in different styles

Requirements
B and B2 Pencil
Etude and tip Etude
Dough eraser and etude eraser
Sharpener
Paper
Basic level of drawing

Description
One of the most basic human body drawing skills is learning to draw the anatomy of the body in a principled way. In this class, I have taught different styles of woman, man and child in different ages and postures in a very principled and easy way. In this course, my focus is on the anatomy of the human body, and for this reason, I have avoided going into the details of the head, face, and body.In this course, by drawing human anatomy in different modes of dance and exercise, anatomy has been taught in models of stretching and bending of the human body.One of the main advantages of this course is teaching basic anatomy design with geometric shapes and then details are added to the initial design to complete the anatomy. I hope this course is useful for you. And have fun.In this course you will learn the following topics:Section 1: Required equipment.Section 2: Learn to draw anatomy baby styles.Section 3: Drawing simple anatomy styles.Section 4: Drawing normal anatomy styles.Section 5: Drawing sport and dance anatomy I hope that by teaching this course, you will gain the ability to create your favorite anatomy and figure.
Overview
Section 1: Introduction
Lecture 1 Introduction
Section 2: Anatomy of Baby and Child styles
Lecture 2 Anatomy of baby styles
Lecture 3 Continuation of Anatomy of baby styles
Lecture 4 Anatomy of a child throwing a ball
Lecture 5 Anatomy of a child playing basketball
Lecture 6 The second anatomy of a child playing basketball
Lecture 7 Anatomy of a girl sitting
Lecture 8 Anatomy of a girl when tying a shoelace
Lecture 9 The girl is crying
Section 3: Simple Styles
Lecture 10 Three styles with simple anatomy
Lecture 11 Acrobatic style with simple anatomy
Lecture 12 Continuation of Acrobatic style with simple anatomy
Lecture 13 Styles with another example of simple anatomy
Lecture 14 Continuation of styles with another example of simple anatomy
Lecture 15 End styles with another example of simple anatomy
Section 4: Normal Anatomy Styles
Lecture 16 Anatomy of physique style of man athlete
Lecture 17 Anatomy of a boxer man
Lecture 18 Anatomy of a woman sitting on the ground
Lecture 19 Anatomy of a lady style with open hand next to the body
Section 5: Sport and Dance styles
Lecture 20 Anatomy of a lady in yoga style
Lecture 21 Anatomy of a lady in bridge style
Lecture 22 Woman Athlete Flexibility Style
Lecture 23 Lady Gymnastic Flexibility
Lecture 24 Lady Flexibility 180 Degree
Lecture 25 Woman Falling Style
Lecture 26 Lady Amazing Jumping
Lecture 27 Gymnastic Jump Style
Lecture 28 Lady Ballet Style
Lecture 29 Lady Ballet Style with dress
Lecture 30 Woman Skate Style
Lecture 31 Man Falling Style 1
Lecture 32 Man Falling Style 2
Lecture 33 Man Falling Style 3
Lecture 34 The first style of lifting a lady by a gentleman
Lecture 35 The second style of lifting a lady by a gentleman
Lecture 36 Double dance style
This course is for those who want book illustration,Character designer,Drawing and illustration students,Game character designer,Practical costume designer


humanstyleanatomydrawpye6m.jpg


Download from RapidGator


Download from DDownload


Animal Character Drawing (Cat, Dog, Horse, Rabbit & Mouse)

ucxgmoq779ernljlfpppdp0in3.jpg


Animal Character Drawing (Cat, Dog, Horse, Rabbit & Mouse)
Last updated 2/2022
MP4 | Video: h264, 1280x720 | Audio: AAC, 44.1 KHz
Language: English | Size: 6.26 GB | Duration: 4h 57m

How to character illustration and character drawing of animal with pencil


What you'll learn
During the course the student is trained to draw more professional animal characters.
And he finds the mental ability to create the works he has in his mind.
Students get acquainted with the rules and principles of work and are guided step by step to draw a animal character.
Students to be able to draw a character in different animal.

Requirements
B and B2 Pencil
Pencil etude and suitable tip of etude
Eraser
Etude Eraser
Colored pencils from any brand but Faber-Castell are recommended
Pencil etude and suitable tip of etude
large brush for removing erasers

Description
If you decide to become a professional character designer or illustrator, and you can easily design different Animal characters.This course is for you.This course is suitable for those who like to work in the field of character design, animation, illustration, comics, and making computer games.In the animal character design course, we give everyone the ability to create the works they have in mind. In this course, the student learns quite fundamentally how to draw a animal character. The student learns how to design different parts of a animal character, using geometric shapes.You do not need expensive tools to start this course and you can become a character designer with a few pencils, paper, and accessories.In this course you will learn the following topics:Section 1: Required tools and basics of animal illustration.Section 2: Illustration and design of three models of cats.Section 3: Illustration and design of three models of dogs.Section 4: Illustration and design of three models of rabbits.Section 5: Drawing the bone structure and then illustrate and draw three models of horse.Section 6: Illustration and design of three models of mouses.I hope that by teaching this course, you will gain the ability to create your favorite character.
Overview
Section 1: Introduction
Lecture 1 Introduction
Lecture 2 Introducing the tools
Lecture 3 Basic principles of animal illustration
Section 2: How to Draw Cat
Lecture 4 General illustration of the first cat
Lecture 5 Drawing the details of the first cat
Lecture 6 General illustration of the second cat
Lecture 7 Drawing the details of the second cat
Lecture 8 Illustration of the third cat
Section 3: How to Draw Dog
Lecture 9 General illustration of the first dog
Lecture 10 Drawing the details of the first dog
Lecture 11 General illustration of the second dog
Lecture 12 Drawing the details of the second dog
Lecture 13 General illustration of the third dog
Lecture 14 Illustration of the details of the third dog
Section 4: How to Draw Rabbit
Lecture 15 General illustration of the first rabbit
Lecture 16 Drawing the details of the first rabbit
Lecture 17 General illustration of the second rabbit
Lecture 18 Drawing the details of the second rabbit
Lecture 19 Illustration of the third rabbit
Section 5: How to Draw Horse
Lecture 20 The initial structure of the body of the first horse
Lecture 21 Drawing the total volume of the first horse
Lecture 22 Drawing the details of the body of the first horse
Lecture 23 General illustration of the second horse
Lecture 24 Drawing the details of the second horse
Section 6: How to Draw Mouse
Lecture 25 General illustration of the first mouse
Lecture 26 Drawing the details of the first mouse
Lecture 27 General illustration of the second mouse
Lecture 28 Drawing the details of the second mouse
Lecture 29 General illustration of the third mouse
Lecture 30 Drawing the details of the third mouse
Suitable for those who do character design,Who want to illustrate different characters according to the real photo,For those who characterize, those who are in the field of animation, animators,Cartoonists,Those who do video advertising,Those who make computer game characters,Those who do children's book illustrations are suitable.


animalcharacterdrawin3yfml.jpg


Download from RapidGator


Download from DDownload


Projects & Project Finance (Law Course)

wgkbn3fasqualhy1sgw6l7vemc.jpg


Projects & Project Finance (Law Course)
Last updated 2/2022
MP4 | Video: h264, 1280x720 | Audio: AAC, 44.1 KHz
Language: English | Size: 5.43 GB | Duration: 3h 54m

Learn in-demand skills and gain practical, commercial understanding of Projects and Projects Finance transactions


What you'll learn
Law
Legal skills
Practical law
Transaction cycle of project transaction
Transaction cycle of project finance transaction
Regulatory framework in India

Requirements
None

Description
About this course - Dual certification courseSkillxPro in association with DSK Legal brings you a comprehensive course on Projects and Projects Finance in which you will learn and understand every element of transactions involving setting up a project and financing of a project, including the major stakeholders, contracts involved (its terms, interpretation, etc.), and regulatory aspects. You will experience the complete transaction cycle starting from identification of a project, to financing, to the closing of the transaction. You will gain insight into the complexities and dilemmas that arise in these transactions. This course takes an interdisciplinary approach to a project's transaction including structuring of projects, transactions and financing, various regulatory considerations, disputes, etc.Increased Demand for Projects LawyerThe increased impetus to develop infrastructure in the country is attracting both domestic and international players. Private sector is emerging as a key player across various infrastructure segments, ranging from roads and communications to the power and energy sectors. In May 2018, India ranked 4th in the Asia Pacific region out of 25 nations on an index that measures its overall power. India is ranked fourth in wind power, fifth in solar power, and fifth in renewable power installed capacity as of 2018. India ranked sixth in list of countries to make most investments in clean energy with US$ 90 billion. Investment Scenario - Large investment in infrastructure has provided momentum to overall PE/VC investments into India which touched an all-time high where infrastructure recorded US$ 1.4 billion during October 2019 accounting 43 percent of all the investment of the month. Between April 2000 and June 2019, the industry attracted US$ 14.54 billion in Foreign Direct Investment (FDI), accounting for 3 percent of total FDI inflows in India.The boom in Infrastructure, Energy and Projects sector is carrying over to the legal profession, with many law firms and corporate expanding teams in these fields. As a result, lawyers and employees with the right skill set in Infrastructure, Energy and Projects may have their pick of jobs.Gain in-demand skill setsWhen you finish, you will be adept at drafting major agreements, conduct due diligence, negotiate key terms, understand the commercial nature of project transactions, and advice your company and/or client. You'll be able to apply the acquired skills to justify each stage of the transaction. You will be appropriately equipped to advise different stakeholders including sponsors, lenders, institutional investors, infrastructure and pension funds, commercial banks, corporations, developers, insurance companies and governmental entities across the spectrum of infrastructure asset classes. With the course's unique combination of skills and experience, you will be able to provide clients with integrated advice and guide them through difficult issues on their most important transactions.Learn and understand each stage of a project (development) and a project finance transactionLearn the drafting and working on project financing transaction including a term sheet, loan agreement, and security documentsUnderstand the structure of aforesaid transaction including arrangements and agreements between key partiesLearn and understand in detail the nuances of the PPP Model and a typical lifecycle of a PPP projectLearn the due diligence process carried out during project financingUnderstand the bidding process in projects transaction and documents involved thereinLearn the negotiation between parties at pre and post procurement stageUnderstand the regulatory framework in relation to procurement process and project financingAbout DSK Legal: is recognized for work done in all stages of infrastructure development, from proof of concept to final commissioning. Correspondingly DSK trains and exposes its lawyers to all the stages of infrastructure development to provide an overall outlook and understanding. Likewise, we have tried designing the course in a manner to provide you with an overall understanding of the projects sector and transaction involved therein.Certification: On completion of the course, you shall be awarded with a certificate from Udemy. Additionally, you shall also be accredited with a certificate from SkillxPro and DSK Legal, on fulfilling the marking criteria as provided in the course instructions.Enrol in this course on Projects & Project Finance (Law Course), today.
Overview
Section 1: Course Overview
Lecture 1 Course Instructions & Format
Lecture 2 Grading Policy
Lecture 3 Abbreviations and Acronyms
Lecture 4 Agenda
Section 2: Introduction to Projects
Lecture 5 Reading: Scope of "Projects" - Harmonized list of Infrastructure sub-sectors
Lecture 6 Video: Scope of the term "projects"
Lecture 7 Reading: Market Size and National Infrastructure Pipeline (NIP)
Lecture 8 Video: Market trends in the sector
Lecture 9 Reading: Project Company (SPV)
Lecture 10 Video: Structure of Project and Project Finance Transaction
Lecture 11 Reading: Overview of Contractual Arrangement on PPP Project
Lecture 12 Video: Contractual arrangement in PPP Project
Lecture 13 Reading: Glossary of Terms
Lecture 14 Video: Key Terms and Concepts
Section 3: Introduction to Public Private Partnership
Lecture 15 Reading: Public Private Partnership (PPP) - Key Considerations
Lecture 16 Video: Introduction - Meaning and Purpose
Lecture 17 Reading: PPP Value Drivers
Lecture 18 Video: Advantages of PPP Projects
Lecture 19 Video: Evolution of PPP in India & Abroad
Lecture 20 Supplemental Reading: PPP and PFI
Lecture 21 Reading: Overview of Legislative Framework w.r.t. Infrastructure Project
Lecture 22 Video: Legislation governing PPP Projects
Lecture 23 Supplemental Reading: Legal Framework: Public Procurement
Lecture 24 Reading: Considerations in determining the Mode of PPP
Lecture 25 Video: Modes of PPP
Lecture 26 Video: Breading down PPP Process
Lecture 27 Supplemental Reading: Characteristics of major PPP Models Families
Section 4: Transaction Cycle of Projects Transaction
Lecture 28 Video: Overview of PPP Transaction Cycle & Role of Lawyers
Lecture 29 Supplemental Reading: Recap- PPP Transaction Cycle
Lecture 30 STAGE 1: IDENTIFICATION STAGE
Lecture 31 Video: Identification Stage
Lecture 32 Supplemental Reading: Identification and implementation strategy
Lecture 33 STAGE 2: DEVELOPMENT STAGE
Lecture 34 Video: Development Stage - Feasibility Study and Due Diligence
Lecture 35 Supplemental Reading: Analysis- Feasibility Study
Lecture 36 Reading: Checklist- Pre-procurement Activities
Lecture 37 STAGE 3: PROCUREMENT STAGE
Lecture 38 Video: Procurement Stage
Lecture 39 Supplemental Reading: Recap: Procurement Stage
Lecture 40 DOCUMENTATION: BID DOCUMENTS
Lecture 41 Video: Request for Qualification
Lecture 42 Supplemental Reading: Request for Qualification: Structure and Key Ingredients
Lecture 43 Video: Request for Proposal
Lecture 44 Supplemental Reading: Request for Proposal: Structure and Key Ingredients
Lecture 45 DOCUMENTATION: PROJECT DOCUMENTS
Lecture 46 Video: Concession Agreement
Lecture 47 Supplemental Reading: Analysing Concession Agreement
Lecture 48 Supplemental Reading: Typical Clauses and Negotiation of Concession Agreement
Lecture 49 Supplemental Reading: Other Documents
Lecture 50 Supplemental Reading: Model Documents
Lecture 51 NEGOTIATION
Lecture 52 Supplemental Reading: Negotiation at Pre & Post Procurement Stage
Lecture 53 Optional Reading: EPC Contract
Lecture 54 Optional Reading: Power Purchase Agreement (PPA)
Lecture 55 IMPLEMENTATION STAGE
Lecture 56 Video: Implementation Stage
Lecture 57 Video: Contract Management
Lecture 58 Supplemental Reading: Contract Management
Section 5: Introduction to Project Finance
Lecture 59 Reading: Project Finance: Meaning, Characteristics & Types
Lecture 60 Video: Introduction - Corporate Finance v Project Finance
Lecture 61 Supplemental Reading: Corporate Finance v Project Finance
Lecture 62 Supplemental Reading: Advantages & Disadvantages of Project Finance
Lecture 63 Reading: Introduction to Project Finance Transaction Structure
Lecture 64 Video: Structure of Project Finance Transaction
Lecture 65 Supplemental Reading: Analysis: Project Finance Transaction Structure
Lecture 66 Reading: Overview- Sources of Finance
Lecture 67 Video: Sources of Finance
Lecture 68 Supplemental Reading: Analysis of Sources of Finance
Section 6: Project Finance Transaction Cycle
Lecture 69 Video: Overview of the Transaction Cycle of Project Financing
Lecture 70 Supplemental Reading: Transaction Cycle of Project Financing
Lecture 71 STAGE 1: PRE-FINANCING STAGE
Lecture 72 Reading: Key action items & tasks in a Due Diligence
Lecture 73 Video: Due Diligence - Introduction and Structure of Due Diligence Report
Lecture 74 Video: Due Diligence - Considerations by Lawyers
Lecture 75 Supplemental Reading: Key Risk And Mitigants in Project Financed Transactions
Lecture 76 Supplemental Reading: Due Diligence Report: Drafting, Structure & Key Clauses
Lecture 77 STAGE 2: FINANCING STAGE
Lecture 78 DOCUMENTATION: TERM SHEET
Lecture 79 Video: Term Sheet
Lecture 80 Supplemental Reading: Analysis and Drafting of Term Sheet
Lecture 81 DOCUMENTATION: PROJECT FINANCING DOCUMENTS
Lecture 82 Video: Loan Agreement (Structure)
Lecture 83 Video: Important Clauses of Loan Agreement
Lecture 84 Video: Negotiation
Lecture 85 Supplemental Reading: Loan Agreement - Structure, Drafting and Negotiation
Lecture 86 SECURITY
Lecture 87 Video: Securities
Lecture 88 Supplemental Reading: Security - Forms and Perfection of Security
Lecture 89 Supplemental Reading: Security Documentation
Lecture 90 Reading: Financial Closure and Disbursement
Lecture 91 POST DISBURSEMENT FORMALITIES
Lecture 92 Video: Post Disbursement Formalities
Section 7: Regulatory Framework & Case Study
Lecture 93 Reading: Overview of Regulatory Framework - Project Finance
Lecture 94 Video: Foreign Investments
Lecture 95 Reading: Bankruptcy proceeding in respect of the project company
Lecture 96 Video: Insolvency Law
Lecture 97 Supplemental Reading: RBI Circular June 7, 2019
Lecture 98 Video: Other Compliances - Reporting, Notary & Stamp Duty
Lecture 99 Case Study - Public Private Partnership Projects in India
Section 8: Final Assessment
Section 9: Understanding Practice Area & Career Guide
Lecture 100 Practice Perspective
Lecture 101 Career Guide
Law Students,Lawyers,Professionals working in Project Sector,Bankers,EPC Professionals


projectsprojectfinanciui1w.jpg


Download from RapidGator


Download from DDownload


Realistic Colored Pencil Drawing: Portrait Drawing Course

zscruewotfvmpdhe2iic3steim.jpg


Realistic Colored Pencil Drawing: Portrait Drawing Course
Last updated 7/2021
MP4 | Video: h264, 1280x720 | Audio: AAC, 44.1 KHz
Language: English | Size: 7.40 GB | Duration: 5h 43m

Learn How to Draw Realistic Famous Face with Colored Pencil. Portrait Drawing with Colored Pencil is a Cool Art


What you'll learn
students learn how to draw a portrait of a celebrity which shows the importance of volume and coloring in painting.
learn painting dark and bronze skin as well as stubble and beard
learn how to draw accessories of Johnny Depp such as his necklace and headband

Requirements
Color pencil ( Marc Faber-Castell Polychrome is recommended)
Types of erasers ( Chargeable, Pencil Sharpener)
Cutter
Steinbach or Fabriano drawing paper ( low gram and tissue less)

Description
In this course, you'll learn how to draw realistic famous face with colored pencil from the ground up. The course is supported with over 5.5 hours of clear content that I walk you through each step of the way.Here's what you get with the course:- In this course, students learn how to draw a portrait of a celebrity which shows the importance of volume and coloring in painting.- Also you will learn how to color dark and bronze skins as well as stubble and beard.- Then students learn how to draw accessories of Johnny Depp such as his necklace and headband.- By the end of this course, students will be able to recognize and analyze colors from an image of partly complicated models and also mix colors.- Additionally, you learn how to paint the parts and tissue of beard, hair, fabric, and skin and also use some tools like a cutter.- There is no age limit in the learning of this course, and all who can recognize color and combination can attend this course.What else will you get?- Personal contact with me, the course tutor- Lifetime access to course materials- Understanding of how professional art is created-This all comes under one convenient easy to use platform. Plus you will get fast, friendly, responsive support on the Udemy Q&A section of the course or direct message.-I will be here for you every step of the way!-So what are you waiting for? Sign up now and change your art world today!
Overview
Section 1: Introduction
Lecture 1 Introduction
Lecture 2 Main Picture
Lecture 3 Faber castell polychrome and classic color chart
Section 2: Painting eye and eyebrow and right part of the face
Lecture 4 Part 1
Lecture 5 Part 2
Lecture 6 Part 3
Section 3: learning the tissue of the skin
Lecture 7 Part 4
Lecture 8 Part 5
Lecture 9 Part 6
Section 4: Adding dark parts of skin and volume creation of the right part of the face
Lecture 10 Part 7
Lecture 11 Part 8
Lecture 12 Part 9
Lecture 13 Part 10
Lecture 14 Part 11
Section 5: Completing the hair of right part of the face
Lecture 15 Part 12
Lecture 16 Part 13
Lecture 17 Part 14
Lecture 18 Part 15
Section 6: Headband
Lecture 19 Part 16
Section 7: Eye and skin of the left part of the face
Lecture 20 Part 17
Section 8: Completing the details of the lighting of the right part of the face
Lecture 21 Part 18
Section 9: Volume creation and painting the nose
Lecture 22 Part 19
Lecture 23 Part 20
Section 10: Painting eye and eyebrow of the left part
Lecture 24 Part 21
Lecture 25 Part 22
Lecture 26 Part 23
Section 11: Skin tissue of the left part of the face
Lecture 27 Part 24
Section 12: Creating the tissue of skin using a cutter and eraser
Lecture 28 Part 25
Lecture 29 Part 26
Section 13: Basis of Beard and mustache
Lecture 30 Part 27
Lecture 31 Part 28
Section 14: Lips
Lecture 32 Part 29
Lecture 33 Part 30
Section 15: Drawing Beard and mustache
Lecture 34 Part 31
Lecture 35 Part 32
Section 16: Coloring and volume creation of the skin of neck and hand
Lecture 36 Part 33
Lecture 37 Part 34
Lecture 38 Part 35
Lecture 39 Part 36
Section 17: Hair of left part of the face
Lecture 40 Part 37
Lecture 41 Part 38
Section 18: Painting headband
Lecture 42 Part 39
Lecture 43 Part 40
Section 19: Necklace and completing headband
Lecture 44 Part 41
Lecture 45 Part 42
Section 20: Hair ornaments
Lecture 46 Part 43
Lecture 47 Part 44
Section 21: Coloring the clothes and skin
Lecture 48 Part 45
Lecture 49 Part 46
Lecture 50 Part 47
Lecture 51 Part 48
This course was designed for those who are interested in painting and coloring techniques and students of all three levels (Primary, intermediate and advanced) can join this course and learn how to draw a portrait of Johnny Depp


realisticcoloredpencim8dyc.jpg


Download from RapidGator


Download from DDownload


Blender For Character Creation

u7wok5ehfktc9y2gpjszuubifl.jpg


Blender For Character Creation
Last updated 1/2020
MP4 | Video: h264, 1280x720 | Audio: AAC, 44.1 KHz
Language: English | Size: 6.49 GB | Duration: 8h 24m

Create character with Blender apply armature and create animation


What you'll learn
Understand 3D rendering of character
Create character using the anatomy
Create low poly character
Create character from picture
Add materials to character
Dress character
Understand armature principles
Create armature for character
Use Rigify addon
Use Manuel Bastioni Addon
Understand animation
Create animation from a character

Requirements
You need to have Blender
You need to have basics of Blender

Description
What is blenderBlender is a 3D computer program for the development of 3D objects, animations, visual effects and much more ... Blender is an open source program, so it can be used for free. It offers many features, including 3D modeling, texturing, motion simulation, animation, rendering. Blender is therefore an extremely versatile and complete modeling software. It is possible to model characters.Why use Blender?- It's free software. The fact that it is free makes it much more powerful than any other tool.- It can run on any machine. Blender is compatible with all computers.- It allows efficient modeling of any object.- It has a number of impressive features. It is powerful software that is full of possibilities.- You can export Blender files to other formats.- It is like no other. Blender allows the massive use of keyboard shortcuts to go faster.- Contextual menus have been revised and added to allow even more settings.Blender character creationBlender is the ideal software for modeling low poly characters but also of worked characters. Start your 3D modeling adventure with the creation of characters in Blender. It is possible to create a complete face and character from scratch. It is also possible to add clothes. Blender allows you to add reinforcements, they are very important because it is then the basis for creating a character animation.The courseIn this training you will see how to easily and quickly create a 3D character step by step. Through several examples you will have different approaches that will allow you to create a character in 3D. You will start by creating a Low Poly character, then you will see how to create a character from a photo. You will also see how to create a face by a specific process. You will also see the basics of frames to position a frame on a character. Addon Rigify will be studied to easily generate reinforcements. Then we will see the basics of animating a character from a frame. An introduction to Manuel Bastioni Addon will also be seen to directly generate a character.
Overview
Section 1: Introduction
Lecture 1 Introduction
Section 2: Low poly character
Lecture 2 Low poly character create body part 1
Lecture 3 Low poly character create body part 2
Lecture 4 Low poly character create body part 3
Lecture 5 Low poly character edit face
Lecture 6 Low poly character materials part 1
Lecture 7 Low poly character materials part 2
Lecture 8 Low poly character add armature
Lecture 9 Low poly character start rendering
Section 3: Create character from image
Lecture 10 Position the images
Lecture 11 Create the body
Lecture 12 Create the legs
Lecture 13 Create the feet
Lecture 14 Create the arms
Lecture 15 Create the hands
Lecture 16 Create the head part 1
Lecture 17 Create the head part 2
Lecture 18 Create the head part 3
Lecture 19 Create the eyes
Lecture 20 Finish the work
Lecture 21 Subdivision surface
Lecture 22 Add shirt part 1
Lecture 23 Add shirt part 2
Lecture 24 Add pants part 1
Lecture 25 Add pants part 2
Lecture 26 Add shoes
Lecture 27 Skin texture
Lecture 28 Eyes materials
Lecture 29 Add hair
Lecture 30 Create armature with Rigify
Section 4: Face modeling process
Lecture 31 Create face part 1
Lecture 32 Create face part 2
Lecture 33 Create face part 3
Lecture 34 Create face part 4
Lecture 35 Create face part 5
Lecture 36 Create face apply skin texture
Lecture 37 Create face apply eyes texture
Section 5: Two process to create clothes
Lecture 38 Create shirt part 1
Lecture 39 Create shirt part 2
Lecture 40 Create pants part 1
Lecture 41 Create pants part 2
Section 6: Armature
Lecture 42 Basics of armature part 1
Lecture 43 Basics of armature part 2
Lecture 44 Apply armature on character part 1
Lecture 45 Apply armature on character part 2
Section 7: Rigify
Lecture 46 Install Rigify
Lecture 47 Introduce metarig
Lecture 48 Apply armature on character
Lecture 49 Edit layers and groups
Lecture 50 Change layers name
Lecture 51 Add bones
Lecture 52 Link character with metarig
Lecture 53 Move the character with layers
Lecture 54 Reset animation and pose
Section 8: Character animation
Lecture 55 Basic character animation part 1
Lecture 56 Basic character animation part 2
Lecture 57 Basic character animation part 3
Lecture 58 Character animation with Rigify part 1
Lecture 59 Character animation with Rigify part 2
Section 9: Manuel Bastioni
Lecture 60 Install Addon
Lecture 61 Generate character
Lecture 62 Edit body
Lecture 63 Materials
Lecture 64 Use armature
People who want to make 3D rendering,People who want to create 3D character,People who want to specialize in blender


blenderforcharactercrcwdxh.jpg


Download from RapidGator


Download from DDownload


Audio Engineering Fundamentals

y02hscpkn6mfia1pgcbtia1dl9.jpg


Audio Engineering Fundamentals
Published 8/2022
MP4 | Video: h264, 1280x720 | Audio: AAC, 44.1 KHz
Language: English | Size: 5.23 GB | Duration: 12h 7m

Theoretical Concepts of Sound Production


What you'll learn
Learners will obtain a thorough understanding of audio theory fundamentals
Learners will be able to use the course content as a springboard with which to improve their creative craft
Learners will be able to apply new knowledge and skill to their chosen digital audio workstation
Learners will be able to more effectively and confidently conduct audio recordings
Learners will be able to apply audio theory in order to troubleshoot audio systems

Requirements
There is no prior knowledge expected of learners undertaking this course. It would be beneficial for students to have access to a digital audio workstation of some kind in order to follow along with some of the materials, but this is not essential.

Description
This course will be a deep dive into important audio engineering and sound production fundamental topics. Knowledge of these topics will improve your skills and confidence in any facet of audio production. The concepts are mostly taught in the music production framework, but the course is intended to be applicable to those interested in film audio, game sound design and podcast recording and editing. The concepts taught are transferable between all of those subcategories of audio engineering.Whether you're just starting out or you've been producing great sounds for a while now I guarantee there will be fundamentals missing from your knowledge base. The overarching topics in this course are Sound Waves, Digital Audio, Analogue Audio Signals, Microphones, Signal Processing and Human Localization of Sounds.Course concepts are demonstrated using Pro Tools, however it is not critical that you following along with or use Pro Tools. The concepts are generic and can be emulated and solidified using any digital audio software! It is encouraged that you follow along with the demonstrations in your own software so that the concepts taught can stick in your mind.Summaries of some of the lessons are downloadable and it is highly encouraged that you download and review these summaries at a later date so that the core concepts can stay with you throughout your audio journey!
Overview
Section 1: Sound Waves
Lecture 1 Sound Waves
Lecture 2 Sound Waves Continued
Lecture 3 Sound Waves and Air Molecules
Lecture 4 Multiple Sounds Playing at Once
Lecture 5 The Polarity Inversion
Lecture 6 Sine Waves Out of Phase
Lecture 7 Amplitude
Lecture 8 Amplitude Continued
Lecture 9 Frequency
Lecture 10 Sine Wave Frequency Demonstration
Lecture 11 Wavelength
Lecture 12 Harmonic Sounds
Lecture 13 String Harmonics
Lecture 14 Octaves and Harmonic Intervals
Lecture 15 EQ Curves
Lecture 16 Noise Signals
Lecture 17 Equal Loudness Curves
Lecture 18 Comb Filtering
Lecture 19 Polarity Inversion Revisited
Lecture 20 Polarity Inversion Pink Noise Demo
Lecture 21 A Polarity Inversion Has No Audible Effect in Isolation
Lecture 22 Inversion vs 180 shift vs Comb Filter
Section 2: Digital Audio
Lecture 23 Digital Audio Overview
Lecture 24 Samples Points in Software
Lecture 25 The Nyquist Theorem (Sampling Theorem)
Lecture 26 Importing the Wrong Sample Rate
Lecture 27 Converting Sample Rates
Lecture 28 Oversampling in Plugins
Lecture 29 Bit Depths
Lecture 30 Bit Crushers
Lecture 31 Bit Crusher Revisited
Lecture 32 Bit Depths and Quantization Distortion
Lecture 33 Floating Point Bit Depth
Lecture 34 Floating Point Bit Depth Part 2
Lecture 35 Recorders with Floating Point
Section 3: Audio Signals
Lecture 36 Microphone Level Signals
Lecture 37 Microphone Preamps
Lecture 38 Mic Level and Line Level
Lecture 39 Pro Line Level and Consumer Line Level
Lecture 40 Speaker Level
Lecture 41 Instrument Level
Lecture 42 Bridging Impedance
Lecture 43 DI Boxes
Lecture 44 Unbalanced Connectors
Lecture 45 Balanced Cables
Lecture 46 Headphone Connectors
Section 4: Microphones
Lecture 47 Dynamic Microphones
Lecture 48 Condenser Microphones
Lecture 49 Phantom Power
Lecture 50 Ribbon Microphones
Lecture 51 Comparing Our Three Mic Types Part 1
Lecture 52 Comparing Our Three Mic Types Part 2
Lecture 53 Polar Patterns
Lecture 54 Plosives
Lecture 55 The Proximity Effect
Section 5: Signal Processing
Lecture 56 Gate/Expanders
Lecture 57 Compression Explained
Lecture 58 Kick and Snare Compression
Lecture 59 Voice Compression
Lecture 60 Parallel Compression
Lecture 61 Bass Compression
Lecture 62 Side Chain Compressor
Lecture 63 De Esser (Side Chain Example)
Lecture 64 Side Chain Kick and Synth
Lecture 65 Reverb Demonstration
Lecture 66 Reverb Drum Timing
Lecture 67 Reverb Auxiliary Inputs
Lecture 68 High Pass Filter on Reverb Auxiliary
Lecture 69 Pre and Post-Fader Sends
Lecture 70 Convolution Reverbs
Lecture 71 Delay
Lecture 72 Chorus
Lecture 73 Flanger
Lecture 74 Distortion
Lecture 75 Tape Saturation
Section 6: Localization
Lecture 76 The Illusion of Stereo
Lecture 77 Localization of Sounds
Lecture 78 Diffraction
Lecture 79 Speaker vs Headphone Mixing
Lecture 80 Single vs Stereo Microphone Recording
Section 7: Finale and Recap!
Lecture 81 Final Recap
This course is for musicians, audio engineers or sound designers who are either beginners or intermediates, who are looking for a course that will give a firm foundation of audio engineering knowledge with which to build their skills upon


audioengineeringfunda8gfa1.jpg


Download from RapidGator


Download from DDownload


Drawing & Painting With Ballpoint Pen: Art Of Pen Drawing

oyxcrzf8jg9rkeqmdh4qog4i86.jpg


Drawing & Painting With Ballpoint Pen: Art Of Pen Drawing
Last updated 7/2020
MP4 | Video: h264, 1280x720 | Audio: AAC, 44.1 KHz
Language: English | Size: 9.01 GB | Duration: 6h 58m

Learn The Colored Ballpoint Pen Drawing Technique Easily. This Art is so Amazing Drawing, Painting, and Sketching


What you'll learn
Acquaintance with necessary tools for Ballpoint Pen drawing
Learn hatching and tonality
Learn how to draw simple models with monochrome pens
Learn how to draw beauty works like autumnal leaf, a simple eye and lip with colored Ballpoint Pens
Learn how to create different kinds of genders with ballpoint pens
Learn how to draw a cloud , brick wall , tree and wineglass with Colored Ballpoint pens
Learn how to draw shoes and a beauty butterfly with Colored Ballpoint Pens
Learn how to draw a real eye and lip with Colored Ballpoint Pens

Requirements
Monochrome ballpoint pens (blue, black)
Colored ball point pens with different brands
Gel pens with transparent colors
Papers: Steinbach paper, Fabriano paper, beige Fabriano paper

Description
In this course, you'll learn the ballpoint pen drawing technique from the ground up. The course is supported with over 7 hours of clear content that I walk you through each step of the way.Colored ballpoint pen technique is one of the newest techniques of drawing and nowadays, it is being developed. The transparent and brilliant colors of colored ballpoint pens can attract the eyes of every audience. The benefits of this technique can be seen in availability and affordability of tools. These features allow you to start drawing in every situation and time with the simple tools which are portable too.Another important advantage of this technique is the high durability of the works. One of the most important features of this technique is that the ink of colored ballpoint pens will be dried immediately, so the paper and your desk won't be dirty.Here's what you get with the course:- After introducing all kinds of ballpoint pens and usable tools in the first phase, I'll teach you how to hatch in the correct way with ballpoint pen.- also you will learn the way of creating different tonalities of color by controlling hand pressure and over hatching.- In the next phase, I'll teach you, how to shade and draw simple models with monochrome ballpoint pens and for more practice I'll draw a wooden bucket, tree and a zebra.- In the coloring with colored Ballpoint pen section, I'll teach you, how to color an autumnal leaf, a simple lip and an eye with colored ballpoint pens.-Then I'll teach you how to create different kinds of genders with colored ballpoint pens, such as a cloud, a brick wall, a tree and a wineglass.-Next you will learn how to color a pair of shoes and a beautiful butterfly in this section.- And finally, I'll teach you the way of drawing and coloring a real lip and a real eye with all the details.- What else will you get?- Personal contact with me, the course tutor- Lifetime access to course materials - Understanding of how professional art is created- This all comes under one convenient easy to use platform. Plus you will get fast, friendly, responsive support on the Udemy Q&A section of the course or direct message.- I will be here for you every step of the way!- So what are you waiting for? Sign up now and change your art world today!
Overview
Section 1: Introduction
Lecture 1 Introduction to the Course
Section 2: Introducing The necessary tools
Lecture 2 Introducing a variety of pens and cardboard that can be used in this technique
Section 3: Hatching and Tonality
Lecture 3 Teaching the correct way of hatching with ballpoint pens
Lecture 4 creating different tonalities by over hatching and controlling the hand pressure
Section 4: How to draw simple models with a monochrome pen
Lecture 5 How to draw a wooden bucket with monochrome ballpoint pen
Lecture 6 How to draw a tree with monochrome ballpoint pen part 1
Lecture 7 How to draw a tree with monochrome ballpoint pen part 2
Lecture 8 How to draw a tree with monochrome ballpoint pen part 3
Lecture 9 How to draw head of a zebra with monochrome ballpoint pen part 1
Lecture 10 How to draw head of a zebra with monochrome ballpoint pen part 2
Section 5: Teaching the correct way of coloring with colored ballpoint pens
Lecture 11 How to create different tonalities by hatching part 1
Lecture 12 How to create different tonalities by hatching part 2
Lecture 13 How to draw a beautiful autumnal leaf with colored ballpoint pens
Lecture 14 How to draw a lip with colored ballpoint pens
Lecture 15 How to draw and color a simple eye with colored ballpoint pens
Section 6: How to create different kinds of genders with ballpoint pens
Lecture 16 How to draw a beautiful cloud with colored ballpoint pens
Lecture 17 How to draw a brick wall with colored ballpoint pens
Lecture 18 How show the gender of a tree with colored ballpoint pens
Lecture 19 How to draw a wineglass with colored ballpoint pens
Section 7: The Shoes Project
Lecture 20 The shoes project picture
Lecture 21 How to draw shoes with colored ballpoint pens part 1
Lecture 22 How to draw shoes with colored ballpoint pens part 2
Lecture 23 How to draw shoes with colored ballpoint pens part 3
Section 8: The Butterfly Project
Lecture 24 The butterfly project picture
Lecture 25 How to draw a beautiful butterfly with colored ballpoint pens part 1
Lecture 26 How to draw a beautiful butterfly with colored ballpoint pens part 2
Section 9: The Lip Project
Lecture 27 The Lip project picture
Lecture 28 How to draw a real lip with colored ballpoint pens part 1
Lecture 29 How to draw a real lip with colored ballpoint pens part 2
Lecture 30 How to draw a real lip with colored ballpoint pens part 3
Lecture 31 How to draw a real lip with colored ballpoint pens part 4
Lecture 32 How to draw a real lip with colored ballpoint pens part 5
Lecture 33 How to draw a real lip with colored ballpoint pens part 6
Lecture 34 How to draw a real lip with colored ballpoint pens part 7
Lecture 35 How to draw a real lip with colored ballpoint pens part 8
Section 10: The Eye Project
Lecture 36 The Eye Project picture
Lecture 37 How to draw a real Eye with colored ballpoint pens part 1
Lecture 38 How to draw a real Eye with colored ballpoint pens part 2
Lecture 39 How to draw a real Eye with colored ballpoint pens part 3
Lecture 40 How to draw a real Eye with colored ballpoint pens part 4
Lecture 41 How to draw a real Eye with colored ballpoint pens part 5
Lecture 42 How to draw a real Eye with colored ballpoint pens part 6
Lecture 43 How to draw a real Eye with colored ballpoint pens part 7
Lecture 44 How to draw a real Eye with colored ballpoint pens part 8
Lecture 45 How to draw a real Eye with colored ballpoint pens part 9
Lecture 46 How to draw a real Eye with colored ballpoint pens part 10
Lecture 47 How to draw a real Eye with colored ballpoint pens part 11
Lecture 48 How to draw a real Eye with colored ballpoint pens part 12
Lecture 49 How to draw a real Eye with colored ballpoint pens part 13
Lecture 50 How to draw a real Eye with colored ballpoint pens part 14
Lecture 51 How to draw a real Eye with colored ballpoint pens part 15
Lecture 52 How to draw a real Eye with colored ballpoint pens part 16
Lecture 53 How to draw a real Eye with colored ballpoint pens part 17
Lecture 54 How to draw a real Eye with colored ballpoint pens part 18
Anyone wanting to learn work with ballpoint Pens,Anyone interested in starting to draw with colored ballpoint pens,Students who decided to create wonderful works with Ballpoint Pens,Students who don't have knowledge or have a little knowledge about ballpoint pens technique,Students who are motivated to create amazing artwork with ballpoint pens


drawingpaintingwithbaupe53.jpg


Download from RapidGator


Download from DDownload


Affinity Designer The Complete Course

mkuskhglqc8omwf6qr1ewqjcj5.jpg


Affinity Designer The Complete Course
Last updated 10/2020
MP4 | Video: h264, 1280x720 | Audio: AAC, 44.1 KHz
Language: English | Size: 6.91 GB | Duration: 12h 52m

Learn Affinity Designer for vector drawing, graphic designs and photo editing


What you'll learn
Understand the dashboard
Manage the windows
Master the vector tools
Master the tools in pixel persona
Create shapes
Add text
Manage grid and guides
Add filters
Master adjustment layers
Import images
Create logo
Create flyer
Create drawing with shapes
Edit photo
Create visit card

Requirements
You need to install Affinity Designer

Description
Affinity DesignerAffinity Designer is a powerful graphic design program for all your needs. It is a software that allows you to work on vector format as well as photo editing. You can use it for logos, vector illustrations, graphic documents, but also photo editing. The tool allows you to work in two different modes, depending on whether you want to work in vector format or in raster format. In the same way, it is very easy to juggle between the two modes, and to combine the tools of one or the other on the same graphic design. The performance is impressive, the interface allows you to work efficiently with clear and precise controls.Main features- Layer system- Vector drawing tools- Advanced retouching settings- Filters- Work plans- And moreTraining courseIn this training you will learn the Affinity designer software in its entirety. You will quickly obtain a good level which will allow you to make vector drawings, graphic documents, and do photo retouching. All the features of the software will be seen in the course. By acting step by step, operating mode of the interface, principle of layers, use of the various tools for both vector and raster mode, photo settings, application of filters, you will be able to move forward quickly in the process. 'learning. Training will also allow you to see all the features seen in the course.
Overview
Section 1: Introduction
Lecture 1 Introduction
Section 2: Start
Lecture 2 Dashboard
Lecture 3 Preferences
Lecture 4 Create new document
Lecture 5 History
Lecture 6 Hand tool
Lecture 7 Zoom tool
Section 3: Layers
Lecture 8 Layers part 1
Lecture 9 Layers part 2
Lecture 10 Layer mask
Lecture 11 Blend mode
Section 4: Grid and guides
Lecture 12 Manage grid
Lecture 13 Add guides
Lecture 14 Add columns and rows
Lecture 15 Smart guides
Section 5: Alignments and distribution
Lecture 16 Alignments
Lecture 17 Distribution
Section 6: Master tools
Lecture 18 Selection tool
Lecture 19 Artboard tool
Lecture 20 Corner tool
Lecture 21 Pen tool
Lecture 22 Node tool
Lecture 23 Point transform tool
Lecture 24 Pencil tool
Lecture 25 Vector brush tool
Lecture 26 Fill tool
Lecture 27 Transparency tool
Lecture 28 Place image tool
Lecture 29 Image inside object
Lecture 30 Vector crop tool
Lecture 31 Rectangle tool
Lecture 32 Rounded rectangle tool
Lecture 33 Ellipse tool
Lecture 34 Basic shape tool
Lecture 35 Advanced shape tool
Lecture 36 Color picker tool
Section 7: Manage objects
Lecture 37 Objects association
Lecture 38 Transformation panel
Lecture 39 Manage symbols
Lecture 40 Manage symmetries
Lecture 41 Duplicate objects
Lecture 42 Groups
Lecture 43 Object selection
Section 8: Color and strokes
Lecture 44 Color panel
Lecture 45 Edit strokes
Section 9: Add text
Lecture 46 Artistic text tool
Lecture 47 Frame text tool
Lecture 48 Character style
Lecture 49 Paragraph style
Lecture 50 Curve text
Lecture 51 Edit letters text
Lecture 52 Image inside text
Lecture 53 Effect text ocean
Section 10: Pixel persona master tools
Lecture 54 Pixel persona
Lecture 55 Rectangular selection tool
Lecture 56 Ellipse selection tool
Lecture 57 Row selection tool
Lecture 58 Column selection tool
Lecture 59 Free hand selection tool
Lecture 60 Selection brush tool
Lecture 61 Refine selection
Lecture 62 Paint brush tool
Lecture 63 Flood fill tool
Lecture 64 Dodge brush tool
Lecture 65 Burn brush tool
Lecture 66 Smudge brush tool
Lecture 67 Blur brush tool
Lecture 68 Sharpen brush tool
Section 11: Pixel persona adjustments
Lecture 69 Adjustment levels
Lecture 70 Adjustment white balance
Lecture 71 Adjustment HSL
Lecture 72 Adjustment black and white
Lecture 73 Adjustment brightness contrast
Lecture 74 Adjustment posterize
Lecture 75 Adjustment vibrance
Lecture 76 Adjustment exposure
Lecture 77 Adjustment shadows highlights
Lecture 78 Adjustment treshold
Lecture 79 Adjustment curve
Lecture 80 Adjustment channel mixer
Lecture 81 Adjustment recolor
Lecture 82 Adjustment selective color
Lecture 83 Adjustment invert
Section 12: Layer effects
Lecture 84 Layer effect gaussian blur
Lecture 85 Layer effect outer shadow
Lecture 86 Layer effect inner shadow
Lecture 87 Layer effects outer glow
Lecture 88 Layer effect inner glow
Lecture 89 Layer effect 3D
Lecture 90 Layer effect bevel emboss
Lecture 91 Layer effect outline
Lecture 92 Layer effect gradient overlay
Lecture 93 Layer effect color overlay
Lecture 94 Layer profile
Lecture 95 Styles
Section 13: Training edit portrait photos
Lecture 96 Make up face part 1
Lecture 97 Make up face part 2
Lecture 98 Change eyes color
Lecture 99 Double exposure
Section 14: Trainings edit landscape photos
Lecture 100 Edit picture with adjustment layer part 1
Lecture 101 Edit picture with adjustment layer part 2
Lecture 102 Selective black and white
Lecture 103 Mix color black and white
Section 15: Trainings basic drawings
Lecture 104 Simple character part 1
Lecture 105 Simple character part 2
Lecture 106 Basic drawing with gradient part 1
Lecture 107 Basic drawing with gradient part 2
Section 16: Training create icons
Lecture 108 Create web icons part 1
Lecture 109 Create web icons part 2
Section 17: Training perspective plan
Lecture 110 Create perspective plan part 1
Lecture 111 Create perspective plan part 2
Section 18: Training graphic documents
Lecture 112 Logo design part 1
Lecture 113 Logo design part 2
Lecture 114 Visit card part 1
Lecture 115 Visit card part 2
Lecture 116 Flyer design part 1
Lecture 117 Flyer design part 2
Lecture 118 Post social network part 1
Lecture 119 Post social network part 2
Lecture 120 Flyer travel part 1
Lecture 121 Flyer travel part 2
Lecture 122 Cover book part 1
Lecture 123 Cover book part 2
Lecture 124 Double page magazine part 1
Lecture 125 Double page magazine part 2
Graphic designer,People who want to do vector drawing, graphic documents and photo editing


affinitydesignertheco0ldxu.jpg


Download from RapidGator


Download from DDownload


How To Draw Face Components With Colored Pencils

uwumxzkegd4lcgycgzsyp12cej.jpg


How To Draw Face Components With Colored Pencils
Last updated 12/2021
MP4 | Video: h264, 1280x720 | Audio: AAC, 44.1 KHz
Language: English | Size: 6.83 GB | Duration: 5h 30m

Learn how to draw and paint face components like nose, lips , ear, eyes and hair with colored pencils


What you'll learn
You will learn how to volume and create texture in a simple and fluent way.
You will also learn how to draw the components of the faces such as (eyes, lips, nose, ears and hair).
You will learn how to draw the nose with a colored pencil.
You you will get acquainted with how to draw and paint the ear.
You will get acquainted with how to draw and paint the lips.
You will get acquainted with how to draw hair.
You will get acquainted with the design and coloring of the eyes.

Requirements
36 FABER-CASTELL Classic Color colored pencil
Etude Eraser
Rechargeable Eraser
Cutter
White pen
Eraser
Paper tape
Steinbach cardboard

Description
In this training course, you will learn how to volume and create texture in a simple and fluent way, and you will also learn how to draw the components of the faces such as (eyes, lips, nose, ears and hair).In the first chapter of this course, we will learn how to draw the nose with a colored pencil. To draw the nose, you must have colorology skills. Recognizing the correct colors in the design will get the main skin color and the right volume in the painting.In the second chapter, you will get acquainted with how to draw and paint the ear. This part of the training is very suitable for people who are interested in face painting, and since the ear is one of the components of the face, its correct execution is very important. In this chapter, we will teach you the correct combination of colors and volume in painting the ear.In the third chapter, you will get acquainted with how to draw and paint the lips. One of the most important parts of the face that gives a special effect to the design in drawing and painting is the human lip, which requires special training and basic steps. In the fourth chapter, you will get acquainted with how to draw hair. Although drawing hair is very simple, but it is still a weakness of many students, and this is because students don't know the key points in relation to hair design, recognizing the directions of coloring hair correctly. Another very important point in painting hair is drawing thin and double-edged hair, that is, the hair strands that we should draw must have a sharp beginning and end.In the last chapter, we will get acquainted with the design and coloring of the eyes. The eye is a very beautiful, delicate and effective organ in the face, which consists of different parts (such as the pupil, iris, tear sac of the eye and the wrinkles of the upper and lower eyelid) and all of them will be fully taught in this chapter
Overview
Section 1: Introduction
Lecture 1 Introduction
Section 2: The Nose Project
Lecture 2 The nose project main picture and also color numbers that used in this section
Lecture 3 Start painting the back ground of the nose
Lecture 4 Volume the nose by adding blurs and creating contrast
Lecture 5 Working on the blur of the nostrils
Lecture 6 Creating nasal skin texture and finishing work
Section 3: The Ear Project
Lecture 7 The ear project main picture and also color numbers that used in this section
Lecture 8 Creating background with dark colors and creating skin texture
Lecture 9 Adding darkness and light to the skin texture of the ear and finishing the work
Section 4: The Lips Project
Lecture 10 The lips project main picture and also color numbers that used in this section
Lecture 11 Painting the primer with red and purple colors
Lecture 12 Painting the red part of the lips
Lecture 13 Adding contrast to the lip texture
Lecture 14 Adding dimming and brightening
Lecture 15 Paint the lower lip
Lecture 16 Volume and shine of the lower lip
Section 5: The Hair Project
Lecture 17 The Hair project main picture and also color numbers that used in this section
Lecture 18 Hair foundation and creating dark and light hair strands
Lecture 19 Adding more color to the work
Lecture 20 Adding hair to the front of the face and adding the final opacity
Section 6: The Eye Project
Lecture 21 The eye project main picture and also color numbers that used in this section
Lecture 22 Start iris coloring
Lecture 23 Adding details to the iris
Lecture 24 Finish iris painting and work on the white part of the eye
Lecture 25 Completion of the white part inside the eye
Lecture 26 Working on the upper part of the eyelid
Lecture 27 Finish the upper eyelid and start painting the lower lash line
Lecture 28 Working on the lower part of the eyelid
Lecture 29 Draw the eyelashes up and down the eyes and finish the work
Suitable for ages fourteen to adults.,It is suitable for people who have an artistic background, including drawing skills.,To make it easier to learn the lessons of this course, you must have learned the previous course,Students who want to learn how to draw with colored pencils.


howtodrawfacecomponenl1d80.jpg


Download from RapidGator


Download from DDownload


Zurück
Oben Unten