• Regeln für den Video-Bereich:

    In den Börsenbereich gehören nur Angebote die bereits den Allgemeinen Regeln entsprechen.

    Einteilung

    - Folgende Formate gehören in die angegeben Bereiche:
    - Filme: Encodierte Filme von BluRay, DVD, R5, TV, Screener sowie Telesyncs im Format DivX, XviD und x264.
    - DVD: Filme im Format DVD5, DVD9 und HD2DVD.
    - HD: Encodierte Filme mit der Auflösung 720p oder darüber von BluRay, DVD, R5, TV, Screener sowie Telesyncs im Format x264.
    - 3D: Encodierte Filme von BluRay, die in einem 3D Format vorliegen. Dies gilt auch für Dokus, Animation usw.
    - Serien: Cartoon/Zeichentrick, Anime, Tutorials, Dokumentationen, Konzerte/Musik, Sonstiges sind demnach in die entsprechenden Bereiche einzuordnen, auch wenn sie beispielsweise im High Definition-Format oder als DVD5/DVD9/HD2DVD vorliegen. Ausnahme 3D.
    - Bereich Englisch: Englische Releases gehören immer in diesen Bereich.
    - Bereich Talk: Der Bereich, in dem über die Releases diskutiert werden kann, darf, soll und erwünscht ist.


    Angebot/Beitrag erstellen

    - Ein Beitrag darf erst dann erstellt werden, wenn der Upload bei mindestens einem OCH komplett ist. Platzhalter sind untersagt.
    - Bei einem Scenerelease hat der Threadtitel ausschließlich aus dem originalen, unveränderten Releasenamen zu bestehen. Es dürfen keine Veränderungen wie z.B. Sterne, kleine Buchstaben o.ä. vorgenommen werden. Ausnahme Serienbörse:
    - Bei einem Sammelthread für eine Staffel entfällt aus dem Releasename natürlich der Name der Folge. Beispiel: Die Simpsons S21 German DVDRip XviD - ITG
    - Dementsprechend sind also u.a. verboten: Erweiterungen wie "Tipp", "empfehlenswert", "only", "reup", usw. / jegliche andere Zusatzinformation oder Ergänzung, welche nicht in obiger Beschreibung zu finden ist.

    Aufbau des Angebots und Threadtitel

    Der Titel nach folgendem Muster erstellt zu werden. <Name> [3D] [Staffel] [German] <Jahr> <Tonspur> [DL] [Auflösung] <Quelle> <Codec> - <Group>
    Beispiel: The Dark Knight German 2008 AC3 DVDRip XviD - iND
    Beispiel: The Dark Knight 2008 DTS DL BDRip x264 - iND
    Beispiel: The Dark Knight 2008 AC3 DL BDRip XviD - iND
    Beispiel: The Dark Knight German 2008 AC3 720p BluRay x264 iND
    Beispiel: The Dark Knight 2008 DTS DL 1080p BluRay x264 iND
    Beispiel: Die Simpsons S01 German AC3 DVDRip XviD iND
    Beispiel: Die Simpsons S20 German AC3 720p BluRay x264 iND
    Beispiel: Sword Art Online II Ger Sub 2014 AAC 1080p WEBRip x264 - peppermint
    Entsprechend sind also u.a. verboten: Sonderzeichen wie Klammern, Sterne, Ausrufezeichen, Unterstriche, Anführungszeichen / Erweiterungen wie "Tipp", "empfehlenswert", "only", "reup", usw. / jegliche andere Zusatzinformation oder Ergänzung, welche nicht in obiger Beschreibung zu finden ist
    Ausnahmen hiervon können in den Bereichen geregelt sein.

    Die Beiträge sollen wie folgt aufgebaut werden:
    Überschrift entspricht dem Threadtitel
    Cover
    kurze Inhaltsbeschreibung
    Format, Größe, Dauer sind gut lesbar für Downloader außerhalb des Spoilers zu vermerken
    Nfo sind immer Anzugeben und selbige immer im Spoiler in Textform.
    Sind keine Nfo vorhanden z.B. Eigenpublikationen, sind im Spoiler folgende Dateiinformationen zusätzlich anzugeben :
    Quelle
    Video (Auflösung und Bitrate)
    Ton (Sprache, Format und Bitrate der einzelnen Spuren)
    Untertitel (sofern vorhanden)
    Hosterangabe in Textform außerhalb eines Spoiler mit allen enthaltenen Hostern.
    Bei SD kann auf diese zusätzlichen Dateiinformationen verzichtet werden.

    Alle benötigten Passwörter sind, sofern vorhanden, in Textform im Angebot anzugeben.
    Spoiler im Spoiler mit Kommentaren :"Schon Bedankt?" sind unerwünscht.


    Releases

    - Sind Retail-Release verfügbar, sind alle anderen Variationen untersagt. Ausnahmen: Alle deutschen Retail-Release sind CUT, in diesem Fall sind dubbed UNCUT-Release zulässig.
    - Im Serien-Bereich gilt speziell: Wenn ein Retail vor Abschluss einer laufenden Staffel erscheint, darf diese Staffel noch zu Ende gebracht werden.62
    - Gleiche Releases sind unbedingt zusammenzufassen. Das bedeutet, es ist zwingend erforderlich, vor dem Erstellen eines Themas per Suchfunktion zu überprüfen, ob bereits ein Beitrag mit demselben Release besteht. Ist dies der Fall, ist der bereits vorhandene Beitrag zu verwenden.
    - P2P und Scene Releases dürfen nicht verändert oder gar unter einem iND Tag eingestellt werden.


    Support, Diskussionen und Suche

    - Supportanfragen sind entweder per PN oder im Bereich Talk zu stellen.
    - Diskussionen und Bewertungen sind im Talk Bereich zu führen. Fragen an die Uploader haben ausschließlich via PN zu erfolgen, und sind in den Angeboten untersagt.
    - Anfragen zu Upload-Wünschen sind nur im Bereich Suche Video erlaubt. Antworten dürfen nur auf Angebote von MyBoerse.bz verlinkt werden.


    Verbote

    - Untersagt sind mehrere Formate in einem einzigen Angebotsthread, wie beispielsweise das gleichzeitige Anbieten von DivX/XviD, 720p und 1080p in einem Thread. Pro Format, Release und Auflösung ist ein eigener Thread zu eröffnen.
    - Grundsätzlich ebenso verboten sind Dupes. Uploader haben sich an geeigneter Stelle darüber zu informieren, ob es sich bei einem Release um ein Dupe handelt.
    - Gefakte, nur teilweise lauffähige oder unvollständige Angebote sind untersagt. Dies gilt auch für eigene Publikationen, die augenscheinlich nicht selbst von z.B. einer DVD gerippt wurden. Laufende Serien, bei denen noch nicht alle Folgen verfügbar sind, dürfen erstellt und regelmäßig geupdatet werden.
    - Untersagt sind Angebote, welche nur und ausschließlich in einer anderen Sprache als deutsch oder englisch vorliegen. Ausnahmen sind VORHER mit den Moderatoren zu klären.


    Verstoß gegen die Regeln

    - Angebote oder Beiträge, die gegen die Forenregeln verstoßen, sind über den "Melden"-Button im Beitrag zu melden.
  • Bitte registriere dich zunächst um Beiträge zu verfassen und externe Links aufzurufen.

*** Bestes IPTV *** bester Preis *** gratis Test ***


Englische Tutorials

3a5771eb4653c8bd3bcb757662359331.jpg


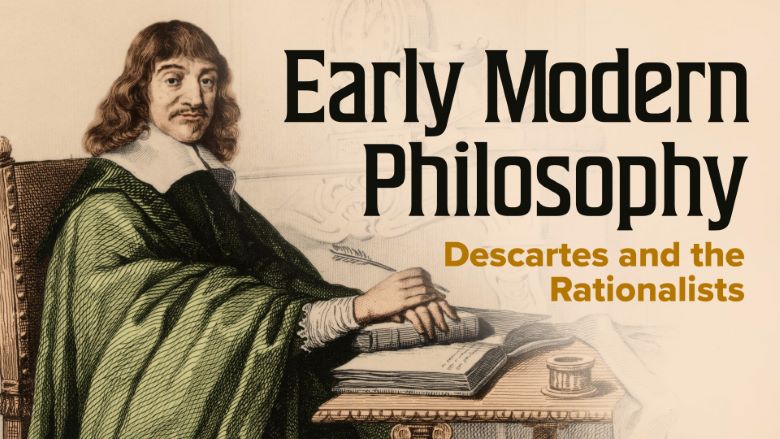
TTC - Early Modern Philosophy: Descartes and the Rationalists
Released 12/2024
By James D. Reid, PhD Professor, Metropolitan State University of Denver
MP4 | Video: h264, 1280x720 | Audio: AAC, 44.1 KHz, 2 Ch
Genre: eLearning | Language: English | Duration: 12 Lessons ( 6h 16m ) | Size: 5.23 GB

From the 17th to the 18th centuries, bold thinkers cast off the authority of ancient traditions and embraced reason as the primary tool for understanding the world. No longer would orthodox beliefs get in their way. Instead, they would use reason alone to seek knowledge. These rationalists, among the early modern philosophers, included René Descartes, Baruch Spinoza, and Gottfried Wilhelm Leibniz-visionaries whose answers to profound questions remain relevant today

What can we know for certain? Employing the tools of reason, the rationalists sought to establish a secure foundation for knowledge in response to the intellectual, scientific, and religious upheavals of their time.
Are we truly free? The problem of free will troubled these thinkers, as it does many philosophers and scientists today. Are our actions determined by natural or divine laws, or can we act according to our own discretion?
Is there a God or a higher power? In an era when God's existence was simply assumed, the rationalists aimed to establish the existence of God or a fundamental substance by using logical arguments.
The rationalist movement also included other innovative thinkers, such as Princess Elisabeth of Bohemia, Lady Anne Conway, and Nicolas Malebranche, each contributing unique perspectives on mind-body interaction, the nature of substance, and the role of God in human understanding.

Early Modern Philosophy: Descartes and the Rationalists covers all of these groundbreaking figures in 12 intellectually rich, half-hour lectures, presented by award-winning teacher James D. Reid, Professor of Philosophy at Metropolitan State University of Denver.

Professor Reid shows how Descartes, Spinoza, Leibniz, and the other early modern philosophers serve as a bridge between the Scholasticism of the late Middle Ages and thinkers of the 18th-century Enlightenment-such as David Hume, Immanuel Kant, John Locke, and Voltaire, who were directly responding to the writings of the rationalists. This broad arc of ideas makes Early Modern Philosophy: Descartes and the Rationalists invaluable for understanding the evolution of thought in Western philosophy.

Witness the Birth of the Modern Mind

It is no accident that early modern philosophy developed in tandem with the Scientific Revolution, spearheaded by Kepler and Galileo, among others. Together, the two movements laid the foundation for a fully modern world, guided by reason, systematic inquiry, empirical evidence, and a growing secular view of the universe that emphasizes human autonomy. As a result, taking this course is like witnessing the birth of the modern mind. For example

Descartes: Famously secluding himself to question all his beliefs and rebuild knowledge from scratch, Descartes concluded that one of the few things he could not doubt was his existence as a thinking being.
Spinoza: Rejecting the notion of a personal God, Spinoza concluded that God and Nature are one, governed by the same unchanging laws-a mechanistic view that promoted a scientific outlook.
Leibniz: Believing in a harmonious universe, Leibniz proposed that reality consists of simple substances, or monads, each reflecting the cosmos-an outlook that emphasized the search for underlying principles.
Descartes also made fundamental contributions to mathematics with his development of analytic geometry, while Leibniz, alongside Isaac Newton, co-developed calculus. Both branches of mathematics are of supreme utility in the physical sciences, and both are products of the rationalist outlook.

A Comprehensive Understanding of Reality

However, the rationalists did not all share the same views. Most of them challenged Descartes's strict dualism of mind and body as distinct substances, a conclusion he reached through his exercise of radical self-doubt. And while Descartes, Spinoza, and Leibniz each incorporated God into their systems, the other philosophers highlighted in this course saw a more active and immediate role for God

Princess Elisabeth of Bohemia: A close friend and philosophical interlocutor of Descartes, Elisabeth explored the emotional and psychological dimensions of human life, with special attention to the divine's role in human well-being.
Lady Anne Conway: An English aristocrat with a mystical bent, Conway proposed that all created beings are emanations of a single, divine substance, implying a dynamic, living universe shaped by divine will.
Nicolas Malebranche: A Catholic priest, Malebranche expanded on Cartesian dualism by advocating occasionalism, the idea that God is the true mediator of all interactions between mind and body.
Early Modern Philosophy: Descartes and the Rationalists also makes connections to post-Enlightenment thinkers. For instance, German philosophers Edmund Husserl and Martin Heidegger, both active in the first half of the 20th century, were heavily influenced by Leibniz. And such existentialist theorists as Søren Kierkegaard, Friedrich Nietzsche, Jean-Paul Sartre, and Maurice Merleau-Ponty, spanning the 19th to 20th centuries, wrote in critical dialogue with rationalist philosophers like Descartes.

Professor Reid notes that the goal of philosophy is "to clarify, understand, and explain the whole of what can be said to be. Unlike the special or specialized sciences, philosophy is concerned with how all things might be said to hang together." This comprehensive understanding of reality has been the project of philosophers throughout history; however, it was the rationalists, inspired by the successes of the Scientific Revolution and sobered by the religious wars sparked by the Protestant Reformation, who first attempted a unified, systematic framework, grounded in reason, that aimed to explain the interconnectedness of all aspects of existence-physical, mental, and divine.

We have been building on their insights ever since.

What Will You Learn?
Learn the arguments for and against free will

Evaluate rationalist arguments for the existence of God

Probe the distinction between mind and body

Discover the ideas that define modernity versus the Middle Ages

Find out how Rationalism helped spark the Scientific Revolution

Homepage


559390254_early_modern_philosophy_descartes_and_the_rationalists.jpg


Download from RapidGator


Download from Keep2Share


Premium Links

 
7896285b04c940dd25257a59872070b1.jpg


Namaste React
Last updated 1/2025
MP4 | Video: h264, 1920x1080 | Audio: AAC, 44.1 KHz, 2 Ch
Genre: eLearning | Language: English | Duration: 29 Lessons ( 65h 24m ) | Size: 30 GB

Join our Namaste React Webseries to master React.js. Learn from the ground up and build real-world apps with ease.

The mission of this series is to take you from Zero to Hero in React. During this journey, you will learn everything by watching videos and then implement it by building projects.
The curriculum is designed with the principle of `learn by building`, so there will be a lot of Assignments/Projects you will work on. So only register if you are ready for a grind.
After this series, you will be able to develop production-ready React frontend web applications from scratch. Limited seats. Register Now. ✌

Learnings
✅ React Hooks

✅ State Management

✅ Config Drive UI

✅ Redux

✅ Reusable Components

✅ Functional Comp.

✅ Props & State

✅ List & Keys

✅ Class Components

✅ Scaling React Apps

✅ Best Coding Practices

✅ React Router

✅ Optimizing React Apps

✅ Building Live Projects

✅ Bundlers & Babel

✅ JSX

✅ React Fragment

✅ Code Splitting

✅ Dynamic UI

✅ Higher Order Comp.

✅ Pure Components

✅ Code Splitting

✅ React Testing Library

✅ Interview Questions

✅ Uncontrolled Comp.

✅ Building Custom Hooks

✅ Handling Events

✅ Conditional Rendering

✅ Tailwind CSS

✅ Jest

And so much more...

Basically, I'll teach you everything I've learned over years of working in the industry and everything that I know about React. ❤

It will be all Project-Based Learning, we will see how the theoryconcepts fit into the projects! I won't be teaching with boring slides, We will dive into the code right from Episode 1 ?

We will start from scratch: ZERO and go till we learn building production-ready apps: HERO from Zero to Hero in 16 episodes ?

Sounds cool, isn't it?


560030957_namaste_react.jpg


Download from RapidGator


Download from Keep2Share


Premium Links


596275d87f2c950d53c4d7f31605a625.jpg


Fatek Plc & Delta & Allen-bradley & Siemens Plc Course
Published 1/2025
Created by Masud Ahmad khan
MP4 | Video: h264, 1280x720 | Audio: AAC, 44.1 KHz, 2 Ch Level: Expert | Genre: eLearning | Language: English | Duration: 170 Lectures ( 48h 13m ) | Size: 23.8 GB

BASIC TO ADVANCE LEVEL TRAINING COURSE AUTOMATION ENGINEERING


What you'll learn
BASIC TO ADVANCE TRAINING COURSE AUTOMATION ENGINEERING
ALLEN-BRADLEY, SIEMENS, FATEK, DELTA AND MITSUBISHI PLC
STEP BY STEP GUIDE INSTRICTIONS IN A SERIAL
ACCESABLE ON MOBILE OR TV
GET A CIRTIFECATION AFTER COMPLETION THE COURSE
ONLINE OR OFFLINE SUPORT ON DEMAND
100% WILL BE ABLE TO DO PROGRAMIG BIGNER TO ADVANCE LEVEL AFTER COMPLETION THE COURSE

Requirements
LAPTOP & PROGRAMMING SOFTWARE FOR ONLINE AND OFFLINE SIMULATION
IF YOU WANT ONLINE PROGRAAM COMMUNICATE WITH PLC HMI WILL BE REQUIRED
UNDRSTAND ABOUT HARDWARE AND RELAY LOGIC

Description
ASSLAM O ALIKUM FRIENDS MY NAME IS MASUD AHMAD AND I M LIVING IN SAUDI ARABIA DAMMAM CITY AND I M A PROFFISSINAL PLC SOFTWARE AND HARDWAVE TRANIR IM WORKING IN INDUSTRY FROM LAST 20 YEARS. IN THIS COURSE I SHOW YOU HOW TO DO PLC PROGRAMMING AND HOW MAKES PROJECTS AND BASIC TRANING ON ALL PLC AND HMI AND OTHER MANY EQUIPMENT TRAINING LIKE VFD PROGRAMING FOR SPECIALY SIEMENS AND LS BY KOREA BRAND ALL NETWORKS RS422 RS 485 PROFINET ETC AND ON GOING PROJECTS DEMOS AND ALSO HOW TO FIEND BUSNUS IN AUTOMATION MARKET REMOTE JOBS ONLINE AND OFFLINE TRANING SECTIONS WILL BE ADDED AND WITCH STUDENTS OFFLINE NEEDS HELP WILL BE POSSIBLE AT DEMAND ADDRESS WILL BE GET FROM OFFICIAL WEBSITE FROM UDEMEY.The Instrumentation course employs a large range of industrial current loop, temperature, pressure, level and flow sensors and associated equipment. The course teaches electricians with no previous instrumentation knowledge how to recognize, calibrate and maintain a range of equipment used in real industrial automation instrumentation systems and then the follow-up course on PID Controllers shows how these would be put into a control loop. These two courses combined together form the Instrumentation & Process Control course

Who this course is for
BEGINNER TO ADVANCE LEVEL
MY COURSE IS FOR BEGINNERS TO ADVANCE LEVEL
IN THIS COURSE KNOWLEDGE PROVIDE ABOUT PLC, HMI, VFD AND SERVO PROGRAMING


560419795_fatek_plc__delta___allen-bradley__siemens_plc_course.jpg


Download from RapidGator


Download from Keep2Share


Premium Links


ac4ae1bd6719373eea15448cb5a419d7.jpg


The Adobe Illustrator CC Mastery Course: Basics To Pro + AI
Last updated 1/2025
MP4 | Video: h264, 1920x1080 | Audio: AAC, 44.1 KHz
Language: English | Size: 21.88 GB | Duration: 31h 7m

Create. Design. Conquer. Master Adobe Illustrator and Build a Portfolio That Stands Out!


What you'll learn
Students will advance their basic knowledge on Adobe Illustrator.
Students will be able to use Adobe Illustrator
Students will be able to create Geometric Grid based designs with Adobe Illustrator.
Students will be able to use Shortcuts and Actions in Adobe Illustrator.
Students will learn how to create amazing Digital Artwork using Adobe Illustrator.
Students will learn how to create Complex Line Art designs.
Students will learn how to create trendy Text based poster designs.
Students will learn how to create Animations with Adobe Illustrator and Adobe After Effects.
Students will learn how to create amazing 3D Isometric designs.
Students will learn how to create amazing Graph Visualizations.

Requirements
Basic knowledge of Adobe Illustrator.

Description
Unlock Your Creative Potential with The Adobe Illustrator CC Mastery Course!Are you ready to turn your creative ideas into stunning digital designs? Whether you're starting from scratch or looking to take your skills to the next level, this course is your ultimate guide to mastering one of the most powerful tools in graphic design.Perfect for All Skill Levels:This comprehensive course is designed to take you from beginner to advanced level, empowering you to create professional-grade designs with confidence.Whether you're just dipping your toes into the design world, or you're already familiar with Illustrator and looking to advance your skills, this course has got you covered. This course will guide you through the basics, with easy-to-follow, step-by-step lessons and also help you refine your skills, and master advanced techniques.What's in store for you?From the beginner section of the course we'll start by getting familiar with the interface of Illustrator, and learning how to draw out ideas using the powerful tools it provides.We'll learn about colors, fonts and type, and also masking in Adobe Illustrator. We'll learn how to use several Effects, Object options, shape patterns and lots more.Level Up your Skill:In more advanced parts of the course, we'll learn several tips to speed up our workflow, such as using shortcuts and actions, we'll learn how to work with the 3D feature in illustrator, we'll learn how to work with brushes, even how to create incredible custom brushes which we'll then use on our artworks or sell them.We'll learn a lot about colors and patterns, how to use illustrator's advanced color tools such as the color guide tool and the generative recolor AI feature.We'll learn how to use advanced types of masks like opacity masks, shape blending and effects, advanced typography, graph visualizations, geometric grid based designs, 3d isometric designs, even creating animations using adobe illustrator and adobe after effects.And that's not All!We have also updated this course to cover several cutting edge AI feature introduced by Adobe. Feature like the generative text to vector graphic, the retype ai feature, generative recolor, and other features like mockup and intertwine.This isn't just theory. You'll dive into practical exercises and real-world projects that teach you how to use Illustrator in creative, impactful ways. From vector art to logos, illustrations, and graphic designs, you'll learn by doing every step of the way.By the end of the course, you won't just have skills-you'll have a portfolio of stunning, professional-level work to showcase your talent to clients, employers, or the world.Why Learn with Me?Well, I'm not just another random educator; I'm a fellow artist passionate about nurturing your talent and fueling your artistic fire. With a curriculum meticulously designed for passionate individuals like yiou, your creativity will know no bounds.Imagine creating eye-catching designs, logos, and illustrations that captivate and inspire. Picture yourself with the skills and portfolio to stand out in the competitive world of graphic design. With Adobe Illustrator Mastery, that future is just a step away.So, what are you waiting for?Enroll Now, and transform your design skills. Let's unlock your creative potential and take your career to new heights!Join the Adobe Illustrator Mega Mastery Course Now - Your Path to Design Greatness Awaits!

Anyone who wants to take their Adobe Illustrator Knowledge to the Next Level.,Anyone who want to learn how to use Adobe Illustrator.,Anyone who want to learn how to create logos, info graphics, icons, social media graphics using Adobe Illustrator.,Anyone who want to translate their existing artwork into vector format using Adobe Illustrator.,Anyone who want to learn how to create amazing digital artwork using Adobe Illustrator.


560096497_the_adobe_illustrator_cc_mastery_course_basics_to_pro_ai.jpg


Download from RapidGator


Download from Keep2Share


Premium Links


9dc2a39da919c6603cf496a47ed07533.jpg


Learn to Create Web Applications using Go
Jonathan Calhoun | Duration: 43 h 34 m | Video: H264 1920x1080 | Audio: AAC 48 kHz 2ch | 49,1 GB | Language: English

No trivial single-page TODO apps here. Just real, production-grade web apps

Go is supposed to be great for web development, so why is it so hard to build even a simple twitter clone? Why can't anyone point me to a concrete example of how to hash and store user passwords? Or how to build the rest of an authentication system?

Why is to so frustrating simply trying to figure out how to share my database connection with my handlers, or how to email users without slowing down every web request? Can anyone just tell me how to organize my code? Why are there so many varying opinions on this? Which one is right? Should I be using MVC? What is this domain driven design? Ugh! I want to give up!

You have heard that Go is great for web apps, but getting started leads to so many questions that it can feel overwhelming. But what if you could build a web application this week, starting today? What if you had someone to guide you through the standard libraries and help you understand how they all work together?


561891161_learn_to_create_web_applications_using_go.jpg


Download from RapidGator


Download from Keep2Share


Premium Links


80710d261f6303d25899dc6248089f11.jpg


Creating Snow Environments For Blender & Unreal
Published 1/2025
MP4 | Video: h264, 1920x1080 | Audio: AAC, 44.1 KHz
Language: English | Size: 36.91 GB | Duration: 18h 22m

Learn to create stunning snowy environments, from detailed structures to landscapes, using Blender & Unreal Engine 5


What you'll learn
Model and texture detailed 3D environments like barns and ruins.
Use procedural techniques to scatter trees, grass, and rocks.
Sculpt arealistic landscape with a river
Integrate 3D assets into Unreal Engine 5 for real-time rendering.

Requirements
Basic knowledge of Blender is helpful but not required.
Access to Blender (4.3 or later) and Unreal Engine (5.5)
A computer capable of running Unreal and Blender

Description
Creating Snow Environments with Blender and Unreal EngineWelcome to an exciting journey into the world of 3D snow environments! In this comprehensive course, you'll learn how to craft stunning winter landscapes, design intricate medieval structures, and seamlessly bring them to life in Unreal Engine. Perfect for intermediate artists or beginners ready to take their skills to the next level, this course will equip you with the tools and techniques to create immersive, realistic scenes.Why This Course?This isn't just another tutorial; it's a deep dive into the art and science of 3D environment creation. Combining the powerful modeling capabilities of Blender with the real-time magic of Unreal Engine, this course empowers you to create professional-grade projects from start to finish. Whether you're crafting for games, films, or personal projects, this course will help you unlock your creative potential.Course OverviewChapter 1: Introduction to the CourseKick things off with an overview of the tools, workflows, and techniques we'll be using to create stunning 3D snow environments. Learn how to set up your projects for success and gain a clear roadmap for what's ahead.Chapter 2: Building a Cabin in BlenderDive into Blender to design a detailed medieval cabin. From sturdy beams to frosted windows, learn how to model intricate details and apply realistic materials like wood, plaster, and snow.Chapter 3: Crafting a Landscape in Unreal EngineSculpt realistic terrain, carve out rivers, and blend textures for snow and forest ground. Use procedural techniques to scatter trees, foliage, and other natural elements, creating a breathtaking winter scene.Chapter 4: Importing the Cabin into Unreal EngineBring your Blender creations to life in Unreal Engine. Master material setup, collision creation, and terrain integration to ensure your cabin fits seamlessly into the environment.Chapter 5: Constructing Castle RuinsTake your skills further by designing crumbling castle ruins. Apply weathering effects, displacement maps, and snow layering to enhance the authenticity and storytelling of your scenes.Chapter 6: Enhancing the ScenePolish your environment to perfection. Import additional assets, refine the terrain, and optimize your scene for real-time exploration in Unreal Engine.What You'll LearnAdvanced modeling and texturing techniques in Blender.Realistic terrain sculpting and procedural asset scattering in Unreal Engine.Effective workflows for integrating Blender and Unreal Engine.Creating immersive winter landscapes with detailed props and structures.Scene optimization for real-time performance.What's Included?Over 19 hours of video content: Engaging, step-by-step lessons recorded in 4K.Exclusive assets: High-quality textures, models, and photo scans created specifically for this course.100% free tools: No commercial plugins or software required. Textures and models are from Polyhaven (free)Meet Your InstructorHi, I'm Rob Tuytel, a seasoned 3D artist specializing in medieval environments. As a co-founder of Polyhaven, I've spent years developing high-quality assets and tutorials for creators worldwide. I'm excited to share my expertise and help you bring your visions to life.Is This Course Right for You?This course is designed for intermediate Blender users but is also accessible to motivated beginners. If you're comfortable navigating Blender's interface and creating basic objects, you're ready to start.Your Journey Starts HereWhether you're building for passion or profession, this course provides the tools, knowledge, and inspiration to bring your ideas to life. Together, let's create worlds worth exploring. Join today and be part of a community that thrives on creativity and innovation.

Overview
Section 1: Chapter 1: Introduction

Lecture 1 Chapter 1 - Introduction

Lecture 2 Chapter 1 - Lecture 1: Installing Blender

Lecture 3 Chapter 1 - Lecture 2: Installing Unreal Engine 5.5

Lecture 4 Chapter 1 - Lecture 3: Introduction to Polyhaven

Lecture 5 Chapter 1 - Lecture 4:Organizing all the files

Lecture 6 Chapter 1 - Lecture 5: Community info

Section 2: Chapter 2: Building the Cabin in Blender

Lecture 7 Chapter 2 - Introduction

Lecture 8 Chapter 2 - Lecture 1: Organizing the old scene files

Lecture 9 Chapter 2 - Lecture 2: Making the cabin base with reference images

Lecture 10 Chapter 2 - Lecture 3: Adding window and door holes

Lecture 11 Chapter 2 - Lecture 4: Adding the trunk and plaster material

Lecture 12 Chapter 2 - Lecture 5: Adding the roof

Lecture 13 Chapter 2 - Lecture 6: Adding an inner roof for Unreal integration

Lecture 14 Chapter 2 - Lecture 7: Making the cabin floor

Lecture 15 Chapter 2 - Lecture 8: Adding a floor material and fixing borders

Lecture 16 Chapter 2 - Lecture 9: Aligning old planks to match the window hole

Lecture 17 Chapter 2 - Lecture 10: Adding a window frame

Lecture 18 Chapter 2 - Lecture 11: Adding more window frames

Lecture 19 Chapter 2 - Lecture 12: Making a door

Lecture 20 Chapter 2 - Lecture 13: Adding construction beams outside

Lecture 21 Chapter 2 - Lecture 14: Making a cabin canopy

Lecture 22 Chapter 2 - Lecture 15: Adding more construction beams outside

Lecture 23 Chapter 2 - Lecture 16: Adding the cabin foundation wall

Lecture 24 Chapter 2 - Lecture 17: Making a chimney and fireplace

Lecture 25 Chapter 2 - Lecture 18: Adding rocks on the foundation

Lecture 26 Chapter 2 - Lecture 19: Adding snow on the roof

Lecture 27 Chapter 2 - Lecture 20: Adding snow on the foundation rocks

Lecture 28 Chapter 2 - Lecture 21: Adding snow on the window borders

Lecture 29 Chapter 2 - Lecture 22: Building the interior construction beams

Lecture 30 Chapter 2 - Lecture 23: Adding more construction beams

Lecture 31 Chapter 2 - Lecture 24: Making a staircase

Lecture 32 Chapter 2 - Lecture 25: Adding stair material

Lecture 33 Chapter 2 - Lecture 26: Cleaning up and finalizing the cabin

Section 3: Chapter 3: Creating a Landscape in Unreal

Lecture 34 Chapter 3 - Introduction

Lecture 35 Chapter 3 - Lecture 1: Starting Unreal and organizing the folders

Lecture 36 Chapter 3 - Lecture 2: Adding a terrain and introduction to sculpting

Lecture 37 Chapter 3 - Lecture 3: Sculpting the landscape and shaping a river

Lecture 38 Chapter 3 - Lecture 4: Smoothing the river and blending it with the terrain

Lecture 39 Chapter 3 - Lecture 5: Making a landscape material shader

Lecture 40 Chapter 3 - Lecture 6: Adding a river texture map and blending it with the terra

Lecture 41 Chapter 3 - Lecture 7: Painting and blending the river with the terrain

Lecture 42 Chapter 3 - Lecture 8: Adding a wet snow map to blend the river with snow textur

Lecture 43 Chapter 3 - Lecture 9: Adding a forest ground map and blending it with snow

Lecture 44 Chapter 3 - Lecture 10: Importing fir trees

Lecture 45 Chapter 3 - Lecture 11: Making fir root materials

Lecture 46 Chapter 3 - Lecture 12: Making the fir twig material

Lecture 47 Chapter 3 - Lecture 13: Adding materials for dead trees

Lecture 48 Chapter 3 - Lecture 14: Scattering trees on the landscape with PFS

Lecture 49 Chapter 3 - Lecture 15: Tweaking scatter settings for better tree distribution

Lecture 50 Chapter 3 - Lecture 16: Adding dead branches and creating materials

Lecture 51 Chapter 3 - Lecture 17: Scattering branches and importing rocks

Lecture 52 Chapter 3 - Lecture 18: Importing more rocks and scattering them on the terrain

Lecture 53 Chapter 3 - Lecture 19: Adding grass on the terrain

Lecture 54 Chapter 3 - Lecture 20: Adding fir sapling trees

Lecture 55 Chapter 3 - Lecture 21: Improving scatter settings for small foliage

Section 4: Chapter 4: Importing the Cabin into Unreal

Lecture 56 Chapter 4 - Introduction

Lecture 57 Chapter 4 - Lecture 01: Preparing scene files in Blender for export

Lecture 58 Chapter 4 - Lecture 02: Applying cabin materials in Unreal

Lecture 59 Chapter 4 - Lecture 03: Shaping the terrain for the cabin site

Lecture 60 Chapter 4 - Lecture 04: Importing the cabin onto the terrain and applying materi

Lecture 61 Chapter 4 - Lecture 05: Improving cabin materials

Lecture 62 Chapter 4 - Lecture 06: Optimizing cabin walls in Blender and exporting again

Lecture 63 Chapter 4 - Lecture 07: Creating a separate window glass export in Blender

Lecture 64 Chapter 4 - Lecture 08: Setting up basic cabin collisions

Lecture 65 Chapter 4 - Lecture 09: Adding additional cabin collisions

Lecture 66 Chapter 4 - Lecture 10: Shaping the terrain around the cabin and importing props

Lecture 67 Chapter 4 - Lecture 11: Refining the snow shader

Lecture 68 Chapter 4 - Lecture 12: Adding more exterior prop assets

Lecture 69 Chapter 4 - Lecture 13: Adding interior props to the cabin

Lecture 70 Chapter 4 - Lecture 14: Creating a candle flame material

Lecture 71 Chapter 4 - Lecture 15: Designing a candle blueprint

Lecture 72 Chapter 4 - Lecture 16: Creating a blueprint for the cabin door to open

Lecture 73 Chapter 4 - Lecture 17: Improving cabin shaders

Section 5: Chapter 5 : Making Castle Ruin Constructions

Lecture 74 Chapter 5 - Introduction

Lecture 75 Chapter 5 - Lecture 01: Using references to make a castle tower

Lecture 76 Chapter 5 - Lecture 02: Creating a mesh to cut holes in the tower

Lecture 77 Chapter 5 - Lecture 03: Making the holes and remeshing the tower

Lecture 78 Chapter 5 - Lecture 04: Designing a castle gate structure

Lecture 79 Chapter 5 - Lecture 05: Creating a castle wall material and adding joints

Lecture 80 Chapter 5 - Lecture 06: Adding dark and red tones to the material for weathering

Lecture 81 Chapter 5 - Lecture 07: Importing an ornament texture layer

Lecture 82 Chapter 5 - Lecture 08: Blending a plaster map onto the wall

Lecture 83 Chapter 5 - Lecture 09: Adding wall displacement maps

Lecture 84 Chapter 5 - Lecture 10: Displacing the wall and adjusting values

Lecture 85 Chapter 5 - Lecture 11: Aligning ornaments with the castle wall

Lecture 86 Chapter 5 - Lecture 12: Designing a gate arch and adding more ornaments

Lecture 87 Chapter 5 - Lecture 13: Aligning ornaments with the gate arch

Lecture 88 Chapter 5 - Lecture 14: Adding weathering effects to the castle wall

Lecture 89 Chapter 5 - Lecture 15 : Adding seam lines and UV unwrapping the wall

Lecture 90 Chapter 5 - Lecture 16: Baking diffuse, roughness, normal, and displacement maps

Lecture 91 Chapter 5 - Lecture 17: Unwrapping the gate structure and baking the maps

Lecture 92 Chapter 5 - Lecture 18: Adding a snow layer to the castle ruin structures

Lecture 93 Chapter 5 - Lecture 19: Creating a ruined cylindrical tower

Lecture 94 Chapter 5 - Lecture 20: Applying materials to the tower and building a ruined w

Lecture 95 Chapter 5 - Lecture 21: Applying materials to the ruined wall

Lecture 96 Chapter 5 - Lecture 22: Creating the gate top border and adding an ornament to

Lecture 97 Chapter 5 - Lecture 23: Designing a bridge and applying the wall material

Lecture 98 Chapter 5 - Lecture 24: Refining the bridge model and adding a cobblestone floor

Lecture 99 Chapter 5 - Lecture 25: Unwrapping all additional ruin models with seam lines

Lecture 100 Chapter 5 - Lecture 26: Baking texture maps for the additional models

Lecture 101 Chapter 5 - Lecture 27: Adding a snow layer to all additional ruin objects

Section 6: Chapter 6: Importing Ruins and Improving Terrain

Lecture 102 Chapter 6 - Introduction

Lecture 103 Chapter 6 - Lecture 01: Importing all ruin files into Unreal

Lecture 104 Chapter 6 - Lecture 02: Creating a small mountain for the castle

Lecture 105 Chapter 6 - Lecture 03: Placing ruin objects in the scene

Lecture 106 Chapter 6 - Lecture 04: Adding a new terrain road map

Lecture 107 Chapter 6 - Lecture 05: Adding the bridge and shaping the terrain

Lecture 108 Chapter 6 - Lecture 06: Placing the gate and surrounding the ruin structure with

Lecture 109 Chapter 6 - Lecture 07: Refining the terrain

Lecture 110 Chapter 6 - Lecture 08: Adjusting collisions and tweaking the atmosphere

Lecture 111 Chapter 6 - Lecture 09: Organizing the outliner

Intermediate Blender users wanting to enhance their skills.,Unreal Engine users interested in real-time snow environment design.,3D artists looking to create stunning winter landscapes.


560421973_creating_snow_environments_for_blender_unreal.jpg


Download from RapidGator


Download from Keep2Share


Premium Links


02da4867c726a52c84c1aec5c2357f41.jpg


The Full Stack Web Development Bootcamp (Frontend & Backend)
Last updated 12/2024
MP4 | Video: h264, 1280x720 | Audio: AAC, 44.1 KHz
Language: English | Size: 23.70 GB | Duration: 43h 22m

Full Stack Web Development Bootcamp (HTML, CSS, JavaScript,jQuery, Web Templates, PHP, MySQL,MySQLi, with Source Code)


What you'll learn
You will learn frontend and backend with practical examples and exercises
You will be able how to setup and Install MySQL Database server. And make connection with Database
You will be able to Learn PHP as backend language that is important as well as most used programming language.
You will be able to learn HTML, CSS with Practical. Also discussed different properties of HTML and CSS.
You will learn How to use CSS different properties like margin, padding, float, background etc
You will learn How to use HTML in website like to comments, to use CSS in HTML, etc
You will learn PHP Extension that is MySQLi, which have different methods to perform different operations.
You will learn how to create CRUD type of application using PHP
You will learn to Create Complete CMS System using PHP and MySQLi
You will learn to Manage Session for Application
The student will learn how to debug and troubleshoot common issues that can arise in web development, which is an essential skill for any web developer.
The student will learn how to connect to databases, query data, and manipulate records using languages such as MySQL.
The student will learn how to develop and deploy web applications.

Requirements
There is no requirements or prerequisites for taking this course
You did not need to purchase or to buy any software for Full Stack web development
If you are fresh, then this Full Stack web development course is for you
No programming background is required

Description
INTRODUCTION to Full Stack Web Development Bootcamp You should know that in this course you will be able to learn front-end skills like HTML, CSS, JavaScript, and Jquery and also Backend Skills like PHP, MySQLi, Database(MySQL), CRUD Applications, CMS system (Blog Type of Website), login form, Registration Form, etc.Course Bundling:You should know that we are providing a bundle of courses in one. You will learn Three courses as discussed below with explanation:HTMLÂ (Frontend Skill)CSS (Frontend Skill)PHP (Backend Skill)MySQL (Database Server) and MySQLi PHP Extension (SQL)JavaScript CoursejQuery with ProjectWeb Templates Creation Projects developing with PHP and MySQLi (MySQL DB)You should know that in this course you will be able to learn front-end skills like HTML, and CSS with different examples, Backend Skills like PHP, MySQLi, Database(MySQL), etc.Why Enrollment for Full Stack Web Development Bootcamp?Comprehensive training in essential web development skills.Taught by experienced instructors who are experts in the field.Practical and hands-on approach with numerous exercises and projects.The course is designed to be accessible to learners of all levels, from beginners to advanced.The bootcamp offers flexible learning options, including online and self-paced learning.Completing the bootcamp can lead to various career opportunities in web development.The skills learned in the bootcamp are highly in-demand in today's job market.Students can develop a strong portfolio of web development projects while completing the course.Why do you Enroll in this Course?Do you want to become a Professional Web Developer? Then this course is for you. You can make enrollment in this course if you want to become a full stack developer because we will discuss front-end and back-end skills with full practical.Our Uniqueness (We Focus Always):You should know that we always focus on something, QualityClear TopicsAssignmentsExamples We will Provide:Front End Skills (HTML, CSS, JavaScript, JQuery)Website DesigningWeb Templates Creating Website DeploymentCRUD ApplicationsCMS systemSign-up and Sign-in FormAnd moreOutlines for this Web Development Course:HTMLCSSJavaScriptJQueryPHPMySQLiDatabase(MySQL)CMS - Web Application Project based on HTML, CSS, JS, JQ, and MySQLCreating a Website and Transferring to a Live ServerWhat is HTML & CSS?HTML and CSS are two of the most fundamental languages used in web development. HTML stands for "Hypertext Markup Language" and is used to structure content and define the layout of a web page. It provides a foundation for web pages, including headings, paragraphs, images, links, and more. CSS, or "Cascading Style Sheets," is used to style and format the content created with HTML, including colors, fonts, layouts, and other design elements.Together, HTML and CSS form the backbone of modern web design, providing developers with the tools they need to create beautiful and functional web pages. HTML and CSS are relatively easy to learn, making them accessible to beginners and experienced developers alike. Additionally, both languages are supported by a wide range of web browsers and devices, making them compatible with most platforms and ensuring that web pages look consistent across different devices and screen sizes.What is PHP?PHP is a popular and versatile server-side scripting language that is widely used in web development. PHP stands for "Hypertext Preprocessor" and is an open-source language that is supported by a large and active community of developers. It is designed to create dynamic and interactive web pages that can be used to build websites, web applications, and content management systems. PHP can interact with various databases, such as MySQL, and can be used with other technologies like HTML, CSS, and JavaScript.What is MySQL?MySQL is a popular and reliable relational database management system that is used by many businesses and organizations around the world. It is designed to handle large amounts of data and offers numerous features that make it an essential tool for managing data. MySQL is easy to use and can be integrated with various programming languages and frameworks, making it a versatile solution for web development. With its robust security features, MySQL ensures that data is kept safe and secure from unauthorized access.Additionally, MySQL offers features like data replication and clustering, which make it highly scalable and capable of handling large workloads. What is MySQLi?MySQLi, or MySQL improved extension, is a PHP library that allows for secure and efficient communication with MySQL databases. It is an updated version of the original MySQL extension, which has been deprecated since PHP version 5.5.0. MySQLi offers numerous benefits over the original extension, including support for prepared statements, which can help prevent SQL injection attacks, and improved performance through support for asynchronous queries.Instructor Experiences and Education: Faisal Zamir is an experienced programmer and expert in computer science with a Master's degree in the field.He has over 7 years of experience teaching at schools, colleges, and universities.Faisal has worked on projects involving PHP, Java, Python, web development, software engineering, and database management.As an instructor, he successfully teaches students from beginners to advanced levels, using a practical approach.Faisal is passionate about helping students achieve their goals through his unique teaching style, blending theory with real-world examples.Advantages of this courseWhen you Enroll in this course you will get the following advantages:Surely, you will get Video LecturesWe will Provide Assignments for your PracticeWe will Provide Problems and their solutionWe will Provide PPT Notes and other Notes when requiringWe will provide all Source Code as we write in the CourseProper Management in Study MaterialsThe Full Stack Web Development BootcampFull stack web development is an exciting field that encompasses a wide range of skills and technologies. The Full Stack web development bootcamp is a complete web development course that covers all essential aspects of web development, from front-end design and development using WordPress to back-end development with PHP and MySQL. The bootcamp is designed to teach students the skills they need to become full-stack web developers, capable of building fully functional web applications from scratch.The bootcamp covers topics such as PHP Website development, website backend & Frontend development, and core PHP concepts, providing students with a comprehensive understanding of web development. In addition, students have access to a full PHP course that covers advanced topics such as database management, session management and security.Thank you!Faisal Zamir

For Everyone who want to learn Web Designing and Web Development with full practical,Individuals who have little to no experience in web development and want to learn how to build websites and web applications from scratch.,Students who are interested in pursuing a career in web development or want to supplement their existing education with practical skills in web development.,Individuals who want to create a website for their business or build web applications for their customers can benefit from a web development course.,Individuals who are looking to switch to a career in web development or programming can take a web development course to gain the necessary skills and knowledge to pursue their new career path.,Web designers who want to expand their skillset and learn how to create fully functional websites can benefit from a web development course.,Anyone who has an interest in coding and wants to learn how to build websites and web applications can take a web development course.


561336147_the_full_stack_web_development_bootcamp_frontend_backend.jpg


Download from RapidGator


Download from Keep2Share


Premium Links


b79374022e3619fd1e3021ea9cbee956.jpg


Prophecy As A Story: From Torah To Daniel To Revelation
Published 1/2025
MP4 | Video: h264, 1920x1080 | Audio: AAC, 44.1 KHz
Language: English | Size: 36.61 GB | Duration: 22h 36m

A Comprehensive Bible Study for Beginners and Experienced Believers Alike Emphasizing Apocalyptic Prophecy


What you'll learn
Learn the traditional historicist approach to Bible prophecy as understood by the Protestant Reformers
Gain a prophetic worldview that links the present day to ancient history and events still to come
Understand key prophecies from the Old Testament book of Daniel and the New Testament book of Revelation
Know the Bible from Genesis to Revelation better than many pastors today
Fall in love with the "blessed hope" of Scripture - the promised return of Jesus Christ!

Requirements
No prior Biblical knowledge needed. Use your own Bible or a free Bible software online. Additional study tools and resources are available for download. The easy-to-understand storytelling approach makes this complex material understandable even to a child.

Description
This course is adapted from the acclaimed live seminar The Story of Hope, which toured Central California from 2013-2019. It aims to teach and understand the apocalyptic prophecies of Daniel (Old Testament) and Revelation (New Testament) as they apply to life in 2025 and beyond. In Prophecy as a Story, you'll explore key prophecies such as the 1,260-day, 2,300-day, and 70-week prophecies from Daniel, as well as symbolic messages from Revelation, including the Pure Woman, Harlot Babylon, and the Mark of the Beast. This course uniquely presents these Biblical prophecies as a logical, interconnected narrative, revealing God's overarching plan throughout history and into the future. Designed for both new and seasoned Bible readers, the course simplifies complex topics, helping you uncover the deeper meaning behind these ancient texts. Whether you're seeking to strengthen your faith or gain a better understanding of Biblical prophecy, Prophecy as a Story will equip you with the knowledge and confidence to interpret the symbols, timelines, and messages hidden within these prophetic books. When you're finished, you will be well equipped to continue your studies into prophecy or any other aspect of Scripture; and it is our prayer that you will understand our place in God's prophetic history as we anticipate the return of Jesus Christ.

Overview
Section 1: Introduction

Lecture 1 Introduction

Lecture 2 What is the Bible?

Lecture 3 Introduction to Bible prophecy (Daniel 2)

Section 2: Chapter 1: The Eternal Conflict (Precipitating Event)

Lecture 4 Lesson 1: The Introduction

Lecture 5 Lesson 2: The Nature of the Conflict

Lecture 6 Lesson 3: Your Role in the Conflict

Section 3: Chapter 2: The Forgotten World (Act One)

Lecture 7 Lesson 1: Review and Setup

Lecture 8 Lesson 2: The Six-Day Creation

Lecture 9 Lesson 3: Why Does This Matter?

Lecture 10 Lesson 4: Science and the Bible

Section 4: Chapter 3: The Eternal Promise (Act One)

Lecture 11 Lesson 1: Review and Setup

Lecture 12 Lesson 2: The Garden of Eden

Lecture 13 Lesson 3: The Sanctuary

Lecture 14 Lesson 4: Thy Way, O God...

Section 5: Chapter 4: People of the Mark (Act One)

Lecture 15 Lesson 1: Review and Setup

Lecture 16 Lesson 2: The Problem With Adam's Sons

Lecture 17 Lesson 3: The Mark of Cain

Lecture 18 Lesson 4: People of the Mark

Lecture 19 Lesson 5 (optional) - Introduction to Bible Prophecy Review

Section 6: Chapter 5: Your Choice to Make (Act One)

Lecture 20 Lesson 1: Review and Setup

Lecture 21 Lesson 2: The Pre-Flood World

Lecture 22 Lesson 3: The Great Flood

Lecture 23 Lesson 4: As in the Days of Noah...

Section 7: Chapter 6: A Man and His Legacy (Plot Point One)

Lecture 24 Lesson 1: Review and Setup

Lecture 25 Lesson 2: The New Cain and Abel

Lecture 26 Lesson 3: Practical Faith

Lecture 27 Lesson 4: Sanctuary Living

Section 8: Act One Assessment Quiz

Section 9: Chapter 7: The Great Escape (Act Two - History)

Lecture 28 Lesson 1: Review and Setup

Lecture 29 Lesson 2: The Exodus and Passover

Lecture 30 Lesson 3: The Ministry of Rest

Lecture 31 Lesson 4: The Sabbath Throughout the Ages

Section 10: Chapter 8: Promises in BLUE (Act 2 - History)

Lecture 32 Lesson 1: Review and Setup

Lecture 33 Lesson 2: The Heavenly Sanctuary and God's Law

Lecture 34 Lesson 3: The Law in Prophecy

Lecture 35 Lesson 4: The Perfect Law of Liberty

Section 11: Chapter 9: Salvation in the Wilderness (Act 2 - History)

Lecture 36 Lesson 1: Review and Setup

Lecture 37 Lesson 2: Rebellion and Grace in the Wilderness

Lecture 38 Lesson 3: Grace and the Atonement

Lecture 39 Lesson 4: Practical Grace

Section 12: Chapter 10: The Lost Generation (Act 2 - History)

Lecture 40 Lesson 1: Review and Setup

Lecture 41 Lesson 2: Death and Spirits

Lecture 42 Lesson 3: The Eternal Conflict Redux

Lecture 43 Lesson 4: The Final Deception

Section 13: Chapter 11: Waiting on a Miracle (Act 2 - History)

Lecture 44 Lesson 1: Review and Setup

Lecture 45 Lesson 2: Baptism and the Holy Spirit

Lecture 46 Lesson 3: The Mystery Hid From Generations

Lecture 47 Lesson 4: The Promise of Newness of Life

Section 14: Chapter 12: The Lamb and the Dragon (midpoint of Act 2)

Lecture 48 Lesson 1: Review and Setup

Lecture 49 Lesson 2: A Walk Through the Old Testament

Lecture 50 Lesson 3: Guidelines for Prophetic Interpretation

Section 15: Act Two - History Assessment Quiz

Section 16: Chapter 13: The Princely Sacrifice (Act 2 - prophecy)

Lecture 51 Lesson 1: Review and Setup

Lecture 52 Lesson 2: The Seventy Weeks

Lecture 53 Lesson 3: God's Thumbprint on History

Section 17: Chapter 14: An Ancient Battle in Modern Day (Act 2 - prophecy)

Lecture 54 Lesson 1: Review and Setup

Lecture 55 Lesson 2: Daniel 7 and the "Little Horn"

Lecture 56 Lesson 3: Supporting Evidence About the Little Horn

Lecture 57 Lesson 4: The Beast That Rises From the Sea

Section 18: Chapter 15: The Dark War (Act 2 - prophecy)

Lecture 58 Lesson 1: Review and Setup

Lecture 59 Lesson 2: The Dark War

Lecture 60 Lesson 3: The Cleansing of the Heavenly Sanctuary

Lecture 61 Lesson 4: The Hour of His Judgment

Section 19: Chapter 16: The Supporting Heroes (Act 2 - prophecy)

Lecture 62 Lesson 1: Review and Setup

Lecture 63 Lesson 2: The Pure Woman

Lecture 64 Lesson 3: "Time No Longer" and Other Mysterious Symbols

Lecture 65 Lesson 4: The Supporting Heroes

Section 20: Chapter 17: God's People Conflicted (Act 2 - prophecy)

Lecture 66 Lesson 1: Review and Setup

Lecture 67 Lesson 2: The Rest of Her Offspring

Lecture 68 Lesson 3: God's People Conflicted

Section 21: Chapter 18: The Plot Twist (Plot Point 2)

Lecture 69 Lesson 1: Review and Setup

Lecture 70 Lesson 2: The Two Beasts of Revelation 13

Lecture 71 Lesson 3: The Reign of Antichrist

Lecture 72 Lesson 4: 666 and "The Mark of the Beast"

Section 22: Act Two - Prophecy Assessment Quiz

Section 23: Chapter 19: Time's Test of Prophecy (Act 3)

Lecture 73 Lesson 1: Review and Setup

Lecture 74 Lesson 2: The Prophetic Pattern

Lecture 75 Lesson 3: Time's Test of Prophecy and the Days Still to Come

Lecture 76 Lesson 4: The Last Crisis

Section 24: Chapter 20: The Story of Hope (Act 3 - Climax)

Lecture 77 Lesson 1: The Story of Hope

Section 25: Chapter 21: A Cleansing Fire (Act 3 - Climax)

Lecture 78 Lesson 1: Review and Setup

Lecture 79 Lesson 2: The End of the "1,000 Years"

Lecture 80 Lesson 3: What Really Killed Jesus, and the Choice it Leaves For Us

Section 26: Chapter 22: Saying Good-bye (Act 3 - Denouement)

Lecture 81 Lesson 1: The Three (Seven) Final Messages

Lecture 82 Lesson 2: "Come Out of Her, My People"

Section 27: Chapter 23: Getting Unstuck (Act 3 - Denouement)

Lecture 83 Lesson 1: Getting Unstuck

Section 28: Chapter 24: No Room For a Sequel (Act 3 - Denouement)

Lecture 84 Lesson 1: Christ in the Heavenly Sanctuary

Lecture 85 Lesson 2: Hope Realized - God's Eternal Kingdom

Religious novices who want to know what the Bible is all about,Experienced believers who want to know Bible prophecy better,Backsliders who want to reconnect to their faith,Introverts for whom a setting like church feels like torment,Anyone frightened by world events or an uncertain future


560424880_prophecy_as_a_story_from_torah_to_daniel_to_revelation.jpg


Download from RapidGator


Download from Keep2Share


Premium Links


4fead340f6fc16f2d8e47c9b8e206b0a.jpg


Blender 3D From Zero to Hero
Last updated 11/2024
MP4 | Video: h264, 1920x1080 | Audio: AAC, 44.1 KHz
Language: English | Size: 24.75 GB | Duration: 29h 39m

The complete guide to learn 3D using Blender from basic to advanced level


What you'll learn
Master the fundamentals of 3D software specifically using Blender.
Create any type of 3D models you can imagine from simple to complex ones using different kind of methods.
Able to create material, texture and understand in-depth UV mapping techniques
This course will get lifetime updates so more and more lessons are coming each week ...

Requirements
Designed for complete beginners so no prior experince needed.
You must have Blender installed. You can download it for free.
Basic knowledge or graphic editing software such as Photoshop will be helpful, although not necessary.
Wacom tablet or similar devices is recommended for texture painting and sculpting lessons.

Description
If you want to learn 3D from zero, meaning no prior experience needed at all. Then you've come to the right place. This course will teach you the fundamentals of 3D skills using Blender 2.8 or above. The curriculum in this course is carefully designed so that students can learn gradually from the easiest lesson to the more advanced lessons, seamlessly. After completing this course you should be able to model a construction robot like in the course cover image, add materials to it, create lights, and then render it using the EEVEE rendering engine.WHAT YOU WILL LEARNYou are going to learn so many things in this course. They are just too many to cover in this short introduction texts. But just for a quick summary. The course is divided into 4 parts.Part 1: Blender essentialsBlender's UIViewport navigationBasic object operationsBasic transformationInteraction modesBasic mesh editingEtcPart 2: Look developmentViewport shading modesRendering enginesCreating and using materialsBasic CG conceptsUsing camera objectSurface smooth shadingScreen space reflection inside EEVEEEtcPart 3: 3D modelingAdvanced transformationPivot pointSelection techniquesInset, Extrude and BevelKnife and Bisect toolsAdding loop cutsPatching holesThe basics of modifiersCommon 3D modeling mistakesNormal directionManifold geometryPoint-to-point modeling techniquesEtcPart 4: Construction robot projectVolume sketchingThe Basics of grease pencilSpecial movement operationsThe basics of the curve objectsBasic rigging with FK (forward kinematics)Create global illumination in EEVEEEtcHANDS-ON PROJECTSThere are many hands-on projects in course. Such as:Custom monkey head model using basic mesh editingAdding materials to the custom monkey head modelModeling a kindergarten chairCreate vases using spin and screw methodsCreate a roman columnModel a toy train by leveraging the vertex snapping featureModel a coffee tableCreate a robot in the final project section. Covers 3D modeling, material, lighting and rendering with EEVEESo get the course now and take your first step into the world of 3D using Blender!

Beginners who want to learn 3D from scratch using Blender.,People who want to make video games using game engines such as: Unity, Unreal, Godot etc.,Architects and interior designers who want to create stunning 3D visualization.,Graphic designers who want to add 3D elements in their design.,Anyone who needs strong 3D skills for different kind of purposes such as: 3D printing, virtual reality, augmented reality, product presentation etc.


561335020_blender_3d_from_zero_to_hero.jpg


Download from RapidGator


Download from Keep2Share


Premium Links


Zurück
Oben Unten