• Regeln für den Video-Bereich:

    In den Börsenbereich gehören nur Angebote die bereits den Allgemeinen Regeln entsprechen.

    Einteilung

    - Folgende Formate gehören in die angegeben Bereiche:
    - Filme: Encodierte Filme von BluRay, DVD, R5, TV, Screener sowie Telesyncs im Format DivX, XviD und x264.
    - DVD: Filme im Format DVD5, DVD9 und HD2DVD.
    - HD: Encodierte Filme mit der Auflösung 720p oder darüber von BluRay, DVD, R5, TV, Screener sowie Telesyncs im Format x264.
    - 3D: Encodierte Filme von BluRay, die in einem 3D Format vorliegen. Dies gilt auch für Dokus, Animation usw.
    - Serien: Cartoon/Zeichentrick, Anime, Tutorials, Dokumentationen, Konzerte/Musik, Sonstiges sind demnach in die entsprechenden Bereiche einzuordnen, auch wenn sie beispielsweise im High Definition-Format oder als DVD5/DVD9/HD2DVD vorliegen. Ausnahme 3D.
    - Bereich Englisch: Englische Releases gehören immer in diesen Bereich.
    - Bereich Talk: Der Bereich, in dem über die Releases diskutiert werden kann, darf, soll und erwünscht ist.


    Angebot/Beitrag erstellen

    - Ein Beitrag darf erst dann erstellt werden, wenn der Upload bei mindestens einem OCH komplett ist. Platzhalter sind untersagt.
    - Bei einem Scenerelease hat der Threadtitel ausschließlich aus dem originalen, unveränderten Releasenamen zu bestehen. Es dürfen keine Veränderungen wie z.B. Sterne, kleine Buchstaben o.ä. vorgenommen werden. Ausnahme Serienbörse:
    - Bei einem Sammelthread für eine Staffel entfällt aus dem Releasename natürlich der Name der Folge. Beispiel: Die Simpsons S21 German DVDRip XviD - ITG
    - Dementsprechend sind also u.a. verboten: Erweiterungen wie "Tipp", "empfehlenswert", "only", "reup", usw. / jegliche andere Zusatzinformation oder Ergänzung, welche nicht in obiger Beschreibung zu finden ist.

    Aufbau des Angebots und Threadtitel

    Der Titel nach folgendem Muster erstellt zu werden. <Name> [3D] [Staffel] [German] <Jahr> <Tonspur> [DL] [Auflösung] <Quelle> <Codec> - <Group>
    Beispiel: The Dark Knight German 2008 AC3 DVDRip XviD - iND
    Beispiel: The Dark Knight 2008 DTS DL BDRip x264 - iND
    Beispiel: The Dark Knight 2008 AC3 DL BDRip XviD - iND
    Beispiel: The Dark Knight German 2008 AC3 720p BluRay x264 iND
    Beispiel: The Dark Knight 2008 DTS DL 1080p BluRay x264 iND
    Beispiel: Die Simpsons S01 German AC3 DVDRip XviD iND
    Beispiel: Die Simpsons S20 German AC3 720p BluRay x264 iND
    Beispiel: Sword Art Online II Ger Sub 2014 AAC 1080p WEBRip x264 - peppermint
    Entsprechend sind also u.a. verboten: Sonderzeichen wie Klammern, Sterne, Ausrufezeichen, Unterstriche, Anführungszeichen / Erweiterungen wie "Tipp", "empfehlenswert", "only", "reup", usw. / jegliche andere Zusatzinformation oder Ergänzung, welche nicht in obiger Beschreibung zu finden ist
    Ausnahmen hiervon können in den Bereichen geregelt sein.

    Die Beiträge sollen wie folgt aufgebaut werden:
    Überschrift entspricht dem Threadtitel
    Cover
    kurze Inhaltsbeschreibung
    Format, Größe, Dauer sind gut lesbar für Downloader außerhalb des Spoilers zu vermerken
    Nfo sind immer Anzugeben und selbige immer im Spoiler in Textform.
    Sind keine Nfo vorhanden z.B. Eigenpublikationen, sind im Spoiler folgende Dateiinformationen zusätzlich anzugeben :
    Quelle
    Video (Auflösung und Bitrate)
    Ton (Sprache, Format und Bitrate der einzelnen Spuren)
    Untertitel (sofern vorhanden)
    Hosterangabe in Textform außerhalb eines Spoiler mit allen enthaltenen Hostern.
    Bei SD kann auf diese zusätzlichen Dateiinformationen verzichtet werden.

    Alle benötigten Passwörter sind, sofern vorhanden, in Textform im Angebot anzugeben.
    Spoiler im Spoiler mit Kommentaren :"Schon Bedankt?" sind unerwünscht.


    Releases

    - Sind Retail-Release verfügbar, sind alle anderen Variationen untersagt. Ausnahmen: Alle deutschen Retail-Release sind CUT, in diesem Fall sind dubbed UNCUT-Release zulässig.
    - Im Serien-Bereich gilt speziell: Wenn ein Retail vor Abschluss einer laufenden Staffel erscheint, darf diese Staffel noch zu Ende gebracht werden.62
    - Gleiche Releases sind unbedingt zusammenzufassen. Das bedeutet, es ist zwingend erforderlich, vor dem Erstellen eines Themas per Suchfunktion zu überprüfen, ob bereits ein Beitrag mit demselben Release besteht. Ist dies der Fall, ist der bereits vorhandene Beitrag zu verwenden.
    - P2P und Scene Releases dürfen nicht verändert oder gar unter einem iND Tag eingestellt werden.


    Support, Diskussionen und Suche

    - Supportanfragen sind entweder per PN oder im Bereich Talk zu stellen.
    - Diskussionen und Bewertungen sind im Talk Bereich zu führen. Fragen an die Uploader haben ausschließlich via PN zu erfolgen, und sind in den Angeboten untersagt.
    - Anfragen zu Upload-Wünschen sind nur im Bereich Suche Video erlaubt. Antworten dürfen nur auf Angebote von MyBoerse.bz verlinkt werden.


    Verbote

    - Untersagt sind mehrere Formate in einem einzigen Angebotsthread, wie beispielsweise das gleichzeitige Anbieten von DivX/XviD, 720p und 1080p in einem Thread. Pro Format, Release und Auflösung ist ein eigener Thread zu eröffnen.
    - Grundsätzlich ebenso verboten sind Dupes. Uploader haben sich an geeigneter Stelle darüber zu informieren, ob es sich bei einem Release um ein Dupe handelt.
    - Gefakte, nur teilweise lauffähige oder unvollständige Angebote sind untersagt. Dies gilt auch für eigene Publikationen, die augenscheinlich nicht selbst von z.B. einer DVD gerippt wurden. Laufende Serien, bei denen noch nicht alle Folgen verfügbar sind, dürfen erstellt und regelmäßig geupdatet werden.
    - Untersagt sind Angebote, welche nur und ausschließlich in einer anderen Sprache als deutsch oder englisch vorliegen. Ausnahmen sind VORHER mit den Moderatoren zu klären.


    Verstoß gegen die Regeln

    - Angebote oder Beiträge, die gegen die Forenregeln verstoßen, sind über den "Melden"-Button im Beitrag zu melden.
  • Bitte registriere dich zunächst um Beiträge zu verfassen und externe Links aufzurufen.

*** Bestes IPTV *** bester Preis *** gratis Test ***


Englische Tutorials

Knitting: The Ultimate Knitting Course (Basic To Advanced)

dwsj4qdjwanfuxd0ewfar2hcmt.jpg


Knitting: The Ultimate Knitting Course (Basic To Advanced)
Last updated 2/2022
MP4 | Video: h264, 1280x720 | Audio: AAC, 44.1 KHz
Language: English | Size: 13.43 GB | Duration: 10h 24m

The tutorial of all hints and techniques for knitting all different kinds of beautiful and useful knitting stitches


What you'll learn
- Tutorial of all different kinds of simple and useful knitting stitches , tutorial of different complex knits with beautiful designs
- Tutorial of horizontal and vertical button holes
- Tutorial of knitting pockets for different types of clothes
- Tutorial of changing the color of the yarn
- Tutorial of attaching two seams of the clothes together
- Tutorial of two models of decorations on knitting
- Tutorial of embroidery on knitting
- Tutorial of two different kinds of torns on knitted clothes
- Common mistakes in knitting and their solutions
- Tutorial of symbols for pattern reading in knitting with two needles, knitting of three models with the help of patterns
- Tutorial of knitting in the round and seamless, knitting a seamless hat with a circular needles
- Introduction to crochet hook and crochet knitting , Crochetting a doll
- What's motif, knitting a handbag with the use of motifs
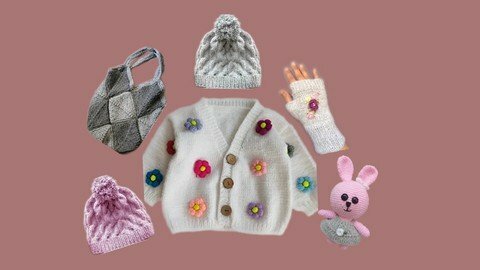
- Compatible with the tutorials of each chapter we will knit a complete and comprehensive model. Tutorial of knitting a hat, jacket, gloves, handbag, bunny doll
- Tutorial of methods for preserving, ironing and washing knits

Requirements
Knitting needle
Circular needles - size 3.5 for knitting the jacket and size 2.5 for knitting the hat
Stitch marker
Scissors, button
Crochet hook size 2 (for knitting the doll)
Tapestry yarn (for the tutorial of embroidery)

Description
Knitting is a very popular handmade art that with learning it you can knit different clothes with different designs. In this course we have started teaching from a very basic level and at last we have reached to the completely advanced and modern level. All people in any level can use this course. It means even beginners that have no background of knitting can use this course ranging from people who are in intermediate levels and know how to knit and want to complete and update their knowledge.In this course even a combination and mixture of arts can be seen. For instance we have combined the art of embroidery with the art of knitting and taught you a very beautiful and popular style.We haven't stopped by only teaching the hints and we will accompany you on some projects from beginning to end. Projects including knitting a seamless hat, bunny doll, fingerless gloves, headband, handbag, and a jacket. With the help of this course you will learn how to knit all of these clothes and dolls completely professionally and ultimately you will enjoy your art. For example in knitting the jacket , a lot of the hints and techniques that you have learned during the course (button holes, knits decorations, attaching seams together, stockinette and rib stitches, increasing and decreasing stitches, knitting with circular needles...) would be seen and taught as a solo whole project. Therefore you will learn the techniques much more better and easier, and use them in suitable situations.With learning the pattern reading you can knit any design easily wherever you've seen and liked a patter. Since you will be introduced to the symbols and signs of the patterns. With the help of this course you can learn some trendy models like torns and apply them in your clothes.The environment of this course is in a way that you will not get bored at all. And you will follow the tutorial with passion and enthusiasm.In order for you to have a general and relatively understanding of the art of crochet knitting as well , we have specified a chapter to crochet knitting. With the help of this chapter you can get introduced to crochet knitting up to a good point and at last knit a bunny doll with a crochet hook. A cute bunny with its clothes.
Overview
Section 1: Introduction
Lecture 1 Introduction of different kinds of needles and different types of yarns
Section 2: All different kinds of simple and useful knitting stitches
Lecture 2 Casting on, knitting and purling(Stockinette stitch)
Lecture 3 Holding the yarn in the hand in 2 ways
Lecture 4 Garter stitch knitting
Lecture 5 The difference in the knit and purl appearances
Lecture 6 Rib stitch knitting
Lecture 7 Seed stitch knitting
Lecture 8 Two ways for Casting off
Section 3: Tutorial of useful hints
Lecture 9 How to change colors without cutting the strands of yarn
Lecture 10 Increasing stitches, decreasing stitches
Lecture 11 Increasing stiches, decreasing stiches on the edge of work
Lecture 12 What is a yarn over (YO) and its use
Lecture 13 Tutorial of vertical button holes
Lecture 14 Tutorial of horizontal button holes
Lecture 15 Attaching 2 seams together
Lecture 16 Tutorial of knitting a pocket 1
Lecture 17 Tutorial of knitting a pocket 2
Lecture 18 Tutorial of knitting a pocket 3
Lecture 19 Tutorial of knitting a pocket 4
Lecture 20 Calculating the number of stitches that we should cast on
Lecture 21 Method of washing and ironing knits
Section 4: Common mistakes in knitting and solving them
Lecture 22 How to fix split stitches
Lecture 23 Correcting the direction of the stitches
Section 5: knitting fingerless gloves & decorate them with embroidery
Lecture 24 Casting on, rib stitch knitting as the hem of the work
Lecture 25 Beginning of the stockinette stitch knitting
Lecture 26 Increasing stitches for knitting the thumb area
Lecture 27 Continuation of the stockinette, Casting off the thumb area
Lecture 28 Attaching the back and the front of the glove
Lecture 29 Starting the rib stitch knitting for the fingers area
Lecture 30 Embroidery on the gloves 1
Lecture 31 Embroidery on the gloves 2
Lecture 32 Embroidery on the gloves 3
Lecture 33 Attaching the seams of the gloves together
Section 6: Decorating your knitting
Lecture 34 Decorating knits with the use of colored beads and colored yarns
Lecture 35 Creating torns on knits
Section 7: Different kinds of beautiful and fantasy knitting stitches
Lecture 36 Tutorial of Netted stitches
Lecture 37 Bamboo stitches
Lecture 38 Honeycomb stitches
Lecture 39 Herringbone stitches
Lecture 40 Moss stitches
Lecture 41 Basketweave stitches(1)
Lecture 42 Basketweave stitches(2)
Lecture 43 Entrelac knitting(1)
Lecture 44 Entrelac knitting(2)
Lecture 45 Entrelac knitting(3)
Lecture 46 Entrelac knitting(4)
Lecture 47 Entrelac knitting(5)
Section 8: Introduction to crochet, doll making project
Lecture 48 Creating chain stitches, single crochet, double crochet
Lecture 49 Bracing and the use of it
Lecture 50 Knitting the doll's head 1
Lecture 51 Continuation of the doll's head crochetting
Lecture 52 Completing the doll head and filling it
Lecture 53 Crochetting the doll's legs
Lecture 54 Crochetting the doll's stomach
Lecture 55 Attaching the doll's head to its body
Lecture 56 Crochetting bunny's ears
Lecture 57 Attaching the ears to the head
Lecture 58 Crochetting the bunny's hands
Lecture 59 Attaching the hands to the body
Lecture 60 Crochetting a bow tie for the bunny's ear
Lecture 61 Crochetting the doll's clothes
Lecture 62 Crochetting the mouth and the nose for the bunny
Section 9: What's motif and the use of it
Lecture 63 Motifs and types of it
Lecture 64 Starting the knitting of the handbag in motif style
Lecture 65 Attaching the motifs together 1
Lecture 66 Attaching the motifs together 2
Lecture 67 Knitting the handbag strap
Section 10: knitting a seamless hat or knitting in the round (with circular needle)
Lecture 68 What is knitting in the round and its use
Lecture 69 The start of knitting a hat, calculating the number of stitches
Lecture 70 Continuation of the calculation for the number of stitches that should be casted
Lecture 71 Beginning of the stockinette stitch
Lecture 72 Beginning of the cable stitches on the hat
Lecture 73 Beginning of the cable stitches of the second row
Lecture 74 Continuation of the cable stitch knitting hints
Lecture 75 The method of tightening and squeezing the top of the hat
Lecture 76 Making pom-pom for the hat
Section 11: Combining some different types of stitches with different designs on a headband
Lecture 77 Casting on and starting the first design
Lecture 78 Continuation of the knitting stitches and combining 3 types together
Lecture 79 Start of the second row of cable stitches
Lecture 80 Casting off and attaching the headband
Section 12: Pattern reading tutorial
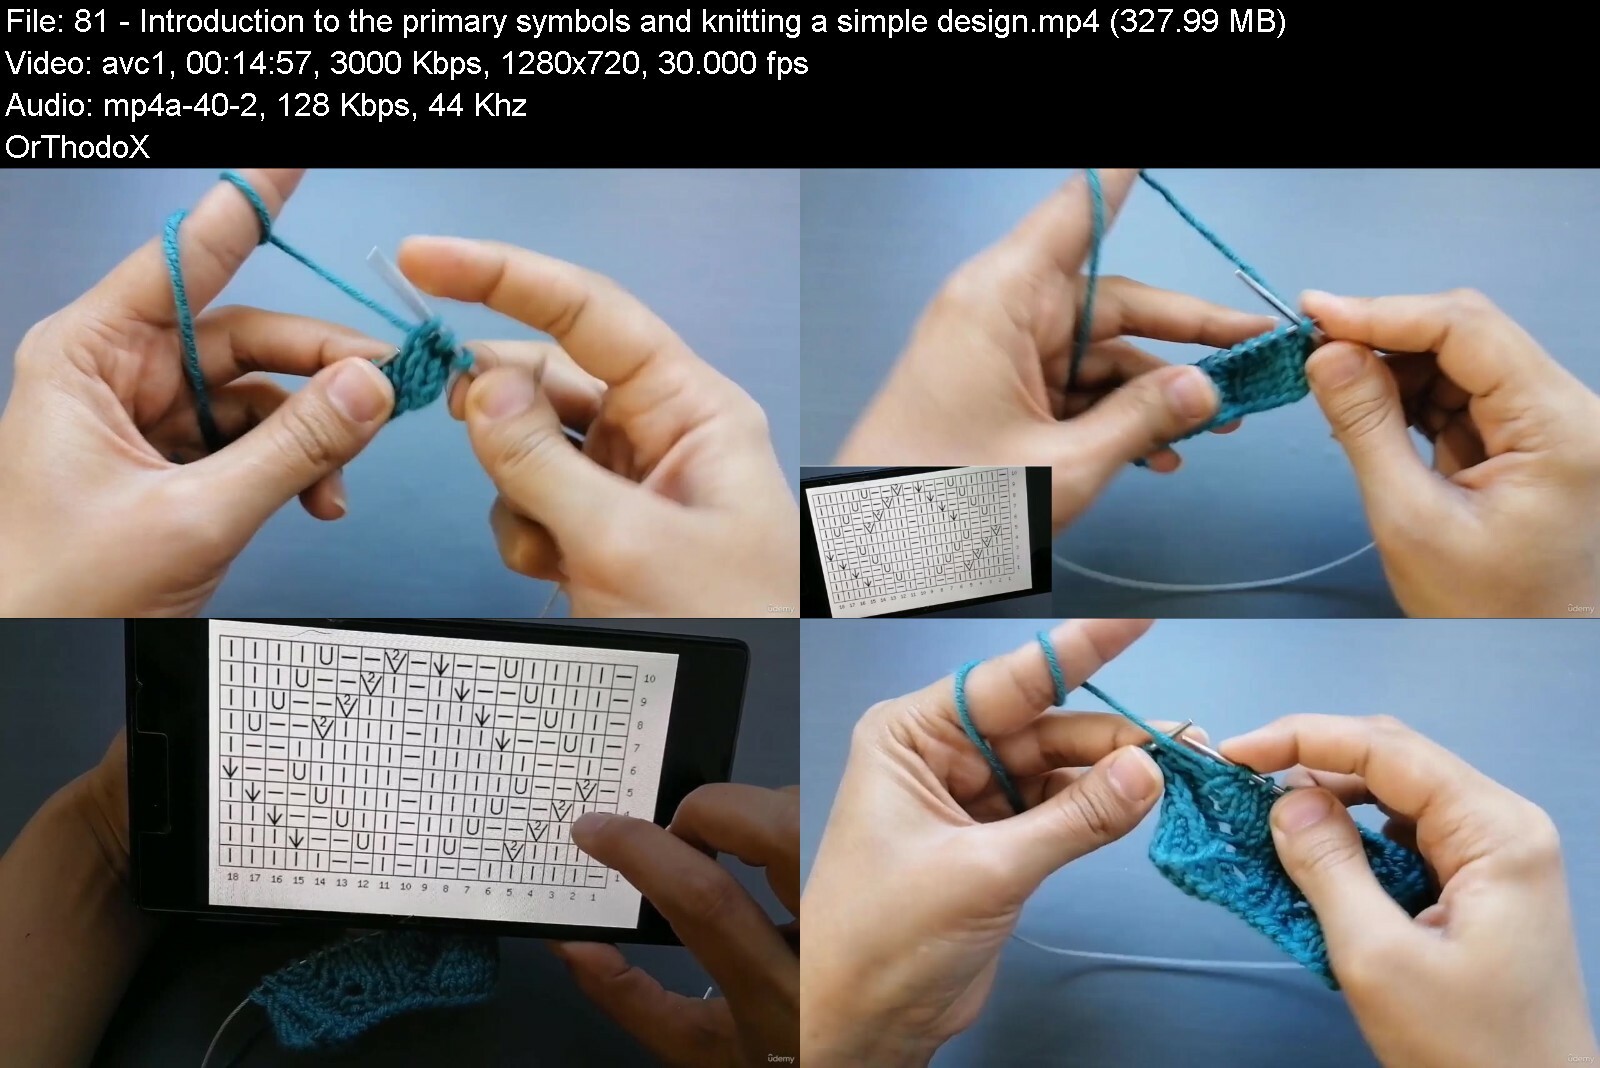
Lecture 81 Introduction to the primary symbols and knitting a simple design
Lecture 82 Tutorial of peacock feather knitting based on the pattern
Lecture 83 Knit a combined design based on the pattern
Lecture 84 Knitting a complicated fantasy design based on the pattern
Lecture 85 Continuation of the fantasy stitches with using the symbols of the patterns
Section 13: Summarizing the tutored hints, knitting the jacket project
Lecture 86 Calculating the number of the stitches that should be casted on
Lecture 87 Casting on and starting the knit
Lecture 88 Decreasing stitches for knitting of the collar
Lecture 89 Continuation of knitting the front of the jacket (1)
Lecture 90 Continuation of knitting the front of the jacket (2)
Lecture 91 Casting off the back of the neck, separations
Lecture 92 Attaching the back and the front of the shoulder
Lecture 93 Counting the number of stitches on arm hole
Lecture 94 Beginning to knit the sleeves
Lecture 95 Casting off the edge of the sleeve, attaching the seams of sleeve together
Lecture 96 Attaching the sleeves to the jacket
Lecture 97 Rib stitch knitting all around the jacket
Lecture 98 Creating button holes
Lecture 99 Continuation the knitting of clothes hem
Lecture 100 Tutorial of knitting flowers for decorating the jacket
All people who are interested in learning how to knit.,People who want to update their art of knitting.,And all people who are interested in creating artistic and handmade pieces.


knittingtheultimatekny0f6r.jpg


Download from RapidGator


Download from DDownload


MasterClass - Spike Lee Teaches Independent Filmmaking

f0r5gp3h2cqbm8gfmbv9bwqcgp.jpg


MasterClass - Spike Lee Teaches Independent Filmmaking
Spike Lee | Duration: 3:11 h | Video: H264 1280x720 | Audio: AAC 48 kHz 2ch | 2,61 GB | Language: English

Academy Award-winning filmmaker Spike Lee teaches his approach to directing, writing, and producing.

Spike Lee didn't just direct his award-winning 1986 feature debut, She's Gotta Have It. He was also the writer, star, truck driver, location scout, electrician, and caterer, because that's what it took to get his film made. In his first-ever online directing class, the visionary behind Do the Right Thing, Malcolm X, and 25th Hour lets you in on his uncompromising approach to filmmaking. Learn about writing, self-producing, working with actors, and making movies that break barriers.

Homepage


irg9xgrrbwjnp73vfbbmvbjehd.jpg


MasterClass - Margaret Atwood Teaches Creative Writing

niirpweuz4faunvwskhpx9vdfl.jpg


MasterClass - Margaret Atwood Teaches Creative Writing
Margaret Atwood | Duration: 3:43 h | Video: H264 1280x720 | Audio: AAC 48 kHz 2ch | 2,22 GB | Language: English

Learn how the author of The Handmaid's Tale crafts vivid prose and hooks readers with her timeless approach to storytelling.

Called the "Prophet of Dystopia," Margaret Atwood is one of the most influential literary voices of our generation. In her first-ever online writing class, the author of The Handmaid's Tale teaches how she crafts compelling stories, from historical to speculative fiction, that remain timeless and relevant. Explore Margaret's creative process for developing ideas into novels with strong structures and nuanced

Homepage


vyysrtxbndar3dkv6mnqtb6fuy.jpg


MasterClass - Doris Kearns Goodwin Teaches U.S. Presidential History and Leadership

yrde6rxvdt5riwvbgwxtnege00.jpg


MasterClass - Doris Kearns Goodwin Teaches U.S. Presidential History and Leadership
Doris Kearns Goodwin | Duration: 2:56 h | Video: H264 1920x1080 | Audio: AAC 48 kHz 2ch | 2,82 GB | Language: English

Pulitzer Prize-winning biographer Doris Kearns Goodwin teaches you how to develop the leadership qualities of exceptional American presidents.

For more than 50 years, historian Doris Kearns Goodwin has studied great American presidents. Now the Pulitzer Prize winner teaches you leadership through the lens of U.S. presidential history. With timeless stories of Lincoln, Teddy Roosevelt, FDR, and LBJ, Doris shares practical wisdom and a template for honing leadership skills. Manage a crisis, craft a message, and guide a team like extraordinary leaders of the past.

Homepage


ijt1wqbka4qvgenykw7ocqbiqq.jpg


Adobe Pack The Basics Photoshop + Illustrator + Indesign

rnxcinnlgzftw2da3znmgg7dtc.jpg
aaa

Adobe Pack The Basics Photoshop + Illustrator + Indesign
Last updated 3/2022
MP4 | Video: h264, 1280x720 | Audio: AAC, 44.1 KHz
Language: English | Size: 5.23 GB | Duration: 12h 46m

Pack graphics design three software, learn the basics of Photoshop, Illustrator and InDesign


What you'll learn
Use Adobe Photoshop software
Master the main tools of Photoshop
Use the tools and practice on projects with Photoshop
Use Adobe Illustrator software
Master the main tools of Illustrator
Use the tools and practice on projects with Illustrator
Use Adobe InDesign software
Master the main tools of InDesign
Use the tools and practice on projects with InDesign

Requirements
You must have Photoshop installed as a trial or subscription
You must have Illustrator installed as a trial or subscription
You must have InDesign installed as a trial or subscription

Description
Learn three software in one course ! In this training we will see the graphics software of the Adobe series. Namely Adobe Photoshop, Adobe Illustrator and Adobe InDesign. These three software have a number of similarities but also many differences. Their uses vary depending on the graphic projects you want to do. They can be also very complementary on many graphic projects. With this training you will have the opportunity to master the basics of the three software. Each time we will see the software in three parts: The start with the understanding of the workspace, the mastery of the main tools, and the training on two basic graphic projects.This course offers the basics of each software. If you want to deepen each software in detail with additional elements and additional training projects, I invite you to see the extensive training on each software that I propose.Photoshop is the graphics software par excellence. Photoshop is a bitmap editing software, your project will be an accumulation of pixels on which you will intervene with new pixels. The strength of Photoshop is to be able to generate any image. Although we often think of Photoshop for photo editing and rightly so, this tool will also allow you to create a poster, to give life to an illustration, to create a mock-up of the Internet site and many others. Photoshop is not a very intuitive and easy-to-use tool, that's why it is important at first to learn how to work and how to use the tools.Illustrator is an illustration software that allows you to create vector images. It can be used totally independently of Photoshop, as it can be in addition to Photoshop. This software is both suitable for creating documents for printing such as brochures, flyers, brochures, logos ... but also for documents for the web. The strength of the vector image lies in the fact that it does not suffer loss of quality when it is enlarged. The zoom can be used to infinity, it will not affect the quality of the image. This method therefore adapts to all formats. The other advantage is the sharpness of the lines obtained. It is on this point that Illustrator is essential. And it is very important for files related to printing.InDesign is more than a layout software. It's really the functionality that is not found on the other 2 tools. Indeed, the software allows the layout of documents in more complex and creative ways than Photoshop and Illustrator. Everything is done to optimize professional layouts. You can do creative word processing and combine text with design. However, the tool does not allow visual editing or even image creation. Very useful for creating book layouts, brochures, flyers ...
Overview
Section 1: Photoshop start with the fundamentals
Lecture 1 Manage windows
Lecture 2 Create new document
Lecture 3 Save and export
Lecture 4 Layers principle part 1
Lecture 5 Layer principle part 2
Section 2: Photoshop discover the main features
Lecture 6 Rectangular selection tool
Lecture 7 Object selection tool
Lecture 8 Quick selection tool
Lecture 9 Magic wand tool
Lecture 10 Select and mask
Lecture 11 Improve selection with edge brush tool
Lecture 12 Crop tool
Lecture 13 Spot healing brush tool
Lecture 14 Brush tool
Lecture 15 Pen tool
Lecture 16 Add delete and edit anchor point
Lecture 17 Gradient tool
Lecture 18 Paint bucket tool
Lecture 19 Eyedropper tool
Lecture 20 Liquify filter
Lecture 21 Layer mask
Lecture 22 Adjustment layers
Lecture 23 The different adjustments to edit photo
Lecture 24 Guides and rulers
Lecture 25 Use the grid
Lecture 26 Add text
Section 3: Photoshop two training projects
Lecture 27 Improve a face part 1
Lecture 28 Improve a face part 2
Lecture 29 Photo montage part 1
Lecture 30 Photo montage part 2
Section 4: Illustrator start with the fundamentals
Lecture 31 Manage dashboard
Lecture 32 Create new document
Lecture 33 Export work
Lecture 34 Layers principle part 1
Lecture 35 Layers principle part 2
Section 5: Illustrator discover the main features
Lecture 36 Rectangle tool
Lecture 37 Pen tool
Lecture 38 Add delete and edit anchor point
Lecture 39 Paint brush tool
Lecture 40 Rotate tool
Lecture 41 Eraser tool
Lecture 42 Shape builder tool
Lecture 43 Create shapes with pathfinder
Lecture 44 Color panel
Lecture 45 Create gradient
Lecture 46 Edit stroke
Lecture 47 Add text
Lecture 48 Text on a path
Lecture 49 Use the guides
Lecture 50 Use the grid
Lecture 51 Manage alignments
Lecture 52 Manage distribution
Lecture 53 Edit transformations
Lecture 54 Import image
Lecture 55 Convert image into tracing object
Lecture 56 Convert tracing object into paths
Section 6: Illustrator two training project
Lecture 57 Basic character part 1
Lecture 58 Basic character part 2
Lecture 59 Invitation drawing part 1
Lecture 60 Invitation drawing part 2
Section 7: In Design start with the fundamentals
Lecture 61 Manage windows
Lecture 62 Create new document
Lecture 63 Export work
Section 8: In Design discover the main features
Lecture 64 Rectangle tool
Lecture 65 Rectangle frame tool
Lecture 66 Adjust image inside frame
Lecture 67 Pen tool
Lecture 68 Alignements
Lecture 69 Transformation
Lecture 70 Distribution
Lecture 71 Color panel
Lecture 72 Gradient
Lecture 73 Effect part 1
Lecture 74 Effect part 2
Lecture 75 Strokes
Lecture 76 Margins and columns
Lecture 77 Create guides
Lecture 78 Add text
Lecture 79 Text on a path
Lecture 80 Warp text
Lecture 81 Edit paragraph
Lecture 82 Shading and border on paragraph
Lecture 83 Manage pages part 1
Lecture 84 Manage pages part 2
Lecture 85 Masters part 1
Lecture 86 Masters part 2
Section 9: In Design two training projects
Lecture 87 Visit card part 1
Lecture 88 Visit card part 2
Lecture 89 Fashion magazine part 1
Lecture 90 Fashion magazine part 2
Students in design graphics,Individuals who wish to learn this software,The designers,Graphic Design Professionals


adobepackthebasicspho4mily.jpg


Download from RapidGator


Download from DDownload


Build Multiplayer Games With Unity And Photon ( Pun 2)

rprckn45r2tkx7jddliyjhrfuc.jpg


Build Multiplayer Games With Unity And Photon ( Pun 2)
Last updated 10/2021
MP4 | Video: h264, 1280x720 | Audio: AAC, 44.1 KHz
Language: English | Size: 7.00 GB | Duration: 10h 56m

Multiplayer game development made easy.Learn the basics of Multiplayer games by building from the scratch with Photon.


What you'll learn
Multiplayer Game Development Basics
Mobile FPS Shooter Basics
How to use FPS Hands and Full Character Model together in multiplayer FPS game
How to synchronize player movement, health and animation for all players in the same room
Adding Mobile Controls For FPS Games

Requirements
Beginner-Intermediate Unity
Intermediate C# Experience
Desire to learn Multiplayer Game Development

Description
Have you ever wanted to build your own multiplayer games that hit the stores like Pixel GUN 3D, Golf Clash and ShadowGun Legends? Yeah, you've come to the right place!Because all these successful games are built using Photon which is a multiplayer game engine trusted by hundred thousands of developers around the globe!In this course, you will learn the basics to create your own multiplayer games! And in every section, we will build a multiplayer game from scratch! So, you will learn by doing in every project...In the first section, we will build Pixel Gun 3D Clone project from scratch with Photon Unity Networking 2 (PUN2).It will be your first multiplayer game. By building this game, you will learn lots of things:Creating and joining a random rooms with Photon.Instantiating remote players in the same room.Synchronizing Player movement and player health across the network.In the second section, we will build a Mobile Multiplayer FPS Game from scratch with Photon Unity Networking 2 (PUN2).In this section, you will learn more advanced stuff in multiplayer games.How to create rooms by name and max.players.How to list the existing rooms.How to list the players in the room.How to synchronize player animations across the network.First Person Shooter basics like FPS Hands and 3D player models.Mobile ControllersBasic re-spawning mechanism after the player got killed!In the third section, we will build Multiplayer Racing Game from scratch with Photon Unity Networking 2 (PUN2).There will be more and more advanced stuff and you will have the opportunity to practice what you learned.How to work with Scriptable ObjectsHow to sync Projectile Shooting over the networkCharacter SelectionGame Mode SelectionRaise Events Player Ready MechanismAnd more..So, come and join me on this Multiplayer Game Development Journey! Lets build together!-Tevfik
Overview
Section 1: Introduction
Lecture 1 Introduction
Lecture 2 Introduction to Photon
Lecture 3 Photon Unity Networking 2 Example Scenes
Section 2: Your First Multiplayer Game: Pixel GUN 3D Clone
Lecture 4 Introduction
Lecture 5 READ BEFORE PROCEED
Lecture 6 Creating The Project And Importing Photon Unity Networking 2 ( PUN 2 )
Lecture 7 Connecting to Photon With Player Name
Lecture 8 Preparing Connection Status UI And Lobby UI
Lecture 9 Creating And Joining Random Room
Lecture 10 Preparing Game Scene
Lecture 11 About The Server Regions
Lecture 12 Loading Game Scene When Joining Room
Lecture 13 Creating FPS Pixel GUN Character
Lecture 14 Basic FPS Movement[Part-1]
Lecture 15 Basic FPS Movement[Part-2]
Lecture 16 Attaching Weapon to Pixel GUN Character
Lecture 17 Spawning Players In The Same Room
Lecture 18 Introduction To Player Networking: Movement Synchronization
Lecture 19 Showing Player Names On Top Of Players
Lecture 20 Showing Health Of Players- Health Bar UI
Lecture 21 Shooting Mechanism
Lecture 22 Killing Mechanism- RPC Calls
Lecture 23 Synchronizing Player Health And Adding Crosshair -RPC Calls
Lecture 24 Dying Mechanism
Section 3: Mobile Multiplayer FPS Game
Lecture 25 Introduction
Lecture 26 Creating Mobile FPS Project And Importing PUN 2
Lecture 27 Creating Lobby Scene
Lecture 28 NetworkManager Script: Connecting To Photon With Player Name
Lecture 29 Preparing Multiplayer UI
Lecture 30 Creating Room With Room Name and Max. Players
Lecture 31 Showing The Existing Rooms In A List[Part-1]
Lecture 32 Showing The Existing Rooms In A List[Part-2]
Lecture 33 Showing The Existing Rooms In A List[Part-3]
Lecture 34 Listing Players In The Same Room[Part-1]
Lecture 35 Listing Players In The Same Room[Part-2]
Lecture 36 Joining Random Room
Lecture 37 Preparing Game Scene
Lecture 38 Loading Game Scene For All Players In the Room
Lecture 39 Importing Player Models: Soldier
Lecture 40 Importing Player Models: FPS Hands
Lecture 41 Instantiating Players In The Same Room
Lecture 42 Writing PlayerSetup Script: FPS Hands OR Full Soldier Model ?
Lecture 43 Basic FPS Character Movement
Lecture 44 Adding Mobile Controller[Part-1]
Lecture 45 Adding Mobile Controller[Part-2]
Lecture 46 Mobile Movement Across The Network
Lecture 47 Character Animations Part-1: Generic Animation Controller
Lecture 48 Character Animations Part-2: Blend Trees
Lecture 49 Character Animations Part-3: Combining FPS Hands Animations And Animation Sync
Lecture 50 Shooting With Hit Effects
Lecture 51 Killing Mechanism Part-1: Revisiting RPCs
Lecture 52 Killing Mechanism Part-2: Synchronized Hit Effects And Dying Animation
Lecture 53 Respawning With Timing
Section 4: Multiplayer Racing Game
Lecture 54 Creating The Project: Importing PUN 2
Lecture 55 Importing Game Assets
Lecture 56 Network Manager Script: Connecting To Photon With Player Name
Lecture 57 Preparing UI Navigation
Lecture 58 Creating Rooms Based On Game Mode Type- Custom Room Properties[Part-1]
Lecture 59 Creating Rooms Based On Game Mode Type- Custom Room Properties[Part-2]
Lecture 60 Joining Random Rooms Based On Game Mode
Lecture 61 Listing Players In The Same Room[Part-1]
Lecture 62 Listing Players In The Same Room[Part-2]
Lecture 63 Player Ready Check Mechanism[Part-1]
Lecture 64 Player Ready Check Mechanism[Part-2]
Lecture 65 Loading Game Mode Scene Based On Game Mode For All Clients
Lecture 66 Racing Game Mode: Player Selection UI
Lecture 67 Racing Game Mode: Instantiating Players Based On Player Selection
Lecture 68 Racing Game Mode: Car Movement Script
Lecture 69 Racing Game Mode: PlayerSetup Script And Synchronizing Movement Across The Netwo
Lecture 70 Racing Game Mode: Synchronizing Countdown To Start The Race!
Lecture 71 Racing Game Mode: Who won?- Lap Controller Script
Lecture 72 Racing Game Mode: Displaying The Race Results-Raise Events[Part-1]
Lecture 73 Racing Game Mode: Displaying The Race Results - Raise Events[Part-2]
Lecture 74 Racing Game Mode: Displaying Player Name On Top of Cars
Lecture 75 Death Race Game Mode: Introduction to Scriptable Objects
Lecture 76 Death Race Game Mode: Dynamic Player Selection With Scriptable Objects
Lecture 77 Death Race Game Mode: Instantiating Players And Synchrozing Movement
Lecture 78 Death Race Game Mode: Shooting With Bullets
Lecture 79 Death Race Game Mode: Shooting With Rocket Launcher And Fire Rate
Lecture 80 Death Race Game Mode: Shooting With Laser Gun
Lecture 81 Death Race Game Mode: Synchronizing Shooting Across The Network
Lecture 82 Death Race Game Mode: Killing Mechanism
Lecture 83 Death Race Game Mode: Respawn Mechanism
Lecture 84 Death Race Game Mode: Quit Match Mechanism
Section 5: Where to go next?
Lecture 85 Final words on Multiplayer Game Development
Section 6: Games Source Codes
Lecture 86 Download Links
Section 7: Bonus Section
Lecture 87 Discounts On My Other Courses
Unity developers who want to build multiplayer games,Developers who want to start game development with multiplayer games


buildmultiplayergames07ckw.jpg


Download from RapidGator


Download from DDownload


Learn to code with C++ UE5 Game Development

48169604e0658fe4y.jpg


Learn to code with C++ UE5 Game Development
Published 08/2022
MP4 | Video: h264, 1280x720 | Audio: AAC, 44.1 KHz, 2 Ch
Genre: eLearning | Language: English + srt | Duration: 33 lectures (4h 40m) | Size: 6.06 GB


Make a game in Unreal with C++ programming!


What you'll learn
Code in C++
Build a game
Run C++ applications
Design a game level
Requirements
No experience necessary
Description
Learn to code with C++ UE5 Game Development
Alexandra Kropova is a software developer with extensive experience in full-stack web development, app development and game development. She has helped produce courses for Mammoth Interactive since 2016, including the Coding Interview series in Java, JavaScript, C++, C#, Python and Swift.
When does the course start and finish?
The course starts now and never ends! It is a completely self-paced online course - you decide when you start and when you finish.
How long do I have access to the course?
How does lifetime access sound? After enrolling, you have unlimited access to this course for as long as you like - across any and all devices you own.
Mammoth Interactive is an online course provider in everything from learning to code to becoming a YouTube star. Mammoth Interactive courses have been featured on Harvard's edX, Business Insider and more.
Over 11 years, Mammoth Interactive has built a global student community with 1.1 million courses sold. Mammoth Interactive has released over 250 courses and 2,500 hours of video content.
Founder and CEO John Bura has been programming since 1997 and teaching since 2002. John has created top-selling applications for iOS, Xbox and more. John also runs SaaS company Devonian Apps, building efficiency-minded software for technology workers like you.
Who this course is for
Anyone interested in coding C++ for game development


learntocodewithcue5gazrf30.jpg


Download from RapidGator


Download from DDownload

 
Concept Art: Draw And Paint Fantasy And Scifi Weapons

tmjesomuj3wspedw1qgirf3cym.jpg


Concept Art: Draw And Paint Fantasy And Scifi Weapons
Last updated 2/2020
MP4 | Video: h264, 1280x720 | Audio: AAC, 44.1 KHz
Language: English | Size: 12.63 GB | Duration: 25h 17m

Learn how to Draw and Paint Fantasy Weapons, Scifi Guns, and Vehicles!


What you'll learn
Drawing and Painting Weapons
Drawing and Painting Guns
Drawing and Painting Vehicles
Drawing and Painting Mechs
Drawing and Painting Melee Weapons
Painting Magical Effects

Requirements
Computer + Drawing Tablet OR iPad with Apple Pencil OR equivalent equipment
Desire to learn!

Description
The Drawing and Painting Weapons, Guns, Vehicles, and Mechs Course gives you a total introduction to digitally drawing and painting a wide array of weapons, guns vehicles and mech robots . Or your money back.Throughout this course, you'll be taught the art and design skills you always wanted to learn. Whether you're just learning as a hobbyist, or you plan on becoming a professional digital illustrator or concept artist. This is the perfect course for you.Throughout this course you'll be going through over 25 hours of live narrated content, over 50 lectures, and 55 downloadable resources. First I'll be bringing you through the very basics of perspective, then shading and rendering, and finally sections on drawing and painting melee and magical weapons, guns, vehicles, and mech robots.Here's what you'll get in this course:Instant access to all 55 lectures, in 8 sections.over 25 hours of live, narrated content where I'll be bringing you through every step in real time.Full money back guarantee within 30 days of purchasing the course!The course is laid out in an easy to understand format:First I'll be teaching you the fundamentals of perspective. We'll go through 1 and 2 point perspective, offering the same assignments that I had when I was a student in some of the top design schools.After that, I'll be teaching you the importance of lighting and how to shade and render the basic elements that create everything. Spheres, Cubes, Cones, and Cylinders. These are the elements that make up almost everything around us. Finishing off with Rendering 3 different weapons as a fundamental final exercise.Next we move on to jumping straight into learning about the basics of melee weapons. Understanding is the most important part of effectively designing, so we'll be looking at weapons and sketching them out with the intention to understand them.After this we'll go into sketching out Swords, Axes, Shields, Staffs, and Bows. Starting very rough and gradually refining them.Next we'll start rendering our weapons, paying attention to the forms, colors, and details. I'll bring two of the weapons to a high quality finish.After this I'll teach you about drawing magical effects, what to think about when drawing magic, and take you through flame effects, ice effects, and lightning effects. Adding them to a weapon as an example.In the next session we'll be moving on to guns. I'll use the same process of first understanding, then applying what we learned and using that to create believable and interesting gun designs.I'll bring you through sketching many different guns and we'll take two of them and render them to a high polish. After this I'll teach you about drawing scifi guns and painting lasers and effects.After guns we'll move on to vehicles. Where again I'll teach you the basics, then introduce you to my favorite way of drawing vehicles without having to worry too much about perspective. We'll sketch a few out that way before diving in and rendering out one of our sketches to a very high detailed finish.I'll go over the basics of tanks and boats as well and how to approach drawing them.After this I'll go over balloon airships, and spaceships. Sketching some and talking about how to approach drawing those as well.Finally we'll be diving into sketching and drawing mechs. I'll walk you through my process when sketching them and also finish off with painting one of our sketches.Throughout this entire course you'll be learning:How to use perspective and understand itHow to render and shade objects realisticallyHow to draw and paint melee weaponsHow to paint magical effectsHow to draw and paint gunsHow to draw and paint vehiclesAdding lots of details!tips and tricks on painting, drawing, and design.tons of live narrated drawing!over 115 downloadable resources!Other Benefits:You'll also be getting access to the Q&A sectionLifetime access to all the course material.Contact with me, your instructorSign up today and take the next step to growing as an artist!
Overview
Section 1: Introduction
Lecture 1 Welcome to the Course!
Lecture 2 Supplies
Lecture 3 How to use the Q&A Section
Lecture 4 Your Toolset
Lecture 5 Inspiration Assignment
Section 2: Fundamentals
Lecture 6 Intro to the Fundamentals Section
Lecture 7 Perspective Introduction
Lecture 8 1 Point perspective Lesson
Lecture 9 1 Point Perspective Homework
Lecture 10 2 Point Perspective Lesson
Lecture 11 Camera Lesson
Lecture 12 2 Point Perspective Homework
Lecture 13 Basics of Lights and Lighting
Lecture 14 Rendering Fundamentals: Half to Black
Lecture 15 Primitive Rendering: Spheres and Cubes
Lecture 16 Primitive Rendering: Cylinders and Cones
Lecture 17 Practice Assignment - Primitive Weapon Rendering
Section 3: Melee Weapons
Lecture 18 Symmetry Drawing
Lecture 19 Side Views and Why We Use Them
Lecture 20 Melee Weapon Basics
Lecture 21 Swords
Lecture 22 Axes
Lecture 23 Shields
Lecture 24 Staff
Lecture 25 Bows
Lecture 26 Finalizing weapons Part 1
Lecture 27 Finalizing Weapons Part 2
Lecture 28 Magical Effects
Lecture 29 Flaming Weapon Effects
Lecture 30 Ice Weapon Effects
Lecture 31 Lightning Weapon Effects
Section 4: Guns
Lecture 32 How Guns Work
Lecture 33 Old Guns
Lecture 34 Weapon Sketches
Lecture 35 Pistol Sketching
Lecture 36 Rifle Sketching
Lecture 37 Sniper Rifle Sketching
Lecture 38 Shotgun Sketching
Lecture 39 Gun Rendering: Part 1
Lecture 40 Gun Rendering: Part 2
Lecture 41 Scifi Guns
Lecture 42 Lasers and Effects
Section 5: Vehicles
Lecture 43 Vehicle Basics
Lecture 44 Side View Vehicle Sketches
Lecture 45 Quick and Easy Way to Draw Vehicles
Lecture 46 Rendering Vehicles: Part 1
Lecture 47 Rendering Vehicles: Part 2
Lecture 48 Vehicle Rendering: Colored Backgrounds
Lecture 49 Tanks
Lecture 50 Boats
Section 6: Airships and Space Ships
Lecture 51 Balloon Airships
Lecture 52 Space Ship Shape Basics
Section 7: Mechs
Lecture 53 Mech Basics
Lecture 54 Rendering Mechs
Section 8: Ending Thoughts
Lecture 55 Farewell!
Anyone who wants to learn how to draw and paint!,Anyone who wants to learn how to design Weapons,Anyone who wants to learn how to draw and design Vehicles,Anyone who wants to learn how to draw and design Mechs,Anyone interested in drawing and painting.


conceptartdrawandpainupc8t.jpg


Download from RapidGator


Download from DDownload


Absolute Beginners Retopology And Uv Unwrapping In 3Dsmax

4ksj49pfszcuam5gmjtbjseeu3.jpg


Absolute Beginners Retopology And Uv Unwrapping In 3Dsmax
Last updated 10/2020
MP4 | Video: h264, 1280x720 | Audio: AAC, 44.1 KHz
Language: English | Size: 10.34 GB | Duration: 9h 13m

Learn the secrets of retopologizing in 3dsMax


What you'll learn
In this course we will make the full character retopology in 3dsMax. We will learn how to export your high poly from Zbrush, put it in to 3dsMax and arrange polygons over it. We will also learn how to make a good, production ready retopo of the realistic human haead and hand. And also make all the UV unwrapping.

Requirements
You should want to put your Zbrush models in to a game engine or render them efficiently.

Description
You probably have always wondered, how to make your Zbrush models animation ready and prepare them for texturing? How to make this retopologizing step that everybody is talking about? How to make this jump from couple of million polygons to just a few thousand? All those questions, and more, will be answered in this course. My name is Niko, and i am a 3D character artist for more than a decade now. I have made numerous characters for numerous games. And for all of them i was using the style of retopologizing and UV mapping i will show you in this course. Using the retopology and UV unwrap tools that come default with 3ds Max, we will retopologize a simple cartoon character. We will then make it's UVs, so he is ready for baking and texturing in Substance painter (whch we will do separately in the Substance painter course). As a bonus i will show you how to retopologize and unwrap an animation ready realistic head with open mouth and also a realistic hand. In this course we will learn:p
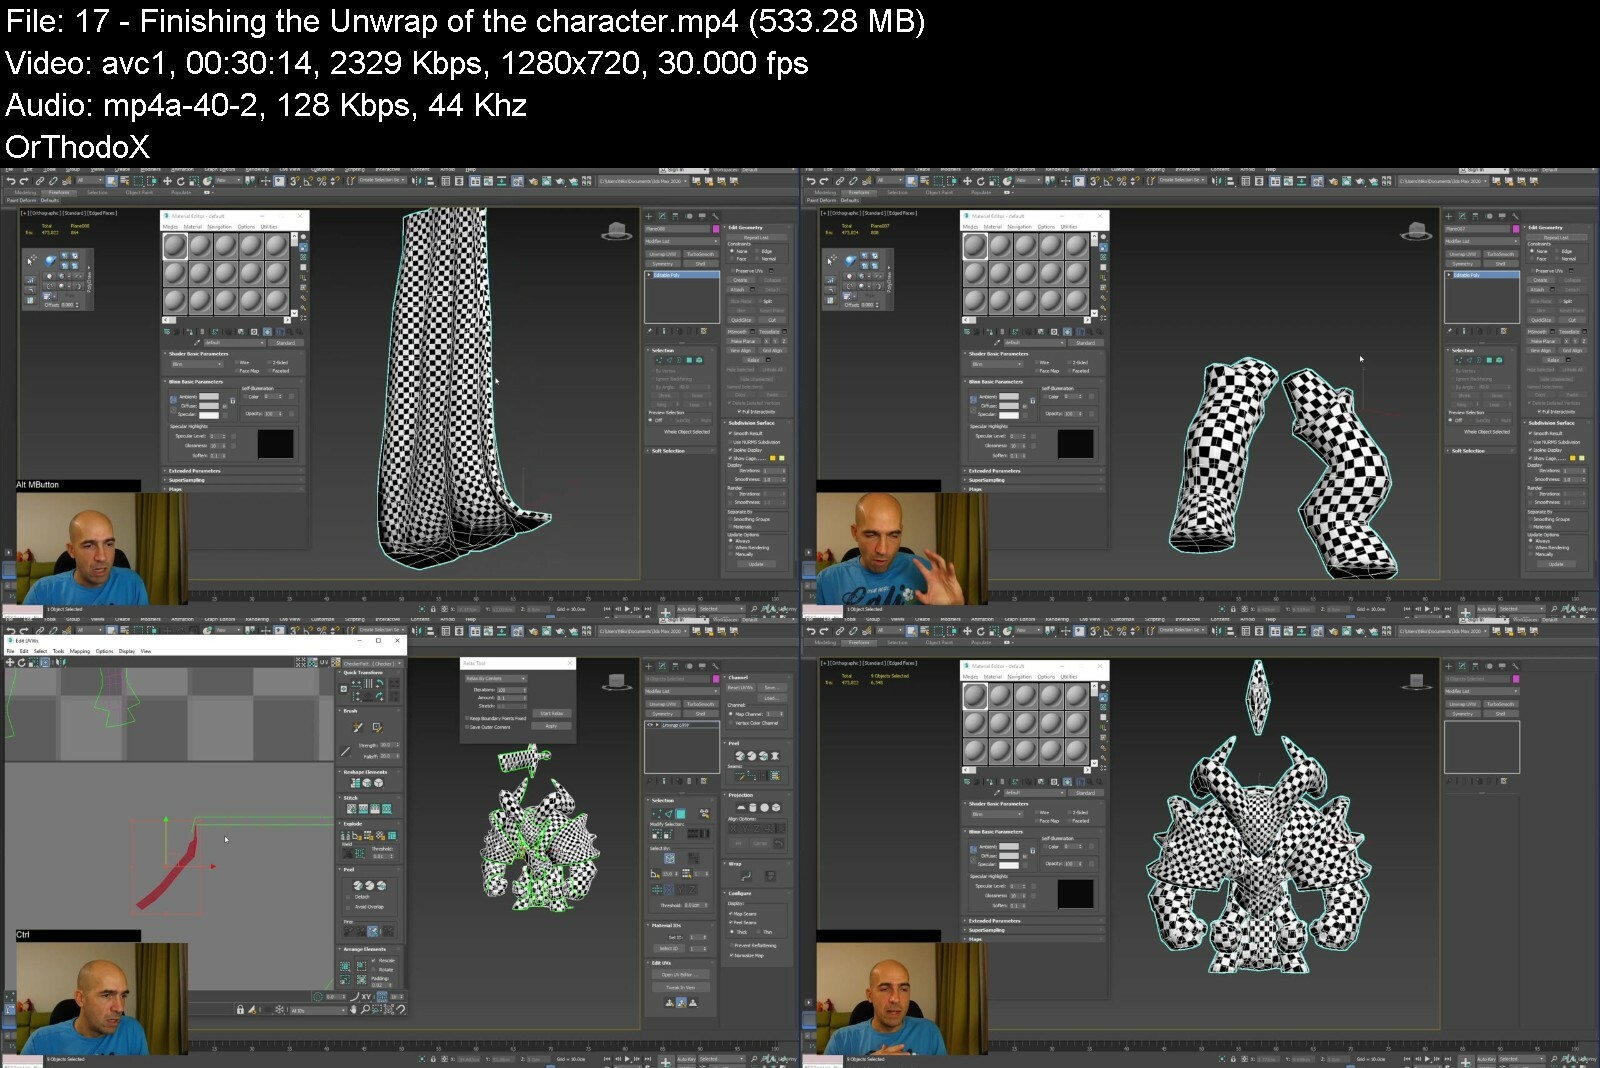
reparing your mesh in Zbrush for exportExporting your meshes from Zbrush and import them in 3dsMaxBaiscs of 3dsMax, needed for retopologyHow to start the retopology of a characterRetopologizing tricks and hintsBasics of 3dsMax UV unwrap Hints and tips on efficiant and quality unwraping of a characterExporting a high poly realistic head from Zbrush and importing in 3dsMaxRetopologizing a realistic head with loops in the right places ready for animationMaking good and useful UV map of a human headRetopology of a human handUV mapping of a human handSome interesting random artistic stuff when we are doing something repetitive :)We will start in Zbrush, where we will spend some time to organize, merge and prepare the high poly meshes for export. Then we will decimate the high poly so we can import it in 3dsMax without too much performance issues. We will see how to export meshes from Zbrush and import them in 3dsMax. Then we will get familiar with the retopology tools and get some basic knowledge about 3d Max. After that we will start the retopolology from the head and horns, and then going trough every separate pieces we have, like the arms, shoulders, cape and legs. As we go i will tell you how i do retopology and how i approach the problems when retopologizing. We will then get familiar with the UV unwrapping capabilities embeded in 3dsMax, and we will start unwrapping the character piece by piece and checking our unwrap with a checker texture. When we finish, we will arrange all the pieces in a sqare texture space like a puzzle. When we are done with that we will export a realistic head from Zbrush, and import it in Max so we can start making it's topology. We will make a topology which is animation friendly and also include the inside of the mouth. Next will be, of course, making the UV unwrapping of the head, in which i will show you how to use Zbrush as a very good unwrapping tool. We will do all this steps again for a realistic hand too. I made this course for absolute retopology beginners and no previous knowledge of 3dsMax is required. I made this course in 3dsMax, because i always made my retopologies and UV mapping there, i think it is a pretty good software for this purpose, and i am ready to prove it! So see you in the first video of the course!
Overview
Section 1: Course
Lecture 1 Introduction
Lecture 2 Preparing the model in Zbrush and exporting meshes for retopology
Lecture 3 Getting familiar with 3dsMax and starting retopology
Lecture 4 Retopologizing the horns
Lecture 5 Retopology of the head and symmetry
Lecture 6 Retopo the shoulders pt1
Lecture 7 Retopo the shoulders pt2
Lecture 8 Retopologizing the cape
Lecture 9 Retopologizing the arm
Lecture 10 Retopologizing the small cloth and traps armor
Lecture 11 Retopo of the chest armor
Lecture 12 Retopologizing the legs
Lecture 13 Retopo the knee armor and the sword
Lecture 14 Starting the UV unwrap
Lecture 15 UV mapping the shoulders and armor
Lecture 16 Unwrapping the arms and some Zbrush unwrap
Lecture 17 Finishing the Unwrap of the character
Lecture 18 Retopology of a realistic head pt1
Lecture 19 Retopology of the head pt2
Lecture 20 Finishing the head retopology
Lecture 21 Making the head UVs
Lecture 22 Using Zbursh to better unwrap the head
Lecture 23 Hand retopology in 3dsMax pt1
Lecture 24 Finish the retopo of the hand
Lecture 25 UV unwrapping of the hand
Lecture 26 Goodbye
People who want to learn retopology and UV unwrap for games.


absolutebeginnersretowlcmu.jpg


Download from RapidGator


Download from DDownload


Adobe 5 Courses In 1: Photoshop, After Effects, Id, Ai & Lr

2slsrfhmynkw0kbpqcgcgpliru.jpg
a

Adobe 5 Courses In 1: Photoshop, After Effects, Id, Ai & Lr
Published 8/2022
MP4 | Video: h264, 1280x720 | Audio: AAC, 44.1 KHz
Language: English | Size: 5.47 GB | Duration: 6h 21m

Learn Adobe CC Smart Tips & Boost Your Creative Skills: After Effects, Photoshop, InDesign, Illustrator & Lightroom


What you'll learn
After Effects: Effects, Presets, Masking Images, Track Matte, Motion Path, Toggle Hold Keyframe, Trim Path PLUS Spinning Globe Effect
Photoshop: Crop Tool, Layers, Blending, Auto-Align & Blend, Smart Objects, Clipping Masks, Hue, Saturation, Monochrome & 3D Shapes
InDesign: Learn graphic design and page layout skills today: Text Flow, Paste Into, Text Import & other Adobe InDesign features
Illustrator: Path Finder, Compound Shapes, Free Form, Intersect, Perspective Grid, Rosette, Revolving Tool PLUS Test Yourself Quizzes
Lightroom: Custom presets, smart previews, Loupe Overlay, panoramas, colour conversion & much more

Requirements
There are no requirements or prerequisites, we assume a beginner level in the lessons and workbooks
You can learn everything you need from following the course but for practice and doing your own projects you will need each Adobe product which you can get in a subscription to Adobe CC

Description
Get instant access to a 50-page workbook on Adobe Creative Cloud with smart tips for all 5 products, follow along, and keep for referencePlus:*Workbooks for each of the 5 Adobe CC productsPlus:*Worksheets for each of the lessonsIntroduce yourself to our community of students in this course and tell us your goals with data scienceEncouragement and celebration of your progress every step of the way: 25% > 50% > 75% & 100%Over 6 hours of clear and concise step-by-step instructions, lessons, Q&A*and engagementKnowledge Checks to assess your knowledge and skillsWhat you will learn:After Affects:*Effects, Presets, Masking Images, Track Matte, Motion Path, Toggle Hold Keyframe, Trim Path PLUS Spinning Globe EffectPhotoshop:*Crop Tool, Layers, Blending, Auto-Align & Blend, Smart Objects, Clipping Masks, Hue, Saturation, Monochrome & 3D ShapesInDesign: Learn graphic design and page layout skills today: Text Flow, Paste Into, Text Import & other Adobe InDesign featuresIllustrator: Path Finder, Compound Shapes, Free Form, Intersect, Perspective Grid, Rosette, Revolving Tool PLUS Test Yourself QuizzesLightroom:*Learn Adobe Lightroom features: custom presets, smart previews, Loupe Overlay, panoramas, colour conversion & much moreContents and OverviewYou'll start by Preview and Download The Adobe After Effects Workbook You Get With This Course; Getting Started & Working With Effects & Presets; Working with Effects and Presets; Masking Images; Working with Track Matte; Creating a Motion Path; Using the Toggle Hold Keyframe; Animating the Stroke of Text Using Trim Path; Create Spinning Globe in the World Effect; Preview and Download The Adobe Photoshop Workbook You Get With This Course; The Crop Tool; Introduction to Layers; Explore Layer Blending Modes; Learn How to Auto-Align Layers; Learn How to Auto-Blend Layers; Working with Smart Objects; Application of Clipping Masks; Explore Hue & Saturation; Perform a Monochrome Conversion; Using Path Blur Filter; Applying Shake Reduction; Creating a 3D-Anaglyph; Creating 3D-Shapes.We will also cover Download & Preview The Adobe InDesign Workbook that you get with this course; Importing Text from a Word Document; Understanding Import Options; Using the Paste into Command; Adding a Placeholder Text; Thread Text Across Frames; Explore Flowing Text in InDesign; Preview and Download The Adobe Illustrator Workbook You Get With This Course; Working with Path Finder; Working with Modifier Keys; Create a Compound Path; Create an Envelope Distortion; Using the Free Form Gradient; Create a Perspective Grid; Create a Rosette; Using the Revolving Tool.This course will also tackle Preview and Download The Adobe LightRoom Workbook That You Get In This Course; Perform a Black & White Lightroom Conversion; Explore White Balance in Lightroom; Create Your Own Custom Presets; Use Smart Previews in Lightroom; Understand Loupe Overlay; Create Panoramic View in Lightroom.Then, Introduction to Mike Lanesman, overview and thoughts on adobe creative software; All about the Adobe community and courses that are coming out soon; join, engage; Mike answers a question about handling lighting on a budget and editing after; "I can take great pics, software takes me to the next level; interdependence"; Know the importance of learning adobe and why adobe is so successful; Does adobe allow once off payments for their software or is it all subscriptions; Learn recommendations on editing software for creating amazing backgrounds; Learn the tips on how and where to start on graphic design; Would it be better to work on photography skills and make up for editing skills; Using phones to take images and overcompensating for editing and other factors; Starting on the courses for where and how to begin on learning adobe software; Is possible to tell if a picture has been edited and other factors on posting; Learn tips on taking decent photo on smartphone and specs you should look for; Make money by learning Adobe skills and become an entrepreneur in your community; Learn Adobe Creative Skills With Certified Trainer Mike Lanesman.Who are the Instructors?Mike Lanesman is your lead instructor - a professional making a living from teaching graphics and design.*As a graphic design expert, he has joined with content creator Peter Alkema to bring you this amazing new course.You'll get premium support and feedback to help you become more confident with Adobe After Effects!We can't wait to see you on the course!Enrol now, and we'll help you improve your Adobe skills!Peter
Overview
Section 1: Introduction
Lecture 1 Introduction
Lecture 2 Adobe CC 5 in 1 Fifty Page Workbook[Preview & Download]
Lecture 3 Hello my name is Mike Lanesman, I am full accredited to teach Adobe and help you
Lecture 4 Introduce Yourself To Your Fellow Students And Tell Everyone What Are Your Goals
Lecture 5 Let's Celebrate Your Progress In This Course: 25% > 50% > 75% > 100%!!
Section 2: Adobe After Effects - Smart Tips To Boost Your Adobe Skills
Lecture 6 5 Reasons To Learn Adobe After Effects by Mike Lanesman
Lecture 7 Preview and Download The Adobe After Effects Workbook You Get With This Course
Lecture 8 Getting Started & Working With Effects & Presets
Lecture 9 Working with Effects and Presets
Lecture 10 Masking Images
Lecture 11 Working with Track Matte
Lecture 12 Creating a Motion Path
Lecture 13 You've Achieved 25% >> Let's Celebrate Your Progress And Keep Going To 50% >>
Lecture 14 Using the Toggle Hold Keyframe
Lecture 15 Animating the Stroke of Text Using Trim Path
Lecture 16 Create Spinning Globe in the World Effect
Section 3: Adobe Photoshop Smart Tips - Boost Your Adobe Skills
Lecture 17 Preview and Download The Adobe Photoshop Workbook You Get With This Course
Lecture 18 The Crop Tool
Lecture 19 Introduction to Layers
Lecture 20 Explore Layer Blending Modes
Lecture 21 Learn How to Auto-Align Layers
Lecture 22 Learn How to Auto-Blend Layers
Lecture 23 Working with Smart Objects
Lecture 24 Application of Clipping Masks
Lecture 25 Explore Hue & Saturation
Lecture 26 Perform a Monochrome Conversion
Lecture 27 Using Path Blur Filter
Lecture 28 You've Achieved 50% >> Let's Celebrate Your Progress And Keep Going To 75% >>
Lecture 29 Applying Shake Reduction
Lecture 30 Creating a 3D-Anaglyph
Lecture 31 Creating 3D-Shapes
Section 4: Smart Tips For Adobe InDesign - Boost Your Creative Skills
Lecture 32 Download & Preview The InDesign Workbook that you get with this course
Lecture 33 Importing Text from a Word Document
Lecture 34 Understanding Import Options
Lecture 35 Using the Paste into Command
Lecture 36 Adding a Placeholder Text
Lecture 37 Thread Text Across Frames
Lecture 38 Explore Flowing Text in InDesign
Lecture 39 You've Achieved 75% >> Let's Celebrate Your Progress And Keep Going To 100% >>
Section 5: Adobe Illustrator - Smart Tips To Boost Your Adobe Skills
Lecture 40 Preview and Download The Adobe Illustrator Workbook You Get With This Course
Lecture 41 Working with Path Finder
Lecture 42 Working with Modifier Keys
Lecture 43 Create a Compound Path
Lecture 44 Create an Envelope Distortion
Lecture 45 Using the Free Form Gradient
Lecture 46 Create a Perspective Grid
Lecture 47 Create a Rosette
Lecture 48 Using the Revolving Tool
Section 6: Adobe Lightroom - Smart Tips To Boost Your Adobe Skills
Lecture 49 Preview and Download The Adobe LightRoom Workbook That You Get In This Course
Lecture 50 Perform a Black & White Lightroom Conversion
Lecture 51 Explore White Balance in Lightroom
Lecture 52 Create Your Own Custom Presets
Lecture 53 Use Smart Previews in Lightroom
Lecture 54 Understand Loupe Overlay
Lecture 55 Create Panoramic View in Lightroom
Lecture 56 You've Achieved 100% >> Let's Celebrate! Remember To Share Your Certificate!!
Section 7:[Optional] More Adobe Insights From Q&A Webinar Interview With Mike Lanesman
Lecture 57 Introduction to Mike Lanesman, overview and thoughts on adobe creative software
Lecture 58 All about the Adobe community and courses that are coming out soon; join, engage
Lecture 59 Mike answers a question about handling lighting on a budget and editing after
Lecture 60 "I can take great pics, software takes me to the next level; interdependence"
Lecture 61 Know the importance of learning adobe and why adobe is so successful
Lecture 62 Does adobe allow once off payments for their software or is it all subscriptions
Lecture 63 Learn recommendations on editing software for creating amazing backgrounds
Lecture 64 Learn the tips on how and where to start on graphic design
Lecture 65 Would it be better to work on photography skills and make up for editing skills
Lecture 66 Using phones to take images and overcompensating for editing and other factors
Lecture 67 Starting on the courses for where and how to begin on learning adobe software
Lecture 68 Is possible to tell if a picture has been edited and other factors on posting
Lecture 69 Learn tips on taking decent photo on smartphone and specs you should look for
Lecture 70 Make money by learning Adobe skills and become an entrepreneur in your community
Lecture 71 Learn Adobe Creative Skills With Certified Trainer Mike Lanesman
This course is for everyone who wants to be more creative and learn powerful design tools


adobe5coursesin1photo7ci4n.jpg


Download from RapidGator


Download from DDownload


Realistic Drawing: Colored Pencil Drawing Art Course

8ymdtwew3zagm2fvt49nqladqb.jpg


Realistic Drawing: Colored Pencil Drawing Art Course
Last updated 7/2021
MP4 | Video: h264, 1280x720 | Audio: AAC, 44.1 KHz
Language: English | Size: 29.71 GB | Duration: 23h 6m

Learn Drawing and Painting Many Sketches with Colored Pencil Drawing. Drawing & Sketching with Pencil is Cool ART


What you'll learn
The correct way of coloring and combining them in a sketch with colored pencils, and at last sketching the very beautiful and simple models.
At the end of this course, it is expected that learners be able to recognize the colors from the model and combining them as well.
different textures of fruit, animals, and objects will be taught in this course and almost you get to know about the color combination of the skin
.

Requirements
Colored pencils in Faber Castell brand preference in the classic or polychrome type
Types of erasers (dough, etude, recharge)
Sharpener
Cutter
brush
Pan pastel
Steinbach cardboard or Fabriano (low grams and no texture)

Description
In this course, you'll learn drawing and painting many sketches with colored pencil from the ground up. The course is supported with over 23 hours of clear content that I walk you through each step of the way.Here's what you get with the course:- In the beginning of the course you will learn how to draw three types of fruits, you will get acquainted with different textures and volumes, which can be a good introduction to learning harder sketches and with more complexity.- Next you will learn how sketch and color two types of beautiful flowers (sunflowers and roses).-Also you will learn how to color objects such as piano keys or the shiny surface of a beautiful classic machine using colored pencils.- At this point you will learn how to draw three different forms and shapes and textures of animals' bodies, and you will learn how to draw scales and fish fins, the body and transparent wings of bees, and the skin of a horse's body will be taught too.- And finally, you will learn how to paint and volume the components of the face, including eyes, lips, and ears with colored pencils.- At the end of this colored pencil course, the student is expected to be able to recognize and distinguish colors from photos of simple models, and to some extent has learned how to combine colors in pencil drawing.What else will you get?- Personal contact with me, the course tutor- Lifetime access to course materials- Understanding of how professional art is created- This all comes under one convenient easy to use platform. Plus you will get fast, friendly, responsive support on the Udemy Q&A section of the course or direct message.- I will be here for you every step of the way!So what are you waiting for? Sign up now and change your art world today!
Overview
Section 1: Introduction
Lecture 1 Introduction
Lecture 2 Faber castell polychrome and Classic color chart
Section 2: How to draw and color fruits with colored pencils
Lecture 3 The Almond Project Main Picture
Lecture 4 Almond part 1
Lecture 5 Almond part 2
Lecture 6 Almond Part 3
Lecture 7 Almond Part 4
Lecture 8 Almond Part 5
Lecture 9 The Banana Project main picture
Lecture 10 Banana Part 1
Lecture 11 Banana part 2
Lecture 12 Banana part 3
Lecture 13 Banana part 4
Lecture 14 Banana part 5
Lecture 15 Banana part 6
Lecture 16 Banana part 7
Lecture 17 Banana part 8
Lecture 18 Banana part 9
Lecture 19 Banana part 10
Lecture 20 Banana part 11
Lecture 21 Banana part 12
Lecture 22 Banana part 13
Lecture 23 Banana part 14
Lecture 24 Banana part 15
Lecture 25 Banana part 16
Lecture 26 Banana part 17
Lecture 27 Banana part 18
Lecture 28 The Watermelon project main Picture
Lecture 29 Watermelon Part 1
Lecture 30 Watermelon Part 2
Lecture 31 Watermelon Part 3
Lecture 32 Watermelon Part 4
Lecture 33 Watermelon Part 5
Lecture 34 Watermelon Part 6
Lecture 35 Watermelon Part 7
Lecture 36 Watermelon Part 8
Section 3: How to draw and color flowers and objects with colored pencils
Lecture 37 The Sunflower project main picture
Lecture 38 Sunflower Part 1
Lecture 39 Sunflower Part 2
Lecture 40 Sunflower Part 3
Lecture 41 Sunflower Part 4
Lecture 42 Sunflower Part 5
Lecture 43 Sunflower Part 6
Lecture 44 Sunflower Part 7
Lecture 45 Sunflower Part 8
Lecture 46 Sunflower Part 9
Lecture 47 Sunflower Part 10
Lecture 48 The piano and flower Main Picture
Lecture 49 Piano and Flower Part 1
Lecture 50 Piano and Flower Part 2
Lecture 51 Piano and Flower Part 3
Lecture 52 Piano and Flower Part 4
Lecture 53 Piano and Flower Part 5
Lecture 54 Piano and Flower Part 6
Lecture 55 Piano and Flower Part 7
Lecture 56 Piano and Flower Part 8
Lecture 57 Piano and Flower Part 9
Lecture 58 The Blue car main project Picture
Lecture 59 The Blue Car Part 1
Lecture 60 The Blue Car Part 2
Lecture 61 The Blue Car Part 3
Lecture 62 The Blue Car Part 4
Lecture 63 The Blue Car Part 5
Lecture 64 The Blue Car Part 6
Lecture 65 The Blue Car Part 7
Lecture 66 The Blue Car Part 8
Lecture 67 The Blue Car Part 9
Lecture 68 The Blue Car Part 10
Lecture 69 The Blue Car Part 11
Lecture 70 The Blue Car Part 12
Lecture 71 The Blue Car Part 13
Lecture 72 The Blue Car Part 14
Lecture 73 The Blue Car Part 15
Lecture 74 The Blue Car Part 16
Lecture 75 The Blue Car Part 17
Lecture 76 The Blue Car Part 18
Lecture 77 The Blue Car Part 19
Section 4: How to draw and color animals with colored pencils
Lecture 78 The Fish Main Project Picture
Lecture 79 Fish Part 1
Lecture 80 Fish Part 2
Lecture 81 Fish Part 3
Lecture 82 Fish Part 4
Lecture 83 Fish Part 5
Lecture 84 Fish Part 6
Lecture 85 Fish Part 7
Lecture 86 Fish Part 8
Lecture 87 The Bee Main Project Picture
Lecture 88 Bee Part 1
Lecture 89 Bee Part 2
Lecture 90 Bee Part 3
Lecture 91 Bee Part 4
Lecture 92 Bee Part 5
Lecture 93 Bee part 6
Lecture 94 The Horse Project Main Picture
Lecture 95 Horse Part 1
Lecture 96 Horse Part 2
Lecture 97 Horse Part 3
Lecture 98 Horse Part 4
Lecture 99 Horse Part 5
Lecture 100 horse part 6
Lecture 101 horse part 7
Lecture 102 Horse Part 8
Lecture 103 horse part 9
Lecture 104 Horse Part 10
Lecture 105 Horse Part 11
Lecture 106 Horse Part 12
Lecture 107 Horse Part 13
Lecture 108 Horse Part 14
Lecture 109 Horse Part 15
Lecture 110 Horse Part 16
Section 5: How to draw and color the face components with colored pencils
Lecture 111 The Ear Project Main Picture
Lecture 112 Ear Part 1
Lecture 113 Ear Part 2
Lecture 114 Ear Part 3
Lecture 115 Ear Part 4
Lecture 116 Ear Part 5
Lecture 117 Ear Part 6
Lecture 118 Ear Part 7
Lecture 119 Ear Part 8
Lecture 120 Ear Part 9
Lecture 121 Ear Part 10
Lecture 122 Ear Part 11
Lecture 123 Ear Part 12
Lecture 124 Ear Part 13
Lecture 125 Two eyes and eyebrows main Project Picture
Lecture 126 Eye Part 1
Lecture 127 Eye Part 2
Lecture 128 Eye Part 3
Lecture 129 Eye Part 4
Lecture 130 Eye Part 5
Lecture 131 Eye Part 6
Lecture 132 Eye Part 7
Lecture 133 Eye Part 8
Lecture 134 Eye Part 9
Lecture 135 Eye Part 10
Lecture 136 Eye Part 11
Lecture 137 Eye Part 12
Lecture 138 Eye Part 13
Lecture 139 Eye Part 14
Lecture 140 Eye Part 15
Lecture 141 The Lips and Cherry Project Main Picture
Lecture 142 Lips and Cherry Part 1
Lecture 143 Lips and Cherry Part 2
Lecture 144 Lips and Cherry Part 3
Lecture 145 Lips and Cherry Part 4
Lecture 146 Lips and Cherry Part 5
Lecture 147 Lips and Cherry Part 6
Lecture 148 Lips and Cherry Part 7
Lecture 149 Lips and Cherry Part 8
Lecture 150 Lips and Cherry Part 9
Lecture 151 Lips and Cherry Part 10
Lecture 152 Lips and Cherry Part 11
Lecture 153 Lips and Cherry Part 12
Lecture 154 Lips and Cherry Part 13
Lecture 155 Lips and Cherry Part 14
Lecture 156 Lips and Cherry Part 15
Lecture 157 Lips and Cherry Part 16
Lecture 158 Lips and Cherry Part 17
Lecture 159 Lips and Cherry Part 18
Lecture 160 Lips and Cherry Part 19
Lecture 161 Lips and Cherry Part 20
Lecture 162 Lips and Cherry Part 21
Lecture 163 Lips and Cherry Part 22
Lecture 164 Lips and Cherry Part 23
Lecture 165 Lips and Cherry Part 24
The course is suitable for those who are interested in the art of painting and the technique of colored pencils, even with the least basic information about the art of painting,All beginners and intermediate students can use these tutorials and learn how to draw simple and beautiful paintings with colored pencil.,There is no age limit for students, and it includes children ranging in age from 9 and older who are able to recognize volume and color to adult learners who are interested in the technique colored pencils.


realisticdrawingcolorrkd2x.jpg


Download from RapidGator


Download from DDownload


How To Sketch & Draw Cartoon Character With Colored Pencil

sr8wllkevfitwvp8pipmzqbe9c.jpg


How To Sketch & Draw Cartoon Character With Colored Pencil
Last updated 11/2021
MP4 | Video: h264, 1280x720 | Audio: AAC, 44.1 KHz
Language: English | Size: 15.33 GB | Duration: 12h 3m

Character Drawing & Character Design with Colored Pencil. Colored Pencil Drawing for Sketch Cartoon Character.


What you'll learn
At the end of the course, the student is expected to be able to create different colors
Identify different colors
Character design and drawing with the method taught in the course
Ability to coloring characters

Requirements
Students must have completed the introductory illustration course and at least a few months of drawing and be ready to use colored pencils.
B & B2 Pencil
Pencil eraser
Etude pencil and tips
Color pencil 24 colors at least
Brush
Pencil sharpener
Fader
Paper and cardboard

Description
If you decide to become a professional character designer or illustrator, and you can easily design different human characters.This course is for you.I have seen people who often decide to paint an interesting idea of ​​a person but do not have the ability to transfer the idea to paper. In the character design course, we give everyone the ability to create the works they have in mind. In this course, these topics are taught.In the first section, the required tools are introducedIn the second section, the basic principles of color are taught.You will learn the main colors and secondary colors, and then you will learn the complementary colors and the different coloring methods, and then you will become fully acquainted with the color cycle by making the color.In the third section, the training of making different skin colors from the lightest color to the darkest color is included and then, as an example, a skin color is worked on the face.In the following, I will make the color tonality and explain it with cold and warm colors.In the fourth section, drawing and coloring a boy character is taught In the fifth section, the design and coloring of the golden-haired girl character is taught.In the sixth section, drawing and coloring the character of a long-haired girl is taught.In the section 7, drawing and coloring the character of the boy with glasses is taught. I hope this course will guide and help you to become a professional character designer.
Overview
Section 1: Introduction
Lecture 1 Introduction
Lecture 2 Tools Needed
Section 2: The Basics of Color
Lecture 3 Primary and Secondary Colors
Lecture 4 Complementary Colors and How to Coloring
Lecture 5 Color Cycle
Lecture 6 Continue the Color Cycle
Section 3: Making Color
Lecture 7 Make Different Skin Colors (Two Skin Colors)
Lecture 8 Make Different Skin Colors (Three other Skin Colors)
Lecture 9 Make Different Skin Colors (A dark skin Color)
Lecture 10 Make Skin Color on the Face
Lecture 11 Continue Skin Color on the Face
Lecture 12 How to Make Color Tonality
Lecture 13 Cold and Warm Colors
Section 4: Drawing and Coloring the Boy Character
Lecture 14 Draw the Hair, Head and Body Of the Boy Character
Lecture 15 Draw Eyebrows and Eyes Of the Boy Character
Lecture 16 Draw the Nose and Lips Of the Boy Character
Lecture 17 Hair Coloring
Lecture 18 Continue Hair Coloring
Lecture 19 Start Skin and Eyebrow Coloring
Lecture 20 Coloring Eyes, Nose and Skin
Lecture 21 Coloring Mouth, Ear, Neck and Clothes
Lecture 22 Coloring Clothes and Hands
Section 5: Drawing and Coloring the Golden Haired Girl
Lecture 23 Draw the Hair, Head and Body Of the Golden Haired Girl Character
Lecture 24 Draw Eyebrows and Eyes Of the Golden Haired Girl Character
Lecture 25 Draw the Nose and Lips Of the Golden Haired Girl Character
Lecture 26 Hair Coloring
Lecture 27 Primary Skin Coloring
Lecture 28 Coloring Eyebrows, Eyes and Nose
Lecture 29 Coloring Nose, Lips and Skin
Lecture 30 Continue Coloring Hair and Neck
Lecture 31 Clothing Coloring and Final Details
Section 6: Drawing and Coloring Girl Characters
Lecture 32 Draw the Hair, Head and Body Of the Long Haired Girl Character
Lecture 33 Draw Eyebrows and Eyes Of the Long Haired Girl Character
Lecture 34 Draw the Nose and Lips Of the Long Haired Girl Character
Lecture 35 Hair Coloring
Lecture 36 Continue Hair and Coloring Eyebrow, Eyes and Skin
Lecture 37 Coloring Nose, Lips, Ears, Hands, Feet and Clothes
Lecture 38 Coloring Clothes and Shorts
Lecture 39 Continue Eye Coloring and Final Details
Section 7: Drawing and Coloring the Boy with Glasses Character
Lecture 40 Draw the Hair, Head and Body Of the Boy with Glasses Character
Lecture 41 Draw the Eyes, Eyebrows and Glasses of the Boy Character
Lecture 42 Draw the Nose and Lips of the Boy Character
Lecture 43 Hair Coloring
Lecture 44 Coloring Skin, Ear, Eyebrows, Nose and Glasses
Lecture 45 Coloring Lips, Eyes, Face, Hands and T-shirt
Lecture 46 Coloring Shorts, Legs, Socks and Shoes
Lecture 47 Complete shoe coloring and final details
This course is suitable for those who work in the field of animation, animators,Character designer,Cartoonists,Those who work in video advertising,Those who work as computer game characters,Those who work as illustrate children's books


howtosketchdrawcartoo82eux.jpg


Download from RapidGator


Download from DDownload


Zurück
Oben Unten