• Regeln für den Video-Bereich:

    In den Börsenbereich gehören nur Angebote die bereits den Allgemeinen Regeln entsprechen.

    Einteilung

    - Folgende Formate gehören in die angegeben Bereiche:
    - Filme: Encodierte Filme von BluRay, DVD, R5, TV, Screener sowie Telesyncs im Format DivX, XviD und x264.
    - DVD: Filme im Format DVD5, DVD9 und HD2DVD.
    - HD: Encodierte Filme mit der Auflösung 720p oder darüber von BluRay, DVD, R5, TV, Screener sowie Telesyncs im Format x264.
    - 3D: Encodierte Filme von BluRay, die in einem 3D Format vorliegen. Dies gilt auch für Dokus, Animation usw.
    - Serien: Cartoon/Zeichentrick, Anime, Tutorials, Dokumentationen, Konzerte/Musik, Sonstiges sind demnach in die entsprechenden Bereiche einzuordnen, auch wenn sie beispielsweise im High Definition-Format oder als DVD5/DVD9/HD2DVD vorliegen. Ausnahme 3D.
    - Bereich Englisch: Englische Releases gehören immer in diesen Bereich.
    - Bereich Talk: Der Bereich, in dem über die Releases diskutiert werden kann, darf, soll und erwünscht ist.


    Angebot/Beitrag erstellen

    - Ein Beitrag darf erst dann erstellt werden, wenn der Upload bei mindestens einem OCH komplett ist. Platzhalter sind untersagt.
    - Bei einem Scenerelease hat der Threadtitel ausschließlich aus dem originalen, unveränderten Releasenamen zu bestehen. Es dürfen keine Veränderungen wie z.B. Sterne, kleine Buchstaben o.ä. vorgenommen werden. Ausnahme Serienbörse:
    - Bei einem Sammelthread für eine Staffel entfällt aus dem Releasename natürlich der Name der Folge. Beispiel: Die Simpsons S21 German DVDRip XviD - ITG
    - Dementsprechend sind also u.a. verboten: Erweiterungen wie "Tipp", "empfehlenswert", "only", "reup", usw. / jegliche andere Zusatzinformation oder Ergänzung, welche nicht in obiger Beschreibung zu finden ist.

    Aufbau des Angebots und Threadtitel

    Der Titel nach folgendem Muster erstellt zu werden. <Name> [3D] [Staffel] [German] <Jahr> <Tonspur> [DL] [Auflösung] <Quelle> <Codec> - <Group>
    Beispiel: The Dark Knight German 2008 AC3 DVDRip XviD - iND
    Beispiel: The Dark Knight 2008 DTS DL BDRip x264 - iND
    Beispiel: The Dark Knight 2008 AC3 DL BDRip XviD - iND
    Beispiel: The Dark Knight German 2008 AC3 720p BluRay x264 iND
    Beispiel: The Dark Knight 2008 DTS DL 1080p BluRay x264 iND
    Beispiel: Die Simpsons S01 German AC3 DVDRip XviD iND
    Beispiel: Die Simpsons S20 German AC3 720p BluRay x264 iND
    Beispiel: Sword Art Online II Ger Sub 2014 AAC 1080p WEBRip x264 - peppermint
    Entsprechend sind also u.a. verboten: Sonderzeichen wie Klammern, Sterne, Ausrufezeichen, Unterstriche, Anführungszeichen / Erweiterungen wie "Tipp", "empfehlenswert", "only", "reup", usw. / jegliche andere Zusatzinformation oder Ergänzung, welche nicht in obiger Beschreibung zu finden ist
    Ausnahmen hiervon können in den Bereichen geregelt sein.

    Die Beiträge sollen wie folgt aufgebaut werden:
    Überschrift entspricht dem Threadtitel
    Cover
    kurze Inhaltsbeschreibung
    Format, Größe, Dauer sind gut lesbar für Downloader außerhalb des Spoilers zu vermerken
    Nfo sind immer Anzugeben und selbige immer im Spoiler in Textform.
    Sind keine Nfo vorhanden z.B. Eigenpublikationen, sind im Spoiler folgende Dateiinformationen zusätzlich anzugeben :
    Quelle
    Video (Auflösung und Bitrate)
    Ton (Sprache, Format und Bitrate der einzelnen Spuren)
    Untertitel (sofern vorhanden)
    Hosterangabe in Textform außerhalb eines Spoiler mit allen enthaltenen Hostern.
    Bei SD kann auf diese zusätzlichen Dateiinformationen verzichtet werden.

    Alle benötigten Passwörter sind, sofern vorhanden, in Textform im Angebot anzugeben.
    Spoiler im Spoiler mit Kommentaren :"Schon Bedankt?" sind unerwünscht.


    Releases

    - Sind Retail-Release verfügbar, sind alle anderen Variationen untersagt. Ausnahmen: Alle deutschen Retail-Release sind CUT, in diesem Fall sind dubbed UNCUT-Release zulässig.
    - Im Serien-Bereich gilt speziell: Wenn ein Retail vor Abschluss einer laufenden Staffel erscheint, darf diese Staffel noch zu Ende gebracht werden.62
    - Gleiche Releases sind unbedingt zusammenzufassen. Das bedeutet, es ist zwingend erforderlich, vor dem Erstellen eines Themas per Suchfunktion zu überprüfen, ob bereits ein Beitrag mit demselben Release besteht. Ist dies der Fall, ist der bereits vorhandene Beitrag zu verwenden.
    - P2P und Scene Releases dürfen nicht verändert oder gar unter einem iND Tag eingestellt werden.


    Support, Diskussionen und Suche

    - Supportanfragen sind entweder per PN oder im Bereich Talk zu stellen.
    - Diskussionen und Bewertungen sind im Talk Bereich zu führen. Fragen an die Uploader haben ausschließlich via PN zu erfolgen, und sind in den Angeboten untersagt.
    - Anfragen zu Upload-Wünschen sind nur im Bereich Suche Video erlaubt. Antworten dürfen nur auf Angebote von MyBoerse.bz verlinkt werden.


    Verbote

    - Untersagt sind mehrere Formate in einem einzigen Angebotsthread, wie beispielsweise das gleichzeitige Anbieten von DivX/XviD, 720p und 1080p in einem Thread. Pro Format, Release und Auflösung ist ein eigener Thread zu eröffnen.
    - Grundsätzlich ebenso verboten sind Dupes. Uploader haben sich an geeigneter Stelle darüber zu informieren, ob es sich bei einem Release um ein Dupe handelt.
    - Gefakte, nur teilweise lauffähige oder unvollständige Angebote sind untersagt. Dies gilt auch für eigene Publikationen, die augenscheinlich nicht selbst von z.B. einer DVD gerippt wurden. Laufende Serien, bei denen noch nicht alle Folgen verfügbar sind, dürfen erstellt und regelmäßig geupdatet werden.
    - Untersagt sind Angebote, welche nur und ausschließlich in einer anderen Sprache als deutsch oder englisch vorliegen. Ausnahmen sind VORHER mit den Moderatoren zu klären.


    Verstoß gegen die Regeln

    - Angebote oder Beiträge, die gegen die Forenregeln verstoßen, sind über den "Melden"-Button im Beitrag zu melden.
  • Bitte registriere dich zunächst um Beiträge zu verfassen und externe Links aufzurufen.


Englische Tutorials

3736042-aa39-40.jpg

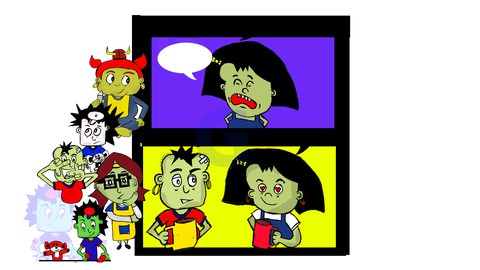
The Art Of Drawing Cartoon Comic Strips [NEW]
Genre: eLearning | MP4 | Video: h264, 1280x720 | Audio: AAC, 48.0 KHz
Language: English | Size: 11.8 GB | Duration: 14 hours​

Learn to Draw Colored Cartoon Character Comic Strips and Express your Ideas with Cartoons.

What you'll learn
How to draw different cartoon characters
How to edit cartoon characters
How to create Cartoon Comic strips
How to design Titles for Cartoon Comic strips
How to Color Cartoon Characters using Adode Photoshop
Beginners will learn how to draw and create Cartoon Comic strips from their own imagination
How to express their ideas and stories visually

Requirements
Passion to Learn
Adobe Photoshop
Windows Paint Software
Ball point Pen (Black)
A Scanner
A4 Papers

Description
NOW IS THE MOMENT

Updated - 18/10/2021

Do You Want To Be a Creative?

Join Thousands of students learn how to Draw & Create cartoon Comic Strips.

This Masterclass is the Compilation 0f 13 years of my Life's Learning & Pesronal experience on the Subject of Drawing Cartoons.

Do You want to learn how to draw Professsional cartoon characters that will enable you create amazing comic strips?

In this very in-depth Course, I want to share my (over 13years of Experience) Cartoon Comic Strip Creation process with You. I will take You through the very basics in Drawing Cartoon Characters so that You can start creating Your own Cartoon Characters straight from your imagination.

My Name is T.S Amachree, ever since i was a kid, I've been passionate about Drawing and Scribbling Cartoon Characters. Its one thing I am really good at; and over the years, I've been privileged to have Great Teachers that Inspired and guided me along the path in making Great Cartoon Comic strips.

You will learn how to Draw and Create Cartoon Comic Strips. Each lesson is made super Easy; Step- by - step Guide in Real Time.

With a Cartoon Comic Strip Examples; featuring some of my best Cartoon Characters.

From Sketching Your Ideas on Paper, Drawing the Cartoon Characters to Coloring & Texting the final Project on Photoshop.


Everything You'd need to know about Creating Your Own Cartoon Comic Strips; Straight from your ideas and imagination.

The Best Part is; It Doesn't Matter If You Do Not Know How To Draw; This course is made Super Easy. Starting with the Very First Principle of Drawing Cartoon Character.

You don't need to use a Graphic tabs, Artist Pencil or Special Brush for this Course.

All you need is the super affordable, simple a Ball Point Pen (BIC Biro).

This Course will teach You new skills and further expand your knowledge in Drawing Cartoon Characters and Creating Cartoon Comic Strips.

You can Start making Cartoon Comic Strips for Newspapers, Magazines, websites, social media and even earn more money through ads.

I even use comic strips to draw up Story block ideas for videos for some of my clients; it helps to communicate a perfect visual understanding of the Proposed Video.

Enroll now; and Enjoy a lifetime and instant access to the entire course.

a 30 Day Money Back Guarantee.

Never Despise or undervalue your own Creative expressions or Art form.

The goal is not to draw something perect but to create Consistency.

Don't Wait Sign up Now - Take Action.

(G)

Who this course is for:
Beginner Artists
Cartoon Artists
Graphics Designers
Anyone with basic drawing Skills
Cartoon Comic strip Artists
Anyone who desires to Draw

[NEW].part01.rar.html
[NEW].part02.rar.html
[NEW].part03.rar.html
[NEW].part04.rar.html
[NEW].part05.rar.html
[NEW].part06.rar.html
[NEW].part07.rar.html
[NEW].part08.rar.html
[NEW].part09.rar.html
[NEW].part10.rar.html
[NEW].part11.rar.html
[NEW].part12.rar.html
[NEW].part13.rar.html
[NEW].part14.rar.html





 
4237998-729e-2.jpg

Elm - The Complete Guide (includes ports, design and more)
Genre: eLearning | MP4 | Video: h264, 1280x720 | Audio: AAC, 48.0 KHz
Language: English | Size: 15.9 GB | Duration: 21 hours​

Learn the language of the future for web development and increase your productivity and fun using Elm, Elm UI and others

What you'll learn
Build modern web apps using Elm
Create your own web site with a high quality long term foundation
Fix an old chaotic legacy web app moving to the solid Elm architecture
Learn all about Elm, including visual design, business rules modeling and browser integration using ports

Requirements
Basics of HTML
No jаvascript experience is required

Description
Create great web sites using this new cool language called Elm, join us and learn how to develop professional nice looking web apps for your blog, your company or your next own startup.


The class is a hands on with practice videos you can follow at your own pace, the reference code is at GitHub for every step of the class. Optionally you can just jump to the last lecture of each section to get the complete code and advance quicker if you feel like to.


We are going to learn how to:


Setup a productive and fast development cycle using Elm Live

Create great visual user interfaces using Elm UI

Display powerful statistics graphs using Elm Charts

Develop solid business logic with The Elm Architecture

Use HTTP API remote calls with Elm JSON

Debug an Elm web application using the Elm Debugger

Design responsive web pages using Elm UI metrics

Make our web sites better using Accessibility with Elm

Draw animations using SVG and Elm SVG

Deploy to production using JAMStack

The teacher has vast experience from real battles developing big systems including HTTP JSON APIs, Thrift APIs, databases, the cloud, mobile and web apps.

Come and join us for learning Elm together, one of the most valuable pieces for developing successful professional web sites today.

Who this course is for:
Developers that want to learn to create how to create modern web apps
Frontend developers looking for a better good alternative to jаvascript and old traditional frameworks
Backend developers that want to become full-stack developers without drowning on the whole jаvascript nightmare
If you are overwhelmed by the spaghetti configuration style with jаvascript projects you may found a refreshing better way using Elm


4570218-3ba6-2.jpg

Complete Filmora (9, X & 11) Megacourse: Beginner to Expert
Genre: eLearning | MP4 | Video: h264, 1280x720 | Audio: AAC, 48.0 KHz
Language: English | Size: 6.17 GB | Duration: 8.5 hours​

Learn how to create and edit videos like a pro with this step-by-step course!

What you'll learn
How to use Filmora 11 and all its elements
What is the difference between the different Filmora versions and how to use them
The principles of video editing in Filmora
The different features in different versions of Filmora
How to do video effects
How to use stock footage
How to do flawless transitions
The principles behind green screens and blending
How to do audio effects and take your audio design to the next level
Color Grading
The principles behind masking and motion tracking
The most useful shortcuts/hotkeys
How to include graphics in your videos
The theory behind your creative choices

Requirements
No previous knowledge of Filmora required!
A desire to learn!
A positive attitude!

Description
Learn video editing with Filmora!

Edit like a pro!

Have you ever wanted to edit your own videos but were too intimidated by all the editing programs out there? There are plenty of programs to choose from, but hardly any of them make editing easier for beginners. With Filmora, you can easily edit your clips with minimal effort. The program is designed for everyone, meaning that you can use it even if you have no knowledge about video editing! With instant templates, your videos are just a few clicks away from being perfect! By providing both basic and advanced tools, Filmora is the perfect place to start if you're looking to become an editor!

In this course, we're going to go through this amazing program and learn about every part of it. From audio design to cinematic color grading, you'll learn everything about professional editing and with some practice you'll become an editor too!

Our instructor has years of experience not only in video editing, but also in teaching, and the expertly-crafted syllabus is designed to be easy to follow and thorough. You will learn how to make your videos great with on screen examples and resources for you to follow and improve. That's why this is the only Filmora course you'll ever need to create professional and great looking videos!

Start creating and editing your own videos today!

Who this course is for:
Anyone who wants to learn to edit videos - no experience needed!
Video editors who want to learn new styles and basics of a new platform
Anyone with specialised needs (video editors, graphic designers, videographers)

Complete Filmora (9, X & 11) Megacourse: Beginner to Expert


13a0acd5-82c4-42c3-8fdc-0e759b033171.png

ChIP Next Generation Sequencing Analysis: Complete A to Z
MP4 | Video: h264, 1280x720 | Audio: AAC, 44.1 KHz, 2 Ch
Genre: eLearning | Language: English + srt | Duration: 134 lectures (8h 29m) | Size: 6 GB

ChIPseq Analysis - Bioinformatics - RStudio - Miniconda - Docker - Linux - Epigenomics - Epigenetics
What you'll learn
You'll be able to undertake a ChIPseq analysis pipeline in Linux and R environment
You'll be given a FREE access to ChIPseq-analysis-ready Docker containers
You'll be given a FREE access to a whole chapter from a review paper worth $31.50
You'll be able to set up ChIPseq analysis Docker container
You'll be able to setup ChIPseq analysis conda virtual environment
You'll be able to manage the working environment of your ChIPseq projects
You'll be able to evaluate the quality of ChIPseq sequencing data using FastQC
You'll be able to perform alignment of reads to the genome using Bowtie2
You'll be able to filter aligned reads based on criteria of your own choosing
You'll be able to run MACS3 peak calling algorithm
You'll be able to use your epigenetic knowledge in order to aid interpretation of ChIP data
You'll be able to use the principles of functional studies and epigenetic lab techniques
You'll understand the full ChIPseq analysis workflow
You'll learn about relationship between epigenetics and environment
Requirements
Exposure to R programming language is required but you don't have to be an R developer!
Familiarity with UNIX command line, conda and docker containers will be advantageous but not necessary
You'll need 80GB of available disc space or access to external hard drive or cloud storage to comfortably do all the ChIPseq analyses
Having an basic understanding of central dogma of molecular biology
Being open-minded and ready to learn!
Description
Did you know that chromatin immunoprecipitation (ChIP) is one of the most commonly used techniques when assessing the effect of epigenetic modifications on gene expression and hence cell identity? Traditionally ChIP was combined with polymerase chain reaction (PCR), but with the advent of next-generation sequencing (NGS), a far more powerful way to study epigenetic modifications on a genome-wide level is through ChIP followed by sequencing (ChIPseq) which this course is about.
I'm Alexander Abdulkader Kheirallah, PhD and I'll be your instructor in this course. I have a doctorate in bioinformatics and my project involved analysis of many ChIPseq datasets. My bioinformatic work has been published in peer-reviewed journals. I have worked as a bioinformatician at University of Cambridge and I am also a data scientist. After the success of my first course on RNAseq differential gene expression analysis, I've decided to take it further by condensing years of my experience in the form of a concise and practical course about epigenomics and ChIPseq data analysis. The ability to analyse big genomic data gives you a lot of opportunities at the intersection of biology, medicine and computer science.
What makes this course unique is that it combines thorough study of epigenetic biology with deep and practical analytical capabilities.
Not only you'll gain epigenetic knowledge to aid your ChIPseq analysis endeavors but also you'll be able to effectively manage your projects, assess their quality, and analyse. You'll be provided with NGS ChIPseq data and I'll walk you through the ChIPseq analysis step-by-step.
--- --- --- --- --- --- --- --- ---
The course is split into 11 sections culminating with a capstone project that you can add to your portfolio
Introduction to the course
Epigenetics of gene expression: a thorough view of biology - Part 1
Epigenetics of gene expression: a thorough view of biology - Part 2
Epigenetics and environment
Laboratory techniques of epigenetics and introduction to functional studies
Canonical ChIPseq analysis workflow
Environment setup and ChIPseq project management
Quality assessment with FastQC
Alignment
Filtering
Peak calling
Your capstone project
By the end of this course you will
Be able to manage the working environment of your ChIPseq projects
You'll be given a FREE access to ChIPseq-analysis-ready Docker containers
You'll be given a FREE access to a whole chapter from a review paper worth $31.50
Be able to evaluate the quality of ChIPseq sequencing data using FastQC
Be able to perform alignment of reads to the genome using Bowtie2
Be able to filter aligned reads based on criteria of your own choosing
Be able to run MACS3 peak calling algorithm
Understand the full ChIPseq analysis workflow
Be able to use your epigenetic knowledge in order to aid interpretation of ChIP data
Be able to use the principles of functional studies and epigenetic lab techniques
Be able to explain the relationship between epigenetics and environment
Who this course is for
STEM graduates that aspire to become bioinformaticians specialising in the study of epigenetic control of gene expression and ChIPseq
Curious learners that want to gauge the subject of epigenomics and ChIPseq
Individuals seeking an opportunity for a hands on ChIPseq analysis experience
Individuals wanting to learn about epigenomics and epigenetics
Doctoral or post-doctoral researchers who need to expand their ChIPseq experience
Students who want to start a higher degree (Bachelor, Masters or PhD) project related to epigenetics and regulation of gene expression
Homepage


5ce73678-017e-4ec5-99ee-ec7a1ab85428.png

Efficient Techniques for Building 3D Environments
Instructors: JAMES A.J. MILLER
Duration: 186 Minutes • 8 Lessons
Video: MP4 1920x1080 44 KHz | English
Size: 11.11 GB​

TIPS FOR NUKE, CLARISSE, HOUDINI, SPEEDTREE, MAYA & MORE WITH JAMES A.J. MILLER
Efficient Techniques for Building 3D Environments
Tips For Nuke, Clarisse, Houdini, SpeedTree, Maya & More With James A.J. Miller
Learn a variety of efficient industry-proven techniques for creating a range of 3D environment styles in this 3-hour workshop by James A.J. Miller, Environment Artist at DreamWorks Animation.
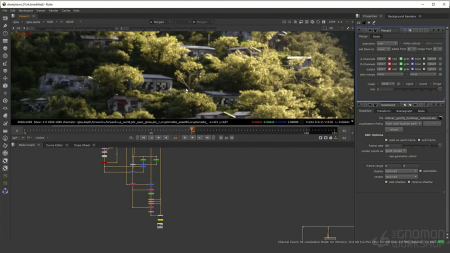
The workshop begins with a demonstration of a large 3D city environment in a desert setting. This type of scene offers a great opportunity for James to cover the importance of Triplanar materials, take a look at Houdini's Terrain tools, look at modeling to shot requirements, as well as scattering in Clarisse. This then sets things up perfectly to lead into AOVs in Nuke, where James dives into an explanation about what they are, and how artists can use them to their advantage. He demonstrates how to install Gizmos as well as his best practices for when to use AOVs in Nuke before returning back to a shot and finishing off a composite.
The proceeding section takes a break from shot work to introduce the topic of photogrammetry in 3D environment building, and how to use it effectively. This demonstration walks through an environment scan using Agisoft Metashape.
Up next, James opens up SpeedTree to walk through his "Mothertree" shot, which makes use of the new SpeedTree for Clarisse plug-in. He additionally animates atmosphere using Houdini, which can be taken back into the scene in Clarisse for added impact and realism.
Moving on, the workshop details some of James's top tips, tricks, and shortcuts that he uses regularly in production to speed up the modeling and texturing, particularly for city environments, with the end goal being to build a scene that utilizes all of the assets with textures applied in Clarisse. This project is then used as a launching point for James's final shot: "The Squatter Village."
This workshop offers a great opportunity to learn how to create AOVs and even write your own, using Light Path Expressions. The closing chapter looks at how to deal with heavy renders, as well as how to use different projection techniques to help avoid rendering more than you need to in 3D.
Project files are included with this workshop.
Screenshots


b6402cf1-9902-4138-a713-c16868092fab.png

HVAC System and Equipment's
MP4 | Video: h264, 1280x720 | Audio: AAC, 44.1 KHz, 2 Ch
Genre: eLearning | Language: English + srt | Duration: 21 lectures (1h 3m) | Size: 410.3 MB

HVAC
What you'll learn
understand HVAC system
know the use of Equipment
working principles of HVAC devices
system sizing
Requirements
mechanical, civil or electrical Engineering or experience in HVAC
Description
In this course you can learn about different systems and Equipment related to HVAC . there are different types of HVAC systems in this course we can discuss all of them
The basic components or equipment of an HVAC system that delivers conditioned air to satisfy thermal comfort of space and occupants and the achieve the indoor air quality are listed below .so we discuss all Equipment used in HVAC system there working principe
All-air systems
The thermal energy transfer medium through the building delivery systems is air. All-air systems can be sub-classified based on the zone as single zone and multizone, airflow rate for each zone as constant air volume and variable air volume, terminal reheat, and dual duct
Single zone
Multi-zone
Terminal reheat
Dual duct
Variable air volume
All-water systems
An all-water system, heated and cooled water is distributed from a central system to conditioned spaces . This type of system is relatively small compared to other types because the use of pipes as distribution containers and the water has higher heat capacity and density than air, which requires the lower volume to transfer heat.
Fan-coil units
Air-water systems
Fan-coil units
we discuss following Equipment
Mixed-air plenum and outdoor air control
Air filter
Supply fan
Air handling units
some Devices
Exhaust or relief fans and an air outlet
Outdoor air intake
Ducts
Terminal devices
Return air system
Heating and cooling coils
Self-contained heating or cooling unit
Cooling tower
air cooled chillers
absorption chillers
centrifugal chillers
Control
Water chiller
Humidification
dehumidification equipment
After this course you are able to study all system and learn all system and there use
Who this course is for
mechanical, civil or electrical Engineering or experience in HVAC
Homepage


5129612c-739b-4100-a583-0dae66f1a0a2.png

High-end Headphones Product Shoot
Karl Taylor Education
Duration: 1h 36m • 1 Lessons
Video: MP4 1920x1080 44 KHz | English
Size: 2.6 GB​

In this photography workshop Karl undertakes a product shoot of a pair of headphones on a white background.
This technically challenging advertising-style shot presented a myriad of challenges, including positioning the product to find the best composition, creating a white background without introducing flare, lighting both matte and reflective surfaces, controlling shadows and balancing multiple lights.
Karl details the step-by-step process of creating this shot, explaining his creative decisions, how he plans to overcome each challenge and the lighting setup. He also shares the post production work required to reach the final image so that members can see the complete start to finish process.
In this product photography workshop we cover the following
How to photograph a pair of headphones
Photographing products on a white background
How to light and photograph matte and reflective surfaces
How to create gradient lighting
Using ND and polarising gels for product photography
Controlling shadows
If you have any questions about this show, please use the comment section below.
Screenshots


49eb18ee-7037-42c7-aefc-bcf44c6168bb.png

PyQt5 Essentials: Build real Applications with Python
MP4 | Video: h264, 1280x720 | Audio: AAC, 44.1 KHz, 2 Ch
Genre: eLearning | Language: English + srt | Duration: 27 lectures (4h 26m) | Size: 2.1 GB

Python GUI application Development with PyQt5 for Beginners
What you'll learn
Responsive GUI Application Development
Developing database, based applications
Learn how to use Advanced and basic python functions when coding
use of Sqlite3
Requirements
Python basic knowledge
Windows/mac os/linux
Description
Hello Everyone, Welcome to PyQt5 Essentials Course. This course is for beginners and beginners alone. With this course, We're going to cover all the essential concepts and topics necessary for you to gain confidence when coding your first application in the real world using PytQt5 with Python Programming Language. The world has become equipped with a lot of Technological advancements which include software and you can be part of software developers and contribute to the global community also. If you want to take your career to the next level by working with PyQt5 in decision making and problem-solving; This is the right course for you.
PyQt is a Python binding of the cross-platform GUI toolkit Qt, implemented as a Python plug-in. PyQt is free software developed by the British firm Riverbank Computing. PyQt5 is a comprehensive set of Python bindings for Qt v5. It is implemented as more than 35 extension modules and enables Python to be used. with PyQt5 you can create a lot of GUI applications very fast and effective. This course is suitable for those who wish to focus on developing a desktop application.
What you will learn
Use of Basic and Advanced Widgets
Combining widgets in developing a user-friendly program
GUI development
Sqlite3 database connection to your application
Are there any course requirements or prerequisites?
Windows/macOS/Linux computer
Who this course is for
No skill required
Who this course is for
Beginner in PyQt5
Learners who are curious about PyQt5 and wish to learn
Homepage


02ddf516-420e-45ad-b2bf-9741bb0ce6d7.png

Complete Blender Creator: Learn 3D Modelling for Beginners (2022)
MP4 | Video: h264, 1280x720 | Audio: AAC, 44.1 KHz, 2 Ch
Genre: eLearning | Language: English | Duration: 9 lectures (1h 22m) | Size: 1.32 GB

Use Blender 3.1 to Create 3D models for Video Games, 3D Printing & More. Beginners & intermediate Level Course
What you'll learn
Use Blender 3.0 and understand it's interface
Modeling tips and trick for making a low poly game assets
How to Create PBR materials
Learn UV maping and unwraping your models & how to Texture them
Learn how to animate the camera and manipulate its setting
Render setting and how to take a simple render animation
All the project file are included
Requirements
Download Blender 3.1
Description
Hello friends!
In this course I will teach you how to model low poly game assets inside the blender 3.1 which is new released version. This tutorial is around 2 hours and if you like be sure to check out our other courses.
Here in first step we will discuss about tools and techniques for modeling and in general how to use blender for creating your desired 3D model and you will learn how to use proportional editing for adding more interest to your model.
In the second part i will explain the right way of UV Unwrapping and how to texture your model using PBR material.
And the third part i am going to teach you what is shadow catcher and how it works and we speak about cycle engine and camera setting. In here we will learn how to us HDRI for lighting our scene.
In the last part we will go further and talk about texturing a bit more and how to set up a camera for taking a render animation.
What Topics are Covered?
3D Modeling
You will learn about Modifiers, which are special modeling effects that you can use for complex modeling tasks.
We will create PBR Materials.
How to illuminate the scene using Easy-HDRI add-on (free).
Learn how to animate the camera in a easy and professional way.
Get introduced to Cycles
So I hope to see you in there.
Who this course is for
Anyone interested in learning how to model game assets, or switching from another 3D software to Blender
Game Developers who wish to expand their Skill Set.
Complete beginners who are willing to work hard
Homepage


03d34ab1-7738-41c7-ba62-d15946ec865c.png

Computer Organization and Architecture Masterclass 2022
Published: 3/2022
Duration: 12h 21m | Video: .MP4, 1280x720 30 fps | Audio: AAC, 48 kHz, 2ch | Size: 5.83 GB
Genre: eLearning | Language: English​

Professional Certification Course 2022: Packaged Everything You Need to Know in Computer Architecture and Organization
What you'll learn:
Formulate A+ grade answers for your Computer Architecture and Organization exams
Analyse computer systems critically and select the best system for a specific need
Write assembly language code with the deeper understanding on Fetch - Decode - Execute cyle
Learn all topics under Computer Organization and Architecture subject in a single course, with simple to understand examples and simulations
Requirements
No prior requirement for taking the course. Everything is explained from the very basic level to advance level
Description
Why should you consider enrolling on this course?
The course instructor is a lecturer teaching Computer Organization and Computer Architecture subjects for 3+ years.
This course is designed in 2022 with the latest Computer Organization and Computer Architecture lessons, examples and activities.
This course covers everything you need to master the subject without enrolling with other parts/courses related to the topic.
This course includes lecture notes/slides as downloadable materials.
You will be part of over 4000+ student communities already in one of my courses.
I invite you to check the free provided videos and course outline. Then, if you are happy, enrol with this latest and best Computer Organization and Architecture course.
All-in-one Complete Computer Organization and Architecture Course Outline
Chapter 01: Introduction
1.1 Introduction to Computer Organization and Architecture
1.2 Computer Level Hierarchy
Chapter 02: Fetch - Decode - Execute Cycle
2.1 Fetch Decode Execute Cycle Explained Part 1
2.2 Fetch Decode Execute Cycle Explained Part 2
Chapter 03: Assembly Language Programming with the Little Man Computer
3.1 What is the Little Man Computer
3.2 Programming the Little Man Computer
3.3 Fetch Decode Execute Cycle Explained using the Little Man Computer
3.4 Writing Assembly Language Code
Chapter 04: Instruction Set Architecture (ISA)
4.1 Introduction to ISA
4.2 CISC and RISC
4.3 Instructions
4.4 Number of Addressing
4.5 Addressing Modes
Chapter 05: CPU Benchmarking
5.1 Introduction to CPU Benchmarking
5.2 Calculating CPU Time
5.3 Understanding CPU Clock
5.4 Calculating CPU Time
5.5 Exercise - Solving CPU Time Calculations
5.6 Exercise - Solving CPI Calculations
Chapter 06: CPU Organization and Structure
6.1 Introduction to CPU Structure
6.2 Registers in CPU
6.3 Understanding CPU Interruptions
6.4 Techniques to Improve CPU Performance
Chapter 07: CPU Pipelining
7.1 What is CPU Pipelining
7.2 Resource Hazards
7.3 Data Hazards
7.4 Control Hazards and Branch Prediction
7.5 Branch Prediction Strategies
7.6 Practical Example for Pipelining - Intel 80486
7.7 CPU Overclocking
Chapter 08: Input-Output Organization
8.1 Introduction to I/O
8.2 I/O Mapping
8.3 Asynchronous Data Transfer
8.4 Modes of Data Transfer
Chapter 09: Memory Organization
9.1 Introduction to Memory Hierarchy
9.2 Deep dive into Computer Memory Hierarchy
9.3 The Principal of Locality
9.4 Memory HIT rate and MISS rate
9.5 Cache Performance and Optimization
9.6 Exercise - Calculating Miss Rate
9.7 Memory Technology
9.8 DRAM Technology
9.9 How a DRAM Works
9.10 DRAM Read Cycle Deeply Explained Step by Step
9.11 SDRAM and DDR SDRAM Explained
Chapter 10: Hierarchical Bus Organization
10.1 Introduction to Hierarchical Bus Structures
10.2 Single and Multiple Bus Implementations and Examples
10.3 Bus Types, Timing, and Additional Details
Chapter 11: Conclusion
11.1 SummaryWho this course is for:Students who are doing a bachelors degree in Computer Science or Information Technology related fieldResearch students who are interested in Computer Organization and ArchitectureLecturers and Teachers who are teaching Computer Hardware or Computer Organization and Architecture subjectsAnyone who is curious to know how a computer system works in much more deeper level
Who this course is for
Students who are doing a bachelors degree in Computer Science or Information Technology related field
Research students who are interested in Computer Organization and Architecture
Lecturers and Teachers who are teaching Computer Hardware or Computer Organization and Architecture subjects
Anyone who is curious to know how a computer system works in much more deeper level
Homepage
Screenshots


b3ce75fa-0b0a-4b12-8e88-9b2931b3b496.png

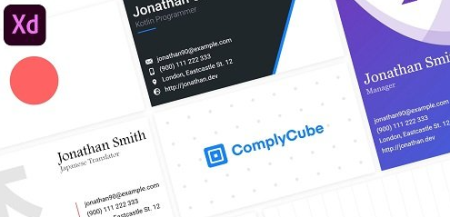
Design Awesome Business Cards with Adobe Xd
Instructors: Art Design
Duration: 1h 25m • 9 Lessons
Video: MP4 1280x720 44 KHz | English
Level: Beginner | Size: 397.793 MB​

In this class I'm going to teach you how to create beautiful designs for business cards.
We are going to use one of the most popular vector tools called Adobe Xd.
In this class you will learn everything about Adobe Xd, it's interface, tools and features
You will learn everything you need, to get started and practice on your own.
I'm going to share with you all the tips and tricks I use on daily basis, the shortcuts
that can help you improve the workflow, and the secret resources I use all the time,
to help me create beautiful designs.
One more thing, the knowledge you gather from this course, about Adobe Xd, can also be
applied to UX/UI design, Web design, Mobile apps design, Logo design, Banner design and
and more!
Bottom line, I'm sure you'll learn a lot from me in this class.
So what are you waiting for, let's get started!
Screenshots


ba93c2a5-53f5-40e2-a5f0-fb636d08d3c2.png

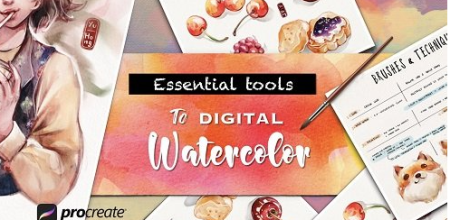
Essential Tools to Digital Watercolors in Procreate
Instructors: Yu Hong
Duration: 59m • 8 Lessons
Video: MP4 1280x720 44 KHz | English
Level: Beginner | Size: 737 MB​

Do you love how loosely watercolor is, or the sensation of dipping brush into paper and watching colors dancing all over the place? - I do.
There was a time when I was so obsessed with watercolor that I used most of my free time just to explore painting colors with many types of paper and ended up broke... No, I'm kidding, but I did really spend a lot at that time on this habit. ^ ^ But now, we can also create all the beautiful watercolor-like paintings digitally in Procreate. I will show you how through this class.
In this class you will learn the essential tools for painting digital watercolor in Procreate, creating a watercolor illustration as the final class project.
I will show you the essential tools in Procreate to create digital watercolor painting through many paintings' demonstrations. You'll have a pre-made assignments file for you to practice as well!
You will also be guided to explore the brushes and combine techniques to achieve your own preferences in watercolor.
A strategic approach that should help you to enjoy the process of doing a project. A lot of class references I made to help you start learning and practicing quickly and easily.
The class is for everyone who is interested in watercolors, in how to create a digital watercolor illustration in Procreate.
Even if you are new to Procreate or not so confident about your sketches to painting, don't worry! The class is exclusive for painting techniques and I also have prepared references and pre-sketch lines for you to work on - just follow the video lessons.
The moodboard I made is close to the project contents and is easy to work with. You can use it to sketch for your own illustration. (If you think you need more references, here are some of my Pinterest Food & characters boards for you to explore and choose references to custom your moodboard for the project instead of using mine)
I choose food because it's an easy and attractive subject. As the final project, you may have a pretty cool gift for your friends or family.
You will need an iPad with access to Procreate and the Apple Pencil to work with.
Some of the brushes that I used in the class are not free. However, I will list them for you to check & buy if you'd like to use them to practice exercises (they have some certain cool effects that are really worth exploring ). If you don't want to invest yet, I included the free brush set for you to use as an option!
Screenshots


Zurück
Oben Unten