• Regeln für den Video-Bereich:

    In den Börsenbereich gehören nur Angebote die bereits den Allgemeinen Regeln entsprechen.

    Einteilung

    - Folgende Formate gehören in die angegeben Bereiche:
    - Filme: Encodierte Filme von BluRay, DVD, R5, TV, Screener sowie Telesyncs im Format DivX, XviD und x264.
    - DVD: Filme im Format DVD5, DVD9 und HD2DVD.
    - HD: Encodierte Filme mit der Auflösung 720p oder darüber von BluRay, DVD, R5, TV, Screener sowie Telesyncs im Format x264.
    - 3D: Encodierte Filme von BluRay, die in einem 3D Format vorliegen. Dies gilt auch für Dokus, Animation usw.
    - Serien: Cartoon/Zeichentrick, Anime, Tutorials, Dokumentationen, Konzerte/Musik, Sonstiges sind demnach in die entsprechenden Bereiche einzuordnen, auch wenn sie beispielsweise im High Definition-Format oder als DVD5/DVD9/HD2DVD vorliegen. Ausnahme 3D.
    - Bereich Englisch: Englische Releases gehören immer in diesen Bereich.
    - Bereich Talk: Der Bereich, in dem über die Releases diskutiert werden kann, darf, soll und erwünscht ist.


    Angebot/Beitrag erstellen

    - Ein Beitrag darf erst dann erstellt werden, wenn der Upload bei mindestens einem OCH komplett ist. Platzhalter sind untersagt.
    - Bei einem Scenerelease hat der Threadtitel ausschließlich aus dem originalen, unveränderten Releasenamen zu bestehen. Es dürfen keine Veränderungen wie z.B. Sterne, kleine Buchstaben o.ä. vorgenommen werden. Ausnahme Serienbörse:
    - Bei einem Sammelthread für eine Staffel entfällt aus dem Releasename natürlich der Name der Folge. Beispiel: Die Simpsons S21 German DVDRip XviD - ITG
    - Dementsprechend sind also u.a. verboten: Erweiterungen wie "Tipp", "empfehlenswert", "only", "reup", usw. / jegliche andere Zusatzinformation oder Ergänzung, welche nicht in obiger Beschreibung zu finden ist.

    Aufbau des Angebots und Threadtitel

    Der Titel nach folgendem Muster erstellt zu werden. <Name> [3D] [Staffel] [German] <Jahr> <Tonspur> [DL] [Auflösung] <Quelle> <Codec> - <Group>
    Beispiel: The Dark Knight German 2008 AC3 DVDRip XviD - iND
    Beispiel: The Dark Knight 2008 DTS DL BDRip x264 - iND
    Beispiel: The Dark Knight 2008 AC3 DL BDRip XviD - iND
    Beispiel: The Dark Knight German 2008 AC3 720p BluRay x264 iND
    Beispiel: The Dark Knight 2008 DTS DL 1080p BluRay x264 iND
    Beispiel: Die Simpsons S01 German AC3 DVDRip XviD iND
    Beispiel: Die Simpsons S20 German AC3 720p BluRay x264 iND
    Beispiel: Sword Art Online II Ger Sub 2014 AAC 1080p WEBRip x264 - peppermint
    Entsprechend sind also u.a. verboten: Sonderzeichen wie Klammern, Sterne, Ausrufezeichen, Unterstriche, Anführungszeichen / Erweiterungen wie "Tipp", "empfehlenswert", "only", "reup", usw. / jegliche andere Zusatzinformation oder Ergänzung, welche nicht in obiger Beschreibung zu finden ist
    Ausnahmen hiervon können in den Bereichen geregelt sein.

    Die Beiträge sollen wie folgt aufgebaut werden:
    Überschrift entspricht dem Threadtitel
    Cover
    kurze Inhaltsbeschreibung
    Format, Größe, Dauer sind gut lesbar für Downloader außerhalb des Spoilers zu vermerken
    Nfo sind immer Anzugeben und selbige immer im Spoiler in Textform.
    Sind keine Nfo vorhanden z.B. Eigenpublikationen, sind im Spoiler folgende Dateiinformationen zusätzlich anzugeben :
    Quelle
    Video (Auflösung und Bitrate)
    Ton (Sprache, Format und Bitrate der einzelnen Spuren)
    Untertitel (sofern vorhanden)
    Hosterangabe in Textform außerhalb eines Spoiler mit allen enthaltenen Hostern.
    Bei SD kann auf diese zusätzlichen Dateiinformationen verzichtet werden.

    Alle benötigten Passwörter sind, sofern vorhanden, in Textform im Angebot anzugeben.
    Spoiler im Spoiler mit Kommentaren :"Schon Bedankt?" sind unerwünscht.


    Releases

    - Sind Retail-Release verfügbar, sind alle anderen Variationen untersagt. Ausnahmen: Alle deutschen Retail-Release sind CUT, in diesem Fall sind dubbed UNCUT-Release zulässig.
    - Im Serien-Bereich gilt speziell: Wenn ein Retail vor Abschluss einer laufenden Staffel erscheint, darf diese Staffel noch zu Ende gebracht werden.62
    - Gleiche Releases sind unbedingt zusammenzufassen. Das bedeutet, es ist zwingend erforderlich, vor dem Erstellen eines Themas per Suchfunktion zu überprüfen, ob bereits ein Beitrag mit demselben Release besteht. Ist dies der Fall, ist der bereits vorhandene Beitrag zu verwenden.
    - P2P und Scene Releases dürfen nicht verändert oder gar unter einem iND Tag eingestellt werden.


    Support, Diskussionen und Suche

    - Supportanfragen sind entweder per PN oder im Bereich Talk zu stellen.
    - Diskussionen und Bewertungen sind im Talk Bereich zu führen. Fragen an die Uploader haben ausschließlich via PN zu erfolgen, und sind in den Angeboten untersagt.
    - Anfragen zu Upload-Wünschen sind nur im Bereich Suche Video erlaubt. Antworten dürfen nur auf Angebote von MyBoerse.bz verlinkt werden.


    Verbote

    - Untersagt sind mehrere Formate in einem einzigen Angebotsthread, wie beispielsweise das gleichzeitige Anbieten von DivX/XviD, 720p und 1080p in einem Thread. Pro Format, Release und Auflösung ist ein eigener Thread zu eröffnen.
    - Grundsätzlich ebenso verboten sind Dupes. Uploader haben sich an geeigneter Stelle darüber zu informieren, ob es sich bei einem Release um ein Dupe handelt.
    - Gefakte, nur teilweise lauffähige oder unvollständige Angebote sind untersagt. Dies gilt auch für eigene Publikationen, die augenscheinlich nicht selbst von z.B. einer DVD gerippt wurden. Laufende Serien, bei denen noch nicht alle Folgen verfügbar sind, dürfen erstellt und regelmäßig geupdatet werden.
    - Untersagt sind Angebote, welche nur und ausschließlich in einer anderen Sprache als deutsch oder englisch vorliegen. Ausnahmen sind VORHER mit den Moderatoren zu klären.


    Verstoß gegen die Regeln

    - Angebote oder Beiträge, die gegen die Forenregeln verstoßen, sind über den "Melden"-Button im Beitrag zu melden.
  • Bitte registriere dich zunächst um Beiträge zu verfassen und externe Links aufzurufen.


Englische Tutorials

Embedded Systems Bare-Metal Programming Ground Up™ (STM32) (updated 9/2020)

cy5f8bqzumwl9mvichpcqihjk4.jpg


Embedded Systems Bare-Metal Programming Ground Up™ (STM32) (updated 9/2020)
Genre: eLearning | MP4 | Video: h264, 1280x720 | Audio: aac, 44100 Hz
Language: English | VTT | Size: 6.24 GB | Duration: 15 section | 74 lectures | (13h 5m)


What you'll learn
Write firmware using only bare-metal embedded-c
Understand the Cortex-M Architecture
Write Analog-to-Digital Converter (ADC) drivers using bare-metal embedded-c
Write PWM drivers using bare-metal embedded-c
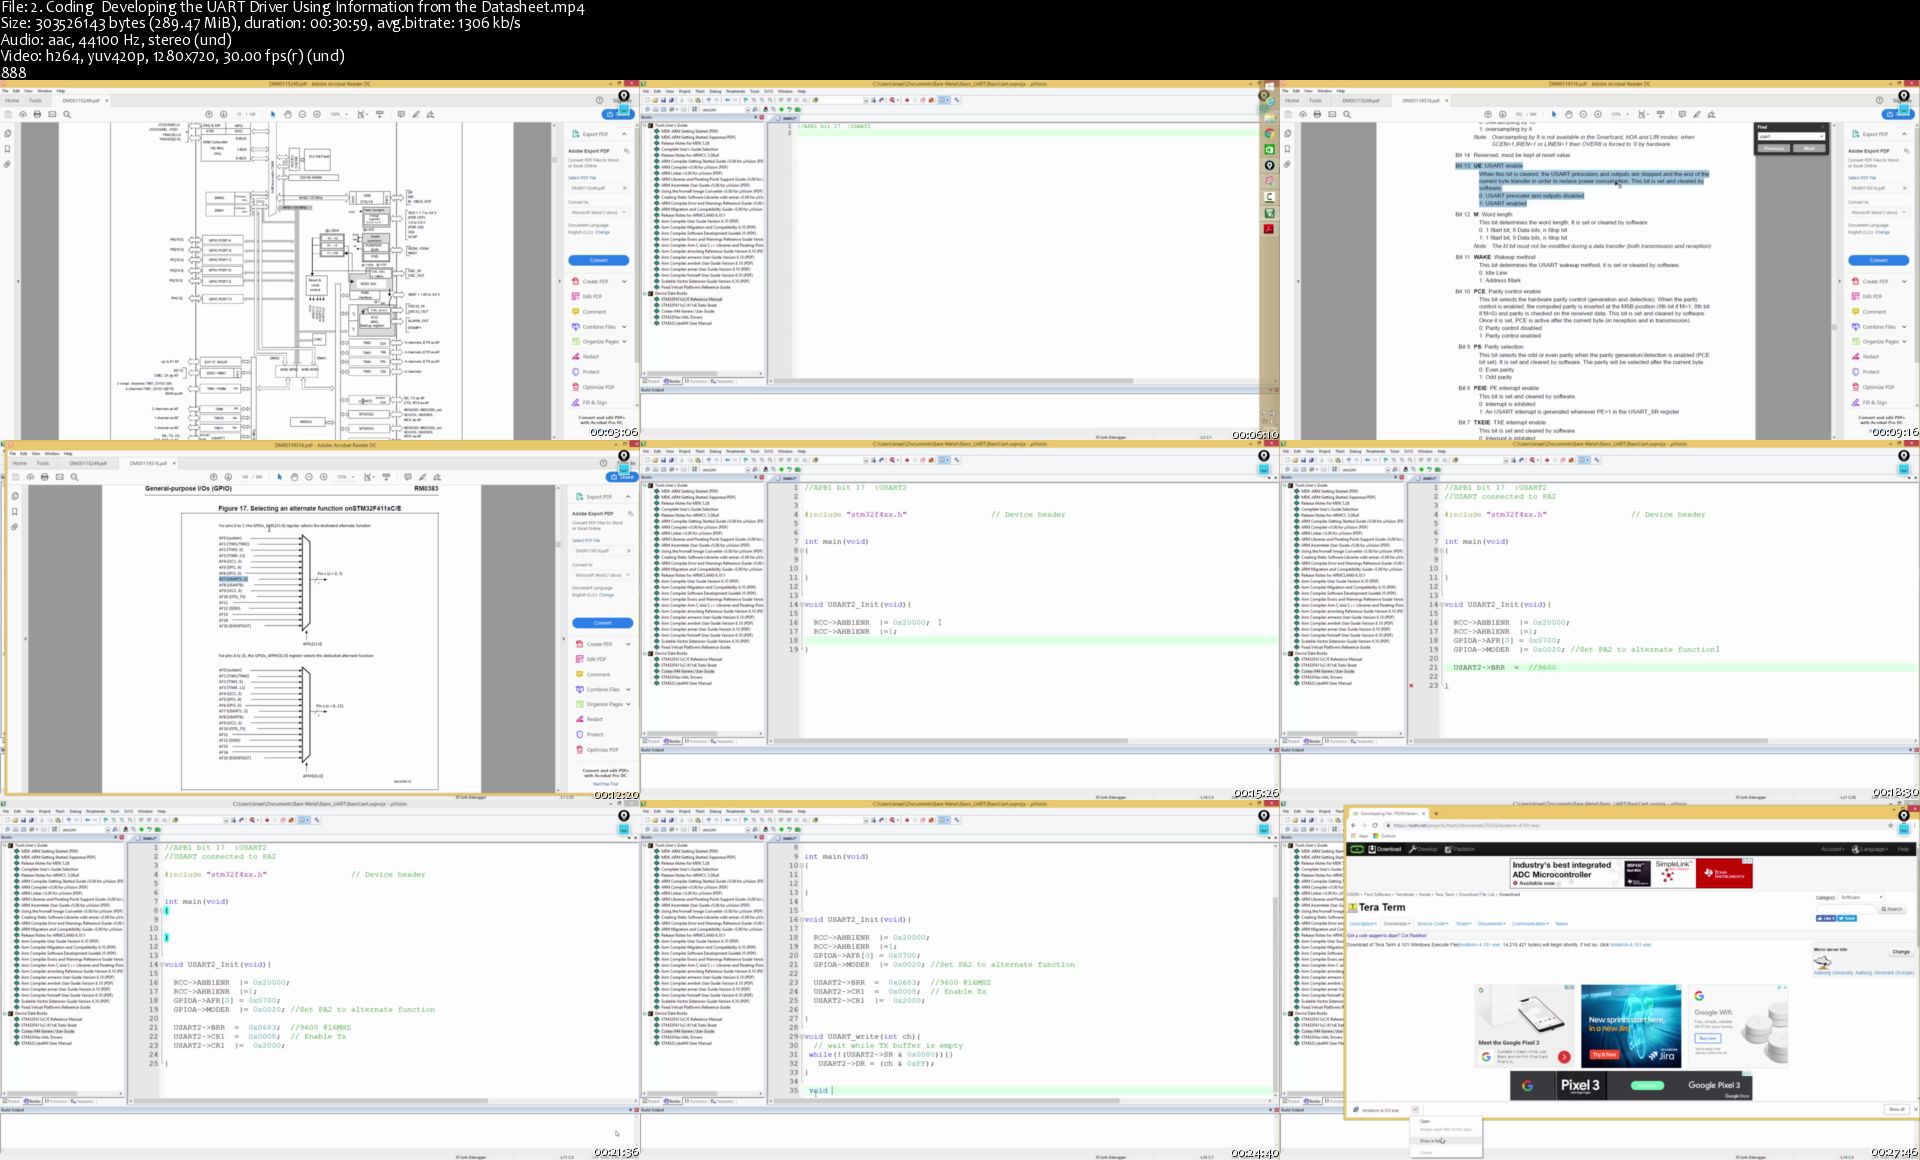
Write UART drivers using bare-metal embedded-c
Write TIMER drivers using bare-metal embedded-c
Write Interrupt drivers using bare-metal embedded-c
Write SPI drivers using bare-metal embedded-c
Write I2C drivers using bare-metal embedded-c
Master the ARM-Cortex CMSIS standard

Requirements
No programming experience needed - I'll teach you everything you need to know.
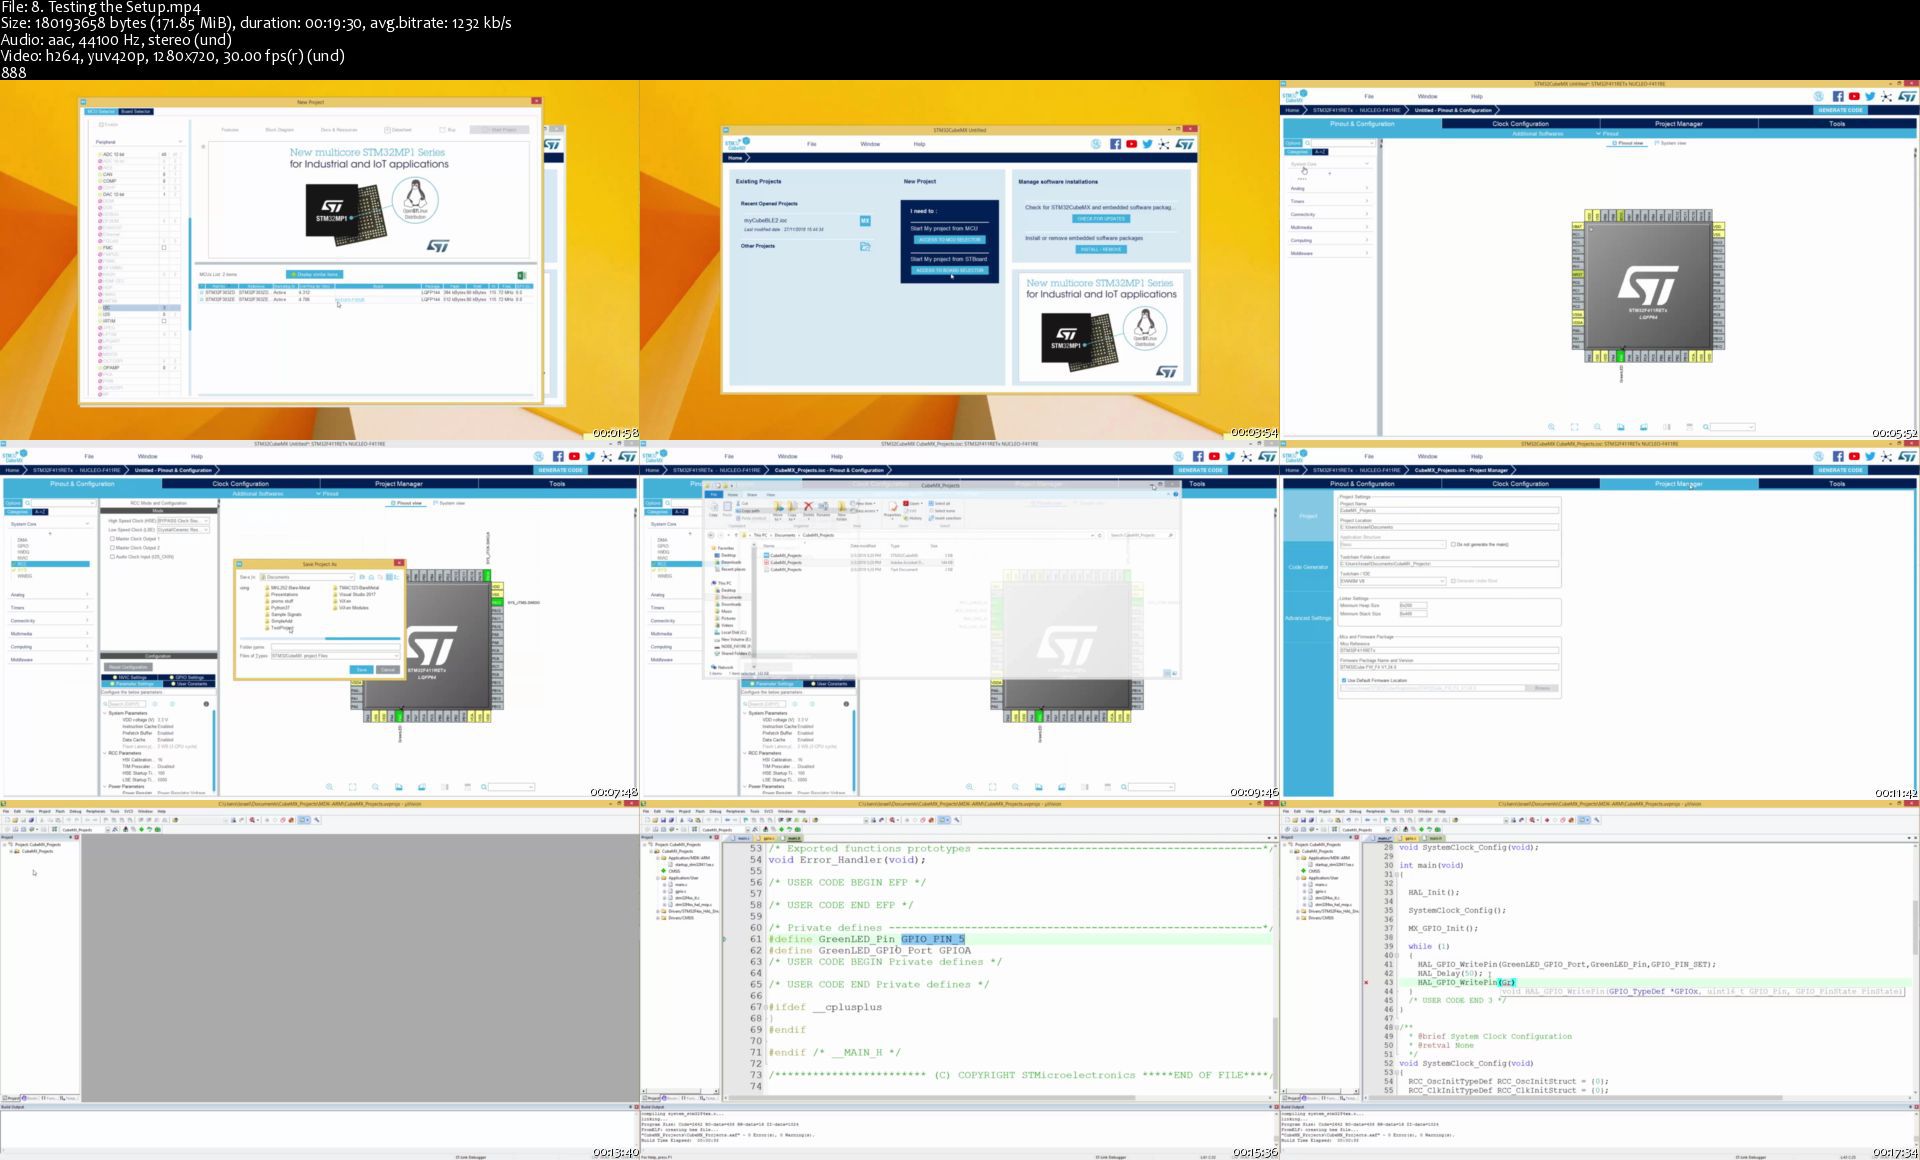
We shall be using the Keil uVision 5 IDE and toolchain which is FREE.

Description
Welcome to the Embedded Systems Bare-Metal Programming Ground Up™ course.

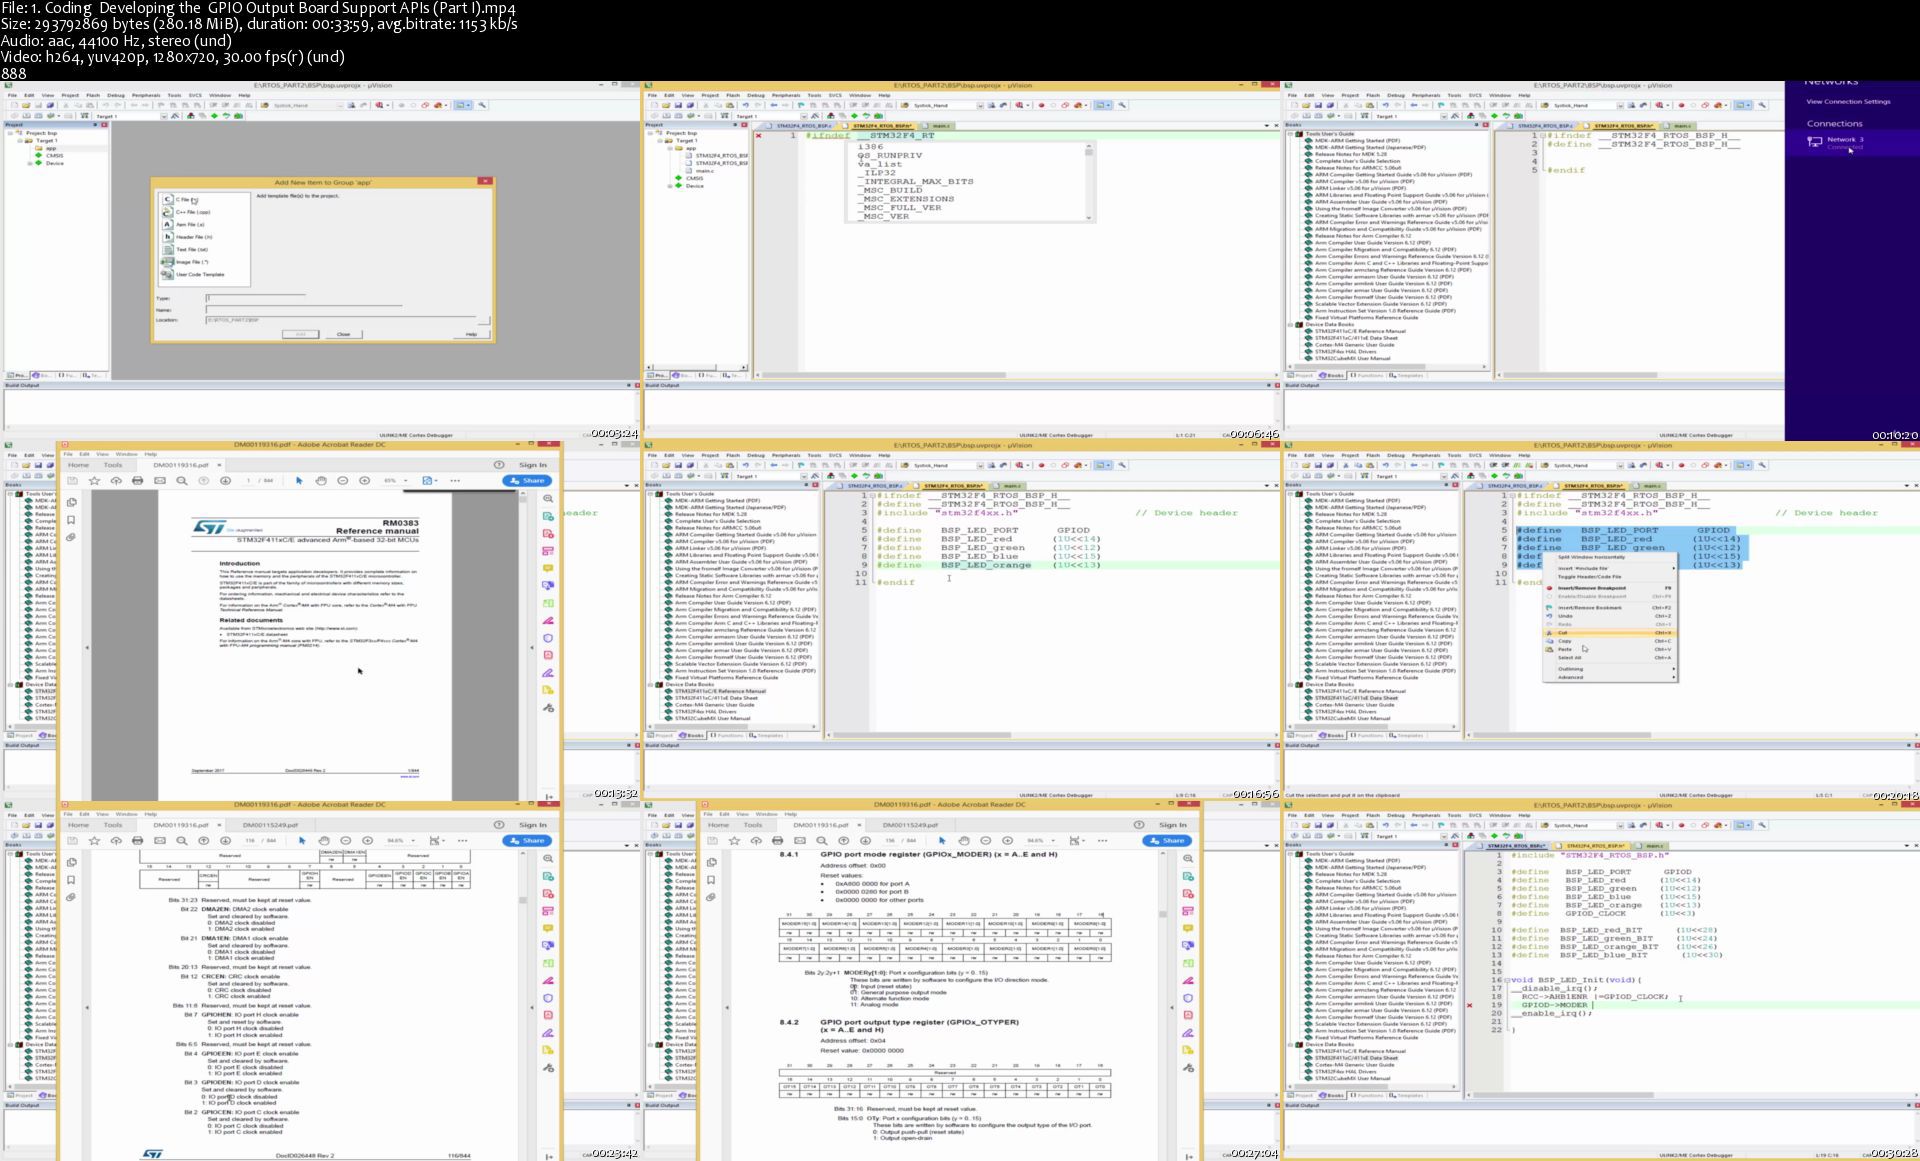
With a programming based approach, this course is designed to give you a solid foundation in bare-metal firmware development for ARM-based microcontrollers . The goal of this course is to teach you how to navigate the microntroller reference manual and datasheet to extract the right information to professionally build peripheral drivers and firmware. To achieve this goal, no libraries are used in this course, purely bare-metal embedded-c and register manipulations.

Still keeping it simple, this course comes in different ARM Cortex-M development boards so that students can put the techniques to practice using an ARM Cortex-M development board of their choice. This version of the course uses the STMicroelectronics STM32F4-NUCLEO which has an ARM Cortex-M4 microcontoller.

By the end of this course you will be able configure microcontroller peripherals like ADC, UART,PWM, GPIO, TIMER,I2C, SPI, etc. You will also master the ARM architecture and how to build professional embedded firmware for ARM processors.

Please take a look at the full course curriculum.

REMEMBER : I have no doubt you will love this course. Also it comes with a FULL money back guarantee for 30 days! So put simply, you really have nothing to loose and everything to gain.

Sign up and lets start toggling some register bits.


Who this course is for:
If you are an absolute beginner to embedded systems, then take this course.
If you are an experienced embedded developer and want to learn how to professionally develop embedded applications for ARM processors, then take this course.


Homepage

2.codingdevelopingthehajw6.jpg


Competitive Programming: Algorithms, Patterns, Techniques

a9bk0forwto8b2awkwejx6ojot.jpg


Competitive Programming: Algorithms, Patterns, Techniques
Genre: eLearning | MP4 | Video: h264, 1280x720 | Audio: aac, 48000 Hz
Language: English | VTT | Size: 7.30 GB | Duration: 18 section | 87 lectures | (9h 50m)


What you'll learn
Time to get a taste of how Competitive Programmers think about questions
See how data structures and algorithms work on various types of problems
Master the theory by solving up-to-date Competitive Programming and Technical Interviews challenges
Strengthen your problem solving and coding skills

Requirements
Basic knowledge of C/C++ language
Basic understanding of Algorithms & Data Structures
Desire to conquer problem solving once and for all

Description
This course is going to be your bible on solving each competitive programming challenge and also easily mock the coding interviews. The content is based on my 6 year experience of struggling to find and solve a wide range of problems and develop the system for mastering this skill, combined with my 4 year experience of teaching it to my students and almost 1 year of teaching it online in my YouTube lectures about past Codeforces rounds and Leetcode questions, which are and will be unavailable for free.

I cover the exact same content that has helped my students' performance skyrocket (some of them have Codeforces ratings much greater than mine) and got them offers at top companies like Google, Facebook and Amazon and solid results in Codeforces, AtCoder, Topcoder and Onsite International Competitive Programming Contests.

We go through a wide range of topics, from basics such as Mathematics Fundamentals and Number theory (Prime Numbers, Sieve of Eratosthenes, Fast Modular Exponentiation), Strings and Arrays all the way to complex topics such as Dynamic Programming, Tree Dynamic Programming, Greedy, Hashes, Stacks and Queues. Then we dive into interesting challenges and gold tricks on Interactive Problems followed by Segment Trees, Constructive Algorithms, Sliding WIndow and Computational Geometry.

If you know me for a while you know my way of teaching is quite revolutionary. I take my time to take you through my thinking process and discuss each step, each little detail of any approach exactly how I thought about it and place great emphasis on making you solve by your own the next similar ones. I reveal bulletproof formulas that guide you in solving every single problem of that specific type.

Here's what make this course amazing:

I guide you through the line of my thought when solving each problem, focusing on building the general approach for any type of problem you can encounter in competitive programming contests or software developing interviews.

You will learn all the theory needed, but our main focus here is on practical applications.

I share with you problem solving tricks and good coding practises that took me years and hundreds of problems to figure out.

It's interactive and engaging: I try to keep the theory as simple and natural as possible and we work as a team in solving any problem.

Do you think it's finally the time to get the Software Developer Job or the results in Competitive Programming you deserve? Follow me!


Who this course is for:
Students wishing to perform well in Competitive Programming Contests
Beginner Computer Science Students wishing to get their dream job
Codeforces, TopCoder, AtCoder Enthusiasts
Self-taught, ambitious persons who need the right guidance


Homepage

2.binarymediansolutiojwjqo.jpg


CGCircuit: Applied Houdini - Liquids III

fhdrv6htvw9iujvu3aaggiukse.jpg


CGCircuit: Applied Houdini - Liquids III
Duration: 5h 28min | Video: .MP4 1920x1080, 29.97 fps | Audio: AAC, 44.1 KHz, 2 channels | Size: 6.96 GB
Genre: eLearning | Language: English

Welcome back to Applied Houdini for Liquids III - Ocean Flat Tank! In this lesson we'll tackle a complex ocean scene, consisting of many different effects rendered out as seperate passes and then all composited together. We'll start by learning how to create a detailed and realistic infinite sea through a deep understanding of the instanced ocean spectrum workflow, and then make things even more interesting by blending a flat tank FLIP simulation into the middle of it! By adding whitewater foam, spray, bubbles, mist and then even more spray on top, we'll really make our speed boat zipping through the waves come alive! Along the way we'll enjoy some technical demos as well as talk about lighting, custom shading, common pitfalls, and many other tips and tricks. Get started mastering oceans in Houdini today with Applied Houdini Liquids III - Ocean Flat Tank!


Homepage

1introductions7jji2.jpg


Tyler Bay - Houdini for the New Artist I & II

k6o14k3nch2xdykzk0qhrunjzz.jpg


Tyler Bay - Houdini for the New Artist I & II
Duration: 8h 38min | Video: .MP4 1280x720, 29.97 fps | Audio: AAC, 44.1 KHz, 2 channels | Size: 7.81 GB
Genre: eLearning | Language: English

Houdini for The New Artist is perfect for anyone interested in learning Houdini for the first time. To keep things interesting, we learn about the basics while building "Alfred the Rhino" from scratch. If you're looking for an intro tutorial that gives you a bit of everything, fun to work with, and straight to the point - this is for you.
Screenshots
Tyler Bay - Houdini for the New Artist I & II

Homepage

08addingthebackdropssc4kt3.jpg

12finaladjustmentrendswjck.jpg


Build Your Own RealTime OS (RTOS) From Ground Up™ on ARM 2

1iyefab1ernyzf1mmnrjlz7jmp.jpg


Build Your Own RealTime OS (RTOS) From Ground Up™ on ARM 2
Genre: eLearning | MP4 | Video: h264, 1280x720 | Audio: aac, 44100 Hz
Language: English | VTT | Size: 5.15 GB | Duration: 13 section | 62 lectures | (10h 45m)


What you'll learn
Build a Real-Time Operating System from Scratch
Be able to build Priority Schedulers
Be able to build Sporadic Schedulers
Be able to build Fixed Schedulers
Be able to build Periodic Schedulers in 4 different ways
Be able to implement and explain popular scheduling algorithms
Be able to explain the Cortex-M Architecture
Be able to give a lecture on Real-Time Operating Systems
Perform Flash Data Storage
Perform effective Heap Management

Requirements
It is recommended to complete the Build Your Own RTOS From Ground Up 1 course before this one

Description
Welcome to the Build Your Own RealTime OS (RTOS) From Ground Up™ on ARM 2 course

This course teaches you how to build Real-Time Operating Systems through intensive practice and theory. It starts by getting you excited through an introduction to the internals of a Real-Time Kernel on ARM Processors, which you shall implement yourself in code.Then we move on to learn all there is about Real-Time Operating Systems, their various parts, how they work and then we finally build our own Real-Time Operating System exploring different scheduling algorithms and Inter-Thread communication tools.

This course is a two part series. This is the second part of the series.

At the end of this course you should be able to build your own Real-Time Operating System from scratch, give your own lecture on Real-Time Operating Systems, be able to build a Round-Robin Scheduler, Priority Scheduler, Sporadic Scheduler, Periodic Scheduler, be able to calculate the CPU utilization of your RTOS, be able to build an OS Kernel etc. Please see the course curriculum section to find out all the amazing content awaiting you.


Who this course is for:
Embedded Systems Engineers
Embedded System students
Computer Engineering students
Hobbyists


Homepage

1.codingdevelopingthejjkls.jpg


Bluetooth Low Energy (BLE) From Ground Up™

ftrusjioclew2uisvec1xpmko7.jpg


Bluetooth Low Energy (BLE) From Ground Up™
Genre: eLearning | MP4 | Video: h264, 1280x720 | Audio: aac, 44100 Hz
Language: English | VTT | Size: 6.04 GB | Duration: 10 section | 64 lectures | (9h 57m)


What you'll learn
Build Bluetooth Low Energy (BLE) firmware for different use cases
Create your own Services and Characteristics
Understand the complete BLE stack
Build Bluetooth Low Energy embedded devices

Requirements
No prior knowledge is required. I will teach you everything from scratch.


Description
Welcome to the Bluetooth Low Energy (BLE) From Ground Up™ course.

This practical Bluetooth Low Energy (BLE) course will provide you with a solid in-depth training to be able to build BLE embedded devices and use them to communicate with other smart devices and mobile phone app. This course aims to provide a solid practical understanding of Bluetooth Low Energy: the protocol, how data is organized, and tshe key design trade-offs that were made in the creation of the protocol.

By the end of this course you should be able to build your own BLE enabled embedded devices and give a lecture on the BLE protocol.

REMEMBER : I have no doubt you will love this course. Also it comes with a FULL money back guarantee for 30 days! So put simply, you really have nothing to loose and everything to gain.

Sign up and lets start transmitting some packets.


Who this course is for:
If you are thinking about developing a product that incorporates Bluetooth Low Energy then take this course.
If you are an embedded engineer who wants to create Bluetooth Low Energy (BLE) firmware then take this course.
If you just want to learn how to code and build BLE devices then take this course.


Homepage

8.testingthesetupsqmjf9.jpg


Artstation - Dragon Concept in Zbrush

gvjfraoct4twoj2xcvths4mk6x.jpg


Artstation - Dragon Concept in Zbrush
Duration: 3h | Video: .MP4 1920x1080, 60 fps | Audio: AAC, 48 KHz, 2 channels | Size: 7.40 GB
Genre: eLearning | Language: English

In this tutorial we will learn how to create a dragon head concept in Zbrush. We will go over the full sculpting process as well as the rendering and compositing of the final image.
Every step of the tutorial is explained to make it as easy to follow as possible.
Perfect for beginners and intermediate users looking to improve their sculpting skills and speed up their workflow.

Free Dragon VDM Brush

As a thank you for trying out my tutorial I have included a free VDM brush.
It includes 40 hand sculpted dragon detail brushes all contained within one Multi-Alpha brush.
Perfect to speed up your dragon creation!
For use with Zbrush 2018 or above versions.

Contents
1.Tutorial files mp4
-Basic setup
-Blockout
-Detailing
-Rendering
-Compositing
2.Project files
-Zbrush project file
-Photoshop presentation file
3.Dragon VDM Brush
One VDM Brush for use with Zbrush 2018 or above

Softwares
-Zbrush 2019 ( the tutorial can be completed with any versions of Zbrush)
-Photoshop CC 2019


Homepage

3.detailingsxnkai.jpg


Artstation - Creating Peeling Wood in Substance Designer

hjpf707s4xqa6xptv6noj01jjy.jpg


Artstation - Creating Peeling Wood in Substance Designer
Duration: 2h | Video: .MP4 1920x1080, 60 fps | Audio: AAC, 48 KHz, 2 channels | Size: 5.14 GB
Genre: eLearning | Language: English

Substance Designer is one of the most versatile programs around today and creating realistic looking wood can be tricky. Step by step, Christian Tammekand, walks you through the process of creating this realistic wood material using only Substance Designer as well as setting up the parameters so that you, the artist, have full control. For the Environment Artist, wood materials are present in numerous objects and the techniques you will learn in this tutorial will enable you to start creating your own wood materials, exposing parameters and create an infinite amount of variations for your projects.

Weather you're a seasoned artist, student, hobbyist or someone just starting out, grab this tutorial and learn an essential workflow that will allow you to work faster and more efficiently. Fuel your Creative Mind today.


Homepage

expchristiantammekandfuj3f.jpg


[ENG].part1.rar
[ENG].part2.rar
[ENG].part3.rar
[ENG].part4.rar
[ENG].part5.rar
[ENG].part6.rar


Scala Programming From Scratch To Depth

007c11adpfkj1.jpg


Scala Programming From Scratch To Depth
Video: .mp4 (1280x720, 30 fps(r)) | Audio: aac, 44100 Hz, 2ch | Size: 17.3 GB
Genre: eLearning Video | Duration: 26 lectures (39 hour, 21 mins) | Language: English

Scala Programming From Scratch To Depth


What you'll learn

Scala Programming from scratch to in-depth, starting from simple Hello World programs, Deep diving into Data Structures, Operators (Mathematical, Logical, Conditional) to concepts of OOPs and Functional Programming with Programs solved.
Scala In Depth


Requirements

No Prerequisite. Only Basic Computer or Laptop. Course is taught in simple language so any one can understand.


Description

Learn Scala Programming From Scratch To Depth


From Simple program to Data Structures to OOPS and Functional Programming. Every thing covered with Hands on programming.


Taught in very simple english language so any once can follow the course easily.


No Prerequisites


Perfect start point to learn scala for Big Data Spark, Play, Scalatra, Lift, Sinatra, etc


Who this course is for:

People looking to learn Scala to use in Big Data - Spark or to build Frameworks, Applications, etc

007c11ae6mkcq.jpeg


Power BI Desktop Combo - Query Editor, Data Modelling, DAX

pjzy6pg0xyi2rgvdfm1wx9mjvn.jpg


Power BI Desktop Combo - Query Editor, Data Modelling, DAX
Genre: eLearning | MP4 | Video: h264, 1280x720 | Audio: aac, 44100 Hz
Language: English | VTT | Size: 5.67 GB | Duration: 15 section | 104 lectures | (11h 50m)


What you'll learn
Cleanse, Shape, Filter, Stage, Merge and integrate data from multiple sources within Power BI
You will master the data cleansing tasks from Power BI Query editor
Proven development techniques and guidance for implementing custom solutions with M language
Build efficient data retrieval and transformation processes with the M Query Language
Requirements
Person who is really struggling with Data Cleansing tasks and looking for robust solution.
Have used or started using Power BI and want to master data cleansing techniques.
Need to install Power BI Desktop (only available for Windows)

Description
Microsoft Power BI is a suite of Business Intelligence tools, designed to help the BI professionals get easier, quick and crucial business insights from their data. It contains three main tool-set combined in one single software:

Power Query

Power Pivot

Power View

Power Query lets you to connect to hundreds of data sources, simplify data preparation and drive ad-hoc analysis. It is also know as Power BI Query Editor.

Power Pivot is the analytical tool in Power BI. Using various DAX formulas you can drive your analytical journey. This is the second step after you import the data into Power BI using Power BI Query Editor.

This course will focus completely on features for Power BI Query Editor, Date Modelling and DAX inside Power BI Desktop.

Before you can present any analysis or insight, you need source data. Your source data could be in many places and in many formats. Nonetheless, you need to access it, look at it, and quite possibly clean it up to some extent. You may also need to join separate data sources before you can shape the data into a coherent data set using PowerPivot, deliver the results using Power View or Power Map, and then share it using Power BI.

Discovering, loading, cleaning, and modifying source data is where Power BI Query editor comes in. It lets you load, shape and streamline data from multiple sources.

Power BI Query Editor allows you to do many things with source data, but the four main steps are likely to be

Import data from a wide variety of sources. This covers corporate databases to files, and social media to big data.

Merge data from multiple sources into a coherent structure.

Shape data into the columns and records that suit your uses.

Cleanse your data to make it reliable and easy to use.

There was a time when these processes required dedicated teams of IT specialists. Well, not any more. With Power Query, you can mash up your own data so that it is the way you want it and is ready to use as part of your self-service BI solution.

This course will start with the basic installation and configuration of Power BI Desktop, and go on to connect your data sources with it. You'll transform and get your data ready for analysis, and create effective data views using it. You would be performing following tasks mainly

Data Discovery -Find and connect to a myriad of data sources containing potentially useful data. This can be from both public and private data sources.

Data Loading -Select the data you have examined and load it into Power Query for shaping.

Data Modification -Modify the structure of each data table that you have imported, filter and clean the data itself, and then join any separate data sources.

Although I have outlined these three steps as if they are completely separate and sequential, the reality is that they often blend into a single process. Indeed there could be many occasions when you will examine the data after it has been loaded into Power Query-or join data tables before you clean them. The core objective will, however, always remain the same: find some data and then load it into Power Query where you can tweak, clean, and shape it.

This process could be described simplistically as "First, catch your data." In the world of data warehousing, the specialists call it ETL, which is short for Extract Transform Load. Despite the reassuring confidence that the acronym brings, this process is rarely a smooth logical progression through a clear-cut series of processes. The reality is often far messier than that. You may often find yourself importing some data, cleaning it, importing some more data from another source, combining the second data set with the first one, cleaning some more, and then repeating many of these operations several times.

This course will excite and empower you to get more out of Power BI Query Editor via detailed recipes, development tips and guidance on enhancing existing Power BI Projects.


Who this course is for:
Users who have used or have started using Power BI.
Person looking for easy alternative to Excel or any other ETL software
This course is for Beginners to pro users as well.
People who want to automate their data preparation task for within Power BI


Homepage

3.gettingfamiliarwithwjj5i.jpg


Modern Java - Learn Java 8 features by coding it

yhf2jlu5nufon2zuuqprjw5jwo.jpg


Modern Java - Learn Java 8 features by coding it
Genre: eLearning | MP4 | Video: h264, 1280x720 | Audio: aac, 48000 Hz
Language: English | Size: 6.39 GB | Duration: 20 section | 104 lectures | (11h 14m)


What you'll learn
Learn Functional programming in Java
Complete understanding of Lambdas, Streams , Optional via code.
Students will be able to implement the new Java 8 concepts in real time
Learn to build complex Streams Pipeline.
Learn the new Date/Time Libraries in Java 8
Learn to use Method Reference , Constructor reference syntax.
Learn and understand Parallel Programming with the Streams.
Student will be able to upgrade their Java knowledge with the new Functional Features.
This course will be continuously updated.


Description
Learn the new Java 8 Features by coding it. This is a pure coding course and you will get a complete understanding of all the Java 8 features by coding it.

Why Should I take this course ?

This course will help the Java developers to build their knowledge on the new Java 8 features.

All the new features such as Lambdas, Streams , Optionals, Functional Interfaces and Parallel Programming will be explained via code.

This course will give you the confidence on implementing new Java 8 features in real Java projects.

By the end of this course you will have a complete understanding of new Java 8 functional features.

Course Overview :

Section 1 - Getting Started:

This section explains about what will be covered in this course.

Section 2 - Why Java-8 ?:

This section covers Why Java 8 is important?.

This section explains about difference between Imperative Programming and Declarative Programming.

Section 3 - WorkSpace Setup - Mac/Windows:

This section covers the installation of Java and IntelliJ in Mac and Windows.

Section 4: Introduction to Lambda

This section covers the Why Lambda is needed , Lambdas Syntax and How to implement Lambdas ?

Implement the Runnable interface using Lambdas.

Implement the Comparator interface using Lambdas.

Section 5: Lambdas and Functional Interfaces

This section covers the new Functional Interfaces that got introduced as part of Java 8.

Consumer Functional Interface

Predicate Functional Interface

Function Functional Interface

Supplier Functional Interface.

Section 6 : Constructor and Method References

This section covers the new Method Reference and the Constructor Reference.

How Method Reference simplifies the code.

How to use Method reference along with Lambdas.

How to use Constructor Reference to create new objects.

Section 7 : Lambdas and Local variables ( Effectively Final )

This section covers the local variable and how it should used in Lambdas.

Definition of Effectively Final scope of a variable.

Section 8 : Streams API

This section covers the Streams API which is one of the important feature that got introduced as part of Java8.

How the Stream API Works Internally ?

How Collections are different from Streams ?

How to debug a Stream ?

Section 9 : Streams API Operations

This section covers different Streams API operations that can be used in Streams to achieve an objective.

Streams Operations such as :

map()

flatMap()

distinct()

count()

filter()

reducer()

Map, Filter and Reduce pattern.

max()

min()

limit()

skip()

allMatch(), anyMatch() and noneMatch()

findAny() and findFirst()

Explanation of Stream operations that are Short Circuit operations.

Section 10 : Streams API - Factory Methods

This section covers different Streams API factory method that can be used to create Streams.

Section 11: Numeric Streams

This section covers the Introduction to Numeric Streams which can be used to perform some numeric related operations.

Section 12: Terminal Operations Streams

This section covers different way to collect the data from the Streams Pipeline.

Terminal Operations such as :

joining()

counting()

mapping()

max(), min()

sum()

average()

groupingBy()

partitioningBy()

Section 12: Streams API - Parallel Processing

This section covers how to perform the Parallel processing using Streams.

How Parallel Programming makes use of the processors in your machine to perform concurrency operations?

How Parallel Programming works internally ?

How to check the performance between the sequential and parallel programming ?

Scenarios when not to use parallel programming.

Section 12: Optional

This section covers What is Optional and the benefits of Optional.

How Optional can help you avoid Null Pointer exception.

Exploring the different operations that are part of Optional such as :

empty()

ofNullable()

of()

orElse()

orElseGet()

orElseThrow()

isPresent()

ifPresent()

map()

flatMap()

filter()

Section 12: New Date/Time Libraries

This section covers new Date/Time Libraries such as LocalDate, LocalTime, LocalDateTime.

How to create/edit the LocalDate,LocalTime and LocalDateTime instances using different approaches.

How to find the difference between the LocalDate, LocalTime and LocalDateTime using Period, Duration.

How to represent the time in the Machine Readable Format using Instant.

How to use the TimeZone using the ZonedDateTime.

How to Format the Date using the DateTimeFormatter.

By the end of this course you will have a complete understanding of all the Java 8 features and implement it in real Java projects.


Who this course is for:
Anyone willing to learn the new Java Features like Lambdas, Streams, Parallel Programming, New Data Time Libraries and etc.,
Java developers who would like to take their knowledge to the next level to write more concise and readable code


Homepage

1.aboutcourses3pjhr.jpg


Mockup Creation Course for Adobe Photoshop or Affinity Photo

007c1323fvjeq.jpg


Mockup Creation Course for Adobe Photoshop or Affinity Photo
Video: .mp4 (1280x720, 30 fps(r)) | Audio: aac, 44100 Hz, 2ch | Size: 12.2 GB
Genre: eLearning Video | Duration: 115 lectures (13 hour, 44 mins) | Language: English

Master mockup creation: T-shirts, branding presentations, books, product boxes, bottles, posters and more!


What you'll learn

Create Custom Mockups
Use Adobe Photoshop or Affinity Photo to craft unique mockup layouts
Place graphics/designs on anything, including rounded edges and objects with perspective
Learn new Photoshop and Affinity Photo tools and master layers, blending modes and warp tools
Learn how to set up your own studio to take product photos for mockups
Learn about proper lighting, highlights and shadows
Learn 3D tools to put together hyper realistic 3d product mockups
Learn proper mockup composition and layout

Requirements

Have access to either Affinity Photo or Adobe Photoshop (both are not required just one or the other) Adobe CC or higher suggested


Description

Have you ever wanted to learn how to create those awesome mockups you see everywhere these days? Do you want to present your design work or product designs in the best most professional way possible, making them both unique and polished? Do you want to create stunning presentations for your portfolio? Then this course is meant for you.

This course is massive spanning multiple projects and software. We will first learn basic mockup theory, how to best layout our mockups. We will talk about proper shadows and highlights and crafting wonderful rich mockup experiences.

We then teach you how to set up your own studio to take photos for mockups including t-shirts, iPads, bottles and more. Learn lighting techniques and photo editing techniques to make your mockups truly custom and unique.

We will go over the basics of pre-made mockups and how to customize those extensively.

Next, we learn how to adapt our designs and graphics to any photo imaginable, even free stock photos. We will give you the foundations needed to place graphics on t-shirts, apparel, mugs, boxes and more. We will learn how to apply graphics that have perspective and use warping tools to warp objects along curves to create product label presentations.

We tackle a presentations of for a branding project so you can find ways to best customize and develop a mockup that adheres to the brands style, making it a stunning portfolio centerpiece.


We will create a 3d Box from scratch and learn how to layer in shadows, highlights and details to create any box style needed for any presentation.

There is even a whole section dedicated to using 3D software like Adobe Dimensions and Blender to create fully 3D product mockups that are hyper realistic. No prior experience needed in the 3D software as it will be taught from scratch.

What makes this course truly unique is it gives you multiple software options for learning mockup creation. I, Lindsay Marsh will be walking you through projects using Adobe Photoshop and Adobe Dimensions and Jermey Hazel will walk you through similar projects using Affinity Products including Affinity Photo but also a free 3D software option called Blender. So no matter your software of choice, this course is for you!

Also included is a wide array of finished fully customizable mockup templates compatible with both affinity and adobe products! This includes branding presentations, t-shirt templates and more.

There are project files included along the way so you can work side by side with us without the hassle of creating your own designs first, giving you time to learn the overall process first.


This course does assume you know the very basics of Photoshop or Affinity software but only very basic knowledge is required to take this course. It is gentle enough for most learners to follow along.

So, if you want to step up your presentation game and produce some killer custom mockups then let's get started!


Who this course is for:

Anyone wanting to create custom mockups for their portfolios
Anyone wanting to place their designs/graphics/illustrations on any product imaginable
Those wanting more experience using either Adobe Photoshop or Affinity Photo using intermediate tools and layering
Those looking for guidance on how to take their own product photos for mockups
Those looking for inspiration to craft mockups
Those wanting to take pre-made mockups and customize them
Those looking to get a quick crash course on 3d software to create hyper realistic product images

007c1322qhjm9.jpeg


Zurück
Oben Unten