




• Regeln für den Video-Bereich:

    In den Börsenbereich gehören nur Angebote die bereits den Allgemeinen Regeln entsprechen.

    Einteilung

    - Folgende Formate gehören in die angegeben Bereiche:
    - Filme: Encodierte Filme von BluRay, DVD, R5, TV, Screener sowie Telesyncs im Format DivX, XviD und x264.
    - DVD: Filme im Format DVD5, DVD9 und HD2DVD.
    - HD: Encodierte Filme mit der Auflösung 720p oder darüber von BluRay, DVD, R5, TV, Screener sowie Telesyncs im Format x264.
    - 3D: Encodierte Filme von BluRay, die in einem 3D Format vorliegen. Dies gilt auch für Dokus, Animation usw.
    - Serien: Cartoon/Zeichentrick, Anime, Tutorials, Dokumentationen, Konzerte/Musik, Sonstiges sind demnach in die entsprechenden Bereiche einzuordnen, auch wenn sie beispielsweise im High Definition-Format oder als DVD5/DVD9/HD2DVD vorliegen. Ausnahme 3D.
    - Bereich Englisch: Englische Releases gehören immer in diesen Bereich.
    - Bereich Talk: Der Bereich, in dem über die Releases diskutiert werden kann, darf, soll und erwünscht ist.


    Angebot/Beitrag erstellen

    - Ein Beitrag darf erst dann erstellt werden, wenn der Upload bei mindestens einem OCH komplett ist. Platzhalter sind untersagt.
    - Bei einem Scenerelease hat der Threadtitel ausschließlich aus dem originalen, unveränderten Releasenamen zu bestehen. Es dürfen keine Veränderungen wie z.B. Sterne, kleine Buchstaben o.ä. vorgenommen werden. Ausnahme Serienbörse:
    - Bei einem Sammelthread für eine Staffel entfällt aus dem Releasename natürlich der Name der Folge. Beispiel: Die Simpsons S21 German DVDRip XviD - ITG
    - Dementsprechend sind also u.a. verboten: Erweiterungen wie "Tipp", "empfehlenswert", "only", "reup", usw. / jegliche andere Zusatzinformation oder Ergänzung, welche nicht in obiger Beschreibung zu finden ist.

    Aufbau des Angebots und Threadtitel

    Der Titel nach folgendem Muster erstellt zu werden. <Name> [3D] [Staffel] [German] <Jahr> <Tonspur> [DL] [Auflösung] <Quelle> <Codec> - <Group>
    Beispiel: The Dark Knight German 2008 AC3 DVDRip XviD - iND
    Beispiel: The Dark Knight 2008 DTS DL BDRip x264 - iND
    Beispiel: The Dark Knight 2008 AC3 DL BDRip XviD - iND
    Beispiel: The Dark Knight German 2008 AC3 720p BluRay x264 iND
    Beispiel: The Dark Knight 2008 DTS DL 1080p BluRay x264 iND
    Beispiel: Die Simpsons S01 German AC3 DVDRip XviD iND
    Beispiel: Die Simpsons S20 German AC3 720p BluRay x264 iND
    Beispiel: Sword Art Online II Ger Sub 2014 AAC 1080p WEBRip x264 - peppermint
    Entsprechend sind also u.a. verboten: Sonderzeichen wie Klammern, Sterne, Ausrufezeichen, Unterstriche, Anführungszeichen / Erweiterungen wie "Tipp", "empfehlenswert", "only", "reup", usw. / jegliche andere Zusatzinformation oder Ergänzung, welche nicht in obiger Beschreibung zu finden ist
    Ausnahmen hiervon können in den Bereichen geregelt sein.

    Die Beiträge sollen wie folgt aufgebaut werden:
    Überschrift entspricht dem Threadtitel
    Cover
    kurze Inhaltsbeschreibung
    Format, Größe, Dauer sind gut lesbar für Downloader außerhalb des Spoilers zu vermerken
    Nfo sind immer Anzugeben und selbige immer im Spoiler in Textform.
    Sind keine Nfo vorhanden z.B. Eigenpublikationen, sind im Spoiler folgende Dateiinformationen zusätzlich anzugeben :
    Quelle
    Video (Auflösung und Bitrate)
    Ton (Sprache, Format und Bitrate der einzelnen Spuren)
    Untertitel (sofern vorhanden)
    Hosterangabe in Textform außerhalb eines Spoiler mit allen enthaltenen Hostern.
    Bei SD kann auf diese zusätzlichen Dateiinformationen verzichtet werden.

    Alle benötigten Passwörter sind, sofern vorhanden, in Textform im Angebot anzugeben.
    Spoiler im Spoiler mit Kommentaren :"Schon Bedankt?" sind unerwünscht.


    Releases

    - Sind Retail-Release verfügbar, sind alle anderen Variationen untersagt. Ausnahmen: Alle deutschen Retail-Release sind CUT, in diesem Fall sind dubbed UNCUT-Release zulässig.
    - Im Serien-Bereich gilt speziell: Wenn ein Retail vor Abschluss einer laufenden Staffel erscheint, darf diese Staffel noch zu Ende gebracht werden.62
    - Gleiche Releases sind unbedingt zusammenzufassen. Das bedeutet, es ist zwingend erforderlich, vor dem Erstellen eines Themas per Suchfunktion zu überprüfen, ob bereits ein Beitrag mit demselben Release besteht. Ist dies der Fall, ist der bereits vorhandene Beitrag zu verwenden.
    - P2P und Scene Releases dürfen nicht verändert oder gar unter einem iND Tag eingestellt werden.


    Support, Diskussionen und Suche

    - Supportanfragen sind entweder per PN oder im Bereich Talk zu stellen.
    - Diskussionen und Bewertungen sind im Talk Bereich zu führen. Fragen an die Uploader haben ausschließlich via PN zu erfolgen, und sind in den Angeboten untersagt.
    - Anfragen zu Upload-Wünschen sind nur im Bereich Suche Video erlaubt. Antworten dürfen nur auf Angebote von MyBoerse.bz verlinkt werden.


    Verbote

    - Untersagt sind mehrere Formate in einem einzigen Angebotsthread, wie beispielsweise das gleichzeitige Anbieten von DivX/XviD, 720p und 1080p in einem Thread. Pro Format, Release und Auflösung ist ein eigener Thread zu eröffnen.
    - Grundsätzlich ebenso verboten sind Dupes. Uploader haben sich an geeigneter Stelle darüber zu informieren, ob es sich bei einem Release um ein Dupe handelt.
    - Gefakte, nur teilweise lauffähige oder unvollständige Angebote sind untersagt. Dies gilt auch für eigene Publikationen, die augenscheinlich nicht selbst von z.B. einer DVD gerippt wurden. Laufende Serien, bei denen noch nicht alle Folgen verfügbar sind, dürfen erstellt und regelmäßig geupdatet werden.
    - Untersagt sind Angebote, welche nur und ausschließlich in einer anderen Sprache als deutsch oder englisch vorliegen. Ausnahmen sind VORHER mit den Moderatoren zu klären.


    Verstoß gegen die Regeln

    - Angebote oder Beiträge, die gegen die Forenregeln verstoßen, sind über den "Melden"-Button im Beitrag zu melden.
  • Bitte registriere dich zunächst um Beiträge zu verfassen und externe Links aufzurufen.

++ Premium IPTV ++ 7000 Live Sender ++ UHD Qualität ++ Mediathek mit 18.000 Inhalten ++


VenneTV


Master RESTful APIs with Spring Boot 2 in 100 Steps

AgentofHeart

MyBoerse.bz Pro Member

761906555_yxusj-0r0b5l83g4sf.jpg

Master RESTful APIs with Spring Boot 2 in 100 Steps
.MP4 | Video: 1280x720, 30 fps(r) | Audio: AAC, 44100 Hz, 2ch | 6.03 GB
Duration: 13.5 hours | Genre: eLearning | Language: English​

What you'll learn

You will be able to develop RESTful web services with Spring Boot 2 from scratch
You will build a real time project using Spring Boot Data JPA & H2 database wherein same project will be leveraged for learning all the modules in an incremental manner.
You will learn about using github to manage the incremental development process for SpringBoot applications both via git command line and using STS IDE.
You will understand how to implement Exception Handling using Spring 5 latest ResponseStatusException package.
You will be able to design and implement Global Exception handling and Validation for RESTful Services.
You will understand and implement JPA OneToMany Association
You will understand in depth of HATEOAS concepts and implement Self Linking and Relationship linking concepts using HATEOAS.
You will implement internationalisation feature for RESTful Services.
You will be able to understand and design filtering solutions for RESTful webservices with static, dynamic filtering methods and also using @JsonView.
You will understand DTOs concept (Data Transfer Objects) and implement Entity to DTO conversion using ModelMapper and MapStruct Dependencies.
You will understand the options available for RESTful APIs versioning and implement all the options available.
You will learn about importance of API Documentation for RESTful APIs and implement SWAGGER integration with UserManagement Service which you will build as part of this course.
You will understand and implement spring boot actuator and Spring Boot admin features for RESTful Services.
You will learn about Micrometer and how it can export metrics to multiple monitoring tools. You will implement exporting metrics via JMX and also to a SAAS solution named AppOptics and create dashboards, verify timeseries data, live metrics in AppOptics.

Requirements

You should be familiar with basic java concepts

Description

Course Overview

Welcome to this Amazing course on Master RESTful API s using Spring Boot 2 in 100 Steps. The below are the list of modules covered in this course.

Course Modules

01. Introduction

02. Manage Spring Boot Projects via Github & HelloWorld REST service

03. Build RESTful APIs using Spring Data JPA and H2 Database

04. Exception Handling with ResponseStatusException - Spring 5 Latest

05. Validations & Global Exception Handling

06. SpringBoot - JPA OneToMany Association

07. SpringBoot - HATEOAS

08. SpringBoot - Internationalisation

09. SpringBoot - Filtering

10. SpringBoot - DTOS - Data Transfer Objects

11. SpringBoot - Versioning & Content Negotiation

12. SpringBoot - Swagger Integration

13. SpringBoot - Actuator & Admin

14. SpringBoot - Actuator & Micrometer

Each of my courses come with

Amazing Hands-on Step By Step Learning Experiences

Real Implementation Experience

Friendly Support in the Q&A section

Section wise course details

Module 1: Introduction

Module 01: Introduction

01 Step 01: Course Introduction

01 Step 02: Introduction to RESTful API

Module 02: Manage Spring Boot Projects via Github & HelloWorld REST service

02 Step 00: Github & HelloWorld Introduction

02 Step 01: Create Spring Boot base project from spring initializer

02 Step 02: Introduction for managing Spring Boot projects via github

02 Step 03: Github Base Setup

02 Step 04: Add GIT Repository to Spring Tool Suite IDE

02 Step 05: Create a Simple Hello World RESTful Service which returns a String

02 Step 06: Create a Simple Hello World REST Service which returns a Bean (JSON)

02 Step 07: GIT Commit & Push Hello World RESTful service changes to Github

Module 03: Build RESTful APIs using Spring Data JPA and H2 Database

03 Step 00: Introduction to Build RESTful APIs with JPA

03 Step 01: Usecase Introduction

03 Step 02: Verify pom.xml for all Dependencies

03 Step 03: Update application.properties required for JPA based RESTful Services

03 Step 04 01: Create User Entity - Understand @Entity Annotation

03 Step 04 02: Create User Entity - Understand @Table Annotation

03 Step 04 03: Create User Entity - Define Variables, Getters & Setters

03 Step 05: Understand and Implement changes related to H2 Database

03 Step 06: Create User Repository - @Repository

03 Step 07: Implement getAllUsers RESTful Service - @service, @RestController

03 Step 08: Test getAllUsers RESTful Service - Using REST Client POSTMAN

03 Step 09: Implement createUser RESTful Service - @PostMapping

03 Step 10: Implement getUserById RESTful Service - @GetMapping

03 Step 11: Implement updateUserById RESTful service - @PutMapping

03 Step 12: Implement deleteUserById RESTful Service - @DeleteMapping

03 Step 13: Implement getUserByUsername RESTful Service - @GetMapping

03 Step 14: GIT Commit, Push, Merge to Master and Push

Module 04: Exception Handling with ResponseStatusException - Spring 5 Latest

04 Step 00: Introduction to Exception Handling using ResponseStatusException

04 Step 00: Create git branch - local & remote

04 Step 01: Implement ResponseStatusException handling for getUserById

04 Step 02: Implement ResponseStatusException for updateUserById RESTful Service

04 Step 03: Implement ResponseStatusException for deleteUserById RESTful Service

04 Step 04: Implement ResponseStatusException for createUser RESTful Service

04 Step 05: Implement HTTP Status code & Location Header for createUser Service

04 Step 06: GIT Commit, Push, Merge to Master and Push

Module 05: Validations & Global Exception Handling

05 Step 00: Introduction to Spring Boot - Validations & Global Exception Handling

05 Step 00: Create git branch for Validations & Global Exception Handling

05 Step 01: Implement Bean Validation - @Valid

05 Step 02: Implement custom Global Exception Handler - @ControllerAdvice

05 Step 03: Implement HttpRequestMethodNotSupportedException in GEH

05 Step 04: Implement UserNameNotFoundException in GEH - @ExceptionHandler

05 Step 05: Path Variable Validation & ConstraintViolationException in GEH

05 Step 06: Implement Global Exception Handling using @RestControllerAdvice

05 Step 07: Switching between @ControllerAdvice and @RestControllerAdvice

Module 06: SpringBoot - JPA OneToMany Association

06 Step 00: Need for JPA OneToMany for HATEOAS

06 Step 00: Introduction to JPA OneToMany Association

06 Step 01: Create git branch for JPA OneToMany Association

06 Step 02: Create Order Entity and @ManyToOne Association

06 Step 03: Update User entity with @OneToMany Association

06 Step 04: Implement "getAllOrders" RESTful Service

06 Step 05: Implement "createOrder" RESTful Service

06 Step 06: Implement "getOrderByOrderId" RESTful Service

06 Step 07: GIT Commit, Push, Merge to Master and Push

Module 07: SpringBoot - HATEOAS

07 Step 00: Introduction to Spring Boot - HATEOAS

07 Step 00: Create git branch for HATEOAS

07 Step 01: Add HATEOAS Dependency in pom.xml

07 Step 02: Extend User and Order Entities with ResourceSupport

07 Step 03: Create new User and Order Controllers for HATEOAS Implementation

07 Step 04: Implement self link in getUserById Method

07 Step 05: Implement self and relationship links in getAllUsers Method

07 Step 06: GIT commit code, push to remote, merge to master

Module 08: SpringBoot - Internationalisation

08 Step 00: Introduction to Internationalisation

08 Step 00: Create git branch for Internationalisation

08 Step 01: Create LocaleResolver and ResourceBundleMessageSource Beans

08 Step 02: Implement RESTful Service with Internationalisation

08 Step 03: GIT Commit, Push, Merge to Master and Push

Module 09: SpringBoot - Filtering

09 Step 01: Implement Static Filtering using @JsonIgnore and @JsonIgnoreProperties

09 Step 02: Implement Dynamic Filtering using MappingJacksonValue

09 Step 03: Implement Dynamic Filtering with MappingJacksonValue & @RequestParam

09 Step 04: Dynamic Filtering - git Commit and Push code

09 Step 05: Introduction to Filtering using @JsonView

09 Step 06: Implement Filtering using @JsonView

Module 10: SpringBoot - DTOS - Data Transfer Objects

10 Step 01: ModelMapper Introduction

10 Step 02: ModelMapper Configuration Setup

10 Step 03: Implement Methods using ModelMapper

10 Step 04: MapStruct Introduction

10 Step 05: MapStruct Configuration Setup

10 Step 06: MapStruct - Create UserMapper and Implement getAllUsers Method

10 Step 07: MapStruct - Implement getUserById Method using MapStruct UserMapper

Module 11: SpringBoot - Versioning & Content Negotiation

11 Step 00: Versioning Introduction

11 Step 01: Create DTO's required for Versioning Implementation

11 Step 02: Implement URI Versioning

11 Step 03: Implement Request Parameter Versioning

11 Step 04: Implement Custom Header Versioning

11 Step 05: Implement Media Type Versioning

11 Step 06: Implement & Test Content Negotiation

11 Step 07: GIT Commit Code & Push for Content Negotiation branch

Module 12: SpringBoot - Swagger Integration

12 Step 00: Introduction to Swagger

12 Step 01: Add Springfox Dependencies to pom.xml and Create SwaggerConfig file

12 Step 02: Adding API Info to modify header part of our documentation

12 Step 03: Restrict scope of swagger document generation using API Base packages

12 Step 04: Auto populate documentation for JSR-303 Validations

12 Step 05: Adding Swagger Core Annotations to Model class

12 Step 06: Adding Swagger Core Annotations to Controller classes

Module 13: SpringBoot - Actuator & Admin

13 Step 00: SpringBoot Actuator Introduction

13 Step 01: Add Actuator Dependency in pom.xml

13 Step 02: Expose all Actuator Endpoints and discuss about them

13 Step 03: SpringBoot Admin Introduction

13 Step 04: SpringBoot Admin - Base Setup

13 Step 05: Point SpringBoot Client Application to SpringBoot Admin Server

13 Step 06: Test the features in SpringBoot Admin Server

Module 14: SpringBoot - Actuator & Micrometer

14 Step 00: Introduction to SpringBoot Micrometer

14 Step 01: Add Micrometer Dependency to pom.xml

14 Step 02: Integrate with JMX and view metrics in JConsole

14 Step 03: Integrate with AppOptics to export metrics and View metrics in AppOptic

14 Step 04: Verify Metrics in AppOptics and Create Metrics Dashboards

Who this course is for:

Anyone who wish to learn on how to design and develop Spring Boot RESTful APIs with Spring Boot from scratch.
Anyone who want to learn Step by Step with a Hands-On Approach.
Anyone who wants to learn how to build enterprise application backend layers with modern approach (RESTful APIs)

Bookmark & Visit it Daily for More Video Tutorial
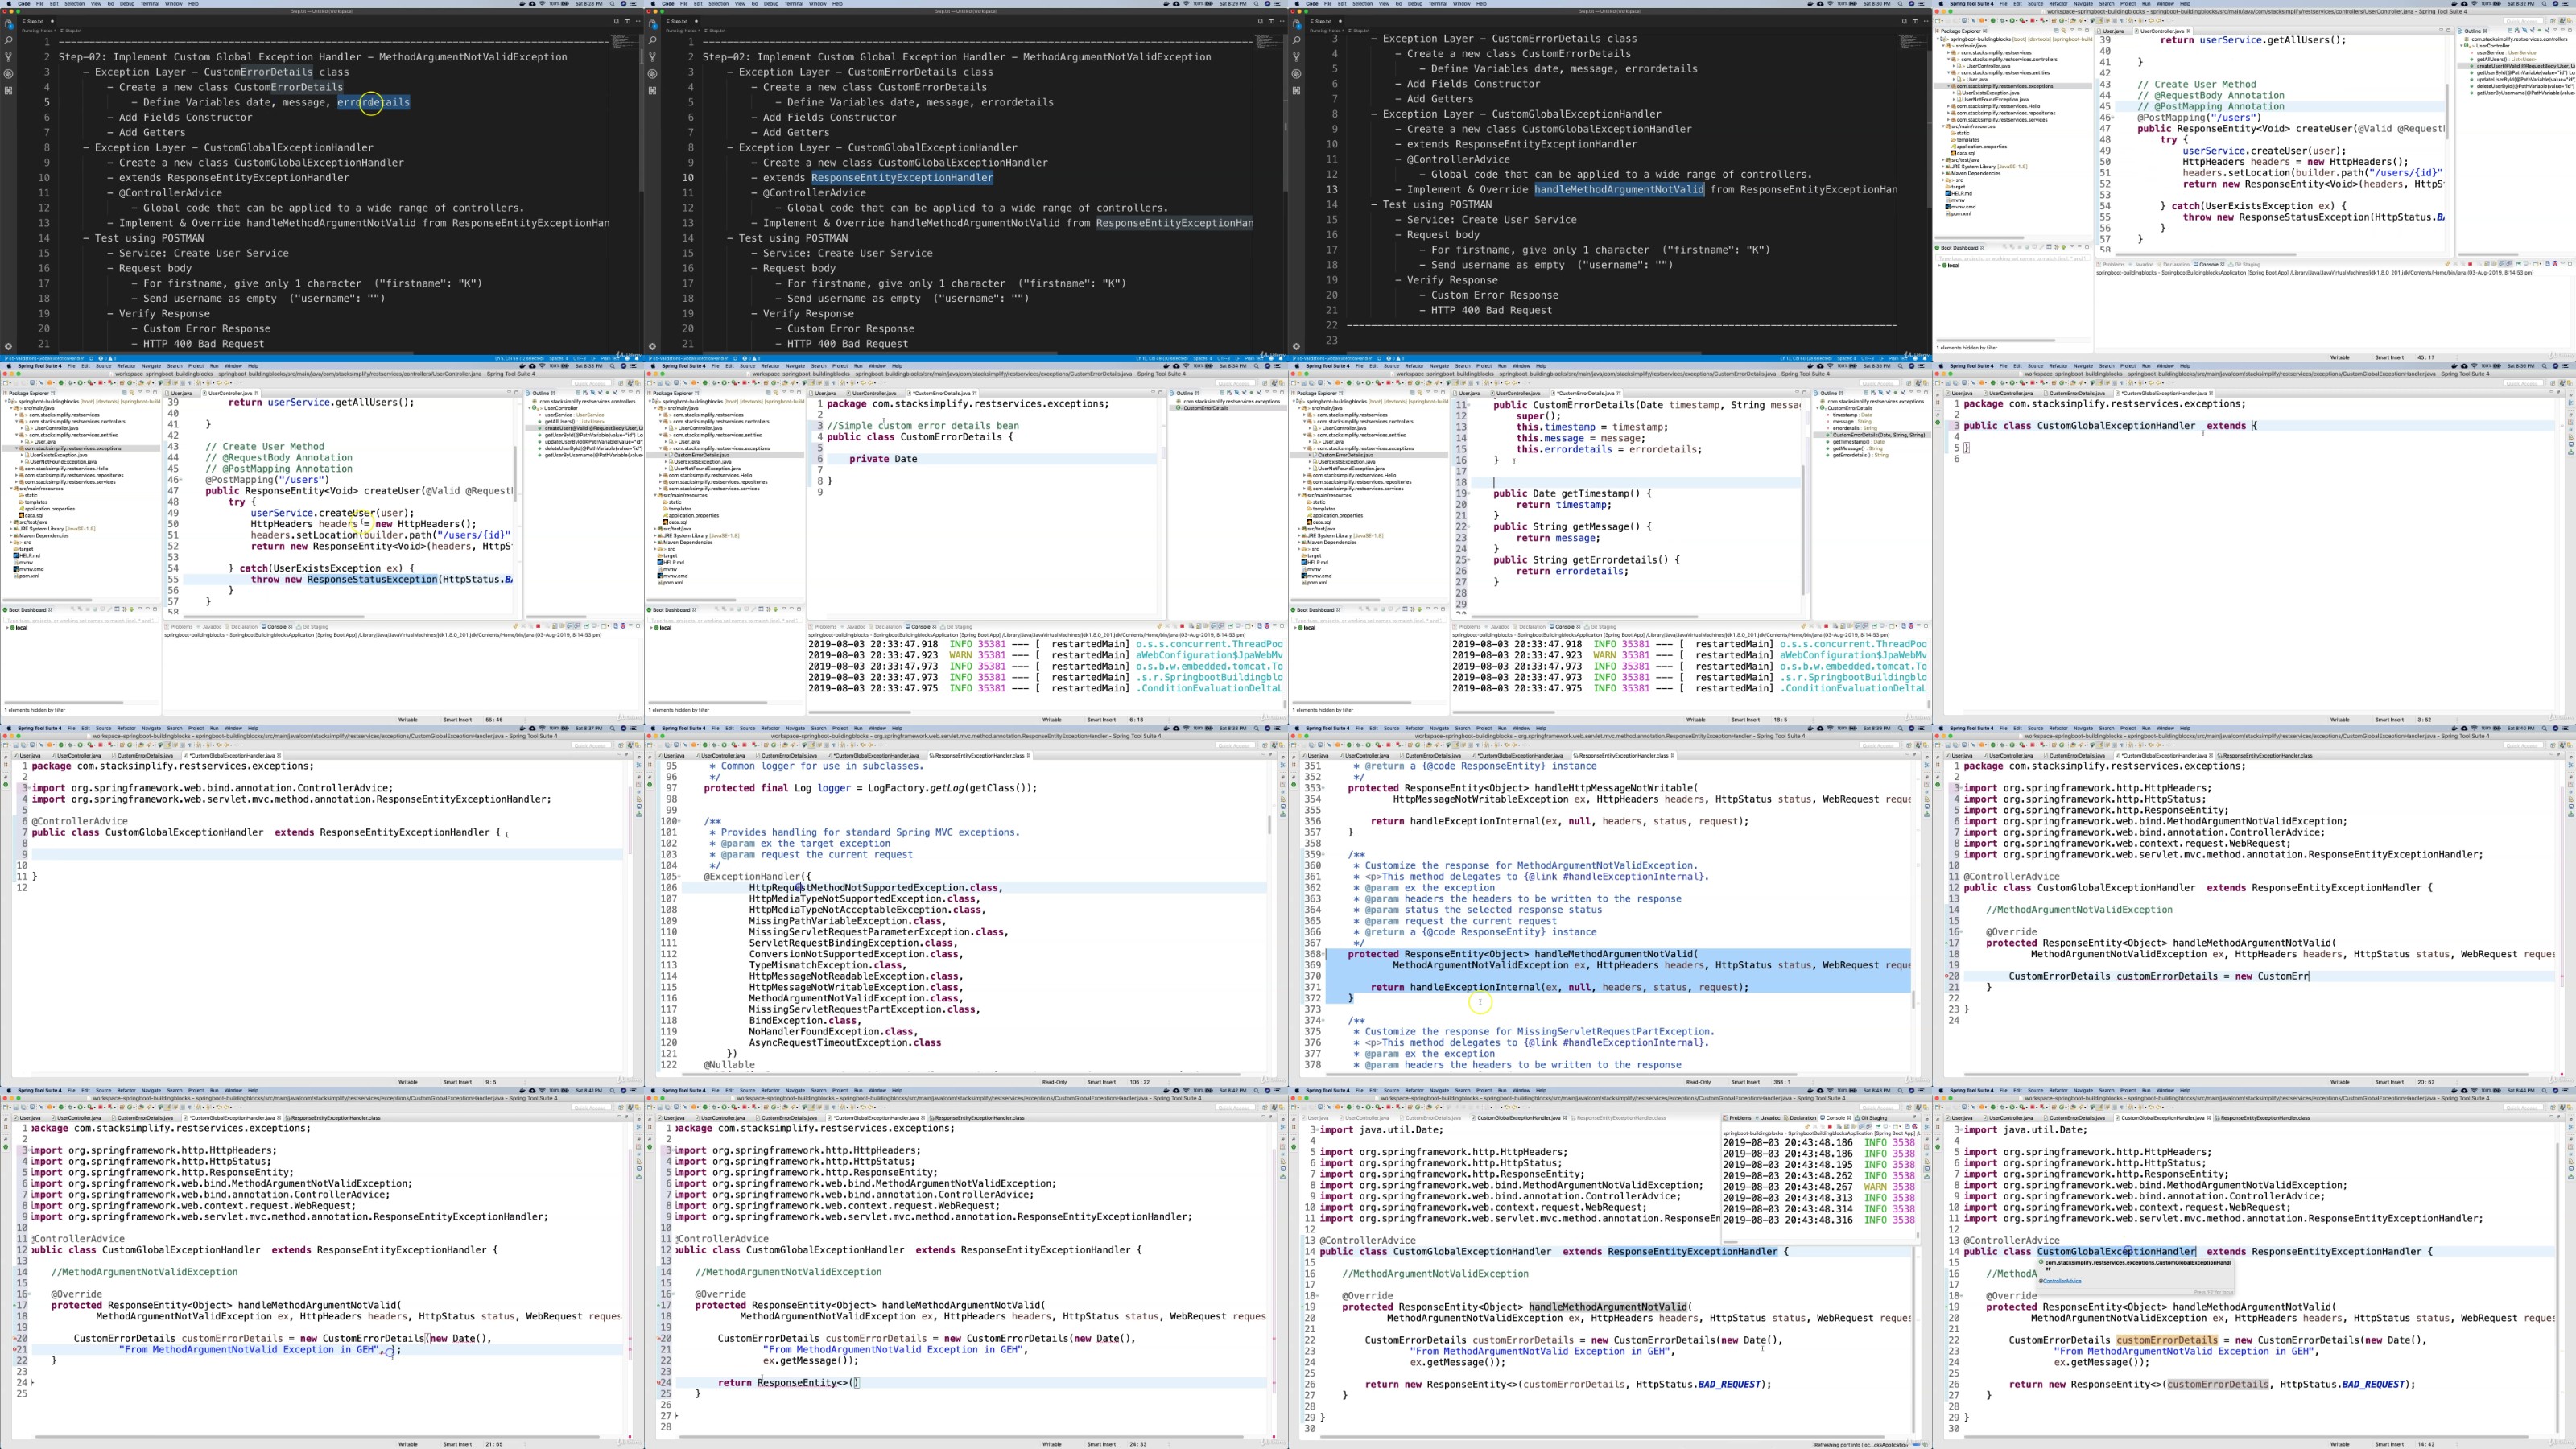
yxusj-43-Step-02-Implement-custom-Global-Exception-Handler-Controller-Advice.jpg

761906647_yxusj-o3s2e2hw71x9.jpg


RapidGator
-.part1.rar
-.part2.rar
-.part3.rar
-.part4.rar
-.part5.rar
-.part6.rar
-.part7.rar
-.part8.rar
DDownload
-.part1.rar
-.part2.rar
-.part3.rar
-.part4.rar
-.part5.rar
-.part6.rar
-.part7.rar
-.part8.rar
NitroFlare
-.part1.rar
-.part2.rar
-.part3.rar
-.part4.rar
-.part5.rar
-.part6.rar
-.part7.rar
-.part8.rar
UsersDrive
-.part1.rar
-.part2.rar
-.part3.rar
-.part4.rar
-.part5.rar
-.part6.rar
-.part7.rar
-.part8.rar
​
 

2344c3935848eae1338e47f7f8794900.jpg

Master RESTful APIs with Spring Boot 2 in 100 Steps
.MP4 | Video: 1280x720, 30 fps(r) | Audio: AAC, 44100 Hz, 2ch | 6.03 GB
Duration: 13.5 hours | Genre: eLearning | Language: English​

What you'll learn

You will be able to develop RESTful web services with Spring Boot 2 from scratch
You will build a real time project using Spring Boot Data JPA & H2 database wherein same project will be leveraged for learning all the modules in an incremental manner.
You will learn about using github to manage the incremental development process for SpringBoot applications both via git command line and using STS IDE.
You will understand how to implement Exception Handling using Spring 5 latest ResponseStatusException package.
You will be able to design and implement Global Exception handling and Validation for RESTful Services.
You will understand and implement JPA OneToMany Association
You will understand in depth of HATEOAS concepts and implement Self Linking and Relationship linking concepts using HATEOAS.
You will implement internationalisation feature for RESTful Services.
You will be able to understand and design filtering solutions for RESTful webservices with static, dynamic filtering methods and also using @JsonView.
You will understand DTOs concept (Data Transfer Objects) and implement Entity to DTO conversion using ModelMapper and MapStruct Dependencies.
You will understand the options available for RESTful APIs versioning and implement all the options available.
You will learn about importance of API Documentation for RESTful APIs and implement SWAGGER integration with UserManagement Service which you will build as part of this course.
You will understand and implement spring boot actuator and Spring Boot admin features for RESTful Services.
You will learn about Micrometer and how it can export metrics to multiple monitoring tools. You will implement exporting metrics via JMX and also to a SAAS solution named AppOptics and create dashboards, verify timeseries data, live metrics in AppOptics.

Requirements

You should be familiar with basic java concepts

Description

Course Overview

Welcome to this Amazing course on Master RESTful API s using Spring Boot 2 in 100 Steps. The below are the list of modules covered in this course.

Course Modules

01. Introduction

02. Manage Spring Boot Projects via Github & HelloWorld REST service

03. Build RESTful APIs using Spring Data JPA and H2 Database

04. Exception Handling with ResponseStatusException - Spring 5 Latest

05. Validations & Global Exception Handling

06. SpringBoot - JPA OneToMany Association

07. SpringBoot - HATEOAS

08. SpringBoot - Internationalisation

09. SpringBoot - Filtering

10. SpringBoot - DTOS - Data Transfer Objects

11. SpringBoot - Versioning & Content Negotiation

12. SpringBoot - Swagger Integration

13. SpringBoot - Actuator & Admin

14. SpringBoot - Actuator & Micrometer

Each of my courses come with

Amazing Hands-on Step By Step Learning Experiences

Real Implementation Experience

Friendly Support in the Q&A section

Section wise course details

Module 1: Introduction

Module 01: Introduction

01 Step 01: Course Introduction

01 Step 02: Introduction to RESTful API

Module 02: Manage Spring Boot Projects via Github & HelloWorld REST service

02 Step 00: Github & HelloWorld Introduction

02 Step 01: Create Spring Boot base project from spring initializer

02 Step 02: Introduction for managing Spring Boot projects via github

02 Step 03: Github Base Setup

02 Step 04: Add GIT Repository to Spring Tool Suite IDE

02 Step 05: Create a Simple Hello World RESTful Service which returns a String

02 Step 06: Create a Simple Hello World REST Service which returns a Bean (JSON)

02 Step 07: GIT Commit & Push Hello World RESTful service changes to Github

Module 03: Build RESTful APIs using Spring Data JPA and H2 Database

03 Step 00: Introduction to Build RESTful APIs with JPA

03 Step 01: Usecase Introduction

03 Step 02: Verify pom.xml for all Dependencies

03 Step 03: Update application.properties required for JPA based RESTful Services

03 Step 04 01: Create User Entity - Understand @Entity Annotation

03 Step 04 02: Create User Entity - Understand @Table Annotation

03 Step 04 03: Create User Entity - Define Variables, Getters & Setters

03 Step 05: Understand and Implement changes related to H2 Database

03 Step 06: Create User Repository - @Repository

03 Step 07: Implement getAllUsers RESTful Service - @service, @RestController

03 Step 08: Test getAllUsers RESTful Service - Using REST Client POSTMAN

03 Step 09: Implement createUser RESTful Service - @PostMapping

03 Step 10: Implement getUserById RESTful Service - @GetMapping

03 Step 11: Implement updateUserById RESTful service - @PutMapping

03 Step 12: Implement deleteUserById RESTful Service - @DeleteMapping

03 Step 13: Implement getUserByUsername RESTful Service - @GetMapping

03 Step 14: GIT Commit, Push, Merge to Master and Push

Module 04: Exception Handling with ResponseStatusException - Spring 5 Latest

04 Step 00: Introduction to Exception Handling using ResponseStatusException

04 Step 00: Create git branch - local & remote

04 Step 01: Implement ResponseStatusException handling for getUserById

04 Step 02: Implement ResponseStatusException for updateUserById RESTful Service

04 Step 03: Implement ResponseStatusException for deleteUserById RESTful Service

04 Step 04: Implement ResponseStatusException for createUser RESTful Service

04 Step 05: Implement HTTP Status code & Location Header for createUser Service

04 Step 06: GIT Commit, Push, Merge to Master and Push

Module 05: Validations & Global Exception Handling

05 Step 00: Introduction to Spring Boot - Validations & Global Exception Handling

05 Step 00: Create git branch for Validations & Global Exception Handling

05 Step 01: Implement Bean Validation - @Valid

05 Step 02: Implement custom Global Exception Handler - @ControllerAdvice

05 Step 03: Implement HttpRequestMethodNotSupportedException in GEH

05 Step 04: Implement UserNameNotFoundException in GEH - @ExceptionHandler

05 Step 05: Path Variable Validation & ConstraintViolationException in GEH

05 Step 06: Implement Global Exception Handling using @RestControllerAdvice

05 Step 07: Switching between @ControllerAdvice and @RestControllerAdvice

Module 06: SpringBoot - JPA OneToMany Association

06 Step 00: Need for JPA OneToMany for HATEOAS

06 Step 00: Introduction to JPA OneToMany Association

06 Step 01: Create git branch for JPA OneToMany Association

06 Step 02: Create Order Entity and @ManyToOne Association

06 Step 03: Update User entity with @OneToMany Association

06 Step 04: Implement "getAllOrders" RESTful Service

06 Step 05: Implement "createOrder" RESTful Service

06 Step 06: Implement "getOrderByOrderId" RESTful Service

06 Step 07: GIT Commit, Push, Merge to Master and Push

Module 07: SpringBoot - HATEOAS

07 Step 00: Introduction to Spring Boot - HATEOAS

07 Step 00: Create git branch for HATEOAS

07 Step 01: Add HATEOAS Dependency in pom.xml

07 Step 02: Extend User and Order Entities with ResourceSupport

07 Step 03: Create new User and Order Controllers for HATEOAS Implementation

07 Step 04: Implement self link in getUserById Method

07 Step 05: Implement self and relationship links in getAllUsers Method

07 Step 06: GIT commit code, push to remote, merge to master

Module 08: SpringBoot - Internationalisation

08 Step 00: Introduction to Internationalisation

08 Step 00: Create git branch for Internationalisation

08 Step 01: Create LocaleResolver and ResourceBundleMessageSource Beans

08 Step 02: Implement RESTful Service with Internationalisation

08 Step 03: GIT Commit, Push, Merge to Master and Push

Module 09: SpringBoot - Filtering

09 Step 01: Implement Static Filtering using @JsonIgnore and @JsonIgnoreProperties

09 Step 02: Implement Dynamic Filtering using MappingJacksonValue

09 Step 03: Implement Dynamic Filtering with MappingJacksonValue & @RequestParam

09 Step 04: Dynamic Filtering - git Commit and Push code

09 Step 05: Introduction to Filtering using @JsonView

09 Step 06: Implement Filtering using @JsonView

Module 10: SpringBoot - DTOS - Data Transfer Objects

10 Step 01: ModelMapper Introduction

10 Step 02: ModelMapper Configuration Setup

10 Step 03: Implement Methods using ModelMapper

10 Step 04: MapStruct Introduction

10 Step 05: MapStruct Configuration Setup

10 Step 06: MapStruct - Create UserMapper and Implement getAllUsers Method

10 Step 07: MapStruct - Implement getUserById Method using MapStruct UserMapper

Module 11: SpringBoot - Versioning & Content Negotiation

11 Step 00: Versioning Introduction

11 Step 01: Create DTO's required for Versioning Implementation

11 Step 02: Implement URI Versioning

11 Step 03: Implement Request Parameter Versioning

11 Step 04: Implement Custom Header Versioning

11 Step 05: Implement Media Type Versioning

11 Step 06: Implement & Test Content Negotiation

11 Step 07: GIT Commit Code & Push for Content Negotiation branch

Module 12: SpringBoot - Swagger Integration

12 Step 00: Introduction to Swagger

12 Step 01: Add Springfox Dependencies to pom.xml and Create SwaggerConfig file

12 Step 02: Adding API Info to modify header part of our documentation

12 Step 03: Restrict scope of swagger document generation using API Base packages

12 Step 04: Auto populate documentation for JSR-303 Validations

12 Step 05: Adding Swagger Core Annotations to Model class

12 Step 06: Adding Swagger Core Annotations to Controller classes

Module 13: SpringBoot - Actuator & Admin

13 Step 00: SpringBoot Actuator Introduction

13 Step 01: Add Actuator Dependency in pom.xml

13 Step 02: Expose all Actuator Endpoints and discuss about them

13 Step 03: SpringBoot Admin Introduction

13 Step 04: SpringBoot Admin - Base Setup

13 Step 05: Point SpringBoot Client Application to SpringBoot Admin Server

13 Step 06: Test the features in SpringBoot Admin Server

Module 14: SpringBoot - Actuator & Micrometer

14 Step 00: Introduction to SpringBoot Micrometer

14 Step 01: Add Micrometer Dependency to pom.xml

14 Step 02: Integrate with JMX and view metrics in JConsole

14 Step 03: Integrate with AppOptics to export metrics and View metrics in AppOptic

14 Step 04: Verify Metrics in AppOptics and Create Metrics Dashboards

Who this course is for:

Anyone who wish to learn on how to design and develop Spring Boot RESTful APIs with Spring Boot from scratch.
Anyone who want to learn Step by Step with a Hands-On Approach.
Anyone who wants to learn how to build enterprise application backend layers with modern approach (RESTful APIs)

Bookmark & Visit it Daily for More Video Tutorial

72-Step-02-Implement-Dynamic-Filtering-using-Mapping-Jackson-Value.jpg

 
Zurück
Oben Unten