

• Regeln für den Video-Bereich:

    In den Börsenbereich gehören nur Angebote die bereits den Allgemeinen Regeln entsprechen.

    Einteilung

    - Folgende Formate gehören in die angegeben Bereiche:
    - Filme: Encodierte Filme von BluRay, DVD, R5, TV, Screener sowie Telesyncs im Format DivX, XviD und x264.
    - DVD: Filme im Format DVD5, DVD9 und HD2DVD.
    - HD: Encodierte Filme mit der Auflösung 720p oder darüber von BluRay, DVD, R5, TV, Screener sowie Telesyncs im Format x264.
    - 3D: Encodierte Filme von BluRay, die in einem 3D Format vorliegen. Dies gilt auch für Dokus, Animation usw.
    - Serien: Cartoon/Zeichentrick, Anime, Tutorials, Dokumentationen, Konzerte/Musik, Sonstiges sind demnach in die entsprechenden Bereiche einzuordnen, auch wenn sie beispielsweise im High Definition-Format oder als DVD5/DVD9/HD2DVD vorliegen. Ausnahme 3D.
    - Bereich Englisch: Englische Releases gehören immer in diesen Bereich.
    - Bereich Talk: Der Bereich, in dem über die Releases diskutiert werden kann, darf, soll und erwünscht ist.


    Angebot/Beitrag erstellen

    - Ein Beitrag darf erst dann erstellt werden, wenn der Upload bei mindestens einem OCH komplett ist. Platzhalter sind untersagt.
    - Bei einem Scenerelease hat der Threadtitel ausschließlich aus dem originalen, unveränderten Releasenamen zu bestehen. Es dürfen keine Veränderungen wie z.B. Sterne, kleine Buchstaben o.ä. vorgenommen werden. Ausnahme Serienbörse:
    - Bei einem Sammelthread für eine Staffel entfällt aus dem Releasename natürlich der Name der Folge. Beispiel: Die Simpsons S21 German DVDRip XviD - ITG
    - Dementsprechend sind also u.a. verboten: Erweiterungen wie "Tipp", "empfehlenswert", "only", "reup", usw. / jegliche andere Zusatzinformation oder Ergänzung, welche nicht in obiger Beschreibung zu finden ist.

    Aufbau des Angebots und Threadtitel

    Der Titel nach folgendem Muster erstellt zu werden. <Name> [3D] [Staffel] [German] <Jahr> <Tonspur> [DL] [Auflösung] <Quelle> <Codec> - <Group>
    Beispiel: The Dark Knight German 2008 AC3 DVDRip XviD - iND
    Beispiel: The Dark Knight 2008 DTS DL BDRip x264 - iND
    Beispiel: The Dark Knight 2008 AC3 DL BDRip XviD - iND
    Beispiel: The Dark Knight German 2008 AC3 720p BluRay x264 iND
    Beispiel: The Dark Knight 2008 DTS DL 1080p BluRay x264 iND
    Beispiel: Die Simpsons S01 German AC3 DVDRip XviD iND
    Beispiel: Die Simpsons S20 German AC3 720p BluRay x264 iND
    Beispiel: Sword Art Online II Ger Sub 2014 AAC 1080p WEBRip x264 - peppermint
    Entsprechend sind also u.a. verboten: Sonderzeichen wie Klammern, Sterne, Ausrufezeichen, Unterstriche, Anführungszeichen / Erweiterungen wie "Tipp", "empfehlenswert", "only", "reup", usw. / jegliche andere Zusatzinformation oder Ergänzung, welche nicht in obiger Beschreibung zu finden ist
    Ausnahmen hiervon können in den Bereichen geregelt sein.

    Die Beiträge sollen wie folgt aufgebaut werden:
    Überschrift entspricht dem Threadtitel
    Cover
    kurze Inhaltsbeschreibung
    Format, Größe, Dauer sind gut lesbar für Downloader außerhalb des Spoilers zu vermerken
    Nfo sind immer Anzugeben und selbige immer im Spoiler in Textform.
    Sind keine Nfo vorhanden z.B. Eigenpublikationen, sind im Spoiler folgende Dateiinformationen zusätzlich anzugeben :
    Quelle
    Video (Auflösung und Bitrate)
    Ton (Sprache, Format und Bitrate der einzelnen Spuren)
    Untertitel (sofern vorhanden)
    Hosterangabe in Textform außerhalb eines Spoiler mit allen enthaltenen Hostern.
    Bei SD kann auf diese zusätzlichen Dateiinformationen verzichtet werden.

    Alle benötigten Passwörter sind, sofern vorhanden, in Textform im Angebot anzugeben.
    Spoiler im Spoiler mit Kommentaren :"Schon Bedankt?" sind unerwünscht.


    Releases

    - Sind Retail-Release verfügbar, sind alle anderen Variationen untersagt. Ausnahmen: Alle deutschen Retail-Release sind CUT, in diesem Fall sind dubbed UNCUT-Release zulässig.
    - Im Serien-Bereich gilt speziell: Wenn ein Retail vor Abschluss einer laufenden Staffel erscheint, darf diese Staffel noch zu Ende gebracht werden.62
    - Gleiche Releases sind unbedingt zusammenzufassen. Das bedeutet, es ist zwingend erforderlich, vor dem Erstellen eines Themas per Suchfunktion zu überprüfen, ob bereits ein Beitrag mit demselben Release besteht. Ist dies der Fall, ist der bereits vorhandene Beitrag zu verwenden.
    - P2P und Scene Releases dürfen nicht verändert oder gar unter einem iND Tag eingestellt werden.


    Support, Diskussionen und Suche

    - Supportanfragen sind entweder per PN oder im Bereich Talk zu stellen.
    - Diskussionen und Bewertungen sind im Talk Bereich zu führen. Fragen an die Uploader haben ausschließlich via PN zu erfolgen, und sind in den Angeboten untersagt.
    - Anfragen zu Upload-Wünschen sind nur im Bereich Suche Video erlaubt. Antworten dürfen nur auf Angebote von MyBoerse.bz verlinkt werden.


    Verbote

    - Untersagt sind mehrere Formate in einem einzigen Angebotsthread, wie beispielsweise das gleichzeitige Anbieten von DivX/XviD, 720p und 1080p in einem Thread. Pro Format, Release und Auflösung ist ein eigener Thread zu eröffnen.
    - Grundsätzlich ebenso verboten sind Dupes. Uploader haben sich an geeigneter Stelle darüber zu informieren, ob es sich bei einem Release um ein Dupe handelt.
    - Gefakte, nur teilweise lauffähige oder unvollständige Angebote sind untersagt. Dies gilt auch für eigene Publikationen, die augenscheinlich nicht selbst von z.B. einer DVD gerippt wurden. Laufende Serien, bei denen noch nicht alle Folgen verfügbar sind, dürfen erstellt und regelmäßig geupdatet werden.
    - Untersagt sind Angebote, welche nur und ausschließlich in einer anderen Sprache als deutsch oder englisch vorliegen. Ausnahmen sind VORHER mit den Moderatoren zu klären.


    Verstoß gegen die Regeln

    - Angebote oder Beiträge, die gegen die Forenregeln verstoßen, sind über den "Melden"-Button im Beitrag zu melden.
  • Bitte registriere dich zunächst um Beiträge zu verfassen und externe Links aufzurufen.

*** Bestes IPTV *** bester Preis *** gratis Test ***


Englische Tutorials

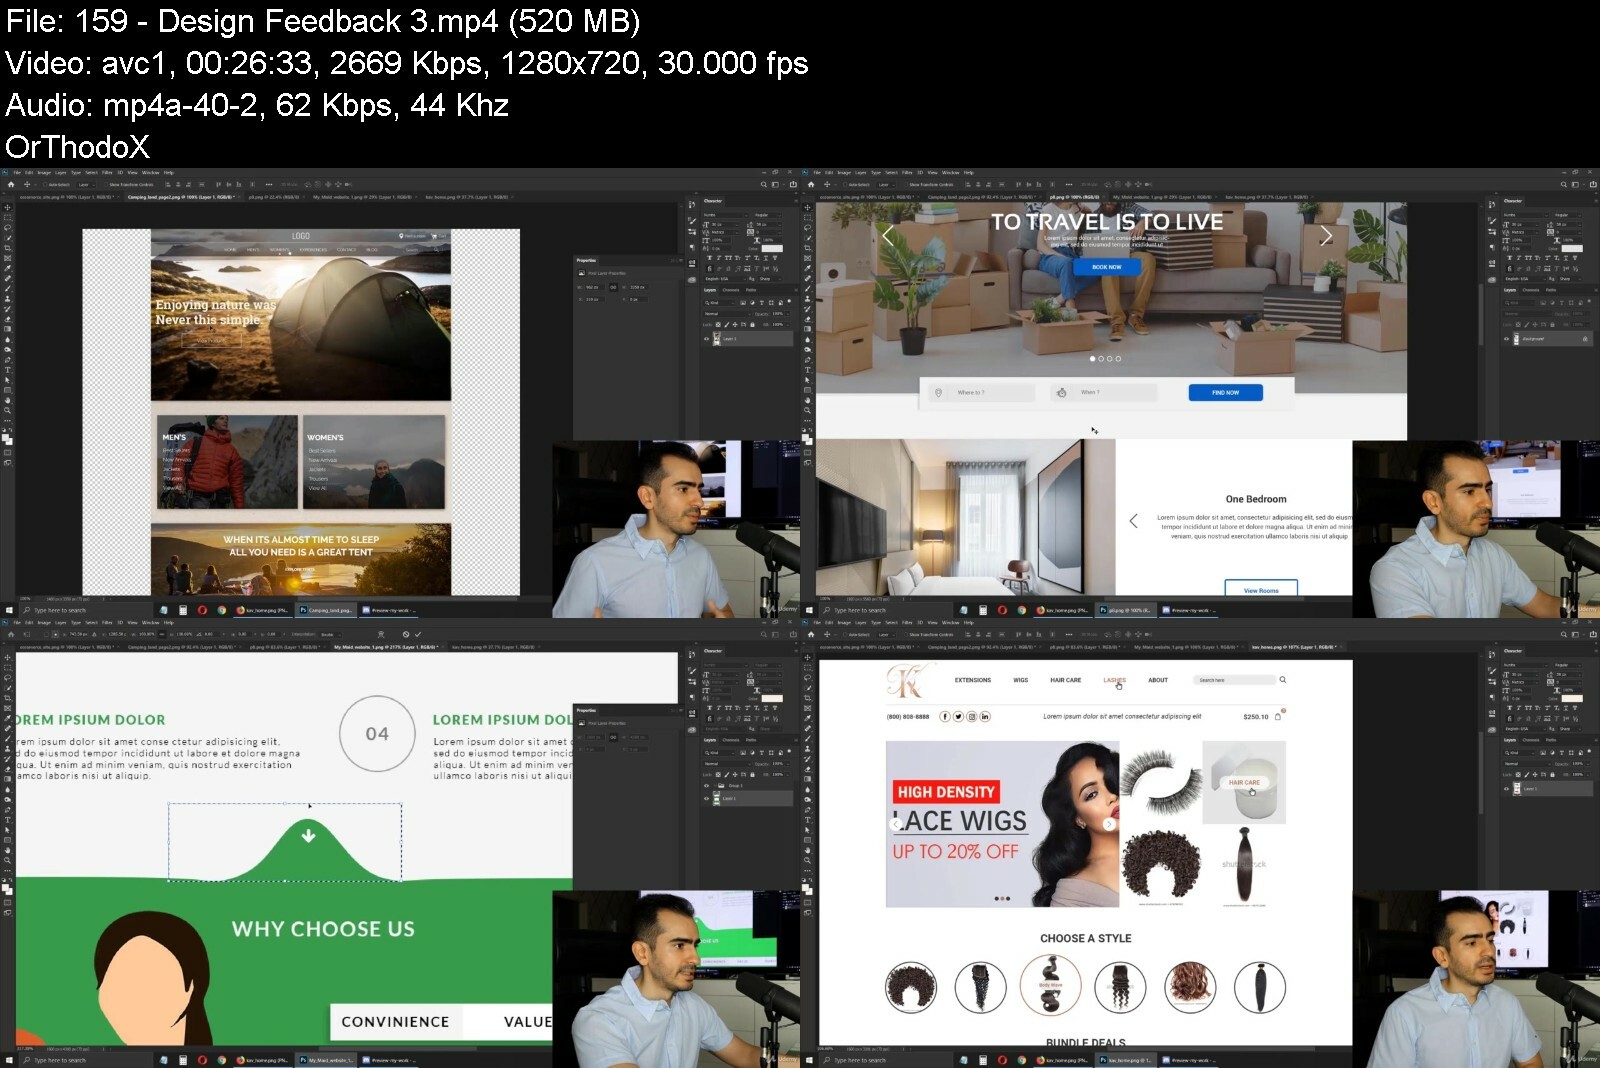
Master Web Design in Photoshop: Complete UI/UX Masterclass
35213274cf5hki6v.jpg


Master Web Design in Photoshop: Complete UI/UX Masterclass
Last Update: 5/2022
Duration: 17h 41m | Video: .MP4, 1280x720 30 fps | Audio: AAC, 48 kHz, 2ch | Size: 10 GB
Genre: eLearning | Language: English

Learn UI/UX and how to create stunning website | Everything you need to know about web design in 2022 | All in Photoshop


What you'll learn:
Learn about conversion rates, bounce rates, improving sales
Learn how to work with coders and succesfully handover the design
Understand fantastic web design principles that can be immediately applied to any project
Learn UX principles that produce immediate results
Create beautiful website designs in Photoshop
The differences between landing pages and standard websites


Requirements
You need at least Photoshop CS6 and a BASIC understanding of how Photoshop works
A positive attitude :)


Description
A website can make or break a business. That's because no matter how great the company's services or products are, without a beautiful website, it's all for nothing! That's why entrepreneurs from all over the world are looking for skilled web designers who are capable of creating awesome websites. This course will help you do just that!
Prepare Yourself for a Career in Web Design by Learning the Foundations of Photoshop and the Ins-and-Outs of the Design Industry
Master the principles of web design & typography.
Learn to design custom graphics and beautiful icons.
Gain access to premium psd files and templates to inspire your own projects.
Discover how to work with clients and how to remain competitive in a cutting-edge industry.
Create Websites that Win Clients and Enhance Your Portfolio
Professional web design is in high demand, with every type of business from large corporations to small boutiques looking for web designers who can improve their online presence and build their brand. This course will teach you the skills you need to create stunning website designs using Photoshop so that you can turn your clients visions into reality. You will also learn how to speak with clients, decode their requests, and meet their demands.
Contents and Overview
Whether you re a beginner or an advanced web designer, you will find this course beneficial in how it blends clear, concise instruction with real world examples and hands-on exercises.
Photoshop & Web Design from A to ZFollowing the course s simple step-by-step process, you will learn the web design principles and Photoshop skills necessary to create vivid web pages and graphics, starting with fundamental topics such as comparing different versions of Photoshop and selecting a monitor, before advancing to spacing, typography, logo design, layout, and more.
Client Case StudiesYou will gain a better understanding of the realities of web design by examining real-life case studies that demonstrate what to do and what not to do when working with clients.
Interactive DemosYou will watch the creation of two websites from start to finish to gain a better understanding of the design process.
Free Templates & ResourcesYou will gain access to an exclusive selection of psd files, a cheat sheet hotkey guide, plus lots of website templates that you can use for your own projects.
Course features:
Crystal clear audio from a native English speaker
Photoshop CC was used throughout the course
Professionally edited: constant zoom in on important areas, hotkeys are shown as subtitles, repetitive techniques are slightly sped up
All lectures have the .psd presentation file attached plus a .pdf with any links that were shown in the video.
After completing this course, you will have a solid understanding of the principles of web design and the foundations of Photoshop necessary to create cutting-edge web pages and graphics. You will also be familiar with the web design industry and the professional strategies necessary to build a client base.

Who this course is for
This course is great for anyone who is into web design and wants to create websites in Photoshop
Anyone who wants to learn a new life skill they can immediately apply and make money
This is must-watch course for any developer, no matter the level of knowledge

Homepage
masterwebdesigninphotn3fch.jpg


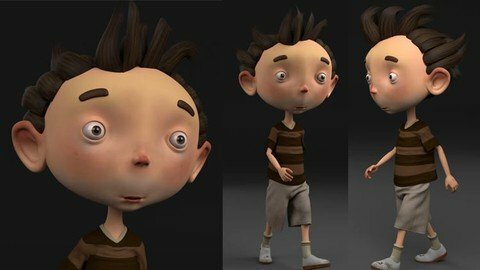
Complete Character Creation in Maya for Beginners

p0dr63u6cgrp6vexzjyyb83cfa.jpg


Complete Character Creation In Maya For Beginners
Last updated 4/2020
MP4 | Video: h264, 1280x720 | Audio: AAC, 44.1 KHz
Language: English | Size: 20.43 GB | Duration: 28h 0m

Be able to Model, Texture, Rig, Animate, Simulate Cloth and Hair and Render characters using Maya and Substance Painter.


What you'll learn
Cartoon Character Modeling in Maya
Texturing in Substance Painter
Basic Character Rigging
Walk Cycle Animation
Creating Cloth and Hair Using ncloth
Rendering Animation

Requirements
There is no requirements. This course is for complete beginners.

Description
Students Reviews : Zoltan Palinkas gave 5 Star and Says : This is the Best Tutorial what I have ever follow. Really good. This is a perfect Maya tutorial for beginners. Clear and accurate, easy to follow. The final result is amazing. Really good tutorial,Orlando Ordonez gave 5 Star and Says : Great course, especially if your a beginner and you want to know how do the complete character pipeline. The instructor does a great job of explaining everything in an easy to follow way. Would definitely recommend, and look forward to other course from this instructor.Check reviews section for more great reviews.Are you a beginner and want to learn complete character creation process in Maya for production ? I mean Everything from modeling, texturing, rigging, animation, cloth and hair simulation and rendering. Instructor : My name is Nalini kanta jena, I am a 3d Instructor. I have been working since 2008. I have worked as game artist in Lakshya Digital and Dhruva Interactive, two Gaming studios based in India. I have also taught at Arena animation, ZICA and Reliance Education as a 3d instructor. I have also taught more than 30,000 students all around the world through my online courses.Course Goal : At the end of this course, you will be able to Model, Texture, Rig, Animate, Simulate Cloth and Hair and Render Cartoon characters using Maya and Substance Painter.Key Topics : In this course, you will be learning:Character Modeling in MayaUV Unwrapping in MayaTexturing in Substance PainterRiggingWalk Cycle AnimationCreating Cloth and Hair Using nclothRendering AnimationI will start the course with Maya basics in case you have never used Maya before. Then I will model the character in Maya. After that I will unwrap UVs in Maya and then I will Switch to Substance painter and texture the character there. Then I will export textures into Maya and setup Lights, material and texture there. Then I will rig the character and then I will animate the character and create a walk cycle. After that I will work on the cloth so I will use ncloth for both the cloth and the hair simulation. at the end we are gonna render the animation sequence using Arnold.This Course is for Whom : I have designed this course for beginner students who wants to create characters for film and short films but struggles to do it because they lack the experience and knowledge of all these topics needed to create a character.Enroll Now : So if you are interested then enroll now and be able to create your own characters for film and short films today.

Overview

Section 1: Introduction

Lecture 1 Introduction

Lecture 2 What are in the Project File folder

Section 2: Maya Basics

Lecture 3 User Interface Overview

Lecture 4 View pot Navigation

Lecture 5 Creating Objects

Lecture 6 Saving and Opening Files

Lecture 7 Selecting Objects and Components

Lecture 8 Using Move, Rotate and Scale Tool

Lecture 9 Using Layers

Lecture 10 Soft Selection and Symmetry

Lecture 11 Hide and Show Objects

Lecture 12 Intro to Outliner

Lecture 13 Using Pivot Point

Lecture 14 Group Objects

Lecture 15 Using Marking Menu

Lecture 16 Using Hotbox & Wrap Up

Section 3: Character Modeling in Maya

Lecture 17 Creating a Project Folder

Lecture 18 Reference Image Setup in Maya

Lecture 19 Block Out the Torso

Lecture 20 Block Out the Arm

Lecture 21 Block Out the Leg

Lecture 22 Block Out the Hand

Lecture 23 Define the Hand

Lecture 24 Block out the Face - Eye Topology

Lecture 25 Block out the Face - Mouth Topology

Lecture 26 Block out the Face - Head Topology

Lecture 27 Modeling the Ear

Lecture 28 Modeling the Nose

Lecture 29 Modeling Mouth Bag

Lecture 30 Adjusting the Head with even Polygons

Lecture 31 Connecting the Head with Body

Lecture 32 Modeling Gum

Lecture 33 Modeling Gum part 02

Lecture 34 Modeling Teeth

Lecture 35 Modeling Tongue

Lecture 36 Blocking the foot

Lecture 37 Defining the lip

Lecture 38 Defining the Nose

Lecture 39 Defining the Eye

Lecture 40 Defining the Head

Lecture 41 Defining the Body

Lecture 42 Correcting the Pose for Rigging

Lecture 43 Mirroring The Character

Lecture 44 Mirroring the Eye

Lecture 45 Modeling the T-Shirt

Lecture 46 Modeling the Pant

Lecture 47 Blocking the Shoe

Lecture 48 Creating Curves for Hair

Lecture 49 Creating Curves for Hair Part 02

Lecture 50 Creating Curves for Hair Part 03

Lecture 51 Generating Geometry from Curves

Lecture 52 Generating Geometry from Curves Part 02

Lecture 53 Adjusting Hair Clumps

Lecture 54 Converting Hair Into Polygons

Lecture 55 Making The Eyebrows

Lecture 56 Creating The Hair Filler

Lecture 57 Final Check

Section 4: UV Unwrapping in Maya

Lecture 58 UV Unwrapping Basics

Lecture 59 Unwrapping Shirt UVs

Lecture 60 Unwrapping Pant UVs

Lecture 61 Unwrapping the Head UVs

Lecture 62 Unwrapping the Torso UVs

Lecture 63 Unwrapping the Hand UVs

Lecture 64 Unwrapping the Leg Uvs

Lecture 65 Unwrapping the Eye Uvs

Lecture 66 Unwrapping the Hair UVs

Lecture 67 Unwrapping Mouth UVs

Lecture 68 Packing UVs for the Cloth Texture

Lecture 69 Packing UVs for the Body Texture

Lecture 70 Packing UVs for the Mouth Texture

Lecture 71 Packing UVs for the Eye Texture

Lecture 72 Packing UVs for the Hair Texture

Lecture 73 Clean up and Exporting the Model

Section 5: Character Texturing in Substance Painter

Lecture 74 Creating a Project

Lecture 75 Interface Overview

Lecture 76 Navigating View port

Lecture 77 Adding Base Skin color

Lecture 78 Adding Base Color

Lecture 79 Adding Skin Tone

Lecture 80 Adding Skin Flaws

Lecture 81 Eye Texturing

Lecture 82 T shirt Texturing

Lecture 83 Pant Texturing

Lecture 84 Socks Texturing

Lecture 85 Shoe Texturing

Lecture 86 Adding Dirt to the Shoes

Lecture 87 Mouth Texturing

Lecture 88 Hair Texture Painting

Lecture 89 Hair Alpha Painting

Lecture 90 Final Touch on Texturing

Lecture 91 Rendering in Substance Painter

Lecture 92 Exporting Textures from Substance Painter

Lecture 93 Import and Assign Textures in Maya

Lecture 94 Rendering Setup using Arnold

Section 6: Character Rigging in Maya

Lecture 95 Organizing the Scene for Rigging

Lecture 96 Creating Leg Joints

Lecture 97 Mirroring Leg Joints

Lecture 98 Creating Spine Joints

Lecture 99 Creating the Head Joints

Lecture 100 Creating Arm Joints

Lecture 101 Binding Skin with the Joints

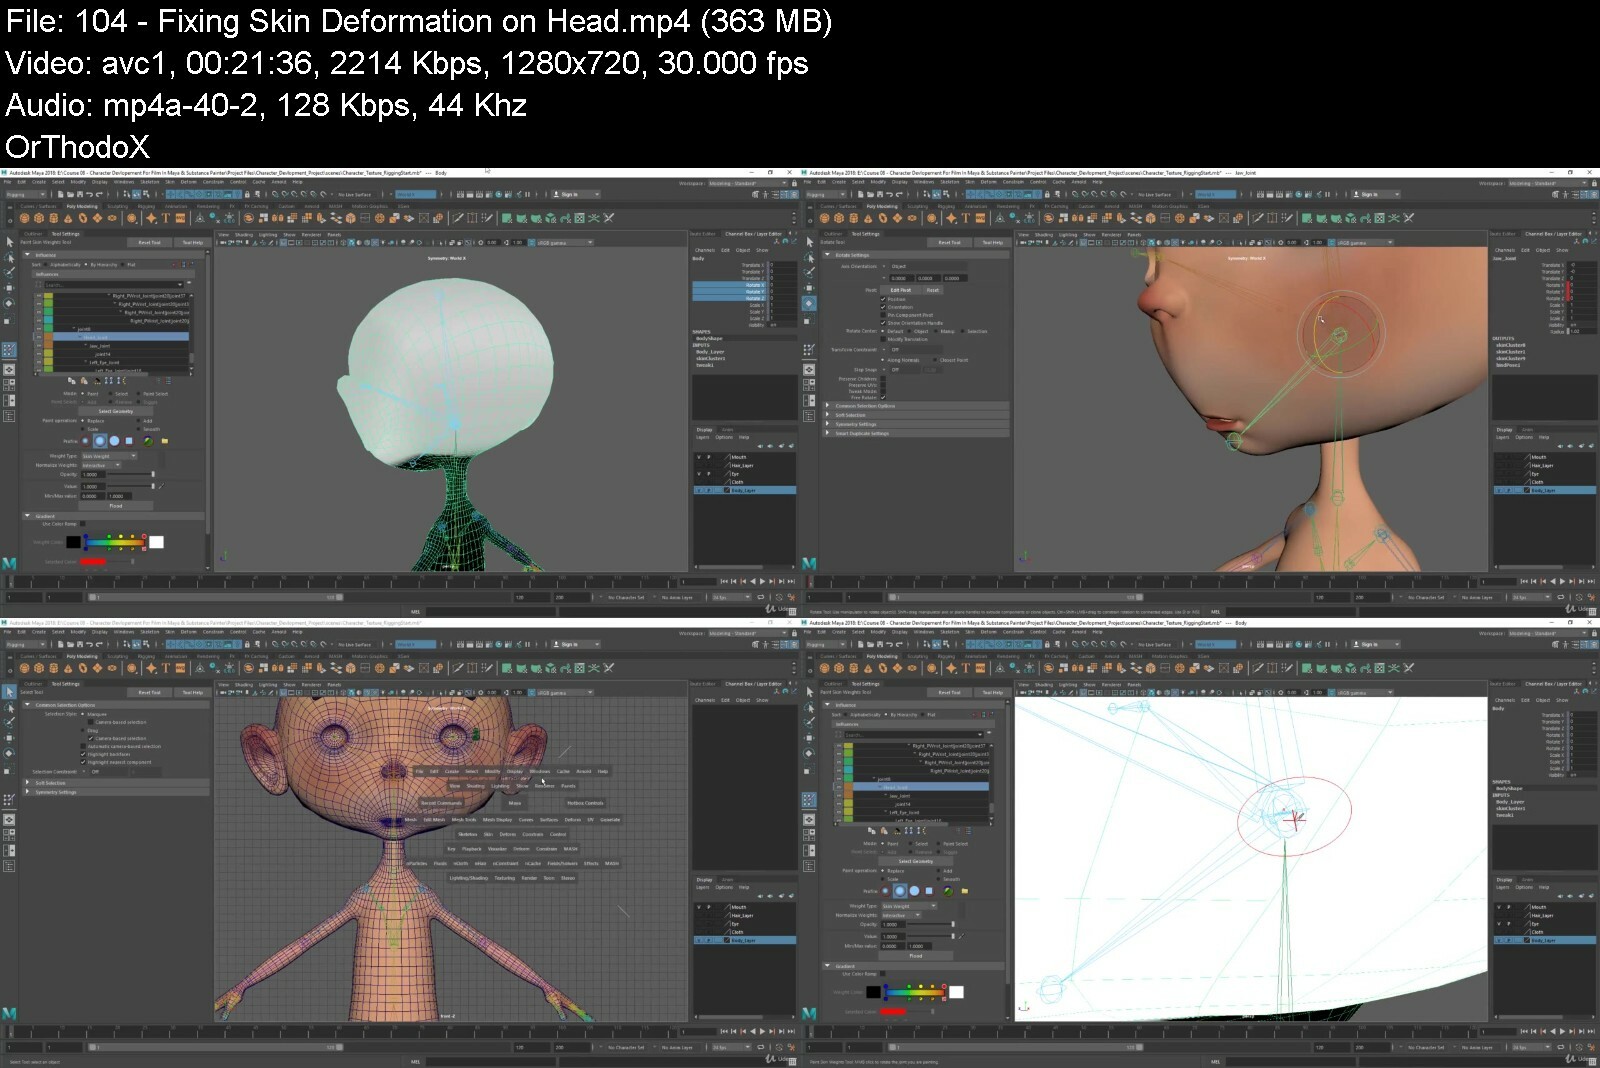
Lecture 102 Fixing Skin Deformation on Leg

Lecture 103 Fixing Skin Deformation on Hand

Lecture 104 Fixing Skin Deformation on Head

Lecture 105 Creating Global Control

Lecture 106 Creating Torso Controls

Lecture 107 Fixing Torso Skin Deformation

Lecture 108 Creating Head Controls

Lecture 109 Creating Eye Controls

Lecture 110 Creating Clavicle and Wrist Controls

Lecture 111 Elbow and Knee Control

Lecture 112 Creating Foot IK Groups

Lecture 113 Creating the Foot Control with Custom Attributes

Lecture 114 Creating Foot Roll and Toe Roll

Lecture 115 Creating Finger Costume Attributes

Lecture 116 Creating an Eye Close Blend shape

Lecture 117 Creating a Smile Blend shape

Lecture 118 Creating a Surprise Blend shape

Lecture 119 Connecting Control Curves with Blend shapes

Lecture 120 Final Tweak to all the Controllers

Section 7: Character Animation in Maya

Lecture 121 Animation Basics

Lecture 122 Correcting the Rig for Animation

Lecture 123 Creating the Contact Pose

Lecture 124 Creating the Middle Contact Pose

Lecture 125 Creating the Down Pose

Lecture 126 Creating the Passing Pose

Lecture 127 Creating the Peak Point Pose

Lecture 128 Fine Tuning the Animation Using Graph Editor

Lecture 129 Making the Animation Cycle

Section 8: Cloth and Hair Simulation

Lecture 130 Making a High poly Version of the Pant

Lecture 131 Making the Low Poly Pant a Ncloth

Lecture 132 Transferring the Ncloth Simulation to High Poly

Lecture 133 Making a High poly Version of the T Shirt

Lecture 134 Making the Low Poly Shirt a Ncloth

Lecture 135 Transferring Ncloth Simulation to the High Poly

Lecture 136 Simulating Hair with Ncloth Part 01

Lecture 137 Simulating Hair with Ncloth Part 02

Lecture 138 Transferring Hair Simulation to High Poly

Lecture 139 Creating a Clean Scene with Cache Data

Section 9: Rendering

Lecture 140 Setting up a Backdrop and Camera

Lecture 141 Adjusting Render Settings to Get good Quality

Lecture 142 Rendering Sequence Images

Section 10: Conclusion

Lecture 143 Conclusion

Lecture 144 Bonus Lecture - What's Next?

Beginner students who wants to create characters for film and short films but struggles to do it because they lack the experience and knowledge of all these topics needed to create a character.


completecharactercreawyexr.jpg


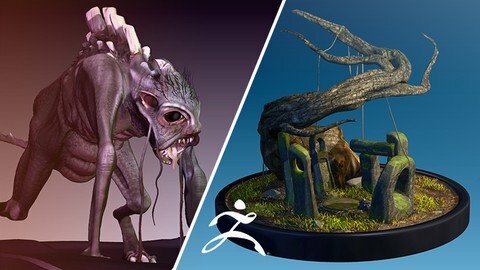
Learn the ART of ZBrush

lanzizqsiisjpy8f3u80iand3t.jpg


Learn The Art Of Zbrush
Last updated 2/2021
MP4 | Video: h264, 1280x720 | Audio: AAC, 44.1 KHz
Language: English | Size: 16.57 GB | Duration: 25h 26m

Learn to sculpt environment props, objects and creatures in ZBrush.

What you'll learn
Learn to Use ZBrush in a professional capacity, with emphasis on environment objects, props and creatures.

Requirements
Have a PC or Mac capable of running ZBrush and a graphics tablet.

Description
Bringing ZBrush into your art pipeline is now more important than ever before. With the launch of new hardware and ever increasing rendering power and tools, like the new Unreal Engine 5, ZBrush sits in a sweet spot that let's you create art for this market of current and next-generation video games like never before.This course assumes you know nothing about ZBrush, that you've never used it, and I will guide you through all of it's quirks and gems from start to finish. ZBrush is renowned for use in character creation, but it is used for so much more than that. I am an environment artist primarily, but I create creatures and props too and I use ZBrush for all of my endeavors in art creation for video games.Not only will you learn how to use ZBrush, but I will take you though the stages to prepare your models for export to various packages like Substance Painter, Unity / Unreal and 3DS Max etc. and show you how you can tighten your pipeline and include ZBrush so it will bring the quality of your art to another level.You will learn all the tools in Zbrush that will allow you to do; detail sculpting, concept sculpting, low-poly modeling, optimize your models, paint your models, texture your models, create grass and hair, retopologize, create UVs, prepare and export your models and much, much more. I will give you challenges throughout the course, and test what you have learned with little fun quizzes along the way.If you take this course, I promise you, you will be proficient in Zbrush by the end of it and you will be able to create anything your creative juices will allow. If you are not happy with it, we offer a 30 day, money back guarantee. So why wait. You have nothing to lose and everything to gain.I'll see you in there.Kevin...

Overview

Section 1: Introduction

Lecture 1 Introduction to the course

Section 2: Course Details

Lecture 2 Course requirements

Lecture 3 What is Zbrush and Who Uses it?

Lecture 4 Installing Zbrush

Lecture 5 Course structure

Lecture 6 Join our facebook page

Section 3: Becoming Familiar With Zbrush

Lecture 7 Introduction

Lecture 8 First Look

Lecture 9 Getting Started

Lecture 10 Some Basic Controls

Lecture 11 Your First Brush and Smoothing

Lecture 12 Using the Space Bar

Lecture 13 Changing Your Sculpting Material

Lecture 14 What is a tool?

Lecture 15 Transform Basics | move, rotate, scale

Lecture 16 Apple Shape | ASSIGNMENT #01

Section 4: Basic Features

Lecture 17 Introduction

Lecture 18 More Help and Quicksave

Lecture 19 Sub Division

Lecture 20 Using Append

Lecture 21 Sub Tool Menu

Lecture 22 Folders

Lecture 23 Swapping Between Sub Tools

Lecture 24 Undo - Redo

Lecture 25 Move and Move Topological (4th Jan 2021)

Lecture 26 Bison Toy Blockout | ASSIGNMENT #2

Lecture 27 My Bison blockout TIMELAPSE

Section 5: Advanced Features

Lecture 28 Introduction

Lecture 29 Masking

Lecture 30 More Masking

Lecture 31 Symmetry X, Y, Z and Radial

Lecture 32 Live Boolean and Initialize

Lecture 33 Live Boolean and Dynamic Subdivide

Lecture 34 Live Boolean and IMM Boolean

Lecture 35 Deformation

Lecture 36 Polygroups Basics

Lecture 37 Alphas

Lecture 38 Alpha Map to 3D Mesh

Lecture 39 Dynamesh Basics

Lecture 40 More Dynamesh Features

Lecture 41 More Brushes

Lecture 42 A New Apple | ASSIGNMENT #3

Lecture 43 My Apple | I show you mine

Lecture 44 IMM Brushes

Lecture 45 Create Custom IMM Brushes

Lecture 46 Custom Curve IMM Brushes

Lecture 47 Lazy Mouse

Lecture 48 Bison Sculpt | ASSIGNMENT #4

Lecture 49 Bison Sculpt |Part 1

Lecture 50 Bison Sculpt | Part 2

Lecture 51 Bison Final Detail | Lightbox Brushes

Lecture 52 Quick Start Guide

Lecture 53 Dynamic Draw Size

Lecture 54 ZSpheres | A Different Start

Section 6: Custom UI

Lecture 55 Introduction

Lecture 56 Current UI Overview

Lecture 57 Customise UI

Lecture 58 Setting up your Quick Brush Pallette

Lecture 59 Changing Camera View Head

Lecture 60 Changing UI Colours

Section 7: ZModeler

Lecture 61 Introduction

Lecture 62 The ZModeler Brush

Lecture 63 ZModeler Basics

Lecture 64 ZModeler and Dynamic Subdivide

Lecture 65 ZModeler | Creating a Vase

Section 8: Zmodeler to Dynamesh | Master Sword

Lecture 66 Introduction

Lecture 67 Sword 01 | Creating the Blade

Lecture 68 Sword 02 | Creating the Handle

Lecture 69 Sword 03 | Handle Wings

Lecture 70 Sword 04 | Bevel and Details

Lecture 71 Sword 05 | Subdivide and Details

Lecture 72 Sword 06 | Handle

Lecture 73 Sword 07 | Finalising Detail

Section 9: Stone Circle Scene Project

Lecture 74 Introduction

Lecture 75 Modelling the Basic Shapes 01

Lecture 76 Modelling the Basic Shapes 02

Lecture 77 Sculpting Detail 01

Lecture 78 Sculpting Detail 02

Lecture 79 Dropping Some Long Grass

Lecture 80 Dropping Some Shorter Grass

Lecture 81 Adding a Tree

Lecture 82 Final Details

Section 10: Concepting / Speed Sculpting In Zbrush

Lecture 83 Introduction

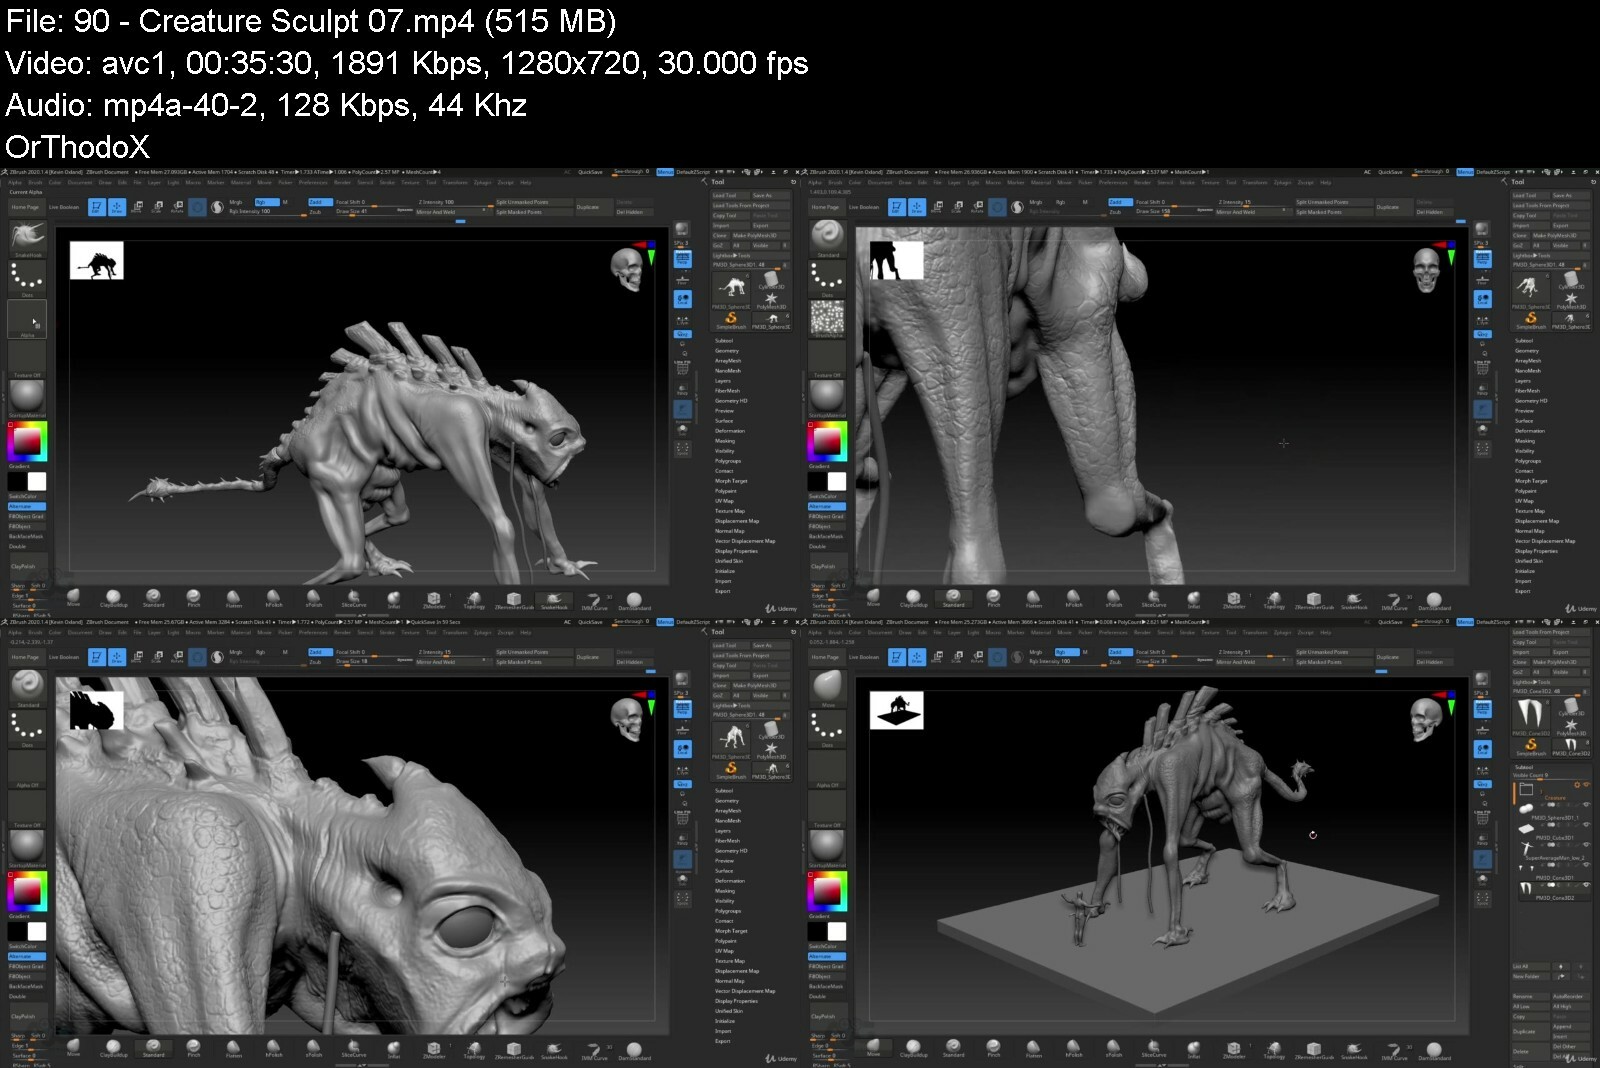
Lecture 84 Creature Scultp | 01 | The Shape

Lecture 85 Creature Scultp | 02 | Refining the Shape

Lecture 86 Creature Scultp | 03

Lecture 87 Creature Sculpt | 04

Lecture 88 Creature Sculpt | 05

Lecture 89 Creature Sculpt | 06

Lecture 90 Creature Sculpt | 07

Lecture 91 Final Sculpt Reveal

Section 11: ZRemesher (Retopology)

Lecture 92 Introduction

Lecture 93 What is ZRemesher

Lecture 94 ZRemesher with Polygroups

Lecture 95 ZRemesher with Polypaint / Polygroups Combo

Lecture 96 ZRemesher Guide Brush

Lecture 97 Projecting Detail

Lecture 98 Extrude Edge Retopo

Section 12: Fibremesh (Hair and Grass)

Lecture 99 Introduction

Lecture 100 FibreMesh UI and Hair

Lecture 101 FibreMesh Grooming

Lecture 102 FibreMesh Grass

Section 13: PolyPaint your Model

Lecture 103 Introduction

Lecture 104 Using RGB

Lecture 105 Using Materials

Lecture 106 Painting Creature 01 | Colour Blockout

Lecture 107 Painting Creature 02 | More Detail and Colour

Lecture 108 Finishing Touches

Lecture 109 Posing Your Creature

Lecture 110 Decimating Your Model

Section 14: Texturing using Spotlight

Lecture 111 Introduction

Lecture 112 Spotlight Overview

Lecture 113 Spotlight as a Reference Plane

Lecture 114 Texture Projection

Lecture 115 Using Multiple Textures

Lecture 116 Final Spotlight Texturing

Section 15: Using Dynamics / Physics

Lecture 117 Introduction

Lecture 118 Quick Build Table | ZModeler | Dynamic Subdivide

Lecture 119 Dynamic Table Cloth

Lecture 120 T-Shirt With Dynamics

Section 16: ZBrush to Game Workflow

Lecture 121 Introduction

Lecture 122 Importing a Model

Lecture 123 UV Mapping / Unwrap

Lecture 124 Exporting a Model from Zbrush

Lecture 125 Baking Normals in Substance Painter

Lecture 126 Exporting Your Maps from Substance

Lecture 127 Bringing Your Models / Textures into Unity

Lecture 128 Render and Save from ZBrush

Section 17: ADDITIONAL PROJECTS

Lecture 129 PROJECT #01 | Witches Corner Intro

Lecture 130 Witches Corner | The Walls

Lecture 131 Witches Corner | The Floor

Lecture 132 Witches Corner | Cauldron

Lecture 133 Witches Corner | Bottles

Lecture 134 Witches Corner | Stool and Books

Lecture 135 Witches Corner | Pumpkin

Section 18: BONUS LECTURE

Lecture 136 BONUS Lecture

Beginners who are keen to learn the latest techniques in 3D modelling for games.


learntheartofzbrushaxf74.jpg


Zuletzt bearbeitet:
Altair Hyperwork - Modelling - Meshing - Run Solver File

sqwiyfob1w0f2hskhwdhf05d4d.jpg


Altair Hyperwork - Modelling - Meshing - Run Solver File
Last updated 4/2019
MP4 | Video: h264, 1280x720 | Audio: AAC, 44.1 KHz
Language: English | Size: 6.12 GB | Duration: 9h 7m

learn with us HyperWorks is an analysis and Optimization Solution


What you'll learn
FEM Theory
Meshing of 1d 2d 3d
Create and set-up Finite element models for analysis
Improve knowledge of meshing
Topology, size, Shape Optimization
learner HyperWork tutorial
learner Hyperwork CFD

Requirements
Basic CAD And 3d modelling
Install latest or old version Altair HyperWork software student Version and licence version

Description
Hyperworks is a complete CAE software made by Altair engineering. It consists all the modules of CAE i.e. modelling, meshing, solver. It is a complete package of finite element procedure. Pre-processing, Solving and Post-processing can be done using Hyperworks.Altair HyperWorks provides the most comprehensive, open-architecture CAE solution in the industry including best-in-class modeling, analysis and optimizatio.HyperWorks line of software, including:OptiStruct - Structural Analysis Solver (linear and non-linear); solution for structural design and optimizationRADIOSS - Structural Analysis Solver (highly non-linear problems under dynamic loadings); an industry standard for automotive crash and impact analysisMotionView - Solver-neutral Multi-body Pre-processorMotionSolve - Multi-body Solver; an integrated solution to analyze and optimize multi-body system performanceHyperXtrude - Metal & Polymer Extrusion Solver; an advanced solver for manufacturing process simulations and validationsHyperForm - Metal Forming SolverHyperMesh, HyperCrash, Simlab, HyperView, HyperGraph - CAE Pre & Post Processing[1]HyperStudy - Design of Experiments and Multi-disciplinary Design OptimizationHyperMath - Mathematical Analysis EnvironmentAcuSolve - General-purpose Finite Element Based CFD SolverFEKO - 3D Electromagnetic Solver

Overview

Section 1: Theory of FEA and CAE

Lecture 1 Introduction

Lecture 2 How to decide element type

Lecture 3 Can we solve same problem using 1-D, 2-D and 3D element

Lecture 4 How to do meshing in critical area

Lecture 5 3d Element

Lecture 6 Minimum element length using in time and crease calculation analysis

Lecture 7 Material and property Information

Section 2: 1D Meshing

Lecture 8 1D Meshing Introduction

Lecture 9 Create Hyper-beam

Lecture 10 Create HyperBeam I Solving the problem usinng 10 rod element

Lecture 11 Create bar element

Lecture 12 Concept of C-D-E-F point

Lecture 13 Bar element analysis

Lecture 14 Create bar element using rectangular cross section

Lecture 15 Different of dof (Degree of freedom)

Lecture 16 Roll cage Analysis

Section 3: 2D Meshing

Lecture 17 2D Meshing topic cover in session

Lecture 18 how to open and save file In HyperMesh

Lecture 19 Working with panel

Lecture 20 Organizing a model

Lecture 21 Importing and repairing CAD

Lecture 22 Create a Mid-surface

Lecture 23 Simplifying Geometry

Lecture 24 Refining topology to achieve a quality mesh

Lecture 25 Auto Meshing panel

Lecture 26 Meshing without surfaces

Lecture 27 Create a Meshing in Curved surfaces

Lecture 28 Checking and editing Mesh

Section 4: 3D Meshing

Lecture 29 Create and Edit solid geometry

Lecture 30 Perform Tetra Meshing

Lecture 31 Creating a hex-penta mesh using surfaces part 1

Lecture 32 Creating a hex-penta mesh using surfaces part 2

Lecture 33 Creating a hexahedral mesh using the solid map function

Lecture 34 Using the tetramesh process manager

Section 5: Analysis and Post Processing

Lecture 35 Linear static analysis of a plate with a hole Part 1

Lecture 36 Linear static analysis of a plate with a hole part 2

Lecture 37 Thermal stress analysis of a coffee pot lid

Lecture 38 Normal modes analysis of a splash shield

Lecture 39 3D Inertia relief analysis using RADIOSS

Lecture 40 3D Buckling analysis using RADIOSS

Lecture 41 Connection of dissimilar meshes using CWELD element

Lecture 42 Analysis of a composite aircraft structure using PCOMPG

Lecture 43 Direct frequency response analysis of a flat plate

Lecture 44 Model frequency response analysis of a flat plate

Lecture 45 Acoustic analysis of a half car model

Lecture 46 Random response analysis of a flat plate

Lecture 47 Nonlinear gap analysis of an airplane wing rib

Lecture 48 Direct transient dynamic analysis of a bracket

Section 6: Topology Optimization

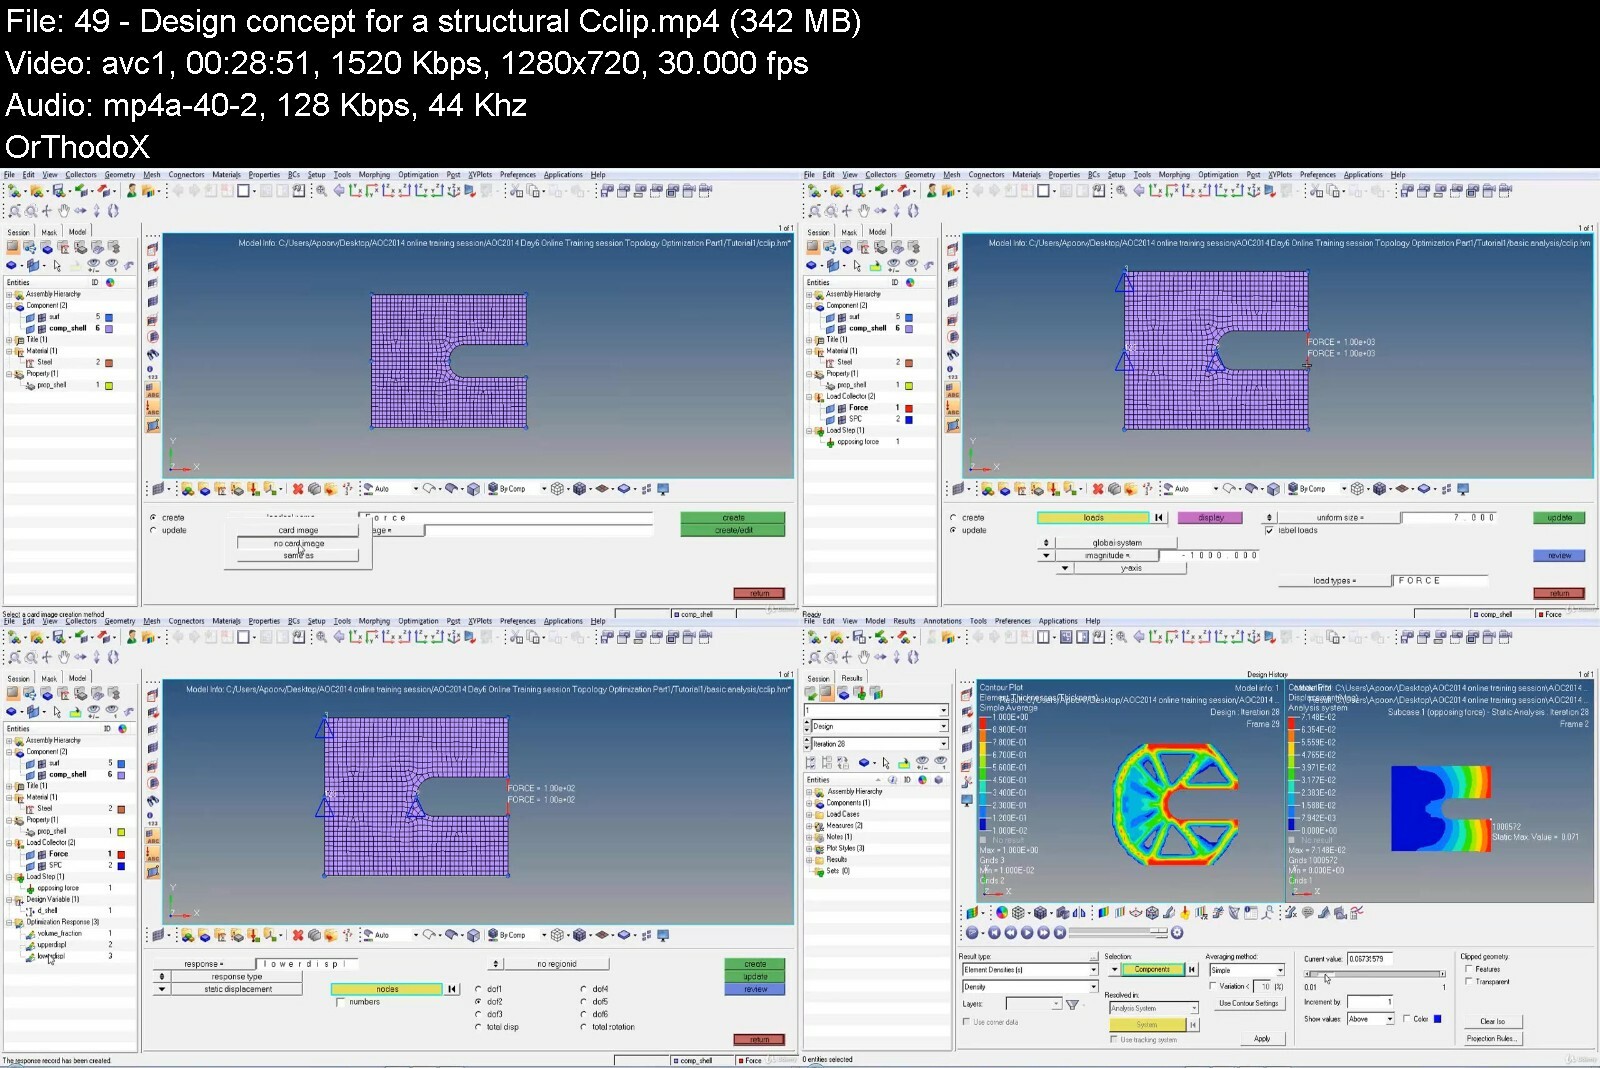
Lecture 49 Design concept for a structural C-clip

Lecture 50 Design concept for a structural C-clip with minimum member size control

Lecture 51 Topology optimization for an automotive control arm

Lecture 52 Increasing natural frequencies of an automotive splash shield with ribs

Lecture 53 Control arm topology optimization with draw direction constraints

Lecture 54 Sport weld reduction using CWELD and 1-D Topology optimization

Section 7: Use 3D Models in practice

Lecture 55 Practice models

Computer aided design & engineering,learn practical application of FEA and CAE,Aerospace Engineering,Mechanical and Industrial Engineer,Learn Meshing and Analysis of Mechanical System,Automobile Engineers

Say Thank You


altairhyperworkmodello3iwd.jpg


NEW! Complete Guide to Substance Painter 2022

4812798001535tcvx.jpg


NEW! Complete Guide to Substance Painter 2022
Published 08/2022
MP4 | Video: h264, 1280x720 | Audio: AAC, 44.1 KHz, 2 Ch
Genre: eLearning | Language: English + srt | Duration: 43 lectures (10h 8m) | Size: 6.5 GB


Learn Texturing in Substance Painter from Beginners to Advanced Level with 3 complete projects


What you'll learn
Learn the UI basics of Substance Painter
Setup a New Project and Bake Mesh Maps
Learn Realistic Texturing in Substance Painter
Learn Texturing in Substance Painter
Learn to use Opacity and Emissive Channels
Learn to use Masks, Smart Masks, Smart Materials, Generators and all the different features in Substance Painter
Learn to Export the Textures from Substance Painter to Blender/Unreal Engine

Requirements
A copy of Substance Painter (Note - Can get an Educational License for free or a Trial copy for 30 days)

Description
"Do you want to learn texturing in Substance Painter from scratch?"

Then I welcome you to this new course - Complete Guide to Substance Painter 2022 where we will be going through the complete process of learning Substance Painter from a beginner's perspective and we will also be working on three complete projects.

What you will get

43 FHD videos with over 10+ hours of content

All the resources files required to complete the course including the Models, Substance Painter Files, Textures, Alphas

We will go over all the important tools and concepts in Substance Painter together and nothing will be skipped. This course Is aimed at complete beginners so the only thing you need for this course is a copy of Substance Painter. Even if you do not have Substance Painter instead of buying it, you can get an Educational License if you are a student and get it completely for free or you can get a trial version for 30 days to try it out before buying.

We will go over each and every step in this course together and nothing will be skipped. The course does not have any kind of time-lapse so that you can follow every step easily.

We'll Go Over

Basic of Substance Painter and Viewport UI

Importing your model into Substance Painter

Setting up a New Project and Baking Mesh Maps

Learn about the all the tools and functions in Substance Painter

Learn about materials and Smart Materials and creating your own Smart Materials

Learn about Masks, Smart Masks, Geometry Masks

Going over different Effects and Filters

Texturing 3 complete projects - Fire Extinguisher, Drill Machine, Wooden Table

Create various real-life materials like Painted Metal, Plastic, Iron, Rubber, Glass etc.

Learn to use Emissive and Opacity maps

Learn to add effects like dust, dirt, roughness variations, edge damage and much more.

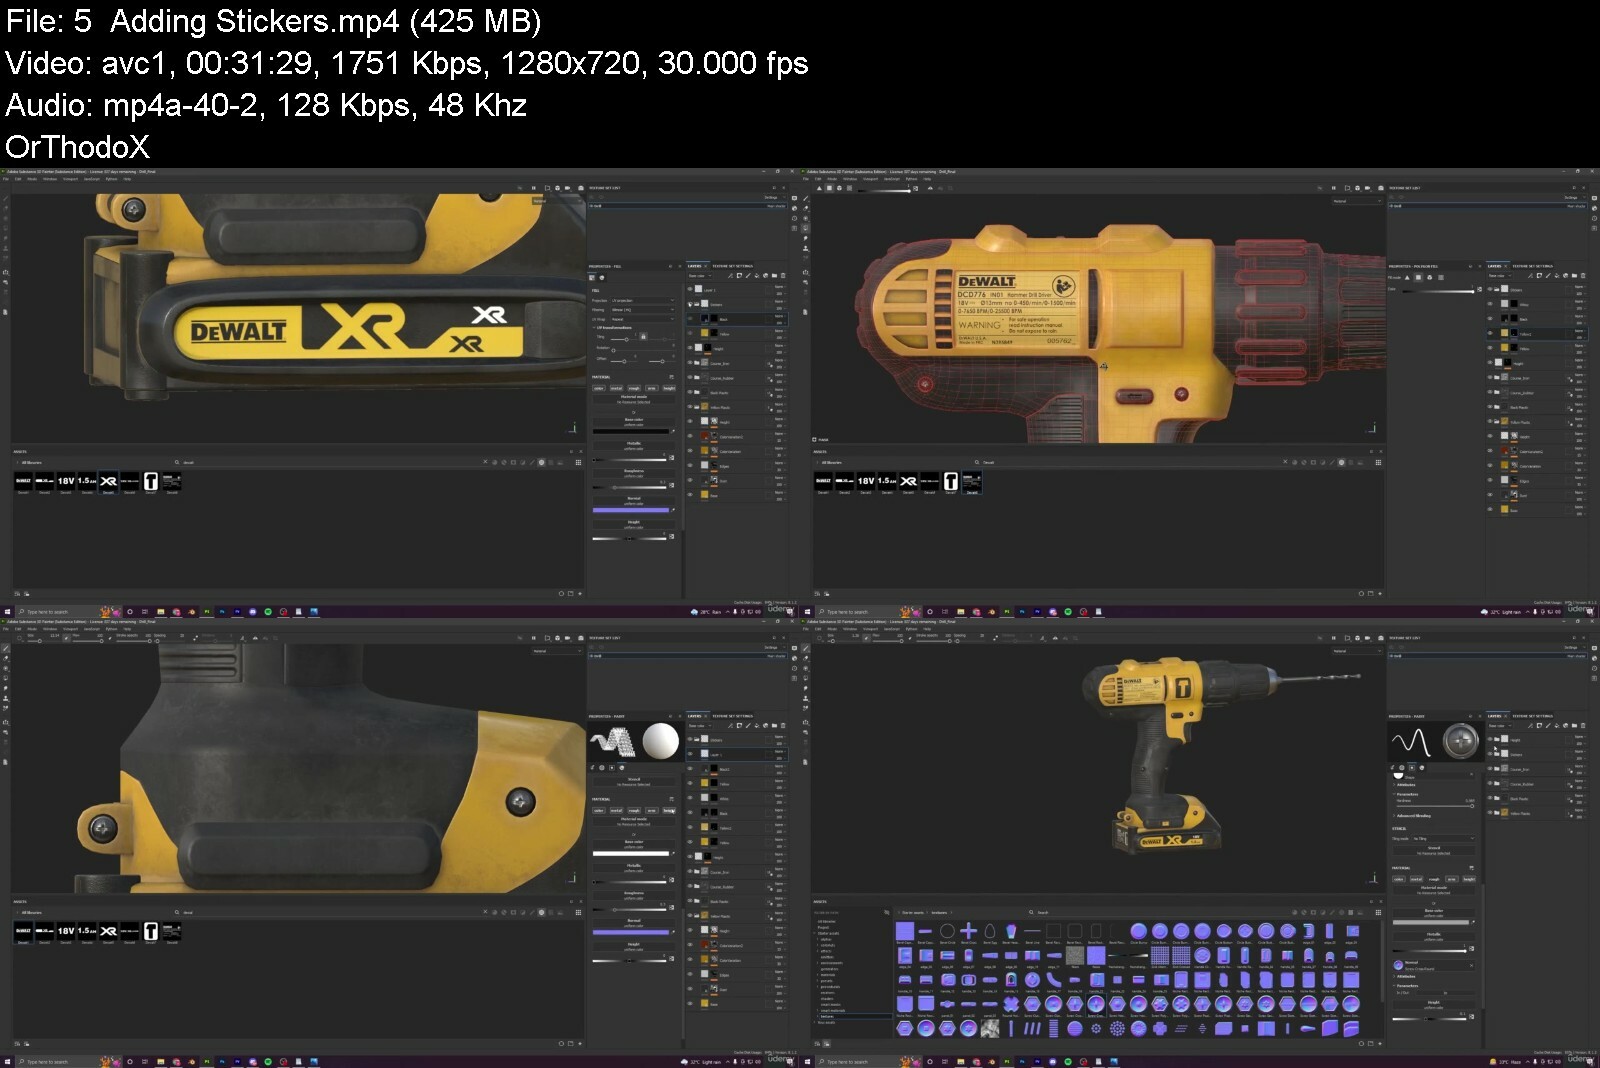
Add stickers/decals to your models to make your textures even more realistic.

Exporting Textures from Substance Painter to Blender/Unreal Engine

and many more things...

So, we will be learning a lot. I hope to see you there in the course.

Who this course is for
This course is aimed at complete beginners in Texturing and Substance Painter. No prior knowledge is required.


newcompleteguidetosubnjfz4.jpg


Beginning Unity 2D

zfpfalp2p5cosf6fj36xtcydqr.jpg


Beginning Unity 2D
Last updated 10/2020
MP4 | Video: h264, 1280x720 | Audio: AAC, 44.1 KHz
Language: English | Size: 8.06 GB | Duration: 20h 52m

Learn How To Build a Full Unity 2D Game And Publish It While Learning Unity Fundamentals


What you'll learn
Building a Multiplayer 2D Game From Scratch, From Nothing To Publishing

Requirements
Either Previous Programming Knowledge Or My General Programming Fundamentals Course Before Starting Course Is Required

Description
In this course we will be building a fully fleshed out gameThe game is a war strategy designed for fast pace pc/console playThis course will include all the main topics needed to learn Unity as well as building a cool game at the same timeThings that will be discussed:TransformsWeaponsWeapon SwitchingPhysicsCollision Detection/ColliderSpritesC# ScriptingPrefabsSpawningSoundGUI/UIAIPublishing GamePlease feel free to preview the course to get an example of the game that is going to be built

Overview

Section 1: Introduction

Lecture 1 Intro

Lecture 2 General Programming Fundamentals Course Prerequesite

Lecture 3 What is Unity 3D

Lecture 4 What is a Game Engine

Lecture 5 Installing Unity 3D & Required Tools

Lecture 6 First Look Unity Editor

Lecture 7 The Game Concept We Will Be Building

Section 2: Building Game

Lecture 8 Importing Sprite

Lecture 9 Unity Documentation Intro

Lecture 10 First Script Transform Translate

Lecture 11 Adding Character Control and Debug Lines

Lecture 12 Complete Character Movement

Lecture 13 Creating Variable That is Editable in Editor

Lecture 14 Rigid Body

Lecture 15 Look Control

Lecture 16 Fixing Player Movement

Lecture 17 Zombie Movement

Lecture 18 Adding Colliders

Lecture 19 Player Death

Lecture 20 Creating Prefabs

Lecture 21 Instantiate Bullet

Lecture 22 Setting Bullet Velocity

Lecture 23 Bullet And Zombie Impact

Lecture 24 Game Controller

Lecture 25 Spawning Zombie Horde

Lecture 26 Round Control

Lecture 27 UI

Lecture 28 Round Count UI

Lecture 29 Bullet Clip Mechanic

Lecture 30 Reloading Mechanic

Lecture 31 Bullet Velocity Based Damage

Lecture 32 Talking About Pathing

Lecture 33 A* Path Finding

Lecture 34 All Zombies Pathing and Obstacles Bullet Impact

Lecture 35 Gate Mechanic

Lecture 36 Standalone Build

Lecture 37 Profiler

Lecture 38 Gate Health Mechanic

Lecture 39 Start Of Shotgun Mechanic

Lecture 40 Shotgun Bullets

Lecture 41 Map Boarders

Lecture 42 On Death Return To Start Screen

Lecture 43 Basic Start Screen

Lecture 44 Saving Single Variable Data

Lecture 45 Customizable Keys in Settings Scene

Lecture 46 Tieing in Settings to Player Controls

Lecture 47 Audio Intro

Lecture 48 Additional Audio Prompts

Lecture 49 Multiplayer and Controllers Discussion

Lecture 50 Setting Up Controller Support

Lecture 51 Implementing Controller Controls

Lecture 52 Adding Controller Cursor

Lecture 53 Controller Rebinding In Settings

Lecture 54 New Controller System In Game Setup

Lecture 55 Finalizing Controller Control and Going Between Both Control Options

Lecture 56 Closing Out Gaemplay Section Of Course

Section 3: Multiplayer

Lecture 57 Narrowing Down Multiplayer Options

Lecture 58 Photon Bolt Vs Mirror

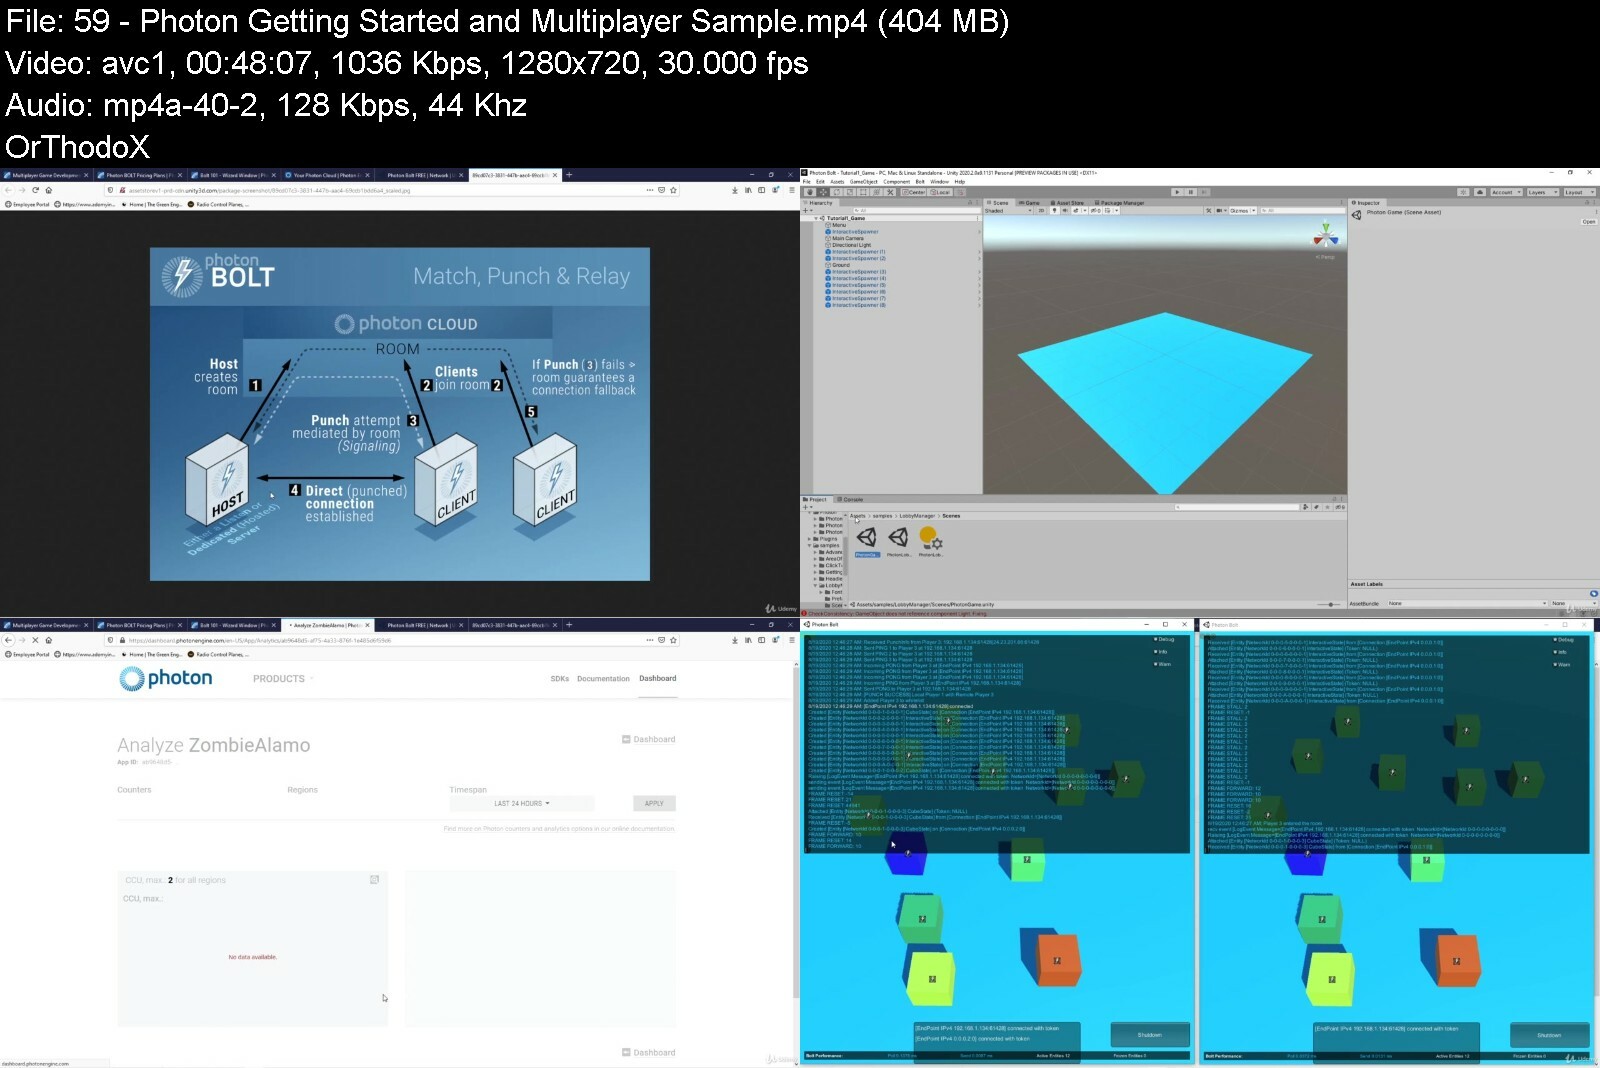
Lecture 59 Photon Getting Started and Multiplayer Sample

Lecture 60 Bolt Basics 102 Documentation (Optional)

Lecture 61 Bolt Basics 103 Documentation (Optional)

Lecture 62 Bolt Basics 104 Documentation (Optional)

Lecture 63 Bolt Basics 105 Documentation (Optional)

Lecture 64 To Replicate Or Not?

Lecture 65 Bolt 102 Game Implementation

Beginners interested in learning Unity 2D

Say Thank You


beginningunity2dh7erp.jpg


Canva For Freelancing: Monetize Your Graphic Design Skills

47642702f45hwezu.jpg


Canva For Freelancing: Monetize Your Graphic Design Skills
Published 07/2022
MP4 | Video: h264, 1280x720 | Audio: AAC, 44.1 KHz, 2 Ch
Genre: eLearning | Language: English + srt | Duration: 62 lectures (8h 32m) | Size: 5.8 GB


Build graphic design skills with canva and monetize this skill using freelancing with fiverr, upwork, etc to make income


What you'll learn
Learn the fundamentals of Canva & graphic design while having fun
Build a strong brand identity & a brand style guide for your business
Discover how to make a positive first impression with all your designs
Learn the smart Canva workflow that will allow to create final assets that are reusable and that continually save you time!
Learn to create animated graphics, ebooks, videos, presentations, and much more
Tips and tricks to use in designs which scream 'Professional Designer' to your audience
Master the art of designing seamless carousels and all graphics that are important to build digital presence on social media
Learn the secrets to start your journey as an International Freelancer and get paid

Requirements
Nothing Required

Description
Welcome to this course, Canva For Freelancing: Monetize Your Graphic Design Skills.

Learn a New Way of Designing Amazing Graphics Using Canva With Zero Prior Experience

With this Canva course, you will learn everything there is to know about graphic design on Canva. The Ultimate Guide to Master Canva Designing skill to become a paid international freelancer.

Are you ready to learn smart workflow tricks that will save you time?

We know, it can be really hard to create that one piece of design that people can t say no to.

Even the perfect designs come back for revisions, but you know, it is what it is. As a designer you should be ready for this, but what if you are not good at using tools like Adobe Photoshop or Illustrator?

Does that mean you cannot make good designs that make your client say WOW in the first look?

Of course, you can! That is where Canva comes into the picture.

Canva is THE BEST tool all around the web that can help you in designing beautiful graphics in no time.

No stress over monthly subscription charges as it is completely free

1000s of Pre-made design templates are available for you to use

Super user-friendly interface

If you re still reading this then you are someone who wants professional quality Graphic Designs but doesn t want to pay a designer or spend hours of precious time learning complicated and expensive software? And guess what? You don t have to!
This Canva mastery course is a step-by-step comprehensive framework that will help to transform you from a beginner to an expert Canva graphics designer and also help you to start your journey as an international freelancer.

Top-notch designing videos from basic to advance in one place. No more scrolling through the internet for tutorials. Avoid wastage of time and grab this opportunity right now.

With 70 Lessons and over 8+ Hours of Rich-Content in the course, you re bound to become a Top-notch designer!

Enroll inside to this course, Canva For Freelancing: Monetize Your Graphic Design Skills.

Enroll Now!

Who this course is for
Virtual Assistants - Who need to create professional graphics & designs for their clients
Content Creators - Who need to produce graphics without wanting to spend hours learning expensive, complicated software
Graphic Design Enthusiasts - Beginner designers and anyone interested in graphic designing
Social Media Managers - Who want to learn an in-demand skill and help brands in growing their visual influence
Freelancers - Who wants to boost their career on Fiverr, Upwork, etc
Business Owners - Who wants to create a strong brand identity


Say Thank You

canvaforfreelancingmoxsimq.jpg


CATIA V5 Industry Oriented Practice Modules

djhhpattawwmoztno4pidxsesz.jpg


Catia V5 Industry Oriented Practice Modules
Last updated 7/2020
MP4 | Video: h264, 1280x720 | Audio: AAC, 44.1 KHz
Language: English | Size: 5.93 GB | Duration: 7h 53m

Practice Modules On Sketching, Part Modelling, Assembly Design, Sheet Metal Design and Drafting


What you'll learn
CATIA V5
Sketching
Part Modelling
Assembly Design
Sheet Metal Design
Manufacturing Technology
Industrial Design
Manufacturing Drawing Preparation
Drafting
Design Standards

Requirements
CATIA V5 Basics
Engineering Basics

Description
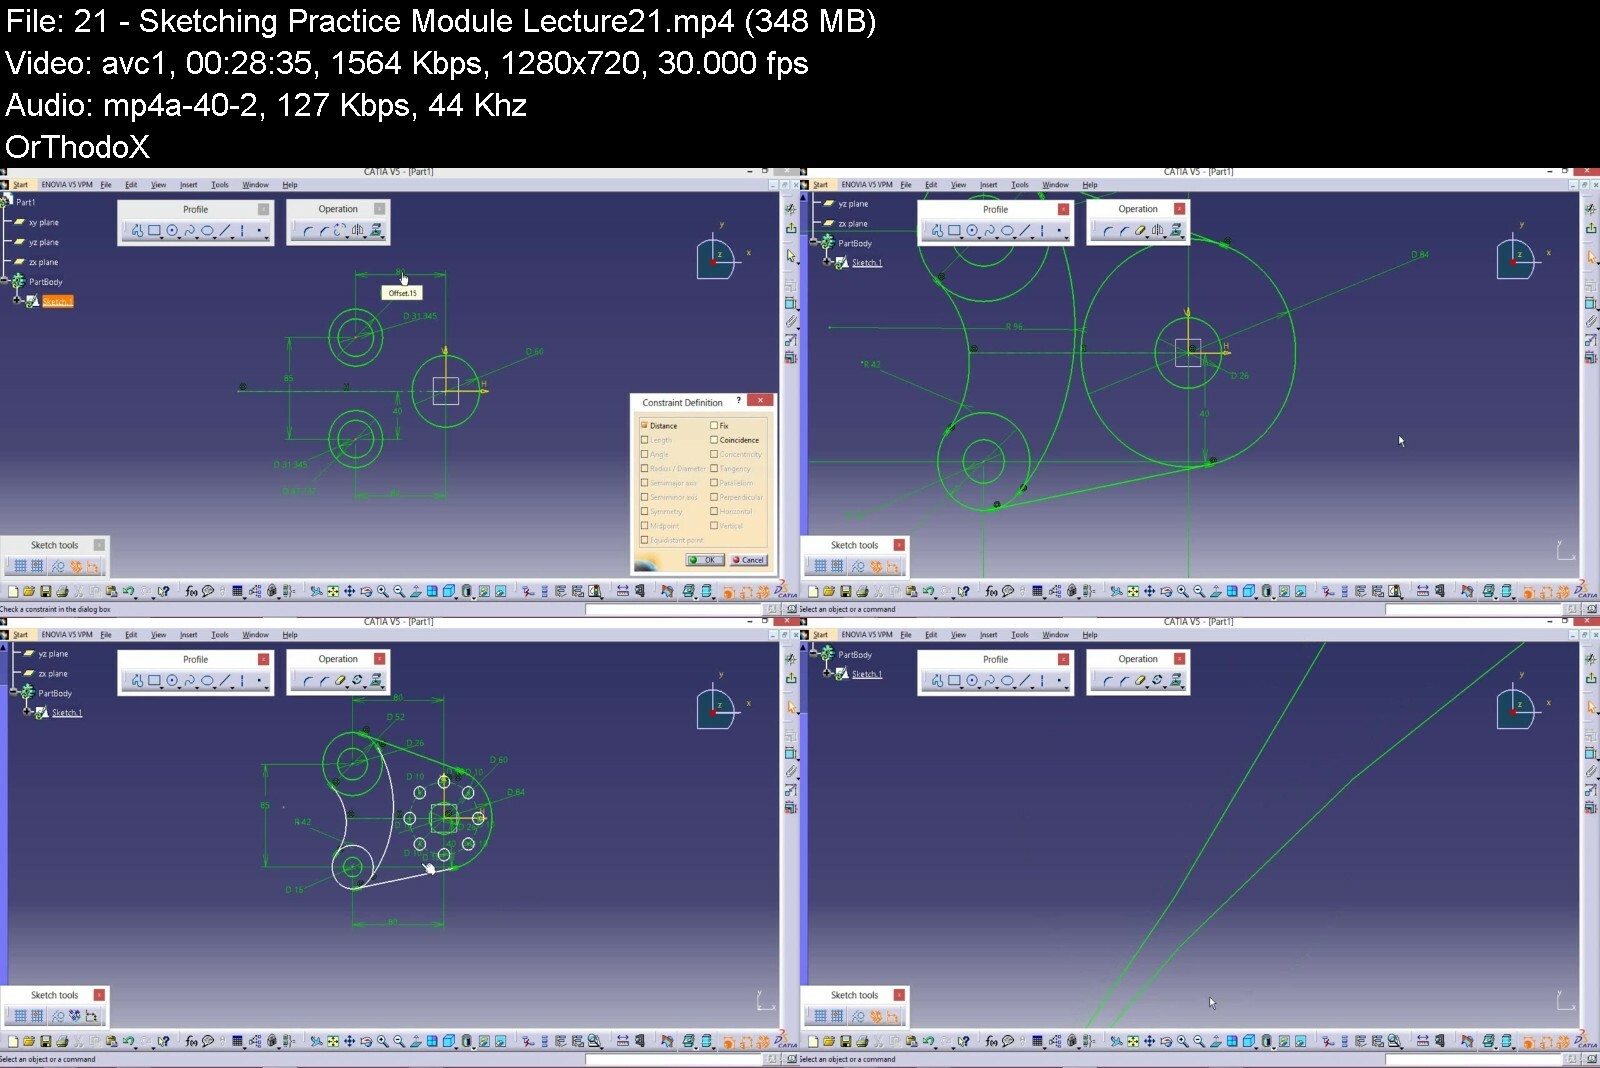
Course Has been created to provide the CAD knowledge in the Industrial Level, This course has been created exactly how the industry projects will be executed to produce Quality products to the Clients.I am sure after taking this course with proper practice with the material provided in the course the students can execute the Operations as per the industry needs.While Explaining the Part Modelling and Drafting Manufacturing methods has been explained clearly and how a designer should adopt his design methods according to the manufacturer needs.Apart from the Design for manufacturing and design for assembly this method of Designing can be followed to produce even automation works also.CurriculumSketchingAbout CatiaCatia InterfaceEntering into Mechanical DesignIntroduction to Sketcher ModuleEntering into Sketcher InterfaceSketching InterfaceSpecification TreeMouse ControlsProfile CommandRectangle and its typesParallelogramElongated HoleCylindrical Elongated HoleKey Hole ProfileHexagonCentered RectangleCentered ParallelogramCircle and TypesArcs and TypesSpline and TypesConic Curves and TypesLine and TypesPoint and TypesCornerChamfer TrimBreakQuick TrimClose arc and ComplimentMirror and SymmetryTranslate and RotateScale and OffsetDimensions and TypesGeometric ConstrainsAnimate DimensionsMulti Dimension EditSketching PracticePart ModellingEntering into Part Design module from SketcherPadMulti PadPocketMulti PocketShaftGrooveHole and Its TypesRibSlotStiffenerMulti Section SolidRemoved Multi Section SolidFillets and TypesChamfer and TypesDraft AngleShell and ThicknessFace RemoveThreadsTranslateRotateSymmetryMirrorPattern and TypesScaling and AffinityDifferent ShadesMaterialsPart Design PracticeSection ViewsMeasure ToolsAssemblyIntroduction to AssemblyBase Component ImportFixing the Base ComponentChild component Assembly methodUsing Different constrainsDifferent Patterns in AssemblyLinear Pattern in Assembly Circular Pattern in AssemblyCopy of Child ComponentsBill of MaterialsHiding a componentExploded View in AssemblyExploded Line Sketch in AssemblyAssembly FeaturesAssembly PracticeSheet Metal DesignIntroduction to Sheet Metal DesignSheet Metal ParametersWallWall on EdgeExtrudeFlangeHemTear DropUser FlangeCut OutHole Round SlotBendFlatBend from FlatEmbossEmbossing typesMirrorPatternPattern TypesCanonical HopperSurface Hopper FilletChamferFlatDrafting/DetailingIntroduction To DraftingSelecting Sheet Its Size and Sheet StandardsChoosing the Model to DetailsStandard Views Creation MethodsModel Views/ Custom Views Section ViewsDetail ViewsBroken ViewBroken Out ViewCrop ViewAuxiliary ViewSmart DimensionsDimension TypesBase Line DimensionChain DimensionOrdinate DimensionModel DimensionNotes and Spell CheckSurface FinishHole Call OutGD&T and Datum FeaturesCenter Mark & Center LineBlocks and HatchingRevision Symbols and TablesAssembly DraftingBallooningWeld SymbolsDrafting PracticeQuality CheckingDrawings Comparison at Different Revisions

Overview

Section 1: CATIA V5 Sketching Practice Module Lectures

Lecture 1 Sketching Practice Module Lecture-01

Lecture 2 Sketching Practice Module Lecture-02

Lecture 3 Sketching Practice Module Lecture-03

Lecture 4 Sketching Practice Module Lecture-04

Lecture 5 Sketching Practice Module Lecture-05

Lecture 6 Sketching Practice Module Lecture-06

Lecture 7 Sketching Practice Module Lecture-07

Lecture 8 Sketching Practice Module Lecture-08

Lecture 9 Sketching Practice Module Lecture-09

Lecture 10 Sketching Practice Module Lecture-10

Lecture 11 Sketching Practice Module Lecture-11

Lecture 12 Sketching Practice Module Lecture-12

Lecture 13 Sketching Practice Module Lecture-13

Lecture 14 Sketching Practice Module Lecture-14

Lecture 15 Sketching Practice Module Lecture-15

Lecture 16 Sketching Practice Module Lecture-16

Lecture 17 Sketching Practice Module Lecture-17

Lecture 18 Sketching Practice Module Lecture-18

Lecture 19 Sketching Practice Module Lecture-19

Lecture 20 Sketching Practice Module Lecture-20

Lecture 21 Sketching Practice Module Lecture-21

Lecture 22 Sketching Practice Module Lecture-22

Section 2: CATIA V5 Part Modelling Practice Module

Lecture 23 Part Modelling Practice Module Lecture-01

Lecture 24 Part Modelling Practice Module Lecture-02

Lecture 25 Part Modelling Practice Module Lecture-03

Lecture 26 Part Modelling Practice Module Lecture-04

Lecture 27 Part Modelling Practice Module Lecture-05

Lecture 28 Part Modelling Practice Module Lecture-06

Lecture 29 Part Modelling Practice Module Lecture-07

Lecture 30 Part Modelling Practice Module Lecture-08

Lecture 31 Part Modelling Practice Module Lecture-09

Lecture 32 Part Modelling Practice Module Lecture-10

Lecture 33 Part Modelling Practice Module Lecture-11

Lecture 34 Part Modelling Practice Module Lecture-12

Lecture 35 Part Modelling Practice Module Lecture-13

Lecture 36 Part Modelling Practice Module Lecture-14

Section 3: CATIA V5 Assembly Design Practice Module

Lecture 37 Assembly Design Practice Module Lecture-01

Lecture 38 Assembly Design Practice Module Lecture-02

Lecture 39 Assembly Design Practice Module Lecture-03

Lecture 40 Assembly Design Practice Module Lecture-04

Lecture 41 Assembly Design Practice Module Lecture-05

Lecture 42 Assembly Design Practice Module Lecture-06

Lecture 43 Assembly Design Practice Module Lecture-07

Mechanical Engineers,Aerospace Engineers,Automotive Engineers

Say Thank You


catiav5industryorient3kcub.jpg


Front End Web Development Bootcamp - Build A Twitter Clone

uk3fq6nac2qsxccmtt94rreer4.jpg


Front End Web Development Bootcamp - Build A Twitter Clone
Last updated 11/2020
MP4 | Video: h264, 1280x720 | Audio: AAC, 44.1 KHz
Language: English | Size: 5.26 GB | Duration: 12h 33m

Build a Twitter Clone using HTML, CSS, CSS Flexbox, CSS Grid, and JavaScript. Master your Front End Web Developer Skills


What you'll learn
You will start from Basics of HTML and learn things like: Basic HTML Document, headings, paragraphs, lists, links, images, forms and much more.
You will learn about the basic concepts of CSS: selectors, colors, text formatting, backgrounds, positions, pseudo-elements and classes, shadows and more...
You will get deep understanding of CSS Flexbox
You will learn how to manage the layout of you web page based on CSS Grid
You will be able to build UI of Twitter based on HTML and CSS
After completing HTML and CSS crash courses, you will move on and learn some basic concepts of JavaScript: variables, data types, objects, functions, arrays, loops and much more...
You will learn about how to interact with HTML document using Document Object Model
Once you are familiar with JavaScript and HTML, you will be able to add some functionality to the project
Finally we will make the project fully responsive on different screen sizes

Requirements
Text Editor
Modern Web Browser
No prior knowledge is required

Description
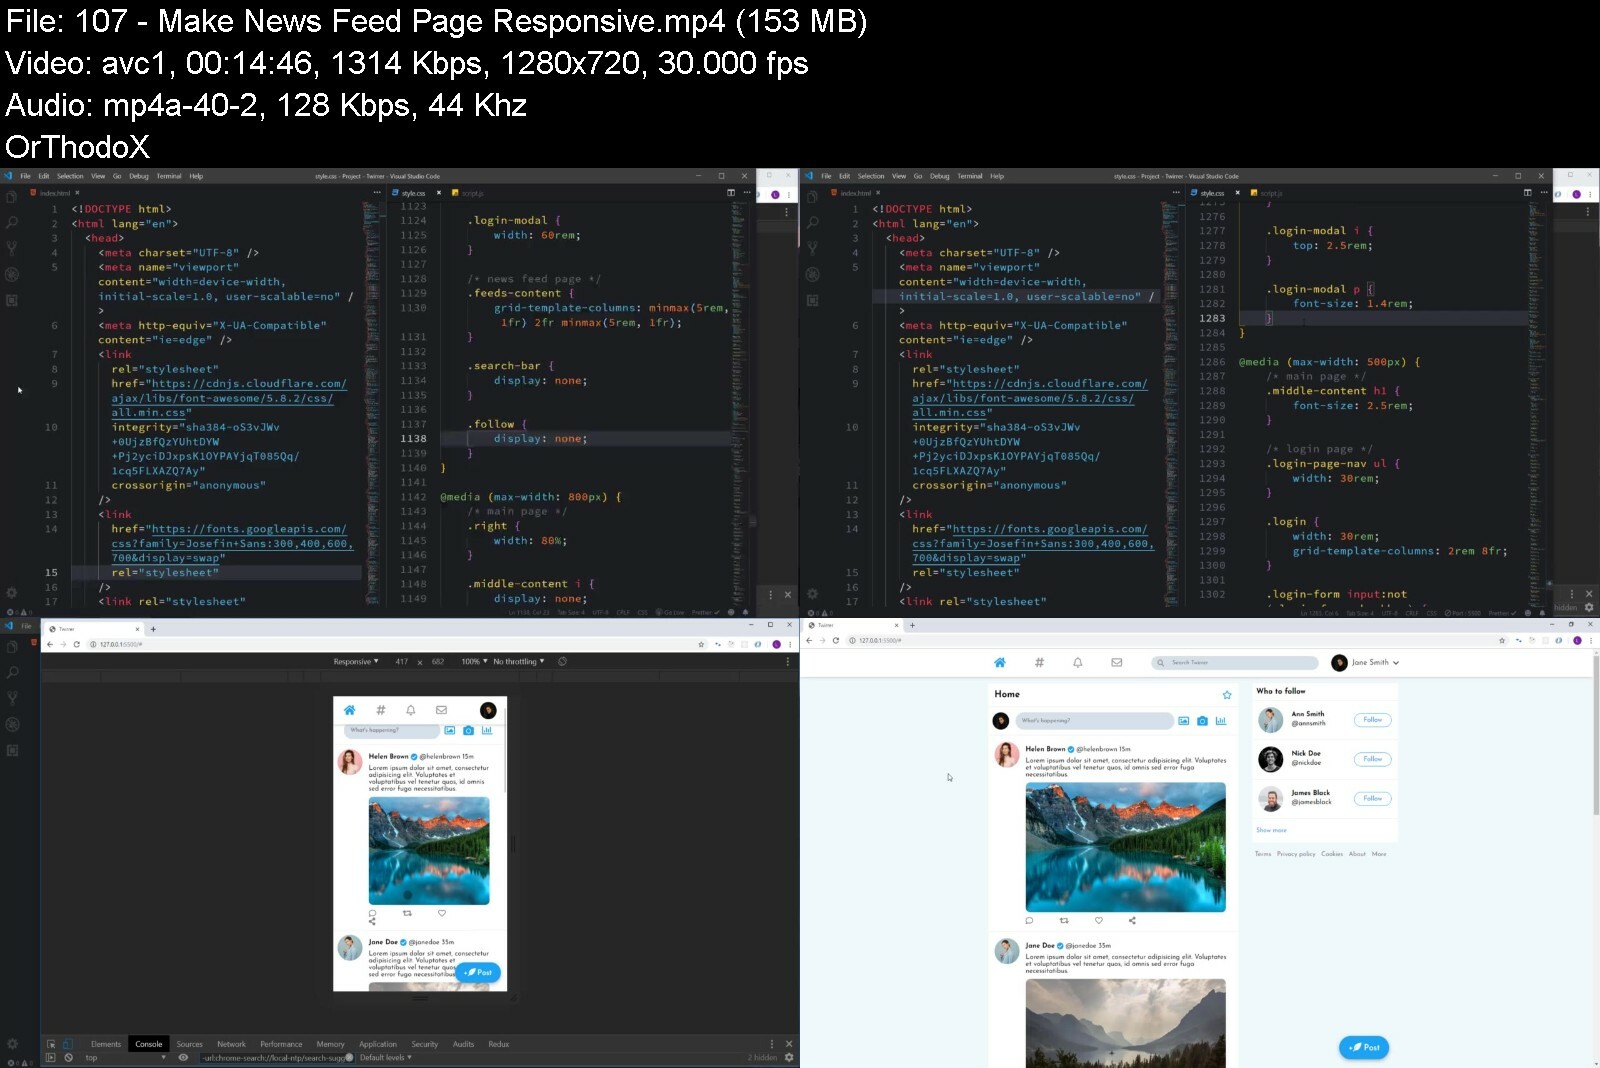
Front End Web Development Bootcamp - Build a Twitter Clone.If you want to learn how the most popular and widely-used websites are created, then this is the right course for you.Throughout the course, we are going to build a clone of Twitter. The project will be created based on:1. HTML2. CSS3. CSS Flexbox4. CSS Grid5. JavaScript6. DOMBefore building the project, you will be able to go through the crash courses of all the mentioned technologies. We will start with HTML and CSS. After completing the following sections:HTML Crash CourseCSS Crash CourseCSS FlexboxCSS GridWe will build three different pages of Twitter - Main Page, Login Page and News Feed Page based on HTML and CSS. After that, comes:JavaScript Crash CourseDOM Crash CourseOnce we are familiar with JavaScript and DOM, we will add some functionality to our project. We will create some validation in order to navigate between different pages, also, you will be able to build different modal boxes, sidebar and dark mode.Finally, we will make our project fully responsive on different screen sizes, so, you'll be able to master the Responsive Web Design.If you have any questions throughout the course, then feel free and post them in the Q&A section, you will get fast and helpful answers.JOIN US!!!

Overview

Section 1: Welcome

Lecture 1 Introduction

Lecture 2 Setup

Lecture 3 Source Files

Section 2: HTML Crash Course

Lecture 4 What Is HTML?

Lecture 5 Basic HTML Document

Lecture 6 Headings, Paragraphs and more...

Lecture 7 Lists

Lecture 8 Links

Lecture 9 Images

Lecture 10 Forms - Part 1

Lecture 11 Forms - Part 2

Lecture 12 HTML5 Semantic Elements

Section 3: CSS Crash Course

Lecture 13 What is CSS and how to write it

Lecture 14 CSS Selectors

Lecture 15 Colors in CSS

Lecture 16 Text Formatting

Lecture 17 Fonts

Lecture 18 Box Model

Lecture 19 Pseudo Classes

Lecture 20 Pseudo Elements

Lecture 21 Measurement units - Part 1

Lecture 22 Measurement units - Part 2

Lecture 23 Positions - Part 1

Lecture 24 Positions - Part 2

Lecture 25 Floats

Lecture 26 Backgrounds - Part 1

Lecture 27 Backgrounds - Part 2

Lecture 28 Shadows

Lecture 29 Transitions

Lecture 30 Transforms - Part 1

Lecture 31 Transforms - Part 2

Section 4: CSS Flexbox

Lecture 32 Introduction to CSS Flexbox

Lecture 33 Flex Container Properties

Lecture 34 Flex Item Properties

Section 5: CSS Grid

Lecture 35 CSS Grid Introduction

Lecture 36 Setup

Lecture 37 How to create Grid

Lecture 38 Fractional Unit

Lecture 39 How to position Grid Items

Lecture 40 Naming Grid Items - Part 1

Lecture 41 Naming Grid Items - Part 2

Lecture 42 Naming Grid Areas

Lecture 43 Explicit and Implicit Grids

Lecture 44 Aligning Grid Items

Lecture 45 Aligning Grid Track

Lecture 46 max-content, min-content, minmax()

Lecture 47 auto-fill and auto-fit

Section 6: Project - Build a Twitter Clone (Main Page)

Lecture 48 Project Overview

Lecture 49 Create Structure of Main Page

Lecture 50 Styling of Main Page - Part 1

Lecture 51 Styling of Main Page - Part 2

Lecture 52 Styling of Form Element

Lecture 53 Styling of Banner

Lecture 54 Styling of Footer

Section 7: Project - Build a Twitter Clone (Login Page)

Lecture 55 Create Structure of Login Page

Lecture 56 Layout of the Page

Lecture 57 Styling of Navigation

Lecture 58 Styling of Login - Part 1

Lecture 59 Styling of Login - Part 2

Section 8: Project - Build a Twitter Clone (News Feed Page)

Lecture 60 Create Structure of Navigation

Lecture 61 Styling of Navigation

Lecture 62 Create structure of News Feed Header

Lecture 63 Styling of News Feed Header - Part 1

Lecture 64 Styling of News Feed Header - Part 2

Lecture 65 Create Structure of Posts

Lecture 66 Styling of Posts

Lecture 67 Create Structure of Section - "Who to follow"

Lecture 68 Styling of "Who to Follow" Section

Lecture 69 Create Post Button

Section 9: JavaScript Crash Course

Lecture 70 What is JavaScript?

Lecture 71 Variables in JavaScript

Lecture 72 JavaScript Data types

Lecture 73 Operators

Lecture 74 Type Coercion

Lecture 75 Conditional Statements

Lecture 76 Functions

Lecture 77 Arrow Functions

Lecture 78 Arrays

Lecture 79 Objects

Lecture 80 Loops

Lecture 81 Template Strings

Section 10: DOM Crash Course

Lecture 82 What is DOM?

Lecture 83 Select and manipulate the elements - Part 1

Lecture 84 Select and manipulate the elements - Part 2

Lecture 85 DOM styles and classes

Lecture 86 Events

Lecture 87 Manipulate the Attributes

Lecture 88 DOM Navigation

Lecture 89 How to Create Elements in DOM

Section 11: Project - Build a Twitter Clone (Add JavaScript to Main and Login Page)

Lecture 90 Navigate to Login Page

Lecture 91 Main Page Validation

Lecture 92 Create Modal Box

Lecture 93 Login Page Validation

Section 12: Project - Build a Twitter Clone (Post Modal Box)

Lecture 94 Create Structure of Post Modal

Lecture 95 Styling of Post Modal - Part 1

Lecture 96 Styling of Post Modal - Part 2

Lecture 97 Make Post Modal Work

Section 13: Project - Build a Twitter Clone (Sidebar)

Lecture 98 Create Structure of Sidebar

Lecture 99 Styling of Sidebar - Part 1

Lecture 100 Styling of Sidebar - Part 2

Lecture 101 Make Sidebar Work

Section 14: Project - Build a Twitter Clone (Dark Mode)

Lecture 102 Create a Toggle Button

Lecture 103 Switching to Dark Mode - Part 1

Lecture 104 Switching to Dark Mode - Part 2

Section 15: Project - Build a Twitter Clone (Responsive Web Design)

Lecture 105 Make Main Page Responsive

Lecture 106 Make Login Page Responsive

Lecture 107 Make News Feed Page Responsive

Section 16: BONUS

Lecture 108 Bonus Lecture: Check Out

Students who want to learn three core technologies of Front End We Development: HTML, CSS, and JavaScript,Students who have zero experience in programming,Students who have the basic knowledge of Front End Web Development and want to develop their skills,Students who want develop Web Design skills


frontendwebdevelopmenzheoh.jpg


Realistic Dagger Game Asset Creation in Blender

heidowgqvx1uvllrjgnezhvel8.jpg


Realistic Dagger Game Asset Creation In Blender
Last updated 2/2020
MP4 | Video: h264, 1280x720 | Audio: AAC, 44.1 KHz
Language: English | Size: 8.61 GB | Duration: 9h 50m

Learn Modeling & Texturing AAA prop using Blender, Marmoset Toolbag, Substance Painter, and Photoshop


What you'll learn
High poly to low poly industry workflow
Optimize 3d models for games
Bake clean texture maps
Solve baking issues
Create realistic details
Create impressive image renders

Requirements
Basic Knowledge of Blender, Marmoset Toolbag, and Substance Painter required

Description
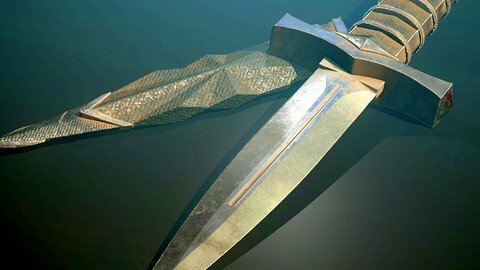
Instructor InfoEmiel Sleegers always had love for video games and when he was young, he started using Unity3D for programming but he found himself gravitating more towards the art of making games. Now he is currently working as an environment artist in Ubisoft. He contributed to creating AAA games such as Forza Horizon 3 and The Division 2. His all time favorite game is The Last of Us and that video game is what inspired him to want to work in the game industry. His advice for beginner artists is to focus on one aspect of gaming that they are passionate about, stick to it and get better at it. His hobbies include anything related to games or films, whether it be working on personal projects, freelance work or going out for movies. Course Info The purpose of this course is to show you how professional game props are created in AAA game studios.We will go over in-depth on how to create a high poly and low poly asset inside Blender. We will then create the uv s of our low poly dagger and make everything as optimal as possible so that we can go into marmoset toolbag where we will be creating texture maps for our asset. We will go through the process of baking our asset and I will show you how to fix any baking issues that might occur so you will know how to solve problems for your own future projects. After we create a wonderful clean bake, we will take our maps into substance painter where we will be creating our final texture. We will cover multiple things inside substance like creating normal map details, creating base materials and revolutionary techniques to add amazing details quickly and accurately. Once we are happy with our texture, I will show you how to create impressive image renders that you can use for your own work that can be represented in your portfolio.Lots of people want to be successful in game asset creation but they are not willing to invest in education and make sacrifices in order to do what is necessary to hit their goals. Don t let this be you. I know you will enjoy this course and you will learn a lot from it. Come and join me at Victory3D.

Overview

Section 1: Introduction

Lecture 1 Introduction

Lecture 2 Going Over Our Reference and Installing Plugins

Section 2: Creating the Grip of Our Knife

Lecture 3 Creating the Grip of Our Knife Part 1

Lecture 4 Creating the Grip of Our Knife Part 2

Lecture 5 Creating the Grip of Our Knife Part 3

Lecture 6 Creating the Grip of Our Knife Part 4

Lecture 7 Creating the Grip of Our Knife Part 5

Lecture 8 Creating the Grip of Our Knife Part 6

Lecture 9 Creating the Grip of Our Knife Part 7

Lecture 10 Creating the Grip of Our Knife Part 8

Section 3: Creating Our Blade and Scabbard

Lecture 11 Creating Our Blade Part 1

Lecture 12 Creating Our Blade Part 2

Lecture 13 Creating Our Blade Part 3

Lecture 14 Finish Creating Our Blade and Creating Our Scabbard

Lecture 15 Creating Our Scabbard Part 1

Lecture 16 Creating Our Scabbard Part 2

Lecture 17 Creating Our Scabbard Part 3

Section 4: Low Poly and Unwrapping

Lecture 18 Turning Our Dagger into Low Poly Part 1

Lecture 19 Turning Our Dagger into Low Poly Part 2

Lecture 20 Turning Our Dagger into Low Poly Part 3

Lecture 21 UV Unwrapping Our Dagger Part 1

Lecture 22 UV Unwrapping Our Dagger Part 2

Section 5: Baking and Texturing

Lecture 23 Baking Our Dagger Part 1

Lecture 24 Baking Our Dagger Part 2

Lecture 25 Baking Our Dagger Part 3

Lecture 26 Creating Our Texture Part 1

Lecture 27 Creating Our Texture Part 2

Lecture 28 Creating Our Texture Part 3

Lecture 29 Creating Our Texture Part 4

Lecture 30 Creating Our Texture Part 5

Lecture 31 Creating Our Texture Part 6 and Setting up Our First Render

Section 6: Polishing

Lecture 32 Polishing and Adding More Render Scenes Part 1

Lecture 33 Polishing and Adding More Render Scenes Part 2

Anyone who wants to wants to enhance their art portfolio,Anyone who wants to understand the process of game asset creation,Anyone who wants to get better in modeling, baking, and texturing


realisticdaggergameasbhdvx.jpg


Cinematic Lighting in Maya

4792696_c238.jpg


Cinematic Lighting in Maya
Published 07/2022
MP4 | Video: h264, 1280x720 | Audio: AAC, 44.1 KHz, 2 Ch
Genre: eLearning | Language: English + srt | Duration: 40 lectures (8h 55m) | Size: 6.8 GB


Light your scene like movies using Maya Arnold renderer


What you'll learn
Learn Cinematic lighting
Render Interiors
Light Exterior Scenes
Light Characters and Props
Learn Maya Arnold

Requirements
I expect you to have basic knowledge of Maya and Arnold.
You should have Photoshop installed as well since we will do our post processing there.

Description
Hey guys, would you like to create amazing renders for your portfolio? Would you like to learn how to create cinematic looking compositions? If that is the case I welcome you to Cinematic Lighting in Maya.

WHY SHOULD YOU LEARN FROM ME

My name is Abraham Leal and I have 11 years of experience in the industry. I currently lead my own studio Critical Hit in Mexico were we produce experiences for the entertainment industry.

By the end of this course

You'll be able to create amazing images and showcase your models in the best possible way

You ll be able to properly light interior scenes, exterior scenes, characters and props.

WHAT WILL I LEARN

Arnold Lights

Camera settings

Composition

Using Assets

Storytelling

Post Production

COURSE PROJECTS

We will start by going over the basics of the Arnold Rendering Engine. We will then explore several exercises were we will apply and create a cinematic look for our renders. After that we will go over rendering exteriors and interiors in different light scenarios. Finally we will create 3 amazing compositions for a final cinematic scene.

IS THIS COURSE RIGHT FOR ME

I have designed this course for intermediate 3d students who want to improve their renders and create amazing pieces for their portfolio.

WHO IS NOT THE IDEAL STUDENT

This course is not designed for absolute Maya beginners.

WHAT SHOULD I KNOW OR HAVE FOR THE COURSE

I expect you to have basic knowledge of Maya and Arnold

You should have Photoshop installed as well since we will do our post processing there.

JOIN ME NOW

Leave all the boring renders behind and learn the tools to create and amazing portfolio. Join me and become a master of light in no time!

Who this course is for
I have designed this course for intermediate 3d students who want to improve their renders and create amazing pieces for their portfolio.
This course is not designed for absolute Maya beginners.


Say Thank You

cinematiclightinginmaunf28.jpg


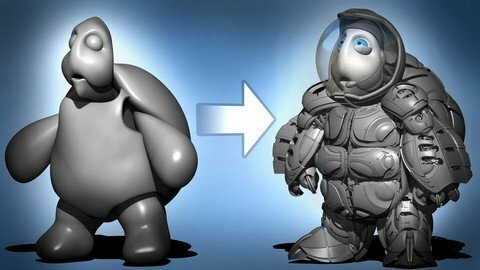
New! Zbrush Hard Surface Sculpting Beginner To Advance

9ajqdd4ga2mymts2petc4fodn6.jpg


New! Zbrush Hard Surface Sculpting Beginner To Advance
Last updated 10/2021
MP4 | Video: h264, 1280x720 | Audio: AAC, 44.1 KHz
Language: English | Size: 7.22 GB | Duration: 9h 20m

A course designed to all levels for anyone interested in learning developing Hard Surface Sculpting Techniques


What you'll learn
Learning and Mastering Techniques in Hard Surface Sculpting with the Newest Features of Zbrush
A solid foundation into mastering Zremesher, Polygroups and their relationship together with other Zbrush functions
How to sculpt and iterate quickly variety of base mesh shapes and re use those base meshes modularly to expedite your workflow
Learn the Primary and Secondary Functions Knife Curve Brush
Understanding of the Gizmos Transform Deformers and how important of a combination it is with the Knife Curve Brush

Requirements
Either a trial or license version of Zbrush 2021.7

Description
Hello and Welcome to Zbrush 2021 Hard Surface Sculpting Beginner to Advance, A course designed to all levels for anyone interested in learning developing Hard Surface Sculpting Techniques in ZbrushThis course will take you through a rundown of the basic tools and techniques needed for you to establish a foundation in your sculpting arsenal for crafting your hard surface subject The SPACE TURTLE!To that end we will supply you a base mesh where you will learn and practice all of our unique quick sculpting techniques and tricks to reveal not only how easy it is to create hard surface sculpts but to also demonstrate how modularly efficient it is to re use pieces to expedite your workflow.What we teach:Well start you off will a beginner section to develop a solid foundation into mastering Zremesher, Polygroups and their relationship together with other Zbrush functionsLearn the Primary and Secondary Functions Knife Curve BrushUnderstanding of the Gizmos Transform Deformers and how important of a combination it is with the Knife Curve BrushProblem solving Zremesher through Dynamic thicknessGoing over functions of zbrush such as Hard Surface Modeling tool Zmodeler, and Live BooleansHave Some fun Carving out a facial expression of our turtle and going over glass transparency rendering settings within ZbrushBy the end of this course you ll have gained the necessary knowledge in understanding just how fast you can flush out complex shapes through zbrush in just a short amount of time as well as have a fully complete Brave and Courageous Space Turtle.With that said let's START SCULPTING!!!

Overview

Section 1: Introduction

Lecture 1 What To Expect

Lecture 2 User Interface Introduction

Lecture 3 Knife Curve Brush

Lecture 4 Panning Curve Brushes With Accuracy

Lecture 5 Masking Isolate Selection and Polygroups

Lecture 6 ZRemesher And Polygroups

Lecture 7 Gizmo Deformers

Section 2: Creating Turtle Arm

Lecture 8 Lesson 1 Hard Surface Base Mesh Creation

Lecture 9 Lesson 2 Shoulder Base Mesh Creation

Lecture 10 Lesson 3 Placement of Base Mesh Arm and Adjustments

Lecture 11 Lesson 4 Detailing Fin Mesh

Lecture 12 Lesson 5 Detailing Mid Arm

Lecture 13 Lesson 6 Detailing Inner Arm

Lecture 14 Lesson 7 Detailing Base Mesh Shoulders

Lecture 15 Lesson 8 Array Meshes

Lecture 16 Lesson 9 Wire Creation

Lecture 17 Lesson 10 Finger Base Mesh

Lecture 18 Lesson 11 Finger Placement

Lecture 19 Lesson 12 Final Placements

Section 3: Leg Construction

Lecture 20 Lesson 13 Foot Creation

Lecture 21 Lesson 14 Shins Creation

Lecture 22 Lesson 15 Center Shins Creation

Lecture 23 Lesson 16 Shins Detailing

Lecture 24 Lesson 17 Shins Detailing 2

Lecture 25 Lesson 18 Wire Placement

Lecture 26 Lesson 19 Decimating And Mirroring

Section 4: Creating Chest

Lecture 27 Lesson 20 Creating Chest Piece Pad

Lecture 28 Lesson 21 Creating Chest Piece Outer Plates

Lecture 29 Lesson 22 Chest Pad Placement

Section 5: Creating Shell

Lecture 30 Lesson 23 Volume Chest Placement

Lecture 31 Lesson 24 Creating Shell Piece

Lecture 32 Lesson 25 Shell Placement

Section 6: Detailing Head and Helmet

Lecture 33 Lesson 26 Detailing Eyes

Lecture 34 Lesson 27 Creating Cloth Hood

Lecture 35 Lesson 28 Creating Helmet and Rendering Transparency

Anyone interested in Hard Surface Sculpting in Zbrush


newzbrushhardsurfacesjfije.jpg


Zurück
Oben Unten