• Regeln für den Video-Bereich:

    In den Börsenbereich gehören nur Angebote die bereits den Allgemeinen Regeln entsprechen.

    Einteilung

    - Folgende Formate gehören in die angegeben Bereiche:
    - Filme: Encodierte Filme von BluRay, DVD, R5, TV, Screener sowie Telesyncs im Format DivX, XviD und x264.
    - DVD: Filme im Format DVD5, DVD9 und HD2DVD.
    - HD: Encodierte Filme mit der Auflösung 720p oder darüber von BluRay, DVD, R5, TV, Screener sowie Telesyncs im Format x264.
    - 3D: Encodierte Filme von BluRay, die in einem 3D Format vorliegen. Dies gilt auch für Dokus, Animation usw.
    - Serien: Cartoon/Zeichentrick, Anime, Tutorials, Dokumentationen, Konzerte/Musik, Sonstiges sind demnach in die entsprechenden Bereiche einzuordnen, auch wenn sie beispielsweise im High Definition-Format oder als DVD5/DVD9/HD2DVD vorliegen. Ausnahme 3D.
    - Bereich Englisch: Englische Releases gehören immer in diesen Bereich.
    - Bereich Talk: Der Bereich, in dem über die Releases diskutiert werden kann, darf, soll und erwünscht ist.


    Angebot/Beitrag erstellen

    - Ein Beitrag darf erst dann erstellt werden, wenn der Upload bei mindestens einem OCH komplett ist. Platzhalter sind untersagt.
    - Bei einem Scenerelease hat der Threadtitel ausschließlich aus dem originalen, unveränderten Releasenamen zu bestehen. Es dürfen keine Veränderungen wie z.B. Sterne, kleine Buchstaben o.ä. vorgenommen werden. Ausnahme Serienbörse:
    - Bei einem Sammelthread für eine Staffel entfällt aus dem Releasename natürlich der Name der Folge. Beispiel: Die Simpsons S21 German DVDRip XviD - ITG
    - Dementsprechend sind also u.a. verboten: Erweiterungen wie "Tipp", "empfehlenswert", "only", "reup", usw. / jegliche andere Zusatzinformation oder Ergänzung, welche nicht in obiger Beschreibung zu finden ist.

    Aufbau des Angebots und Threadtitel

    Der Titel nach folgendem Muster erstellt zu werden. <Name> [3D] [Staffel] [German] <Jahr> <Tonspur> [DL] [Auflösung] <Quelle> <Codec> - <Group>
    Beispiel: The Dark Knight German 2008 AC3 DVDRip XviD - iND
    Beispiel: The Dark Knight 2008 DTS DL BDRip x264 - iND
    Beispiel: The Dark Knight 2008 AC3 DL BDRip XviD - iND
    Beispiel: The Dark Knight German 2008 AC3 720p BluRay x264 iND
    Beispiel: The Dark Knight 2008 DTS DL 1080p BluRay x264 iND
    Beispiel: Die Simpsons S01 German AC3 DVDRip XviD iND
    Beispiel: Die Simpsons S20 German AC3 720p BluRay x264 iND
    Beispiel: Sword Art Online II Ger Sub 2014 AAC 1080p WEBRip x264 - peppermint
    Entsprechend sind also u.a. verboten: Sonderzeichen wie Klammern, Sterne, Ausrufezeichen, Unterstriche, Anführungszeichen / Erweiterungen wie "Tipp", "empfehlenswert", "only", "reup", usw. / jegliche andere Zusatzinformation oder Ergänzung, welche nicht in obiger Beschreibung zu finden ist
    Ausnahmen hiervon können in den Bereichen geregelt sein.

    Die Beiträge sollen wie folgt aufgebaut werden:
    Überschrift entspricht dem Threadtitel
    Cover
    kurze Inhaltsbeschreibung
    Format, Größe, Dauer sind gut lesbar für Downloader außerhalb des Spoilers zu vermerken
    Nfo sind immer Anzugeben und selbige immer im Spoiler in Textform.
    Sind keine Nfo vorhanden z.B. Eigenpublikationen, sind im Spoiler folgende Dateiinformationen zusätzlich anzugeben :
    Quelle
    Video (Auflösung und Bitrate)
    Ton (Sprache, Format und Bitrate der einzelnen Spuren)
    Untertitel (sofern vorhanden)
    Hosterangabe in Textform außerhalb eines Spoiler mit allen enthaltenen Hostern.
    Bei SD kann auf diese zusätzlichen Dateiinformationen verzichtet werden.

    Alle benötigten Passwörter sind, sofern vorhanden, in Textform im Angebot anzugeben.
    Spoiler im Spoiler mit Kommentaren :"Schon Bedankt?" sind unerwünscht.


    Releases

    - Sind Retail-Release verfügbar, sind alle anderen Variationen untersagt. Ausnahmen: Alle deutschen Retail-Release sind CUT, in diesem Fall sind dubbed UNCUT-Release zulässig.
    - Im Serien-Bereich gilt speziell: Wenn ein Retail vor Abschluss einer laufenden Staffel erscheint, darf diese Staffel noch zu Ende gebracht werden.62
    - Gleiche Releases sind unbedingt zusammenzufassen. Das bedeutet, es ist zwingend erforderlich, vor dem Erstellen eines Themas per Suchfunktion zu überprüfen, ob bereits ein Beitrag mit demselben Release besteht. Ist dies der Fall, ist der bereits vorhandene Beitrag zu verwenden.
    - P2P und Scene Releases dürfen nicht verändert oder gar unter einem iND Tag eingestellt werden.


    Support, Diskussionen und Suche

    - Supportanfragen sind entweder per PN oder im Bereich Talk zu stellen.
    - Diskussionen und Bewertungen sind im Talk Bereich zu führen. Fragen an die Uploader haben ausschließlich via PN zu erfolgen, und sind in den Angeboten untersagt.
    - Anfragen zu Upload-Wünschen sind nur im Bereich Suche Video erlaubt. Antworten dürfen nur auf Angebote von MyBoerse.bz verlinkt werden.


    Verbote

    - Untersagt sind mehrere Formate in einem einzigen Angebotsthread, wie beispielsweise das gleichzeitige Anbieten von DivX/XviD, 720p und 1080p in einem Thread. Pro Format, Release und Auflösung ist ein eigener Thread zu eröffnen.
    - Grundsätzlich ebenso verboten sind Dupes. Uploader haben sich an geeigneter Stelle darüber zu informieren, ob es sich bei einem Release um ein Dupe handelt.
    - Gefakte, nur teilweise lauffähige oder unvollständige Angebote sind untersagt. Dies gilt auch für eigene Publikationen, die augenscheinlich nicht selbst von z.B. einer DVD gerippt wurden. Laufende Serien, bei denen noch nicht alle Folgen verfügbar sind, dürfen erstellt und regelmäßig geupdatet werden.
    - Untersagt sind Angebote, welche nur und ausschließlich in einer anderen Sprache als deutsch oder englisch vorliegen. Ausnahmen sind VORHER mit den Moderatoren zu klären.


    Verstoß gegen die Regeln

    - Angebote oder Beiträge, die gegen die Forenregeln verstoßen, sind über den "Melden"-Button im Beitrag zu melden.
  • Bitte registriere dich zunächst um Beiträge zu verfassen und externe Links aufzurufen.

*** Bestes IPTV *** bester Preis *** gratis Test ***


Englische Tutorials

Vinyasa Yoga Made Simple: 27 Days Of Self-discovery

uyqxqhmlz5s263pvmeskkk1ipb.jpg


Vinyasa Yoga Made Simple: 27 Days Of Self-discovery
Marisa Weppner | Duration: 5:30 h | Video: H264 1920x1080 | Audio: AAC 44,1 kHz 2ch | 6,69 GB | Language: English

Vinyasa Yoga Made Simple: 27 Days of Self-Discovery by Marisa Weppner was designed for you to begin a yoga practice in the simplest way possible while in the comfort of your own home. You are invited to lay the book open on the floor next to your mat, to take your time and move slowly while learning to be comfortable in your own body. I learned to practice yoga in just the same way in 1999, and it transformed my life immensely; physically, mentally and spiritually. I am delighted that you have chosen to embark on this lifelong journey of learning, and I hope to be but one of your many teachers. In addition to the teaching in this book you also have access to these 28 videos designed as a companion piece to this book. The videos are a helpful visual aide as well as an opportunity to revisit the series again and again.

Homepage


01sunsalutationsabs1mico.jpg


Deploy and Run Apps with Docker, Kubernetes, Helm, Rancher

21986543ee549ed4q.jpg


Deploy and Run Apps with Docker, Kubernetes, Helm, Rancher
Last Updated 01/2020
MP4 | Video: h264, 1280x720 | Audio: AAC, 44.1 KHz, 2 Ch
Genre: eLearning | Language: English | Duration: 220 lectures (23h 45m) | Size: 10.9 GB

Build, deploy, and run apps in Docker and Kubernetes. Use Helm to package apps. Manage multiple clusters with Rancher


What you'll learn
Docker fundamentals
Building development and production Docker images
Service communication in a Docker Network
Automatically building Docker images with Travis CI and publish to Docker Hub
Using Docker Compose for basic container orchestration
Docker container deployment to Amazon Elastic Beanstalk
Kubernetes Concepts, such as Pod, Service, Deployment, StatefulSet, ConfigMap, Secret etc.
Kubernetes architecture and abstractions of hardware, storage, and network
Running Kubernetes locally with Docker for Desktop on Mac and Windows and MicroK8s on Linux Desktop
Microservices communication in a Kubernetes environment
Using Helm to package your applications for deployment to Kubernetes cluster
Setting up your own Helm Repository for your charts
Deploy Helm charts automatically to Helm Repository with Travis CI
Running Kubernetes in the Cloud with Google Cloud Platform and GKE
Running Kubernetes in the Cloud with Amazon Web Services and Kops and EKS
Using Travis CI to deploy to Kubernetes cluster in the Cloud
Managing multiple Kubernetes clusters with Rancher

Requirements
Students should be interested in learning more about how to build, run, and deploy apps as containers
Students should be interested in Kubernetes and wanting to learn more about it both locally and in the cloud
Students should have command line experience (can be Linux, Windows or Mac)
Should have a PC, Mac, or Linux Desktop


Description
In this course we will take a simple Angular Client application that talks to a Node.JS server and deploy and run it as Docker containers. We will learn how to build both development and production Docker images for these types of applications. We will then be introduced to basic container orchestration with Docker Compose.

After this we will refactor the application to be more decoupled, resilient and scalable by using a Microservice architecture, making the app more Cloud native. We will learn how we can build Docker images and publish them to Docker hub automatically with Travis CI. We will deploy the containerized application to the Cloud with the help of Amazon Elastic Beanstalk service. We will also look at automating the deployment to Elastic Beanstalk with Travis CI. When we deploy the application to Elastic Beanstalk we will also see how we can use AWS services such as AWS RDS, AWS Elasticsearch and AWS Elasticache instead of running these as our own containers.

Then it's time for Kubernetes. We will spend a lot of time on Kubernetes as it is the preferred choice for most people when they want to run a container workload in Production. We will write Kubernetes manifest files (YAML) to deploy the application to a Kubernetes cluster. We will look at deploying both to a local Docker for Desktop single node Kubernetes cluster and to a multi node Kubernetes cluster in the Cloud (Google GKE, Amazon Kops, Amazon EKS).

Then we will look at Kubernetes Helm that can be used to package the Kubernetes manifest files so they can be versioned and released as one entity. Learn how to use Travis CI to build docker images and deploy automatically to Kubernetes clusters. Finally see how you can manage multiple Kubernetes clusters with Rancher.

Who this course is for
Developers
Architects
DevOps
IT

Homepage


1.introductionsmmijg.jpg


Learn SolidWorks Basics from Scratch

483201087fa372e50.jpg


Learn SolidWorks Basics from Scratch
Published 10/2022
MP4 | Video: h264, 1280x720 | Audio: AAC, 44.1 KHz, 2 Ch
Genre: eLearning | Language: English | Duration: 24 lectures (5h 33m) | Size: 5.74 GB


CAD Training: Learn to Master SolidWorks to aim for good jobs if you are a complete beginner


What you'll learn
Acquire Product Designer skills and can include that in your resume.
Apply for CSWA certification programme for SOLIDWORKS with confidence.
Become expert in Computer Aided Designing field of Mechanical Engineering and eligible for many Jobs in this field.
Become specialist in Modelling because it is the basic need for any product design.
Use SOLIDWORKS to create 3D and 2D Models.
Make assemblies and animate it in SOLIDWORKS.
Requirements
No CAD Experience needed. you will learn everything from scratch about CAD in this course.
You will need SOLIDWORKS 2018 or newer to open the models I provide throughout the course.
Description
I am a Mechanical Engineer, and I love this profession because I enjoy engineering. I love to crack engineering behind every action taking place in the world. Specifically, in mechanical engineering, I love the design part. This is one of the initial steps in producing anything. I was utterly dependent on my professors for jobs, skills, and education at my UG. Later I learned that they are here in college only for your education, not for your job. They can guide you but you have to learn skills yourself if you want to make your career. If you want to be a design engineer and get a good job, you can't depend on professors because these advanced skills don't come under the college curriculum. It is not their responsibility to teach you these softwares.
Everyone thinks that mechanical engineers get significantly lower salaries compared to other engineers. If you also feel the same, then I must say your approach is incorrect. You must work with the latest technologies & software to keep up with every profession. If you solely depend on core mechanical studies, then I'm sorry, but you will earn significantly less than others. Foreign Mechanical Engineers earns a lot more than Indian engineer. Do you ever think of why? Because they know how to work with the latest technologies.
Mechanical engineering is very vast, and we are the ones who can keep it updated. You should start learning new skills in the mechanical field. I got inspired by designers worldwide working on massive projects through LinkedIn, and because of that, I also began learning software from my first year of UG. Now I am trying to pass on this teaching skill to my juniors, classmates, and everyone. I am a teacher but you can call me a friend. I think that if you are learning something from your friend then definitely you will not forget that but if any teacher is teaching you then there is a high chance that you will not focus properly and you'll definitely forget that skill. So, here I am, a college student from the National Institute of Technology, Calicut and I want you to watch this course assuming that your friend is teaching you.
This is a full legit course on CAD Software right from basics. In this course, I demonstrated all the features of CAD software. SolidWorks is the most user-friendly software available for Computer-Aided Design. I tried to make this course as comprehensive as possible so that you all can learn the basic features of SolidWorks in time and practice all the questions that are uploaded in this course.
=======
About this course
with this course, you are liable for
- Full, free lifetime access to all the lectures of this course.
- Lectures that will be added to this course in the future will also be free with this purchase.
- Unconditional Udemy 30 days money-back guarantee - I am sure you would love the course though :)
So, overall with the help of this course, you can learn new CAD skills and add them to your resume and aim for high-paying jobs in mechanical engineering. I tried and I got it so you can also get it. All the best. :)
=======
Why our course?
- As I said already, learning from a friend will make to remember this skill for all time. I am sure you all faced this challenge while preparing for exams in college.
- I am 24 X 7 available to clear your doubts. You can mail me if you have any doubt.
- This is the challenge that I have created for myself to teach all my juniors and help them choose the right career.
- This is a recorded lecture (No screenshots), you can learn with me. You can also design with me if you think that will help you.
- Lectures are short and concentrated but cover all the features available in Solidworks.
=======
Instructor support
Whenever you have a subject matter question you can post it in the Q&A forum or you can mail me directly on my mail ID and I will answer your questions as soon as possible. So, with the course, you not only get video lessons but also quick and responsive support from your friend.
=======
So this is it. Click on the "Take this course" button and help me in this challenge. Mark my words, you have to learn advanced technologies to sustain yourself in this fast-moving world and to earn more than a conventional mechanical engineer. Enhance your skill not only through this course but by doing projects in advanced fields like Metal additive manufacturing, Topology optimization, and many more.
I wish you all the best for your future and feedback is most welcomed.
Thanks,
Harsh Mundra.
Who this course is for
Beginners intending to take SOLIDWORKS Associate Certificate - CSWA and many other exams.
Beginners intending to learn the basics of SOLIDWORKS.
Beginners intending to get started with 2D and 3D modeling.
Beginners wanting to get a better job via CAD skills.
Beginners wanting to list SOLIDWORKS (CAD) skills in their resume.


learnsolidworksbasics7wdus.jpg


Download from RapidGator


Download from Keep2Share


Right hemispheric painting

1h4gtrmtnioxfvigz4bjtg5irh.jpg


Right Hemispheric Painting
Published 10/2022
MP4 | Video: h264, 1280x720 | Audio: AAC, 44.1 KHz
Language: English | Size: 6.36 GB | Duration: 5h 10m

Who can and cannot draw, as well as for art teachers.


What you'll learn
You will learn how to quickly paint pictures, due to special techniques and drawing life hack.
At a good speed, you turn off the logic and turn on the creative mode of the brain.
And, of course, a quickly painted picture.
Reducing logic will solve problems with psychological stress, you will also get the experience of moving into the sensual sphere
Requirements
The technique is very suitable for beginner students who want to quickly learn how to draw.

Description
This course includes a collection of painting lessons with the activity of the right hemisphere of the brain.The technique is very suitable for beginners and those who already paint, who are engaged in bodily practices, yoga, for psychologists, esotericists and art teachers.Right hemisphere painting is an art therapy for activating the right hemisphere, personality emancipating. Reducing logic will solve tasks with a psychological stress. Also you will get the experience of moving into the sensual sphere - it improves the quality of life, tested on 100,000 students who have passed out our Creativity School.And the online course has made it possible for people all over the world!You will learn how to quickly paint pictures, due to simple techniques and painting life hack. You can turn off the logic with a good speed and turn on the creative mode of the brain. And, of course, a quickly painted picture.В классе каждый получает то, за чем пришел. Кто-то учится рисовать, кто-то решает психологические проблемы, кто-то получает удовольствие от процесса, у кого-то упрощенная система обучения. Включив активность Правого полушария, вы раскроете творческие способности, которые проявятся не только в живописи, но и в других сферах вашей жизни.Вы получите такие знания, которые не дают в художественных заведениях. Техника настолько проста, что захватывает, и тогда можно рисовать без остановки, целый день, день за днем, вдохновляясь творчеством!Присоединяйтесь к Школе творчества и рисуйте с удовольствием уже сегодня!
Overview
Section 1: Art supplies
Lecture 1 Art supplies
Lecture 2 Activation of the right hemisphere.
Lecture 3 Backgrounds
Lecture 4 Far and close.
Lecture 5 Three tones.
Lecture 0 Mother, father and I.
Lecture 0 Color and Tone.
Who can and cannot draw, as well as for art teachers. A right hemisphere technique quickly allows you to paint a landscape, still life, flowers, etc. This is an alternative for perfectionists.


righthemisphericpaintd2edk.jpg


Download from RapidGator


Download from Keep2Share


History Of English Literature - All Govt Exams

ouvygaxizjzknxseyxbck26een.jpg


History Of English Literature - All Govt Exams
Published 10/2022
MP4 | Video: h264, 1280x720 | Audio: AAC, 44.1 KHz
Language: English | Size: 15.43 GB | Duration: 11h 57m

Detail Study - Anglo Saxon Period to Modern Age


What you'll learn
Taught by Prof Anurag Agarwal - NET, Ph.D. MBA Qualified | 20+ Years Experience
Qualify the All Teaching Exams and Other competitive Exams in English literature.
Providing a comfortable and Nurturing Environment - Students Reviews
Can visualize up to 1000+ Questions in All Online Video Classes covering all salient and foremost topics and questionnaires
Requirements
No Experience

Description
Dr Anurag Agarwal: History of English Literature encompasses the knowledge about the age of the monarchies and the trends of the age. This helps students to know in a better perspective right from the 14 th century Chaucer's Age and moving towards the Barren Age of Literature ( 15 C ) and then Renaissance and the Golden period of Literature. The movements in Poetry / Drama /, Essay / Etc are taught as per the age trends up to the Modern AgeDr Anurag Agarwal: These century-wise classes with all the details about Authors and their works and in between there are certain very important movements which are taught to Make the student always ready for answering in any exams and interviewsWelcome to India's Best Coaching for English Literature - Crack UGC NET JRF and UPSC IAS PCS Mains Optional Subject in First Attempt | Video Classes, Test Series, Books and Notes (200% sure you love to Watch Quality English Literature) >>>Happy to say that the Maximum number of students Satisfied with our Content - is 4.7 Google Review UPSC Optional English | UPHESC Assistant Professor - English Literature | UGC NET English | UP TGT English | UP PGT English | DSSSB & KVS - PGT English | APPSC PGT English | LT Grade Assistant Teacher - English | UPPSC GIC Mains English Literature | WBCS Exe (Mains) 2022 Optional English Literature | BPSC Mains 2022 English Literature Optional | GATE 2022 English Literature | PCS Mains (UPSC) 2022 English Literature Optional |
Overview
Section 1: Introduction
Lecture 1 Introduction
Section 2: History of English Literature
Lecture 2 Intro of Poetry | Part 1
Lecture 3 Intro of Poetry | Part 2
Lecture 4 Age of Shakespeare
Lecture 5 The Age of Milton
Lecture 6 The Age of Dryden | Part 1
Lecture 7 The Age of Dryden | Part 2
Lecture 0 The Age of Pope
Lecture 0 The Age of Wordsworth
Lecture 0 The Romantic Age
Lecture 0 Victorian Age
Lecture 0 The Modern Age
Lecture 0 Essay from Bacon to Present
Lecture 0 Important Essayists of 18th Century
Lecture 0 Novel upto Fielding and Goldsmith
Lecture 0 Novel in the Romantic Age
Lecture 0 The Victorian Novel
Lecture 0 The Modern Novel
Lecture 0 English Drama upto Shakespeare
Lecture 0 William Shakespeare - Drama
Lecture 0 Drama in the Puritan Age
Lecture 0 The Restoration Drama
Lecture 0 English Drama in 18th Century
Lecture 0 Revival of Drama in the Modern Age
NTA UGC NET English Literature,DSSSB PGT TGT and UP PGT UP TGT,UPSC Mains Optional English,Optional English Literature,MA Entrance English Literature,BA English Literature,English Literature,GATE English Literature,All State PCS Mains English Optional,State Level Teacher Exam


historyofenglishliter8gil4.jpg


Download from RapidGator


Download from Keep2Share


Wingfox - Applied Illustration Tutorial - Realistic Portrait Painting Processes and Techniques with Tim Liu

wingfoxappliedillustrqae9a.gif


Wingfox - Applied Illustration Tutorial - Realistic Portrait Painting Processes and Techniques with Tim Liu
Video: MPEG4 Video (H264) 1920x1080 30fps 396kbps | Audio: AAC 48000Hz stereo 160kbps Genre: eLearning | Duration: 12hrs | Language: English | File size: 2.6 GB

In this tutorial, the lecturer will use portrait to improve the understanding of light and shadow and human structure, and to shape the perspective by applying the characteristics of brushes and layers. This course is divided into two parts. The first part is to get familiar with the basic operation process of bust of a figure, and the second is the whole figure and its basic knowledge that we need to know about. The learning process will start with how to find the appropriate practice materials, how to compose a figure and how form arrange the composition. Then we will continue to extract the skeleton of the character, find the key structure point of the face and the body to be the reference of the sketch. Then we will finish the gray level by using the color blocks, and analyze how to draw the facial features and the body, and finally coloring the picture after the gray level.

Content: HD Videos + Project Files
Duration: About 12 hours
Software: Adobe Photoshop 2020
System: Graphics tablet,and any devices that can run Photoshop CC.
Project file: References, Photoshop brushes and Photoshop project files.


wingfoxappliedillustrmzi1q.jpg


Download from RapidGator


Download from Keep2Share
 
3Dsmax 2016 & Substance Painter For Videogame Production

xvcjspzjmzcnbureyus0yuhdyx.jpg


3Dsmax 2016 & Substance Painter For Videogame Production
Last updated 11/2015
MP4 | Video: h264, 1920x1080 | Audio: AAC, 44.1 KHz
Language: English | Size: 21.40 GB | Duration: 17h 33m

Start your 3D Artist career today and learn how to create top quality game art with the help of a Senior 3D Artist.


What you'll learn
Learn and apply all aspects of creating high quality game art.
Understand 3Ds Max with the Basics & Beyond Chapter and be able to model and unwrap efficiently in the following hours featuring the AKM.
Create textures as close to photorealism as possible for video game standards with Substance Painter.
Make your portfolio shine by creating renders with Marmoset Toolbag 2 and post process them in Photoshop to get that extra edge out of it.
Final high-poly AKM .OBJ file for reference; 7.62 cartridge .OBJ / Max file for reference; Essential reference images; Pivot Script for 3Ds Max; My shortcut file for 3Ds Max Checker-pattern texture for unwrapping; Procedural wood substance for texturing; Diamond pattern normal map
Requirements
It is recommended to follow the course with the same software that you'll see in the video: 3Ds Max, Photoshop, Substance Painter and Marmoset Toolbag 2.
The modeling part of the tutorial makes heavy use of the "chamfer" modifier which is only available in 3Ds Max 2015 and 2016. If you have an older versions of 3Ds Max you can instead google for a third party modifier called "quad chamfer".

Description
Are you thinking about a 3D artist career in the video game industry? This tutorial will help you understand and apply all aspects of creating high quality game art. Learn 3Ds Max with the Basics & Beyond Chapter and how to model and unwrap efficiently in the following hours featuring the AKM. Create textures as close to photo realism as possible with Substance Painter and make the portfolio shine by creating renders with Marmoset Toolbag 2. At the end we are going to post process those renders in Photoshop to get that extra edge out of it. This Course has it all.Software used: 3Ds Max 2016, Photoshop, Substance Painter and Marmoset Toolbag 2.Important: the modeling part of the tutorial makes heavy use of the "chamfer" modifier which is only available in 3Ds Max 2015 and 2016. If you have an older version of 3Ds Max you can instead google for a third party modifier called "quad chamfer".
Overview
Section 1: 3Ds Max 2016 - Basics & Beyond
Lecture 1 3Ds Max 2016 - Basics & Beyond - Part 1
Lecture 2 3Ds Max 2016 - Basics & Beyond - Part 2
Lecture 3 3Ds Max 2016 - Basics & Beyond - Part 3
Lecture 4 3Ds Max 2016 - Basics & Beyond - Part 4
Section 2: AKM - 3Ds Max 2016 - Modeling
Lecture 5 AKM - Modeling - Chapter 1 - Part 1
Lecture 6 AKM - Modeling - Chapter 1 - Part 2
Lecture 7 AKM - Modeling - Chapter 1 - Part 3
Lecture 8 AKM - Modeling - Chapter 1 - Part 4
Lecture 9 AKM - Modeling - Chapter 1 - Part 5
Lecture 10 AKM - Modeling - Chapter 2 - Part 1
Lecture 11 AKM - Modeling - Chapter 2 - Part 2
Lecture 12 AKM - Modeling - Chapter 2 - Part 3
Lecture 13 AKM - Modeling - Chapter 2 - Part 4
Lecture 14 AKM - Modeling - Chapter 2 - Part 5
Lecture 15 AKM - Modeling - Chapter 3 - Part 1
Lecture 16 AKM - Modeling - Chapter 3 - Part 2
Lecture 17 AKM - Modeling - Chapter 3 - Part 3
Lecture 18 AKM - Modeling - Chapter 3 - Part 4
Lecture 19 AKM - Modeling - Chapter 3 - Part 5
Lecture 20 AKM - Modeling - Chapter 4 - Part 1
Lecture 21 AKM - Modeling - Chapter 4 - Part 2
Lecture 22 AKM - Modeling - Chapter 4 - Part 3
Lecture 23 AKM - Modeling - Chapter 4 - Part 4
Lecture 24 AKM - Modeling - Chapter 4 - Part 5
Lecture 25 AKM - Modeling - Chapter 5 - Part 1
Lecture 26 AKM - Modeling - Chapter 5 - Part 2
Lecture 27 AKM - Modeling - Chapter 5 - Part 3
Lecture 28 AKM - Modeling - Chapter 5 - Part 4
Section 3: AKM - 3Ds Max 2016 - Unwrapping
Lecture 29 AKM - Unwrapping - Chapter 1 - Part 1
Lecture 30 AKM - Unwrapping - Chapter 1 - Part 2
Lecture 31 AKM - Unwrapping - Chapter 1 - Part 3
Lecture 32 AKM - Unwrapping - Chapter 1 - Part 4
Lecture 33 AKM - Unwrapping - Chapter 1 - Part 5
Lecture 34 AKM - Unwrapping - Chapter 2 - Part 1
Lecture 35 AKM - Unwrapping - Chapter 2 - Part 2
Lecture 36 AKM - Unwrapping - Chapter 2 - Part 3
Lecture 37 AKM - Unwrapping - Chapter 2 - Part 4
Lecture 38 AKM - Unwrapping - Chapter 2 - Part 5
Lecture 39 AKM - Unwrapping - Chapter 3 - Part 1
Lecture 40 AKM - Unwrapping - Chapter 3 - Part 2
Lecture 41 AKM - Unwrapping - Chapter 3 - Part 3
Lecture 42 AKM - Unwrapping - Chapter 3 - Part 4
Lecture 43 AKM - Unwrapping - Chapter 3 - Part 5
Lecture 44 AKM - Unwrapping - Chapter 4 - Part 1
Lecture 45 AKM - Unwrapping - Chapter 4 - Part 2
Lecture 46 AKM - Unwrapping - Chapter 4 - Part 3
Lecture 47 AKM - Unwrapping - Chapter 4 - Part 4
Lecture 48 AKM - Bake Preparation - Chapter 5 - Part 1
Lecture 49 AKM - Bake Preparation - Chapter 5 - Part 2
Lecture 50 AKM - Bake Preparation - Chapter 5 - Part 3
Lecture 51 AKM - Bake Preparation - Chapter 5 - Part 4
Section 4: AKM - Substance Painter - Texturing
Lecture 52 AKM - Substance Painter - Texturing - Chapter 1 - Part 1
Lecture 53 AKM - Substance Painter - Texturing - Chapter 1 - Part 2
Lecture 54 AKM - Substance Painter - Texturing - Chapter 1 - Part 3
Lecture 55 AKM - Substance Painter - Texturing - Chapter 1 - Part 4
Lecture 56 AKM - Substance Painter - Texturing - Chapter 1 - Part 5
Lecture 57 AKM - Substance Painter - Texturing - Chapter 2 - Part 1
Lecture 58 AKM - Substance Painter - Texturing - Chapter 2 - Part 2
Lecture 59 AKM - Substance Painter - Texturing - Chapter 2 - Part 3
Lecture 60 AKM - Substance Painter - Texturing - Chapter 2 - Part 4
Section 5: AKM - MarmoSet Toolbag 2 - Rendering
Lecture 61 AKM - MarmoSet Toolbag 2 - Rendering - Part 1
Lecture 62 AKM - MarmoSet Toolbag 2 - Rendering - Part 2
Lecture 63 AKM - MarmoSet Toolbag 2 - Rendering - Part 3
Lecture 64 AKM - MarmoSet Toolbag 2 - Rendering - Part 4
A bit of knowledge in 3D modeling is prefered but thanks to the introduction video we cover all the important basics here as well.,Anyone who is willing to spend hard work to create top quality game art as you would see it in a modern first person shooter video game.


3dsmax2016substancepatke4q.jpg


Download from RapidGator


Download from Keep2Share


Blues Piano & Improvisation - The Next Level - Slow Blues!

3japn8mbvl4macih3pnsm78fxw.jpg


Blues Piano & Improvisation - The Next Level - Slow Blues!
Last updated 10/2022
MP4 | Video: h264, 1280x720 | Audio: AAC, 44.1 KHz
Language: English | Size: 6.02 GB | Duration: 5h 4m

Improvise Blues Piano in the "Slow Blues" Style | An early to advanced Blues Piano Course


What you'll learn
How to play "Slow Blues" style piano
How to improvise Blues piano fluently
Learn a wealth of blues licks, riffs, scales and techniques
Upon completing the course you will be also be able to play five Blues piano pieces
Improve your hand and finger coordination with the vast amount of exercises
Improve your timing/ability to play with an even tempo with the use of the blues backing tracks
Requirements
Not for beginners! You must understand piano basics such as key names, basic rhythm and be able to play simple chords.
An understanding of how to read music notation would give you an advantage, but not required.
An understanding of basic blues concepts is preferable not essential.
A keyboard or piano.

Description
Take your blues piano playing to the next level with this course on blues piano and improvisation in the slow blues style! Beginning with a basic slow blues progression, it methodically builds your skills all the way to being able to freely improvise impressive blues piano. Throughout you'll accumulate a wealth of licks, riffs and techniques that will have you creating blues sounds in a way that you've always wanted to!Systematic Approach - The strength of the course comes from the systematic approach to implementing of every aspect or skill, with exercises that enable you to easily integrate your new abilities fluently into your improvisations.Practice Pieces - It's important to have the opportunity to put your new skills into practice. Which is why there are also specially designed blues pieces that incorporate every you're learning as you progress, culminating in a final blues tune that shows off everything you've learnt in the course.50+ Sheet Music Downloads - Everything in the course has been notated for those that can read music, with over 50 PDF downloads available!Music Reading Ability Not Essential - You don't need to be able to read music notation to take this course. Every scale, lick, riff, technique, exercise and practice piece is broken down and talked through during the video lessons by the instructor, for students that prefer to copy and play by ear. The tutorials include highlighted keyboard graphics, and the notation within the videos also include the note names (inside the note heads) for anyone that may find it useful.Improvisation - Improvising is at the heart of Blues piano, which is why the course has a core focus on giving you the skills to be able to fluently improvise using a step-by-step approach.Backing Track Downloads - So you can have even more fun whilst learning and playing the blues, the course also has backing tracks so you can play along to a blues band sound in the comfort of your own home.Bonus eBook - Everyone learns differently, which is why as an added bonus the course includes an eBook that you can download and print off, to further enhance the learning process.Not For Complete Beginners - This course is not for beginners and assumes some previous knowledge on the piano, although it is still suitable for pianists that may be early on in their piano learning journey, because it starts with a gentle approach, and methodically builds to advanced levels as you move through.START TODAY - So if you want to have fun improvising smooth blues piano right off the top of your head, then sign up, and start playing today!
Overview
Section 1: Introduction
Lecture 1 Introduction
Lecture 2 Course Navigation
Lecture 3 Bonus eBook Download
Lecture 4 The C Minor Blues Scale
Lecture 5 The C Minor Blues Scale (Supplement)
Lecture 6 A Quick Improv
Lecture 7 A Quick Improv (Supplement)
Lecture 8 The Basic Left Hand Chords
Lecture 9 The Basic Left Hand Chords (Supplement)
Lecture 10 Minor Blues Scale Exercise - Triplet Eighths (Simple Left Hand)
Lecture 11 Minor Blues Scale Exercise - Triplet Eighths (Supplement)
Lecture 12 Minor Blues Scale Exercise - Triplet Eighths with Backing Track
Lecture 13 A Quick Tip on Playing Along to Tracks
Lecture 14 Minor Blues Scale Exercise - Swung Eighths (Basic Left Hand Chords)
Lecture 15 Minor Blues Scale Exercise - Swung Eighths (Supplement)
Lecture 16 Minor Blues Scale Exercise - Swung Eighths with Backing Tracks
Lecture 17 Thoughts on Practice
Lecture 18 Mixing Up the Rhythms & Improvising
Lecture 19 Mixing Up the Rhythms & Improvising
Lecture 20 Minor Blues Scale Exercise - Alternating Rhythms (Basic Left Hand Chords)
Lecture 21 Minor Blues Scale Exercise - Alternating Rhythms (Supplement)
Lecture 22 Including the Sustain Pedal
Lecture 23 Jumping Left Hand Pattern
Lecture 24 Jumping Left Hand Pattern (Supplement)
Lecture 25 Easy Left Hand Version (Without the Jumps)
Lecture 26 Easy Left Hand Version (Without the Jumps) - (Supplement)
Lecture 27 Minor Blues Scale Exercise (Jumping Left Hand) Triplet Eighths
Lecture 28 Minor Blues Scale Exercise (Jumping Left Hand) Triplet Eighths - (Supplement)
Lecture 29 Minor Blues Exercise - Triplet Eighths - Simplified Left Hand (Without Jumps)
Lecture 30 Minor Blues Exercise - Triplet Eighths - Simplified Left Hand (Supplement)
Lecture 31 Minor Blues Exercise - Swung Eighths with Jumping Left Hand Pattern
Lecture 32 Minor Blues Exercise - Swung Eighths with Jumping Left Hand Pattern (Supplement)
Lecture 33 Minor Blues Exercise - Swung Eighths - Simple Left Hand Pattern (Without Jumps)
Lecture 34 Minor Blues Exercise - Swung Eighths - Simplified Left Hand Pattern
Lecture 35 A Quick Improv - Swung & Triplet Rhythms Over Left Hand Jumping Pattern
Lecture 36 Minor Blues Scale Exercise - Triplet 16ths (with Left Hand Jumping Pattern)
Lecture 37 Minor Blues Scale Exercise - Triplet 16ths (Simplified Left Hand)
Section 2: Building Up the Blues
Lecture 38 Rocking 3rds Riff in C (from the 5)
Lecture 39 Crushed/Slide Notes
Lecture 40 Octave Harmony
Lecture 41 Octave Harmony Exercise - Swung Eighths
Lecture 42 Octave Harmony Exercise - Swung Eighths (Simplified Left Hand)
Lecture 43 What You've Learnt So Far - Etude/Practice Piece
Lecture 44 Building the Improv
Lecture 45 Left Hand Chromatic Transitions & Turnaround Walk-Up
Lecture 46 Left Hand Pattern With Chromatic Transitions & Turnaround Walk-Up
Lecture 47 Turnaround Walk Up in Left Hand (Simple Version)
Lecture 48 Syncopated Rhythms
Section 3: Let's Take It Up A Notch
Lecture 49 Slow Blues Lick 1
Lecture 50 Slow Blues Lick 2
Lecture 51 Slow Blues Lick 1 & 2 Practice Piece - Etude 2
Lecture 52 Chromatic 3rds Turnaround with Octaves
Lecture 53 Chromatic 3rds Turnaround - Easier Variation
Lecture 54 C7 Tremelo Chord Finish
Lecture 55 Blues Licks 1 & 2 - Etude 2 (with Chromatic 3rds Octave Turnaround)
Lecture 56 Progressing in Blues - Etude 3
Lecture 57 Alternating Swung & Triplet Exercise (With Left Hand Chromatic Transitions)
Lecture 58 Octave Harmony Triplet Rhythms Exercise
Section 4: Minor & Major Contrast
Lecture 59 The Major Blues Scale
Lecture 60 Major Blues Scale Exercise - Triplet 8ths
Lecture 61 Major Blues Scale Exercise - Swung 8ths
Lecture 62 Practice Improv Play Along with the Major Blues Scale
Lecture 63 Improvisation - Mixing the Major & Blues Scales
Lecture 64 A Classic Blues Chords Riff
Lecture 65 Classic Blues Chords Rocking Riff Over the Left Hand
Lecture 66 Classic Blues Riff - Playing Around With the Rhythms & Order of the Patterns
Lecture 67 Integrating the Classic Rocking Riffs Into Your Improvising
Lecture 68 Slow Blues Lick 3
Lecture 69 Slow Blues Lick 3 with Left Hand
Lecture 70 Slow Blues Lick 4
Lecture 71 Slow Blues Lick 5
Lecture 72 Slow Blues Lick 5 Extended
Lecture 73 Blues Licks 1-5 in Practice - Etude 4
Lecture 74 It's Improv Time
Lecture 75 A Few Tips on Improvising with Scales
Lecture 76 Slow Blues Lick 6
Lecture 77 Slow Blues Lick 7
Lecture 78 Slow Blues Lick 7 with Left Hand
Lecture 79 Tremelo 3rds
Lecture 80 Octave Blues Scale Solos in Right Hand
Section 5: Putting it All Together
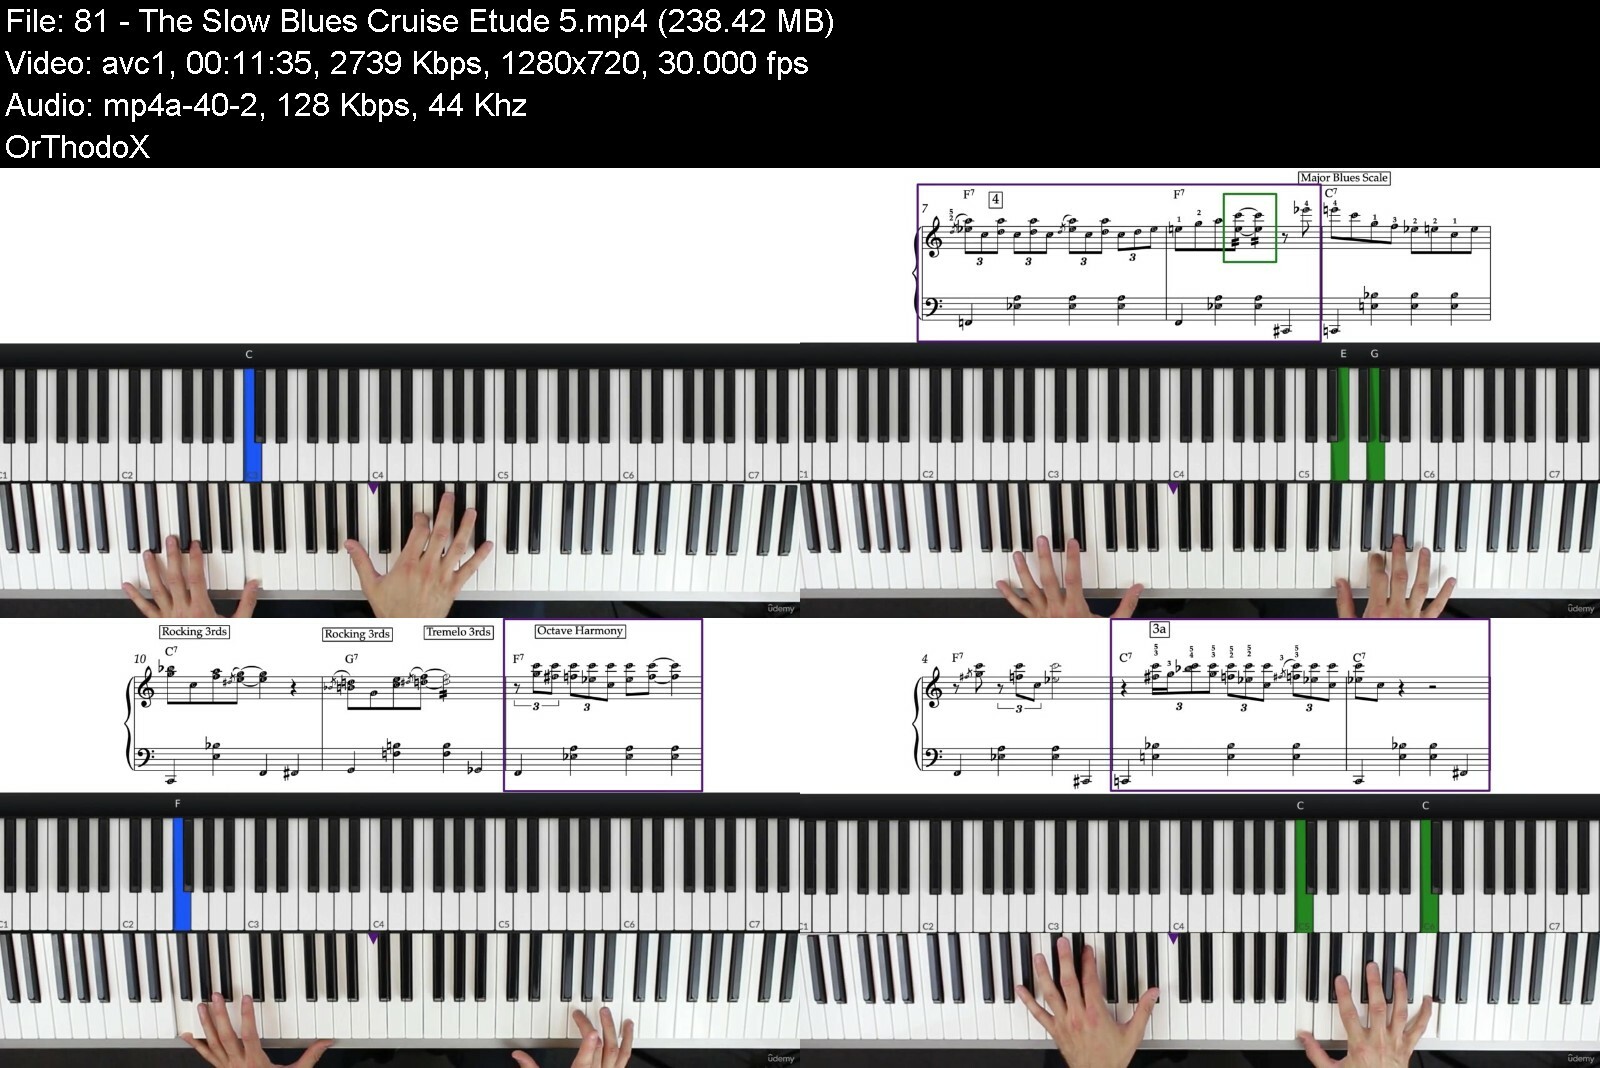
Lecture 81 The Slow Blues Cruise - Etude 5
Lecture 82 The Slow Blues Cruise - Etude 5 - Part 2
Lecture 83 The Slow Blues Cruise - Full Piece Played Slowly (Practice Reference)
Lecture 84 A Short Intro on the Dominant 5th
Lecture 85 Putting it All Together in Improvisation
Lecture 86 Play Along Improv Practice - 45bpm
Lecture 87 Play Along Improv Practice - 60bpm
Lecture 88 It's Over to You
Lecture 89 Alternate Progression - The 8 Bar Blues
Lecture 90 The 8 Bar Blues - Applying Your New Skills
Lecture 91 Closing Thoughts
Blues piano lovers who want to take their blues skills to the next level.,Piano players wanting to learn how to improvise in a smooth slow Blues style.


bluespianoimprovisati0veuy.jpg


Download from RapidGator


Download from Keep2Share


Store Design: How To Design Successful Retail Stores

uhhlxpxokaabgpl1m8vfglzfyi.jpg


Store Design: How To Design Successful Retail Stores
Last updated 10/2020
MP4 | Video: h264, 1920x1080 | Audio: AAC, 44.1 KHz
Language: English | Size: 6.93 GB | Duration: 3h 39m

Everything you need to know to create effective brick & mortar retail stores: Image, Display, Storefront, and Lighting.


What you'll learn
Design or evaluate any type of retail store, in any location using the tools and techniques presented in this Store Design course. You will learn how to convert your client's image of the store into a three-dimensional reality show. To do this you will learn product presentation, store planning, storefront design and the special requirements of retail lighting.
This course is best suited for people who are designers, retailers, or real estate executives who can use this new knowledge to design a store or evaluate a retail store design. Architectural or interior design students can use the course as a basis for school projects. This course is only intended for "brick and mortar" stores, and is not for the design of on-line stores.
Requirements
No special materials or software are required for this course. However, it would be a good idea, for 2 or 3 days, to take special notice of retail stores you encounter in your everyday activities before starting the course. Identify the designs you think are effective and pleasing, and those that fail. And if possible, come to some conclusions as to why they succeed or fail. This focus will get you ready to take the course. See you soon.
Optionally, you may wish to purchase the companion book to this course, STORE DESIGN: A Complete Guide to Designing Retail Stores. This book is available at all on-line book retailers, or usually by special order at local brick-and-mortar bookstores. While it is not a required element of this course, it would be a useful tool for understanding the store design process and as a handy summary reference.

Description
Store Design is an informative, stimulating course that provides everything you need to design retail stores. You will create stores that establish a strong image, attract shoppers, and motivate buying...in short, well-conceived designs...that sell. NOTE: Before you purchase this course, please understand this course is not a substitute for practical experience or knowledge in the world of design and construction. To use this course successfully, other than to just gain a better understanding of this interesting and distinctive design field, you will have to have basic architectural/interior design knowledge and/or experience.
You will gain a comprehensive knowledge of what makes a successful retail store design, and the pitfalls to avoid.
Determine the correct image for your storeDesign a sensible, logical floor planCreate totally effective product presentationDesign storefronts that attract, sell and reinforce the store imageDesign vibrant and effective lighting
Store Design is your guided tour through the entire retail design process.
Design fast and effectively and explain the reasons for your design decisions. Take the mystery out of the process. The axiomatic elements of the design of stores are presented in simple diagrams with straight-forward language. It's a structured process leading to design success. Of course, you are still the designer. This comprehensive course is your toolkit to use to increase your abilities and critical perception.
The skills of a store designer are always in demand. This is an exciting, edgy, and never-boring area of work. The store design process moves quickly, and it's full of theater and fun. Unlike other project types which may take years to complete, the products of your imagination in retail will be revealed in a matter of weeks.
After you complete the course, you will have the confidence to know that your store design will work functionally, aesthetically, and psychologically. You will always create the right concept for every product, every location, and every retailer, because you will have sound design principles on which to base every decision. Take the course: broaden your skills, become more marketable, and have fun creating cutting-edge retail stores. You'll be amazed how fast you can become an expert in the exciting field of retail store design.
Overview
Section 1: WELCOME TO STORE DESIGN
Lecture 1 Introduction to Store Design
Lecture 2 What makes retail design so exciting?
Lecture 3 Course overview
Lecture 4 My background
Section 2: IDENTIFYING YOUR STORE'S IMAGE
Lecture 5 The critical importance of creating the proper image for your store.
Lecture 6 Turning "shoppers" into "customers". Activating the action-triggers of success.
Lecture 7 Reinforcing the store image with lines and shapes.
Lecture 8 Enriching the store image with sensory input.
Section 3: ORGANIZING YOUR SPACE
Lecture 9 The functional elements of a store layout.
Lecture 10 Product Organization
Section 4: DESIGNING HIGH-IMPACT PRODUCT DISPLAYS
Lecture 11 The three elements of product display
Lecture 12 Product qualities: Size, Class, Price
Lecture 13 Display techniques: Presentation, Product support and Integration
Lecture 14 Display fixture properties: Customer access, Product support, Fixture types
Section 5: THE STOREFRONT TELLS THE STORY OF YOUR STORE
Lecture 15 An overview of storefront design.
Lecture 16 The three components of storefront design.
Lecture 17 Storefront elements: Display, Transitional, and Identification
Section 6: LIGHTING - THE FROSTING ON THE CAKE
Lecture 18 An overview of store lighting
Lecture 19 Lighting task areas
Lecture 20 Lighting criteria: Color
Lecture 21 Lighting criteria: Modeling
Lecture 22 Lighting criteria: Brightness
Lecture 23 An overview of lighting sources
Lecture 24 Lighting sources: Lamps
Lecture 25 Lighting sources: Fixtures
Lecture 26 Lighting sources: Location
Section 7: Putting the toolkit into action
Lecture 27 Your store design
Lecture 28 BONUS: Storefront Signs


storedesignhowtodesigd5elz.jpg


Download from RapidGator


Download from Keep2Share


Adobe Premiere Pro 2022: The comprehensive A-Z course

4887008e2b02ued9h.jpg


Adobe Premiere Pro 2022: The comprehensive A-Z course
Published 10/2022
MP4 | Video: h264, 1280x720 | Audio: AAC, 44.1 KHz, 2 Ch
Genre: eLearning | Language: English | Duration: 46 lectures (5h 59m) | Size: 5.1 GB


Become a Premiere Pro-fessional with the help of exciting project examples! Includes video material and handout


What you'll learn
You'll learn and understand the Premiere Pro user interface and workspaces.
You'll learn to import media, create sequences and use the editing tools effectively.
You'll learn to create engaging texts, keyframe and animate them along with other elements of your sequences.
You'll add fascinating effects to your videos, understand masks and learn how to work with green screen.
You'll get to know the possibilities of simple, as well as highly professional color editing of video clips with the help of realistic examples.
You'll comprehend several ways to adjust playback speeds and directions.
You'll have fun collaborating with exciting project examples: Create your own Youtube channel intro, stabilize shaky drone video, edit trailer voice and more.
You'll highlight different project and render settings to get the most out of your videos, depending on what you're looking to achieve.
You'll discover how to link Premiere Pro with other products in the Adobe suite, such as After Effects, to work as efficiently as possible.
You'll learn about optional useful plug-ins and extras to take your video editing to the next level.
You'll receive a handout with the most important keyboard shortcuts for quick and lasting use.
You'll have access to professional video footage for your own collaboration, which I have recorded for this course by drone and GoPro.
Requirements
You should have a relatively powerful PC or laptop with Internet access.
You should be aware that this course provides you with all the tools and knowledge you need to understand Adobe Premiere Pro in theory. In order to memorize this knowledge, it is recommended for you to open Premiere Pro while watching, work along and pause the videos again and again in between.
Description
Are you interested in video editing and want to be able to create professional productions for social media, TV, and more? Then there's no getting around the industry standard Adobe Premiere Pro.
Of course, in a basic section, you'll learn about the user interface, workspaces, preferences and tools. I'll also show you how to create exceptional text, animate your elements with keyframes, how masks and green screen can lead to even better videos and how highly professional color edits can take your sequences to the next level.
Throughout the course, we'll use fascinating project examples that encourage you to get involved and reinforce the knowledge you've learned in a practical way. For example, we'll create our own Instagram reel and Youtube intro, stabilize a shaky drone video, turn our own voice into a deep trailer voice, track objects, and much more.
I'll also show you how to link Premiere Pro with other Adobe products like After Effects, how to create your own presets, we'll consider the best render settings for your individual project and we'll go over useful external sources and templates.
For you, there's not only a handout with the most important keyboard shortcuts, but also downloadable video footage that I shot via drone, among other things, for this course to collaborate on.
So this one is a real A-Z masterclass on Premiere Pro!
If you are passionate about video creation and want to learn and understand Adobe Premiere Pro, the most professional and intuitive program available, then this course might be for you. If you are willing to use realistic examples to apply your knowledge to projects in a way that will stick with you, then this course is definitely for you!
Enroll today - I am confident that I can repay your trust in me with content and I look forward to sharing my enthusiasm for Premiere Pro with you!
...Regardless of that, I'm always available for questions, comprehension problems or suggestions in the comment section or via private message.
Who this course is for
Premiere Pro newcomers who want to build comprehensive knowledge and understanding in a complete course.
Premiere Pro advanced users who want to learn even more about techniques and effects in a variety of use cases to further improve their workflow.


adobepremierepro2022tjmchw.jpg


Download from RapidGator


Download from Keep2Share


Cyber Security For Beginners v2023

4838162f860nzi2y.jpg


Cyber Security For Beginners v2023
Published 10/2022
MP4 | Video: h264, 1280x720 | Audio: AAC, 44.1 KHz, 2 Ch
Genre: eLearning | Language: English | Duration: 241 lectures (20h 54m) | Size: 7.4 GB


Learn System Hacking, Wi-Fi Hacking, Mobile Hacking, Website Hacking, Linux and much more


What you'll learn
Learn Cyber Security from scratch
All Important topics of Ethical Hacking are covered
Get MS-Word Short Course for Free
Basics of Linux Included
Requirements
No Prerequisites
Description
Learn Cyber Security from Scratch. Learn cybersecurity strategies that prevents unauthorized access to organizational assets such as computers, networks, and data. It maintains the integrity and confidentiality of sensitive information, blocking the access of sophisticated hackers.
Learn to Protect the network, its infrastructure and all its traffic from external cyberattacks. Protect all IT assets and resources available via the network from unauthorized access. Ensure authorized users have adequate access to these network IT assets and resources to effectively perform work.
Learn to create Malware, Trojans, Viruses and how to protect your system and other devices.
Your website or web application's security depends on the level of protection tools that have been equipped and tested on it. There are a few major threats to security which are the most common ways in which a website or web application becomes hacked. Some of the top vulnerabilities for all web-based services include
SQL injection
Cross-site scripting
Preventing these common threats is the key to making sure that your web-based service is practicing the best methods of security.
Anyone who is interested in learning about cyber security may join this course. You will learn all topics from basics to advanced in this single course only.
Learn strategies and tools that secure mobile devices against security threats. Although mobile security components vary based on each company's needs, mobile security always involves authenticating users and restricting network access.
Who this course is for
Anyone who is interested to learn about Cyber Security


cybersecurityforbeginuiipy.jpg


Download from RapidGator


Download from Keep2Share


Summit Ignite - Skills to Conquer Your Business Mountain

4852538a0b322udom.jpg


Summit Ignite - Skills to Conquer Your Business Mountain
Published 10/2022
MP4 | Video: h264, 1280x720 | Audio: AAC, 44.1 KHz, 2 Ch
Genre: eLearning | Language: English | Duration: 16 lectures (13h 10m) | Size: 13.2 GB


How to Grow Your Business[Entrepreneurship 101]


What you'll learn
Building up your audience
​Increasing your traffic
Converting traffic into sales
​Analyzing your competition
​Building a strong team
Requirements
no experience required
Description
Discover how to grow and scale your business beyond your income expectations, even if you're just starting out!
Tired of spinning your wheels and getting nowhere in your business?
Here, You WILL Expand Your Business With The Secrets Shared By Our 15 World-Class Business Experts!
INSIDE YOU WILL GET
15 sales expert interviews
So you can ➔ Maximize your sales success
Audio downloads
So you can ➔ easily listen while you're on the run
Important notes from each interview
So you can ➔ Focus on listening and not note-taking
Easy to remember graphics
So you can ➔ Reference our 2 proprietary methods quickly
Every SUMMIT IGNITE speaker has "been there and done that." We've stripped away the theory you can get anywhere and replaced it with the real secrets and strategies you need for success. The success topics covered include
Building up your audience
​Increasing your traffic
​Converting traffic into sales
​Analyzing your competition
​Building a strong team
and so much more
Here are a few secrets our speakers will be revealing
The #1 skill to build in order to get your target customers to buy from you...
The quickest way to find influencers who will promote your offer to their followers...
How every entrepreneur can get a $100k business credit without walking into a bank...
The two ways to run your business: the way you're doing it now, and the SMART way...
How to convert buyers into raving fans that will be your brand's "evangelists"...
Who this course is for
Entry to Mid-level Entrepreneurs and Business Owners


summitigniteskillstoceoiur.jpg


Download from RapidGator


Download from Keep2Share


Zurück
Oben Unten