

• Regeln für den Video-Bereich:

    In den Börsenbereich gehören nur Angebote die bereits den Allgemeinen Regeln entsprechen.

    Einteilung

    - Folgende Formate gehören in die angegeben Bereiche:
    - Filme: Encodierte Filme von BluRay, DVD, R5, TV, Screener sowie Telesyncs im Format DivX, XviD und x264.
    - DVD: Filme im Format DVD5, DVD9 und HD2DVD.
    - HD: Encodierte Filme mit der Auflösung 720p oder darüber von BluRay, DVD, R5, TV, Screener sowie Telesyncs im Format x264.
    - 3D: Encodierte Filme von BluRay, die in einem 3D Format vorliegen. Dies gilt auch für Dokus, Animation usw.
    - Serien: Cartoon/Zeichentrick, Anime, Tutorials, Dokumentationen, Konzerte/Musik, Sonstiges sind demnach in die entsprechenden Bereiche einzuordnen, auch wenn sie beispielsweise im High Definition-Format oder als DVD5/DVD9/HD2DVD vorliegen. Ausnahme 3D.
    - Bereich Englisch: Englische Releases gehören immer in diesen Bereich.
    - Bereich Talk: Der Bereich, in dem über die Releases diskutiert werden kann, darf, soll und erwünscht ist.


    Angebot/Beitrag erstellen

    - Ein Beitrag darf erst dann erstellt werden, wenn der Upload bei mindestens einem OCH komplett ist. Platzhalter sind untersagt.
    - Bei einem Scenerelease hat der Threadtitel ausschließlich aus dem originalen, unveränderten Releasenamen zu bestehen. Es dürfen keine Veränderungen wie z.B. Sterne, kleine Buchstaben o.ä. vorgenommen werden. Ausnahme Serienbörse:
    - Bei einem Sammelthread für eine Staffel entfällt aus dem Releasename natürlich der Name der Folge. Beispiel: Die Simpsons S21 German DVDRip XviD - ITG
    - Dementsprechend sind also u.a. verboten: Erweiterungen wie "Tipp", "empfehlenswert", "only", "reup", usw. / jegliche andere Zusatzinformation oder Ergänzung, welche nicht in obiger Beschreibung zu finden ist.

    Aufbau des Angebots und Threadtitel

    Der Titel nach folgendem Muster erstellt zu werden. <Name> [3D] [Staffel] [German] <Jahr> <Tonspur> [DL] [Auflösung] <Quelle> <Codec> - <Group>
    Beispiel: The Dark Knight German 2008 AC3 DVDRip XviD - iND
    Beispiel: The Dark Knight 2008 DTS DL BDRip x264 - iND
    Beispiel: The Dark Knight 2008 AC3 DL BDRip XviD - iND
    Beispiel: The Dark Knight German 2008 AC3 720p BluRay x264 iND
    Beispiel: The Dark Knight 2008 DTS DL 1080p BluRay x264 iND
    Beispiel: Die Simpsons S01 German AC3 DVDRip XviD iND
    Beispiel: Die Simpsons S20 German AC3 720p BluRay x264 iND
    Beispiel: Sword Art Online II Ger Sub 2014 AAC 1080p WEBRip x264 - peppermint
    Entsprechend sind also u.a. verboten: Sonderzeichen wie Klammern, Sterne, Ausrufezeichen, Unterstriche, Anführungszeichen / Erweiterungen wie "Tipp", "empfehlenswert", "only", "reup", usw. / jegliche andere Zusatzinformation oder Ergänzung, welche nicht in obiger Beschreibung zu finden ist
    Ausnahmen hiervon können in den Bereichen geregelt sein.

    Die Beiträge sollen wie folgt aufgebaut werden:
    Überschrift entspricht dem Threadtitel
    Cover
    kurze Inhaltsbeschreibung
    Format, Größe, Dauer sind gut lesbar für Downloader außerhalb des Spoilers zu vermerken
    Nfo sind immer Anzugeben und selbige immer im Spoiler in Textform.
    Sind keine Nfo vorhanden z.B. Eigenpublikationen, sind im Spoiler folgende Dateiinformationen zusätzlich anzugeben :
    Quelle
    Video (Auflösung und Bitrate)
    Ton (Sprache, Format und Bitrate der einzelnen Spuren)
    Untertitel (sofern vorhanden)
    Hosterangabe in Textform außerhalb eines Spoiler mit allen enthaltenen Hostern.
    Bei SD kann auf diese zusätzlichen Dateiinformationen verzichtet werden.

    Alle benötigten Passwörter sind, sofern vorhanden, in Textform im Angebot anzugeben.
    Spoiler im Spoiler mit Kommentaren :"Schon Bedankt?" sind unerwünscht.


    Releases

    - Sind Retail-Release verfügbar, sind alle anderen Variationen untersagt. Ausnahmen: Alle deutschen Retail-Release sind CUT, in diesem Fall sind dubbed UNCUT-Release zulässig.
    - Im Serien-Bereich gilt speziell: Wenn ein Retail vor Abschluss einer laufenden Staffel erscheint, darf diese Staffel noch zu Ende gebracht werden.62
    - Gleiche Releases sind unbedingt zusammenzufassen. Das bedeutet, es ist zwingend erforderlich, vor dem Erstellen eines Themas per Suchfunktion zu überprüfen, ob bereits ein Beitrag mit demselben Release besteht. Ist dies der Fall, ist der bereits vorhandene Beitrag zu verwenden.
    - P2P und Scene Releases dürfen nicht verändert oder gar unter einem iND Tag eingestellt werden.


    Support, Diskussionen und Suche

    - Supportanfragen sind entweder per PN oder im Bereich Talk zu stellen.
    - Diskussionen und Bewertungen sind im Talk Bereich zu führen. Fragen an die Uploader haben ausschließlich via PN zu erfolgen, und sind in den Angeboten untersagt.
    - Anfragen zu Upload-Wünschen sind nur im Bereich Suche Video erlaubt. Antworten dürfen nur auf Angebote von MyBoerse.bz verlinkt werden.


    Verbote

    - Untersagt sind mehrere Formate in einem einzigen Angebotsthread, wie beispielsweise das gleichzeitige Anbieten von DivX/XviD, 720p und 1080p in einem Thread. Pro Format, Release und Auflösung ist ein eigener Thread zu eröffnen.
    - Grundsätzlich ebenso verboten sind Dupes. Uploader haben sich an geeigneter Stelle darüber zu informieren, ob es sich bei einem Release um ein Dupe handelt.
    - Gefakte, nur teilweise lauffähige oder unvollständige Angebote sind untersagt. Dies gilt auch für eigene Publikationen, die augenscheinlich nicht selbst von z.B. einer DVD gerippt wurden. Laufende Serien, bei denen noch nicht alle Folgen verfügbar sind, dürfen erstellt und regelmäßig geupdatet werden.
    - Untersagt sind Angebote, welche nur und ausschließlich in einer anderen Sprache als deutsch oder englisch vorliegen. Ausnahmen sind VORHER mit den Moderatoren zu klären.


    Verstoß gegen die Regeln

    - Angebote oder Beiträge, die gegen die Forenregeln verstoßen, sind über den "Melden"-Button im Beitrag zu melden.
  • Bitte registriere dich zunächst um Beiträge zu verfassen und externe Links aufzurufen.

*** Bestes IPTV *** bester Preis *** gratis Test ***


Englische Tutorials

nZJ8yJEwzZcAyF7d5ucd9ehIpmXrpJ4v.jpg

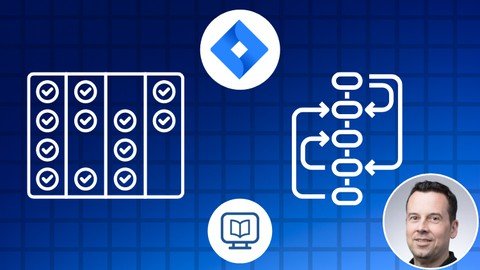
Practical JIRA Workflows and Boards for Scrum Projects
Genre: eLearning | MP4 | Video: h264, 1280x720 | Audio: AAC, 44.1 KHz
Language: English | Size: 1.33 GB | Duration: 3h 39m
Scrum masters, product managers and project managers hands-on guide to boards and workflows in JIRA Scrum projects

What you'll learn
Create and configure Jira workflows and workflow schemes.
Understand and utilize workflow components (statuses, transitions, resolutions, post functions, properties, triggers, conditions, validators).
Create and configure Jira boards.
Understand and utilize board settings (filters, columns, swim-lanes, issue card customizations).
Use boards' Backlog Screen to prioritize work and plan and create sprints.
Manage sprints using Active Sprints screen.
Understand specifics and differences between Scrum and Kanban boards
Use Jira roadmaps to manage project timelines.
Use Jira reports to monitor sprints and project progress (Burndown and Burnup Charts. Sprint Report, Velocity Chart, Cumulative Workflow Diagram).
Monitor and manage work using Jira mobile app.
Requirements
Basic understanding of JIRA. All prerequisites are covered in my free Udemy course "Atlassian Jira and Scrum Fundamentals for Beginners 2021".
Description
Welcome to the Practical Jira Workflows and Boards for Scrum Projects course. In this course you will learn everything there is to know about Jira workflows and Jira boards, how they work hand in hand, how to configure them to suit your needs and how to use them to improve the efficiency and transparency of your work process.
By the end of the course while working along and creating the project's workflows and boards, you will learn and use
Components of Jira workflows
statuses,
transitions,
resolutions,
transition screens,
triggers,
conditions,
validators,
post functions
properties
Components of Jira boards
board filters
columns
quick filters
card colors
card layout
estimation
roadmap view
Core Jira reports
Burnup Chart
Burndown Chart
Sprint Report
Velocity Chart
Cumulative Workflow Diagram
WHY TAKE THE COURSE
Increase transparency, accountability, and productivity of the team using workflows and boards optimized for your Scrum project.
Earn stakeholders and team trust by creating and distributing real-time reports from the Jira report library.
Learn skills that very few Jira users possess.
STRUCTURE OF THE COURSE
Course Project - This whole course revolves around a single Jira configuration project which requires two workflows and three boards. Completion of the project scope requires the usage of every workflow component and every board component.
Workflows and Schemes Concepts - Deep dive into concepts of workflows schemes, what are they, why they exist and how should they be used.
Workflow Components - Comprehensive review of all workflow components (statuses, transitions, resolutions, transition screens, triggers, conditions, validators, post function, properties).
Board Concepts - Detailed summary of Jira board concepts, what are they and what are the benefits of using them.
Board Components and Settings - Detailed review of all board screens and components (Backlog, Active Sprints and Reports screens, board filters, columns, quick filters, card colors, card layout, estimation, roadmap view).
Reports - Overview of Jira reporting features and thorough review of five core reports: Burndown Chart, Burnup Chart, Sprint Report, Velocity Chart and Cumulative Flow Diagram.
Who this course is for
Scrum Masters looking to optimize boards and workflows for their teams.
Project Managers wanting to get better insights into project progress and problems.
Product Owners desiring to improve how work priorities are communicated to the team.
Developers wishing to optimize how they use Jira in everyday work.
Jira Administrators needing advanced Jira configuration skills.
Screenshots





 
b36v0rHqY0gLTj8gY0MXewnIwOq6j2eF.jpg

Qt 6 C++ GUI Development for Beginners : The Fundamentals
Genre: eLearning | MP4 | Video: h264, 1280x720 | Audio: AAC, 48.0 KHz
Language: English | Size: 11.2 GB | Duration: 18h 53m
Build Cross Platform Desktop Applications and Run Them on Windows, Mac and Linux. Build once, Run Everywhere!

What you'll learn
The fundamentals of working with Qt to build C++ Gui Applications
Working with Qt Widget Classes
Working with Dialog Classes
Using the Qt Resource System
Styling Qt Applications
Working with Networks to fetch HTTP Data
Working with the File System
Model View Architecture
Requirements
Basic knowledge of working with Computers
Open mind and strong willingness to learn how to build Qt C++ Gui applications
Basic understanding of programming will be useful but not required
Description
Welcome to Qt 6 C++ GUI Development for Beginners.
Qt is a cross platform application development framework. It can be used to build Graphical User interfaces that can run on Windows, Mac Linux , mobile platforms like android and ios, even embedded devices.
This course will focus on using Qt Widgets to build robust cross platform desktop applications capable of running well on major desktop Operating Systems like Windows , Mac and Linux.
While Qt Widgets can technically run both on mobile and embedded, it's better and less painful to use QML, another technology provided by the Qt framework. If you want to target mobile and embedded, then please check our courses on QML and Qt Quick. This course doesn't QML , Mobile or embedded!
The course assumes no prior knowledge of Graphical User Interface Development and even provides a C++ refresher crash course for those in need of a helping hand to get up and running with C++ within the Qt environment. By the time you are done with the course, you'll not only be armed with knowledge you could use to build basic to intermediate Graphical user interfaces, but you will also have enough momentum to use the documentation to even learn more on your own. As with my other courses, I use every chance I get to show you how to use the documentation to find solutions on your own and faster.
Let's take a look at the content of the course.
We start with a complete beginner to both C++ and Qt in mind, and we take you through the the process of getting your environment set up on your platform of choice
We do a live install of Qt Creator on Windows
We do a live install of Qt Creator on Linux
We guide you though how you would install Qt Creator on a Mac
We then take you on a tour of the C++ programming language, covering the concepts deemed important to start working with Qt to build your shinny GUI applications. You don't need to be a C++ wizard to start writing your applications using Qt. One of the goals behind Qt itself is to be as easy to use as possible, helping you to focus on your application logic rather than the C++ complex plumbing. This does not mean that you can do with zero C++ knowledge though. That's why we take you on a tour to cover the basic concepts of the language covering topics like
Running your first console application and understanding the main function
Streams that help you write and read data from your C++ applications
Variables and Data Types
Basic C++ Operators and Control flow where among other things you learn about if clauses and loops
Build an app to guess numbers and put together the concepts learned so far
C++ Functions
C++ classes
Building your first Qt C++ GUI Application
Building a GUI Version of your Number guessing game
We then visit the fascinating concept signals and slots in Qt where you learn the most flexible way to respond to events :
We'll explore lambda functions in C++ in general, we'll need them to use their SIGNAL SLOT syntax
We explore different ways to connect signals to slots in Qt
We then do a concept enforcing demo for you to try them out
Next we dive in the Qt Widgets section and visit some of the most important widget classes in Qt :
QWidget
QMainWindow
QMessageBox
QPushButton
QLineEdit
QTextEdit
QLabel
QHBoxLayout, QVBoxLayout, QGridLayout
We visit size policies and stretches and how they help tie the knots in your layouts
QCheckBox and QRadioButton
QList
QComboBox
QListWidget
QTabWidget
QMenu, QToolBar, QAction
Dialogs are explored next , we look at QDialog and how to build your own custom dialog class from scratch , QDialogButtonBox, QMessageBox, QFontDialog, QFileDialog, QInputDialog and how they add a layer of interactivity to your Qt GUI applications.
We then go on and explore how to work with the Qt Resource System , Styling your Qt applications with QStyle, QPalette and Style Sheets, Saving your application settings with QSetting, Working with Files and Directories using QFile and QDir, working with the network capabilities of Qt where we :
See the different classes that are available to work with networks in Qt
Build an application to download web pages in our Qt Applications
Build an application to consume Rest APIs in your Qt Applications
and we wrap up the course looking at the Model View Architecture of the Qt framework where we learn about classes like
QListWidget
QTableWidget
QTreeWidget
QListView
QTableView
QTreeView
QStandardItemModel
QAbstractItemTableModel
QAbstractItemListModel
QStringListModel
and much more!
Qt has quite a huge user base and there are thousands of projects using both open source and commercial, including the one I am using to record this video right now. If you want to build cross platform graphical user interface applications using C++, this course is designed with the skill, patience and depth, needed to get you there as effisciently as possible. Please check out some of the preview videos and let's get you started building cross platform GUI applications using C++ and Qt 6.
Who this course is for
Anyone willing to Build Cross Platform Gui Software using Qt
Complete Beginners
Anyone willing to get a job building Qt Gui Applications
Students and Researchers willing to use Qt Gui features in their projects
Screenshots


8109d8ca-c01c-4d1d-a984-ce5b9be225b6.png

Arduino Object Oriented Programming (Updating)
MP4 | Video: h264, 1280x720 | Audio: AAC, 44.1 KHz, 2 Ch
Genre: eLearning | Language: English + srt | Duration: 65 lectures (6h 21m) | Size: 2.96 GB

Learn how to create Arduino programs using object-oriented programming techniques
What you'll learn
Learn how to program Arduino boards using the Arduino programming language
Understand and use fundamental concepts of object-oriented programming (OOP)
Master advanced features of the Arduino language
Gain a deep understanding of how Arduino works internall
Develop flexible and reliable code with Arduino classes and objects
LEARN HOW TO PROGRAM ROBOTS
Learn Arduino Object Oriented Program
Requirements
focus mind with a little bit of fun
You don't need any technical skills to take this course
willingness to learn
Description
This programming course is an introduction to Arduino Object-Oriented Programming. If you have already programmed using C++ and Object-Oriented Programming, and are ready to start writing Arduino OOP code, this is the place.
I'll demonstrate step-by-step how to correctly rewrite some common Arduino tutorials using the object-oriented approach.
At the end of the lesson, you will receive the entire code so you can then try it out on your own Arduino board.
Course Content Includes the following
Arduino Object-Oriented Programming limitations
Hardware setup
A class for a LED
Class for a Button
Complete Arduino Object Oriented code
Reorganize your Arduino OOP code
Led.h
Led.cpp
Button.h
Button.cpp
Main
Arduino Object Oriented: it's already everywhere
Arduino Object-Oriented Programming limits may apply to Arduino.
Even if Oriented Object Programming with Arduino is possible, you must be aware of the constraints.
The Arduino programming language is essentially a subset of C/C++. You can construct classes, use inheritance, composition, and a variety of other OOP features, but you must
Why you should take this course?
You will learn how to create classes, use inheritance and polymorphism, and write reusable code.
The course is taught by an experienced Arduino instructor who has been teaching Arduino for many years.
Create more complex programs with ease, using methods that you understand-
Get helpful tips and advice from experienced Arduino programmers
List Components
1* Arduino Uno board (Any Arduino board will do)
1* breadboard
4* LEDs (any color you want)
4* 220 Ohm resistors (one for each LED)
1* push button
1* 10k Ohm resistor (for the push button)
A few male-to-male wires
When the button is hit, the tutorial's purpose is to turn on LEDs 1 and 3 and turn off LEDs 2 and 4. When the button isn't touched, we'll perform the polar opposite and turn off LED 1 and 3 while turning on LED 2 and 4.
Do you want to learn more about OOP for Arduino?
Take a look at this comprehensive Arduino OOP course. Sign Up now!
Who this course is for
This course is designed for Arduino users who want to learn how to program in a more object-oriented way.
Arduino geeks
Arduino Hobbyist
Arduino beginners ot Intermediate
anyone who want's to enhance their knowledge in programming
anyone who wan'ts to enhance their knowledge in Arduino
Homepage


b6b4bf1b-8034-48b2-8ea9-9949cb2bcf8e.png

Beginners Guide to Crosshatching Drawing Techniques
Duration: 1h 13m | Video: .MP4, 1280x720, 30 fps | Audio: AAC, 48 kHz, 2ch | Size: 678 MB
Genre: eLearning | Language: English​

Join the crosshatching style artist community of Ankit Jasmatiya by learning this detailed guide for still life drawing for beginners.
Beauty is always lying in lines; all you need is to know how to express them,
Understanding lines and doing shading with lines is always a bigger task. This class is all about understanding expression through lines and finding the still life object. This may be the most efficient way of drawing still life object or even a portrait.
This technique is for those who love to do shading using crosshatching technique. The most amazing property of this technique that it takes less time and you don't need to explore or use so many shading tools, which means it will enhance your control and strength over pencil.
Now let's talk about the three important features of this class
1. Familiarization with pencils and other tools
2. In depth knowledge about Crosshatching and its various types
3. Generating force in line strokes.
3. Understanding lines and its expression in still life artworks
In this class, we are going to explore the various aspects of hatching*like horizontal, vertical, curve or the mixed type hatching. We will also be going to learn about the approaches to drawing any object using observations. Doing the simple practices as mentioned in this class one can easily create any still life object of artworks.
You can also join my already uploaded skillshare classes for better understanding of this topic.
Homepage
Screenshots


f8832c6c-488d-4baa-ac7c-313b6165acb9.png

Best Speed Reading® v3.7 - Learn Read 3x Speed in 14 Days
MP4 | Video: h264, 1280x720 | Audio: AAC, 44.1 KHz, 2 Ch
Genre: eLearning | Language: English + srt | Duration: 64 lectures (1h 33m) | Size: 1.57 GB

Speed Reading - Fast Learning - Don't accept imitations! Original Speed Reading Course(Try-Learn-Be Different and Live.)
What you'll learn
Original Course, not a copy.
Get the speed reading techniques used by the World Speed Reading Champions.
Learn all the secrets and hacks of Speed Reading.
Learn, practice and succeed ALL EXERCISES used in Speed Reading.
Get 20 SECRET techniques that will increase your reading speed to 1000 words in 1 minute.
Instantly increase your reading speed by 60% just after the FIRST Hour of this course.
Reprogram your mind to stop forgetting.
Become faster, sharper, UNSTOPPABLE in your daily life and career.
Solve the TIME problem in exams and learn how to be SUCCESSFUL with confidence.
Understand to the maximum and learn to read at approximately 3X THE SPEED of a college graduate.
Requirements
Students should be able to read proficiently in their native language and in English. Though these skills can be applied to any language, the provided materials will be in English.
A passionate mind to learn, a burning desire to achieve, and an open mind to learn.
All resources given to the course, in short, everything is included for free!
Description
This course is a new course, but one of the courses that will raise awareness about Speed Reading on Udemy - Why? Because; Accelerated and Updated Version 3.7!
First of all this is an Original Course.
I can say this very clearly and with confidence.
Because; I have been doing research and studies in the field of speed reading for 20 years. I have written 3 different books on Speed ​​Reading. I am a Speed ​​Reading Expert. For the last 2 years, due to the pandemic, I have attended speed reading courses with thousands of students and participants in distance education. I have attended face-to-face Speed ​​Reading courses, seminars and trainings with tens of thousands of students for 10 years. Many of the trainings I attended were planned as TRAINING OF THE TRAINER, and as a Speed ​​Reading Specialist and Instructor, I have taken part in these trainings as a Speed ​​Reading Specialist.
Now, in your Udemy search for Speed ​​Reading, you're looking at my course! You are in doubt. Because and this is the first time I've met you. Yeah! You may hesitate, but you should join my course now. Set your goals and compare when the course is finished.
Alpha Speed ​​Reading is different! You ask why? Let me explain right away
For example, you got sick and went to your doctor. Your doctor examined you and wrote a prescription. Is your disease clear now? The medicines that your doctor has given are also clear. And you put the prescription in your bag and went home. Days have passed but you are still sick because you didn't buy your medicine from the ******** to be well. This is exactly what I've been talking about.
You want to read speed, you are researching and you are getting books or online trainings about Speed ​​Reading. Many of these trainings and books theoretically explain what Speed ​​Reading is, how a strong brain should be, in short, what you want to be. Unfortunately, the medicines you really need are not available. Implementation and planning section is missing. Bottom line: You're like a patient waiting to go to the doctor and get a prescription just to get well. Where are your medicines? How will you be fine? If speed reading is explained theoretically in videos for hours, unless you practice practically, you will only be a knowledgeable person on the subject. Sorry to say, you can't be a Speed ​​Reader.
Alpha Speed ​​Reading Techniques has been prepared as a professional course to get you to the goal you seek, aim and want to reach. Please review our curriculum. I don't promise you that you can read 1000 words per minute. I'm telling you: if you study regularly and with discipline, you will soon have the brain to read more than 1000 words.
This course is a general course and is for everyone. Speed ​​reading is a skill. Anyone can improve their Speed ​​Reading and Speed ​​Learning skills!
It contains a program where you can get the level up to the top by starting from scratch.
Alpha Speed ​​Reading targets 5 super goals
It treats your lazy eye, increases your eye splashes 3-4 times,
Saves 50% of time in exams,
It gives high (90%) comprehension and fast reading skills in the texts that you read,
Strengthens memory to quickly and accurately store and recall large amounts of information.
It develops the cognitive infrastructure to support this new flow of information in the long term.
In the last 5 years, I have received tens of thousands of feedback from tens of thousands of students in the face-to-face courses, trainings and seminars I have attended. I have constantly updated my education with teaching methods and techniques that are easier, more flexible and more suitable for the student's skills.
You will see that; This new course has more (and better) content than the courses you're used to, with speed reading techniques and exercises you've never seen before
First of all, the plan and user guide of our 14-day crash course are given step by step.
Application videos of eye exercises, which are not found anywhere and are hidden, have been prepared.
Application cards have been prepared for all of the exercises described in the course.
In short, MORE additional resources that are nowhere to be found are waiting for you!
Practical promotional videos are attached to each main concept.
The image and sound quality in the videos are prepared in the best way.
The course has been activated by preparing interactive worksheets.
Are you still hesitating after all I've told you?
Alpha Speed ​​Reading Techniques are the best, most comprehensive accelerated learning product I've published on Udemy.
The course includes exercises and practices that require 3 repetitions per day. During the training, it will require speed reading practice and training and this training will take approximately 2 weeks. It won't be easy, but if you stick to the plan, success is guaranteed.
Alpha Speed ​​Reading and Exam Techniques
This course is sponsored by Udemy Inc. not undertaken by.
Who this course is for
Anyone who has ever wished they could learn more effectively
Anyone who wants to retain information that they read
People who love to learn
Students
Professionals
Hobbyists
Students who want to adopt an extremely productive, strategic and consistent approach towards their learning, both in and out of the classroom.
Homepage


image.jpg

Build Travel Portfolio using Invision Studio
Duration: 5h 30m | Video: .MP4, 1280x720, 30 fps | Audio: AAC, 48 kHz, 2ch | Size: 1.13 GB
Genre: eLearning | Language: English​

Want to learn Website Prototype in Invision?*This course won't be like most courses out there, we will get right into learning how to use InVision Studio to create websites. Once you finish this course you will be able to get up and running really quickly with InVision Studio.
In addition to learning to use InVision Studio to design websites, you will also learn the fundamentals of using InVision Studio sand create stunning and functional prototypes.
Homepage
Screenshots


b026751d-d7ce-4d65-94f6-37f9435fb195.png

Business Data Analysis with Excel
MP4 | Video: h264, 1280x720 | Audio: AAC, 44.1 KHz, 2 Ch
Genre: eLearning | Language: English + srt | Duration: 17 lectures (1h 37m) | Size: 1 GB

Learn in-depth Microsoft Excel data analysis skills with business datasets and an Excel & business consulting instructor
What you'll learn
Develop business data analysis skills using Excel spreadsheets.
Apply several Excel functions and tools to analyze data in Excel.
Practice and work with real world business data to explore and answer key business questions.
Apply quantitative analysis and problem solving techniques within the Excel spreadsheet.
Requirements
No prior data analysis experience needed. You will learn what you need to know for the course.
Description
Welcome!
Microsoft Excel spreadsheets are widely used to store, organize, and analyze data. In light of this, Excel has grown to become arguably the most important computer program in workplaces around the world. Any role in any industry can benefit from someone like you with strong Excel knowledge.
Excel is a powerful tool that has become ingrained in business processes worldwide, from analyzing stocks, budgeting, and organizing client sales lists, to analyzing staff performances, managing employee schedules, and comparing periodic product sales performances, to name a few.
Through the manipulation of stored data, Excel enables you to identify trends and organize and sort data into meaningful categories. With the use of pivot tables in Excel (one of my personal favorites) you can skillfully summarize data from a worksheet into an illustrative chart. Finance and accounting professionals choose Excel for its complex analytical and computing features, while Excel also performs Human Resources functions, such as sorting worked hours and organizing employee profiles and expenses, which help businesses better understand the structure and activities of their workforce.
This Business Data Analysis with Excel course will provide you with an in-depth understanding of
Excel functions and pivot tables, pivot charting, and pivot reporting, to group, slice, calculate and summarize large syndicated datasets in order to answer specific questions
Sorting, filtering and grouping tools in Excel
Creating financial statements (with particular focus on the income statement)
Analyzing employee performance using the LOOKUP and COUNTIF functions
Performing break-even analysis and introductory cluster analysis
Charting, graphing, and illustrating data trends in Excel, amongst others!
Using Excel for business has almost no limits for applications. Here are some examples
- Excel creates revenue growth models for new products based on new customer forecasts.
- When planning a team outing to a baseball game, you can use Excel to track the RSVP list and costs.
- When planning an editorial calendar for a website, you can list out dates and topics in a spreadsheet.
- When creating a budget for a small product, you can list expense categories in a spreadsheet, update it monthly and create a chart to show how close the product is to budget across each category.
- You can calculate customer discounts based on monthly purchase volume by product.
- You can conduct a thorough analysis of patient and medical research data
- You can summarize customer revenue by product to find areas where to build stronger customer relationships etc.
A working knowledge of Excel is vital for most professionals today, and stronger Excel skills can open the door to promotion and leadership opportunities.
Enroll now and start your journey to data management and storytelling through Excel data analysis and visualization!
Who this course is for
Beginner Excel users curious about conducting business data analysis in Excel.
Homepage


2ce21267bf96b4b523ac116fbce93546.jpg

Create & Design a Modern 3D House in Blender 3.0
Duration: 5h 2m | Video: .MP4, 1280x720 30 fps | Audio: AAC, 48 kHz, 2ch | Size: 3.9 GB
Genre: eLearning | Language: English​

Learn how to model a 3D photo realistic architectural render using Blender!
What you'll learn:
Create their own architectural renders using Blender
Texture and make realistic materials for their own scenes.
Work comfortably in Blender
Start a big Blender project and learn the process of how to completing it.
Requirements
Students need to have Blender installed on their computer.
It is recommended that you have a computer mouse
Prior knowledge about Blender is helpful but not required
Description
Do you want to learn how to create stunning photorealistic 3D architectural renders in Blender? Do you want to be able to digitally recreate your own house in Blender? By the end of this course you will have made a beautiful 3D modern house. The first section of this course will be focused on modeling our modern house. Over the next couple sections we will be adding materials, textures, modeling and lighting to our scene. I will then show you how to render your image and post process it.
There are a couple bonus videos as well! The first 2 are: How to Create a Clay Version of your Render and how to use the Workbench Engine! After that we jump into the real-time render engine Eevee and learn setup our scene using this engine in Blender!
Learning Blender can be very hard when you first start that's why I built this course for all levels beginner to advanced. I will be showing you step by step on what to do and why we do it. From the basics of modeling to advanced techniques like creating grass with particle systems.
I have also included 3 bonus sections in this course. The first one is creating a realistic tree in Blender. We will go through how to create an organic looking tree, apply textures and use particle systems to create the branches.
The second bonus section is about creating a modern bed! We will learn all about the cloth simulation and how to easily create pillows using it!*After that we learn about creating a procedural fabric material!
Finally the last tutorial I will show you how to create a modern couch in Blender. First thing we will do is model and sculpt it. This will add some creases to make it more realistic. Then, of course, the materials and rendering.
I will be giving away 15 professionally made models and 5 high resolution textures. You are free to use these models for other scenes but you are not allowed to sell or upload them. By enrolling in this course you agree those conditions.
What you'll learn
Create their own architectural renders using Blender
Texture and make realistic materials for their own scenes.
Work comfortably in Blender
Are there any class requirements or prerequisites?
Students need to have Blender installed on their computer.
It is recommended that you have a computer mouse.
Prior knowledge about Blender will be useful but not required.
Who this course is for
Anyone who wants to learn about Blender, 3d, architectural rendering, or photorealism.
We will be using the following programs in this course.
Programs Used in this Class
Blender 3D
I hope you are excited to jump into this course! And I can't wait to see your amazing renders!
Thanks
Stephen
Who this course is for
Anyone who wants to learn about Blender, 3d, architectural rendering, or photorealism.
Someone just getting started in Blender 3.0 and wanting to learn about it
Homepage
Screenshots


3da4669b-ddf1-4395-8462-7af0bfec092e.png

Create a vector portrait illustration from scratch on the iPad
Duration: 1h 13m | Video: .MP4, 1280x720, 30 fps | Audio: AAC, 48 kHz, 2ch | Size: 532 MB
Genre: eLearning | Language: English​

Create a vector portrait illustration on the iPad!
As a freelance sports illustrator I am regularly*commissioned to create illustrations of famous athletes and sports people. In this video, I will break down my illustration process in full - working from a blank canvas, and take you*through the stages of digital drawing in a way that's perfect for artists of all levels.
From*building construction lines, to creating line work, and then adding shading and colour to your illustration, you'll learn how how to use your iPad*to create portraits illustrations like a pro.
Topics
How to build construction lines
Create a sketch over our construction lines
Creating line work and inking
Creating, and adding lighting and shading to your illustration
Adding the finer details to your illustration and experimenting with colour for your finished drawing
See how I create a high detail, vector portrait illustration, with plenty of tips, tricks, and real-time troubleshooting along the way.
Whether you're an*experienced digital artist, a traditional artist looking to work in the*digital format, or a hobbyist in search of a new creative outlet,*this class will take you on the*journey to creating awesome portrait illustrations. Grab your iPad, and get drawing!
Homepage
Screenshots


Unity 2D Dungeon Gunner Roguelike Development Course

epyur2opb5bxc1n0uimchbjj17.jpg


Unity 2D Dungeon Gunner Roguelike Development Course
Genre: eLearning | MP4 | Video: h264, 1280x720 | Audio: AAC, 48.0 KHz
Language: English | Size: 23.1 GB | Duration: 51h 4m

Build a sophisticated 2D Roguelike Dungeon Shooter game using the Unity game engine and C# in this intermediate course.


What you'll learn
Unity 2D Game Development to create a 2D Dungeon Shooter Roguelike game like 'Enter The Gungeon' or 'The Binding Of Isaac'.
Intermediate level course will show you how to build a sophisticated game by creating complex Unity components using C# scripting.
How to build a fully featured, complete game - not just a tech demo.
160+ in depth lectures with over 50 hours of detailed video supported by a full completed project with save points after every lecture.
How to build a dungeon room node editor tool to create node graphs of dungeon room layouts for dungeon levels.
Implement game cameras using Cinemachine and Pixel Perfect components.
How to use layers and sorting layers in a 2D game, and create dungeon room templates using tilemap layers.
Create entire randomized game levels using a dungeon builder algorithm that combines dungeon level node graphs and dungeon room templates.
Create multiple player characters using prefabs, animator controllers and animations.
Implement player movement and weapon aiming, including dodge roll manoeuvres.
Doors which open for the player and lock the player into dungeon rooms while battling enemies.
Dungeon lighting that fades in as dungeon rooms are explored.
How to create object pools and use them in the game to improve game performance.
How to implement multiple weapon and ammo types which are configurable using scriptable objects.
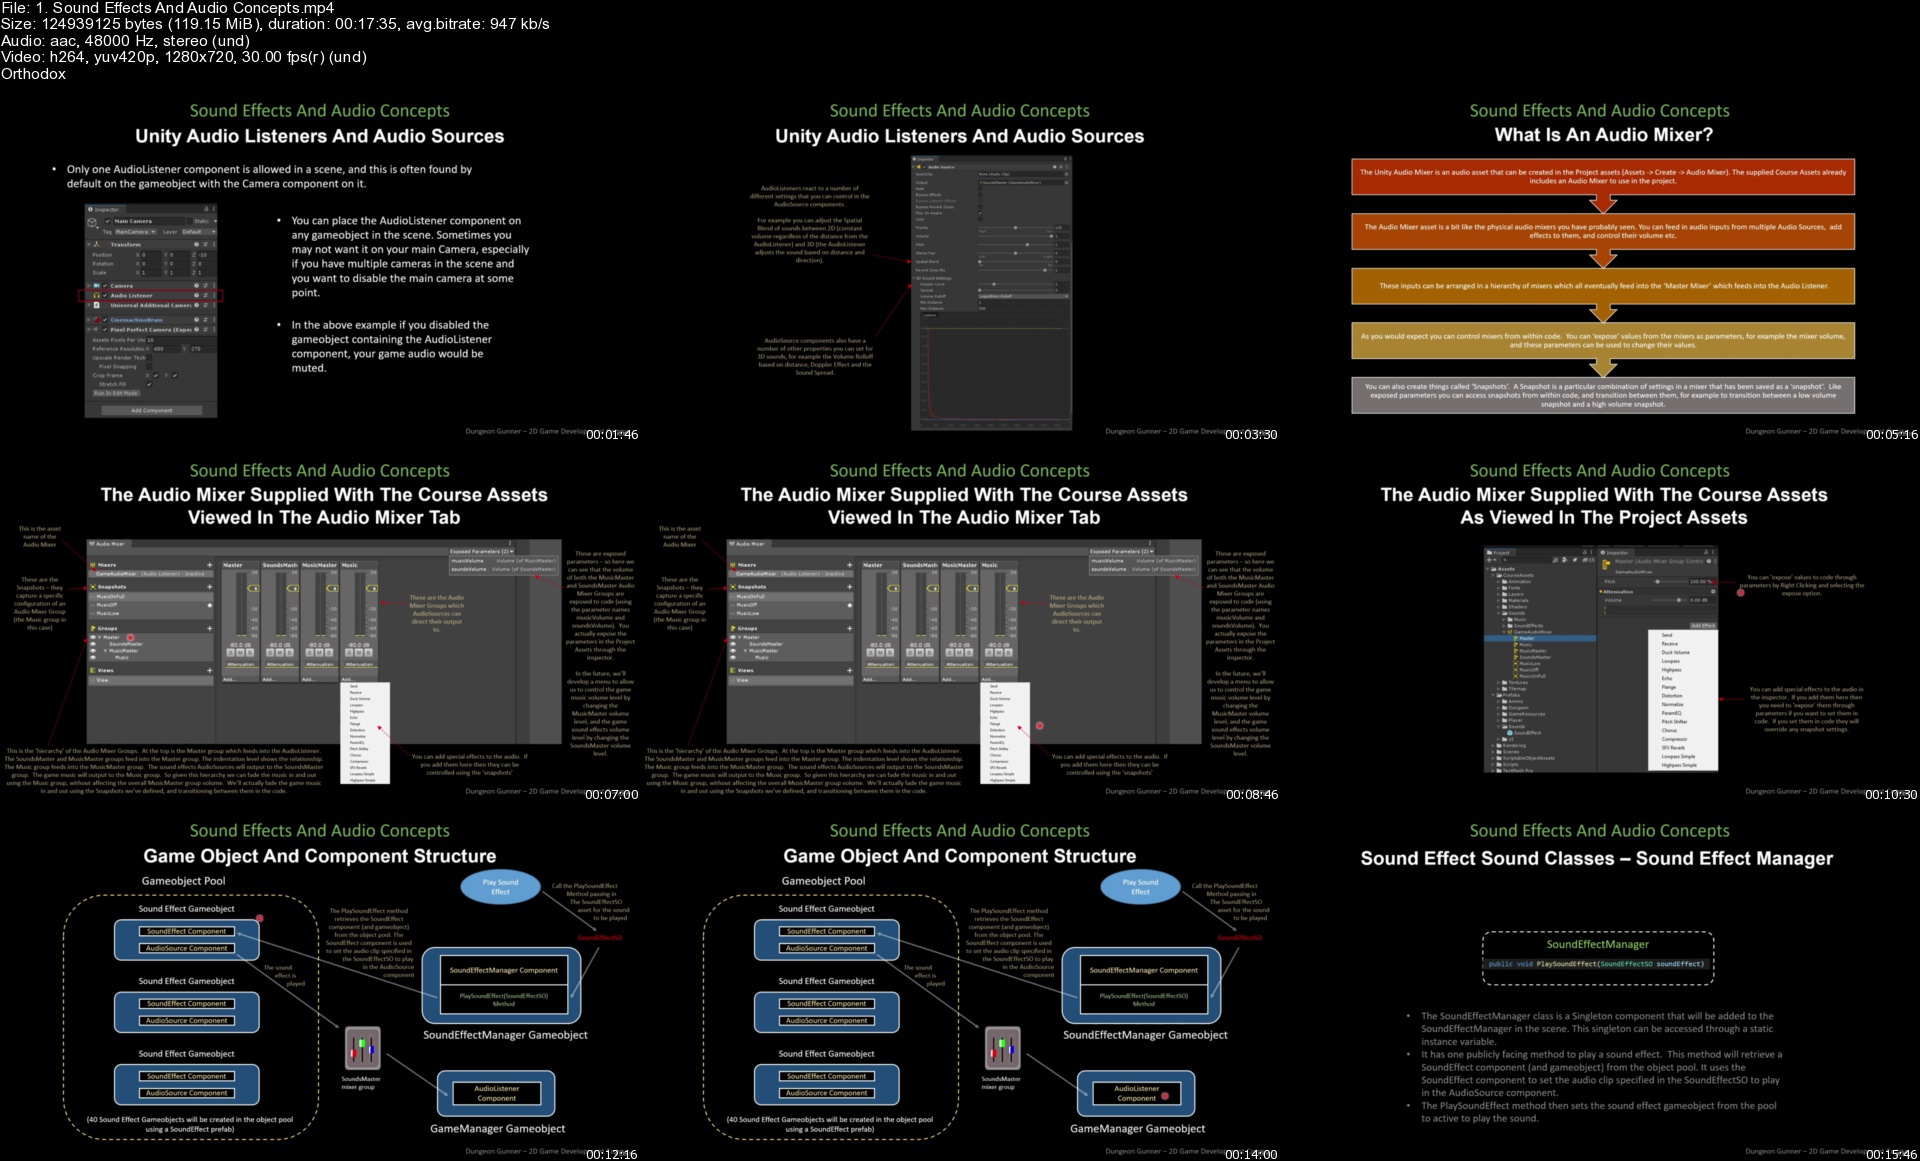
How to implement sound effects in the game using audio sources, audio listeners, and audio mixers.
How to create a Minimap in the game UI to show a zoomed out view of the player and surrounding dungeon rooms.
How to create special effects using particle systems and implement them for weapon shooting and ammo hit effects.
Create multiple enemy types and bosses that you will encounter across the multiple dungeon levels.
Use hidden tilemaps to store grid properties, such as preferred paths for enemies.
Understand how AStar pathfinding works by using algorithms and create an AStar pathfinding system for the game enemies.
Learn how to spawn enemies in dungeon rooms in a configurable and random way using materialize effects.
Implement weapons and ammo for enemies, including ammo patterns and enemy weapon firing AI.
Create health and damage systems for ammo damage and contact damage.
Learn how to implement play across multiple dungeon levels with boss battles, and high scores with accuracy multipliers.
Create items to decorate the dungeon rooms that can take damage and be destroyed.
Learn how to implement tables that can be flipped to provide cover for the player.
Implement Dungeon Chests that the player can loot, that can contain health, ammo and weapons.
Implement a dungeon overview map that the player can use to navigate to rooms they've already visited.
Learn how to implement music in the game which is configurable for each dungeon room to play both ambient music and battle music.
Add a Pause Menu to adjust the music and sound effect volume levels, and save the set levels using Player Preferences.
Create a Main Menu for the game with a character selector, high scores table, and game play instructions.

Requirements
This isn't a beginner course! You should have Intermediate Unity Development Skills - and built a few Unity prototypes or games before.
Good knowledge of the Unity editor, and how to use it's main features.
Good knowledge of C# scripting and the fundamentals of object oriented programming.
Good knowledge and understanding of some of the main Unity API classes and C# system classes.
The willingness to look up anything you are not familiar with in the Unity scripting manual or C# resources online.
Install the free Unity 3D game engine software and Visual Studio Community Edition.
Install the free SourceTree git client to help follow along with the provided completed Unity project and the branches that correspond to completed lectures.

Description
Have you ever wanted to build a 2D Roguelike game using the Unity game engine like 'Enter The Gungeon' or 'The Binding of Isaac'?

Well with this course you can!

The course and underlying project have taken several thousand hours to develop, but all that knowledge will be transferred to you step by step, lecture by lecture. The course is massive with over 50 hours of detailed video tutorials spread over more than 160 lectures. This has to be one of the most complete and sophisticated Unity 2D development courses available.

We'll take you through every line of code and every configuration step, from a blank Unity project to a fully functional and complete game. The game is built in a modular and expandable way, and uses best practice coding techniques like events to decouple the interdependencies in the code. The project has been built under GIT source control, so you can easily load the supplied completed course at a save point for every lecture.

The game is sophisticated, and goes far beyond what most Unity courses will ever attempt to teach you. The course covers

Creating a node editor tool to build dungeon level layouts

Procedural random dungeon generation

Multiple game levels

2D lighting using the Unity Universal Render Pipeline

A UI minimap

A dungeon overview map with player teleporting

Multiple player characters

A range of weapons and ammunition types

Multiple enemy characters

Particle system special effects

Shader graph material effects

AStar enemy pathfinding

Enemy weapon firing AI

Enemy ammo patterns

Lootable Chests

Flippable tables for cover

Sound effects

and Game music

This is just a selection of what you'll learn, and all the assets you'll need to complete the course and produce a fully functional and polished game are included. The concepts you'll learn will help you create your own game that you can tailor to match your game development vision.

So fasten your seatbelts and prepare yourself for a Unity game development journey like no other, and at the end of this course I'm confident that your Unity game development skills will be levelled up, and that you'll be able to create better and more sophisticated games on your own.

So why not join me in this course, and build your own Dungeon Gunner 2D Roguelike in Unity. I really hope you do, and I look forward to seeing you in the course.

Who this course is for
Intermediate Unity Developers who want to extend their skills and knowledge using a full project based course.
Existing Unity developers who are fans of Enter The Gungeon or The Binding Of Issac and want to build their own 2D Roguelike dungeon shooter.
A Unity developer who has previously built some prototypes or games and wants a challenging project course to level up their skills.

Homepage


1.soundeffectsandaudiaxjeq.jpg


dedf9056-d902-4419-9a58-311d0abd66d6.png

Creative Buttercream Cakes: Sharp Corners to Modern Textures
Duration: 35m | Video: .MP4, 1280x720, 30 fps | Audio: AAC, 48 kHz, 2ch | Size: 460 MB
Genre: eLearning | Language: English​

Whether you're a seasoned cake decorator or a new baker, learning to work with buttercream is so important to achieve professional looking cakes. That is exactly what will be covered in this course.
Alexandria is the owner of Finespun Cakes which specializes in elegant and timeless cakes with a modern spin.
She will not only show you the basics for creating a sleek, clean canvas for your designs, but also how to make artful and modern buttercream cakes simply with a few different colours and techniques.
In this class you'll learn how to
Make fool-proof Italian Meringue Buttercream
Flavour and colour your buttercream
Easily assemble and crumb coat your cake
Mask your cake with sharp edges and trendy unfinished edges
Create a watercolour finish on your cakes
Create palette knife textures on your cakes
You'll be creating a modern buttercream cake with your own artistic spin from this class.
Even if it's your first time making a cake, Alexandria will take you through the tips and techniques for all levels to ensure everyone can master buttercream, meltdown-free.
Homepage
Screenshots


039efe48963b74a4939ea8a1c5956f78.jpg

Data Analysis Using Tableau: The Ultimate Guide(2022)
MP4 | Video: h264, 1280x720 | Audio: AAC, 44.1 KHz, 2 Ch
Genre: eLearning | Language: English + srt | Duration: 23 lectures (3h 18m) | Size: 1.46 GB

Data Analysis Masterclass for Future Data Analysts Using Tableau with real-time hands on projects
What you'll learn
In-depth knowledge of how to analyze data Using Tableau.
Create Interactive Dashboards in Tableau.
Create Visualization from your data.
Learn to clean and prepare data.
Get Experienced in Data Analysis and Analytical thinking.
Create Amazing graphs and Map visualization alongside some great advanced Tableau features
Finding Out insights from Data and Turning them into assets for the organization
Requirements
No Earlier Analysis Knowledge required
Completely Beginner's Friendly
Desire to Learn and work with Data
Description
This is a Condensed course that will teach you all you need to know about how to get started and get going with Tableau for Data analysis. This course is made for anyone who wants to learn the art of Data analysis and data visualization. We will begin by exploring what is data analysis, how it can help organizations, then we will learn the various steps for doing data analysis which are data cleaning, preparation and finally data visualization after which we will use all of these learned skills to create real interaction dashboard for our projects. This course should prepare you to utilize Tableau to do your next analysis with confidence. You will be able to proudly able to showcase your skills to the world and add it to your resume.

You will receive the following benefits as a result of taking this course
Full free lifetime access to all the lecture videos
More than 3 hours of content with extra bonus videos.
All subsequent upgrades and supplementary lectures will always be free.
Bonuses are added on a regular basis to help you learn more. - a plethora of interesting topics!
This course is made using Tableau 2021.4 so it will be great for any future version.
Confidently add your skills to your resume
Udemy offers an unconditional 30-day money-back guarantee. - However, I am confident that you would enjoy the course:)
Why this Course
I have tried to create the video and explain it in view short and crisp manner.
The course structure is such a way that you go through tableau understanding all concepts in the most structured way.
The course is segmented into various sections to help the student's individual section in-depth and in a step-by-step manner.
The course has used learn by doing method which is best for software like Tableau.
With ZERO prior experience, you may begin your journey to become experienced at Tableau!
Looking forward to seeing you on the other side with me in your Data Analysis journey.
Who this course is for
Anyone who want to learn to work across with data
Future Analysts, Managers, Operations/finance Persons
Data hobbyists/Enthusiasts
Homepage


Zurück
Oben Unten