



• Regeln für den Video-Bereich:

    In den Börsenbereich gehören nur Angebote die bereits den Allgemeinen Regeln entsprechen.

    Einteilung

    - Folgende Formate gehören in die angegeben Bereiche:
    - Filme: Encodierte Filme von BluRay, DVD, R5, TV, Screener sowie Telesyncs im Format DivX, XviD und x264.
    - DVD: Filme im Format DVD5, DVD9 und HD2DVD.
    - HD: Encodierte Filme mit der Auflösung 720p oder darüber von BluRay, DVD, R5, TV, Screener sowie Telesyncs im Format x264.
    - 3D: Encodierte Filme von BluRay, die in einem 3D Format vorliegen. Dies gilt auch für Dokus, Animation usw.
    - Serien: Cartoon/Zeichentrick, Anime, Tutorials, Dokumentationen, Konzerte/Musik, Sonstiges sind demnach in die entsprechenden Bereiche einzuordnen, auch wenn sie beispielsweise im High Definition-Format oder als DVD5/DVD9/HD2DVD vorliegen. Ausnahme 3D.
    - Bereich Englisch: Englische Releases gehören immer in diesen Bereich.
    - Bereich Talk: Der Bereich, in dem über die Releases diskutiert werden kann, darf, soll und erwünscht ist.


    Angebot/Beitrag erstellen

    - Ein Beitrag darf erst dann erstellt werden, wenn der Upload bei mindestens einem OCH komplett ist. Platzhalter sind untersagt.
    - Bei einem Scenerelease hat der Threadtitel ausschließlich aus dem originalen, unveränderten Releasenamen zu bestehen. Es dürfen keine Veränderungen wie z.B. Sterne, kleine Buchstaben o.ä. vorgenommen werden. Ausnahme Serienbörse:
    - Bei einem Sammelthread für eine Staffel entfällt aus dem Releasename natürlich der Name der Folge. Beispiel: Die Simpsons S21 German DVDRip XviD - ITG
    - Dementsprechend sind also u.a. verboten: Erweiterungen wie "Tipp", "empfehlenswert", "only", "reup", usw. / jegliche andere Zusatzinformation oder Ergänzung, welche nicht in obiger Beschreibung zu finden ist.

    Aufbau des Angebots und Threadtitel

    Der Titel nach folgendem Muster erstellt zu werden. <Name> [3D] [Staffel] [German] <Jahr> <Tonspur> [DL] [Auflösung] <Quelle> <Codec> - <Group>
    Beispiel: The Dark Knight German 2008 AC3 DVDRip XviD - iND
    Beispiel: The Dark Knight 2008 DTS DL BDRip x264 - iND
    Beispiel: The Dark Knight 2008 AC3 DL BDRip XviD - iND
    Beispiel: The Dark Knight German 2008 AC3 720p BluRay x264 iND
    Beispiel: The Dark Knight 2008 DTS DL 1080p BluRay x264 iND
    Beispiel: Die Simpsons S01 German AC3 DVDRip XviD iND
    Beispiel: Die Simpsons S20 German AC3 720p BluRay x264 iND
    Beispiel: Sword Art Online II Ger Sub 2014 AAC 1080p WEBRip x264 - peppermint
    Entsprechend sind also u.a. verboten: Sonderzeichen wie Klammern, Sterne, Ausrufezeichen, Unterstriche, Anführungszeichen / Erweiterungen wie "Tipp", "empfehlenswert", "only", "reup", usw. / jegliche andere Zusatzinformation oder Ergänzung, welche nicht in obiger Beschreibung zu finden ist
    Ausnahmen hiervon können in den Bereichen geregelt sein.

    Die Beiträge sollen wie folgt aufgebaut werden:
    Überschrift entspricht dem Threadtitel
    Cover
    kurze Inhaltsbeschreibung
    Format, Größe, Dauer sind gut lesbar für Downloader außerhalb des Spoilers zu vermerken
    Nfo sind immer Anzugeben und selbige immer im Spoiler in Textform.
    Sind keine Nfo vorhanden z.B. Eigenpublikationen, sind im Spoiler folgende Dateiinformationen zusätzlich anzugeben :
    Quelle
    Video (Auflösung und Bitrate)
    Ton (Sprache, Format und Bitrate der einzelnen Spuren)
    Untertitel (sofern vorhanden)
    Hosterangabe in Textform außerhalb eines Spoiler mit allen enthaltenen Hostern.
    Bei SD kann auf diese zusätzlichen Dateiinformationen verzichtet werden.

    Alle benötigten Passwörter sind, sofern vorhanden, in Textform im Angebot anzugeben.
    Spoiler im Spoiler mit Kommentaren :"Schon Bedankt?" sind unerwünscht.


    Releases

    - Sind Retail-Release verfügbar, sind alle anderen Variationen untersagt. Ausnahmen: Alle deutschen Retail-Release sind CUT, in diesem Fall sind dubbed UNCUT-Release zulässig.
    - Im Serien-Bereich gilt speziell: Wenn ein Retail vor Abschluss einer laufenden Staffel erscheint, darf diese Staffel noch zu Ende gebracht werden.62
    - Gleiche Releases sind unbedingt zusammenzufassen. Das bedeutet, es ist zwingend erforderlich, vor dem Erstellen eines Themas per Suchfunktion zu überprüfen, ob bereits ein Beitrag mit demselben Release besteht. Ist dies der Fall, ist der bereits vorhandene Beitrag zu verwenden.
    - P2P und Scene Releases dürfen nicht verändert oder gar unter einem iND Tag eingestellt werden.


    Support, Diskussionen und Suche

    - Supportanfragen sind entweder per PN oder im Bereich Talk zu stellen.
    - Diskussionen und Bewertungen sind im Talk Bereich zu führen. Fragen an die Uploader haben ausschließlich via PN zu erfolgen, und sind in den Angeboten untersagt.
    - Anfragen zu Upload-Wünschen sind nur im Bereich Suche Video erlaubt. Antworten dürfen nur auf Angebote von MyBoerse.bz verlinkt werden.


    Verbote

    - Untersagt sind mehrere Formate in einem einzigen Angebotsthread, wie beispielsweise das gleichzeitige Anbieten von DivX/XviD, 720p und 1080p in einem Thread. Pro Format, Release und Auflösung ist ein eigener Thread zu eröffnen.
    - Grundsätzlich ebenso verboten sind Dupes. Uploader haben sich an geeigneter Stelle darüber zu informieren, ob es sich bei einem Release um ein Dupe handelt.
    - Gefakte, nur teilweise lauffähige oder unvollständige Angebote sind untersagt. Dies gilt auch für eigene Publikationen, die augenscheinlich nicht selbst von z.B. einer DVD gerippt wurden. Laufende Serien, bei denen noch nicht alle Folgen verfügbar sind, dürfen erstellt und regelmäßig geupdatet werden.
    - Untersagt sind Angebote, welche nur und ausschließlich in einer anderen Sprache als deutsch oder englisch vorliegen. Ausnahmen sind VORHER mit den Moderatoren zu klären.


    Verstoß gegen die Regeln

    - Angebote oder Beiträge, die gegen die Forenregeln verstoßen, sind über den "Melden"-Button im Beitrag zu melden.
  • Bitte registriere dich zunächst um Beiträge zu verfassen und externe Links aufzurufen.

*** Bestes IPTV *** bester Preis *** gratis Test ***


Englische Tutorials

63c35d23-7712-44f3-b898-9b69b3c9fbbd.png

Model a Soda Can in Cinema 4D
Duration: 1h 21m | Video: .MP4, 1280x720, 30 fps | Audio: AAC, 48 kHz, 2ch | Size: 520 MB
Genre: eLearning | Language: English​

Welcome to this course on Modeling a Soda Can in Cinema 4D.
In this series of lessons we will cover a lot of topics to give you a solid understanding of the entire product visualization workflow including
01. Reference and Inspiration
Gathering reference and inspiration images and viewing various label designs.
02. Modeling with Parametric Primitives, Points and Subdivision Surface.
Creating a project folder to save all your files.
Configuring a viewport, importing a reference image and scaling to real-world size
use a parametric primitive cylinder as the basis of modeling, add height and rotation segments.
the use of the make editable function to gain access to points, lines and polygons.
Using the point mode for shaping the soda can and loop/path cut tool to add segments as necessary
Use of the scale tool to resize sections of the model uniformly to match the reference image
Use of the polygon mode with the inset and extrude functions to model the top and bottom of the can.
Use the subdivision surface object to smooth the edges of the can.
03. Modeling the Pop Top
Connecting splines
Use of splines, extrusion and sweep NURBS to to model details.
Store selections function
04. Label Design
Reference gathered inspiration images to create a unique design.
Use of Adobe Illustrator and Photoshop to custom-craft a label with illustrations, text, nutritional information and bar code.
05. Texturing
Create a label and chrome material.
Use stored selections to apply different materials to various parts of the soda can model.
06. Environment and Lighting
Create a seamless background using a plane, background object and Cinema 4D compositing tag.
Create a 3-point light setup with a main light and 2 fill lights.
Vary the light color properties for added visual interest.
07. Cameras and Composition
Overview of composition and strategies
Use the the cloner to duplicate soda cans
Enable camera 'grid' to reference the rule of thirds.
Enable Depth of Field in rendering settings for added visual impact.
08. Rendering
Use of Cinema 4D's Physical Render engine in conjunction with multi-pass layers and object buffers
Set up final output render settings.
09. Post-Production
Adjustments in Adobe Photoshop to enhance the image.
Blurs, sharpening, vignettes, adjustment layers, hue/saturation, curves.
10. Bonus Lessons
Learn additional composition, modeling and post-production techniques
MoGraph cloner with random effector
Radial and motion blurs and focusing the viewers attention on a specific area of an image
Use the MoGraph cloner in object mode to create water droplets on the soda can
Homepage
Screenshots



 
007b2b55_medium.jpg

Play Framework Web Development For Beginners
MP4 | Video: h264, 1280x720 | Audio: AAC, 44.1 KHz, 2 Ch
Genre: eLearning | Language: English + srt | Duration: 30 lectures (1h 54m) | Size: 1 GB


Join The Amazing World Of PLAY Framework Using Java
What you'll learn
Create Java Web Applications using PLAY
Develop Evolution Scripts For Database Migration
Create and Validate Forms
Configure And Perform Database Operations
Use Bootstrap to Create Nice-Looking UIs For Your Java Applications
Write Twirl Templates With Ease
Requirements
Basic Java knowledge or at least some programmatical skills
Desire to learn how Play Framework works
Description
Whether you are just getting started with Java and want to explore the PLAY Framework for building powerful Web Applications or if you are a Java expert and want to get or get back to Play, this course is for you.
You will get an organised course, which is easy to follow and designed with real world use-cases.
If you don't have the necessary setup yet, don't worry! There is a whole section which is aimed to help you install everything that's needed for following throughout the course.
By the end of Play Framework Web Development For Beginners course, you will have a solid basis and hopefully even more enthusiasm to develop your knowledge further.
About the Author
Stefan Trifunović is a software engineer and Java Developer living in Vienna, Austria. He wasn't born as a coder, actually he fell in love with it spontaneously and kept going since.
He started as Java Developer using PLAY Framework. Although he learnt various other programming languages and frameworks, he remained a Java-Fan.
He honestly hopes, that with this course he can help at least a dozen of people to learn something and benefit from the knowledge by either finding a new job, creating a fancy product or even just by fulfilling their dreams.
Who this course is for
Beginner and Intermediate Java Developers
Everyone who wants to enter the PLAY Framework world
Homepage


8DNLXHM0SqjaamTWSdlrKEUSCeiIkAmM.jpg

Raspberry Pi 4 and Internet of Things (IoT) For Beginners
Genre: eLearning | MP4 | Video: h264, 1280x720 | Audio: AAC, 44.1 KHz
Language: English | Size: 1.24 GB | Duration: 3h 21m
Setup, Wire, Program and send data over the Internet

What you'll learn
Setup the Raspberry Pi 4 and control it remotely
Connect sensors and outputs (LED) to the Raspberry Pi
Use Linux Commands and Python Scripts to control sensors and outputs
Send data to ThingSpeak
Visualize data on ThingSpeak
Requirements
No programming or electronics experience is required. Learners will be given examples to follow to kickstart their journey.
The hardware used is listed in intro videos. You can also watch the videos to appreciate the methods or try it yourself if you have the items.
Description
This course is designed to help beginners kick start their journey into the Internet of Things. Key skills covered would include
- Setup IoT Device. We will be using the Raspberry Pi 4 as our IoT Device. The initial setup will include a monitor, keyboard and mouse. But after configuration, we will control it heedlessly/
- Remote Device Management using UpSwift. Upswift offers up to 3 free devices for prototyping IoT Device management. We will use UpSwift capabilities to remotely control the Raspberry Pi
- Basic Terminal commands and Python programming will be covered to introduce and improve proficiency. The content covered serves to enable participants to complete this module with reasonable proficiency.
- Wiring sensors and outputs will be done as well. Breadboard basics will also be covered to help participants. Schematic Diagrams will be used to illustrate circuit connections and explanations will be given for each sensor behaviour The sensors used are the DHT11 and HC SR04 Ultrasonic. An LED will be used as the output.
- Sensors and outputs will be programmed using the GPIO ports of the Raspberry Pi and Python scripts.
- Data from the sensors will be sent to ThingSpeak, where we will setup channels to receive incoming data and use various in-built charts to visualize the data.
These skillsets are essential to embarking on the journey for Internet of Things.
Who this course is for
Anyone who wishes to learn methods of setting up an IoT device, managing it, connecting sensors and outputs and sending data to an IoT Platform such as ThingSpeak
Screenshots


vo7cUowjORd7yAUzgju6fgoRbxUmucV6.jpg

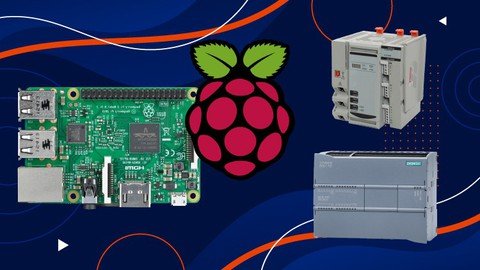
Raspberry PI + Node-RED + Python
Genre: eLearning | MP4 | Video: h264, 1280x720 | Audio: AAC, 44.1 KHz
Language: English | Size: 984 MB | Duration: 1h 19m
Learn Raspberry Pi dedicated to Industrial Automation and IT. Python + Controls + Data Science + Node-RED Library on RP!

What you'll learn
Raspberry PI 4 - For Beginning and All levels. Special edition Raspberry PI with PLC Comm
Learn how to setup Raspberry PI for Machine Learning, Data visualization, Python code!
You'll learn how to setup communication between Rockwell and Siemens PLC to Raspberry PI.
Daily Report using PLC, Python, Raspberry PI and MS Excel.
Requirements
No programming experience required. All levels. Get started today!
Description
Dive in deep with us on Raspberry Pi. This course will give you a deep understanding of the core values needed to be able to program, troubleshooting on Raspberry PI, Python, Node-RED with several controllers like: Controllogix, Compactlogix, Siemens S7-1200, S7-200, S7-300 and Modbus Communications. Grafana, Node-RED, Web Scada.
Some questions that in this course we'll answer
How can I setup my PLC in Ethernet network to communicate with others PLC's?
=> Ethernet/IP COMM
=> What's firmware revision?
=> What's the difference between RSLogix 5000 and Studio 5000?
=> Digital and Analog Inputs and Outputs
=> Template with Pump Station PLC Logic created on Studio 5000 Version 32.
=> Creating PLC logic with ADD-ON Instructions between Controllogix and Powerflex 525
=> To assist with this effort as will which is Online PLC Support
As part of making this course the best, I will be adding revisions or videos from time to time to add more sections but as it sits right now there is over 15 hours of video training about RSLogix 5000 and Studio 5000 controls.
I have a very successful YouTube channel about PLC programming and run a website.
The instructor was employee on Rockwell Automation and still designing several projects around USA.
Learn with who it worked at Rockwell Automation and can advise in everything that you need related to RSLogix or Studio 5000.
Who this course is for
Beginners in industrial automation, IT professionals , Engineers, Technicians, Electricians, Operations.
Screenshots


a0b497c9-e0fa-4dc0-9f4d-2c7d5498f3f4.png

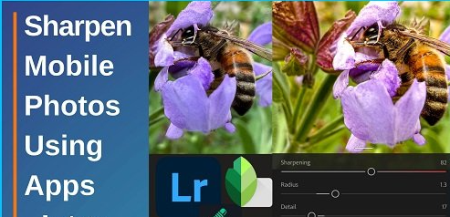
Sharpen Smartphone Photos Using Mobile Editing Apps
Duration: 1h 26m | Video: .MP4, 1280x720, 30 fps | Audio: AAC, 48 kHz, 2ch | Size: 1.09 GB
Genre: eLearning | Language: English​

Do you love incredible details in your photos?
This course is the companion to my other Skillshare course 'Capture Tack-Sharp Photos On Your Smartphone' - link here.
Once you learn how to set up and capture tack-sharp photos on your smartphone, the next step is to increase overall sharpness and extract incredible details exactly where you want in the photo.
Avoid the tell-tale signs of over-sharpening and make your photos look like they were captured on a mirrorless or DSLR camera!
You will also discover the techniques to reduce and balance noise artefacts with a sharpness to achieve the best possible version of your photo.
Imagine being able to*confidently capture and now edit tack-sharp photos every time*in any conditions? You can even recover some of your discarded photos and make them your new*favourites.
Homepage
Screenshots


bcbf597b-3893-4fdd-86e4-4840a9286ada.png

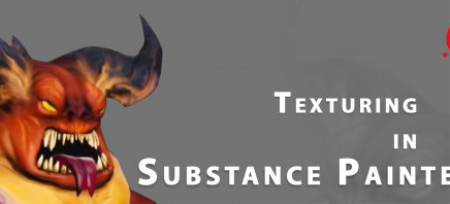
Texturing in Substance Painter
Duration: 2h | Video: .MP4, 1280x720, 30 fps | Audio: AAC, 48 kHz, 2ch | Size: 616 MB
Genre: eLearning | Language: English​


Welcome
To my course, Texturing in Substance Painter. In this course, you'll learn how to use substance painter to quickly and easily to texture your model, more stylize and hand painted way.
What is your benefit to choose this course ?
Some of the key takeways from watching this course include learning how to use substance painter interface utilize elements of your highpoly model to quickly add detail to your texture...
By the end of the training you will be able to quickly texture a handpainted model without ever having to load photoshop .. Or get lost on a confusing UV map.
Things you learn here.......
You'll explore the different tools that can be utilized for good texturing.
Learn how to create baking in substance painter and also how to use different brushes.
You will be familier with various types or material, masks, alphas etc.
You'll discover new skills and increase your changes for new opportunities in industry.
Students who is Ideal for this course
3D Artist, 3d Texturing Artist.
Software required:*Substance Painter.
Still thinking abut taking this course ?
Go ahead and click the enroll button, and can't wait to see you in this course.
Please leave your comment.
Good luck.
Cheers.
Homepage
Screenshots


Q5WxnUFFAXZLO6BNJ0IoJUd0tzmEuAps.jpg

XML , XSLT and XPath for Beginners Crash Course
Genre: eLearning | MP4 | Video: h264, 1280x720 | Audio: AAC, 44.1 KHz
Language: English | Size: 595 MB | Duration: 1h 59m
Learn XML programming and we will also investigate XML technologies like XPATH and XSLT.

What you'll learn
You will be able to learn what is XML
You will learn advantages and disadvantages of XML
You will learn types of XML content
You will learn XML syntax
You will learn by using advance CSS in XML
You will be able to learn what is DOM
You will be able to learn XPath
You will be able to learn XSLT
You will learn XSLT and CSS
and much more
Requirements
No requirements
Description
Welcome guys my name is Anwer Khan and I will be your instructor throughout this course. In this course I will talk straight to the point. Therefore, we will cover more in less time.
Now mostly courses about XML XSLT and XPath are too long and I have noticed that when someone is taking long course, he forget lot of things in-between. So I tried my best to make this course compact and precise.
XML has become a widely-used standard for storing and exchanging information on the Internet and for building mobile applications.
XML (Extensible Markup Language) is a markup language similar to HTML, but without predefined tags to use.
The Extensible Markup Language (XML) is a simple text-based format for representing structured information, documents, data, configuration, books, transactions, invoices, and much more.
Knowing how to work with XML has become a core skill that every developer needs to have. In this course we'll start off by learning about what XML is, and some of its advantages and drawbacks.
Then we'll see how to create and style XML content using a variety of approaches such as CSS and using the browser's DOM. We'll investigate complementary XML technologies like XPATH and XSLT and see how they can be used to manipulate XML content.
Whether it's working behind the scenes of publishing blogs, distributing data over the Web, or bridging the gaps between separate computer systems, XML is a foundational technology that every developer needs to know.
When you're finished with this course, you'll be able to immediately put XML to use.
I invite you to join me on this XML journey.
Let's get started.
Thank you.
Who this course is for
Who wants to learn XML
Who wants to learn XSLT
Who wants to learn XPath
for Developers, Programmers
and much more
Screenshots


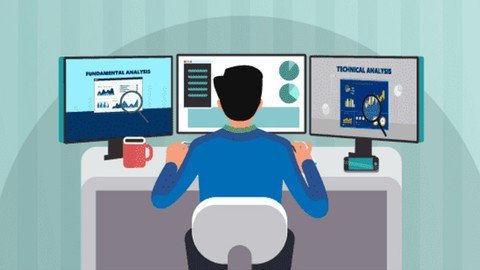
Stock Market For Beginners with live demo with CA RISHI RAI

psdllzq2mpljpb6jdx6iiwcjcg.jpg


Stock Market For Beginners with live demo with CA RISHI RAI
MP4 | Video: h264, 1280x720 | Audio: AAC, 44.1 KHz
Language: English | Size: 8.55 GB | Duration: 8h 10m

Basics Of Stock Market


What you'll learn
Students Will learn the basic of Stock Market and simple version of Market Analysis with live demo
Terminologies in Stock Market
A Story to Understand the company
Fundamental analysis
Technical Analysis
Future & Options Trading
When to enter and When to Exit
Price Action Strategies
System + Risk Management + Psychology
Option Strategies for Bull market
Option Strategies for Sideways market
How to pick stocks for long term and at what price
Live sessions

Description
This is not an ordinary course.Each and every session has been designed first to make you understand the concept that is called basic session and then detailed explanation is given with FAQs
Apart from that you will get Live sessions every monday wednesday friday evening.
What You Will Learn
In this course I have explained Stock Market for basics designed in Such manner so that beginners can understand it quickly.
Why Stock Market?
A Story to Understand Company
Terminologies
Bull & Bear
Long & short
Square off
NSE & BSE
Sensex & Nifty
Market Cap
Application Tutorial
How to open Trading /D-Mat Account?
How to operate application?
Fundamental Analysis
Profit & Loss
Cash flow
Balance sheet
Ratio Analysis
Valuation
How to find quality companies?
At what price to invest?
Technical Analysis
Terminologies
Trading Types
Trend Identification
Candlesticks
Support & Resistance on Chart
Risk Reward Ratio
Moving Averages
Inside bar Strategy
Intraday Strategies
Price Action Strategies
When to enter and When to Exit
Psychology of Trading
Risk Management
RSI
Trading Vs Investing
Derivatives
Introduction to Derivatives
Future Trading
Option basics-How to value a Premium
Option Buying & option Selling
Future Open Interest Analysis
Option Chain Analysis
How to get FII DII DATA
How to interpret and trade basis on FII Data
Option Strategies for Low capital
Option Selling Strategies
Option Strategies for Bull market
Option Strategies for Bear Market
Option Strategies for Sideways market
How to earn passive income from options(require capital atleast 5,00,000-10,00,000)
Derivatives Now you understand all concepts of Stock market that is needed for trading you will get a ROBUST INTRADAY Trading SYSTEM
System + Risk Management + Psychology
Who this course is for
Who want to earn from Stock Market and are absolute beginners, In this course I (CA Rishi Rai,Equity Research Analyst,Investment Advisor) explained it from very beginning as in you know nothing about stock market till the time you start earning.
Who want to generate passive income from stock market


stockmarketforbeginne2fjsn.jpg


Download from RapidGator


Download from NitroFlare


Download from UploadGig


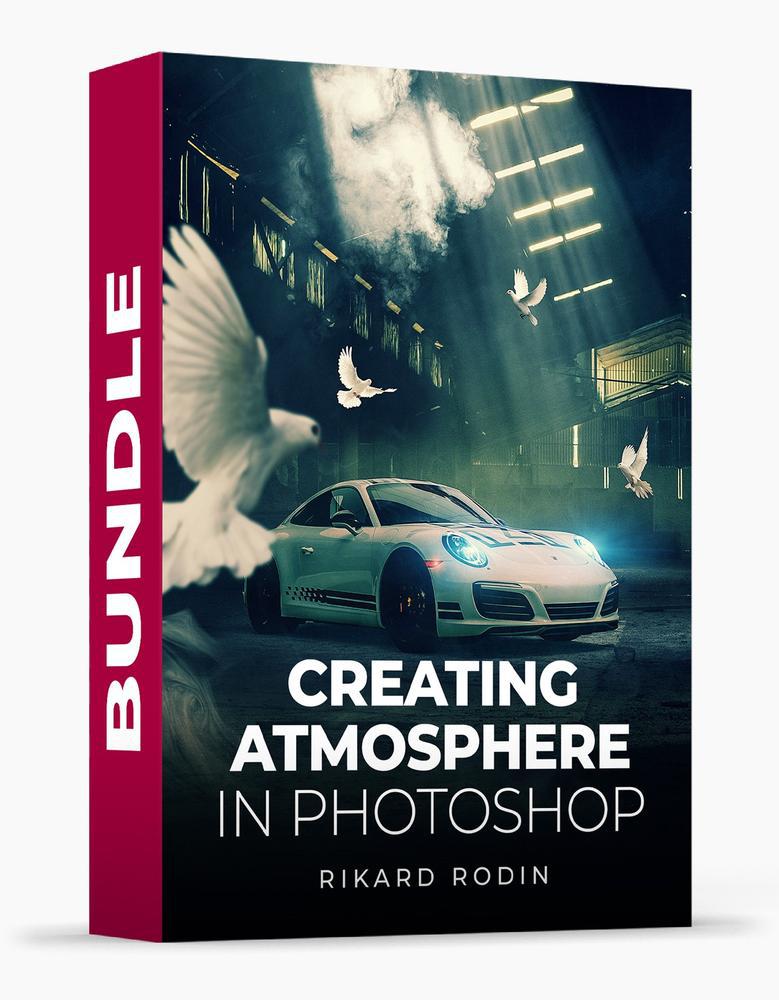
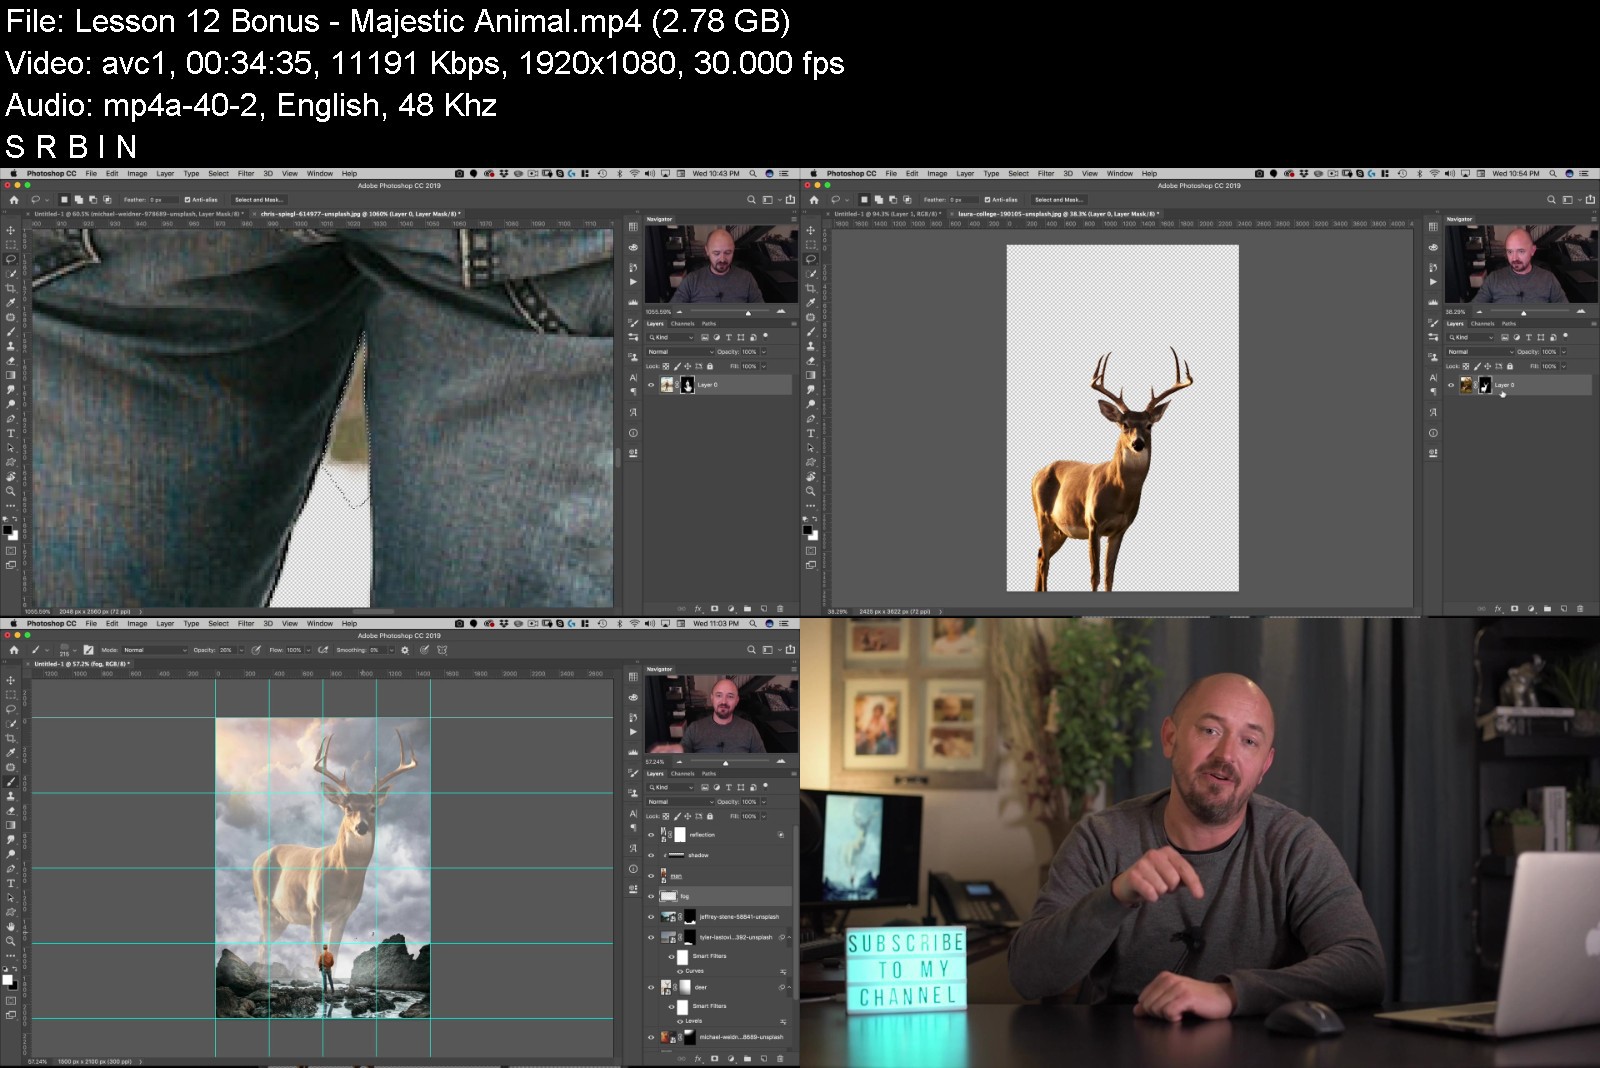
Creating Atmosphere In Photoshop Bundle

oeztjlv4qkaxdnvbfm3dpvmknc.jpg


Creating Atmosphere In Photoshop Bundle
Nucly
Instructors: Rikard Rodin
10 courses • BONUS TOOLS • OVERLAYS • BRUSHES
Video: MP4 1920x1080 48 KHz | English + Sub
Beginner-Advanced | Size: 10.789 GB

This bundle contains everything you need to start creating epic atmospheric composites - over four hours of in-depth project-based tutorials and more than four hundred compositing tools.
In this course, we will do ten projects that will take you through all of the basics of creating, coloring, and manipulating atmosphere in Photoshop. In addition to the basics of brushing and blending overlays, you will also learn many other Photoshop skills; selections, blurring, color grading, sharpening, and much more.
What's Included?
Atmosphere makes an image. Create full, atmospheric, and dramatic composites of your own in no time.

zpahkdd4buxv89ozj0xeuyzjqa.jpg

Creating Atmosphere In Photoshop Masterclass
10 LESSONS | 4H 23M | +600 BONUS TOOLS
$147included
By following along with the ten projects included in this course, your ability to create masterpieces with atmosphere and drama will hit heights previously unachievable.

lhatllj2nmi6r1y9ykczqjyjvj.jpg

Light Rays
58 LIGHT & ATMOSPHERE OVERLAYS
$79included
58 high-quality photographs of volumetric light rays from stage lights. Completely customizable, you'll be able to cast light on your subjects from any direction.

xcamy0zjjvkxjnttzsqpecajye.jpg

Stage Lights
67 LIGHT & ATMOSPHERE OVERLAYS
$79included
67 high-quality photographs of two different stage lights at various angles, with and without light cones, for use in your photos or composites.

uovm6f3lh0qmrmvwshjkvq0j84.jpg

Textured Light
61 LIGHT & ATMOSPHERE OVERLAYS
$79included
61 high-quality photographs of light, shot through wispy and cloudy atmosphere. Use these to add texture and atmosphere to your image.

lsltrhumreqstfupu857kpxj8n.jpg

Atmospherics
71 LIGHT & ATMOSPHERE OVERLAYS
$79included
71 high-quality photographs of textured light, shot through wispy and cloudy smoke. Use them as textures, backgrounds, or overlays to add atmosphere with ease.

jupvxf7oltxbhflxpftrt4cjjo.jpg

God Rays
63 LIGHT & ATMOSPHERE OVERLAYS
$79included
63 high-quality photographs of large light beams coming from above (often referred to as God Rays). All images are neutral, allowing you the versatility to change the color or contrast of the image.

5uo9jjx5s0jjeckmitnvxiijay.jpg

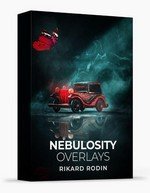
Nebulosity
63 LIGHT & ATMOSPHERE OVERLAYS
$79included
63 high-quality photographs of a variety of light rays, smoke and atmosphere. Use these to create dramatic texture, impact, and atmosphere in your images.
Bonus Content!
Atmosphere Photoshop Brushes

efiivdcwp5noyg2h41nc5yuktf.jpg

Smoke & Fog
35 PHOTOSHOP BRUSHES
$79included
Whether you are adding smoke to a cigarette or filling a horror scene with dense fog, this pack has what you need to add texture and detail to your images. These incredibly versatile tools can be used lightly, to create a specific mood or applied drastically to transport your subjects.

cnehpthm9bzrzpgd0cutzg5j7u.jpg

Dust
35 PHOTOSHOP BRUSHES
$79included
Whether you are trying to very gently add interest to a light source or totally transport your subject these versatile and high-resolution brushes will speed up your goal of producing amazing images.

nakgx9sdg02ryuanoaiug4xkbv.jpg

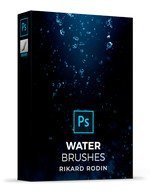
Water
36 PHOTOSHOP BRUSHES
$79included
A boring image can be improved by adding texture or atmosphere in the background or foreground. With these brushes & overlays, it's now easy to add the mood of raindrops or splashes. You can simply blend them into any image.

Homepage

creatingatmosphereinp59knf.jpg


Download from RapidGator


Download from NitroFlare


Download from UploadGig


Fundamentals of Computer Network

lsfdmjowyhfecfzzt2lwctrkwq.jpg


Fundamentals of Computer Network
Genre: eLearning | MP4 | Video: h264, 1280x720 | Audio: AAC, 44.1 KHz
Language: English | Size: 21.6 GB | Duration: 27h 2m


What you'll learn
Study the basic taxonomy and terminology of the computer networking and enumerate the layers of OSI model and TCP/IP model
Acquire knowledge of Application layer and Presentation layer paradigms and protocols
Study Session layer design issues, Transport layer services, and protocols
Gain core knowledge of Network layer routing protocols and IP addressing

Description
This course on Computer Network is useful for all beginners and under graduate students which covers: Basics of Computer Network, Internet, Network Edge, Network Core, Delay, Loss, Throughput in Networks, Protocol Layers, Service Models, Network Security, Principal of Network Applications, Web & HTTP, FTP, Email, SMTP & IMAP, DNS, P2P Application, Transport-layer services, Multiplexing and Demultiplexing, Connectionless transport: UDP, Principal of Reliable Data Transfer: rdt1.0, rdt2.0, rdt3.0, Go-Back-N Protocol (GBN), Selective Repeat Protocol (SR), Connection-oriented transport: TCP, TCP - Flow Control, 2 Way & 3Way Handshaking, Principles of Congestion Control, Network Layer: Introduction, Data Plane & Control Plane, Best-efforts Service Model, Virtual Circuit Vs Datagram Network, Router Architecture, Internet Protocols (IP): Datagram Format, Fragmentation & Re-assembly, Addressing, CIDR Addressing, Dynamic Host Configuration Protocol (DHCP), Network Address Translation (NAT), Internet Protocol: IPv6, Tunnelling & Dual Stack (IPv4 to IPv6 Transition), Routing Algorithm: Dijkstra's Algorithm, Routing Algorithm: Distance Vector Algorithm (DV), Intra-AS: OSPF & RIP Routing, Inter-AS: BGP Routing, Link Layer: Introduction. Parity Check, Checksum & Cyclic Redundancy Code (CRC): Error Detection & Correction, Cyclic Redundancy Code (CRC): Error Detection & Correction, Link Layer: Multiple Access Protocols, Multiple Access Protocols: Random Access Protocol, Multiple Access Protocols: Talking Turns, Link Layer: Addressing and ARP, Ethernet, Switches & VLAN, Link Virtualization - MPLS, Data Center Networking.
Who this course is for
This course is useful for all UG science students specially for engineering UG students of CSE / IT / E&TC / EEE branches.


fundamentalsofcomputeerjrb.jpg


Download from RapidGator


Download from NitroFlare


Download from UploadGig


React Native with Typescript - The Practical Guide [2022]

4500110e49a2x7koe.jpg


React Native with Typescript - The Practical Guide [2022]
MP4 | Video: h264, 1280x720 | Audio: AAC, 44.1 KHz, 2 Ch
Genre: eLearning | Language: English + srt | Duration: 108 lectures (12h 13m) | Size: 6.2 GB

Create an app in React Native - from basic knowledge to working app. Learn React Native components, Typescript, and more


What you'll learn
Create a working app made in React Native & Typescript
Understand React Native in practical and fun way
Use gained knowledge to create your own applications
Establish yourself in the field of the exciting mobile app development environment
Requirements
Basic Javascript knowledge
React basics, recommended but isn't must have
Description
What is React Native?
React Native combines the best parts of native development with React, a best-in-class JavaScript library for building user interfaces. React primitives render to native platform UI, meaning your app uses the same native platform APIs other apps do. Simplified, with React Native you can create a native application on IOS and Android devices, only with a knowledge of one language (Javascript).
Is this course right for you?
If you plan to start your career as a developer or improve your programming skills, this course is right for you.
You will get the confidence and skills required to start your own projects.
What are you going to work on?
You will create a "Workout" mobile application just with Javascript programing language.
According to the application's features, the course is divided into multiple parts(check curriculum).
In the first part, you will set up a development environment simulator and learn more about React Native theory.
Right away after that, you will start working on the application. First, you will learn to create multiple screens(views) and navigation between them. An instructor will show you different ways and techniques to set up navigation and, most importantly, how navigation works.
In the next part, you will discover some React Native components. Native components are similar to those used in the browser. If you have some basics in HTML, it will be for your piece of cake to grasp these concepts.
Loading external resources such as fonts is very important for UX. You will create a simple resource loader and prepare a function to boot up all required initial data of your application. This will be a topic of the fourth section.
In the next couple of lectures, you will create a detailed page of the workout, displaying more precise information. You will learn how to pass parameters in navigation and use them to fetch data.
The fifth part of the course covers data management, storage, and data manipulation. It's important to know where to store data and retrieve them. An instructor will show you an easy way how to do that. As storage, you will use native storage of your phone(simulator).
Hooks functions are an essential part of React environment. You will learn how to use them to get data in the sixth section.
In the seventh section, you will go back to the detail screen of the application. You will learn how to create a reusable component, modal. A modal window will be responsible for displaying a sequence of workout exercises.
The application's core feature is to display a countdown(timer) for currently active exercise. In the eighth section, you will work precisely on this feature. An instructor will guide you through creating a reusable hook function that will provide "countdown" functionality.
Countdown functionality goes hand-in-hand with the feature to display the currently "active" exercise, and after the countdown is finished, load the next exercise and reload the countdown again. That's what you will learn in the ninth section.
In the next section, you will work on a form to create a workout and add/remove exercises in the workout.
The course is finishing with you working on the "theme" feature. This simple functionality allows users to toggle between the dark and light theme of the application.
Who this course is for
Beginners as well as experienced devs interested in mobile development with React Native.
People looking for the practical development guide.
This course is for everyone eager to understand how to build an app from scratch


reactnativewithtypescrzkvj.jpg


Download from RapidGator


Download from NitroFlare


Download from UploadGig


Making Pretty Seamless Patterns from Photos in Photoshop

l1jfm.jpg


Making Pretty Seamless Patterns from Photos in Photoshop
Duration: 9h 26m | Video: .MP4, 1280x720, 30 fps | Audio: AAC, 48 kHz, 2ch | Size: 6.28 GB
Genre: eLearning | Language: English

Learn how to use your camera to make pretty seamless patterns in Photoshop! Seamless patterns are the foundation for many fun projects, including print-on-demand, paper goods, and fabrics. This fun skill is perfect for stretching your creativity and creating products to sell. This course tackles specific issues around pattern creation with photographed elements.
What does this course cover?
How to set up a small home studio for photographing pattern elements
Best shooting practices for compositing
Creating a bank of images to pull from for creating patterns
How to cut out complicated subjects and layer them as patterns in Photoshop
How to use Pattern Preview in Photoshop to create patterns
Learn how to use the Pattern Fill command in two ways to create complicated patterns
Using the Offset Filter in Photoshop to make repeating patterns
Processing cut-out elements in other programs, like Topaz Impression, Exposure Snap Art, and iColorama
Creating several types of patterns from start to finish
Problem and solution videos covering common issues relating to faulty repeats, edge meet-up issues, and document size
Tips for common problems
Long-form edits so you can see the process in real-time and watch as I work through challenges
A how-to guide for uploading to print on demand site, Redbubble
Please note: This course covers many variations of pattern creation in Photoshop. The first few videos are an orientation on tools, shortcuts, and commonly used techniques. Don't worry if the things I mention seem foreign, as I will dive deeper into each of these items in later videos.

makingprettyseamlessp3tjzf.jpg


Download from RapidGator


Download from NitroFlare


Download from UploadGig


Zurück
Oben Unten