




• Regeln für den Video-Bereich:

    In den Börsenbereich gehören nur Angebote die bereits den Allgemeinen Regeln entsprechen.

    Einteilung

    - Folgende Formate gehören in die angegeben Bereiche:
    - Filme: Encodierte Filme von BluRay, DVD, R5, TV, Screener sowie Telesyncs im Format DivX, XviD und x264.
    - DVD: Filme im Format DVD5, DVD9 und HD2DVD.
    - HD: Encodierte Filme mit der Auflösung 720p oder darüber von BluRay, DVD, R5, TV, Screener sowie Telesyncs im Format x264.
    - 3D: Encodierte Filme von BluRay, die in einem 3D Format vorliegen. Dies gilt auch für Dokus, Animation usw.
    - Serien: Cartoon/Zeichentrick, Anime, Tutorials, Dokumentationen, Konzerte/Musik, Sonstiges sind demnach in die entsprechenden Bereiche einzuordnen, auch wenn sie beispielsweise im High Definition-Format oder als DVD5/DVD9/HD2DVD vorliegen. Ausnahme 3D.
    - Bereich Englisch: Englische Releases gehören immer in diesen Bereich.
    - Bereich Talk: Der Bereich, in dem über die Releases diskutiert werden kann, darf, soll und erwünscht ist.


    Angebot/Beitrag erstellen

    - Ein Beitrag darf erst dann erstellt werden, wenn der Upload bei mindestens einem OCH komplett ist. Platzhalter sind untersagt.
    - Bei einem Scenerelease hat der Threadtitel ausschließlich aus dem originalen, unveränderten Releasenamen zu bestehen. Es dürfen keine Veränderungen wie z.B. Sterne, kleine Buchstaben o.ä. vorgenommen werden. Ausnahme Serienbörse:
    - Bei einem Sammelthread für eine Staffel entfällt aus dem Releasename natürlich der Name der Folge. Beispiel: Die Simpsons S21 German DVDRip XviD - ITG
    - Dementsprechend sind also u.a. verboten: Erweiterungen wie "Tipp", "empfehlenswert", "only", "reup", usw. / jegliche andere Zusatzinformation oder Ergänzung, welche nicht in obiger Beschreibung zu finden ist.

    Aufbau des Angebots und Threadtitel

    Der Titel nach folgendem Muster erstellt zu werden. <Name> [3D] [Staffel] [German] <Jahr> <Tonspur> [DL] [Auflösung] <Quelle> <Codec> - <Group>
    Beispiel: The Dark Knight German 2008 AC3 DVDRip XviD - iND
    Beispiel: The Dark Knight 2008 DTS DL BDRip x264 - iND
    Beispiel: The Dark Knight 2008 AC3 DL BDRip XviD - iND
    Beispiel: The Dark Knight German 2008 AC3 720p BluRay x264 iND
    Beispiel: The Dark Knight 2008 DTS DL 1080p BluRay x264 iND
    Beispiel: Die Simpsons S01 German AC3 DVDRip XviD iND
    Beispiel: Die Simpsons S20 German AC3 720p BluRay x264 iND
    Beispiel: Sword Art Online II Ger Sub 2014 AAC 1080p WEBRip x264 - peppermint
    Entsprechend sind also u.a. verboten: Sonderzeichen wie Klammern, Sterne, Ausrufezeichen, Unterstriche, Anführungszeichen / Erweiterungen wie "Tipp", "empfehlenswert", "only", "reup", usw. / jegliche andere Zusatzinformation oder Ergänzung, welche nicht in obiger Beschreibung zu finden ist
    Ausnahmen hiervon können in den Bereichen geregelt sein.

    Die Beiträge sollen wie folgt aufgebaut werden:
    Überschrift entspricht dem Threadtitel
    Cover
    kurze Inhaltsbeschreibung
    Format, Größe, Dauer sind gut lesbar für Downloader außerhalb des Spoilers zu vermerken
    Nfo sind immer Anzugeben und selbige immer im Spoiler in Textform.
    Sind keine Nfo vorhanden z.B. Eigenpublikationen, sind im Spoiler folgende Dateiinformationen zusätzlich anzugeben :
    Quelle
    Video (Auflösung und Bitrate)
    Ton (Sprache, Format und Bitrate der einzelnen Spuren)
    Untertitel (sofern vorhanden)
    Hosterangabe in Textform außerhalb eines Spoiler mit allen enthaltenen Hostern.
    Bei SD kann auf diese zusätzlichen Dateiinformationen verzichtet werden.

    Alle benötigten Passwörter sind, sofern vorhanden, in Textform im Angebot anzugeben.
    Spoiler im Spoiler mit Kommentaren :"Schon Bedankt?" sind unerwünscht.


    Releases

    - Sind Retail-Release verfügbar, sind alle anderen Variationen untersagt. Ausnahmen: Alle deutschen Retail-Release sind CUT, in diesem Fall sind dubbed UNCUT-Release zulässig.
    - Im Serien-Bereich gilt speziell: Wenn ein Retail vor Abschluss einer laufenden Staffel erscheint, darf diese Staffel noch zu Ende gebracht werden.62
    - Gleiche Releases sind unbedingt zusammenzufassen. Das bedeutet, es ist zwingend erforderlich, vor dem Erstellen eines Themas per Suchfunktion zu überprüfen, ob bereits ein Beitrag mit demselben Release besteht. Ist dies der Fall, ist der bereits vorhandene Beitrag zu verwenden.
    - P2P und Scene Releases dürfen nicht verändert oder gar unter einem iND Tag eingestellt werden.


    Support, Diskussionen und Suche

    - Supportanfragen sind entweder per PN oder im Bereich Talk zu stellen.
    - Diskussionen und Bewertungen sind im Talk Bereich zu führen. Fragen an die Uploader haben ausschließlich via PN zu erfolgen, und sind in den Angeboten untersagt.
    - Anfragen zu Upload-Wünschen sind nur im Bereich Suche Video erlaubt. Antworten dürfen nur auf Angebote von MyBoerse.bz verlinkt werden.


    Verbote

    - Untersagt sind mehrere Formate in einem einzigen Angebotsthread, wie beispielsweise das gleichzeitige Anbieten von DivX/XviD, 720p und 1080p in einem Thread. Pro Format, Release und Auflösung ist ein eigener Thread zu eröffnen.
    - Grundsätzlich ebenso verboten sind Dupes. Uploader haben sich an geeigneter Stelle darüber zu informieren, ob es sich bei einem Release um ein Dupe handelt.
    - Gefakte, nur teilweise lauffähige oder unvollständige Angebote sind untersagt. Dies gilt auch für eigene Publikationen, die augenscheinlich nicht selbst von z.B. einer DVD gerippt wurden. Laufende Serien, bei denen noch nicht alle Folgen verfügbar sind, dürfen erstellt und regelmäßig geupdatet werden.
    - Untersagt sind Angebote, welche nur und ausschließlich in einer anderen Sprache als deutsch oder englisch vorliegen. Ausnahmen sind VORHER mit den Moderatoren zu klären.


    Verstoß gegen die Regeln

    - Angebote oder Beiträge, die gegen die Forenregeln verstoßen, sind über den "Melden"-Button im Beitrag zu melden.
  • Bitte registriere dich zunächst um Beiträge zu verfassen und externe Links aufzurufen.

*** Bestes IPTV *** bester Preis *** gratis Test ***


Englische Tutorials

wekkkqhv15gro4ntbhrj2h6fji.jpg


Enhance Your Intuition With Tarot
Published 10/2022
MP4 | Video: h264, 1280x720 | Audio: AAC, 44.1 KHz
Language: English | Size: 14.77 GB | Duration: 13h 45m

Learn how to accurately read Tarot for yourself and others


What you'll learn

Enhance your Intuition so you can trust your inner knowing.
Learn how to accurately read Tarot for yourself and others.
Feel excited to activate your spiritual awakening.
Remember the truth about who you are and your connection to Tarot.
Connect & communicate with your Tarot Guides
Discover what is the difference between your ego & your intuition.

Requirements

You will need your Rider Waite Tarot Deck which you can buy online.


Description
Have you ever found yourself feeling stuck and just needing another perspective? But what everyone else is saying just does not feel right. Or perhaps you found yourself wondering why this is happening to why me? This is when intuition with Tarot makes a BIG difference in your life.Not only will the Tarot tell you what is blocking you from having what you want, it will give you deep understanding of possible solutions through life's challenges. When you understand the language within the Tarot, you can quickly identify what your Higher-Self wants you to know, so life becomes easier to live through daily challenges.While Tarot can be known as "Witchy", "Woo-Woo" or "Psychic future telling", truth is, Tarot is a tool when used by a trained reader, can enhance your intuition, to find answers that are more accurate and useful than what others will tell tell. It is your ultimate self development tool. I find Tarot goes hand in hand with every day life, as I pull a cards every single day. For me, my family, my clients and my loved ones.In this fun, expansive and interactive program, I will make enhancing your intuition EASY by learning Tarot.I will help you clear away the confusion and doubt around your connection with the universe and feel more aligned to your intuition.Even if you are new to Tarot, you will will discover effective methods to connect and confidently trust your intuition.
Overview

Section 1: Introduction to the course

Lecture 1 Welcome to the course

Lecture 2 What you will discover from this course

Lecture 3 About your Instructor - Claire

Lecture 4 Tarot guidebook

Lecture 5 In Tarot, the Fool is YOU

Section 2: Learn about the Tarot

Lecture 6 Journey of the Fool

Lecture 7 What are the Major Arcana cards

Lecture 8 What are the Minor Arcana cards

Lecture 9 Minor Arcana cards - the energy of our day to day

Lecture 10 Meet your Tarot guides

Section 3: Major arcana cards

Lecture 11 0 - Fool

Lecture 12 1 - Magician

Lecture 13 2 - The High Priestess

Lecture 14 3 - The Empress

Lecture 15 4 - The Emperor

Lecture 16 5 - The Hierophant

Lecture 17 6 - Lovers

Lecture 18 7 - The Chariot

Lecture 19 8 - Strength

Lecture 20 9 - The Hermit

Lecture 21 10 - Wheel of Fortune

Lecture 22 11 - Justice

Lecture 23 12 - The Hanged Man

Lecture 24 13 - Death

Lecture 25 14 - Temperance

Lecture 26 15 - The Devil

Lecture 27 16 - The Tower

Lecture 28 17 - The Star

Lecture 29 18 - The Moon

Lecture 30 19 - The Sun

Lecture 31 20 - Judgement

Lecture 32 21 - The World

Section 4: Things to know before we go the Minor Arcana

Lecture 33 How to shuffle your Tarot cards

Lecture 34 Cleansing your Tarot cards

Lecture 35 How to energetically cleanse your Tarot cards

Lecture 36 Daily Tarot tips

Section 5: Minor arcana - Suit of Wands

Lecture 37 Introduction to the wands suit

Lecture 38 Ace of Wands

Lecture 39 2 of Wands

Lecture 40 3 of Wands

Lecture 41 4 of Wands

Lecture 42 5 of Wands

Lecture 43 6 of Wands

Lecture 44 7 of Wands

Lecture 45 8 of Wands

Lecture 46 9 of Wands

Lecture 47 10 of Wands

Lecture 48 Page of Wands

Lecture 49 Knight of Wands

Lecture 50 Queen of Wands

Lecture 51 King of Wands

Section 6: Minor arcana - Suits of Swords

Lecture 52 Introduction to Swords

Lecture 53 Ace of Swords

Lecture 54 2 of Swords

Lecture 55 3 of Swords

Lecture 56 4 of Swords

Lecture 57 5 of Swords

Lecture 58 6 of Swords

Lecture 59 7 of Swords

Lecture 60 8 of Swords

Lecture 61 9 of Swords

Lecture 62 10 of Swords

Lecture 63 Page of Swords

Lecture 64 Knight of Swords

Lecture 65 Queen of Swords

Lecture 66 King of Swords

Section 7: Minor arcana - Suit of Cups

Lecture 67 Introduction to the Suit of Cups

Lecture 68 Ace of Cups

Lecture 69 2 of Cups

Lecture 70 3 of Cups

Lecture 71 4 of Cups

Lecture 72 5 of Cups

Lecture 73 6 of Cups

Lecture 74 7 of Cups

Lecture 75 8 of Cups

Lecture 76 9 of Cups

Lecture 77 10 of Cups

Lecture 78 Page of Cups

Lecture 79 Knight of Cups

Lecture 80 Queen of Cups

Lecture 81 King of Cups

Section 8: Minor arcana - Suit of Pentacles

Lecture 82 Introduction to the Suit of Pentacles

Lecture 83 Ace of Pentacles

Lecture 84 2 of Pentacles

Lecture 85 3 of Pentacles

Lecture 86 4 of Pentacles

Lecture 87 5 of Pentacles

Lecture 88 6 of Pentacles

Lecture 89 7 of Pentacles

Lecture 90 8 of Pentacles

Lecture 91 9 of Pentacles

Lecture 92 10 of Pentacles

Lecture 93 Page of Pentacles

Lecture 94 Knight of Pentacles

Lecture 95 Queen of Pentacles

Lecture 96 King of Pentacles

Section 9: The art of doing a reading

Lecture 97 How to interpret the meaning in a card

Lecture 98 How to read more than one card in a reading

Lecture 99 Everyday spreads

Lecture 100 Does Tarot predict the future?

Lecture 101 Reconnect with your Tarot Guides

Lecture 102 Were you connected to Tarot in a past life? (History of Tarot)

Lecture 103 How to navigate difficult questions in a Tarot reading

Lecture 104 What to do if you are triggered by a reading?

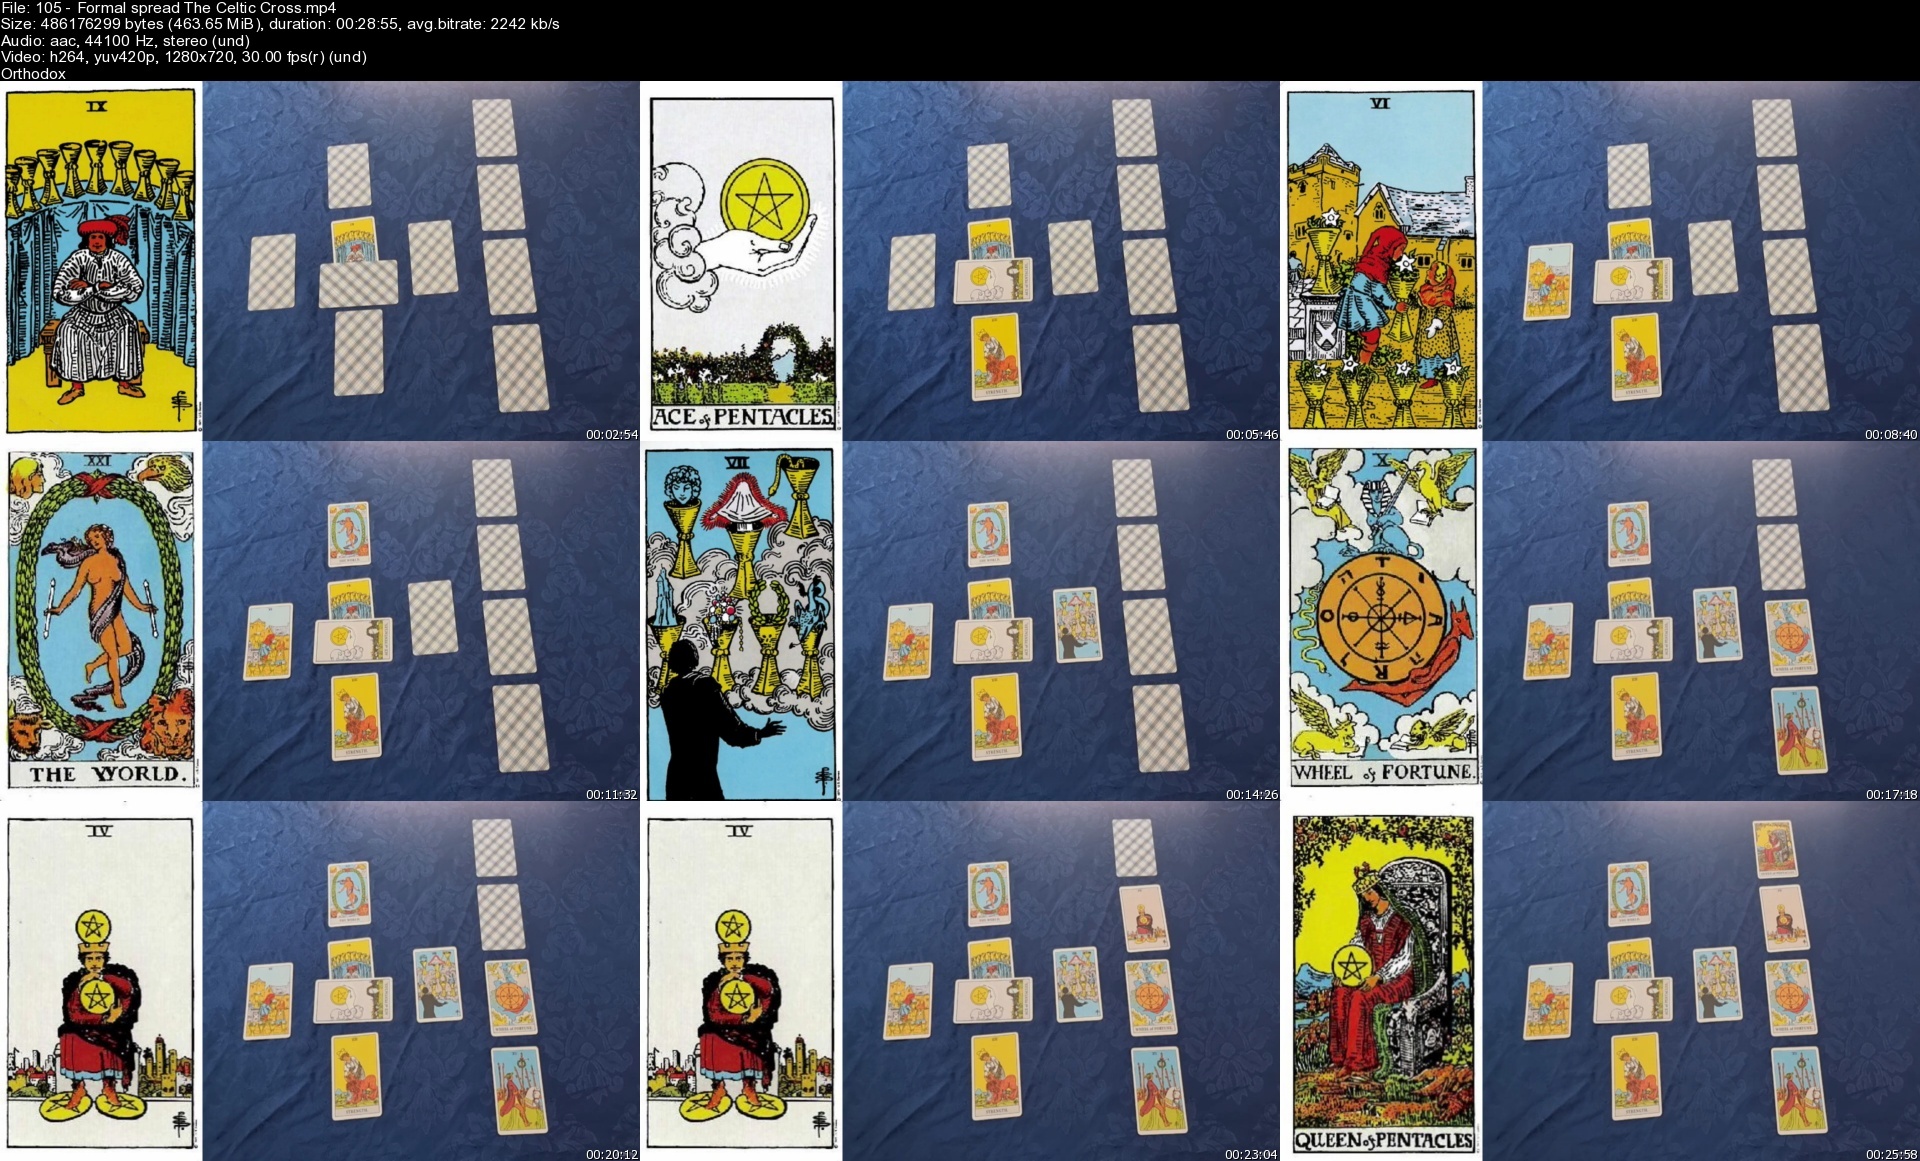
Lecture 105 Formal spread - The Celtic Cross

Lecture 106 Another Celtic cross spread

Lecture 107 Who is the type of client you want to read for?

Lecture 108 How to set up for a reading

Section 10: More meanings in the Tarot

Lecture 109 Colours

Lecture 110 Numbers

Lecture 111 Court Cards

Lecture 112 Health within the Tarot (part 1)

Lecture 113 Health within the Tarot (part 2)

Lecture 114 Glossary of the Tarot

Section 11: How to enhance your intuition

Lecture 115 Enhance your Intuition

Lecture 116 Yes / No Intuitive guidance

Lecture 117 The difference between ego & intuition

Lecture 118 Raise your consciousness

Lecture 119 Thank You

This course is designed for everyone who is curious about Tarot.,It is simplified for beginners, as well as covering advanced topics and spiritual concepts.,It is for women who find yourself feeling stuck and just needing another perspective,Those who are awakening to their intuition and want to find ways to improve it,You have started your spiritual awakening and want to explore more


Homepage

105formalspreadthecelj0fak.jpg


gqypurkomqgctsr2izng74qcnc.jpg


Master Computer Vision With Deep Learning, Opencv4 & Python
Last updated 5/2023
MP4 | Video: h264, 1920x1080 | Audio: AAC, 44.1 KHz
Language: English | Size: 12.83 GB | Duration: 12h 3m

Become a Computer Vision Guru, Implement object detection, tracking and recognition using OpenCV4, Dlib & Deep Learning


What you'll learn
Become a Master Computer Vision Programmer by learning from the field experts.
Start from the ground up by Coding Image Processing basics i.e. (Image access and manipulations)
Make your CV Projects interactive by learning to utilize Trackbars and Mouse Events
Deep-dive into CV_101 topics i.e. (Transformations, Filtering, Segmentation, Contours and Features )
Conquer advanced techniques like Object detection, Object Tracking, Object Recognition
Understand, Train and deploy Haar Cascade and YOLOv3 for Object detection
Perform Single Object Tracking using CSRT, KCF etc. and Multi-Object Tracking using DeepSort.
Implement and compare Simple Face-Recognizers like LBP, FisherFaces with highly accurate dlib Implementation.
Secure Access: Create a python executable that only allows access on your pc to authorized personnel's through a complete end-to-end development.


Requirements
Python basic Programming


Description
This course is your ultimate guide for entering into the realm of Computer Vision. We will start from the very basics i.e Image Formation and Characteristics, Perform basic image processing (Read/Write Image & Video + Image Manipulation), make CV applications interactive using Trackbars and Mouse events, build your skillset with Computer Vision techniques (Segmentation, Filtering & Features) before finally Mastering Advanced Computer Vision Topics i.e Object Detection, Tracking, and recognition. Right at the end, we will develop a complete end-to-end Visual Authorization System (Secure Access). The course is structured with below main headings.Computer Vision FundamentalsImage Processing Basics (Coding)CV-101 (Theory + Coding)Advanced [Detecion] (Theory + Coding)Advanced [Tracking] (Theory + Coding)Project: PeopleTrackr ( Crowd Monitoring System )Advanced [Recognition] (Theory + Coding)Project: EasyAttend ( Live Attendance System )Project: Secure Access (End-to-end project development & deployment)GoodbyeFrom Basics to Advanced, each topic will accompany a coding session along with theory. Programming assignments are also available for testing your knowledge. Python Object Oriented programming practices will be utilized for better development.Learning Outcomes - Computer VisionRead/Write Image & Video + Image ManipulationInteractive CV applications with Trackbars & MouseEventsLearn CV Techniques i.e (Transformation, Filtering, Segmentation, and Features)Understand, train, and deploy advanced topics i.e (Object Detection, Tracking, and Recognition) Test your knowledge by completing assignments with each topic. [Project-1] PeopleTrackr: Crowd Monitoring System [Project-2] EasyAttend: Live attendance System for Classrooms and offices.[Final-Project] Secure Access: End-to-end Visual Authorization System for your Computer.- AlgorithmsFacial recognition algorithms like LBP and Dlib-ImplementationLBP (Fast-Less accurate)Dlib-Implementation (Slow-Accurate)Single Object TrackersCSRT, KCFMultiple Object TrackersDeepSort (Slow-Accurate)Object DetectionHaar Cascades (Fast-Less accurate)YoloV3 (Slow-Accurate)Computer Vision TechniquesSift | Orb Feature MatchingCanny Edge detectionBinary, Otsu, and Adaptive ThresholdingKmeans SegmentationConvex hull ApproximationPre-Course RequirmentsSoftware BasedOpenCV4PythonSkill BasedBasic Python ProgrammingMotivated mind :)All the codes for reference are available on the GitHub repository of this course.Get a good idea by going through all of our free previews available and feel free to contact us in case of any confusion :)
Overview
Section 1: Prerequisites

Lecture 1 GitHub Resources And Dependencies

Lecture 2 Environment Setup

Section 2: Introduction

Lecture 3 Computer Vision Fundamentals

Section 3: Image Processing Basics

Lecture 4 Reading/Writing image and Videos in OpenCV (Coding)

Lecture 5 Image Manipulation (Coding)

Lecture 6 Important Functions (Coding)

Lecture 7 Make CV Applications Interactive #1 : Trackbars

Lecture 8 Make CV Applications Interactive #2 : MouseEvents

Section 4: CV-101

Lecture 9 Image Transformations (Theory)

Lecture 10 Image Transformations (Coding)

Lecture 11 Image Filtering (Theory)

Lecture 12 Image Filtering (Coding)

Lecture 13 Image Segmentation (Theory)

Lecture 14 Image Segmentation (Coding)

Lecture 15 Image Contours (Theory)

Lecture 16 Image Contours (Coding)

Lecture 17 Image Features - Keypoints (Theory)

Lecture 18 Image Features - Keypoints (Coding)

Lecture 19 Image Features - Descriptors (Theory)

Lecture 20 Image Features - Descriptors (Coding)

Lecture 21 Feature Matching

Section 5: Advanced ( Detection )

Lecture 22 Object detection (Theory)

Lecture 23 Haar Cascades (Theory) - Object Detection

Lecture 24 Training a Custom Haar Cascade detector (Coding) - Object detection

Lecture 25 Detection Using Haar Cascade (Coding) - Object Detection

Lecture 26 YOLO (Theory) - Object detection

Lecture 27 Detection Using YOLO in OpenCV (Coding) - Object detection

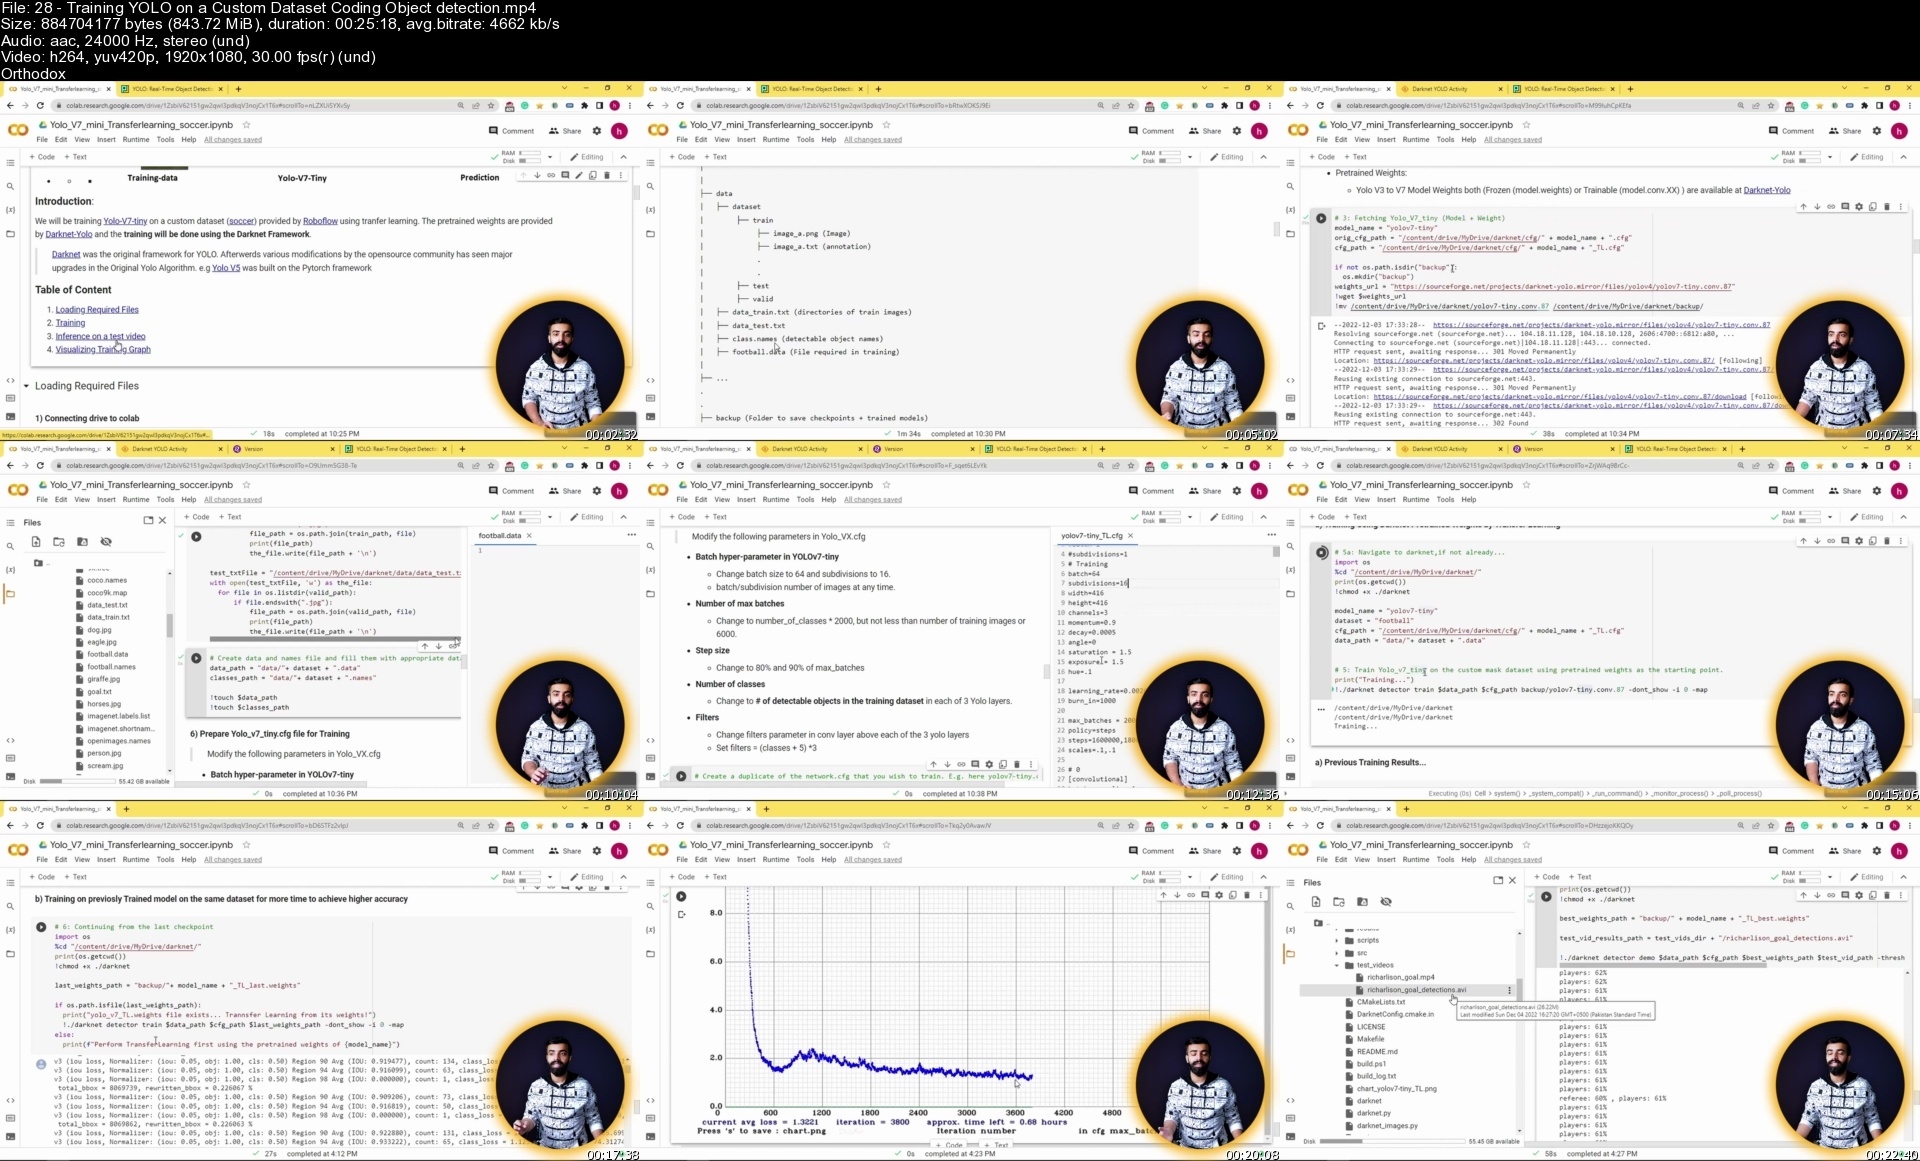
Lecture 28 Training YOLO on a Custom Dataset (Coding) - Object detection

Section 6: Advanced (Tracking)

Lecture 29 What is Object Tracking?

Lecture 30 Single Object Tracking (Theory) - Comparison

Lecture 31 Single Object Tracking (Coding)

Lecture 32 Multiple Object Tracking (T + C)

Lecture 33 MOT: DeepSort (Theory)

Lecture 34 MOT: DeepSort (Setup) - Environment Setup

Lecture 35 MOT: DeepSort (Theory) - Algorithm Overview

Lecture 36 MOT: DeepSort (Coding)

Section 7: Project 1: PeopleTrackr

Lecture 37 Feature 1: Live-People-Counter

Lecture 38 Feature 2: Displaying trajectories

Lecture 39 Feature 3: Focus On Suspicious Individual

Section 8: Advanced (Recognition)

Lecture 40 What is Image Recognition?

Lecture 41 Face Recognition OpenCV (Theory) - Comparison

Lecture 42 Face Recognition OpenCV (Coding)

Section 9: Project 2: Live Attendance System

Lecture 43 Part A: Workflow and Dataset Acquisition

Lecture 44 Part B: Implementation

Section 10: Final Project : Secure Access

Lecture 45 Part A: Face Detection

Lecture 46 Part B: Tracking

Lecture 47 Part C: Alignment & Representation

Lecture 48 Part D: Matching

Lecture 49 Part E: MultiProcessing

Section 11: Goodbye

Lecture 50 Message to Students

Beginner Python developers curious about Computer Vision,Undergrads wanting to investigate/opt-in to Computer Vision,University Graduates looking to add Computer Vision in their skillset,Computer Vision Programmers wanting to brush up on some basics

Homepage


28trainingyoloonacust2weil.jpg


rgc8xtohhlagepph9u3crise9u.jpg


Essential Hypnosis And Nlp Training Certification
Last updated 3/2021
MP4 | Video: h264, 1280x720 | Audio: AAC, 44.1 KHz
Language: English | Size: 10.15 GB | Duration: 9h 51m

Go from zero to hypnotist!


What you'll learn
What is hypnosis? What is NLP? How do they differ
The history of hypnosis and NLP
The responsibility of the mind
Structures of reality explained
Levels of trance and vibrations
Waking hypnosis
Body Language
Inductions
Convincers and deepeners
Suggestibility Tests (can this person be hypnotised?)
Metaphors
Post Hypnotic Suggestion (PHS)
Awakening Techniques
Script setups
Ideomotor Response
Somnambulism
Dealing with difficult clients , Referrals, ethics and fallacies
Your own hypnosis scripts

Requirements
No

Description
Curious about hypnosis and nlp?This course is for the beginner! Starting with the basics and easily helping you advance to hypnotist.Whats on offer:* What is hypnosis? What is NLP? How do they differ* The history of hypnosis and NLP* The responsibility of the mind* Structures of reality explained* Levels of trance and vibrations* Waking hypnosis* Body Language* Inductions* Convincers and deepeners* Suggestibility Tests (can this person be hypnotised?)* Metaphors* Post Hypnotic Suggestion (PHS)* Awakening Techniques* Hakalua learning state* Hot, cold and warm reading* Script setups* Ideomotor Response* Somnambulism* Introductions that sell* Dealing with difficult clients* Booking clients* Referrals, ethics and fallacies* Your own hypnosis scripts

Overview

Section 1: 1 Welcome 2 What is hypnosis?

Lecture 1 1 Welcome 2 What is hypnosis?

Section 2: 3 The history of hypnosis

Lecture 2 3 The history of hypnosis

Section 3: 4 Responsibility of the mind

Lecture 3 4 Responsibility of the mind

Section 4: 5 Structure of reality explained

Lecture 4 5 Structure of reality explained

Section 5: 6 Prestige and rapport

Lecture 5 6 Prestige and rapport

Section 6: 7 Levels of trance and vibrations

Lecture 6 7 Levels of trance and vibrations

Section 7: 8 Pretalk and waking hypnosis

Lecture 7 8 Pretalk and waking hypnosis

Section 8: 9 Tonality

Lecture 8 9 Tonality

Section 9: 10 Body Language

Lecture 9 10 Body Language

Section 10: 11 Hypnotic inductions

Lecture 10 11 Hypnotic inductions

Section 11: 12 Convincers and deepeners

Lecture 11 12 Convincers and deepeners

Section 12: 13 Suggestibility tests

Lecture 12 13 Suggestibility tests

Section 13: 14 Scaling evidence procedure

Lecture 13 14 Scaling evidence procedure

Section 14: 15 Metaphors

Lecture 14 15 Metaphors

Section 15: 16 Breaking state and future pacing

Lecture 15 16 Breaking state and future pacing

Section 16: 17 Post hypnotic suggestions

Lecture 16 17 Post hypnotic suggestions

Section 17: 18 awakening technique

Lecture 17 18 awakening technique

Section 18: 19 Hakalua

Lecture 18 19 Hakalua

Section 19: 20 Pace, pace leading technique

Lecture 19 20 Pace, pace leading technique

Section 20: 21 Hot, cold, warm reading

Lecture 20 21 Hot, cold, warm reading

Section 21: 22 Eye fixation

Lecture 21 22 Eye fixation

Section 22: 23 Script setup

Lecture 22 23 Script setup

Section 23: 24 Triggers

Lecture 23 24 Triggers

Section 24: 25 Ideomotor response

Lecture 24 25 Ideomotor response

Section 25: 26 Somnambulism

Lecture 25 26 Somnambulism

Section 26: 27 External environment

Lecture 26 27 External environment

Section 27: 28 Introductions

Lecture 27 28 Introductions

Section 28: 29 Group sessions

Lecture 28 29 Group sessions

Section 29: 30 Forms

Lecture 29 30 Forms

Section 30: 31 CBT's

Lecture 30 31 CBT's

Section 31: 32 Benefitting technique

Lecture 31 32 Benefitting technique

Section 32: 33 Stage hypnosis basics

Lecture 32 33 Stage hypnosis basics

Section 33: 34 Instant and rapid inductions

Lecture 33 34 Instant and rapid inductions

Section 34: 35 Adding value

Lecture 34 35 Adding value

Section 35: 36 Booking and maintenance sessions

Lecture 35 36 Booking and maintenance sessions

Section 36: 37 How to always get paid

Lecture 36 37 How to always get paid.

Section 37: 38 Free sites

Lecture 37 38 Free sites

Section 38: 39 Referrals and fallacies

Lecture 38 39 Referrals and fallacies

Section 39: 40 You website

Lecture 39 40 You website

Section 40: 41 Your social media

Lecture 40 41 Your social media

Section 41: 42 Advance techniques

Lecture 41 42 Advance techniques

Section 42: 43 Your scripts

Lecture 42 43 Your scripts

Section 43: Full Access Library

Lecture 43 Full Access Library

Beginner people interested in self improvement and development with no previous knowledge required


essentialhypnosisandnq3i3o.jpg


byinvqsdhewesbi7nmbq1xgdaz.jpg


How To Draw Animals For Beginners - Volume 3
Last updated 3/2022
MP4 | Video: h264, 1280x720 | Audio: AAC, 44.1 KHz
Language: English | Size: 11.02 GB | Duration: 8h 46m

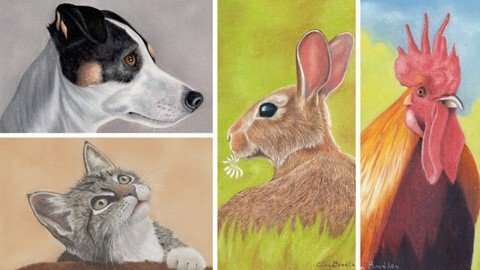
Learn to draw a Jack Russell, Kitten, Rabbit and Cockerel with this Pastel Pencil for Beginners Course.


What you'll learn
How to Draw 4 Animals using Pastel Pencils
The fundamentals with using Pastel Pencils
The light to dark rule when layering Pastel Pencils
How to apply the techniques learnt to colour their animals

Requirements
Pastel Pencils (Colin uses Faber-Castell PITT Pastel Pencils)
Pastel Paper (Colin uses Sand Coloured Fabriano Ingres Paper)
Colour Shaper Blending Tool (We recommend to have a grey chisel size 2 shaper)
Eraser (we recommend a double ended eraser - one with a soft and hard end)

Description
Have you ever wished you could paint animals?Would you love to be able to draw AMAZING pets and animals you never thought possible?With this course, you will learn the techniques and skills to be able to do just this.Pastel PencilsIn my 30+ Years of Experience I have found that Pastel Pencils is the by far the easiest art medium to pick up and learn.When you have finished this course not only will you walk away with 4 AMAZING animal paintings but you will also be able to apply what you have learnt to draw your own pictures.MaterialsEach subject requires just a few colours and there are just 17 pencils in total that you need to draw all 4. You do not have to use the exact same brand as me either :)The colours are as follows:Faber-Castell PITT Pastel Pencils273 warm grey IV181 payne's grey199 black131 coral187 burnt ochre283 burnt sienna101 white192 indian red182 burnt ochre175 dark sepia170 may green186 terracotta191 pompeian red176 van dyck brown143 cobalt blue109 dark chrome yellow106 light chrome yellowPastel PaperThe paper I use is a fabriano ingres pastel paper in sand colour (160gsm thickness). This is a great paper for starting out as you can erase mistakes easily! If you do not have this paper then you can use another paper that you prefer.Outline DrawingI provide you with an outline drawing for each portrait so that you do not have to draw the subject free hand. Trace this through to your paper using preferably a graphite transfer sheet like tracedown or print it straight out using your home printer.Step by Step InstructionsI walk you through step by step with video instruction how to draw each stage. You'll learn techniques behind drawing beautiful animal portraits and create pictures you can be proud of.Start Learning TodayWith just a small amount of pencils you will see the AMAZING effects you can get.Let your journey into drawing and painting animals start here.

Overview
Section 1: Introduction

Lecture 1 Introduction

Section 2: Basics

Lecture 2 Welcome

Lecture 3 Pastel Pencils

Lecture 4 Pastel Paper

Lecture 5 Blending

Lecture 6 Fixative

Lecture 7 Using our Courses

Section 3: Jack Russell

Lecture 8 Part 1

Lecture 9 Part 2

Section 4: Kitten

Lecture 10 Part 1

Lecture 11 Part 2

Section 5: Rabbit

Lecture 12 Part 1

Lecture 13 Part 2

Section 6: Cockerel

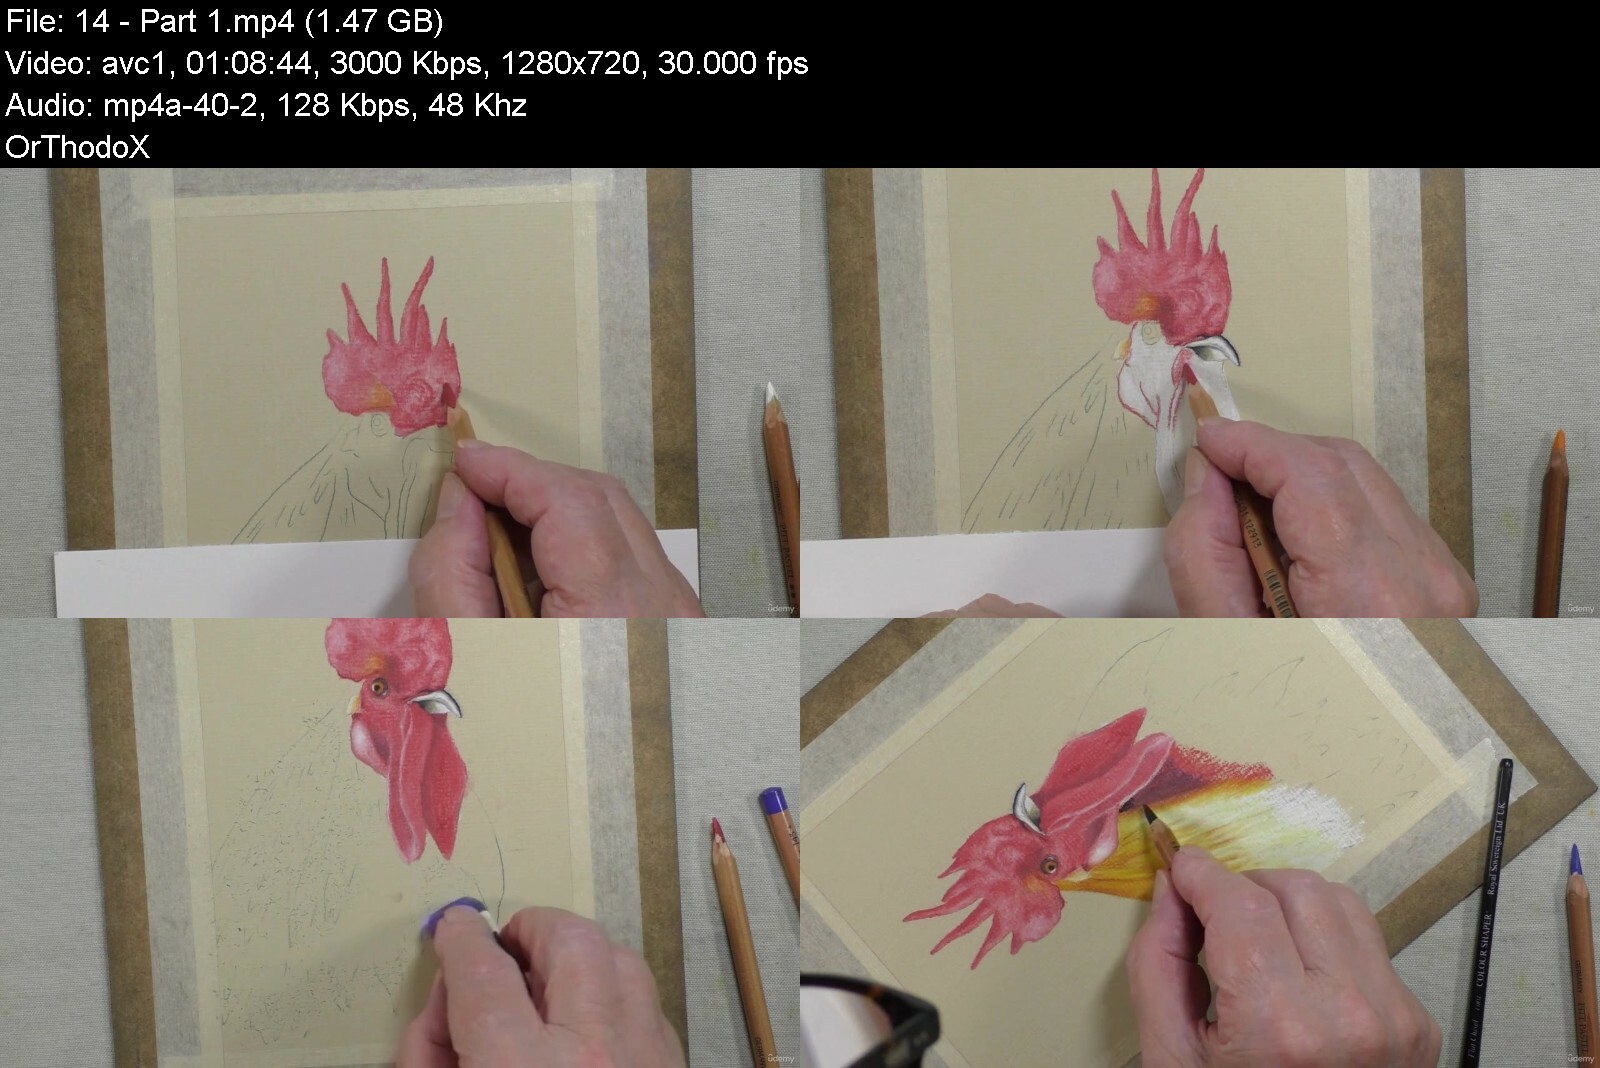
Lecture 14 Part 1

Lecture 15 Part 2

Absolute beginners with no previous drawing experience,Artists that wish to try a new medium,Anyone wanting to try colouring as an enjoyable hobby


howtodrawanimalsforbe2qict.jpg


491716229d1hxeob.jpg


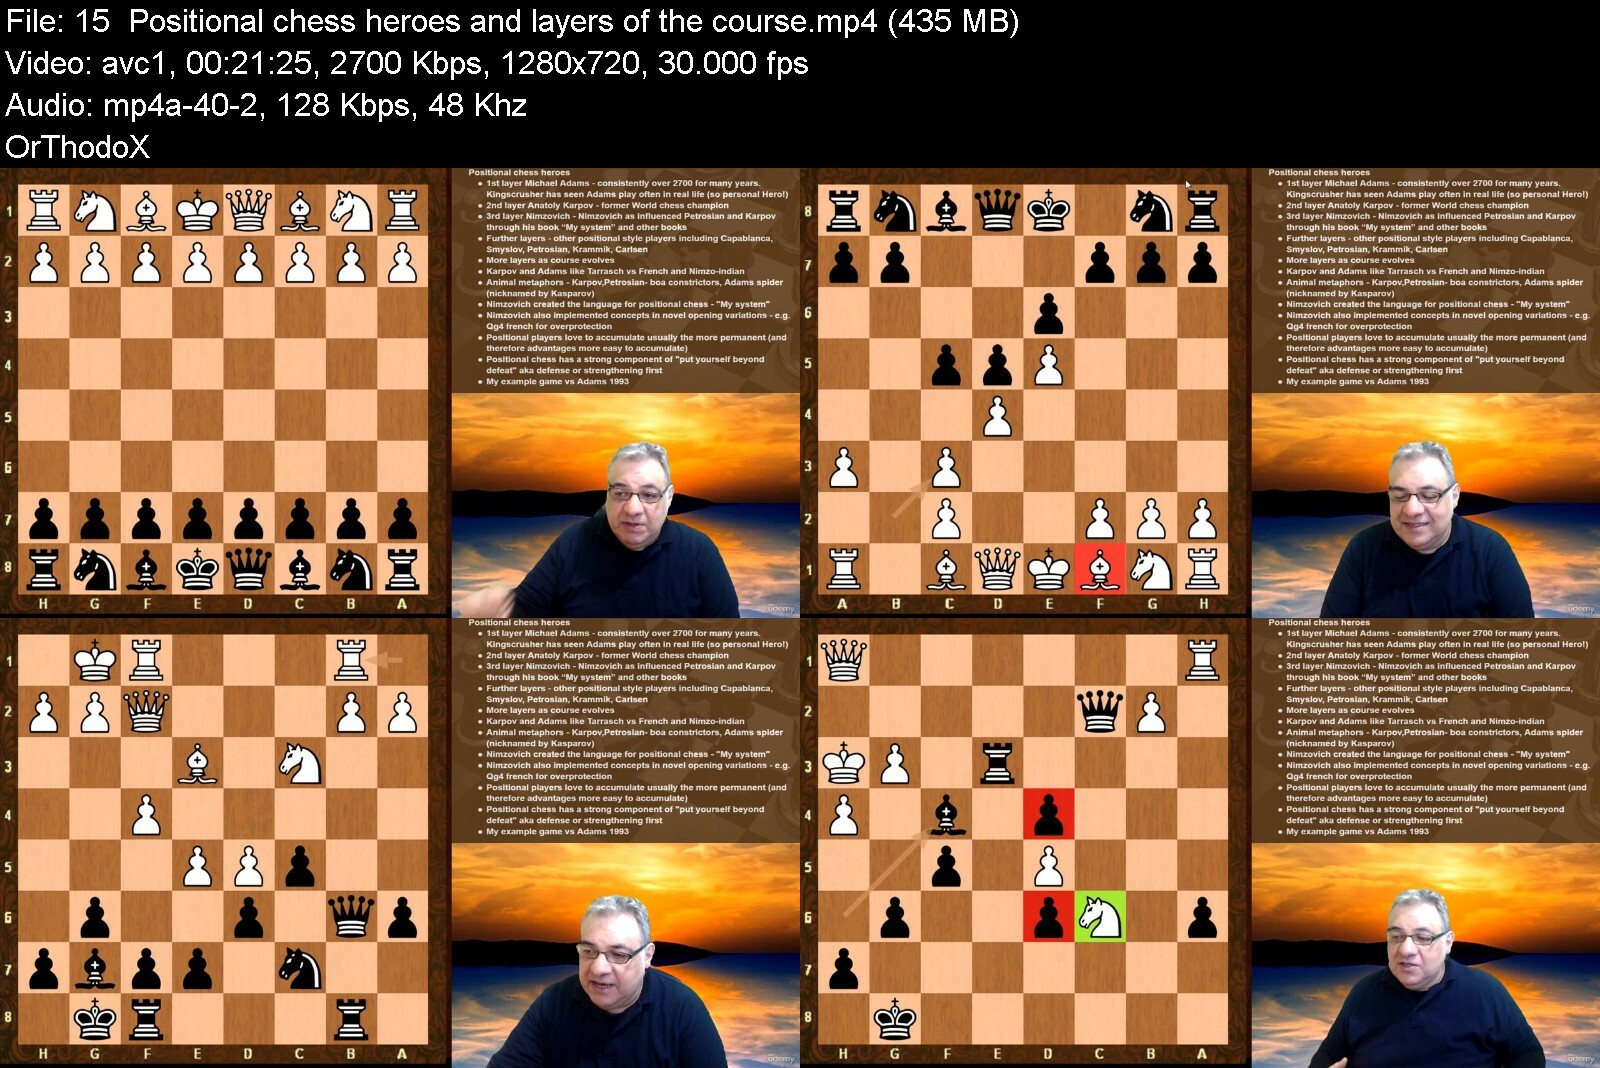
The Complete Guide to Positional Chess
Published 12/2022
Created by Tryfon Gavriel
MP4 | Video: h264, 1280x720 | Audio: AAC, 44.1 KHz, 2 Ch
Genre: eLearning | Language: English | Duration: 192 Lectures ( 38h 31m ) | Size: 44.8 GB


Important positional chess patterns for making slight improvements to your position and accumulating small advantages


What you'll learn
Be able to play positionally when there are no tactics as positional play becomes the main factor
Be able to improve long term strength of position and generally safeguarding position
Be able to improvement the placement of pieces and harmonise with pawn structure
Be able to limit the good moves and opportunities of opponent
Be able to steer pawn structure in a favourable way
Be able to create weaknesses in the opponent's position
Be able to fix weaknesses in the opponent's position with the option of eliminating them later
Be able to prevent opponent's threats and strongest sources of counterplay
Be able to coordinate pieces to common goals
Be able to improve the worst placed piece
Be able to appreciate the downsides of pawn breaks played too quickly and the value of preparing pawn breaks
Be able to appreciate that when tactics break out, the better placed pieces side will usually do better
Be able to improve either strengthening own position or continually not creating downsides or its possibility
Be able to say "no" to opponent'd threats and not give opponent option because have been strengthening own position or no downside policy
Be able to play a bit more like GM Michael Adams - spider style
Be able to make use of longer term approaches to building up great positions
Be able to use a positional opening repertoire with examples from Adams and Karpov especially the Caro-Kann usage

Requirements
Know how the chess pieces move

Description
Many of the world chess champions excelled at positional play and often hardly lost including Jose Raul Capablanca and Tigran Petrosian. Petrosian was an inspiration to Anatoly Karpov who made comments in a key Gibraltar interview that he essentially used Petrosian's style but to win and not be content as much with drawing. The more modern world champions such as Vladimir Kramnik and Magnus Carlsen also excel at positional play. This course looks at the foundations set out by the first official World chess champion Wilhelm Steinitz and consolidated byEmanual Lasker and shows how the positional world champions took the concept of accumulating advantages and managing counterplay to new levels. This course provides important positional patterns for making slight improvements to your position and accumulating small advantages. Doing these things whilst also making sure control is kept of the position through minimizing the opponent's counterplay can lead to very one-way controlled games. A positional chess pattern architectureThe course does not wish to be overly prescriptive as this may result in concepts being the driver of one's own games instead of one's own thinking about the unique challenges and resources one faces. Instead of "principles", the course makes use of "Patterns". The "patterns" are structured in this course into:Control Patterns - making sure control is not lost in the position and therefore it becomes much harder to build any sort of advantage. Control patterns including simplification and minimizing counterplay.Imbalance Patterns - how differences in the position can be a great way to both liven up games but also provide key winning opportunities with positional play focused on one's own favorable imbalancesStructure Patterns - Philidor has indicated "Pawns are the soul of Chess" and it seems the positional players really aim for pawn structures in general that are healthy and have great prospects for supporting the pieces and great positional plansWaiting Patterns - how the opportunities to win can often be amplified if only the opponent is given the opportunity to weaken their position further or crack under the positional pressureEndgame Patterns - showing how the Endgame has its own particular positional themesOverwhelming Patterns - showing how positional pressure can be made to overwhelm opponentsPiece Quality Patterns - showing how small improvements to piece position can really be importantCenter Patterns - showing the importance of the center and the hypermodern view of control vs occupation. Weapon Patterns - including passed pawns, thorn pawns, bishop without a counterpartKing-safety patterns - Checkmate still ends the game even for positional playersActivity patterns - making sure one's pieces are activeCrowning patterns - standard ways of making use of positional advantagesGame examplesFull game examples are taking for the positional great players such as Steinitz, Lasker, Capablanca, Alekhine, Petrosian, Karpov, and modern super grandmasters such as Michael Adams. Games are analysed in great detail using the very best modern engine technology with Neural network capabilities which make their analysis more positional grounded than in the past.

Who this course is for
Beginner to intermediate players


thecompleteguidetopos1ocu1.jpg


zef0chkmtyshlcon0nksejwd42.jpg


How To Paint Snowy Pine Trees - Acrylic Masterclass
Published 11/2022
MP4 | Video: h264, 1280x720 | Audio: AAC, 44.1 KHz
Language: English | Size: 11.95 GB | Duration: 9h 21m

Learn to paint different types of snowy pine trees using 4 different brushes and then create artworks using them.


What you'll learn
Learn to paint snowy pine trees with 4 different brushes
Learn acrylic blending and color mixing, that will help you understand how to paint any winter landscape.
Learn to paint 4 resin coasters
Learn to paint 2 canvas paintings and 2 greetings cards

Requirements
This class is beginner friendly. So if you are new to acrylic paintings, you can definitely learn a lot here which will boost your confidence to handle the medium.

Description
Snow-covered pine trees are the beauty of the winter season and painting a canvas full of snowy pine trees can transport us to a magical scene. If you want to paint a winter landscape painting, learning to paint pine trees covered with snow is essential. And with that goal in mind, I created this course for you.In this class, you will learn to paint snowy pine trees with 4 different types of acrylic brushes - Flat brushFilbert brushFan brushRound brushWith each brush, you get to learn different brush techniques and also learn to paint different types of pine trees.Once you learn all the different brush strokes, you can decide for yourself which one you resonate with the most and love painting, and use that mostly in your winter paintings. After creating a strong foundation for painting winter landscapes, by learning how to paint snowy pine trees, we will learn a very important exercise of acrylic blending and color mixing, that will help you understand how to paint any winter landscape.Finally, we finish off this class by creating some beautiful artworks:2 beautiful winter landscape paintings 4 different coasters (2 square and 2 round) and seal them with resin2 handmade Christmas greetings cards with lots of snow and pine trees.You can use your masterpieces as home decor or for gifting this holiday season.So I hope you are excited by now to dive into this exciting class of painting snowy pine trees.Happy Painting!

Overview
Section 1: 1. Introduction

Lecture 1 Introduction

Lecture 2 Art Supplies

Lecture 3 Before You Begin

Lecture 4 Preparing The Papers

Section 2: 2. Snow Pine Trees With Flat Brush

Lecture 5 Flat Brush - Brushstrokes

Lecture 6 Flat Brush - Snow Pine Tree 1 - Step 1

Lecture 7 Flat Brush - Snow Pine Tree 1 - Step 2

Lecture 8 Flat Brush - Snow Pine Tree 1 - Step 3

Lecture 9 Flat Brush - Snow Pine Tree 1 - Step 4

Lecture 10 Flat Brush - Snow Pine Tree 1 - Step 5

Lecture 11 Flat Brush - Snow Pine Tree 1 - Step 6

Lecture 12 Flat Brush - Snow Pine Tree 2

Lecture 13 Flat Brush - Final Touches

Section 3: 3. Snow Pine Trees With Filbert Brush

Lecture 14 Filbert Brush - Brushstrokes

Lecture 15 Filbert Brush - Snow Pine Tree 1

Lecture 16 Filbert Brush - Snow Pine Tree 2

Lecture 17 Filbert Brush - Final Touches

Section 4: 4. Snow Pine Trees With Fan Brush

Lecture 18 Fan Brush - Brushstrokes

Lecture 19 Fan Brush - Snow Pine Tree 1

Lecture 20 Fan Brush - Snow Pine Tree 2

Section 5: 5. Snow Pine Trees With Round Brush

Lecture 21 Round Brush - Brushstrokes

Lecture 22 Round Brush - Tree 1

Lecture 23 Round Brush - Tree 2

Lecture 24 Round Brush - Snow Pine Tree 3

Lecture 25 Round Brush - Small Snow Pine Trees

Section 6: 6. Color Mixing + Acrylic Blending Exercises

Lecture 26 Exercise Intro

Lecture 27 Winter Landscape Exercise 1

Lecture 28 Winter Landscape Exercise 2

Lecture 29 Winter Landscape Exercise 3

Lecture 30 Winter Landscape Exercise 4

Lecture 31 Winter Landscape Exercise 5

Lecture 32 Winter Landscape Exercise 6

Lecture 33 Final Words

Section 7: 7. Winter Snowfall Scenery with Snow Pine Trees painting

Lecture 34 Intro

Lecture 35 Sky

Lecture 36 Land

Lecture 37 Distant Pine Trees

Lecture 38 Big Pines

Lecture 39 Tree Shadows

Lecture 40 Snowfall

Section 8: 8. Winter Night Painting with Snow Pine Trees

Lecture 41 Sky

Lecture 42 Land

Lecture 43 Road

Lecture 44 Distant Pine Trees

Lecture 45 Big Pine

Lecture 46 Birch Tree

Section 9: 9. Resin Coasters (2 Square + 2 Round)

Lecture 47 Intro

Lecture 48 Background

Lecture 49 Square Coaster 1

Lecture 50 Square Coaster 2

Lecture 51 Round Coaster 1

Lecture 52 Round Coaster 2

Lecture 53 Preparing The Resin

Lecture 54 Resin Pour

Lecture 55 Final Pieces

Section 10: 10. Handmade Greetings Cards

Lecture 56 Preparing The Blank Cards

Lecture 57 Card 1 - Purple

Lecture 58 Card 2 - Blue

Lecture 59 Card Message & Packaging

Lecture 60 Final Words

The step-by-step approach of this acrylic painting class can be followed by anyone and everyone.


howtopaintsnowypinetrtwi4v.jpg


sjplrisibph2p9vhkld2gikemr.jpg


How To Draw Wild Animals Vol 4 - Lion, Rhino And Cheetah
Last updated 9/2019
MP4 | Video: h264, 1280x720 | Audio: AAC, 44.1 KHz
Language: English | Size: 11.32 GB | Duration: 8h 48m

Learn how to draw 3 Wild Animal Pictures. Get AMAZING results with Pastel Pencils. Create art you can be proud of.


What you'll learn
How to use Pastel Pencil Techniques to Draw 3 Wild Animals
Apply the light to dark rule when layering pastel tones
Be able to apply the techniques learnt to their own pictures
Easy to copy techniques with step by step videos

Requirements
Selection of Pastel Pencils (Faber-Castell Pitt - see our introduction lecture for full materials breakdown)
Pastel Paper - Colin uses Sand Coloured Fabriano Ingres Paper
Colour Shaper Blending Tool (We recommend to have a grey chisel size 2 shaper at least. See the materials lecture for more information on shapers)
Eraser (we recommend a double ended eraser - one with a soft and hard end)

Description
Have you ever wished you could draw?Would you love to be able to draw AMAZING pictures you never thought possible?With this course you'll learn to draw 3 amazing wild animals by following our easy step by step videos.Pick up and LearnIn my 30+ Years of Experience I have found that Pastel Pencils is the by far the easiest art medium to pick up and learn.In this course you will learn how to draw 3 stunning wild animals:LionRhinoCheetahWhen you have finished this course not only will you walk away with 3 incredible paintings but you will also be able to apply what you have learnt to draw your own pictures.MaterialsFor all pictures I use Sand Coloured Fabriano Ingres Paper, this is a great neutral tone and works so well for all kinds of subjects. It is ideal for someone fairly new to pastel pencil work as you can erase so easily on the paper. I also use Faber-Castell Pitt Pastel Pencils and refer to these throughout the course. You can of course use any materials that you wish to use.I would recommend this course for intermediate level artists. Perhaps you have tried my free courses and want to venture into the next level up or have already used Pastel Pencils before. If you are just starting out with pastel pencils let me not discourage you from giving this subject a go, you will certainly learn a lot from the lessons and hopefully enjoy it as you do!I provide you with an outline drawing for each subject so that you do not have to draw free hand. Trace this through to your paper or print it straight out using your printer. I walk you through step by step with Video instruction how to draw each stage. You'll learn techniques behind drawing beautiful wild animals and create pictures you can be proud of.I have broken the course down into bitesize chunks that you can follow and return to with ease.If you love drawing and want to discover easy techniques to create stunning art that you can transfer to your own pictures then this course is for you.

Overview
Section 1: Introduction

Lecture 1 Introduction

Lecture 2 General Introduction

Lecture 3 Pencils and Paper Makes I Use

Lecture 4 Pencils used in the course

Section 2: Lion

Lecture 5 Part 1

Lecture 6 Part 2

Lecture 7 Part 3

Lecture 8 Part 4

Lecture 9 Part 5

Lecture 10 Part 6

Lecture 11 Part 7

Section 3: Rhino

Lecture 12 Part 1

Lecture 13 Part 2

Lecture 14 Part 3

Lecture 15 Part 4

Lecture 16 Part 5

Lecture 17 Part 6

Lecture 18 Part 7

Lecture 19 Part 8

Lecture 20 Part 9

Section 4: Cheetah

Lecture 21 Part 1

Lecture 22 Part 2

Lecture 23 Part 3

Lecture 24 Part 4

Lecture 25 Part 5

Section 5: Summary - Share Your Work

Lecture 26 Sharing your work

Those that have tried Colin's free courses and want to try more challenging pictures,Students with some drawing experience wishing to use pastels,Artists that wish to learn Colin's self taught pastel pencil techniques in their own work,Intermediate Level Artists


howtodrawwildanimalsv4idsf.jpg


4851638e92e6b8cw5.jpg


Drawing human faces from any angle from mind
Published 11/2022
MP4 | Video: h264, 1280x720 | Audio: AAC, 44.1 KHz, 2 Ch
Genre: eLearning | Language: English | Duration: 75 lectures (20h 25m) | Size: 26 GB


A practical and logical approach to learn drawing human faces from any angle from mind


What you'll learn
Drawing the complete human face with the features (Eyes, Nose, Ears, Lips and Hairs) from more than 40 + angles from mind.
Eyes (The structure, anatomy and drawing technique).
The ratios and proportions of a human face.
Nose (The structure, anatomy and drawing technique).
The structure of a human head and face.
Lips (The structure, anatomy and drawing technique).
Understanding and drawing the human skull.
Ears (The structure, anatomy and drawing technique).
The muscles on the human skull.
The placement of the Eyes, Nose, Ears, Lips and Ears on the face.
Hair styles more than 20 styles (Male and Female both).
The human face in the form of a 3d shape with (40+ angles explained).
The human face in the form of shapes.
Male and Female face differences.

Requirements
There is absolutely no requirement of any experience or skill. This course is made up from the scratch. Even a child can learn very easily

Description
Welcome to this journey guys!What we have covered in this course* The basic necessities for a learner to adapt.* Understanding and drawing the ratios and proportions of a human face.* Understanding and drawing the structure of a human head and face.* Understanding and drawing the human face in the form of shapes.* Understanding and drawing the spherical shape of the head with 40+ angles explained.* Understanding and drawing the human face in the form of a 3d shape with 40+ angles explained.* Understanding and drawing The human skull.* Understanding and drawing the muscles on the human skull.* Understanding and drawing the placement of the Eyes, Nose, Ears, Lips and Ears on the face* Understanding and drawing the structure, anatomy and drawing technique of Eyes from any angle.* Understanding and drawing the structure, anatomy and drawing technique of Nose from any angle.* Understanding and drawing the structure, anatomy and drawing technique of Lips from any angle.* Understanding and drawing the structure, anatomy and drawing technique of Ears from any angle.* Understanding and drawing Hair styles more than 20 styles.* Understanding and drawing Male and Female face differences* And finally drawing the complete human face with the features from more than 40 + angles.Why this could be the easiest to understand* We have used: - physical models, Real logics and a lots of efforts to make it easiest to understand how human faces can be drawn from any angle from mind. * We have explained 40+ angles in this course and have spent a huge time to elaborate each and every deep detail.* We have covered the Head and face anatomy as well which gives solid logics to the learner about drawing human faces.* We have covered the features like Eyes, Nose, Lips, Ears and Hairs very deeply as we have explained their Structure, Anatomy, How to draw and the placement on the skull.* We have used a logical and practical approach here. We have used physical model tools to elaborate the things.* And Finally we have drawn and explained complete face with 40+ angles with every minor detail.For whom this course is* This course is made up for all the learners. Whoever want to be proficient in drawing a human head and face, this course is for them. * There is totally 0 experience required for this course. * There is no skill required for this course as this course is made up from the scratch. Even a child can learn from this course very easily. * Art Lovers, University Students, Parents & Children, Beginners, Experienced and everyone can learn very easily in this course.The Goal of mine and the learner* The core objective of this course is to make you capable of drawing the human faces1. From any angle2. From mind (Drawing without watching any reference image or model)3. With features like Eyes, Nose, Lips, Ears and Hairs.

Who this course is for
Who wants to draw human face - Beginners to advanced level. Even a child can learn very easily.


drawinghumanfacesfromhte5s.jpg


5rxfh4kejskiuhaebveozjmevd.jpg


How To Draw Birds Vol 1 - Parrot, Kingfisher, Robin & Owl
Last updated 7/2019
MP4 | Video: h264, 1280x720 | Audio: AAC, 44.1 KHz
Language: English | Size: 15.31 GB | Duration: 11h 43m

Learn to draw a variety of birds with stunning results using pastel pencils with Colin Bradley. 4 Subjects in 1!


What you'll learn
How to use Pastel Pencil Techniques to Draw a variety of Birds
Apply the light to dark rule when layering pastel tones
Be able to apply the techniques learnt to their own pictures
Easy to copy techniques with step by step videos

Requirements
Selection of Pastel Pencils (Faber-Castell is what Colin uses and refers to)
Pastel Paper - Colin uses Sand Coloured Fabriano Ingres Paper
Colour Shaper Blending Tool (We recommend to have a grey chisel size 2 shaper at least. See the materials lecture for more information on other shapers used.)
Eraser (we recommend a double ended eraser - one with a soft and hard end)

Description
In my 30+ Years of Teaching Experience I have found that Pastel Pencils is the by far the easiest art medium to pick up and learn.In this course you will learn how to use a range of pastel pencils to create 4 stunning pictures! Two ParrotsKingfisherRobin in SnowEagle OwlWe believe these three subjects are a great combination of learning techniques for drawing birds. You will learn how to draw a variety of different subjects - their feathers features, backgrounds, settings and lots more. There are elements in all 4 pictures that we feel a student will learn so much from and be able to apply the same techniques to their own work.For all pictures I use Sand Coloured Fabriano Ingres Paper, this is a great neutral tone and works so well for all kinds of subjects. It is ideal for someone fairly new to pastel pencil work as you can erase so easily on the paper. I also use Faber-Castell Pitt Pastel Pencils and refer to these throughout the course. You can of course use any materials that you wish to use.I would recommend this course for intermediate level artists. Perhaps you have tried my free courses and want to venture into the next level up or have already used Pastel Pencils before. If you are just starting out with pastel pencils let me not discourage you from giving this subject a go, you will certainly learn a lot from the lessons and hopefully enjoy it as you do!We provide you with an outline drawing for each subject so that you do not have to draw free hand. Trace this through to your paper or print it straight out using your printer. We walk you through step by step with Video instruction how to draw each stage. You'll learn techniques behind drawing birds and create pictures you can be proud of.We have broken the course down into bitesize chunks that you can follow and return to with ease.If you love drawing and want to discover easy techniques to create stunning art that you can transfer to your own pictures then this course is for you.

Overview
Section 1: Introduction

Lecture 1 Introduction

Lecture 2 General Introduction

Lecture 3 Pencils and Paper Makes I Use

Lecture 4 Pencils used in the course

Section 2: Two Parrots

Lecture 5 Part 1

Lecture 6 Part 2

Lecture 7 Part 3

Lecture 8 Part 4

Lecture 9 Part 5

Lecture 10 Part 6

Lecture 11 Part 7

Lecture 12 Part 8

Lecture 13 Part 9

Lecture 14 Part 10

Lecture 15 Part 11

Lecture 16 Part 12

Lecture 17 Part 13

Lecture 18 Part 14

Lecture 19 Part 15

Lecture 20 Part 16

Lecture 21 Part 17

Lecture 22 Part 18

Lecture 23 Part 19

Lecture 24 Part 20

Section 3: Kingfisher

Lecture 25 Part 1

Lecture 26 Part 2

Lecture 27 Part 3

Lecture 28 Part 4

Lecture 29 Part 5

Lecture 30 Part 6

Lecture 31 Part 7

Lecture 32 Part 8

Lecture 33 Part 9

Lecture 34 Part 10

Section 4: Robin

Lecture 35 Part 1

Lecture 36 Part 2

Lecture 37 Part 3

Lecture 38 Part 4

Lecture 39 Part 5

Lecture 40 Part 6

Lecture 41 Part 7

Section 5: Eagle Owl

Lecture 42 Part 1

Lecture 43 Part 2

Lecture 44 Part 3

Lecture 45 Part 4

Lecture 46 Part 5

Lecture 47 Part 6

Lecture 48 Part 7

Lecture 49 Part 8

Lecture 50 Part 9

Lecture 51 Part 10

Lecture 52 Part 11

Section 6: Summary - Share Your Work

Lecture 53 Sharing your work

Intermediate Level Artists,Students with some drawing experience wishing to use pastels,Artists that wish to learn Colin's self taught pastel pencil techniques in their own work


howtodrawbirdsvol1paretfeb.jpg


kxzqq3zp0ldfrvyeqgnnkr8cie.jpg


Seaturtles, Pastelpencils On Pastelmat
Last updated 1/2022
MP4 | Video: h264, 1280x720 | Audio: AAC, 44.1 KHz
Language: English | Size: 22.93 GB | Duration: 18h 4m

learn to create this beautiful seascape yourself!


What you'll learn
you will learn to work with pastelpencils
you will learn to draw in a realistic way
you will make a beautiful seascape with pastelpencils and panpastels on pastelmat
you will have hours of fun creating this one!

Requirements
Of course you need the artsupplies , some time and some patience

Description
In this course, ( it is all realtime video!), I will teach you in 11 lessons, how to create those beautiful seaturtles and the detailed background on pastelmat. Each lesson is devided into two parts. I teach you the whole project from start to finish. Of course there is a possibility to slow down the video or to speed it up (these possibilities depend on your device). The project is made with pastel pencils, I've used the Pitt pastels from Faber Castel. But of course you can use you're own preferred brand. Allthough I name the colors I use of course. I've used allmost all the colors, so there is no list of used pencils. In the end there were just a few - not used ones- in the box left. I name every color I use in the project, but of course you can pick your own. I'm working on clairfontaine pastelmat. I've used the white pastelmat, because the colors will come out the brightest on a white surface, again ..of course you can choose another color to work on. Further I've used a paperstump, some kneeded eraser and transferpaper (I've used grey, but blue will work too of course). So dive in the deep!Let's color the world!

Overview
Section 1: Introduction

Lecture 1 Introduction

Lecture 2 lesson 1A

Lecture 3 lesson 1B

Lecture 4 lesson 2A

Lecture 5 lesson 2B

Lecture 6 lesson 3A

Lecture 7 lesson 3B

Lecture 8 lesson 4A

Lecture 9 lesson 4B

Lecture 10 lesson 5A

Lecture 11 lesson 5B

Lecture 12 lesson 6A

Lecture 13 lesson 6B

Lecture 14 lesson 7A

Lecture 15 lesson 7B

Lecture 16 lesson 8A

Lecture 17 lesson 8B

Lecture 18 lesson 9A

Lecture 19 lesson 9B

Lecture 20 lesson 10A

Lecture 21 lesson 10B

Lecture 22 lesson 11A

Lecture 23 lesson 11B

Lecture 24 lesson 11C

this course is for everyone who wants to create this beautiful seascape in pastels


seaturtlespastelpenci4zdky.jpg


3236621dd4c4xcz8.jpg


Learn Vedic Astrology Part 6
Last updated 10/2020
MP4 | Video: h264, 1280x720 | Audio: AAC, 44.1 KHz, 2 Ch
Genre: eLearning | Language: English + srt | Duration: 72 lectures (11h 50m) | Size: 13.1 GB


The Wonderful World of Nakshatras


What you'll learn
Nakshatras - The 27 Lunar Mansions

Requirements
Completed Learn Vedic Astrology Parts 1 - 3

Description
In this course you will pick up invaluable tools for your Jyotish "trade". Learn the mythology, the Yoga Tara for each Nakshatra, the Nakshatra Classifications, which graha rules each Nakshatra, and lastly, take a peek into one or two sample charts for each Nakshatra, the "27 Lunar Mansions" in the sky.

Who this course is for
Intermediate Vedic Astrology Students


learnvedicastrologypa90es6.jpg


irlne6lelzsbcpl3hhoero8en0.jpg


How To Colour An Elk, Stag And Impala | Pastel Pencil Course
Last updated 2/2022
MP4 | Video: h264, 1280x720 | Audio: AAC, 44.1 KHz
Language: English | Size: 11.27 GB | Duration: 9h 6m

Learn to draw 3 AMAZING Wild Animal paintings with Colin Bradley. Follow along step by step and get amazing results


What you'll learn
How to colour a Stag, Impala and Elk
The fundamentals with using Pastel Pencils
The light to dark rule when layering Pastel Pencils
How to apply the techniques learnt to colour their own wild animal paintings

Requirements
Pastel Pencils (we list all the pencils required in the introduction)
Pastel Paper - Colin uses Fabriano Ingres and PastelMat Paper but you can use another make
Colour Shaper Blending Tools (We recommend to have at least a grey chisel size 2 shaper)
Eraser (we recommend a double ended eraser - one with a soft and hard end)

Description
Would you love to be able to paint AMAZING Wild Animals?In this course you will learn techniques to be able to paint a Stag, Elk and Impala. When you're finished, you'll have the skills to be able to paint your own wild animals too.Pastel PencilsIt all starts with Pastel Pencils. In my 30+ Years of Experience I have found that Pastel Pencils is the by far the easiest art medium to pick up and learn.When you have finished this course not only will you walk away with 3 AMAZING Paintings but you will also be able to apply what you have learnt to draw own pictures.MaterialsPastel PencilsPastel Pencils are a wonderful medium, they can be blended easily on top of each other and, because they're in a pencil form, are very easy to use. These subjects are technically classed at an "Intermediate" level however I always say that no matter your experience, if you want to have a go, then you should. We use 24 Pastel Pencils from Faber- Castell and 8 from Cretacolor. You can of course use your own brand of pastel pencil too. We provide you with colour charts so that you can compare the colours. Here is the full list of colours used within the course:Faber-Castell PITT Pastel Pencils101 white103 ivory230 cold grey I233 cold grey IV132 beige red189 cinnamon131 coral169 caput mortuum283 burnt sienna181 payne's grey199 black156 cobalt green143 cobalt blue102 Cream113 Orange Glaze186 Terracotta182 Brown Ochre184 Dark Naples Ochre270 Warm Grey I273 Warm Grey IV176 van dyck brown188 sanguine187 burnt ochre172 earth greenCretacolor Pastel Pencils231 silver gray229 brown gray130 tan dark136 old rose dark135 old rose light239 paynes gray210 sienna237 blue grayPastel PaperI start off with using Fabriano Ingres Pastel Paper (160gsm) for the Stag and Impala and move onto using PastelMat Pastel Paper (300gms) for the Elk. The Fabriano is a more forgiving paper in that you can erase mistakes more easily so we start off with this one and then move onto PastelMat which is a better paper in that it can take more layers and gets better results, but it is less forgiving in that you cannot really erase mistakes. You can of course use your own paper that you would like, there's no pressure to use the same as me.Outline DrawingI provide you with a basic outline drawing for each picture. If you wish to use this, simply trace the outline to your paper using a graphite transfer sheet like tracedown (for dark grey paper you will benefit from using a white tracing sheet so you can see the outline more clearly).Step by Step InstructionsI walk you through step by step with video instruction how to draw each stage. You'll learn techniques behind drawing beautiful bird pictures and create pictures you can be proud of.Start Learning TodayWith just a small amount of pencils you will see the AMAZING effects you can get.Let your journey into drawing and painting start here.

Overview
Section 1: Introduction

Lecture 1 Introduction

Lecture 2 Colour Charts

Section 2: Basics

Lecture 3 Welcome

Lecture 4 Pastel Pencils

Lecture 5 Pastel Paper

Lecture 6 Blending Pastel Pencils

Lecture 7 Fixative

Lecture 8 Outline Drawing/Using Our Courses

Section 3: Stag

Lecture 9 Part 1

Lecture 10 Part 2

Lecture 11 Part 3

Lecture 12 Part 4

Section 4: Impala

Lecture 13 Part 1

Lecture 14 Part 2

Lecture 15 Part 3

Section 5: Elk

Lecture 16 Part 1

Lecture 17 Part 2

Lecture 18 Part 3

Section 6: Summary

Lecture 19 Sharing your work

Artists that would like to learn to use Pastel Pencils,Anyone wanting to try colouring as an enjoyable hobby,Artists that enjoy drawing wild animals


howtocolouranelkstaga4ud3f.jpg


Zurück
Oben Unten