• Regeln für den Video-Bereich:

    In den Börsenbereich gehören nur Angebote die bereits den Allgemeinen Regeln entsprechen.

    Einteilung

    - Folgende Formate gehören in die angegeben Bereiche:
    - Filme: Encodierte Filme von BluRay, DVD, R5, TV, Screener sowie Telesyncs im Format DivX, XviD und x264.
    - DVD: Filme im Format DVD5, DVD9 und HD2DVD.
    - HD: Encodierte Filme mit der Auflösung 720p oder darüber von BluRay, DVD, R5, TV, Screener sowie Telesyncs im Format x264.
    - 3D: Encodierte Filme von BluRay, die in einem 3D Format vorliegen. Dies gilt auch für Dokus, Animation usw.
    - Serien: Cartoon/Zeichentrick, Anime, Tutorials, Dokumentationen, Konzerte/Musik, Sonstiges sind demnach in die entsprechenden Bereiche einzuordnen, auch wenn sie beispielsweise im High Definition-Format oder als DVD5/DVD9/HD2DVD vorliegen. Ausnahme 3D.
    - Bereich Englisch: Englische Releases gehören immer in diesen Bereich.
    - Bereich Talk: Der Bereich, in dem über die Releases diskutiert werden kann, darf, soll und erwünscht ist.


    Angebot/Beitrag erstellen

    - Ein Beitrag darf erst dann erstellt werden, wenn der Upload bei mindestens einem OCH komplett ist. Platzhalter sind untersagt.
    - Bei einem Scenerelease hat der Threadtitel ausschließlich aus dem originalen, unveränderten Releasenamen zu bestehen. Es dürfen keine Veränderungen wie z.B. Sterne, kleine Buchstaben o.ä. vorgenommen werden. Ausnahme Serienbörse:
    - Bei einem Sammelthread für eine Staffel entfällt aus dem Releasename natürlich der Name der Folge. Beispiel: Die Simpsons S21 German DVDRip XviD - ITG
    - Dementsprechend sind also u.a. verboten: Erweiterungen wie "Tipp", "empfehlenswert", "only", "reup", usw. / jegliche andere Zusatzinformation oder Ergänzung, welche nicht in obiger Beschreibung zu finden ist.

    Aufbau des Angebots und Threadtitel

    Der Titel nach folgendem Muster erstellt zu werden. <Name> [3D] [Staffel] [German] <Jahr> <Tonspur> [DL] [Auflösung] <Quelle> <Codec> - <Group>
    Beispiel: The Dark Knight German 2008 AC3 DVDRip XviD - iND
    Beispiel: The Dark Knight 2008 DTS DL BDRip x264 - iND
    Beispiel: The Dark Knight 2008 AC3 DL BDRip XviD - iND
    Beispiel: The Dark Knight German 2008 AC3 720p BluRay x264 iND
    Beispiel: The Dark Knight 2008 DTS DL 1080p BluRay x264 iND
    Beispiel: Die Simpsons S01 German AC3 DVDRip XviD iND
    Beispiel: Die Simpsons S20 German AC3 720p BluRay x264 iND
    Beispiel: Sword Art Online II Ger Sub 2014 AAC 1080p WEBRip x264 - peppermint
    Entsprechend sind also u.a. verboten: Sonderzeichen wie Klammern, Sterne, Ausrufezeichen, Unterstriche, Anführungszeichen / Erweiterungen wie "Tipp", "empfehlenswert", "only", "reup", usw. / jegliche andere Zusatzinformation oder Ergänzung, welche nicht in obiger Beschreibung zu finden ist
    Ausnahmen hiervon können in den Bereichen geregelt sein.

    Die Beiträge sollen wie folgt aufgebaut werden:
    Überschrift entspricht dem Threadtitel
    Cover
    kurze Inhaltsbeschreibung
    Format, Größe, Dauer sind gut lesbar für Downloader außerhalb des Spoilers zu vermerken
    Nfo sind immer Anzugeben und selbige immer im Spoiler in Textform.
    Sind keine Nfo vorhanden z.B. Eigenpublikationen, sind im Spoiler folgende Dateiinformationen zusätzlich anzugeben :
    Quelle
    Video (Auflösung und Bitrate)
    Ton (Sprache, Format und Bitrate der einzelnen Spuren)
    Untertitel (sofern vorhanden)
    Hosterangabe in Textform außerhalb eines Spoiler mit allen enthaltenen Hostern.
    Bei SD kann auf diese zusätzlichen Dateiinformationen verzichtet werden.

    Alle benötigten Passwörter sind, sofern vorhanden, in Textform im Angebot anzugeben.
    Spoiler im Spoiler mit Kommentaren :"Schon Bedankt?" sind unerwünscht.


    Releases

    - Sind Retail-Release verfügbar, sind alle anderen Variationen untersagt. Ausnahmen: Alle deutschen Retail-Release sind CUT, in diesem Fall sind dubbed UNCUT-Release zulässig.
    - Im Serien-Bereich gilt speziell: Wenn ein Retail vor Abschluss einer laufenden Staffel erscheint, darf diese Staffel noch zu Ende gebracht werden.62
    - Gleiche Releases sind unbedingt zusammenzufassen. Das bedeutet, es ist zwingend erforderlich, vor dem Erstellen eines Themas per Suchfunktion zu überprüfen, ob bereits ein Beitrag mit demselben Release besteht. Ist dies der Fall, ist der bereits vorhandene Beitrag zu verwenden.
    - P2P und Scene Releases dürfen nicht verändert oder gar unter einem iND Tag eingestellt werden.


    Support, Diskussionen und Suche

    - Supportanfragen sind entweder per PN oder im Bereich Talk zu stellen.
    - Diskussionen und Bewertungen sind im Talk Bereich zu führen. Fragen an die Uploader haben ausschließlich via PN zu erfolgen, und sind in den Angeboten untersagt.
    - Anfragen zu Upload-Wünschen sind nur im Bereich Suche Video erlaubt. Antworten dürfen nur auf Angebote von MyBoerse.bz verlinkt werden.


    Verbote

    - Untersagt sind mehrere Formate in einem einzigen Angebotsthread, wie beispielsweise das gleichzeitige Anbieten von DivX/XviD, 720p und 1080p in einem Thread. Pro Format, Release und Auflösung ist ein eigener Thread zu eröffnen.
    - Grundsätzlich ebenso verboten sind Dupes. Uploader haben sich an geeigneter Stelle darüber zu informieren, ob es sich bei einem Release um ein Dupe handelt.
    - Gefakte, nur teilweise lauffähige oder unvollständige Angebote sind untersagt. Dies gilt auch für eigene Publikationen, die augenscheinlich nicht selbst von z.B. einer DVD gerippt wurden. Laufende Serien, bei denen noch nicht alle Folgen verfügbar sind, dürfen erstellt und regelmäßig geupdatet werden.
    - Untersagt sind Angebote, welche nur und ausschließlich in einer anderen Sprache als deutsch oder englisch vorliegen. Ausnahmen sind VORHER mit den Moderatoren zu klären.


    Verstoß gegen die Regeln

    - Angebote oder Beiträge, die gegen die Forenregeln verstoßen, sind über den "Melden"-Button im Beitrag zu melden.
  • Bitte registriere dich zunächst um Beiträge zu verfassen und externe Links aufzurufen.

*** Bestes IPTV *** bester Preis *** gratis Test ***


Englische Tutorials

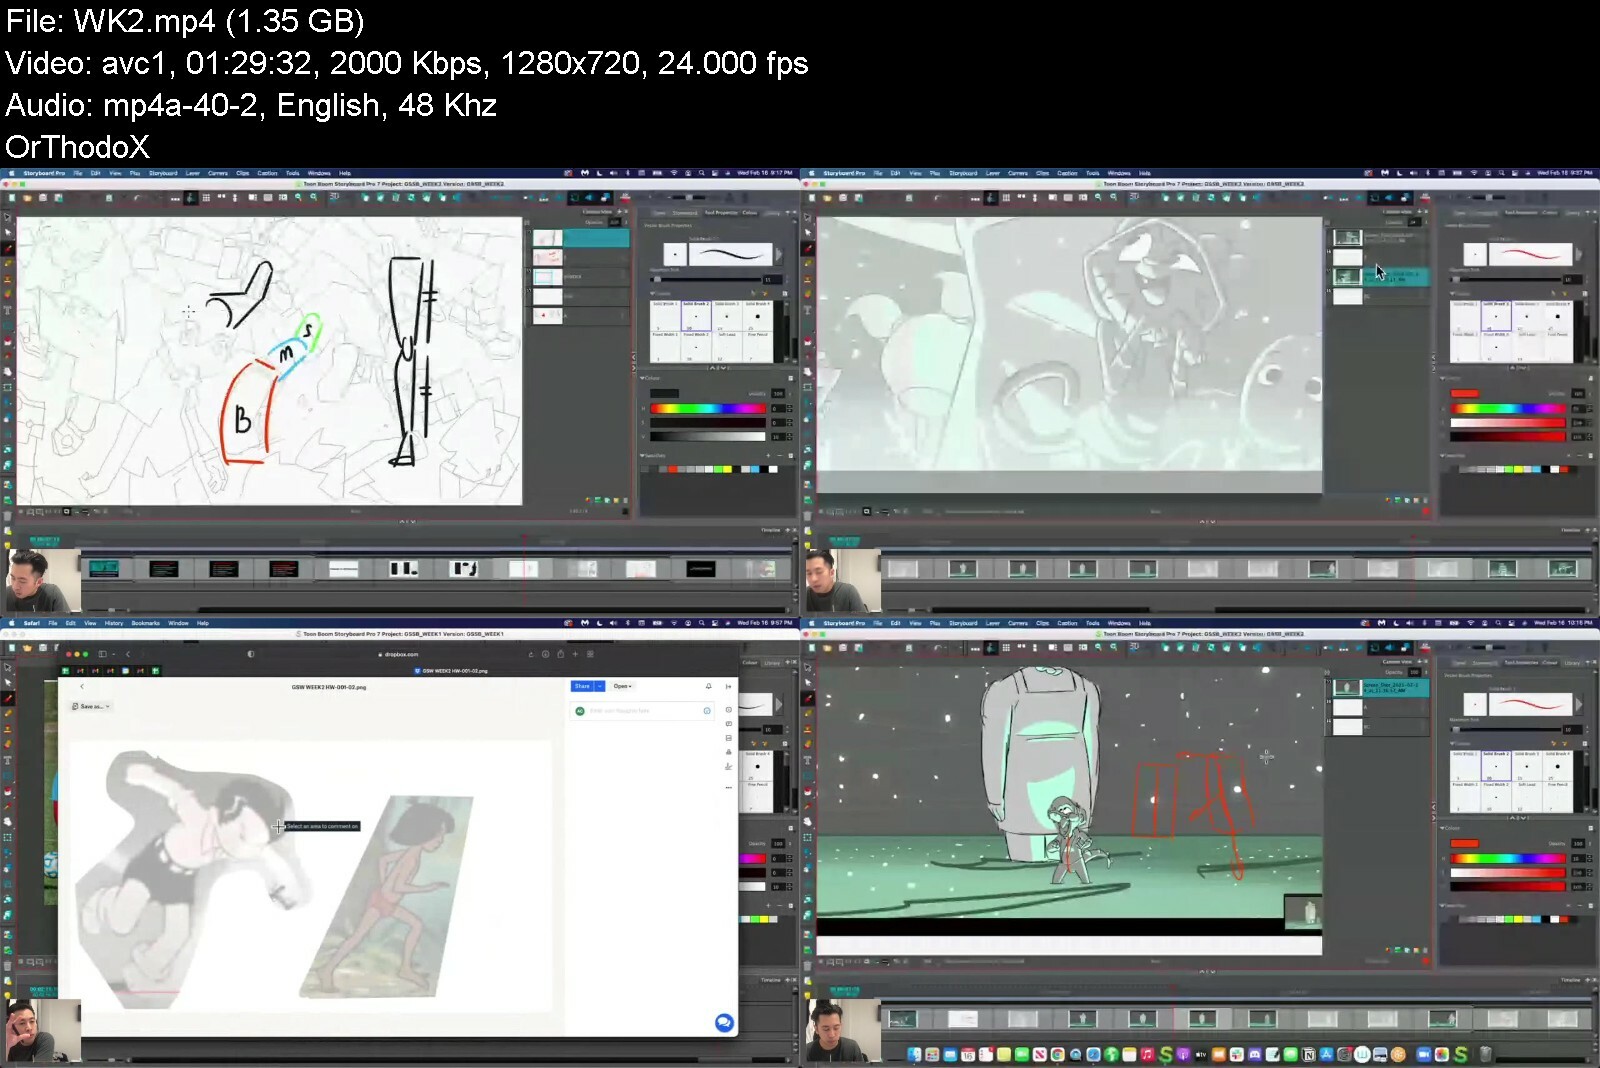
Gesture drawing for storyboarding

c5tdimuyo1l7mkq63zjaeeti6g.jpg


Gesture Drawing for Storyboarding
MP4 | Video: h264, yuv420p, 1280x720 | Audio: aac, 48000 Hz | Duration: 6h 45m | 16.8 GB
Genre: eLearning | Language: English

This 6-week intensive class will focus on a more analytical approach to gesture drawing geared towards storyboarding. The objective of the class is to help improve your foundations in gesture drawing and prepare you for figure invention.

This class will help strengthen your storyboard shorthands or bridge the gap from gesture drawing to drawing for storyboards. The class will cover the fundamentals of gesture drawing such as line of action, shape, silhouette, rhythm, form, and design theory. By the end of the class, you will develop an understanding that will allow you to create dynamic poses for gesture drawing and figure invention for your storyboards.

6-Week Class Itinerary

Week 1: Line of Action & Shape

Week 2: Silhouette & Spatial Relationships

Week 3: Rhythm & Straights vs. Curves

Week 4: Basic Mannequin Form Breakdown (Cylinders, Boxes, Spheres)

Week 5: Application for Storyboards (Abstraction gestures and putting in on animated characters)

Say Thank You

Homepage

gesturedrawingforstor2edwl.jpg


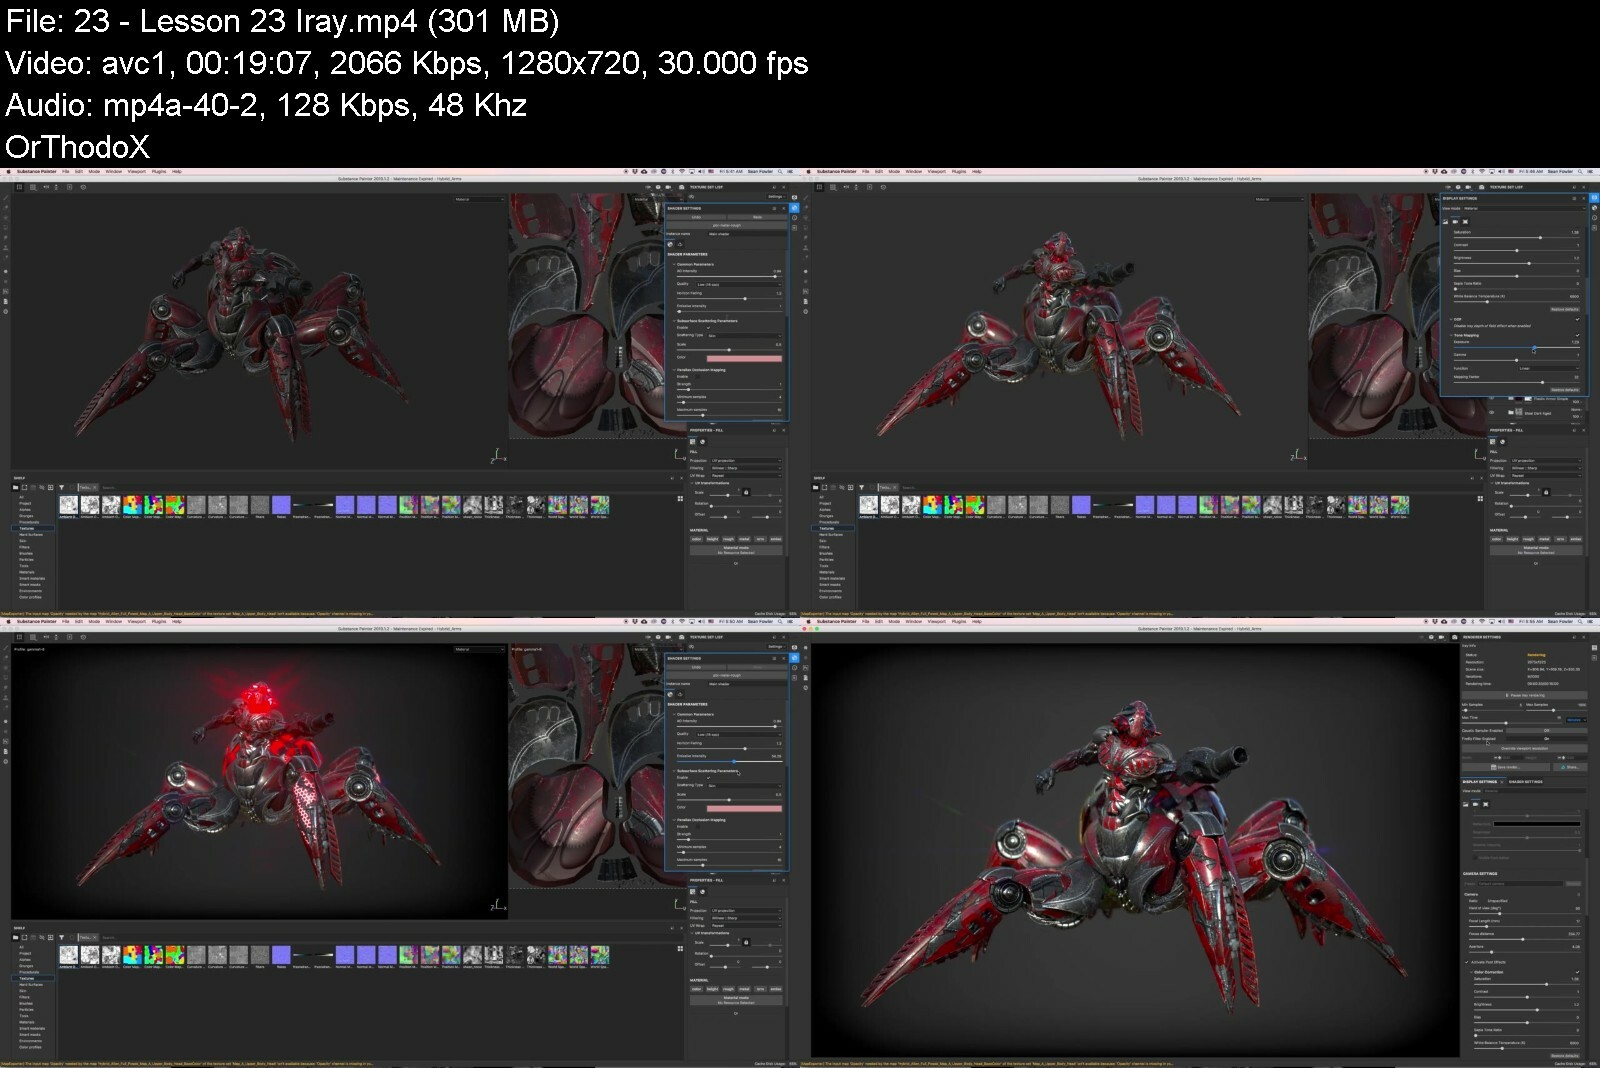
Understanding Substance Painter Volume 2 All Levels!

z8flioyqtkunbpmppakvp1hd4w.jpg


Understanding Substance Painter Volume 2 All Levels!
Last updated 9/2019
MP4 | Video: h264, 1280x720 | Audio: AAC, 44.1 KHz
Language: English | Size: 6.91 GB | Duration: 5h 38m

A Focus Intensive Course in learning AND practicing Substance Painter with included 3D Model as shown!


What you'll learn
- Review of the UI basics and map baking process of 2018 - 2019 Substance Painter
- Explore and experiment how to combine smart materials together through masks and how to edit their properties to obtain different resulting outcomes
- Utilizing paint layers for stenciling details in the with course supplied customized height maps for precision details
- Walkthrough of the basics in Iray and how to export a quality high rez render shots
- How to export maps out to different 3D softwares and game engines

Requirements
Either a Free Demo or Copy of Substance Painter 2018-2019
A drive in curiosity for exploring different textures within workflow of instant results!

Description
Welcome to the Second Volume of Substance Painter , In this course we will review basics of Substance Painter and expand on those concepts in new texturing techniques such as stenciling, and decaling through our library shelf. For this as before you will be supplied and challenged to a new model to not only practice what is taught to show examples how to innovate on your own texturing techniquesAs mentioned in earlier volumes this course is a continuation of a series of courses dedicated assisting those with an interested in learning, practicing, AND exploring new texturing techniques through this powerful texturing software.

Overview

Section 1: Introduction

Lecture 1 What to Expect

Section 2: Section 2: Quick Overview of the Basics

Lecture 2 Lesson 2 Overview and Review of UI

Lecture 3 Lesson 3 Fill Layers And Masks Review

Lecture 4 Lesson 4 Baking Maps Overview

Lecture 5 Lesson 5 Materials and Smart Materials and Mask Generators

Section 3: Section 3: Legs And Arms

Lecture 6 Setup

Lecture 7 Lesson 7 Leg Plates Part 1

Lecture 8 Lesson 8 Leg Plates Part 2

Lecture 9 Lessong 9 Leg Plates Part 3

Lecture 10 Lesson 10 Secondary Leg Texture

Lecture 11 Lesson 11 Stenciling

Lecture 12 Lesson 12 Arms Part 1

Lecture 13 Lesson 13 Arms Part 2

Section 4: Section 4 Lower Body

Lecture 14 Lesson 14 Normal Map Decaling

Lecture 15 Lesson 15 Normal Map Decaling Anchors

Lecture 16 Lesson 16 Plate Strips

Lecture 17 Lesson 17 Filling Out

Section 5: Section 5 Chest Head

Lecture 18 Lesson 18 Chest Part 1

Lecture 19 Lesson 19 Chest Part 2

Lecture 20 Lesson 20 Head Part1

Lecture 21 Lesson 21 Head Part 2

Lecture 22 Lesson 22 Head Part 3

Section 6: Section 6 Iray and Exporting Textures

Lecture 23 Lesson 23 Iray

Lecture 24 Lesson 24 Texture Export

Anyone looking for a focus intensive Substance Painter course for not only learning but practice, experiment and iterate with new texturing techniques on the supplied models,Anyone looking for an opportunity to showcase another strong portfolio piece demonstrating their texturing skillsets.,Anyone looking to break into the gaming or movie industry

Say Thank You


understandingsubstanc0bdth.jpg


Creature Modeling with Zbrush & Marmoset Toolbag

imagelwewb.jpg


Creature Modeling with Zbrush & Marmoset Toolbag
Instructors: Eric Keller
22 Lessons | Duration: 5h 8m
Video: MP4 1920x1080 48 KHz | English
ZBrush/Maya/Marmoset Toolbag | Size: 5.678 GB

Eric Keller demonstrates how to accurately model a unique species of Mantis using ZBrush and Marmoset Toolbag in this 5-hour video workshop. Follow along with the project files provided, including Eric s personal references images, and sketches, along with his ZBrush Project files and the final Marmoset Toolbag render scene.

The Orchid Mantis scientifically known as the Hymenopus coronatus takes the center stage in this video workshop created for intermediate and advanced ZBrush artists. This comprehensive tutorial highlights many of the features released in recent versions of ZBrush and starts from the absolute beginning: photo references. Using Eric s reference images along with anatomical diagrams available online, Eric shows how to block out the initial shape from scratch using ZSpheres before adding and refining each part of the mantis, step by step.

Once the sculpt is fleshed out, Eric demonstrates his approach to applying color to the model using ZBrush PolyPaint for the first round of texture, before exporting the model and textures into Marmoset Toolbag for the final texturing and rendering stage.

This workshop aims to teach you the skills you need to apply to any creature design and is suitable for those looking to create highly detailed scientific visualizations, as well as artists wishing to create high-quality assets for animation, VFX, and games.

Eric Keller is a veteran CG artist with over 20 years of experience creating models for film, TV, scientific visualization, planetarium shows, VR, AR, 3D printing, and jewelry design. He has taught numerous workshops for The Gnomon Workshop and is one of our most-viewed instructors.

Say Thank You

creaturemodelingwithzeafy0.jpg


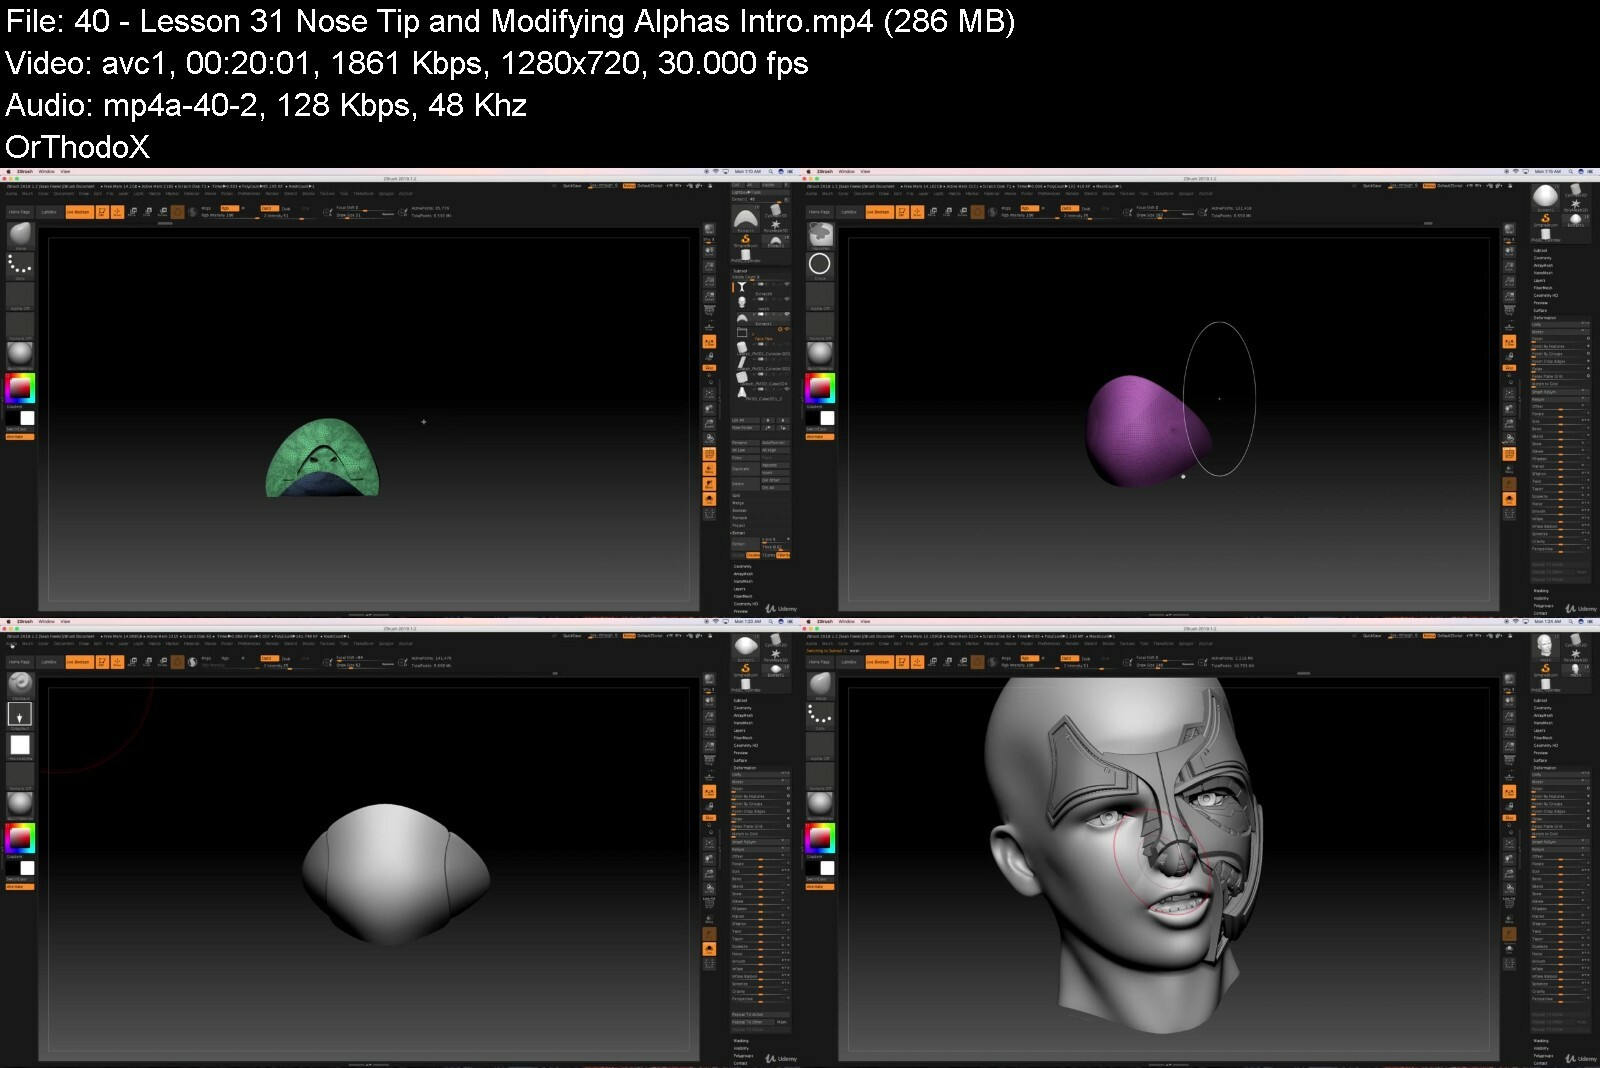
ZBRUSH Hard Surface Techniques and Workflows

nwqevpe5akvvloc9a1ay4wtc4c.jpg


Zbrush Hard Surface Techniques And Workflows
Last updated 1/2020
MP4 | Video: h264, 1280x720 | Audio: AAC, 44.1 KHz
Language: English | Size: 10.38 GB | Duration: 12h 46m

Understand Hard Surface Techniques by combining Sculpting and Zmodeler Editing through Zremsher 3 for New Workflows!


What you'll learn
Zbrush Hard Surface Sculpting Workflows
Understanding the workflow between Digital Sculpting and Zmodeler Editing through Zremesher 3.0
Comprehending the various uses and applications of Zremesher 3.0 as well as its strengths and weakness
A strong emphasis throughout the course on quick keys with narration of walk through
Beveling Techniques on Concave and Convex surfaces.
Sculpting techniques through Live Booleans and how to make customized bevels through them
Additionally we will walk you through the process in how to create customizable booleans, along with being supplied samples free for you to use in any of your projects,
Learning the Difference between Clip curve and Trim Curves as well as their importance in the main theme workflow

Requirements
A version Zbrush 2019 or Higher
Wacom Tablet and Pen (recommended but not required)

Description
Hello and Welcome to ZBRUSH Hard Surface Techniques and Workflows All Levels- In this course we will take a focus in depth look into Hard Surface Sculpting in a variety of Techniques such as combing digital sculpting and Zmodeler Editing through one of ZBrushes biggest upgraded feature Zremesher 3.0 and building modular component pieces that can be reusable in other projects.- Here I will be doing demonstrations in Zremesher 3.0 to show its strengths and weakness as part of its primary bridge between sculpting and Zmodeler- Throughout this course we will examine ways to combine what we learn in our hard surface sculpting techniques to push our shapes further utilizing gizmos deformers to make one modular piece construction to be reusable to multiple shapes as we progress with our subject piece.- In addition to these new workflows I will also be illustrating how to create customized booleans and demonstrate their versatility across multiple surfaces.- We will be making HEAVY emphasis to in hotkey narration from the most commonly used hotkeys in this course to more advance hotkey techniques such panning curves and selection tools through space bar.By the end of this course you should have a solid foundation to zbrush hard surface sculpting and its features with carving out hard surfaces mesh through extraction function

Overview

Section 1: Introduction

Lecture 1 What to Expect

Section 2: Zbrush Basics Review

Lecture 2 Intro and UI Overview

Lecture 3 Common Quick Keys used

Lecture 4 Trim Curves VS Clip Curves And Space Bar Trick

Lecture 5 Importance of Polygrouping

Lecture 6 Selection Tool

Lecture 7 Zremesher 3.0

Lecture 8 Zmodeler breakdown

Lecture 9 Boolean Introduction

Section 3: Sculpting and Cleaning up with Zremesher 3.0 Basics

Lecture 10 Lesson 1 Scene Setup

Lecture 11 Lesson 2 Eyebrowl Blockout

Lecture 12 Lesson 3 Eyebrowl Clean Up and Zremsher Iterations

Lecture 13 Lesson 4 Zmodeler Process Intro

Lecture 14 Lesson 5 Assigning Polygroups through Zmodeler

Lecture 15 Lesson 6 Booleans and Adjusting

Section 4: Block out and Beveling Techniques with Jaw Section

Lecture 16 Lesson 7 Jawline Blockout

Lecture 17 Lesson 8 Beveling Technique 2

Lecture 18 Lesson 9 Finalizing Jaw

Section 5: Creating Eyelids with Zmodeler

Lecture 19 Lesson 10 Eyelid Blockouts

Lecture 20 Lesson 11 Deforming Eyelids

Section 6: Modular Component Construction

Lecture 21 Lesson 12 Modular Component Piece Construction

Section 7: Cheek Bone Construction

Lecture 22 Lesson 13 Cheek Component Contructions

Lecture 23 Lesson 14 Cheek Component Placements

Lecture 24 Lesson 15 Cheek Plate Construction

Lecture 25 Lesson 16 Cleaning up and Finalizing Cheek Plate

Section 8: Carving Eyebrows Ridges

Lecture 26 Lesson 17 Carving EyeBrowls Ridge

Lecture 27 Lesson 18 Secondary Ridge And Bend Curves Deformers

Section 9: Customizable Boolean Construction

Lecture 28 Lesson 19 Customizable Boolean Intro

Lecture 29 Lesson 20 Blocking out through Masking and Space Bar Trick

Lecture 30 Lesson 21 Wires and Curve Brushes

Lecture 31 Lesson 22 Finalizing and Testing Customized Boolean

Section 10: Secondary Face Construction

Lecture 32 Lesson 23 Secondary Detailing Cheek

Lecture 33 Lesson 24 Cleaning Secondary Cheek For Zremesher 3.0

Lecture 34 Lesson 25 Applying First Customizable Boolean

Section 11: Nose Section

Lecture 35 Lesson 26 Nose Ridges with Zremesher 3.0

Lecture 36 Lesson 27 Extender Deformer And zmodeler editing

Lecture 37 Lesson 28 Nose Placement and Clip Curve editing with Symmetry Functions

Lecture 38 Lesson 29 Upper Plate 1 Blockout

Lecture 39 Lesson 30 Upper Ridge part 2

Lecture 40 Lesson 31 Nose Tip and Modifying Alphas Intro

Section 12: Mouth Region

Lecture 41 Lesson 32 Lips Part 1

Lecture 42 Lesson 33 Lip Masking and Geometry Clean Up

Lecture 43 Lesson 34 Lips Part 3

Lecture 44 Lesson 35 Lip Adustments

Lecture 45 Lesson 36 Synthetic Mesh

Lecture 46 Lesson 37 Chin Construction

Lecture 47 Lesson 38 Finishing Lips with Wiring Detail

Lecture 48 Decimation and and Mirroring

Section 13: Upper Head

Lecture 49 Lesson 39 Beginning upper head

Lecture 50 Lesson 40 Carving Out Flat Sculptor for Boolean

Lecture 51 Lesson 42 Customizing Bevel with Booleans through zmodeler

Lecture 52 Lesson 43 Adjust and finalizing customized Beveling

Lecture 53 Lesson 44 Finishing Upper Forhead Section with secondary texture

Lecture 54 Lesson 45 Temple Strip Construction

Lecture 55 Lesson 46 Secondary Frame Housing

Lecture 56 Lesson 47 Deforming Temple before Applying Booleans

Section 14: Ear Section

Lecture 57 Lesson 48 Ear Sculpting with Concave and Convex Booleans

Lecture 58 Lesson 49 Constructing Greeble In Cavity of Ear

Lecture 59 Lesson 50 Connector Construction

Lecture 60 Lesson 51 Panel Loops Break Down and Final Thoughts

Anyone interested in learning or expanding their skill set in Zbrush

Say Thank You


zbrushhardsurfacetechkhirh.jpg


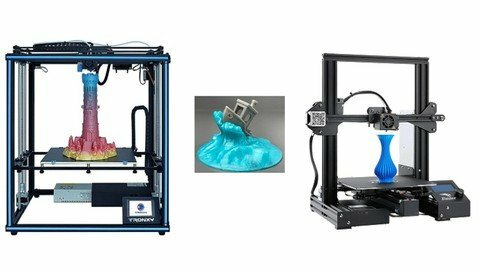
Intro To 3D Printing (Fdm)

qvh0ko082m2dymx3pzar9fqe06.jpg


Intro To 3D Printing (Fdm)
Last updated 1/2021
MP4 | Video: h264, 1280x720 | Audio: AAC, 44.1 KHz
Language: English | Size: 18.19 GB | Duration: 23h 22m

Introduction To The World Of FDM 3D Printing


What you'll learn
Introduction To FDM 3D Printing
What 3D Printer Should You Purchase
How To Start Using Your FDM 3D Printer

Requirements
None

Description
Welcome to the introduction to the crazy world of 3D Printing (Specifically FDM 3D Printing)In this course we will start with discussing what 3D Printing is.Then we will talk about what are some current technologies and features available for FDM printers to select the best printer for your uses.What Materials are currently available.What can be done and can't be done on FDM 3D Printers.We will then go over Slicers and other Software and 3D Printing BasicsThen we will get onto a printer to talk about the basics of operating a 3d printer.

Overview

Section 1: Introduction

Lecture 1 Introduction

Lecture 2 What Is This Course About

Lecture 3 Who Is Your Instructor

Lecture 4 Who Is This Course For

Lecture 5 What WIll You Learn In This Course

Lecture 6 What Is 3D Printing

Lecture 7 Types Of 3D Printers Avaiable

Lecture 8 FDM vs Resin Printers

Section 2: FDM 3D Printing Basics

Lecture 9 What Is FDM 3D Printing

Lecture 10 FDM 3D Printer Strength V.S. Weakneses

Lecture 11 Anatomy Of A FDM 3D Printer

Section 3: FDM Materials Options

Lecture 12 Into To Material Mechanics

Lecture 13 PLA Material

Lecture 14 ABS Material

Lecture 15 PETG Material

Lecture 16 HIPS Material

Lecture 17 Polycarbonate Material

Lecture 18 Nylon Material

Lecture 19 PEEK Material

Lecture 20 UlTEM / PEI Material

Lecture 21 TPU Material

Lecture 22 Composites

Lecture 23 Material Spread Sheet

Section 4: 3D Printer Features For Printer Selection

Lecture 24 Introduction To Printer Features

Lecture 25 Material Diameter

Lecture 26 Nozzle Diameter

Lecture 27 Hotend

Lecture 28 Number of Exturders/Hotends

Lecture 29 Heated Bed

Lecture 30 Printer Volume

Lecture 31 Type Of Bed Leveling

Lecture 32 Parts Cooling

Lecture 33 Bed Material

Lecture 34 Heated Chamber

Lecture 35 Motion Kinematic Used

Lecture 36 Filament Drive Type (Extruder Type)

Lecture 37 Control Software And Hardware Type (Open Vs Closed Source)

Lecture 38 Filament Run Out Sensor

Lecture 39 Interaction Interface (AKA Screens)

Lecture 40 Options to Transfer Files

Lecture 41 Kits Vs Retail

Lecture 42 Controller Board Type

Lecture 43 Fume Filtering Systems

Lecture 44 3D Printer Market Research 1

Lecture 45 3d Printer Market Reasearch 2

Section 5: 3D Printing Basics

Lecture 46 Introduction

Lecture 47 Looking at Slicers

Lecture 48 Installing Cura & Setting Up Cura

Lecture 49 First Look At Cura

Lecture 50 Locating Models To Print & Importing Models

Lecture 51 Cura Model Modifying Tools

Lecture 52 Slicing Your First Parts

Lecture 53 Layer Thickness Selection

Lecture 54 Infill Percentage Selection

Lecture 55 Supports

Lecture 56 Bed Adhesion

Lecture 57 Extruder Temperature

Lecture 58 Bed Temperature

Lecture 59 Print Speed

Lecture 60 Individual Model Options

Lecture 61 Printer Selection For This Course: Ender 3 Pro

Lecture 62 Ender 3 Pro Specifications

Lecture 63 Parts Of The Printer

Lecture 64 Checking For Issues and Moving Axis

Lecture 65 Leveling Bed

Lecture 66 Loading Filament

Lecture 67 Slicing Benchy In Cura For First Print On Ender 3

Lecture 68 Starting Benchy Print On Ender 3 Pro

Lecture 69 Finished Printed Benchy Removing From Bed

Lecture 70 Benchy Closer Look

Lecture 71 Slicing Benchy Wave Ender 3 Pro

Lecture 72 Controlling Printer From Cura

Lecture 73 Starting Print Of Benchy Wave Ender 3 Pro

Lecture 74 Middle Look at Benchy Wave Ender 3 Pro

Lecture 75 Benchy Wave Ender 3 Pro Print Inspection

Lecture 76 Ender 3 Conclusion

Lecture 77 Tronxy X5SA Intro

Lecture 78 Tronxy X5SA Axis Move

Lecture 79 Tronxy X5SA Changing Filament

Lecture 80 Tronxy X5SA Bed Leveling

Lecture 81 Slicing Benchy For Tronxy X5SA

Lecture 82 Starting Benchy Tronxy X5SA

Lecture 83 Finishing Benchy Tronxy X5SA

Lecture 84 Starting Benchy Wave Tronxy X5SA

Lecture 85 Middle Benchy Wave Tronxy X5SA

Lecture 86 Finished Benchy Wave Tronxy X5SA

Lecture 87 Tronxy X5SA Review

Lecture 88 Benchy Printer Comparison

Lecture 89 Benchy Wave Printer Comparison

Lecture 90 Intro To 3D Printing (FDM) Conclusion

Lecture 91 Intermediate and Advanced FDM 3D Printing Topics

Beginners To 3D Printering And Have Not Yet Purchased Their First Printer Is Best,Beginners Interested In FDM 3D Printers

Say Thank You


introto3dprintingfdmsxeay.jpg


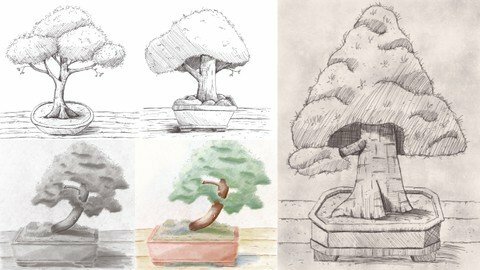
Drawing, Shading And Coloring Bonsai Trees In Procreate

fzykcyvwnmitdlb2hdhhk9dd5m.jpg


Drawing, Shading And Coloring Bonsai Trees In Procreate
Published 7/2022
MP4 | Video: h264, 1280x720 | Audio: AAC, 44.1 KHz
Language: English | Size: 6.23 GB | Duration: 4h 46m

Enhance your Procreate skills, discover how to sketch, do semi-realistic shading, hatching, color manipulation and more


What you'll learn
Drawing in Procreate
Quick Shading in Procreate
Color Manipulation in Procreate
Coloring grey toned images in Procreate
Sketching in Procreate
Semi-realistic Shading

Requirements
No prior experience needed at all
iPad
Procreate
Apple Pencil or other Pressure Sensitive Stylus is recommended
Procreate Pocket may work, but isn't tested

Description
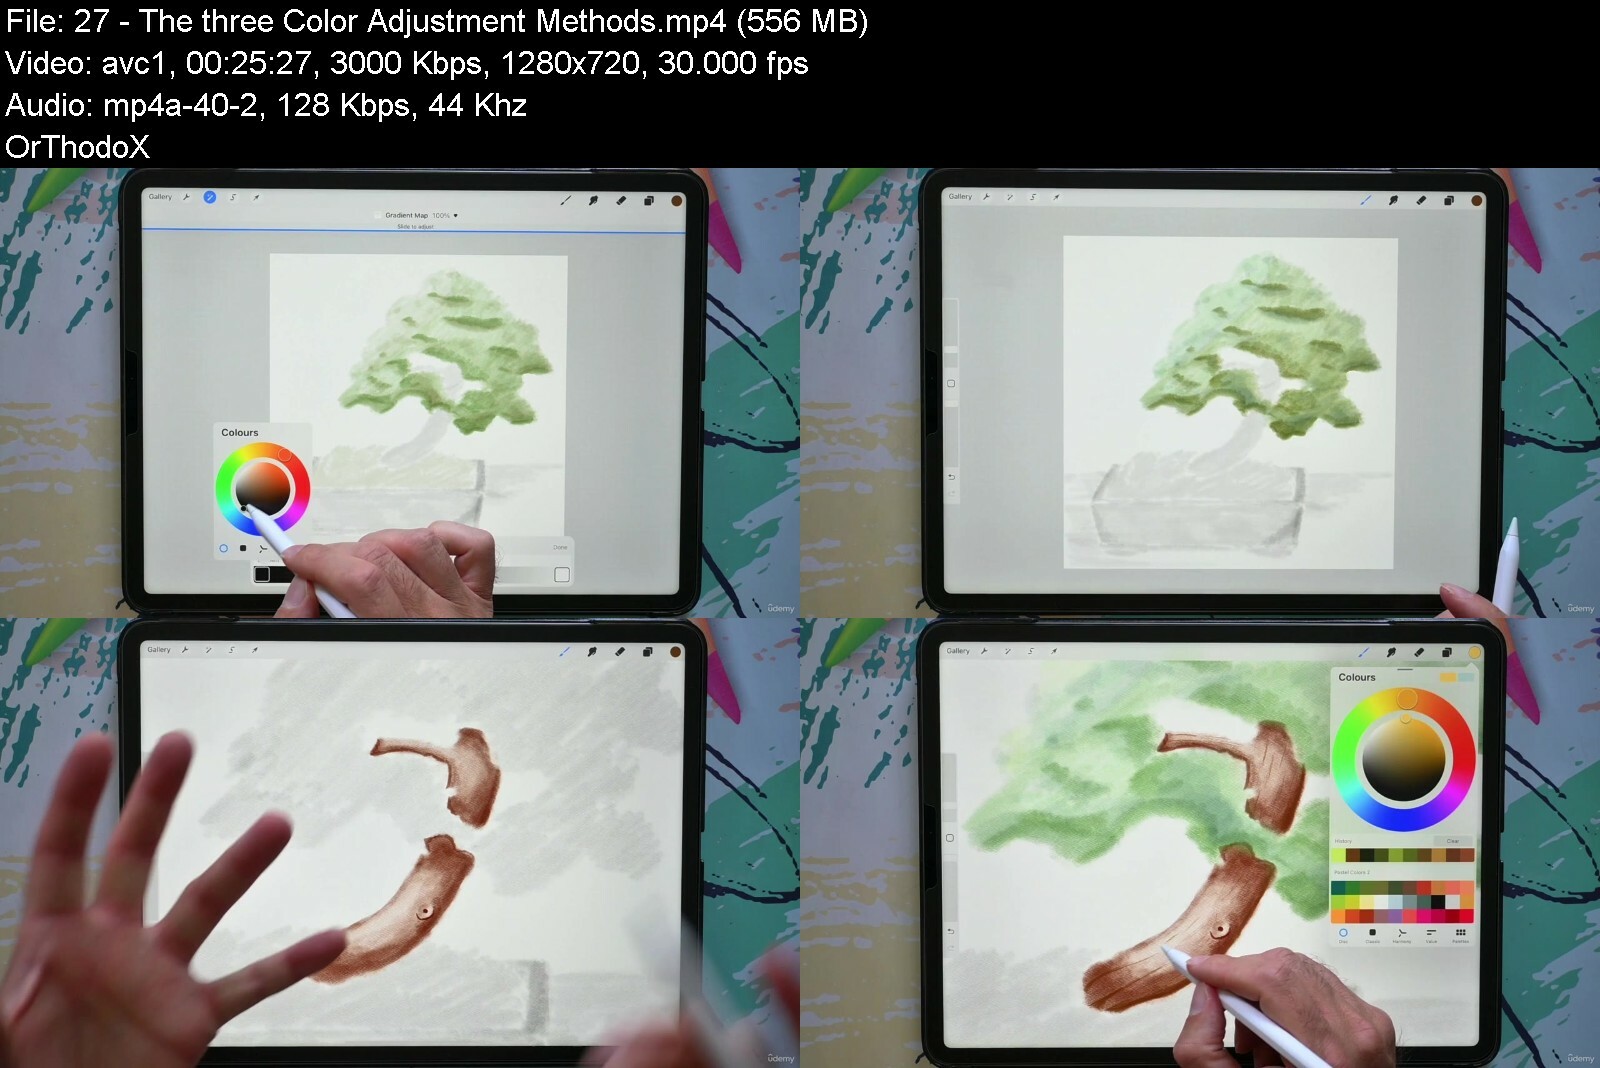
Who doesn't like these lovely miniature trees? Looking closely at some Bonsai Trees together, can be a great tool to start you off or help you improve your drawing skills.In the 1st Part we're going to draw a Bonsai Tree from scratch and draw it all the way, just using the Procreate HB Pencil. No Procreate tricks or special effects, but just you - your pencil (or finger) - and drawing skills.And yes, you can absolutely do this! My step-by-step clear instructions will guide you through the whole process and help you create something beautiful.You will discover what to actually pay attention to, how to draw and sketch in Procreate, how to hatch - adding lovely light & shadow effects, ending up with a gorgeous Bonsai Tree.In the 2nd Part we're going to draw a Pine Bonsai Tree from scratch and draw it all the way, just using the Procreate HB Pencil. No Procreate tricks or special effects, but just you - your pencil (or finger) - and drawing skills. Building on the skills we've gained in the previous part, we're going to add a few effective techniques to it to be able to draw the Pine shaped Bonsai Tree successfully.In the 3rd part of Drawing Bonsai Trees, which can be done without having done the previous parts, we ll be focusing on semi-realistic-shading. Using our Apple Pencil in a total different way.But first we need to draw the tree, so I ll be showing you a few ways how to use the photo as a base for your sketch. Once happy with the sketch we ll discover how to shade with a pencil in Procreate. Of course we ll also pay some attention to bringing in light and shadow convincingly.We even go further with this one, creating a nice background which will make it look like we ve really drawn our Bonsai Tree with graphite.Using your pencil in this way might be a very different experience, but it will surely enhance your Procreate skills.In the 4th Part we re going to take the grey-toned Bonsai Tree we drew (or use the one I ve provided) and turn it into a lovely colored piece.There are several ways to go about this in Procreate. We ll be looking at 5 different methods to get the job done: Alpha Lock, Clipping Masks, Gradient Maps, Curves and Color Balance.I ll be showing you how to effectively use these different methods and we ll also be venturing into using a combo of the options to give us just the look we want ending up with the best result.Enjoy coloring the uncolored, or use these very helpful methods to change the colors of existing pieces into your liking. Another great skill to add to your Procreate toolbox.You will love drawing the various adorable Bonsai Trees, mastering semi-realistic-shading and doing some color manipulation in Procreate so come and join the fun and see what beautiful results you ll end up with. Aside from your iPad with Procreate and all the resources I provide there's nothing else needed to get started.

Overview

Section 1: Introduction

Lecture 1 Introduction

Lecture 2 Support, Community and Feedback

Section 2: Drawing Bonsai Trees Part 1

Lecture 3 Introduction

Lecture 4 What do you need and setting up the Canvas

Lecture 5 The Basics of drawing a Bonsai Tree

Lecture 6 Drawing the first Bonsai Tree

Lecture 7 Shading the first Bonsai Tree

Lecture 8 Shading the Plant Pot

Lecture 9 The Project

Section 3: Drawing a Bonsai Pine Tree

Lecture 10 Introduction

Lecture 11 Setting up the Canvas

Lecture 12 The basics of a Bonsai Pine Tree

Lecture 13 Outlining the Bonsai Pine Tree

Lecture 14 Adding interest through Shading

Lecture 15 Needles, Bark and extras

Lecture 16 The Project and something extra!

Section 4: Shading a semi-realistic Bonsai Tree

Lecture 17 Introduction

Lecture 18 Setting up the Canvas, Drawing the Tree and some basics

Lecture 19 General Areas and the Trunk

Lecture 20 Shading the Leaves

Lecture 21 Shading the Plant Pot and the Floor

Lecture 22 The Project and the Backgroumd

Section 5: Coloring the Uncolored

Lecture 23 Introduction

Lecture 24 The Procreate Files

Lecture 25 The Alpha Lock Method

Lecture 26 The Clipping Mask Method

Lecture 27 The three Color Adjustment Methods

Lecture 28 The Demonstration

Lecture 29 The Project

Section 6: Bonus Lecture

Lecture 30 Bonus Lecture

Artists and non-artists of any level,Beginning artists,Intermediate artists,Anyone with a desire to draw nature with a fresh perspective,The lessons are presented with such simplicity and clarity that anyone can follow and do them, from beginner to advanced,Procreate enthusiasts,Procreate beginners,Procreate artists

Say Thank You


drawingshadingandcolo32d9i.jpg


Excellence in Solutions Design

dzwkl0xvah8haeu9qpuqybecvq.jpg


Excellence In Solutions Design
Last updated 2/2022
MP4 | Video: h264, 1280x720 | Audio: AAC, 44.1 KHz
Language: English | Size: 7.22 GB | Duration: 5h 42m

To help you fly in your Technology or consulting Career in roles like Solution Architect, Analyst or Consultant


What you'll learn
Understanding what are they looking for in Excellence in Solutions Design
Learn what are the tools and techniques like Six Sigma, Lean, Design Excellence, Design Thinking, DFSS tools like VOC, QFD etc
Learn how to build Excellence in Solutions Design using these tools and techniques
Start building Excellence in Solutions Design

Requirements
Open mind and willingness to learn

Description
Do you want to fly in your technology or consulting career higher than most others by gaining excellence in solution design?Take a look at this Udemy course only where you willLearn and build excellence in solutions design to fly in your technology or consulting career higher than most others. Gain Practical Experience by doing real life assignments.Preview 50% of lectures for FREEGet Enrichmentors Course Completion Certificate cum Letter of RecommendationHave 30 days Money Back GauranteeThis course is based on 16 years of my life experiences at Johnson & Johnson learning all about designing and developing new products and solutionsThis course is built on my experiences at Johnson & Johnson Consumer as Director of Operations driving a Signature of Quality Initiative for J&J Consumer India. During this initiative I was fortunate to learn all about the Process Excellence Tools like Six Sigma, Lean and Design Excellence and then apply them in the Operations to make some significant business gains. I was also fortunate to lead a Cross Functional Team for SAP implementation which gave me lot of first hand knowledge of how to go about designing solutions to help business do better. All these experiences took shape into this course at IIM Udaipur preparing the MBA students for roles like Business Analyst, IT Consultant, Solution Architect etc.You can also get a Enrichmentors Course Completion Certificate cum Letter of Recommendation to whoever will complete their assignments and Practice Test successfully. These certificates will be signed by me and will be in addition to the normal Udemy Certificate you get on completion of the course. You will need to score 75% in the Practice Test and complete all the steps of the assignment to my satisfaction of similar level. It will be great if you can also do the rating and write reviews while doing the course as a feedback to us!Preview for yourself 50% of lectures for FREE covering each section. If you like the content, enrol for the course, enjoy and build Excellence in Solution Design to fly higher than most others! If don't like the content, please message me about how can we modify to meet your expectations.Please remember that this course comes with 30 days Money Back Gaurantee using which you can get a full refund if you are not satisfied after doing the full course

Overview

Section 1: Introduction & Overview

Lecture 1 Introduction

Lecture 2 Overview I- Role of Solution Design Professional

Lecture 3 Overview II- Excellence requirements in Solution Design

Lecture 4 Overview III- Way to Excellence in Solutions Design

Section 2: Process Excellence Tools- Six Sigma

Lecture 5 Six Sigma I- What is Six Sigma?

Lecture 6 Six Sigma II- How can it improve process quality?

Section 3: Process Excellence Tools-Lean

Lecture 7 Lean I- What is Lean?

Lecture 8 Lean II- How can you systematically identify waste?

Lecture 9 Lean III- Cycle time accounting, DFM and 5S-CANDO

Lecture 10 Lean IV- Visual Management, Pull Production Systems, Single Unit Mfg & Poka Yoke

Section 4: Process Excellence Tools- Design Excellence

Lecture 11 Design Excellence I- What is Design Excellence?

Lecture 12 Design Excellence II- What are the Design Excellence Methodologies?

Lecture 13 Design Excellence III=DFSS Tools- VOC and QFD

Lecture 14 Design Excellence IV-Other DFSS Tools like Taguchi, FMEA etc

Lecture 15 Design Excellence V- Before you begin applying Design Thinking

Lecture 16 Design Excellence VI- Design Thinking Tools- Visualization

Lecture 17 Design Excellence VII- Design Thinking Tools- Research Methodologies

Lecture 18 Design Excellence VIII- Design Thinking- Idea Generation

Lecture 19 Design Excellence IX-Design Thinking Tools for What Wows and What Works

Section 5: Requirements Management

Lecture 20 Requirements Management I-Overview

Lecture 21 Requirements Management II-What is customer requirements and how can we collect

Lecture 22 Requirements Management III-What all requirements to gather and with what tools?

Lecture 23 Requirements Management IV-Analyzing Requirements

Lecture 24 Requirements Management V-Defining Requirements

Lecture 25 Requirements Management VI-How to Prioritize Requirements

Lecture 26 Requirements Management VII-How to validate and maintain requirements?

Section 6: RFP Response

Lecture 27 RFP Response I- Overview

Lecture 28 RFP Response II-First Personal Contact

Lecture 29 RFP Response III-Understand RFP

Lecture 30 RFP Response IV-Understand Requirements

Lecture 31 RFP Response V-Develop Multiple Possible Solutions

Lecture 32 RFP Response VI-Configure Ideal Option

Section 7: Project Timelines

Lecture 33 Project Timelines I-Overview

Lecture 34 Project Timelines II-How to define the project

Lecture 35 Project Timelines III-How to plan the project I

Lecture 36 Project Timelines IV-How to plan the project II

Section 8: Determine gaps in existing client systems/As-Is Processes

Lecture 37 Determine gaps in existing client systems/As-Is Processes I- Overall Approach

Lecture 38 Determine gaps in existing client Processes II-Documenting As-Is Processes

Lecture 39 Determine gaps in existing client Processes III- Identify Customer Requirements

Lecture 40 Determine gaps in existing client Processes IV- Analyze the Process

Lecture 41 Mapping & Enhancing solutions to suit client requirements IV- Should be Maps

Section 9: Mapping & Enhancing solutions to suit client requirements

Lecture 42 Mapping & Enhancing solutions to suit client requirements I- Overall Approach

Lecture 43 Mapping & Enhancing solutions to suit client requirements II- Perform RCA

Lecture 44 Mapping & Enhancing solutions to suit client requirements III- Generate Solution

Lecture 45 Mapping & Enhancing solutions to suit client requirements V- Reassess the Gap

Section 10: Build, Test & Release Solutions including Solution write-ups

Lecture 46 Build, Test & Release Solutions including Solution write-up I- Overall Approach

Lecture 47 Build, Test & Release Solutions II- Create Detailed Solution Design

Lecture 48 Build, Test & Release Solutions III- Make Multiple Rapid Prototypes

Lecture 49 Build, Test & Release Solutions IV- Test the Rapid Prototypes

Lecture 50 Build, Test & Release Solutions V- Release Prototype best meeting....

Section 11: Reporting Metrices & Summary

Lecture 51 Maintenance and reporting of the solution design metrics for Reviews

Lecture 52 Summary

Information Technology Professionals,MBA Students,Consultants,Developers

Say Thank You


excellenceinsolutions1qiyc.jpg


WordPress for Non-Coders: From Setup to Stunning Websites

e5xahfwji025xohb1worzm5dpg.jpg


WordPress for Non-Coders: From Setup to Stunning Websites
Published 07/2022
Genre: eLearning | MP4 | Video: h264, 1280x720 | Audio: AAC, 48.0 KHz
Language: English | Size: 8.46 GB | Duration: 61 lectures 8h 51m


What you'll learn
Design a Beautiful WordPress Site From Start to Finish
Learn the NEW WordPress 6.0, Released in 2022
Identify the Best Install Location and Successfully Install WordPress
Create a Proper Plan for Building a Better WordPress Site
Get Familiar with the WordPress Admin Area & Dashboard
Master WordPress's Block Editor & Site Editor
Find and Download the Best Plugins for Your WordPress Website
Add New Pages and Blog Posts
Utilize Important SEO Concepts to Get More Traffic to Your WordPress Website
Customize Your Site's Colors and Fonts to Match Your Branding


Requirements
No prior WordPress experience needed. I'll cover everything you need to know to start with WordPress from scratch.

Description
Learn how to plan, set-up, and design your website using WordPress! This beginner-friendly course will walk you through everything you need to know to get your site up and running, while showing you how to design your website professionally without needing to hire a web developer. The best part? There's no coding required!

I show you everything I've learned in my 10+ years using WordPress as a digital storefront for my business. I not only help you decide on the best URL (also known as a "web address") to use for your website, but also show you where and how to purchase your domain URL and install WordPress. I then provide TONS of planning tips and tricks that I've learned throughout the years to help you make better decisions about your website's size, style, and content.

In the course, you'll learn

Basic and Advanced WordPress Concepts and Terminology

How to Download & Install WordPress On a Host (like Siteground or GoDaddy) or On Your Own Computer

Proper Planning Techniques to Set Your Site Up for Success

The WordPress Layout

The Site Editor for Designing Templates in WordPress 6.0

The Block Editor for Designing Webpages

Setting a Static Homepage

How to Design Important Webpages from Start to Finish, Including


Homepage

About Page

Portfolio Page (Image Gallery)

Blog Page

Contact Page

Important Concepts and Tips for WordPress Plugins

How to Install and Set Up Plugins

SEO Tips and Techniques to Help Your Site Get More Traffic

And more!

My high-definition, high-quality video lessons ensure you learn the various features and settings found throughout the WordPress layout so that you know your way around the CMS (Content Management System) like the back of your hand. Plus, you'll learn how to create and manage site templates, pages, blog posts, and more.

I integrate my knowledge of SEO (Search Engine Optimization) along the way - providing pointers and tips that I've used on client sites and my own sites to get more traffic. These SEO strategies have helped my main site reach 1,000,000 annual site visitors in back-to-back years (2020 and 2021). More site visitors usually leads to higher sales volume, which means more money for you and your business!

WordPress is an extremely popular free and open source Content Management System (CMS), and I hope you'll enjoy using it as much as I have over the years!

Who this course is for
Beginners of all backgrounds looking to create a website with WordPress
Non-coders who want to build a website from scratch with no coding
Anyone looking to finally master WordPress to build better websites the proper way

Say Thank You


wordpressfornoncoderskccvl.jpg


Solidworks Secrets Course - From Beginner To Advanced

ooucir4gzozwxjat7uhwbc1fiz.jpg


Solidworks Secrets Course - From Beginner To Advanced
Last updated 11/2021
MP4 | Video: h264, 1280x720 | Audio: AAC, 44.1 KHz
Language: English | Size: 6.28 GB | Duration: 12h 0m

Become SOLIDWORKS INDUSTRY PROFESSIONAL With 12 Hours Actionable Course Full Of Examples Even With ZERO Experience


What you'll learn
Learning sketching where are explained sketch tools (Line, Circle, Rectangle, Slot, Spline, Fillet, Chamfer, Mirror, Linear and circular sketch pattern ...
Learning how to use those sketches to create a 3D model. All main tools for working with 3D model are explained
Learning how to use parts to create assembly. How to define relations between parts in assembly using mates.
Learning how to create engineering drawings. Different drawing views, how to put dimensions, how to use symbols such as surface finish and welding
Learning how to model a product using picture (.jpg file) to get as much as possible realistic design
Learning how to evaluate your model using Compare documents, Part reviewer, Measure, Symmetry check, Performance Evaluation...
Learning how to create photorealistic images and how to create animation videos
You'll gain confidence to negotiate for bigger salary
You ll learn to confidently design CAD models from the sketch to 3D even if you never open Solidworks before
You ll be able to start your Solidworks CAD designer career and start making money
You ll start to think like a CAD designer
You ll be able to confidently list your SOLIDWORKS skills in your resume

Requirements
PC
Solidworks 2016 software or newer version
Basic knowledge of Windows PC
No need for prior Solidworks experience

Description
Become SOLIDWORKS INDUSTRY PROFESSIONAL With 12 Hours Actionable Course Full Of Examples Even With ZERO Experience! The problem is that most of the students...1. Don t have the right mind strategy to think like a designer2. They are not able to find the quickest way to find the design solution o3. They don t know how to approach to the design problemIf you want have full confidence in your skills let me introduce you to the training that will teach you professional skills even if you never touched Solidworks before.In this course you will get skills, training and examples to overcome those obstacles and starts employing your skills in industry environment by ...1. Learning sketching where are explained sketch tools (Line, Circle, Rectangle, Slot, Spline, Fillet, Chamfer, Mirror, Linear and circular sketch pattern, Convert and offset entities, Polygon...).2. Learning how to use those sketches to create a 3D model. All main tools for working with 3D model are explained (Extruded Boss, Extruded Cut, Revolved Boss, Revolved Cut, Swept Boss, Lofted Boss, Hole Wizard, Fillet, Chamfer, Mirror, Linear pattern, Rib, Draft, Shell...). As well how to create a new plane, new coordinate system, how to calculate mass, volume, and center of mass.3. Learning how to use parts to create assembly. How to define relations between parts in assembly using mates. All the basic mates (Coincident, concentric, parallel, perpendicular, distance, angle, tangent...), advanced mates (Width, Distance and angle, Width, Profile center, Path mate, Symmetric...) and mechanical mates (Hinge, Cam, Gear, Screw ).4. Learning how to create engineering drawings. Different drawing views, how to put dimensions, how to use symbols such as surface finish and welding. As well how to create Bill of Materials (BOM) table and much more.5. Learning how to model a product using picture (.jpg file) to get as much as possible realistic design.6. Learning how to evaluate your model using Compare documents, Part reviewer, Measure, Symmetry check, Performance Evaluation...7. Learning how to create photorealistic images and how to create animation videos. It is explained how to set up a camera, lights, appearance and scene. How to render a model and how to set up a Schedule rendering. As well how set up a motors in animations video, how to change appearance and position of the model in animation video. And in the last lectures is shown how to create an walkthrough videos.8. You'll gain confidence to negotiate for bigger salary9. You ll learn to confidently design CAD models from the sketch to 3D even if you never open Solidworks before10. You ll be able to start your Solidworks CAD designer career and start making money11. You ll start to think like a CAD designer12. You ll be able to confidently list your SOLIDWORKS skills in your resumeNow what makes me credible to teach you this topic?I have master s degree in mechanical engineering and I m Solidworks certified professional designer. I have over 5 years industry experience in using Solidworks, CATIA and AutoCAD where I was designing resistance welding machines.On the other hand last two years I have enrolled over 30 000 students on my 12 courses with my average courses rate 4.6 out of 5.This course can transform your Solidworks skills, your career and at the end your life as you know but don t take my word for it.Read just few of these raving student testimonials for yourself " This course was really very helpful to learn and explore Solidworks. As a future mechanical engineer it was very important for me to learn Solidworks and this course was really designed in the way which help an absolute beginner to learn more about Solidworks." Om S. " It is the most underrated course in this platform. Understood the concepts very well." Madhusuthan A. " Course is excellent for beginners with step by step explanation and covers almost all the tool in Solidworks." - Mageshwaran R.BONUS: Students who enroll today will receive my lifetime personal email support. So you can contact me anytime regarding any question you have.30-DAY GUARANTEE: If you don t see incredible results from this course within the next 30 days, Udemy will refund your entire investment!You literally have nothing to lose and so much to gain!ADD TO CART now to truly change your life forever.

Overview

Section 1: INTRODUCTION

Lecture 1 Introduction

Lecture 2 What Is Solidworks?

Lecture 3 Note!!!

Section 2: GETTING FAMILIAR WITH SOLIDWORKS

Lecture 4 Creating a New File

Lecture 5 User Interface

Lecture 6 Mouse Movements

Lecture 7 Opening/Saving Document

Section 3: SKETCHING

Lecture 8 Creating a Sketch On The Standard Planes

Lecture 9 Basic Sketch Tools

Lecture 10 Under/Fully/Over Defined Sketch

Lecture 11 Sketch Relations

Lecture 12 Sketch Dimensions

Lecture 13 Driving vs Driven Dimension

Lecture 14 Trim And Extend

Lecture 15 Offset Entities

Lecture 16 Mirror Entities

Lecture 17 Dynamic Mirror Entities

Lecture 18 Linear And Circular Sketch Pattern

Lecture 19 Move/Copy/Rotate/Scale/Stretch Sketch Entities

Lecture 20 Repair Sketch

Lecture 21 Quick Snaps

Lecture 22 Instant 2D

Lecture 23 Edit Sketch

Lecture 24 Unit System

Lecture 25 Converting Sketch To 3D Model

Section 4: SKETCH EXAMPLES

Lecture 26 Example#1

Lecture 27 Example#2

Section 5: SKETCH EXERCISES

Lecture 28 Download Exercises

Section 6: EXTRUSION

Lecture 29 Extruded Boss - Start/End Conditions

Lecture 30 Extruded Cut - Start/End Conditions

Lecture 31 Extrusion Direction

Lecture 32 Ectruded Boss - Thin Feature

Section 7: SKETCHING ADVANCED

Lecture 33 Sketch On The Face

Lecture 34 Rapid Sketch

Lecture 35 Plane Creation

Lecture 36 Derived Sketch

Lecture 37 3D Sketch

Lecture 38 Convert And Offset Entities

Lecture 39 Linked Dimensions And Global Variables

Lecture 40 Equations

Lecture 41 Heads-Up View Toolbar

Section 8: EXTRUSION EXAMPLES

Lecture 42 Example#1

Lecture 43 Example#2

Section 9: EXTRUSION EXERCISES

Lecture 44 Download Exercises

Section 10: PART MODELLING FEATURES

Lecture 45 Revolved Boss / Revolved Cut

Lecture 46 Swept Boss Geometry Creation

Lecture 47 Swept Boss

Lecture 48 Swept Cut

Lecture 49 Lofted Boss

Lecture 50 Lofted Cut

Lecture 51 Boundary Boss

Lecture 52 Boundary Cut

Lecture 53 Multi-Body Part

Lecture 54 Fillet And Chamfer

Lecture 55 Draft

Lecture 56 Draft Types

Lecture 57 Rib

Lecture 58 Shell

Lecture 59 Hole Wizard

Lecture 60 Thread

Lecture 61 Mirror

Lecture 62 Linear Pattern

Lecture 63 Wrap

Lecture 64 Helix, Spiral And Composite Curve

Lecture 65 Split Line And Text

Lecture 66 Intersect

Lecture 67 Instant 3D

Lecture 68 Using Sketch By Multiple Features

Lecture 69 Part Modification

Section 11: MATERIAL, APPEARANCE AND RENDERING

Lecture 70 Material And Density

Lecture 71 Appearance

Lecture 72 Scene

Lecture 73 Camera

Lecture 74 Lights

Lecture 75 Rendering

Section 12: PART MODELLING EXAMPLES

Lecture 76 Example#1

Lecture 77 Example#2

Section 13: PART MODELLING EXERCISES

Lecture 78 Download Exercises

Section 14: CONFIGURATIONS AND DESIGN TABLE

Lecture 79 Configuration

Lecture 80 Design Table

Section 15: ASSEMBLY CREATION

Lecture 81 Inserting Components

Lecture 82 Moving Components

Lecture 83 Standard Mates

Lecture 84 Advanced Mates

Lecture 85 Mechanical Mates

Lecture 86 Belt

Lecture 87 Mirror Components

Lecture 88 Assembly Features

Lecture 89 Sub-assembly

Lecture 90 Exploded View

Lecture 91 In-Context Features And External References

Lecture 92 Collision Detection

Lecture 93 Replacing Part

Lecture 94 Top-Down Assembly

Section 16: ASSEMBLY EXAMPLES

Lecture 95 Example#1

Lecture 96 Example#2

Section 17: ASSEMBLY EXERCISES

Lecture 97 Download Exercises

Section 18: ANIMATION

Lecture 98 Motion Study And Animation Wizard

Lecture 99 Applying Motors

Lecture 100 Adding Appearance And View Orientation

Lecture 101 Walk Through 1

Lecture 102 Walk Through 2

Section 19: DRAWINGS

Lecture 103 Setting Up A Drawing Sheet

Lecture 104 Orthographic Views

Lecture 105 View Properties And Projected View

Lecture 106 Driving VS Driven Dimensions

Lecture 107 Driving Dimensions

Lecture 108 Driven Dimensions

Lecture 109 Baseline Dimensions

Lecture 110 Ordinate Dimensions

Lecture 111 Angular Dimension

Lecture 112 Chamfer dimension

Lecture 113 Model Items Assembly

Lecture 114 Dimension Properties

Lecture 115 Dimension Style

Lecture 116 Document Properties

Lecture 117 Dimension Rounding

Lecture 118 View Focus

Lecture 119 Custom Type View

Lecture 120 3D Drawing View Tool

Lecture 121 Convert View

Lecture 122 Predefined View

Lecture 123 Relative View

Lecture 124 Section View

Lecture 125 Auxiliary View

Lecture 126 Detail View

Lecture 127 Broken-out Section View

Lecture 128 Break View

Lecture 129 Alternate Position View

Lecture 130 Crop View

Lecture 131 Isometric Section View

Lecture 132 Centermark And Centerline

Lecture 133 Hole Callout

Lecture 134 Surface Finish Symbol

Lecture 135 Weld Symbol

Lecture 136 Hatch Pattern

Lecture 137 Exploded View

Lecture 138 Balloon and magnetic line

Lecture 139 Autoballoon

Lecture 140 Hole Table

Lecture 141 Bill Of Materials Table (BOM)

Lecture 142 BOM Sorting

Lecture 143 Missing Item In BOM

Lecture 144 Custom Properties

Lecture 145 Equations

Lecture 146 Show/Hide Components

Lecture 147 Linked Notes

Lecture 148 General Table

Lecture 149 Layers

Lecture 150 Multiple Sheets

Lecture 151 Edit Sheet

Lecture 152 Measuring Tool

Lecture 153 Sheet Properties

Lecture 154 Saving Options

Section 20: DRAWING EXAMPLES

Lecture 155 Example#1

Lecture 156 Example#2

Section 21: DRAWING EXERCISES

Lecture 157 Download Exercises

Section 22: MODELLING FROM PHOTOGRAPHS

Lecture 158 Introduction

Lecture 159 Sketch Picture1 And Extrusion

Lecture 160 Sketch Picture2 And Extrusion

Lecture 161 Slot And Circular Hole

Lecture 162 Fillet

Lecture 163 Creating USB Slots

Lecture 164 Text

Lecture 165 Appearance And Rendering

Section 23: MODELLING FROM PHOTOGRAPHS EXERCISE

Lecture 166 Download Exercise

Section 24: REFERENCE GEOMETRY AND EVALUATION TOOLS

Lecture 167 Mass Properties

Lecture 168 Override Mass Properties

Lecture 169 Measuring Tool

Lecture 170 Interference Detection

Lecture 171 Compare Documents

Lecture 172 Symmetry Check

Lecture 173 Part Reviewer

Lecture 174 Assembly Visualisation

Lecture 175 Performance Evaluation

Lecture 176 Compare Assembly

Lecture 177 Check Active Document

Section 25: CONCLUSION

Lecture 178 Congratulations!!!

Lecture 179 Bonus Lecture

Absolute beginners and intermediate students,Individuals interested in 3D modeling,Individuals interested to level up career in 3D modeling

Say Thank You



solidworkssecretscourkvfdk.jpg


Learn how to paint a realistic tiger with oil colors

4777714400722fcxx.jpg


Learn how to paint a realistic tiger with oil colors
Published 07/2022
MP4 | Video: h264, 1280x720 | Audio: AAC, 44.1 KHz, 2 Ch
Genre: eLearning | Language: English + srt | Duration: 8 lectures (7h 27m) | Size: 9.5 GB


Basics to intermediate level understanding on creating a realistic oil painting shared with you by an art lover


What you'll learn
Get to know the tips and tricks as to how to make a good quality painting
Learn how to make an oil painting portrait of a tiger step-by-step
Build that structure that you need to move from basic to intermediate level artist
Learn more about the materials used and various alternatives, so you can choose the appropriate work tools

Requirements
List of Materials required: 1. Oil Colors - 1 set 2. Cold-pressed raw linseed oil 3. Hog hair brushes 1 set 4. soft synthetic brushes for Oil /Acrylic 1 set 5. wooden /metal /glass palette or plate 1 6. small metal lid or candle stand to pour oil 1 7. 1 small bottle of dishwashing liquid for cleaning brushes 8.1 cleaning cloth 9. 2- earbuds & 1 toothpick 10.1 Paper towel 11. 1 glass medium-sized jar 12. 1 A3 size Mixed Media Multi techniques paper 13. small magnifying glass 14. a drawing pencil and eraser 15. a drawing paper for practice

Description
Watch, and paint along with me :) Learn how to make an oil painting of a tiger step-by-step. Get to know the tips and tricks as to how to make a good quality painting.

This step-by-step guide comprises of 8 videos from real-time recording and covers all the details as to the materials used, and how they were used. All the techniques and challenges.

Here's the list of materials required

1. Belluno Oliefarve (or any oil colors) 12 12 ml 1 pack & linseed oil used for oil painting 1 bottle 2. Hog hair brushes 1 set 3. soft synthetic brushes for Oil /Acrylic 1 set 4. wooden /metal /glass palette or plate 1 (Avoid plastic palette) 5. small metal lid or candle stand to pour oil 1 6. 1 small bottle of dishwashing liquid for cleaning brushes 7. 1 cleaning cloth 8. 2- earbuds & 1 toothpick 9. 1 Paper towel 10. 1 glass medium-sized jar (any used jar f.eks. marmalade jar) 11. 1 A3 size Mix Media Multitechniques paper (250 gsm) 12. small magnifying glass 13. 1 drawing pencil 14. Eraser 15. 1 drawing paper (if needed for practice)

In case you do not have the whole oilpainting set, Ivory Black and Titanium White will suffice to work on this painting

Who this course is for
creative people, oil painting artists, anyone interested in pursuing creativity for relaxation or as a business opportunity


Say Thank You

learnhowtopaintareali5dfgy.jpg


CATIA V5 Essential Training

4625610d86bkget4.jpg


CATIA V5 Essential Training
Published 07/2022
MP4 | Video: h264, 1280x720 | Audio: AAC, 44.1 KHz, 2 Ch
Genre: eLearning | Language: English + srt | Duration: 171 lectures (15h 2m) | Size: 13 GB


CATIA V5 Essential Training


What you'll learn
You will understand CAD concept and the most used operation of CATIA V5.
Work independently on any Part in any version of CATIA V5.
How to assemble different parts into an ASSEMBLY file.
Use CATIA V5 to design/draft your next innovation.
Work independently on any SHEET METAL part.
Confidently list your CATIA V5 skills in your resume.
How to import the part file from any CAD software.
Make any complex Designs easily using a combination of tools as shown in Examples & Exercises.

Requirements
You will need to download the free CATIA V5 Academic Version. You can do this with a simple web search: CATIA V5 - Software for Students and Teacher.

Description

Description

In this "CATIA V5 Essential Training" program you will experience a unique successful method with hands on for practice.

This course is designed for individuals who are new to CATIA V5 as well as working in any company who had learned any CAD course long time ago and just want a brush up on the tools and operation quickly and use in their projects immediately.

Even if you presently know nothing about 3D Design and CATIA V5 this course is geared to accelerate you professional development and validate your skills.

This course is not a shortcut to certification. To pass you will need to cover all the course material and spend time using and experimenting with CATIA V5 and get industry recognized credentials.

CATIA V5 with Surface is a computer-aided design (CAD) system for mechanical assembly, part modeling, drawing production, and simulation. CATIA V5 boosts essential CAD user productivity by capturing engineers' solid modeling design intentions through inference logic and decision-management concepts. Synchronous technology makes it possible to modify the design of any model, without having to know how it was constructed.

About this course

With this course, you will get

Full, free lifetime access to all lectures (increasing over time).

All future extra lectures and upgrades will always be free.

Unconditional Udemy 30 days money-back guarantee - We are sure you would love the course though

Today, you can start your journey to becoming a CATIA V5 professional with ZERO prior experience!

I stress that you need no prior experience and there is nothing to buy or pay for!!! You will only need CATIA V5 itself.

You will learn

How to navigate through the CATIA V5 interface.

How to sketch with different sketch commands.

How to define sketches using constraint or distances.

How to use more than 10 different features to create 3D models. (extruded boss and cut, fillet, chamfers, revolved boss and cut, swept boss and cut, lofted boss and cut)

How to create additional reference planes.

How to modify given parts to match design needs.

How to explore different materials for your models.

How to design sheet metal parts.

How to assemble different parts into an assembly file.

How to generate drawings from parts and models.

How to work with surface models.

How to generate drafting of any model.

Who this course is for

Students - Engineers Hobbyists: Interested in 3D Mechanical Design? - Want to improve their job skills? Students interested in 3D Printing." program you will experience a unique successful method with hands on for practice.

Who this course is for
Technical students
Diploma mechanical
BTech Mechanical
M. Tech CAD CAM
Any technical person
First Timer Professionals


Say Thank You

catiav5essentialtrainzveg7.jpg


Blender 3.2 (LBT) Laid-Back Tutorial

blender3.2beginnerwalclets.png


Blender 3.2 (LBT) Laid-Back Tutorial
Published 07/2022
MP4 | Video: h264, 1280x720 | Audio: AAC, 44.1 KHz, 2 Ch
Genre: eLearning | Language: English + srt | Duration: 195 lectures (21h 33m) | Size: 14.8 GB


Get accustomed to the basics of a near-limitless 3d software, casually and taught via a compartmental method


What you'll learn
. . . Blender's UI.
. . . Blender's Preferences.
. . . addons: default and external.
. . . blender's flexibility/customization.
. . . the basics of creating a primitive object.
. . . how to solve issues.
. . . how Blender Way of Life created the logo (what a discovery).
. . . how to - not - to animate a bouncing ball.
. . . are the rumors true, regarding Blender's "learning curve"?
Most videos about 10-20 minutes; longest video: 40 minutes (only one).

Requirements
Plain/Gaming Mouse (a must).
Blender 3.2 (any version with similar interface).
A basic knowledge of Blender default and 27x keymaps (worth mentioning).
Basic knowledge of EDIT mode (worth...).
Instructor learned Blender using 2.7x series of keymap. I give a serious attempt at Blender's default keymap, but...maybe next time.
For example: Addons start in Section 4. Screencast key(s) addon isn't implemented until Section 5.

Description
You can always refer to the Blender manual. This software has much to remember.

Blender Way of Life's principles

The name of the game is 3d (learn from everywhere).

Blender is Blender.

Find inspiration from everywhere.

Let nothing hinder your imagination.

Teaching credentials...? Well, being a certified instructor in a particular martial discipline, I can attest... the learning structure - of any art - is vital. Not to mention, I know the feeling of being a beginner and wanting to excel - ASAP.

A true teacher learns how to teach a subject/topic.

Fast-forward, to the notion of creating Blender courses; I made a previous course, but it's not available for the public. It was my first one...I had to learn the ropes and the mat...so to speak. Basically, that course was messy and unorganized. After analyzing that monstrosity; I pulled it.

The thing is, I didn't want to do a beginner course. If I did, how could I do better? I set a few key points: do not overpower students by jamming so much content into each video, let students see about 60% - 70% of Blender's environment and it had to be original.

About 8 months later after canceling the first course, it hit me. I came up with the proper concept for a beginner Blender course. The idea ran flawlessly when I start recording.

There where a couple of screen recording hiccups, but nothing major pertaining to the course's structure.

I'm not one of those instructors who likes to hear themselves talk; preferring, to hear myself teach.

You're about to enter the world of a seemingly vast, software. Covering it all, may take, 200 or more hours...even the basics can get technical. No worries. This is not that kind of course.

In case you need to refer back to a topic, the sections and chapters are named so you can focus on the area of interest. Reviewing content while shifting through 30-40-50, or more, minutes of video - is not cool. I try to keep the videos around ten minutes. There are exceptions...for example when I get into - the zone.

We're not making any specific project...like a landscape scene, a car, building, dog, cat...etc. The object you'll create, will assist you in navigating Blender's environment. ( . . . object is subject to change to fit your liking).

With that, we'll continue browsing through the areas of Blender that receive the most attention. (Blender's UI, Workspaces, Preferences, default addons, external addons, Edit Mode, Object mode, Sculpting, UV unwrapping and basic rendering).

The fact of the matter is, I wanted to make a near, real-time course, in which, I did not scout ahead.

My job is to put a kink to the learning curve. This semi-methodical style is the most logical approach to learn any software that has the reputation of having a hard learning curve.

Give credit to the course's serendipity...built on a checklist, a system, a plan and the order I've established to unlock your creativity... without being overwhelming.

Let me say, I am a former stroke victim, in spite of my compromised speech, most of the course's content is...recorded - as is. But, rest assured, and I guarantee... you'll have complete comprehension. (previews).

I did experience screen-recorder difficulties, no worries, I was able to adjust them. (same guarantee).

Due to the "kid in a candy store "syndrome" ", there are areas in the course... I had to cut short.

Look, I can't tell the future, but I think Blender's UI, is going to be around for a long time. No matter, the current version of Blender, you should be able to interpret the basics. I'll do my best, to keep the course updated.

One more thing, I hope this course serves you well and ignites for your new hobby or career.

THANKS FOR YOUR TIME.

CORRECTIONS: (as needed)

During Camera Clipping section, I mentioned something about an exercise...scratch that. It would have taken up your precious Blending time.

Empties: should've - parented - primitive to empty.

It's not that no one can teach you how to sculpt, but you need a "feel" for it.

. . .think I said, "layperson", somewhere...? I meant, like newbie, rookie, greenhorn, pure beginner...etc.

Retopology: change Viewport Display plane color the way I do the first time...then go to matcap section and change to - object.

Animation resolution: reduce it in half. That should make the rendering process faster. You can increase the resolution back to 1080p when you export from the VSE.

Who this course is for
Blender beginners looking for a casual, non-technical approach to Blender, without hours of complexity.


Say Thank You

blender3.2lbtlaidbackoid3q.jpg


Zurück
Oben Unten