• Regeln für den Video-Bereich:

    In den Börsenbereich gehören nur Angebote die bereits den Allgemeinen Regeln entsprechen.

    Einteilung

    - Folgende Formate gehören in die angegeben Bereiche:
    - Filme: Encodierte Filme von BluRay, DVD, R5, TV, Screener sowie Telesyncs im Format DivX, XviD und x264.
    - DVD: Filme im Format DVD5, DVD9 und HD2DVD.
    - HD: Encodierte Filme mit der Auflösung 720p oder darüber von BluRay, DVD, R5, TV, Screener sowie Telesyncs im Format x264.
    - 3D: Encodierte Filme von BluRay, die in einem 3D Format vorliegen. Dies gilt auch für Dokus, Animation usw.
    - Serien: Cartoon/Zeichentrick, Anime, Tutorials, Dokumentationen, Konzerte/Musik, Sonstiges sind demnach in die entsprechenden Bereiche einzuordnen, auch wenn sie beispielsweise im High Definition-Format oder als DVD5/DVD9/HD2DVD vorliegen. Ausnahme 3D.
    - Bereich Englisch: Englische Releases gehören immer in diesen Bereich.
    - Bereich Talk: Der Bereich, in dem über die Releases diskutiert werden kann, darf, soll und erwünscht ist.


    Angebot/Beitrag erstellen

    - Ein Beitrag darf erst dann erstellt werden, wenn der Upload bei mindestens einem OCH komplett ist. Platzhalter sind untersagt.
    - Bei einem Scenerelease hat der Threadtitel ausschließlich aus dem originalen, unveränderten Releasenamen zu bestehen. Es dürfen keine Veränderungen wie z.B. Sterne, kleine Buchstaben o.ä. vorgenommen werden. Ausnahme Serienbörse:
    - Bei einem Sammelthread für eine Staffel entfällt aus dem Releasename natürlich der Name der Folge. Beispiel: Die Simpsons S21 German DVDRip XviD - ITG
    - Dementsprechend sind also u.a. verboten: Erweiterungen wie "Tipp", "empfehlenswert", "only", "reup", usw. / jegliche andere Zusatzinformation oder Ergänzung, welche nicht in obiger Beschreibung zu finden ist.

    Aufbau des Angebots und Threadtitel

    Der Titel nach folgendem Muster erstellt zu werden. <Name> [3D] [Staffel] [German] <Jahr> <Tonspur> [DL] [Auflösung] <Quelle> <Codec> - <Group>
    Beispiel: The Dark Knight German 2008 AC3 DVDRip XviD - iND
    Beispiel: The Dark Knight 2008 DTS DL BDRip x264 - iND
    Beispiel: The Dark Knight 2008 AC3 DL BDRip XviD - iND
    Beispiel: The Dark Knight German 2008 AC3 720p BluRay x264 iND
    Beispiel: The Dark Knight 2008 DTS DL 1080p BluRay x264 iND
    Beispiel: Die Simpsons S01 German AC3 DVDRip XviD iND
    Beispiel: Die Simpsons S20 German AC3 720p BluRay x264 iND
    Beispiel: Sword Art Online II Ger Sub 2014 AAC 1080p WEBRip x264 - peppermint
    Entsprechend sind also u.a. verboten: Sonderzeichen wie Klammern, Sterne, Ausrufezeichen, Unterstriche, Anführungszeichen / Erweiterungen wie "Tipp", "empfehlenswert", "only", "reup", usw. / jegliche andere Zusatzinformation oder Ergänzung, welche nicht in obiger Beschreibung zu finden ist
    Ausnahmen hiervon können in den Bereichen geregelt sein.

    Die Beiträge sollen wie folgt aufgebaut werden:
    Überschrift entspricht dem Threadtitel
    Cover
    kurze Inhaltsbeschreibung
    Format, Größe, Dauer sind gut lesbar für Downloader außerhalb des Spoilers zu vermerken
    Nfo sind immer Anzugeben und selbige immer im Spoiler in Textform.
    Sind keine Nfo vorhanden z.B. Eigenpublikationen, sind im Spoiler folgende Dateiinformationen zusätzlich anzugeben :
    Quelle
    Video (Auflösung und Bitrate)
    Ton (Sprache, Format und Bitrate der einzelnen Spuren)
    Untertitel (sofern vorhanden)
    Hosterangabe in Textform außerhalb eines Spoiler mit allen enthaltenen Hostern.
    Bei SD kann auf diese zusätzlichen Dateiinformationen verzichtet werden.

    Alle benötigten Passwörter sind, sofern vorhanden, in Textform im Angebot anzugeben.
    Spoiler im Spoiler mit Kommentaren :"Schon Bedankt?" sind unerwünscht.


    Releases

    - Sind Retail-Release verfügbar, sind alle anderen Variationen untersagt. Ausnahmen: Alle deutschen Retail-Release sind CUT, in diesem Fall sind dubbed UNCUT-Release zulässig.
    - Im Serien-Bereich gilt speziell: Wenn ein Retail vor Abschluss einer laufenden Staffel erscheint, darf diese Staffel noch zu Ende gebracht werden.62
    - Gleiche Releases sind unbedingt zusammenzufassen. Das bedeutet, es ist zwingend erforderlich, vor dem Erstellen eines Themas per Suchfunktion zu überprüfen, ob bereits ein Beitrag mit demselben Release besteht. Ist dies der Fall, ist der bereits vorhandene Beitrag zu verwenden.
    - P2P und Scene Releases dürfen nicht verändert oder gar unter einem iND Tag eingestellt werden.


    Support, Diskussionen und Suche

    - Supportanfragen sind entweder per PN oder im Bereich Talk zu stellen.
    - Diskussionen und Bewertungen sind im Talk Bereich zu führen. Fragen an die Uploader haben ausschließlich via PN zu erfolgen, und sind in den Angeboten untersagt.
    - Anfragen zu Upload-Wünschen sind nur im Bereich Suche Video erlaubt. Antworten dürfen nur auf Angebote von MyBoerse.bz verlinkt werden.


    Verbote

    - Untersagt sind mehrere Formate in einem einzigen Angebotsthread, wie beispielsweise das gleichzeitige Anbieten von DivX/XviD, 720p und 1080p in einem Thread. Pro Format, Release und Auflösung ist ein eigener Thread zu eröffnen.
    - Grundsätzlich ebenso verboten sind Dupes. Uploader haben sich an geeigneter Stelle darüber zu informieren, ob es sich bei einem Release um ein Dupe handelt.
    - Gefakte, nur teilweise lauffähige oder unvollständige Angebote sind untersagt. Dies gilt auch für eigene Publikationen, die augenscheinlich nicht selbst von z.B. einer DVD gerippt wurden. Laufende Serien, bei denen noch nicht alle Folgen verfügbar sind, dürfen erstellt und regelmäßig geupdatet werden.
    - Untersagt sind Angebote, welche nur und ausschließlich in einer anderen Sprache als deutsch oder englisch vorliegen. Ausnahmen sind VORHER mit den Moderatoren zu klären.


    Verstoß gegen die Regeln

    - Angebote oder Beiträge, die gegen die Forenregeln verstoßen, sind über den "Melden"-Button im Beitrag zu melden.
  • Bitte registriere dich zunächst um Beiträge zu verfassen und externe Links aufzurufen.

*** Bestes IPTV *** bester Preis *** gratis Test ***


Englische Tutorials

th_XLcLqNrq0SbKcFTYngn1HSYgJpXiRFQ9.jpg

Learn How to Make Rough Puff Dough : From Galettes to Puff Pizzas to Turnovers
MP4 | Video: h264, 1280x720 | Audio: AAC, 44.1 KHz
Language: English | Size: 1.14 GB | Duration: 1h 17m
Hello you beautiful bakers!​

In this class, I will walk you through the process of making Rough Puff Dough (it has a billion possible uses!!)
Then I will be teaching you 5 amazing recipes to make using the rough puff dough
French Palmiers (with sugar and cinnamon)
Strawberry Turnovers (glossy turnovers with a jam filling)
Apple Puff Galette (I will also teach how to assemble the apples to make them look like the ones you see in fancy bakeries)
Hand Puff Pizzas (the perfect snack for parties)
BONUS RECIPE: Twisted Puffs: After seeing this recipe, your dough scraps will never go to waste and perhaps will be tastier than the actual products
CLASS HIGHLIGHTS
All recipes have been simplified to accommodate all skill levels: from novice to professional
All ingredients used are simple, common and easy to procure (and easily customisable)
This course consists of vegetarian (egg-free) recipes too
On completion of the course, you end up learning a universal and dynamic recipe of Rough Puff Dough and five unique recipes to make using that dough
SKILL LEVEL
This course is perfect for novice bakers who want to try their hands at laminated dough, as well as for experienced bakers who are seeking to master a classic puff dough that can be transformed into a billion bakes.
WHAT YOU NEED TO DO BEFORE YOU GET STARTED
Download the recipes from the Resource section
Read the recipe carefully, beforehand
Make sure you have all the ingredients before you start baking
Feel free to ask any questions or queries you may have
FOR ANY QUERIES,
Leave a comment in the DISCUSSIONS section.
Send a DM on Instagram: instagram.com/savinithebakeshop
Write an email to
Happy Baking!
- Savini Gauri
Screenshots


upqwd8Ce6Ensn5s6Ct0OAxvqmGgaYqSy.jpg

Logstash Fundamentals Masterclass (elasticsearch, filebeat)
MP4 | Video: h264, 1280x720 | Audio: AAC, 44.1 KHz
Language: English | Size: 600 MB | Duration: 2h 17m
Learn Logstash from scratch and operate your own data ingestion pipelines using the ELK stack (elastic search, kibana)​

What you'll learn
Understand the basic concept of Logstash - everything you need to get started
Understand the features and utility of Logstash
Learn to read the real time logs and put into Elasticsearch
Different types of plugins used in the configuration pipeline
Install, configure and develop logstash data ingestion pipelines
How to create a Logstash pipeline to read logs and ingestion into Elasticsearch
Much more...
Requirements
Basic understanding about software development processes
Basic understanding of JSON and Regex Patterns
Description
THE BEST DEDICATED LOGSTASH FUNDAMENTALS COURSE
The primary objective of this course is to help students learn the basic fundamentals of Logstash and how to process events.
Logstash is a log aggregator that collects data from various input sources, executes different transformations and enhancements and then ships the data to various supported output destinations.
If you want to learn how to process such a variety of data with easy json like a configuration file, you are in the right place.
This Logstash Fundamental course is all you need to take your skills to the next level and position yourself for a pay-raise.
The course is for beginners with a basic understanding of JSON and web technologies. Additionally, it will be helpful for students to be familiar with Logging Techniques and Regex patterns.
As the title suggests - this course aims to provide you enough knowledge about Logstash so that you can run and operate your own data ingestion pipelines using ELK. But specifically
You will get familiar with the features and benefits offered by Logstash.
Since this course provides detailed demos of installation and configuration of Logstash, it will equip you well for future use of this technology.
Working with data types
Data aggregation
Parching logs demonstrations
Overview of different beats (Filebeat, Metricbeat, Packetbeat etc.)
How to work with plugins
Practical exercises for you to try out your Logstash skills
Much more...
In this course, we will cover two practical activities.
One of them deals with structured data in a CSV file and the other deals with semi-structured Apache web server logs.
The course is a step-by-step introduction on Logstash, ELK, and configuration of logstash pipeline to read the csv file and apache logs. In this course you will learn about different types of plugins and use cases.
This course will give you a solid theoretical understanding of Logstash programming, as well as the practical skills of Logstash.
WHAT IS LOGSTASH & ELK?
Logstash is a technology to collect logs then manipulate the input data and finally put into destination source like Elasticsearch. Logstash is a log aggregator that collects data from various input sources, executes different transformations and enhancements and then ships the data to various supported output destinations.
In recent years - the term BigData has been gaining popularity. And there has been a paradigm shift in the volume of information and the ways in which it can be extracted from this data.
ELK is one of the few new-age frameworks which is capable of handling Big Data demands and scale. Over the years the ELK stack has become quite popular. And for a good reason. It is a very robust, mature and feature-rich framework. Logstash is the Heart of the ELK.
TOP 3 BENEFITS OF LOGSTASH
1: Get a job The demand for ELK experts increases every day and Logstash is the heart of ELK.
2: A usable skill Knowing Logstash programming makes you a better and more well-rounded programmer. You will be able to complete many tasks, that your colleagues will not know how to do.
3: Further your career. Software companies all around the world are actively seeking out, competent Logstash experts. There are not a lot of them, so the pay is good. If you become a Logstash programmer, it will open up many new options in your career going forward
FREQUENTLY ASKED QUESTIONS
Any paid software is required to learn this course?
No paid software is required to learn this course. Logstash is an open-source project.
How is this course different from other ELK courses?
Along with hands-on Logstash demonstrations and exercises, you also get in-depth theoretical knowledge focused on the heart of ELK - Logstash.
Other courses, may only briefly touch on Logstash and focus more on eg. Kibana.
After completing this course you will learn the basic concept of Logstash, like what is ELK, how to configure Logstash, how to create a Logstash pipeline to read logs and ingestion into Elasticsearch etc.
You will also learn about different types of plugins like input, filter, output plugins, and their use cases.
GUARANTEE
If within 30 days of buying the course you decide that it's not for you, please get a refund. We only want happy students.
ARE YOU READY TO LEARN LOGSTASH PROGRAMMING?
Please press the "Take This Course" button and start learning 2 minutes from now!
Who this course is for
Anyone who wants to learn the fundamentals of Logstash programming, ELK & Elasticsearch
Screenshots


th_pguJ05ixNuWVM53VcqCkizFLZozVe1ke.jpg

Master The Basics Of PyQT
MP4 | Video: h264, 1280x720 | Audio: AAC, 44.1 KHz, 2 Ch
Genre: eLearning | Language: English + srt | Duration: 13 lectures (2h 14m) | Size: 990.9 MB

PyQt5 Tutorial | Learn GUI programming with Python and PyQt5 | Master the Basics of Qt5 GUI
What you'll learn
Learn the fundamentals of Qt
Create your own, Interactive software.
Make You Own GUI applications
Learn Python GUI Programming Using PyQt5
Requirements
A basic knowledge of Python is helpful but not necessary to get the most out of this course
Very basic understanding of programming
Description
Welcome to this video on PyQt5 Tutorial. This video provides an Introduction to PyQt5 with python. Qt a cross-platform C++ application development framework. Qt is Widely used to develop GUI programs, in this case also known as the Department Toolbox. Qt Can also be used to develop non-GUI programs, such as controls Desk tools and servers. Qt is a free and open source software that is looser in GNU Published under the terms of the public license. All versions support a wide range Compiler, including GCC C++ compiler and Visual Studio. PyQt is one of the GUI programming solutions for the Python language. PyQt Can be used instead of Python built-in Tkinter▪ Other alternatives include PyGTK, wxPython, etc.▪ Like Qt, PyQt is a free software▪ PyQt is the foundation of PyKDE.
Qt also Pronounce "Cute" is a Cross platform application development framework.
Qt is a cross-platform application and UI framework.
Using Qt, you can write applications once and deploy them across desktop, mobile and embedded operating systems without rewriting the source code.
Qt is partly C++ and partly native code depending on platform.
Qt UI APIs wrap native UI components.
Why would you want to use it?
Qt has a quite good penetration on different platforms.
It's fairly straight-forward to port your application to platforms where Qt is supported.
Qt has been around for a long time, so it has matured as a framework.
It adds somewhat automatic memory management on top of python through different means.
There's plenty of components.
The goal of this course is to provide you with a working knowledge of Qt python GUI applications. We'll start with the basics, starting from installing Qt , creating our first Qt project, using widgets, signals and slots, layouts, resource file etc.
So Let's get started !!!
Who this course is for
Programmers and Developers
Beginners
Students
Homepage


WS0Z6lchsqvfqeMdldO0NjjsoIuxofTj.jpg

Master the Arabic Conversation
MP4 | Video: h264, 1280x720 | Audio: AAC, 44.1 KHz
Language: English | Size: 3.40 GB | Duration: 4h 42m
A new methodology to learn the Arabic conversation very easily in a short time.
What you'll learn​

Engage in a real conversation with Arabs around the world.
Ask & Answer questions in Arabic
Numbers from 1--> 99
Countries, Nationalities, Professions and Drinks
Time in PM/AM
Build your vocabulary
Requirements
No Arabic grammar needed. You will learn everything you need to know to speak Arabic.
Focus on the lessons and do more practice.
Anything you learn try to practice it with Arabic speakers or learners.
Don't be shy to make mistakes when you speaking.
Complete the quizzes so you can check your understanding.
Description
Welcome to the Arabic Conversation Master Course! This course is for absolute beginners to intermediate level+.
This course is designed to teach you the Arabic conversation very easily in a short time, you will only learn the important things that you need to speak Arabic.
- This course is based on a new scientific methodology that was tested with many students and got very good results.
- During this course there will be different types of practice like ''Asking & answering practice, Think & Answer practice and Listen & Answer practice'' which I will be practicing with you like you are in a live lesson, and also there will be Quizzes with audios to check you understanding.
- You will have Arabic writing, English translation and the transliteration to make easy to understand an read Arabic.
This course is divided into chapters, the 1st chapter is complete and I will update you with the next coming chapters that will be included in the same course.
# In the 1st chapter you will learn
Some basic Pronouns & Grammar rules that are used in the course.
Some Professions
Some Countries & Nationalities.
Some basic Drinks (Cold - Hot)
Time (Pm - Am)
Numbers (1 --> 99)
10 Questions with different answers.
# The questions that you will learn how to ask/answer in the 1st chapter
What's your name ?
How are you ?
Where are you from ?
What are you drinking ?
When do you sleep ?
Why do you study Arabic ?
How old are you ?
Who are you ?
Which food do you prefer ?
Do you speak Arabic ?
At the end of the first chapter you will be able to ask/answer all the 10 questions and engage in a real conversation with Arabs.
The Important thing that you need to do is to practice anything you learn with with an Arabic speaker o an Arabic learner.
Who this course is for
Anyone wants to learn how to speak Arabic language / Modern Stander Arabic very easily in a short time.
Anyone planning to travel to an Arabic country for work or tourism.
Anyone wants to learn a new language
Screenshots


rymEjcA4HJv0Nof1Te5jClpPa5veVaE2.jpg

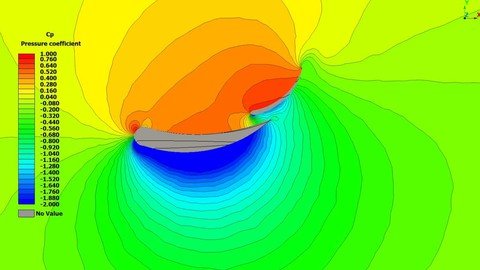
Mastering ANSYS with FEA & CFD(Computational Fluid Dynamics)
MP4 | Video: h264, 1280x720 | Audio: AAC, 44.1 KHz
Language: English | Size: 3.00 GB | Duration: 5h 42m
Finite Element Analysis & Computational Fluid Dynamics Analysis using ANSYS
What you'll learn​

Express modeling and its role in the field of fluid flow and heat transfer
Apply the various discretization methods, solution procedures and turbulence modeling to solve flow and heat transfer problems
Interpret the knowledge, capability of analyzing and solving any concept or problem associated with heat energy dynamics and utilization.
Be able to generate 2-D and 3-D models for finite element analysis using ANSYS Mechanical APDL
Understand and conclude from the analysis results. The student will be able to assess any given structural engineering problem
Illustrate the working concepts of thermal engineering.
Be able to Solve Structural Engineering Problems using ANSYS MechanicalAPDL
Be able to Analyze and solve any Engineering Mechanics Problem using ANSYS Mechanical APDL
Requirements
Should have a grasp on Engineering Drawing, Solid Mechanics and a bit of Finite Element Analysis
Description
ANSYS Mechanical APDL for Finite Element Analysis provides a hands-on introduction to engineering analysis using one of the most powerful commercial general purposes finite element programs. APDL is the foundation for all sophisticated features, many of which are not exposed in the Workbench Mechanical user interface. Students will find a practical and integrated approach that combines finite element theory with best practices for developing, verifying, validating and interpreting the results of finite element models, while engineering professionals will appreciate the deep insight presented on the program's structure and behavior. Additional topics covered include an introduction to commands, input files, batch processing, and other advanced features in ANSYS.
Ansys Mechanical finite element analysis software is used to simulate computer models of structures, electronics, or machine components for analyzing strength, toughness, elasticity, temperature distribution, fluid flow, and other attributes. Ansys is used to determine how a product will function with different specifications, without building test products or conducting crash tests.
This course introduces new users, or experienced Ansys Mechanical users, to the Ansys Mechanical APDL user interface and also ANSYS Fluent . The Mechanical APDL workflow, graphical user interface, and analysis of simple mechanical components like Beam, Bar, Truss, Plate etc. With this foundation in place, users can apply this knowledge to efficiently set up, solve, and post process virtually any type of analysis. This course work is divided into two sections. First section contains Computational Fluid Dynamic analysis of Real-world Engineering problems using ANSYS Fluent. Second section contains multiple subsections, combining almost all types of Finite Element Analysis, e.g. Thermal Analysis, Structural Analysis, Analyzing Engineering Mechanics problems etc. using ANSYS Mechanical APDL. In this coursework nineteen videos are there containing practical applications of various types of Analysis.
Who this course is for
Engineering students who want to start their career as a Design Engineer or CAD/CAE/CFD professional can have enough confidence from this course.
Engineering Professionals who are already working in industry.
Any CAD/CAM/CAE Professional
Screenshots


G4QzfNdpnD9R59wrIcg5wf2Fo3C2nLIH.jpg

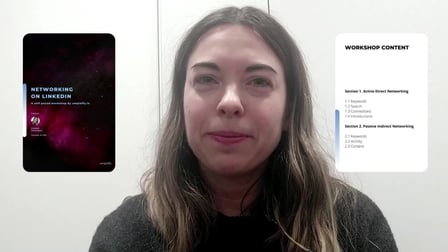
Networking on LinkedIn
MP4 | Video: h264, 1280x720 | Audio: AAC, 44.1 KHz
Language: English | Size: 411 MB | Duration: 27m​


Learn about functionalities and apply techniques that will help you improve the quantity and quality of your network on the world's largest professional network, LinkedIn.
Why take this workshop:
59,2 % of people get hired through their network.
This workshop is for anyone interested in:
improving the quantity and quality of your network online
leveraging the various functionalities of LinkedIn to do that
You will get inspiration, knowledge, and an actionable set of tools to begin building your network on LinkedIn, or to add to your efforts so far.
Contents:
Section 1. Active Direct Networking
1.1 Keywords
1.2 Search
1.3 Connections
1.4 Introductions
Section 2. Passive Indirect Networking
2.1 Keywords
2.2 Activity
2.3 Content
Materials to help you:
A PDF file with instructions, examples and templates
A Freehand for a more social experience of this self-paced workshop
You can print the PDF and use pen and paper to work on the exercises, or use tools like Adobe's pdf editor to complete them digitally. For a more social experience, you can also utilize the Freehand, where it is easy to add text, draw things etc.
Screenshots


hGySkwG07QaHbltLcwjEBMCJdEnYMLa2.jpg

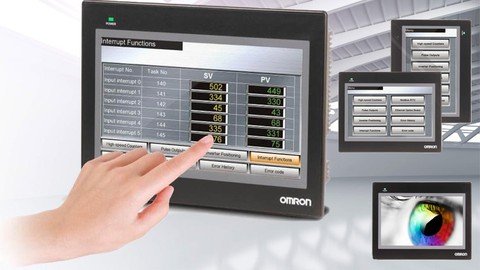
Omron NB HMI Training Course (NB-Designer)
MP4 | Video: h264, 1280x720 | Audio: AAC, 44.1 KHz
Language: English | Size: 2.92 GB | Duration: 5h 39m​


Learn how you can use NB-Designer to Design and use NB in your systems
What you'll learn
How create project in NB-Designer
How using any parts in NB-Designer
Upload and Download
Connecting NB to PLC
Requirements
No programming experience needed. You will learn everything you need to know
Description
Lecture 1: Create Project (Serial)
Lecture 2: Create project (Ethernet)
Lecture 3: Upload / Download
Lecture 4: Offline and Indirect Simulation
Lecture 5: Task Bar
NB-Designer provides a simple method (i.e. the Task Bar) to make the screen pop up or be minimized, to change the display of the screen and fast switch the screen display etc. Task Bar has 2 operation buttons, one of which is used to control the Menu Screen, and the other is used to control the Task Bar. You can set the Properties such as the Task Bar, whether to use the Menu Screen, color and position and so on in the[PT Property] in the Configuration and Setup Window. (By default, all the options in the Display Task Bar are checked.)
Lecture 6: Sheet
Common Sheet will always be displayed in the screen, and the components to be displayed forever can be put in Common Sheet. In this way, you can see the state of this component or operate this component at any time. The default Common Sheet is Frame 1. You can use[Change Common Sheet] function key to switch the other screen as the current Common Sheet, but only one screen can be used as the current Common Sheet.
Lecture 7: VNC
Lecture 8: Indirect Refrence
Lecture 9: System Information Message
Lecture 10: Bit Button & Bit Lamp
Bit Button component defines one touching area. When this area is activated, the bit address inside the PT or in the PLC can be switched to "On" or "Off" forcefully.
Lecture 11: Bit Switch
Bit Switch is the combination of the Bit Lamp and the Bit Button component. It defines a touching area, and the bit address inside the PT or of the PLC can be switched between On and Off state when this area is enabled.
Lecture 12: Command Button
Command Button component also defines a touching area and the state value will be input into the specified word address when the area is enabled.
Lecture 13: Word Lamp
Word Lamp is the component which will switch the display information according to the value of the specified word address.
Lecture 14: Word Switch
Word Switch is the component which changes the status value of the value specified for each status value and send the value to the specified address. The status value is changed by increasing or decreasing for each touch operation or by selecting from the list. When changing the status, the mapping value specified for each status will be sent to the specified memory. The statuses can be set up to 256.
Lecture 15: XY Graph
XY Graph reflects the correlation of two variables visually. If you want to monitor the XY Graph reflecting the changes of address values, the NB Unit can clearly displayed it out only by using this component.
Lecture 16: Animation
The Animation component is used to put the component into the position with the specified track in the PT, and this position is determined by the preset path and the data of PLC. The status and absolute position of the component in the PT is determined by the data in the 2 consecutive PLC memories. Generally speaking, the Read Address and the Read Address + 1 are used to store the state and the position in the preset path respectively. When the values in the position memory of PLC (Read Address + 1) change, the Vector Graphics or bitmap will jump to the next position in the preset path.
Lecture 17: Number Input / Number Display
The Number Input component can be used to display the current data contained in word address inside a specified PT or of PLC, to input data through the pop-up keyboard and to change the data contained in this address by pressing "ENTER" button.The Number Display component is used to display the data in the specified word memory.
Lecture 18: Text Input / Text Display
Text Input component can modify or display the data in the specified word memory, which is analyzed through the standard ASCII character table as default settings. The input data is saved to a consecutive memory with the "Registered Address" as the first address. Low-byte character codes are displayed on the left, while high-byte character codes are displayed on the right. The Text Display component can display data in the specified word memory, which is analyzed through the standard ASCII character table in default settings. Low-byte character codes are displayed on the left, while high-byte character codes are displayed on the right.
Lecture 19: Level Meter
The value specified of the communication address is displayed in level picture based on the upper limit value and the lower limit value set by[Level Meter Property].
Lecture 20: Analog Meter
Analog Meter can display the data in the specified memory by means of a Analog Meter diagram.
Lecture 21: Direct Screen
Direct Screen can make a specified screen pop up onto the current screen. The pop-up screen will be displayed within the area of the[Direct Screen]. Normally, the Direct Screen size should be set to same as that of the pop-up screen. There is no absolute limitation on the number of Direct Screen. However, a maximum of 16 Direct Screens can be displayed simultaneously during operation. The closing or opening of the Direct Screen is only determined by the bit address of the[Read Address] that control it, while Function Key can't be used to close it. When this bit address is ON, the screen will pop up, and when it is OFF, the screen will be closed.
Lecture 22: Alarm / Alarm Display / Alarm Setting
The Alarm component will display all the alarm information enabled in the set area. The content it displays is the same as that displayed by the Alarm Display, and both of them are about the alarm information of a certain node switch (bit address). When the bit address which worked as alarm trigger is released, the alarm display will be removed. The alarm information displayed by the alarm is necessarily registered by "Alarm Setting". When multiple alarms occur, the alarms will be displayed in the order descending to the newer (the top is the oldest and the bottom is the newest).
Alarm Display icon can be used to display the triggered preset alarm information by using the Neon Lamp in the area where the Alarm Display locates. The alarm information must be related to node address of a certain bit, and it will scroll from the right to the left when the bit address is triggered to the alarm state. The alarm information will continue to scroll until this bit address is switched to the nonalarm state. The alarm information must be logged in the[Alarm Setting] database in advance. (This component only displays the alarm information, and the component to be displayed must be logged in the[Alarm Setting] database).
Lecture 23: Data Log
The Data Log component acquires some PLC data and displays it in the manner of a Data Log at regular intervals. When each sampling period comes to an end, new data will be read from the PLC and displayed on the right of the Data Log, which ensures the real-time display.
Lecture 24: Recipe
The component of the Recipe transmits the data with consecutive memories. And the data can be downloaded from the recipe memory to the PLC or uploaded from the PLC to the recipe memory. The size of the data to be transferred can be set. For the NB Unit, the recipe memory with 128K word can be selected for recipe data storage.
Lecture 25: Scroll Bar
Scroll Bar is used to change the value in the specified word memory by pressing the slider.
Lecture 26: Event / Event Display / Event Setting
Event component is used to display the event information registered in "Event Setting" and whose current state satisfying the triggering conditions. The Event component will display triggered event information one by one according to the time sequence of the triggered event. If the accurate time needs to be displayed, the RTC must be used or the Time must be read from the PLC. If multiple events are triggered, the events will be displayed in the order of descending or the latest event will be at the top and the oldest event at the bottom. In addition, if 1024 events or more are triggered, the event will be deleted in order from the oldest event. When only a particular event is displayed, there may be the cases where the event suddenly disappears because of the hidden events of which the number has significantly increased to exceed 1024.
Lecture 27: Word Neon Lamp
The text string which is specified as Label is displayed in loopy-moving way, and it supports the label contents corresponding to 256 (max.) states in the loopy-moving way.
Lecture 28: Bit Neon Lamp
The text string which is specified as Label displayed in loopy-moving way, and it supports the label contents corresponding to State 0 and State 1 in the loopy-moving way. The difference of the Word Neon Lamp and the Bit Neon Lamp is the controlling method, and the former selects the different states ranging from 1 to 256 by changing the memory value, while the latter changes the display state (only 2 states available) by changing the state of the control bit.
Lecture 29: Touch Trigger
The Touch Trigger component is applicable to the conditions where the several components can be triggered to act not through the triggering method. When the triggering conditions for the specified memory of the Touch Trigger component are satisfied, the components placed in the valid area for the Touch Trigger component can be triggered to act.
Lecture 30: Table
The Table component can make the selection type of "Select by row", "Select by Column" and "Select by cell". The user can set the "Row", "Column", "Color when Selected", "Background Color", "Border Color", and write the selected Row No. and Column No. into the specified memory.
Lecture 31: Data History
The Data History component can be used to read a series of date in consecutive memories from the specified word memory(s) inside PT, PLC or word memory(s) of the controller periodically and display them in the table form.
Lecture 32: Operation Log
The Operation Log component can be used to record or display the operations made by the users to the PT in the table form. The operation log will be stored into the external memory in CSV format.
Lecture 33: Scale
It is applicable to the conditions with the requirement of equal-division notation.
Lecture 34: Timer
Timer is a kind of component performing the timing. When the timing is over, it will play the other corresponding functions such as periodical Macro instruction execution, parameter setting and data transmission etc.
Lecture 35: Bitmap
Bitmap component is used to call and display the bg-form graphics registered in the system graphics library or the graphics library in Project File Window. Bitmap component is not controlled by the memory, and doesn't have multiple states, thus the bitmap corresponding to the graphics state specified by you at the designing time will always be displayed.
Lecture 36: Vector Graphics
Vector Graphics component is used to call and display the vg-form graphics registered in the system graphics library or the graphics library in Project File Window. The Vector Graphics component is not controlled by the memory, and doesn't have multiple states, thus the Vector Graphics corresponding to the graphics state specified by you at the designing time will always be displayed.
Lecture 37: Data Transmission
Data Transmission component can make the data in the specified memory address transferred to the other memory address. Data Transmission can be triggered by the manual touching method or the state change of the specified address.
Lecture 38: Date/Time
The Date/Time component can display the value of the internal RTC clock of the PT in the set format.
Lecture 39: Indirect Shape
The Indirect Shape component can modify the positions and sizes of the rectangle, ellipse or line by changing the value of the memory.
Lecture 40: Multifunction
The component which is unified the Bit Button and the Word Switch can operate the both the bit set and the word set through one key. The Multifunction component can be created by using the mouse to click[Components] -[Button/Switch] -[Multifunction] or dragging[Multifunction] component from[Project Library Window] -[Function Parts] to the Edit Window. The number of Actions which can be set by the Multifunction is 16 at max
Lecture 41: Text Library and Multi Language
Text Library can be used to store the text contents needed by the project, thus preventing the label with the same text from being input frequently. In addition, Text Library can be used to the conditions with the requirement of multi-language support to realize the switching among the multiple languages for the PT Edit screen. NB-Designer currently supports up to 32 kinds of languages setting.
Lecture 42: Variable Table
Variable Table is a useful address logon library, which prevents the inconvenience resulting from repeated input of address, thus saving a lot of time. Check the[Use Variable] check box in setting items for each component to use the address which was registered to the Variable Table with the settings for each component.
Lecture 43: Security
can be set for each level at the request of the users, and the greater the level number, the higher the level. 15-level is the highest and 0-level is the lowest. When the security level is 0, it means no password. 0 can't be used for setting the password.
Lecture 44: User Permission and User Information
The software opens 32 users and 32 operation permissions for free use. The users and operation permission can be set separately, and the operation permission is not limited to the users. And the online user addition/deletion and permission modification can be done in the PT.
When the system uses User Permission function, the related information of the current login user can be displayed in the table form by using the User Information component. The User Information component must be used in combination with the User Permission, otherwise it will not work.
Who this course is for
For everyone that uses or wants to use Omron NB HMI
Screenshots








 
4Q779PtZ55owAMz8ApZTY0Vqkh56l8Kv.jpg

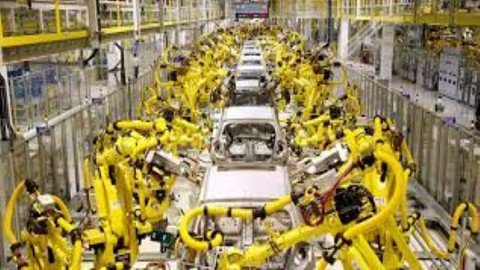
Omron Robot Programming Tutorial
MP4 | Video: h264, 1280x720 | Audio: AAC, 44.1 KHz
Language: English | Size: 266 MB | Duration: 41m
Omron Robot Programming Tutorial​

What you'll learn
Using a flexpendant
Using a robot simulation
Using a robot programming
Using a controller
Requirements
to be learn robotic
Description
This series of "Robotics: Learn by building" modules has an end-goal focus on the diverse field of robotics. In module I we learned the basics of electricity and electronics. In this module II you further developed your knowledge and skills to include digital electronics and practice your skills on real-life digital components. In this third course you will learn physics principles (from simple to very complex) with a specific goal of understanding and even designing your own drive systems for robots. You will learn details about different robotic drive systems you will see in commercial, industrial robots like how timing belt drives work and why they are so important in robotics, as well as the more esoteric drives like the harmonic drive - what it is an how that amazing system works.
We will even look at a real-life case study as we design a submarine robot, remotely operated and able to withstand the bone-crushing operating depths of over 600 meters minimum. The unique challenges we will face will build up your knowledge so that you too can design sea-floor robots facing harsh environments to perform inspection, welding or maintenance on submarine pipes or cables.
This course is the prerequisite for the module IV course where you'll learn prototyping skills, and gain a wide variety of knowledge and skills so you can actually build your own robots and manufacture your own parts. In module IV, you'll culminate all you've learned so far as you build a 3D printer from scratch, hook it up to a desktop computer and make your own plastic parts. The 3D printer is, in effect, a robot which you can then use to make parts for your other robot designs. In module V you can take your robot design and construction skills to the next level with a hands-on approach to autonomous robotic systems: learning about various sensors to know where you are and what your robot is doing, GPS navigation, basic artificial intelligence, powerful microchips known as FPGA's where you literally design a custom circuit on the chip, vision systems and more.
Lesson overview
In this course we'll be covering
Simple machines (which all come into play in surprising ways you probably haven't seen before)
Designing an arm robot
The toggle mechanism (again, comes into play in a ridiculous number of surprising ways you probably haven't seen before)
harmonic drives, cycloidal drives, epicyclic drives, traction drives
strength of materials & construction challenge
case study: design challenges of a deep-submarine, remotely operated vehicle
hydraulics & pneumatics (including building your own)
air & hydraulic muscles, muscle wire
servos (speed, pressure, force, position, etc...)
DC motors, BLDC motors, BLDC servo motors, stepper motors, AC motors, AC servo motors, single and three phase power, electrical generation
frequency drives, PWM AC signal generation
regenerative / rheostatic / dynamic braking, looking at electric vehicle design and locomotive design
counter-force systems you will encounter in industrial robots
safety around robot systems, in industry and hobby
robot designs: articulated arm, gantry, spine, collaborative
case study: combat robots
Who this course is for
controller
Screenshots


0L4el8acqdGHhdzAxQ6O1m4k9YkUWKDr.jpg

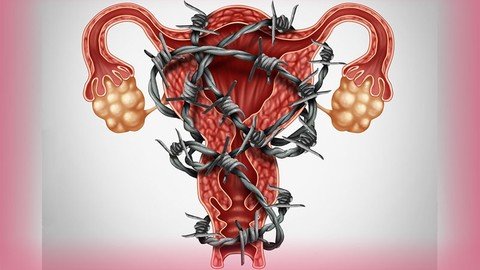
Optimizing Fertility In Endometriosis
MP4 | Video: h264, 1280x720 | Audio: AAC, 44.1 KHz
Language: English | Size: 1.10 GB | Duration: 1h 21m​

A to Z of Endometriosis and how to deal with associated Infertility
What you'll learn
Pathophysiology of Endometriosis
Clinical, Biochemical,Ultrasound, MRI and Endoscopic Diagnosis of Endometriosis
Endometriosis Fertility Index Staging
Natural conception in Endometriosis - is it possible ?
Role of IUI
How to improve success rates in IVF in such patients
Role of Medical therapy in Infertility associated with Endometriosis
Is there any role of laparoscopy in Endometriosis with Infertility ?
Requirements
MBBS
Description
A to Z of Endometriosis and how to deal with associated Infertility
This is an advanced course and the eligibility criteria are Post Graduate trainees in Obstetrics and Gynaecology, Infertility specialists, Gynaecologists also MBBS Doctors.
Endometriosis is a problem we need to encounter both as Gynaecologists as well as Fertility experts. How do we diagnose the problem at the earliest? Do the same treatments as applicable to pain management apply to Fertility as well? Is the role of Natural conception and laparoscopy exaggerated in such patients? Which patients will benefit through IUI or Intra Uterine Insemination? How does an Endometriotic cyst affect IVF? Is the agonist cycle better or does the antagonist cycle give better results in such cases? This is a unique venture and probably one of the first to be tried in the world and thus you are part of history in the making. The answer to these and many more questions lies a few moments away....click Register to find out more !!!
· Pathophysiology of Endometriosis
· Clinical, Biochemical, Ultrasound, MRI and Endoscopic Diagnosis of Endometriosis
· Endometriosis Fertility Index Staging
· Natural conception in Endometriosis - is it possible?
· Role of IUI
· How to improve success rates in IVF in such patients
· Role of Medical therapy in Infertility associated with Endometriosis
· Is there any role of laparoscopy in Endometriosis with Infertility?
Who this course is for
Post Graduate trainees in Obstetrics and Gynaecology, Budding Gynaecologists, Infertility specialists
Screenshots


d4fb8406-b570-466d-840a-bfb0790d2ad8.png

Procreate: The Fast Guide
MP4 | Video: h264, 1280x720 | Audio: AAC, 44.1 KHz, 2 Ch
Genre: eLearning | Language: English + srt | Duration: 27 lectures (4h 39m) | Size: 5 GB

Everything you need to know about Procreate - quickly, effectively, concisely.
What you'll learn
You will learn the tools of Procreate - fast!
You will also learn about workflow in Procreate which is just as important as what the tools do
You will be able to revise what you've learned fast with time-checked videos
You will also be able to follow along with time-checked videos
Requirements
An iPad and a working copy of Procreate. An Apple pencil is also strongly recommended
No experience or artistic talent needed!
Description
Want to get painting with Procreate but you're in a hurry? Aren't we all! So this course is designed especially for you. Everything you need and nothing you don't, all in one course that tells you all the important stuff in record time.
This is the course for people who want to get up to speed with Procreate in double speed time. But I'm not selling you short on technique. Nope. I've brought my 30+ years as a designer to this course to select the main tools and techniques you will need to create great paintings. This is all about getting you started with painting in Procreate. I don't cover animation or 3d painting. I concentrate on painting and the tools you need to do the job effectively.
So why is this course different? I offer you a series of videos explaining the various tools and features of Procreate, and these videos are time stamped - at the start of each video I give the times where I talk about the various topics I cover. That way you can go straight to the point in the video where I talk about the particular bit you want to know about. I also include a PDF which lists the various topics I cover in the reference videos. This is going to be a huge time saver for you because you don't have to search though an entire video to find the bit you want to revise.
But I also give you workflow videos at the start of the course because just learning the tools isn't enough. You need to know when and why to use the tools in Procreate to be an effective artist. What's more, at various points in the workflow videos I'll use a tool, and I'll put up a caption showing you the title and time in the reference video where I focus on that particular tool. That why this is the Fast Guide. You can find the information you want quickly.
This course has been designed to as a speedy and compact alternative to my more extensive Procreate: Solid Foundations course I offer here at Udemy. So you if you want to deepen your knowledge after this course, I've got you covered. This course may be for people in a hurry. But I still bring the same philosophy to this course as I do to all my courses. Knowing what a tool does is not enough. You have to know why and when to use it. That way you gain understanding as well as technique. I'll give you both in record time!
Who this course is for
Beginners in Procreate who want a course with the right balance of speed and thoroughness
Homepage


8K5bPOYJlJrlukwgZEVdG2SzdLa04oGk.jpg

S4 HANA1909 FSCM SD FICO credit management concepts
MP4 | Video: h264, 1280x720 | Audio: AAC, 44.1 KHz
Language: English | Size: 972 MB | Duration: 3h 2m
SAP Credit management with FI and SD integration
What you'll learn​

SAP S4 HANA 1909 FSCM - CREDIT MANAGEMENT - SD / FI
S4 HANA Credit management concepts Overview
Difference between Old (ECC) and New Credit management
Credit Master Role creation
Credit segment concept
About Rating procedure brief
Create rule for scoring and Credit limit calculation
Define customer credit groups
Credit control area and assignment to Credit segment configuration
FI and SD integration configurations for FSCM
Transactional Data for Credit blocks at OTC level (Order to Cash)
BP customer and vendor creation overview
BP credit role master data set up
Risk classes and Risk categories
Brief about scoring and ranking practical
BAdi: Connections of SD to Sap Credit Management
Requirements
Introduced ECC level concepts
Description
Topics covered
SAP S4 HANA 1909 FSCM - CREDIT MANAGEMENT - SD / FI
S4 HANA Credit management concepts Overview
Difference between Old (ECC) and New Credit management
Credit Master Role creation
Credit segment concept
About Rating procedure brief
Create rule for scoring and Credit limit calculation
Define customer credit groups
Credit control area and assignment to Credit segment configuration
FI and SD integration configurations for FSCM
Transactional Data for Credit blocks at OTC level (Order to Cash)
BP customer and vendor creation overview
BP credit role master data set up
Risk classes and Risk categories
Brief about scoring and ranking practical
BAdi: Connections of SD to Sap Credit Management
Credit block at sales order, delivery and PGI level
New capabilities for SAP S/4HANA 1909
Schedule Credit Management Jobs
The following update jobs may now be scheduled
Repeat the credit check of SD documents
released documents are checked only if the validity period for release is over (number of days).
re-check SD documents to find out if the creditworthiness of the customer has changed in the period between the sales order date and the delivery date.
re-check SD documents that have passed the initial credit check successfully, but for which in the meantime negative events might have happened. For example, the credit limit of the customer might have been reduced or other the dunning level might have been raised.
Update the score for business partners
perform mass updates to the score of business partner
You can restrict update by Business Partner, Rule, and Valid-to date of score.
Update the credit limit for business partners
perform mass changes to the credit limit in the credit account of business partners
restrict updates by
Business partner, Rating procedure, Credit segment, and Valid-to date of the credit limit
the field Only Blocked in Credit Management, then only those credit accounts that are blocked in Credit Management are selected,
the field Only Special Attention, then only those credit accounts that are marked for special attention are selected
Update the rule for scoring and credit limit calculation, and the checking rule
restrict updates by filtering on the previous rule for scoring and credit limit calculation and/or the business partner
Assign the Credit Management role to business partners
select on or more business partners to assign them the Credit Management role
Who this course is for
SAP SD CONSULTANTS
SAP FI CONSULTANTS
SAP CO CONULTANTS
SAP S4 HANA STUDENTS
SAP S4 HANA END USERS
SAP S4 HANA CUSTOMER CARE CONSULTANTS
SAP SD/MM CONSULTANTS
Screenshots


9Yr9m8wGTwlriHRpQ1onb5VaPwulihg5.jpg

SC-200 Microsoft Security Operations Analyst
MP4 | Video: h264, 1280x720 | Audio: AAC, 44.1 KHz
Language: English | Size: 3.76 GB | Duration: 12h 47m
Learn all about Microsoft security services and get certified as a Microsoft Security Operations Analyst​

What you'll learn
Explain how Microsoft Defender for Endpoint can remediate risks in your environment
Create a Microsoft Defender for Endpoint environment
Configure Attack Surface Reduction rules on Windows devices
Configure alert settings in Microsoft Defender for Endpoint
Conduct advanced hunting in Microsoft 365 Defender
Manage incidents in Microsoft 365 Defender
Investigate DLP alerts in Microsoft Defender for Cloud Apps
Explain the types of actions you can take on an insider risk management case
Configure Microsoft Defender for Cloud
Remediate alerts in Microsoft Defender for Cloud
Construct Kusto Query Language (KQL) statements
Extract data from unstructured string fields using KQL
Manage a Microsoft Sentinel workspace
Use KQL to access the watchlist in Microsoft Sentinel
Manage threat indicators in Microsoft Sentinel
Configure different data sources in Microsoft Sentinel
Requirements
Basic understanding of Microsoft 365
Basic understanding of Microsoft security, compliance, and identity products
Intermediate understanding of Windows 10/11
Familiarity with Azure services
Familiarity with Azure virtual machines and virtual networking
Basic understanding of scripting concepts
Description
This course is a complete preparation for the SC-200 exam. ( Including hands-on Labs)
The Microsoft Security Operations Analyst collaborates with organizational stakeholders to secure information technology systems for the organization. Their goal is to reduce organizational risk by rapidly remediating active attacks in the environment, advising on improvements to threat protection practices, and referring violations of organizational policies to appropriate stakeholders.
Responsibilities include threat management, monitoring, and response by using a variety of security solutions across their environment. The role primarily investigates, responds to, and hunts for threats using Microsoft Sentinel, Microsoft Defender for Cloud, Microsoft 365 Defender, and third-party security products. Since the Security Operations Analyst consumes the operational output of these tools, they are also a critical stakeholder in the configuration and deployment of these technologies.
Don't be left behind. Be ahead of the curve by getting certified as a Microsoft Security Operations Analyst, and be ready for the opportunity to advance your career.
· Video lectures on each topic of the exam with demos that fully prepare you for your exam as well as ensuring you can administer all Microsoft security services and tools like a Pro
· Review questions at the end of each section (quizz) to test your knowledge on the topics learned in the section
· LABS at the end of each section. The labs follow the official Microsoft training labs and they are designed so you can practice yourself at your own pace when you aren't watching the videos. You will have step-by-step instructions available to complete each lab and instructions to prepare your lab environment and deploy the necesarry resources for the labs.
· Interactive pre-recorded demonstrations on some of the topics that cannot be covered in the lab environment
· Links to official Microsoft resources/blogs/videos for further documentation available for each lesson on each topic
All video lectures will cover all SC-200 exam topics and include hands on demonstrations on each topic.
The course has been structured to follow the exact official Microsoft training plan. So if you want to pass your exam on your first attempt hit the enroll button now and you will get
This course curriculum follows the Microsoft's SC-200 exam study areas
· Mitigate threats using Microsoft 365 Defender (25-30%)
· Mitigate threats using Microsoft Defender for Cloud (25-30%)
· Mitigate threats using Microsoft Sentinel (40-45%)
Microsoft, Windows, Microsoft 365 and Microsoft Azure are either registered trademarks or trademarks of Microsoft Corporation in the United States and/or other countries. This course is not certified, accredited, affiliated with, nor endorsed by Microsoft Corporation.
Who this course is for
Security Operations Analysts or anyone aspiring to work in this role
Anyone working in IT with exposure to Security Operations
Any IT enthusiast who wants to learn about Microsoft Security technologies
Candidates for the SC-200 exam
Screenshots


Zurück
Oben Unten