• Regeln für den Video-Bereich:

    In den Börsenbereich gehören nur Angebote die bereits den Allgemeinen Regeln entsprechen.

    Einteilung

    - Folgende Formate gehören in die angegeben Bereiche:
    - Filme: Encodierte Filme von BluRay, DVD, R5, TV, Screener sowie Telesyncs im Format DivX, XviD und x264.
    - DVD: Filme im Format DVD5, DVD9 und HD2DVD.
    - HD: Encodierte Filme mit der Auflösung 720p oder darüber von BluRay, DVD, R5, TV, Screener sowie Telesyncs im Format x264.
    - 3D: Encodierte Filme von BluRay, die in einem 3D Format vorliegen. Dies gilt auch für Dokus, Animation usw.
    - Serien: Cartoon/Zeichentrick, Anime, Tutorials, Dokumentationen, Konzerte/Musik, Sonstiges sind demnach in die entsprechenden Bereiche einzuordnen, auch wenn sie beispielsweise im High Definition-Format oder als DVD5/DVD9/HD2DVD vorliegen. Ausnahme 3D.
    - Bereich Englisch: Englische Releases gehören immer in diesen Bereich.
    - Bereich Talk: Der Bereich, in dem über die Releases diskutiert werden kann, darf, soll und erwünscht ist.


    Angebot/Beitrag erstellen

    - Ein Beitrag darf erst dann erstellt werden, wenn der Upload bei mindestens einem OCH komplett ist. Platzhalter sind untersagt.
    - Bei einem Scenerelease hat der Threadtitel ausschließlich aus dem originalen, unveränderten Releasenamen zu bestehen. Es dürfen keine Veränderungen wie z.B. Sterne, kleine Buchstaben o.ä. vorgenommen werden. Ausnahme Serienbörse:
    - Bei einem Sammelthread für eine Staffel entfällt aus dem Releasename natürlich der Name der Folge. Beispiel: Die Simpsons S21 German DVDRip XviD - ITG
    - Dementsprechend sind also u.a. verboten: Erweiterungen wie "Tipp", "empfehlenswert", "only", "reup", usw. / jegliche andere Zusatzinformation oder Ergänzung, welche nicht in obiger Beschreibung zu finden ist.

    Aufbau des Angebots und Threadtitel

    Der Titel nach folgendem Muster erstellt zu werden. <Name> [3D] [Staffel] [German] <Jahr> <Tonspur> [DL] [Auflösung] <Quelle> <Codec> - <Group>
    Beispiel: The Dark Knight German 2008 AC3 DVDRip XviD - iND
    Beispiel: The Dark Knight 2008 DTS DL BDRip x264 - iND
    Beispiel: The Dark Knight 2008 AC3 DL BDRip XviD - iND
    Beispiel: The Dark Knight German 2008 AC3 720p BluRay x264 iND
    Beispiel: The Dark Knight 2008 DTS DL 1080p BluRay x264 iND
    Beispiel: Die Simpsons S01 German AC3 DVDRip XviD iND
    Beispiel: Die Simpsons S20 German AC3 720p BluRay x264 iND
    Beispiel: Sword Art Online II Ger Sub 2014 AAC 1080p WEBRip x264 - peppermint
    Entsprechend sind also u.a. verboten: Sonderzeichen wie Klammern, Sterne, Ausrufezeichen, Unterstriche, Anführungszeichen / Erweiterungen wie "Tipp", "empfehlenswert", "only", "reup", usw. / jegliche andere Zusatzinformation oder Ergänzung, welche nicht in obiger Beschreibung zu finden ist
    Ausnahmen hiervon können in den Bereichen geregelt sein.

    Die Beiträge sollen wie folgt aufgebaut werden:
    Überschrift entspricht dem Threadtitel
    Cover
    kurze Inhaltsbeschreibung
    Format, Größe, Dauer sind gut lesbar für Downloader außerhalb des Spoilers zu vermerken
    Nfo sind immer Anzugeben und selbige immer im Spoiler in Textform.
    Sind keine Nfo vorhanden z.B. Eigenpublikationen, sind im Spoiler folgende Dateiinformationen zusätzlich anzugeben :
    Quelle
    Video (Auflösung und Bitrate)
    Ton (Sprache, Format und Bitrate der einzelnen Spuren)
    Untertitel (sofern vorhanden)
    Hosterangabe in Textform außerhalb eines Spoiler mit allen enthaltenen Hostern.
    Bei SD kann auf diese zusätzlichen Dateiinformationen verzichtet werden.

    Alle benötigten Passwörter sind, sofern vorhanden, in Textform im Angebot anzugeben.
    Spoiler im Spoiler mit Kommentaren :"Schon Bedankt?" sind unerwünscht.


    Releases

    - Sind Retail-Release verfügbar, sind alle anderen Variationen untersagt. Ausnahmen: Alle deutschen Retail-Release sind CUT, in diesem Fall sind dubbed UNCUT-Release zulässig.
    - Im Serien-Bereich gilt speziell: Wenn ein Retail vor Abschluss einer laufenden Staffel erscheint, darf diese Staffel noch zu Ende gebracht werden.62
    - Gleiche Releases sind unbedingt zusammenzufassen. Das bedeutet, es ist zwingend erforderlich, vor dem Erstellen eines Themas per Suchfunktion zu überprüfen, ob bereits ein Beitrag mit demselben Release besteht. Ist dies der Fall, ist der bereits vorhandene Beitrag zu verwenden.
    - P2P und Scene Releases dürfen nicht verändert oder gar unter einem iND Tag eingestellt werden.


    Support, Diskussionen und Suche

    - Supportanfragen sind entweder per PN oder im Bereich Talk zu stellen.
    - Diskussionen und Bewertungen sind im Talk Bereich zu führen. Fragen an die Uploader haben ausschließlich via PN zu erfolgen, und sind in den Angeboten untersagt.
    - Anfragen zu Upload-Wünschen sind nur im Bereich Suche Video erlaubt. Antworten dürfen nur auf Angebote von MyBoerse.bz verlinkt werden.


    Verbote

    - Untersagt sind mehrere Formate in einem einzigen Angebotsthread, wie beispielsweise das gleichzeitige Anbieten von DivX/XviD, 720p und 1080p in einem Thread. Pro Format, Release und Auflösung ist ein eigener Thread zu eröffnen.
    - Grundsätzlich ebenso verboten sind Dupes. Uploader haben sich an geeigneter Stelle darüber zu informieren, ob es sich bei einem Release um ein Dupe handelt.
    - Gefakte, nur teilweise lauffähige oder unvollständige Angebote sind untersagt. Dies gilt auch für eigene Publikationen, die augenscheinlich nicht selbst von z.B. einer DVD gerippt wurden. Laufende Serien, bei denen noch nicht alle Folgen verfügbar sind, dürfen erstellt und regelmäßig geupdatet werden.
    - Untersagt sind Angebote, welche nur und ausschließlich in einer anderen Sprache als deutsch oder englisch vorliegen. Ausnahmen sind VORHER mit den Moderatoren zu klären.


    Verstoß gegen die Regeln

    - Angebote oder Beiträge, die gegen die Forenregeln verstoßen, sind über den "Melden"-Button im Beitrag zu melden.
  • Bitte registriere dich zunächst um Beiträge zu verfassen und externe Links aufzurufen.


Arduino IoT Environment Monitor Project

Tutorials

MyBoerse.bz Pro Member
ad3befb0e7524e3621a98006784185e5.jpeg

Free Download Arduino IoT Environment Monitor Project
Published 3/2023
Created by Dr. Peter Dalmaris
MP4 | Video: h264, 1280x720 | Audio: AAC, 44.1 KHz, 2 Ch
Genre: eLearning | Language: English | Duration: 27 Lectures ( 3h 11m ) | Size: 2.6 GB

The perfect project for the new Arduino maker looking for a weekend IoT challenge.
Free Download What you'll learn
How to create an Arduino IOT system.
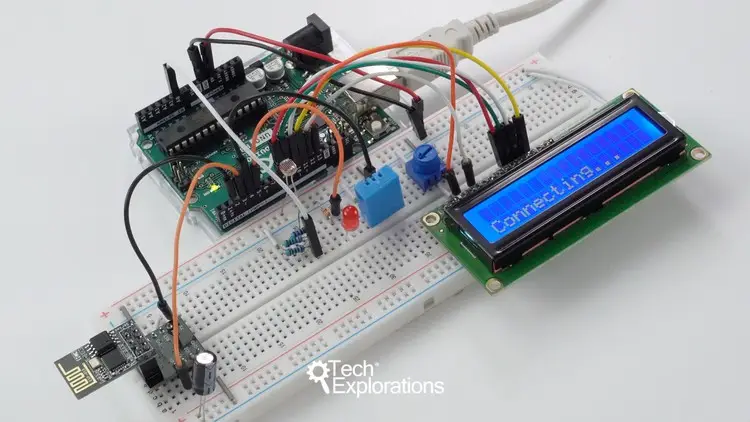
Intergrate sensors, LEDs, LCDs, and Wifi hardware.
Create and interact with a mobile and web dashboard powered by Blynk.
How to use the the DHT11 sensor.
How to use the photoresistor.
How to use the 2x16 LCD display using the 4-bit parallel connection method.
How to use the ESP01S WiFi module with an Arduino Uno.
How to configure the ESP01S Wifi module using its AT command set.
How to use the above mentioned hardware within the limited resource constraints of the Arduino Uno.
How to create an Arduino shield PCB in KiCad to replace the prototyping breadboard.
Requirements
This is not an introductory course.
You should know how to wire up simple circuits on a breadboard
You should know how to upload a sketch to your Arduino.
You should be able to read and understand simple Arduino code.
You should be able to install external libraries to the Arduino desktop IDE
You should be able to fix simple code bugs and wiring errors.
Description
With this course, you will apply the knowledge you acquired from Arduino Step by Step Getting Started to create a simple Internet of Things device.This course aims to give you the opportunity to complete your first Arduino project that is non-trivial, combines modern hardware and software components, and includes an Internet of Things element.In designing this course, one of my core objectives was to make this project course small and focused in scope. With this project, I want to give you a quick win and bolster your confidence so that you will feel good about continuing with bigger and more complicated projects.In this course, you will learn to use an Arduino Uno along with these peripherals:The DHT11 sensor.The photoresistor.The 2x16 LCD display with the 4-bit parallel connection method.The ESP01S WiFi module.You will learn how to assemble those peripherals into a single circuit. You will also learn how to calculate the appropriate fixed resistor for the photoresistor so that light sensor readings are accurate.On the software side of the project, you will learn how to write a sketch that:Makes use of the peripherals within the limited resource constraints of the Arduino Uno.Design a web and mobile dashboard that displays sensor data and controls the Arduino.You will also learn how to power your Arduino motor project with one or two batteries to separate the Arduino and motor sub-circuits.HardwareMost of the hardware I used in this course is conveniently part of the "3 in 1 IoT/Smart Car/Learning Kit for Arduino" by Sunfounder.This kit contains an Arduino Uno clone board, the sensors, the wifi module, assorted resistors, wires and the breadboard.This hardware is not included in this course, and you must purchase it separately.You can purchase these items as part of a kit sold by Sunfounder, or individually from your preferred retailer.Before you purchase any hardware, please take a few minutes to watch the lecture, "Hardware and kit overview", where I discuss all hardware components needed in this course.This course has a prerequisite: Arduino Step-by-Step Getting StartedThis is not an introductory course.You should know how to wire up simple circuits on a breadboard and upload a sketch to your Arduino.You should be able to read and understand simple Arduino code, install external libraries to the Arduino desktop IDE, and know how to fix simple code bugs and wiring errors. If you don't feel confident about the skills I described, I recommend that you complete my course Arduino Step by Step Getting Started before attempting this course.
Who this course is for
Post-beginner Arduino makers.
Anyone looking for an opportunity to complete their first non-trivialArduino project.
Anyone looking for a quick win and bolster their confidence.
Homepage

Recommend Download Link Hight Speed | Please Say Thanks Keep Topic Live
Links are Interchangeable - Single Extraction
 
99a4ed9aeff0c08a933e3684fd8cc27a.webp


Arduino IoT Environment Monitor Project
Duration: 03:11:05 | .MP4 1280x720, 30 fps(r) | AAC, 44100 Hz, 2ch | 2.58 GB​

Genre: eLearning | Language: English [/center]

The perfect project for the new Arduino maker looking for a weekend IoT challenge.
What you'll learn
How to create an Arduino IOT system.
Intergrate sensors, LEDs, LCDs, and Wifi hardware.
Create and interact with a mobile and web dashboard powered by Blynk.
How to use the the DHT11 sensor.
How to use the photoresistor.
How to use the 2x16 LCD display using the 4-bit parallel connection method.
How to use the ESP01S WiFi module with an Arduino Uno.
How to configure the ESP01S Wifi module using its AT command set.
How to use the above mentioned hardware within the limited resource constraints of the Arduino Uno.
How to create an Arduino shield PCB in KiCad to replace the prototyping breadboard.
Requirements
This is not an introductory course.
You should know how to wire up simple circuits on a breadboard
You should know how to upload a sketch to your Arduino.
You should be able to read and understand simple Arduino code.
You should be able to install external libraries to the Arduino desktop IDE
You should be able to fix simple code bugs and wiring errors.
Description
With this course, you will apply the knowledge you acquired from Arduino Step by Step Getting Started to create a simple Internet of Things device.
This course aims to give you the opportunity to complete your first Arduino project that is non-trivial, combines modern hardware and software components, and includes an Internet of Things element.
In designing this course, one of my core objectives was to make this project course small and focused in scope. With this project, I want to give you a quick win and bolster your confidence so that you will feel good about continuing with bigger and more complicated projects.
In this course, you will learn to use an Arduino Uno along with these peripherals:
The DHT11 sensor.
The photoresistor.
The 2x16 LCD display with the 4-bit parallel connection method.
The ESP01S WiFi module.
You will learn how to assemble those peripherals into a single circuit. You will also learn how to calculate the appropriate fixed resistor for the photoresistor so that light sensor readings are accurate.
On the software side of the project, you will learn how to write a sketch that:
Makes use of the peripherals within the limited resource constraints of the Arduino Uno.
Design a web and mobile dashboard that displays sensor data and controls the Arduino.
You will also learn how to power your Arduino motor project with one or two batteries to separate the Arduino and motor sub-circuits.
Hardware
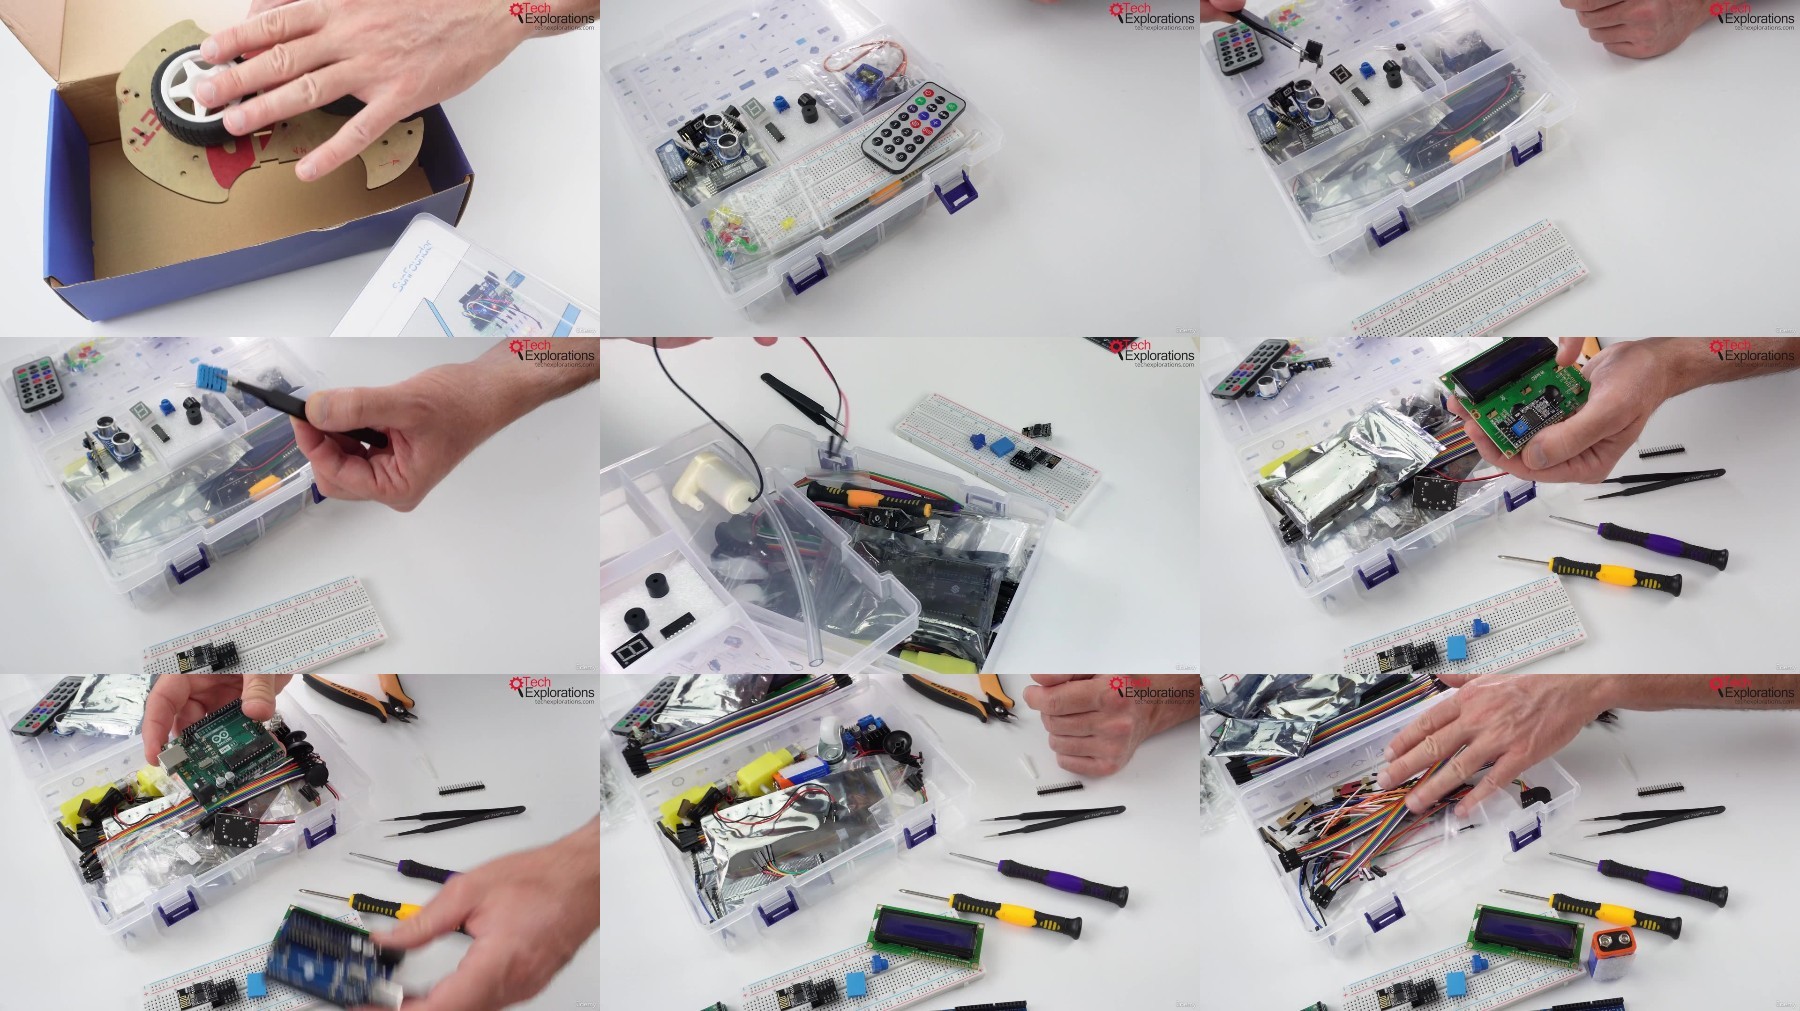
Most of the hardware I used in this course is conveniently part of the "3 in 1 IoT/Smart Car/Learning Kit for Arduino" by Sunfounder.
This kit contains an Arduino Uno clone board, the sensors, the wifi module, assorted resistors, wires and the breadboard.
This hardware is not included in this course, and you must purchase it separately.
You can purchase these items as part of a kit sold by Sunfounder, or individually from your preferred retailer.
Before you purchase any hardware, please take a few minutes to watch the lecture, "Hardware and kit overview", where I discuss all hardware components needed in this course.
This course has a prerequisite: Arduino Step-by-Step Getting Started
This is not an introductory course.
You should know how to wire up simple circuits on a breadboard and upload a sketch to your Arduino.
You should be able to read and understand simple Arduino code, install external libraries to the Arduino desktop IDE, and know how to fix simple code bugs and wiring errors.
If you don't feel confident about the skills I described, I recommend that you complete my course Arduino Step by Step Getting Started before attempting this course.

Who this course is for:
Post-beginner Arduino makers.
Anyone looking for an opportunity to complete their first non-trivialArduino project.
Anyone looking for a quick win and bolster their confidence.


UGkg42un_o.jpg


375727939_katfile.png


Free search engine download: Udemy Arduino IoT Environment Monitor Project
 
Zurück
Oben Unten