


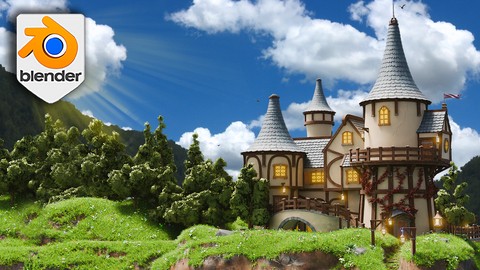
Blender 4 Modeling And Geometry Node Workshop
Published 4/2024
MP4 | Video: h264, 1920x1080 | Audio: AAC, 44.1 KHz
Language: English
| Size: 46.40 GB
| Duration: 29h 7m
3D creation of a stylized wizard's tower, complete with a serene pond and an ancient stone bridge.
What you'll learn
• Referencing Complete Guide: Understand how to effectively use references to begin your projects with clarity and precision.
• Greyboxing and Ambient Occlusion: Learn the fundamentals of setting up your scene correctly from the start using greyboxing techniques and ambient occlusion.
• Sky Texture Lighting: Master the use of Blender's sky texture for dynamic and realistic lighting effects.
• Progressive Modeling Skills: Develop your modelling skills from simple to advanced techniques, suitable for any level of experience.
• Stylized Aesthetic Creation: Achieve a stylized look that captures the essence of fantasy and enchantment.
• Windows and Doors: Learn specific techniques for creating functional and aesthetic windows and doors.
• Complex Lamps: Construct detailed lamps that add character and light to your scenes.
• Structured Building Techniques: Build with structure in mind, balancing realistic elements within a stylized framework.
• Storytelling through Architecture: Discover how to infuse your buildings with narratives that engage and intrigue.
• Cloth Generator Usage: Use the cloth generator to create dynamic flags and other fabric elements.
• Precise Staircases: Design staircases that are both beautiful and logically placed.
• Ivy Creation: Add natural elements like ivy that enhance the aged look of your wizard's tower.
• Terrain Sculpting Made Easy: Simplify the process of terrain creation using Blender's sculpting tools.
• Complex UV Unwrapping: Tackle the challenges of unwrapping complex and curved UVs.
• Grass and Flowers: Create lush, vibrant landscapes with detailed grass and flowers.
• Vertex Painting for Terrains: Learn how to paint detailed terrains using vertex painting techniques.
• Cobblestone Walkways: Develop atmospheric cobblestone paths that add depth to your scenes.
• Advanced Shader Techniques: Apply and troubleshoot shaders to bring realism and flair to your models.
• Modelling Problem-Solving: Discuss common issues like normal directions and the use of ngons.
• Professional Modeling Techniques: Enhance your workflow and model quality with professional tips and tricks.
• Composition Deep Dive: Explore advanced composition techniques to lay out your scenes effectively.
• Comprehensive Compositor Breakdown: Master layering and alphas in the Blender compositor.
• Emission Lighting: Learn how to creatively light scenes using emission shaders.
• Resource Pack Utilization: Integrate a massive resource pack into your projects, enhancing your creative toolkit.
• Asset Manager Proficiency: Get a thorough understanding of the Blender asset manager and its application.
• Rendering with Eevee and Cycles: Achieve stunning visuals with Blender's rendering engines, optimizing for performance.
• Seams and Sharps Mastery: Maximize the use of seams and sharps in your modelling process.
• Efficient Scene Management: Organize and tidy up your scenes rapidly with Blender's collection system.
• Modifier Guide: Navigate through Blender's most useful modifiers and learn how to apply them effectively.
• Geometry Node Mastery: Utilize custom geometry nodes to enhance your models and scenes.
Requirements
• To own a computer (Microsoft, Linux or Mac)
• To have downloaded Blender
• The course is designed for all levels, so no previous experience in Blender or 3D modelling is necessary
• A thirst to learn and excitement about 3D modelling, game art, and lighting to take your portfolio to the next level
Description
Introducing: 'Blender 4: Modeling and Geometry Node Workshop'!Get ready to embark on a magical journey with our newest and most enchanting course of the year. Dive deep into the mystical world of fantasy architecture with a 40-hour comprehensive guide focused on building a wizard's tower using Blender 4.'Blender 4: Modeling and Geometry Node Workshop' will guide you through the creation of a stylized wizard's tower, complete with a serene pond and an ancient stone bridge.Master Fantasy Architecture with Blender 4: Modeling and Geometry Node WorkshopThis course is designed to transport you into a realm where powerful arcane forces shape the very foundations of this magical structure, ideal for sorcerers in training or seasoned magic wielders.Here's what makes 'Blender 4: Modeling and Geometry Node Workshop' magical:Foundation of Fantasy Storytelling: Start with learning how to effectively use references to plan your wizard tower, ensuring every spire and doorway contributes to the overall narrative of arcane mastery.Step-by-Step Greyboxing and Lighting: Establish the basic shapes and lighting of your tower early on, setting a solid foundation for intricate detailing.Progressive Skill Enhancement: From beginner-friendly methods to advanced professional techniques, elevate your modelling skills strategically throughout the course. Learn to create simple yet enchanting elements like doors and walls, advancing to more complex structures like winding staircases and ornate lamps.Mastering Geometry Nodes: Leverage the included pack of unique geometry nodes to add captivating architectural details and magical elements to your tower.Shader and Texture Wizardry: Explore the art of shader development to bring to life the textures that cloak your tower in mystery and enchantment.Sculpting Magical Landscapes: Learn the straightforward techniques for sculpting terrains that surround your tower, enhancing the fantastical setting.Weight Painting for Natural Elements: Discover how to use weight painting to create lush, realistic grass around the tower's grounds.Vertex Painting for Detailed Terrains: Get hands-on with vertex painting to add depth and realism to the landscapes that form the base of your wizardly abode.Compositing to Animate the Scene: Delve into compositing within Blender to breathe life into your scenes, ensuring they tell a story of mystic allure and ancient power.Complete Scene Development: From conceptualization to final render, develop a full scene that encapsulates the spirit of a magical training ground for wizards.Key features of 'Blender 4: Modeling and Geometry Node Workshop':Enchanting Wizard Tower Creation: Construct a tower that pierces the sky with its tall spires and magical doors, surrounded by a mystical pond and a stone bridge that invites the curious to explore further.Extensive Resource Pack: Gain access to a diverse set of resources, including bespoke geometry nodes, shaders, and texture maps. Learn how to seamlessly integrate these tools into your magical creations.Structured Learning Path: Follow a curated path that guides you from the basics of 3D modelling to intricate professional techniques, ensuring a learning curve that meets all skill levels.Innovative Techniques for Realism and Fantasy: Master advanced camera setups, lighting strategies, and compositing techniques to enhance the atmospheric effects and storytelling impact of your scenes.Interactive and Practical Exercises: Engage with hands-on exercises that encourage you to apply what you've learned in practical settings, boosting your confidence and competence.Step-by-Step Guide to Building a Wizard's TowerWith its quaint, multi-turreted towers, warm glowing windows, and whimsical winding staircases, this course is designed to unlock the secrets of creating structures that look like they've been plucked right out of a storybook.1. Introduction to Blender 4 and the Course· Overview of Blender's interface and the course objectives.· Understanding the project: The Wizard's Tower.Imagine a floating island, where lush greenery bursts into life, framing a serene pond that reflects the clear blue sky.2. Modelling the Basics· Greyboxing the tower and surrounding elements.· Establishing initial lighting and ambience.A place where flowers bloom in joyful splashes of colour, and cobblestone paths invite you to wander through an otherworldly retreat suspended in the sky.3. Advanced Modeling Techniques· Creating detailed architectural features like staircases and ornate lamps.· Techniques for functional and aesthetic windows and doors.4. Advanced Geometry Node Techniques5. Utilizing custom nodes for architectural details.6. Dynamic creation of environmental elements like rocks and meadows.7. Shader and Texture Development· Developing shaders for various materials like water, stone, and wood.· Texture painting for enhanced realism and detail.8. Sculpting and Terrain· Techniques for creating realistic terrains and landscapes.· Vertex and weight painting for natural-looking flora.9. Environmental Storytelling· Integrating elements that tell a story through architecture.· Designing with narrative in mind to engage viewers.10. Compositing and Scene Finalization· Using Blender's compositor to add finishing touches.· Rendering settings for optimal output.Your 'Blender 4: Modeling and Geometry Node Workshop' wizard's tower scene will include:A Grandiose Tower: Dominating the landscape, this tower features interactive doors adorned with mystical symbols and houses a collection of ancient books and artefacts. The structure is defined by tall, elegant spires that capture the essence of both day and night scenes through dynamic lighting setups. Ornate roofs add a regal touch, while steep staircases spiral up the exterior, leading to various chambers and lookouts.Arched Stone Bridge: A robust arched bridge gracefully spans the tranquil pond below, crafted with ancient runes that emit a subtle glow under the moonlight. This bridge not only serves as a practical passage but also as a mystical gateway, enhancing the enchanting atmosphere of the scene.Serene Pond with Water Features: The pond, a reflective canvas for the tower's majesty, is adorned with lily pads and assorted aquatic plants. A specially designed water shader creates realistic ripples and reflections, contributing to the serene and mysterious ambience of the setting.Cobblestone Pathways and Fenced Walkways: Navigate through the scene via an amazing cobblestone walkway that winds through the landscape, flanked by a quaint fence. This path not only enhances the medieval fantasy aesthetic but also guides the viewer's eye through the scene, inviting further exploration.Lush Terrain with Stylized Flora: Surrounding the tower and bridge, the terrain is peppered with strategically placed rocks and a variety of trees, creating a natural, rugged look. The ground is covered in beautiful stylized grass and vibrant flowers, each blade and petal artistically crafted to add colour and life to the wizard's secret haven.Resource packUnlock the full potential of your 3D projects with our comprehensive resource pack, included free with the 'Blender 4: Modeling and Geometry Node Workshop'. This pack features 14 diverse shaders, 10 unique tree models, extensive meadow and water packs, various types of foliage, a human reference, and 8 valuable geometry nodes for creating everything from stylized rocks to intricate cobblestone paths.Summing it all upWith our step-by-step instructions, you'll learn how to:· Model stylized medieval architecture with its distinctive half-timbered structures.· Create vibrant ecosystems of flora that breathe life into your scene.· Design lighting that casts an ethereal glow, turning your model into a beacon of warmth.· Apply textures and materials that give a touch of realism to your fantastical creation.This meticulously designed scene in 'Blender 4: Modeling and Geometry Node Workshop' not only teaches you the technical skills needed for advanced 3D modelling but also immerses you in the art of creating a fantasy environment that tells a story of mystery and magic.'Blender 4: Modeling and Geometry Node Workshop' isn't just about mastering 3D modelling techniques; it's a portal into the world of fantasy architecture and storytelling. Step into the shoes of a wizard architect, and bring to life a structure that's not only visually stunning but also rich in magical lore.Prepare to cast spells with your cursor and weave enchantment with your creativity!Until our next magical encounter, happy modelling everyone,Neil - 3D Tudor
Overview
Section 1: Introduction
Lecture 1 Introduction to Blender Viewport and Modeling
Section 2: Introduction to Blender Viewport and Modeling
Lecture 2 Lesson 1 - Exploring Blender's Resource Pack and References
Lecture 3 Lesson 2 - Mastering Blender's Viewport Navigation
Lecture 4 Lesson 3 - Fundamentals of 3D Modeling in Blender
Lecture 5 Lesson 4 - Utilizing References for Accurate Modeling
Section 3: Introduction to Greyboxing and Basic Modifiers
Lecture 6 Lesson 5 - Starting Greyboxing with Primitive Shapes
Lecture 7 Lesson 6 - Using Boolean and Bend Modifiers for Styling
Lecture 8 Lesson 7 - Advanced Greyboxing: Towers and Staircases
Lecture 9 Lesson 8 - Refining Object Alignment in Greybox Models
Lecture 10 Lesson 9 - Enhancing Details in Greybox Wizard Buildings
Section 4: Enhancing Architectural Details
Lecture 11 Lesson 10 - Designing Functional Entrances and Exits
Lecture 12 Lesson 11 - Expanding the Wizard Tower with New Extensions
Lecture 13 Lesson 12 - Basic Techniques for Render Preview in Blender
Lecture 14 Lesson 13 - Implementing Ambient Occlusion for Depth
Section 5: Asset Management and Scene Composition
Lecture 15 Lesson 14 - Introduction to Blender's Asset Manager
Lecture 16 Lesson 15 - Organizing Projects with Collections and Layers
Lecture 17 Lesson 16 - Preparing Your Asset Manager with a Resource Pack
Lecture 18 Lesson 17 - Importing and Utilizing External Assets
Section 6: Advanced Modeling Techniques and Texture Application
Lecture 19 Lesson 18 - Bridge Modeling: Techniques and Tools
Lecture 20 Lesson 19 - Crafting Detailed Stone Slabs in Blender
Lecture 21 Lesson 20 - Dynamic Use of Mirror Modifiers for Railings
Lecture 22 Lesson 21 - Mastering Seams and Sharps for Clean Modeling
Lecture 23 Lesson 22 - Shader Basics for Realistic Materials
Section 7: Advanced Texture Mapping and Geometry Nodes
Lecture 24 Lesson 23 - Applying Textures to Architectural Elements
Lecture 25 Lesson 24 - Designing Curved Staircases with Geometry Nodes
Lecture 26 Lesson 25 - Adding Railings to Staircases in Blender
Lecture 27 Lesson 26 - UV Unwrapping and Texturing a Staircase
Section 8: Enhancing Structural Elements with Modifiers
Lecture 28 Lesson 27 - Creating Arches with Boolean Modifiers
Lecture 29 Lesson 28 - Modeling Stone Edge Slabs for Bridges
Lecture 30 Lesson 29 - Crafting Decorative Wood Framework
Lecture 31 Lesson 30 - Building Framework for Structural Extensions
Lecture 32 Lesson 31 - Constructing Detailed Roof Frameworks
Section 9: Finalizing Architectural Details and Textures
Lecture 33 Lesson 32 - Decorating Extensions with Wooden Framework
Lecture 34 Lesson 33 - Utilizing Geometry Nodes for Roof Tiling
Lecture 35 Lesson 34 - Adjusting Shader Settings for Roof Tiles
Lecture 36 Lesson 35 - Cleanup Techniques for Wizard Tower Extensions
Lecture 37 Lesson 36 - UV Unwrapping Complex Wood Frameworks
Section 10: Dynamic Modeling for Water Features and Windows
Lecture 38 Lesson 37 - Modeling Water Entrances in Blender
Lecture 39 Lesson 38 - Crafting Underwater Entrance Frames
Lecture 40 Lesson 39 - Framework Setup for Window Placement
Lecture 41 Lesson 40 - Modeling Main Roofs in Blender
Lecture 42 Lesson 41 - Building Support Frameworks for Roofs
Section 11: Advanced Window Modeling Techniques
Lecture 43 Lesson 42 - Starting Window Designs from References
Lecture 44 Lesson 43 - Styling Windows with Custom Textures
Lecture 45 Lesson 44 - Texture Application Techniques for Windows
Lecture 46 Lesson 45 - Variations in Window Modeling
Section 12: 3D Modeling Windows In Blender
Lecture 47 Lesson 46 - Circular Window Design and Modeling
Lecture 48 Lesson 47 - Adding Decoration to our 3D Windows
Lecture 49 Lesson 48 - Single Frame Window Modeling Techniques
Lecture 50 Lesson 49 - UV Unwrapping for Small Windows
Section 13: Advanced Window Design Techniques
Lecture 51 Lesson 50 - Modeling Unique Window Variations in Blender
Lecture 52 Lesson 51 - Crafting Symmetrical Window Decorations
Lecture 53 Lesson 52 - UV Unwrapping and Placement of Window Models
Section 14: Curved Architectural Features and Detailing
Lecture 54 Lesson 53 - Building Curved Staircases with Geometry Nodes
Lecture 55 Lesson 54 - Adding Railings to Curved Staircases
Lecture 56 Lesson 55 - Texturing and Mesh Adjustments for Staircases
Lecture 57 Lesson 56 - Designing Wood Framework for Round Towers
Lecture 58 Lesson 57 - UV Unwrapping Techniques for Complex Structures
Section 15: Roofing Techniques and Wood Detailing
Lecture 59 Lesson 58 - Modeling Cone-Shaped Roof Tiles
Lecture 60 Lesson 59 - Constructing Wood Support Frames for Roofs
Lecture 61 Lesson 60 - Adding Decorative Wood Framework Using Modifiers
Lecture 62 Lesson 61 - Creating Radial Symmetry in Wood Framework
Section 16: Terrain Modeling and Environmental Sculpting
Lecture 63 Lesson 62 - Initiating Terrain Sculpting in Blender
Lecture 64 Lesson 63 - Sculpting Terrain with Clay and Smooth Brushes
Lecture 65 Lesson 64 - Integrating Stone Designs and Staircases in Terrain
Lecture 66 Lesson 65 - Refining Terrain Sculpting Forms
Lecture 67 Lesson 66 - Enhancing Water Features and Staircase Details
Section 17: Complex Structural Extensions and Enhancements
Lecture 68 Lesson 67 - Modeling Balcony Walkways on Second Floors
Lecture 69 Lesson 68 - Shaping Curved Sections of Balcony Railings
Lecture 70 Lesson 69 - Adding Second Floor Staircases with Geometry Nodes
Lecture 71 Lesson 70 - Wood Support Modeling for Second Floor Staircases
Section 18: Enhancing Staircase and Structural Supports
Lecture 72 Lesson 71 - Enhancing Staircase Supports in Blender
Lecture 73 Lesson 72 - Finalizing Staircase Designs in Blender
Lecture 74 Lesson 73 - Structural Wood Supports for Large Towers
Section 19: Section 15 - Performance Optimization and Detailed Modeling
Lecture 75 Lesson 74 - Basics of Blender Performance Optimization
Lecture 76 Lesson 75 - Reinforcing Structures on Second Floors
Lecture 77 Lesson 76 - Adding Detailed Elements to Tower Structures
Lecture 78 Lesson 77 - Modeling Cone-Shaped Rooftops with Geometry Nodes
Section 20: Advanced Door and Roof Modeling
Lecture 79 Lesson 78 - Crafting Decorative Roof Pieces and Doors
Lecture 80 Lesson 79 - Advanced Door Modeling Techniques
Lecture 81 Lesson 80 - Variations in Hinge Modeling
Lecture 82 Lesson 81 - Stone Framed Doors: Modeling Techniques
Lecture 83 Lesson 82 - Continuing Stone Frame Door Modeling
Section 21: Innovative Door Designs and Texturing
Lecture 84 Lesson 83 - Placeholder Frames for Decorative Door Elements
Lecture 85 Lesson 84 - Embellishing Doors with Gems and New Designs
Lecture 86 Lesson 85 - Finalizing Door Design Variations in Blender
Lecture 87 Lesson 86 - Window Inserts for Doors: Modeling Techniques
Lecture 88 Lesson 87 - UV Unwrapping and Texturing Advanced Doors
Section 22: Roofing and Extension Frameworks
Lecture 89 Lesson 88 - Modeling Roofs and Frameworks for Tower Extensions
Lecture 90 Lesson 89 - Adding Detailed Elements to Tower Extensions
Lecture 91 Lesson 90 - Decorative Framework for Tower Extensions
Lecture 92 Lesson 91 - Wood Support and Decorative Features for Extensions
Section 23: Organizational Techniques and Final Adjustments
Lecture 93 Lesson 92 - Organizing and Refining Wood Frameworks
Lecture 94 Lesson 93 - Reorganizing Collections for Efficient Workflow
Lecture 95 Lesson 94 - Modeling Fences and Outer Fields
Lecture 96 Lesson 95 - Adjusting Stone Fences and Planks
Lecture 97 Lesson 96 - Stone Slab Modeling Techniques
Section 24: Refining Outer sections of our 3D Environment
Lecture 98 Lesson 97 - Creating Realistic Cobblestone Surfaces
Lecture 99 Lesson 98 - Refining Cobblestone Placement and Texture
Lecture 100 Lesson 99 - Advanced Roof Attachments with Tile Generators
Lecture 101 Lesson 100 - Continuing Advanced Roof Modeling
Lecture 102 Lesson 101 - Reinforcing Roof Structures with Wood Beams
Section 25: Working on Roof
Lecture 103 Lesson 102 - Adjusting Roof Tiles for Stylized Shapes
Lecture 104 Lesson 103 - Final Adjustments to Roof and Framework
Lecture 105 Lesson 104 - Utilizing Wood Beams for Structural Enhancement
Lecture 106 Lesson 105 - Applying Final Touches to Wood Framework
Section 26: Geometry node for ivy foliage
Lecture 107 Lesson 106 - Using Ivy Geometry Nodes for Environmental Detailing
Lecture 108 Lesson 107 - Crafting Ivy Root Shaders for Realistic Texturing
Lecture 109 Lesson 108 - Crafting Brass Chimneys in Blender
Section 27: Advanced Roofing and Architectural Details
Lecture 110 Lesson 109 - Ornate Roof Design with Curved Wood Supports
Lecture 111 Lesson 110 - Extending Structures with Backdoor Modeling
Lecture 112 Lesson 111 - UV Unwrapping and Roof Tile Application
Section 28: Enhancing Foundations and Support Structures
Lecture 113 Lesson 112 - Stylized Stone Archway Creation
Lecture 114 Lesson 113 - Adding Detailed Stone Supports
Lecture 115 Lesson 114 - Spiral Wood Support Modeling
Lecture 116 Lesson 115 - Enhancing Wooden Staircase Foundations
Section 29: Creative Texturing and Environmental Design
Lecture 117 Lesson 116 - Creating Stone Props with Geometry Nodes
Lecture 118 Lesson 117 - Applying Vertex Paint for Terrain Shading
Lecture 119 Lesson 118 - Advanced Texture Painting for Stone and Dirt
Section 30: Finalizing the Wizard Environment
Lecture 120 Lesson 119 - Beginning Final Environment Assembly
Lecture 121 Lesson 120 - Adding Windows and Wood Frames
Lecture 122 Lesson 121 - Implementing Variations in Architectural Framework
Section 31: Advanced Lighting and Decorative Features
Lecture 123 Lesson 122 - Modeling Decorative Lanterns in Blender
Lecture 124 Lesson 123 - Hanging Lanterns with Geometry Nodes
Lecture 125 Lesson 124 - Crafting Wood Supports for Lanterns
Lecture 126 Lesson 125 - Forging Metal Bars for Lantern Lighting
Lecture 127 Lesson 126 - Designing Secondary Light Variations
Section 32: Advanced Lighting Techniques and Details
Lecture 128 Lesson 127 - Crafting Small Floor Light Sources in Blender
Lecture 129 Lesson 128 - Detailing Light Lanterns in Blender
Lecture 130 Lesson 129 - Creating Wood Tiles for Lanterns
Lecture 131 Lesson 130 - Finalizing Lantern Framework in Blender
Section 33: Finalizing the Wizard Tower Structure
Lecture 132 Lesson 131 - Initiating Final Wizard Tower Modeling
Lecture 133 Lesson 132 - Adding Detailed Architectural Elements to Tower
Lecture 134 Lesson 133 - Enhancing Tower Base and Overhangs
Lecture 135 Lesson 134 - Structural Support for Enhanced Stability
Lecture 136 Lesson 135 - Integrating Windows and Frameworks in Tower Walls
Section 34: Decorative Frameworks and Environmental Integration
Lecture 137 Lesson 136 - Expanding Decorative Wood Frameworks
Lecture 138 Lesson 137 - Asset Tweaking and Preview Adjustments
Lecture 139 Lesson 138 - Installing Lightposts in Blender Environments
Lecture 140 Lesson 139 - Placing and Attaching Smaller Light Sources
Lecture 141 Lesson 140 - Simulating Cloth Flags in Blender
Section 35: Final Lighting and Scene Composition
Lecture 142 Lesson 141 - Enhancing Scene Lighting with Additional Sources
Lecture 143 Lesson 142 - Fine-Tuning Point Light Sources in Blender
Lecture 144 Lesson 143 - Organizing Blender Projects for Efficiency
Section 36: Environmental Foliage and Plant
Lecture 145 Lesson 144 - Adjusting Meadow Parameters with Geometry Nodes
Lecture 146 Lesson 145 - Applying Weight-Painted Meadows
Lecture 147 Lesson 146 - Enhancing Staircases with Grass Textures
Section 37: Plant setup in Blender Environments
Lecture 148 Lesson 147 - Adding Trees and Water Foliage
Lecture 149 Lesson 148 - Placing Shrubs and Bushes
Lecture 150 Lesson 149 - Finalizing Foliage Placement in Blender
Section 38: Final Renders and Blender
Lecture 151 Lesson 150 - Optimizing Rendering Parameters in Blender
Lecture 152 Lesson 151 - Enhancing Scenes with Compositor for Vibrant Colors
Lecture 153 Lesson 152 - Applying Color Grading Techniques in Blender
Lecture 154 Lesson 153 - Final Compositor Tweaks and Background Adjustments
• Aspiring Fantasy Architects: Dreamers with a passion for fantasy and mystical settings, keen on mastering the art of 3D modelling and environment creation within a fantastical context using Blender 4.,• 3D Modelers and Visual Artists: Experienced artists and beginners who are looking to refine their skills in modelling, texture mapping, and environmental storytelling, especially within the fantasy genre.,• Game Designers and Developers: Game industry professionals and indie developers interested in creating detailed, immersive fantasy environments for games using geometry node-based modelling and procedural texturing.,• Animation and VFX Professionals: Animators and visual effects artists who want to incorporate advanced 3D modelling and scene-building techniques into their workflows.,• Educators and Academic Professionals: Instructors and professors who teach 3D modelling, game design, or digital art, looking for in-depth material on using Blender 4's latest tools.,• DIY Enthusiasts and Hobbyists: Hobbyists and DIY creators who enjoy building and visualizing magical worlds as a pastime.
Free search engine download: Blender 4 Modeling and Geometry Node Workshop
